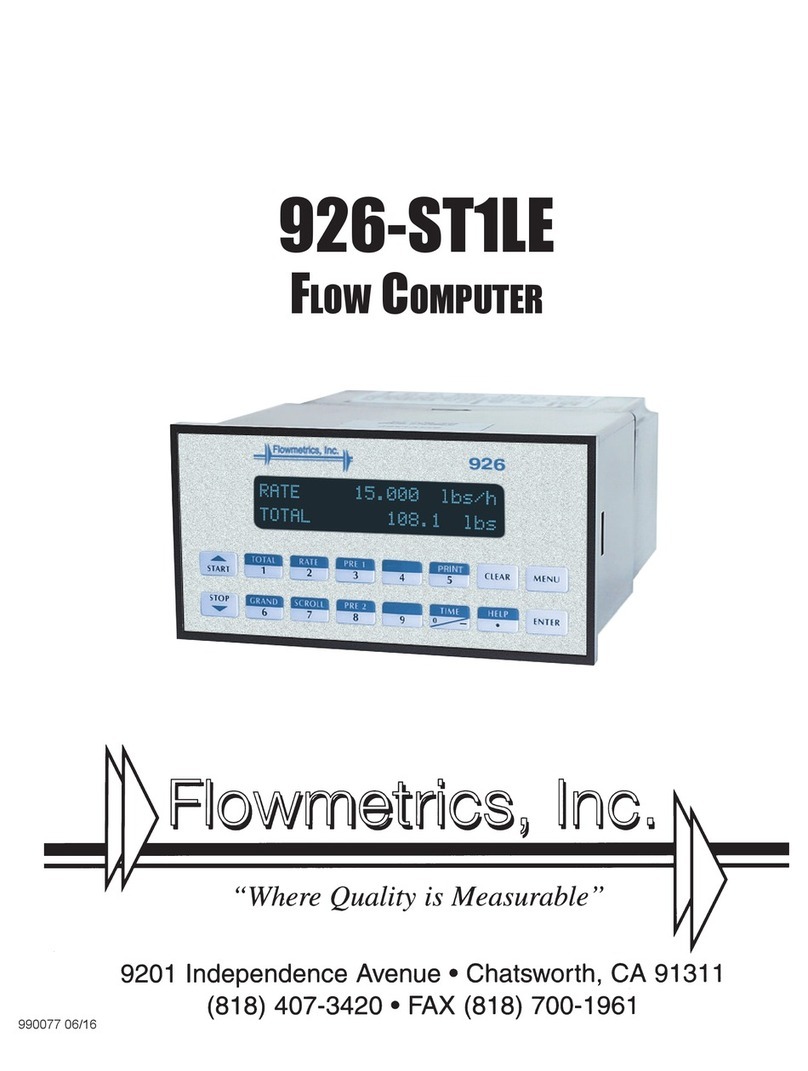
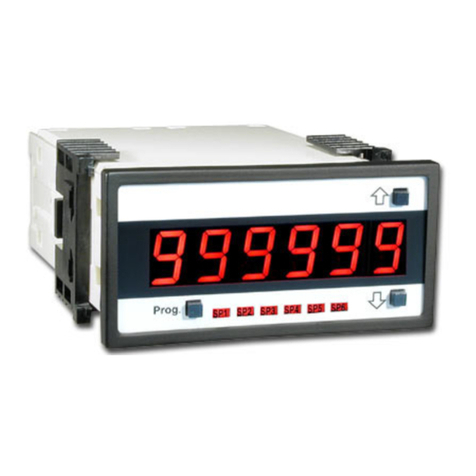
Flowmetrics 918 RTP Manual

918 RTP
Pulse Input Ratemeter and Totalizer
INSTALLATION & OPERATING INSTRUCTIONS
99828 08/27/01

Proprietary Notice
The in ormation contained in this publication is derived in part rom proprietary and patent data.
This in ormation has been prepared or the expressed purpose o assisting operating and
maintenance personnel in the e icient use o the instrument described herein. Publication o
this in ormation does not convey any rights to use or reproduce it or to use or any purpose other
than in connection with the installation, operation and maintenance o the equipment described
herein.
Copyright 1990
Printed in USA. All Rights Reserved.
WARNING!
This instrument contains electronic components that are susceptible to damage by static
electricity. Proper handling* procedures must be observed during the removal, installation, or
handling o internal circuit boards or devices.
*Handling Procedure
1. Power to unit must be removed.
2. Personnel must be grounded, via wrist strap or other sa e, suitable means, be ore any
printed circuit board or other internal device is installed, removed or adjusted.
3. Printed circuit boards must be transported in a conductive bag or other conductive container.
Boards must not be removed rom protective enclosure until the immediate time o installation.
Removed boards must be placed immediately in protective container or transport, storage, or
return to actory.
Comments
This instrument is not unique in its content o ESD (electrostatic discharge) sensitive
components. Most modern electronic designs contain components that utilize metal oxide
technology (NMOS, CMOS, etc.). Experience has proven that even small amounts o static
electricity can damage or destroy these devices. Damaged components, even though they
appear to unction properly, may exhibit early ailure.
!

SAFETY INSTRUCTIONS ........................................................... 1
DESCRIPTION & SPECIFICATIONS .......................................... 2
MOUNTING ................................................................................. 3
WIRING........................................................................................ 3
PROGRAMMING MENU ............................................................. 5
PROGRAMMING FLOWCHART ................................................. 7
ANALOG OUTPUT CALIBRATION ............................................. 13
SOLDER JUMPERS .................................................................... 13
WARRANTY ................................................................................ 14
DECODING PART NUMBER ...................................................... 14
TABLE OF CONTENTS

THIS PAGE IS BLANK

1
!
SAFETY INSTRUCTIONS
The following instructions must be observed.
• This instrument was designed and is checked in accordance with regulations in force
EN 60950 (“Safety of information technology equipment, including electrical business
equipment”).
A hazardous situation may occur if this instrument is not used for its intended purpose
or is used incorrectly. Please note operating instructions provided in this manual.
• The instrument must be installed, operated and maintained by personnel who have
been properly trained. Personnel must read and understand this manual prior to
installation and operation of the instrument.
• The use of an external line fuse is recommended. Add or replace the external fuse with
the following specified type and rating only:
Input Power Recommended Fuse
115 VAC 100 mA slow blow fuse
230 VAC 50 mA slow blow fuse
12-24 VDC 250 mA slow blow fuse
Disconnect power supply before adding or replacing fuse!
• The manufacturer assumes no liability for damage caused by incorrect use of the
instrument or for modifications or changes made to the instrument.
Symbols Used On Unit
Number Symbol Publication Description
1IEC 417, No. 5031 Direct current
2IEC 417, No. 5172 Equipment protected throughout by
DOUBLE INSULATION or REINFORCED
INSULATION (equivalent to Class II of IEC
536–see annex H)
3
!
ISO 3864, No. B.3.1 Caution (refer to accompanying documents)
Technical Improvements
• The manufacturer reserves the right to modify technical data without prior notice.

2
RESET OPTIONS
The entire unit, i.e. all counters and control outputs, or
Counter A, Counter B, Counter A+B, Counter A-B, Control
O/P A and Control O/P B can be individually programmed
to be reset on pressing the ront panel RST key and also
by a positive edge signal to any o the Control I/Ps C, D
and E.
SERIAL COMMUNICATION
The serial strobed port can be used or serial printing o
Total or Rate data with descriptors. The unit can also
communicate with a master device through a Modbus-RTU
protocol. The data given or each parameter is in IEEE
loat ormat comprising o 2 words. The unit can be
connected in a network. Order Option 1 is RS-232 level
ormat; Order Option 2 is RS-422/485 level ormat.
CONTROL OUTPUTS
The 918 RTP has the ollowing Control Outputs:
RELAY / O.C. : 2 N.O. / N.C. relays o 5 A and 250 V OR
2 Open Collector Outputs;
100 mA maximum.
ANALOG OUTPUT:
Type: 4-20 mA output.
Accuracy: ± 50µA worst case.
This Analog O/P can be programmed to track any
parameter. Reverse tracking O/P is also available.
PRESETS: The unit supports ive counters, i.e. Counter A,
Counter B, Counter A+B, Counter A-B and Grand Total.
The counters can either be reset to zero or disabled. Relays
can be activated by any o the Total or Rate values. I a
Total preset activates the relay, the user can select an output
duration o 0.1 to 99.9 seconds with instant auto reset to
"0". A 00.0 duration keeps the relay activated until externally
reset. I both presets are assigned to same counter, with
Relay A duration set to 00.0 and Preset A lower than Preset
B, Relay A pulls in at Preset A and drops out when Preset B
(having a duration other than 00.0) pulls in. Counter
recycles immediately, and Relay B stays activated or the
selected duration.
I activated by rate, the relay pulls in at High Preset or above
and remains on until rate alls below Low Preset.
LOCKOUT: The unit program and presets can be protected
with a lock code to prevent unauthorized ront panel
changes. This code can be assigned with a maximum o 4
digits and is user selectable. It can be entered through
ront panel LOCK key or by con iguring any o the Control I/
Ps to “Lock unit”. Alternate entry o the lock code or pulses
to that I/P will lock or unlock the unit.
DESCRIPTION:
The 918 RTP is a presettable Ratemeter and Totalizer rom
two pulse inputs. It can show rate and total at the same
time on the 2 X 16 backlit LCD display. Both inputs can
have up to 16 point linearizing k actors. The unit can be
connected in a network or Data Acquisition.
SPECIFICATIONS:
INPUT POWER: AC:110 V or 220 V; 6.5 VA AC
DC:+24 VDC ; 250 mA max.
THRESHOLD: High: 4-24 VDC; Low: < 1Vdc or open
INPUT A: Count Input, 3 kHz max.
INPUT B: Count Input, 3 kHz max.
INPUT C: Control Input
INPUT D: Control Input
INPUT E: Control Input (Not Used with RS485)
NOTE: AC powered units have isolated inputs. DC units
share -DC with input common.
OUTPUT POWER: +24VDC @25 mA (unreg), +/- 15%
DISPLAY: 2 lines o 16 characters, backlit LCD
(character size: 2.95mm x 5.55mm)
BEZEL: NEMA 4/IP65 rated membrane keypad
INDICATORS: Two LED’s to indicate control output
status. (Red = Output A, Green =
Output B)
MEMORY: NVRAM retains data on power ailure
TEMPERATURE: Operating : 0 to 50 degrees C
Storage : -40 to 90 degrees C
HUMIDITY: 10% to 90% ( Non condensing )
SIZE: Bezel: 103mm X 55 mm; Depth:97 mm
PANEL CUTOUT: 92 mm X 45 mm (1/8 DIN size cutout )
IMMUNITY TO ESD: Level 3 per IEC1000-4-2
IMMUNITY TO TRANSIENTS: Level 3 per IEC1000-4-4
RADIATED SUSCEPTIBILITY: Level 3 per IEC1000-4-3
EMISSIONS: EN55011 CISPR A
PULSE INPUTS
The 918 RTP can accept two pulse inputs ( A&B ). It
computes rate and total o A, B, A+B and A-B. For both
inputs the user can de ine up to 16 points o “k” actors.
This allows linearization o the displayed rate, which is use ul
in improving the accuracy o the lowmeter.
The rate is computed within 300 ms per input. To stabilize
the rate display, the user can select normalizing actor, which
allows weighted average to be shown. Moreover, or rate
displays, a time delay o up to 25 seconds can also be
selected.
CONTROL INPUTS
The 918 RTP has three Control Inputs, i.e. Input C, Input D
and Input E (Only C & D with RS485 option). Each input
can be con igured to start/stop each counter or reset each
counter and Control Output. These inputs can also per orm
di erent control actions like printing on serial port, lock unit
and reeze display.
DESCRIPTION & SPECIFICATIONS

3
WIRING
MOUNTING
HOW TO MOUNT:
Slide the body o the unit through the rubber gasket.
Insert the unit into the panel. Slide the brackets up the
groove to press against the back o the panel. I nsert the
screws into the rear o the brackets.
Tighten the screws evenly and alternately. A panel less
than .1" may distort i the clamps are screwed too tightly.
Do not over tighten! A normal level o torque is required.
Maximum torque should be 3" pounds.
The panel must be parallel to the bezel to assure proper
seal. Unit seals to NEMA 4/IP65 i properly mounted.
DIMENSIONS:
12345678910111213141516
12345
6789
4.05” (103mm)
3.62” (92mm)
2.17” (55mm)
1.7” (45mm)
Bezel Gasket
Panel
3.82” (97mm)
RS-232 Port
WIRING CONSIDERATIONS:
AC / DC CONNECTIONS:
NOTE: Connect power only a ter other connections are
inished. Do not touch the live AC power terminals. The unit
has been designed with an isolated AC input, there ore
polarity is not a concern or the AC power. The chassis is
plastic, earth ground is used to improve noise immunity.
This Product complies with requirements o the European
Community Directive 89/336/EEC [Electromagnetic Com-
patibility]. However, electrical noise or intense electromag-
netic ields in the vicinity o the unit may disturb the micro-
processor. Users should exercise care and should take
proper precautions to avoid microprocessor disturbance.
Four common sources o noise are:
1) AC power line noise- The input power lines should not be
common to power lines or motors, pumps, contactors, etc.
I the unit cannot be connected to an electrically clean power
source, an inductive load suppressing device (MOV as
GE#V130LA1 or Resistor Capacitor as Paktron# .2u /220
ohm @ 400V) can be installed. Although locating the
suppressor across the AC supply at the unit should help,
best results are obtained by connecting the suppressor
across the leads o the "load" at the device causing the
spikes.
2) Input line noise- The noise is carried on the input and DC
ground lines. Make sure the input wires are not run into the
unit in a bundle with power input lines. We recommend
using shielded cable. Connect the shield to DC ground o
the unit and "earth" at one point in the circuit pre erably at the
DC ground terminal o the unit.
3) Output lines- The unit has two open collector outputs and
two optional relay outputs. When these outputs are used to
run external relays or solenoids, spikes can be generated
upon activation. This noise can spread through the instru-
ment causing operating problems. I the source is a D.C.
operated device, a general purpose diode (IN4004) placed
across the solenoid prevents electrical noise spikes. Con-
nect the cathode (banded side) to the more positive side o
the coil. I the source is an A.C. operated device, use a
Resistor Capacitor or MOV across the coil.
4) 24 VDC output supply- Noise can be generated on the 24
VDC output supply i it is used to drive inductive loads or i
the current draw exceeds 25mA. Insure that all inductive
loads have a diode (such as IN4004) across the coil and that
the current does not exceed 25mA.

4
TERMINAL DESIGNATIONS:
1 • AC1 (115 VAC)
2 • AC2 (115 VAC)
3 • RELAY B
4 • COMMON
5 • RELAYA
6 • COMMON
7 • (+) 20VDC OUT (50mA)
8 • (–) 20VDC OUT (50mA)
9 • ANALOG O/P (+)
10 • ANALOG O/P (–)
11 • CTRL I/P E
12 • CTRL I/P D
13 • CTRL I/P C
14 • PULSE I/P B
15 • PULSE I/PA
16 • INPUT GND
TYPICAL WIRING HOOKUPS:
•5 N.O. (N.C.)
•6 Common
•3 N.O. (N.C.)
•4 Common
Output A
AC Supply
MOV
recommended
for inductive
loads
Neutral
LOAD
-+
DC
Supply
LOAD
-
+Diode
recommended
for inductive
loads
Output B
INPUT A
INPUT B
RELAY OUTPUTS
WIRING (CONTINUED)
COMMUNICATION PORT
TERMINAL DESIGNATIONS:
RS-232 P rt: (DB9 Female)
12345
6789
1 • N.C.
2 • Transmit
3 • Receive
4 • N.C.
5 • Ground
6 • Strobe
7 • N.C.
8 • N.C.
9 • N.C.
RS-485 P rt: (DB9 Female)
12345
6789
1 • Transmit B (-)
2 • Receive B (-)
3 • N.C.
4 • N.C.
5 • Ground
6 • N.C.
7 • N.C.
8 • Receive A (+)
9 • Transmit A (+)
Flowmeter A
–
+
signal
1 • AC1 (115 VAC)
2 • AC2 (115 VAC)
3 • Relay B
4 • Common
5 • Relay A
6 • Common
7 • (+) 20VDC Out (50mA)
8 • (–) 20VDC Out (50mA)
9 • Analog O/P (+)
10 • Analog O/P (–)
11 • CTRL I/P E
12 • CTRL I/P D
13 • CTRL I/P C
14 • Pulse I/P B
15 • Pulse I/PA
16 • Input GND
110 VAC
60/50 Hz
Flowmeter B
–
+
signal
1 • AC1 (115 VAC)
2 • AC2 (115 VAC)
3 • Relay B
4 • Common
5 • Relay A
6 • Common
7 • (+) 20VDC Out (50mA)
8 • (–) 20VDC Out (50mA)
9 • Analog O/P (+)
10 • Analog O/P (–)
11 • CTRL I/P E
12 • CTRL I/P D
13 • CTRL I/P C
14 • Pulse I/P B
15 • Pulse I/PA
16 • Input GND
110 VAC
60/50 Hz

5
Main Menu:
The Main menu consists o the ollowing steps:
De ine list o parameters used, Con igure Inputs, Setup
Counters, Setup Ratemeters, Setup Relays / O.C., Setup
Security, Setup 4-20mA Output, Setup Comm Port, De ine reset
options and Back to RUN mode (or Exit programming). The
PROG key allows scrolling through these steps. All these steps
are given in brie below:
Define list f parameters used:
The unit is capable o showing nine di erent parameters. The
parameters are the readings 918 RTP gives a ter a pulse input
is given to it. The parameter names are ixed in Default M de
and are user programmable in Message M de.
The parameter names in De ault Mode are:
Rate A, Rate B, Rate A+B, Rate A-B, Total A, Total B, Total A+B,
Total A-B and Gr. Total.
The parameter names in Message Mode are user de inable.
The length o these user de ined names can be upto nine
characters. Valid characters are SPACE, A-Z, a-z, 0-9, /.
The menu also enables the user to de ine the sequence in
which the parameters are to be viewed at Run time and the no.
o digits a ter the decimal point (0-3). It also enables the user to
program the message or each parameter.
C nfigure Inputs :
The unit has ive inputs, two o which are pulse inputs and the
remaining three are control inputs. The two pulse inputs are
Input A and Input B. They can programmed to be either linear
or non-linear.
For linear input a six digit multiplier scaling actor has to be
entered (.00001 to 999999). This scaling actor is constant or a
linear input. For a non-linear input the scaling actor is di erent
at di erent requencies so the points (Frequency, Factor) have
to be entered. The unit supports a maximum o sixteen such
points. Input B is normally a separate input with separate
scaling. It can also be programmed as a control input or up
counting or down counting o Total A. A High on Input B makes
Total A count up and a low on Input B makes Total A count
down.
The remaining three inputs C, D and E are control inputs and
can be programmed to control actions such as start counting,
reset counting, stop counting, reeze display, lock unit and print
activities.
When reeze display is activated (or a pulse is applied to the
control input which is con igured to reeze display) the unit
stops re reshing the display. The unit continues to run in the
background.
Setup C unters:
918 RTP has ive counting parameters:
Parameter Default name Functi n
Counter A Total A Counts pulses on A
Counter B Total B Counts pulses on B
Counter A+B Total A+B Adds counter A & B
Counter A-B Total A-B Subtracts counter B rom
counter A
Grand Total Grand Total Tracks any o the above
our on which it is pro-
grammed to be dependent.
Each counter can be reset to zero or disabled. The Grand Total
is programmable and can be set to ollow any o the remaining
counters.
Setup Ratemeters :
The parameters Rate A, Rate B, Rate A + B, Rate A - B can be
programmed to be rate/seconds, rate/minutes, rate/hours. The
user can use custom scaling i the units are di erent than RPS,
RPH, RPM e.g. rate/day, so that the rates can be converted to
engineering units. The custom scaling actor can be o 6 digits
ranging rom 0.00001 to 999999. The normalizing actor
ranging rom 0.1 to 99.9 can be programmed.
Normalizing Equation:
(Old Data x "Normalizing Factor" + New Data)
("Normalizing Factor" + 1)
For rate display, a time o up to 25 seconds can also be
applied.
Setup Relays:
The unit has two control outputs NO/NC relay A or Open
Collector A and NO/NC relay B or Open Collector B. The
control outputs can be programmed to track any o the nine
parameters and can also be programmed to operate in Timed
M de ( or count) or Hysterisis M de ( or rate).
In Timed mode (count) a low preset value or a high preset value
can be entered. I a l w preset value is entered then the
control output will energize whenever the value o the param-
eter, which the control output is tracking goes bel w the preset
value. I a high preset value is entered then the control output
will energize whenever the value o the parameter, which the
control output is tracking goes ab ve the preset value. In Timed
mode (count) a ter low preset or high preset have been entered
unit will ask or reset time (the time duration that the control
output will remain energized). Set time rom 0.1 to 99.9 sec.
with auto reset o counter. I set to 00.0, count continues and
output is latched until reset by external or ront panel reset.
In Hysterisis mode (rate) b th the high preset and low preset
or the Hysterisis have to be entered. The control relay will
activate when the rate parameter is equal t or exceeds the
high preset. The relay will remain energized until the rate
parameter all bel w the low preset.
PROGRAMMING MENU

6
V
IEW
PRE A
CLR
PRE B
ENT
LOCK
RST
PROG
KEYPAD FUNCTIONS
Run Mode
Enter The Programming
Mode
VIEW key scrolls through the
selected viewing parameters
PRE A key allows Preset A to
be changed if unit is not
locked
PRE B key allows Preset B to
be changed if unit is not
locked
Lock Key allows the entry of
a lock code to lock/unlock the
unit
RST Key resets counters
(with/without confirmation
Program Mode
Toggles between menus
Left key shifts digits in
number entry/characters in
message mode
Up key increments digits/
characters
CLR key clears the numeric
field
ENT key saves changes and
steps to next menu
Unit comes out of
programming at any level
(stores all data entered)
KEY
Setup Security:
Unauthorized ront panel changes can be prevented by entering
a user selectable our digit code. The unit can be in LOCK ALL
or LOCK PROGRAM mode. The unit can be locked while unit
is running by pressing the LOCK key three times continuously
in one second. I any o the control input (C, D, E) is con igured
as to LOCK UNIT then the unit can be locked by only giving a
pulse at that input and not by pressing the LOCK key .
In LOCK PROGRAM mode only the runtime presets are
accessible through ront panel. In LOCK ALL mode, program-
ming and the runtime presets are not accessible.
Setup 4-20 mA Anal g Output :
The unit gives a 4-20 mA analog output and it can be pro-
grammed to track any o the nine parameters. The unit can be
programmed or reverse tracking (4mA value higher than 20mA
value). The analog output is isolated. Compliance voltage must
be 3 to 24 VDC. Accuracy ±50µA worst case.
PROGRAMMING MENU (CONTINUED)
Setup C mm p rt :
In this menu, the unit can be assigned a unique ID and the
communication parameters, i.e. baudrate and parity.
The serial port can be used or serial printing or also or data
acquisition. The unit can communicate with a master device
through a Modbus-RTU protocol. The addresses or all nine pa-
rameters that can be read rom the unit are as ollows (the data
given or each parameter is in IEEE loat ormat comprising o 2
words):
Rate A 100 Total A 500
Rate B 300 Total B 700
Rate A+B 900 Rate A-B 1100
Total A+B 1300 Total A-B 1500
Grand Total 1700
Define Reset Opti ns:
In this menu either the entire unit ( all counters and control
outputs ) or Counter A, Counter B, Counter A + B, Counter A -
B, Relay A / Open Collector A or Relay B / Open Collector B can
be individually programmed to be reset on pressing the ront
panel RST key or by positive edge signal to selected control
input.
Back t RUN m de
Exit pr gramming :
Pressing ENT at this menu exits programming mode and the
unit enters the Run mode.
FRONT PANEL OPERATION

7
918 RTP PROGRAMMING FLOWCHART
Define List f Parameters Used
RUN
MODE
PROG
LOCK
ENT
De ine list o
Parameters used
Set Viewing Mode
Message Mode
Set Viewing Mode
De ault Mode
PRE A
LOCK
ENT
LOCK
ENT
PROG
Con igure
Inputs
Back to the
Main Menu
PROG
LOCK
ENT
Para: Gr. Total
Messg: Gr. Total
LOCK
ENT
Para: Rate A
Messg: Batch A
Para: Rate B
Messg: Batch B
LOCK
ENT
Para: Total A
Messg: Total A
Para: Total B
Messg: Total B
LOCK
ENT
Para: Rate A+B
Messg: Rate A+B
Para: Rate A-B
Messg: Rate A-B
LOCK
ENT
LOCK
ENT
LOCK
ENT
Para: Total A+B
Messg: Total A+B
Para: Total A-B
Messg: Total A-B
LOCK
ENT
LOCK
ENT
LOCK
ENT
PROG
Parameter1(2,3,4,5,6)
Rate A
Rate B
Total A
Total B
Rate A+B
Rate A-B
Total A+B
Total A-B
Gr. Total
Disabled!
PRE A
Decimal Pt or
Rate A 3
LOCK
ENT
LOCK
ENT

8
C nfigure Inputs
918 RTP PROGRAMMING FLOWCHART (continued)
Con igure
Inputs
PROG
LOCK
ENT
Input Type
Linear
Input Type
Non Linear
PRE A
LOCK
ENT
LOCK
ENT
LOCK
ENT
Scaling Factor A
Enter: 1.0000
Input
High CPS
Input
Low CPS
PRE A
LOCK
ENT
No. o nonlinear
Points: 16
Control Input
Disable
Control Input
Enable
PRE A
LOCK
ENT
Back to the
Main Menu
LOCK
ENT
LOCK
ENT
LOCK
ENT
LOCK
ENT
Back to the
Main Menu
LOCK
ENT
LOCK
ENT
LOCK
ENT
Start
Counting
Reset
Count
Stop
Counting
Freeze
Display
Lock
Unit
Print
Activities
PROG
Setup
Counters
De ine list o
Parameters used
PROG
Stop Count A
Stop Count B
Stop Count A+B
Stop Count A-B
Stop Grand. Tot.
PRE A
YES
NO
PROG
Reset Count A
Reset Unit
Reset Count B
Reset Count A+B
Reset Count A-B
Reset Grand. Tot.
PRE A
YES
NO
PROG
Reset Relay/OC A
Reset Relay/OC B
Start Count A
Start Count B
Start Count A+B
Start Count A-B
Start Grand. Tot.
PRE A
YES
NO
PROG LOCK
ENT
LOCK
ENT
LOCK
ENT
NOTE: Continue through all points assigned
or Press RST to exit routine.
Input Type
Linear
Input Type
Non Linear
PRE A
LOCK
ENT
LOCK
ENT
LOCK
ENT
Scaling Factor B
Enter: 1.0000
Input
High CPS
Input
Low CPS
PRE A
LOCK
ENT
No. o nonlinear
Points: 16
NOTE: Continue through all points assigned
or Press RST to exit routine.
LOCK
ENT
LOCK
ENT
LOCK
ENT
LOCK
ENT
LOCK
ENT
LOCK
ENT
Con igure
Input A
Con igure
Input B
Con igure
Input C
Con igure
Input D
Con igure
Input E
PROG
Back to the
main menu
LOCK
ENT
LOCK
ENT
Input Type B
Control
Input Type B
Pulse
PRE A
LOCK
ENT
LOCK
ENT
Input B as
Up/Down Control
LOCK
ENT
LOCK
ENT
LOCK
ENT
LOCK
ENT
LOCK
ENT
Freq(A00)➔100.00
Fact(B00) 140.64
Freq(A00) 100.00
Fact(B00)➔140.64
Freq(A01)➔200.00
Fact(B01) 141.39
Freq(A01) 200.00
Fact(B01)➔141.39
LOCK
ENT
LOCK
ENT
LOCK
ENT
LOCK
ENT
Freq(A00)➔100.00
Fact(B00) 140.64
Freq(A00) 100.00
Fact(B00)➔140.64
Freq(A01)➔200.00
Fact(B01) 141.39
Freq(A01) 200.00
Fact(B01)➔141.39

9
Setup C unters
Setup Ratemeters
Con igure
Inputs
PROG
Setup
Counters
PROG
LOCK
ENT
Setup
Ratemeters
PRE A
Setup Grand Tot.
Total A, Total B,
Total A+B, Total A-B,
Disabled!
Setup Grand Tot.
Disable Counter
Setup Grand Tot.
Reset to Zero
PRE A
LOCK
ENT
Set
Counter A
Set
Counter B
Set
Counter A+B
Set
Counter A-B
Setup
Grand. Tot.
PROG
LOCK
ENT
LOCK
ENT
Set Counter A (B)
Reset to Zero
Set Counter A (B)
Disable Count
PRE A
Input Count Mode
Count Up
Input Count Mode
Count Down
PRE A
LOCK
ENT
LOCK
ENT
LOCK
ENT
LOCK
ENT
Set Counter A+B (A-B)
Disable Counter
Set Counter A+B (A-B)
Reset to Zero
LOCK
ENT
LOCK
ENT
PRE A
LOCK
ENT
LOCK
ENT
LOCK
ENT
Setup
Ratemeters
Setup
Counters
Setup
Relays
PROG
PROG
LOCK
ENT
Display Rate as
Rate/Second
Display Rate as
Rate/Minute
Display Rate as
Rate/Hour
Display Rate as
Custom Scaling
PRE A
LOCK
ENT
LOCK
ENT
LOCK
ENT
LOCK
ENT
Scaling or Rate
Enter: 100.00
LOCK
ENT
LOCK
ENT
Normalising
Factor: 2.0
LOCK
ENT
Rate Update
Factor: 1.0
918 RTP PROGRAMMING FLOWCHART (continued)

10
Setup Relays
Setup Security
Setup
Ratemeters
PROG
PROG
PRE A
Setup
Relays
PROG
LOCK
ENT
Setup Relay/O.C. A
Total A, Total B, Rate A+B, Rate A-B, Total A+B,
Total A-B,GR. Total, Rate A, Rate B, Disabled
Setup Relay/O.C. B
Total A, Total B, Rate A+B, Rate A-B, Total A+B,
Total A-B,GR. Total, Rate A, Rate B, Disabled
Back to the
Main Menu
PROG
LOCK
ENT
LOCK
ENT
LOCK
ENT
LOCK
ENT
PRE A
Setup
Security
LOCK
ENT
LOCK
ENT
Relay/OC A(B) Low
Preset: .00000
Relay/OC A(B) High
Preset: 5000.0
Relay/OC A(B) Reset
Time: 1.2
Operate Relay/OC
Timed Mode
Operate Relay/OC
Hysteresis Mode
Total
Selected
Rate
Selected
Relay/OC A(B) Low
Preset: .00000
Relay/OC A(B) High
Preset: 5000.0
PROG LOCK
ENT
LOCK
ENT
Setup
Relays
PROG
Setup
Security
PROG
LOCK
ENT
Setup Security
Lock All
Setup Security
Lock Program
PRE A
LOCK
ENT
Lock Code
Enter: 1010
LOCK
ENT
PROG PRE A
Parameter List
Con igure Inputs
Setup Counters
Setup Ratemeters
Setup Relays/OC
Analog Output
Comm. Parameters
Reset Options
Lock runtime key PRE A
Lock runtime key PRE B
YES
NO
LOCK
ENT
LOCK
ENT
Setup 4-20 mA
Analog Output
STEP
5
STEP
6
STEP
7
918 RTP PROGRAMMING FLOWCHART (continued)

11
Setup 4-20 mA Output
Setup C mm P rt
Setup
Security
PROG
LOCK
ENT
Set Analog Out
Total A, Total B, Rate A+B, Rate A-B, Total A+B,
Total A-B,GR. Total, Rate A, Rate B, Disabled
LOCK
ENT
LOCK
ENT
Value or 4 mA
Output: 100.00 Value or 20 mA
Output: 5000.00
LOCK
ENT
PROG
PRE A
Setup
Comm Port
Setup 4-20 mA
Analog Output
PROG
Setup
Comm Port
LOCK
ENT
Unit ID
Enter: 0001
LOCK
ENT
Set Baudrate
4800 Baud, 7200 Baud, 9600 Baud,
19200 Baud, 38400 Baud,
LOCK
ENT
PRE A LOCK
ENT
PROG
De ine
Reset Options
Set Parity
Even (8E1), Odd (8O1), None (8N2)
PRE A
Setup 4-20 mA
Analog Output
918 RTP PROGRAMMING FLOWCHART (continued)

12
Define Reset Opti ns
Setup
Comm Port
PROG
De ine
Reset Options
LOCK
ENT
Back to RUN mode
Exit programming
PROG
PROG LOCK
ENT
Press ENT to exit
Programming Mode
Press PROG to Return to
De ine List o Parameters Used
PROG PRE A
Reset Unit
Reset Count A
Reset Count B
Reset Count A+B
Reset Count A-B
Reset Grand Total
Reset Relay/OC A
YES
NO
LOCK
ENT
Ask Con irmation on Reset:Yes
Ask Con irmation on Reset:No
PRE A LOCK
ENT
Reset Relay/OC B
918 RTP PROGRAMMING FLOWCHART (continued)

13
ANALOG OUTPUT CALIBRATION
Anal g Output Calibrati n Pr cedure:
The calibration o the 918 RTP can be done in the ollowing way :
Connect the ollowing circuit to terminal pins 11 and 12, i.e Analog O/P (+) and Analog O/P (-).
LOAD
+24 VDC + – Pin # 11 [Analog O/P (+)]
Pin # 12 [Analog O/P (-)]
Press the key immediately at power-up to enter the Calibration mode.
The unit irst displays
The unit then displays
Calibrate the unit or 4 mA. Use key to increase the O/P current and key to decrease the O/P current.
Press key and the next display is
Calibrate the unit or 20 mA. Use the same keys as stated above to increase / decrease the O/P current.
PROG
Calibrate Analog
Output
Output ting 4 mA
Pre A:+ Pre B:-
PRE A
CLR
PRE B
ENT
LOCK
Output ting 2 0mA
Pre A:+ Pre B:-
SOLDER JUMPERS
Solder pads on the unit:
The solder pads are used to select the relay settings (whether NO or NC) and the Open Collector outputs.
To make the solder pad selections follow the steps given below:
1. Remove the PBT cover from the back of the unit by removing the screws.
2. After you remove the PBT cover, you will notice solder pads on the right hand side of the PCB. (Shown in the figure above.)
3. Short the solder pads according to the output selected.
Refer to the table given below:
OUTPUT SHORT OPEN
Relay A (NO) (5, 6) together 4, 8, 11 must be OPEN
(12, 18) together
(16, 17) together
Relay A (NC) (4, 5) together 6, 8, 11 must be OPEN
(12, 18) together
(16, 17) together
Open Collector A (8, 12) together 4, 5, 6, 16, 18 must be OPEN
(11, 17) together
Relay B (NO) (2, 3) together 1, 7, 9 must be OPEN
(10, 15) together
(13, 14) together
Relay B (NC) (1, 2) together 3, 9, 10 must be OPEN
(10, 15) together
(13, 14) together
Open Collector B (7, 10) together 1, 2, 3, 13, 15 must be OPEN
(9, 14) together

14
WARRANTY
This product is warranted against de ects in materials and workmanship or a period
o two (2) years rom the date o shipment to Buyer.
The Warranty is limited to repair or replacement o the de ective unit at the option
o the manu acturer. This warranty is void i the product has been altered, misused,
dismantled, or otherwise abused.
ALL OTHER WARRANTIES, EXPRESSED OR IMPLIED, ARE EXCLUDED,
INCLUDING BUT NOT LIMITED TO THE IMPLIED WARRANTIES OF
MERCHANTABILITY AND FITNESS FOR A PARTICULAR PURPOSE.
Decoding Part Number
Example: 918 RTP A 3 1
Series:
918 RTP= ................................... Pulse Input Ratemeter
Totalizer
Operating V ltage:
A= 110 VAC ± 15%
B= 220 VAC ± 15%
*C= 24 VDC
Input:
3= Standard, 4-30 VDC simultaneous inputs
*3MB= Mag. Input, inputs A & B 30mV input
Opti ns:
1= RS-232, 3 Control Inputs
*2= RS-485, 2 Control Inputs
*3= Open Collector Output
*A= 4-20 mA Out (Can be ordered with options 1 or 2)
* Special Order
NOTE TO OUR CUSTOMER
KEP is dedicated to providing complete cus-
tomer service and customer satis action. I
you have any comments or criticisms about
how to improve this manual, please make a
note o the problem/improvement and noti y
us. We are always open to new ideas and
improvements. So please let us know your
ideas and comments.
Call us toll ree: 800-631-2165
This manual suits for next models
2
Table of contents
Other Flowmetrics Measuring Instrument manuals
Popular Measuring Instrument manuals by other brands

OHAUS
OHAUS MB120 instruction manual
Dwyer Instruments
Dwyer Instruments SLR-01 Installation and operating instructions

Hioki
Hioki PW3365-20 quick start guide
Rosemount
Rosemount 1199 Reference manual

2B Technologies
2B Technologies POM Operation manual

Thermo Scientific
Thermo Scientific RadEye PRD-ER operating instructions

