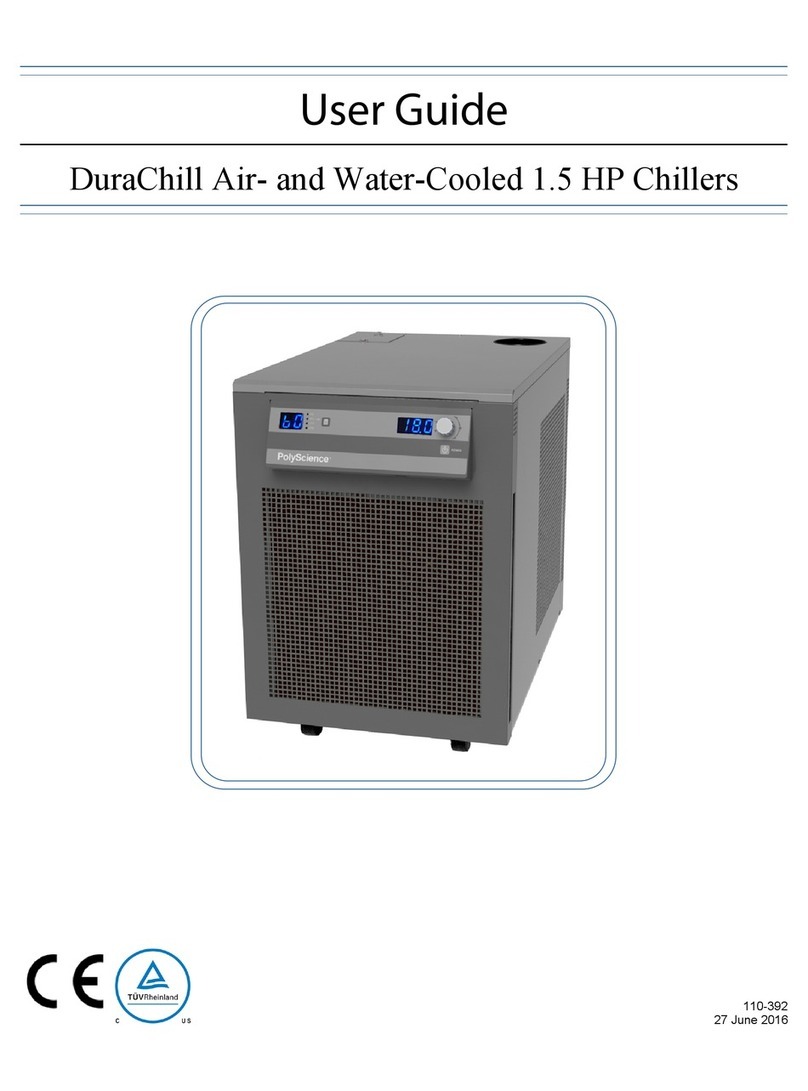
Fluidigm Juno User manual

PN 100-7070 J2
Juno System
User Guide

Juno System: User Guide
2
For technical support visit techsupport.fluidigm.com.
Japan +81 3 3662 2150 | techsupportjapan@fluidigm.com
China (excluding Hong Kong) +86 21 3255 8368 | techsupportch[email protected]m
For Research Use Only. Not for use in diagnostic procedures.
Information in this publication is subject to change without notice. It is
Fluidigm policy to improve products as new techniques and components
become available. Therefore, Fluidigm reserves the right to change
specifications at any time. Every effort has been made to avoid errors in
the text, diagrams, illustrations, figures, and screen captures. However,
Fluidigm assumes no responsibility for any errors or omissions. In no
event shall Fluidigm be liable for any damages in connection with or
arising from the use of this publication.
Patent and Limited License Information
Fluidigm products are covered by issued and pending patents in the
United States and other countries. Patent and limited license information
is available at fluidigm.com/legalnotices.
Limited Use License to Perform Preamplification with Fluidigm IFCs
A license to use Thermo Fisher Scientific’s patented preamplification
method workflows involving a Fluidigm integrated fluidic circuit (IFC) can
be obtained (i) with purchase of a Fluidigm IFC from Fluidigm Corporation
or (ii) by a separate license from Thermo Fisher Scientific. For licensing
information, contact outlicensing@lifetech.com.
Limited Digital PCR License
A license to use Thermo Fisher Scientific’s patented digital PCR method in
all fields other than in the Sequencing Field, the Mass Spectrometry Field,
and the Prenatal Field in workflows involving a Fluidigm IFC can be
obtained (i) with purchase of a Fluidigm IFC from Fluidigm Corporation or
(ii) by a separate license from Thermo Fisher Scientific. For licensing
information, contact outlicensing@lifetech.com.
Trademarks
Fluidigm, the Fluidigm logo, Biomark, Digital Array, Dynamic Array, EP1,
Flex Six, Juno, qdPCR 37K, and SNP Type are trademarks and/or
registered trademarks of Fluidigm Corporation in the United States and/or
other countries. All other trademarks are the sole property of their
respective owners.
For EU's WEEE directive information, go to fluidigm.com/compliance.
© 2018 Fluidigm Corporation. All rights reserved. 12/2018

Juno System: User Guide
Contents
3
Contents
About This Guide 5
Purpose 5
Safety Alerts for Chemicals 5
Safety Alerts for Instruments 5
Safety Data Sheets 6
Chapter 1: Introducing the Juno System 7
The Juno System 7
Consumables Ordering 7
Components of the Juno System 8
Interface Plates and IFCs 10
System Software 10
Scripts 11
Basic Scripts 11
Advanced Scripts 14
Components Included in Shipping Box 15
Optional Components 15
System Functions 16
Air Options 16
Regulatory Compliance 16
General Regulations and Requirements 16
Harmonized Standards 16
Conformity Symbols on the Instrument 17
Chapter 2: Getting Started with Juno 18
Start the Juno System 18
How to Use the Juno Touchscreen 20
Start a Run 20
Load an IFC 20
Select a Script 23
Schedule the Harvest with the LP 192.24 IFC or
LP 48.48 IFC 24
Run a Script 24
Switch an Interface Plate 26
Install an Interface Plate 29
View System Information 32
Export a Log 33
Shut Down the System and Then the
Instrument 34
Chapter 3: Using Advanced Features
of Juno 36
Log In 36
Log Out 36
Manage Scripts 37
Enable Advanced Scripts 37
Export Scripts to a USB 37
Install Scripts from a USB 38
Modify Scripts 39
To View the Scripts to Modify 39
To Change General Properties of a Script 40
To Change Thermal Properties of a Script 40
To Remove a Script 42
Manage Users 42
Change the Date and Time 44
Update the System 45
Enable In-House Air 46
Appendix A: Troubleshooting 47
Powering ON/OFF 47
Loading 48
Running 49
Cleaning 49
Appendix B: Preventive Maintenance,
Decontamination, and Disposal 50
Preventive Maintenance 50
Preventive Maintenance Recommendations 50
Clean the Thermal Cycler Chuck 50
Clean an Interface Plate 51
Clean the Juno System 53
Clean the Touchscreen 55
Replace the Fuses 55
Decontamination and Disposal 56
Biological Agents 56
Hazardous Chemicals 56
Radioactive Materials 56

Juno System: User Guide 5
About This Guide
IMPORTANT Before using the instrument, read and understand the safety guidelines in this
document. Failure to follow these guidelines may result in undesirable effects, injury to
personnel, and/or damage to the instrument or to property.
For complete safety information, see Appendix D.
Purpose
This guide describes how to use the Juno™ system, including the instrument and the system
software. For complete instrument specifications and unpacking/installation instructions, see
the Juno System Site Requirements Guide (PN 100-7072).
Safety Alerts for Chemicals
For hazards associated with chemicals, this document follows the United Nations Globally
Harmonized System of Classification and Labelling of Chemicals (GHS) and uses indicators
that include a pictogram and a signal word that indicates the severity level:
Safety Alerts for Instruments
For hazards associated with instruments, this document uses indicators that include a
pictogram and signal words that indicate the severity level:
Indicator Description
Pictogram (see example) consisting of a symbol on a white background within a red
diamond-shaped frame. Refer to the individual safety data sheet (SDS) for the applicable
pictograms and hazards pertaining to the chemicals being used.
DANGER Signal word that indicates more severe hazards.
WARNING Signal word that indicates less severe hazards.
Indicator Description
Pictogram (see example) consisting of a symbol on a white background within a black
triangle-shaped frame. Refer to the instrument user guide for the applicable
pictograms and hazards pertaining to instrument usage.
DANGER Signal word that indicates an imminent hazard that will result in severe injury or death
if not avoided.
WARNING Signal word that indicates a potentially hazardous situation that could result in serious
injury or death if not avoided.
CAUTION Signal word that indicates a potentially hazardous situation that could result in minor
or moderate personal injury if not avoided.
IMPORTANT Signal word that indicates information necessary for proper use of products or
successful outcome of experiments.

Juno System: User Guide
About This Guide
Safety Data Sheets
6
Safety Data Sheets
Read and understand the SDSs before handling chemicals. To obtain SDSs for chemicals
ordered from Fluidigm, either alone or as part of this system, go to fluidigm.com/sds and
search for the SDS using either the product name or the part number.
Some chemicals referred to in this user guide may not have been provided with your system.
Obtain the SDSs for chemicals provided by other manufacturers from those manufacturers.

Juno System: User Guide 7
Chapter 1: Introducing the Juno System
The Juno System
The Juno™ system is used for genotyping low-concentration DNA with the Juno 96.96
Genotyping IFC (integrated fluidic circuit) and for preparing libraries for targeted sequencing
with the LP 192.24 and LP 48.48 IFCs. This is possible through advanced microfluidics
technology.
In a single workflow, the Juno 96.96 Genotyping IFC integrates preamplification and
genotyping reactions of up to 96 samples and 96 genotyping assays to produce 9,216
genotypes in less than three hours. Samples are loaded into individual inlets of the Juno
96.96 Genotyping IFC, then distributed across multiple reaction chambers in nanoliter-
volume aliquots. With high-quality samples, detecting the specific targets requires a sufficient
number of copies in the final preamplification mix of 4 μL. After genotyping is performed on
the Juno system, the IFC is scanned on the EP1™ system or Biomark™ HD system to collect
genotyping data for later analysis.
The LP 192.24 IFC facilitates parallel amplification of up to 192 samples and up to 2,400
assays for targeted sequencing. The LP 48.48 IFC facilitates parallel amplification of up to 48
samples and up to 4,800 assays for targeted sequencing. Juno performs sample and assay
loading, mixing, thermal cycling, and harvesting automatically for further processing and
targeted sequencing.
NOTE For Research Use Only. Not for use in diagnostic procedures.
Consumables Ordering
To reorder IFCs and reagents, contact your regional Fluidigm sales representative or
distributor. Go to fluidigm.com/contact.html.

Juno System: User Guide
Chapter 1: Introducing the Juno System
Components of the Juno System
8
Components of the Juno System
Figure 1. Front panel of the Juno instrument.
Figure 2. Back panel of the Juno instrument. There are also two USB 2.0 ports on the side of the
instrument.
Touchscreen
interface
Retracted tray
Power and
standby indicator
USB 2.0 ports
Ethernet
port
DVI port
ON/OFF switch
Power socket
Compressed
air input
Exhaust fan

Juno System: User Guide
Chapter 1: Introducing the Juno System
Components of the Juno System
9
Figure 3. Tray and thermal chuck of the Juno instrument. The white notch is used to orient the notched
corner of the IFC in the tray.
Figure 4. Interface Plate Loading Fixture
White notch

Juno System: User Guide
Chapter 1: Introducing the Juno System
Interface Plates and IFCs
10
Figure 5. MX Interface Plate
Interface Plates and IFCs
Table 1 shows the appropriate interface plate for the IFC you are using.
Table 1. Interface plates and supported IFCs
System Software
Ensure that you have installed the Juno system software v3.1 or later if you are using the
Juno 96.96 Genotyping IFC. Install software v3.5 or later if you are using the Juno 96.96
Genotyping IFC or an IFC for the Targeted DNA Sequencing Library application. Install
software v3.11.1 or later if you are using the 24.192 Dynamic Array IFC for Gene Expression.
To get the latest system software, go to fluidigm.com/software.
Interface Plate Name Label Color on Interface Plate Supports…
MX Black 48.48 Dynamic Array™ IFCs
LP 48.48 IFC
qdPCR 37K™ IFC
48.770 Digital Array™ IFC
12.765 Digital Array IFC
SX Silver Juno 96.96 Genotyping IFC
HX Green 96.96 Dynamic Array IFCs
Flex Six™ Genotyping and Gene Expression IFCs
RX Red 192.24 Genotyping and Gene Expression IFCs
24.192 Dynamic Array IFC for Gene Expression
TX Blue LP 192.24 IFC

Juno System: User Guide
Chapter 1: Introducing the Juno System
Scripts
11
Scripts
Basic Scripts
Tab in Juno
Software
Scripts for IFCs Controller/Interface
Plate to Use*
(label color)
Script Descriptions
Targeted Seq One Step LP-192.24 TX (blue) One step load mix, PCR, and harvest of
LP 192.24 IFC (192x)
One Step LP-48.48 MX (black) One step load mix, PCR, and harvest of
LP 48.48 IFC (155x)
Prime LP-48.48 MX (black) Preparation of the LP 48.48 IFC (155x) for
loading
Digital PCR One Step 12.765 MX (black) One step load and PCR of the 12.765 dPCR
IFC (115x)
One Step 48.770 MX (black) One step load and PCR of the 48.770 dPCR
IFC (148x)
One Step qdPCR 37K MX (black) One step load and PCR of the qdPCR 37K IFC
(167x)

Juno System: User Guide
Chapter 1: Introducing the Juno System
Scripts
12
IFC Control Load 12.765 MX (black) Load the 12.765 dPCR IFC (115x)
Load 48.770 MX (black) Load the 48.770 dPCR IFC (148x)
Load Mix 192.24 GE RX (red) Prime, load, and mix the 192.24 GE IFC (169x)
Load Mix 24.192 GE RX (red) Prime, load, and mix the 24.192 GE IFC (158x)
Load Mix 48.48 GE MX (black) Load the 48.48 GE IFC (113x)
Load Mix 96.96 GE HX (green) Load the 96.96 GE IFC (136x)
Load Mix Flex Six GE HX (green) Load the Flex Six GE IFC (153x)
Load qdPCR 37K MX (black) Load qdPCR 37K IFC (167x)
Post Run Flex Six GE HX (green) Preparation of the Flex Six GE IFC (153x) for
storage
Post Run Flex Six GT HX (green) Preparation of the Flex Six GT IFC (154x) for
storage
Prime 12.765 MX (black) Preparation of the 12.765 dPCR IFC (115x) for
loading
Prime 48.48 GE MX (black) Preparation of the 48.48 GE IFC (113x) for
loading
Prime 48.48 GT MX (black) Preparation of the 48.48 GT IFC (124x) for
loading
Prime 48.770 MX (black) Preparation of the 48.770 dPCR IFC (148x) for
loading
Prime 96.96 GE HX (green) Preparation of the 96.96 GE IFC (136x) for
loading
Prime 96.96 GT HX (green) Preparation of the 96.96 GT IFC (138x) for
loading
Prime Flex Six GE HX (green) Preparation of the Flex Six GE IFC (153x) for
loading
Prime Flex Six GT HX (green) Preparation of the Flex Six GT IFC (154x) for
loading
Prime qdPCR 37K MX (black) Preparation of the qdPCR 37K IFC (167x) for
loading
Tab in Juno
Software
(Continued)
Scripts for IFCs Controller/Interface
Plate to Use*
(label color)
Script Descriptions

Juno System: User Guide
Chapter 1: Introducing the Juno System
Scripts
13
Probe GT Juno 96.96 Fast SX (silver) One step load and PCR of Juno GT IFC (180x)
for probe GT chemistry
One Step 192.24 Fast RX (red) One step load and fast PCR of 192.24 GT IFC
(166x) for probe GT chemistry
One Step 48.48 MX (black) One step load and standard PCR of 48.48 GT
IFC (124x) for probe GT chemistry
One Step 48.48 Fast MX (black) One step load and fast PCR of 48.48 GT IFC
(124x) for probe GT chemistry
One Step 96.96 HX (green) One step load and standard PCR of 96.96 GT
IFC (138x) for probe GT chemistry
One Step 96.96 Fast HX (green) One step load and fast PCR of 96.96 GT IFC
(138x) for probe GT chemistry
One Step Flex Six HX (green) One step load and standard PCR of Flex Six
GT IFC (154x) for probe GT chemistry
One Step Flex Six Fast HX (green) One step load and fast PCR of Flex Six GT IFC
(154x) for probe GT chemistry
SNP Type Juno 96.96 SX (silver) One step load and PCR of Juno GT IFC (180x)
for SNP Type™ chemistry
One Step 192.24 RX (red) One step load and PCR of 192.24 GT IFC
(166x) for SNP Type chemistry
One Step 48.48 MX (black) One step load and PCR of 48.48 GT IFC (124x)
for SNP Type chemistry
One Step 96.96 HX (green) One step load and PCR of 96.96 GT IFC (138x)
for SNP Type chemistry
One Step Flex Six HX (green) One step load and PCR of Flex Six GT IFC
(154x) for SNP Type chemistry
* The interface plates are distinguished by color labels and two-letter names. See the scripts table on page 10.
Tab in Juno
Software
(Continued)
Scripts for IFCs Controller/Interface
Plate to Use*
(label color)
Script Descriptions

Juno System: User Guide
Chapter 1: Introducing the Juno System
Scripts
14
Advanced Scripts
NOTE To view advanced scripts on the instrument, log in as an administrator, tap
Preferences, then select Enabled under Advanced Scripts.
Tab in Juno
Software
Scripts for IFCs Controller/Interface
Plate to Use*
(label color)
* The interface plates are distinguished by color labels and two-letter names. See the scripts table on page 10.
Script Descriptions
Targeted Seq Load Mix LP-192.24 TX (blue) Load and mix samples and assays for
LP 192.24 IFC (192x)
PCR Harvest LP-192.24 TX (blue) PCR and harvest of LP 192.24 IFC (192x)
Load Mix LP-48.48 MX (black) Load and mix samples and assays for
LP 48.48 IFC (155x)
PCR Harvest LP-48.48 MX (black) PCR and harvest of LP 48.48 IFC (155x)
Digital PCR PCR 12.765 MX (black) PCR of the 12.765 dPCR IFC (115x)
PCR 48.770 MX (black) PCR of the 48.770 dPCR IFC (148x)
PCR qdPCR 37K MX (black) PCR of the qdPCR 37K IFC (167x)
IFC Control Load Mix 96.96 GT HX (green) Load the 96.96 GT IFC (138x)
Load Mix 48.48 GT MX (black) Load the 48.48 GT IFC (124x)
Load Mix Flex Six GT HX (green) Load the Flex Six GT IFC (154x)
Load Mix 192.24 GT RX (red) Prime, load, and mix the 192.24 GT IFC (166x)
Probe GT Fast PCR 192.24 RX (red) Fast PCR of 192.24 GT IFC (166x) for probe
GT chemistry
Fast PCR 48.48 MX (black) Fast PCR of 48.48 GT IFC (124x) for probe GT
chemistry
Fast PCR 96.96 HX (green) Fast PCR of 96.96 GT IFC (138x) for probe GT
chemistry
Fast PCR Flex Six HX (green) Fast PCR of Flex Six GT IFC (154x) for probe
GT chemistry
PCR 96.96 HX (green) Standard PCR of 96.96 GT IFC (138x) for
probe GT chemistry
PCR 48.48 MX (black) Standard PCR of 48.48 GT IFC (124x) for
probe GT chemistry
PCR Flex Six HX (green) Standard PCR of Flex Six GT IFC (154x) for
probe GT chemistry
SNP Type PCR 192.24 RX (red) PCR of the 192.24 GT IFC (166x) for SNP Type
chemistry
PCR 48.48 MX (black) PCR of the 48.48 GT IFC (124x) for SNP Type
chemistry
PCR 96.96 HX (green) PCR of the 96.96 GT IFC (138x) for SNP Type
chemistry
PCR Flex Six HX (green) PCR of the Flex Six GT IFC (154x) for SNP
Type chemistry

Juno System: User Guide
Chapter 1: Introducing the Juno System
Components Included in Shipping Box
15
Components Included in Shipping Box
The Juno system (PN 101-6455) includes the following components:
Optional Components
Depending on the type of IFC used with Juno, you will need additional interface plates.
Component Purpose
Juno system with system software
version 3.3 or later
Preamplification and genotyping of DNA through targeted
DNA sequencing preparation
Power cable, >10 A, 2 m, IEC C13 Country-specific power cable to connect the Juno
instrument to the wall socket
The instrument has a connection to protective
earth through the power cord provided by
Fluidigm. Ensure that the electrical receptacle
provides an earth ground before connecting the
power cord.
Use only power cords provided by Fluidigm or power cords
that meet the minimum ratings of 250V/10A, 16AWG and a
length not exceed 2 meters (6 feet).
Cleaning plate Clean the Juno instrument
Interface Plate Loading Fixture The Interface Plate Loading Fixture is used to load interface
plates into the Juno instrument. Store the loading fixture in
its storage container when not in use.
MX Interface Plate The MX Interface Plate (PN 101-6115) adapts Juno for use
with the LP 48.48 IFC, 48.48 Dynamic Array IFCs, and
digital PCR IFCs. Store the interface plate in the storage
container when not in use.
Barrier Tape Applicator and Adapter The Barrier Tape Applicator applies barrier tape to the LP
192.24 IFC. The adapter fits onto the Barrier Tape
Applicator to apply barrier tape to the LP 48.48 IFC.
Component Purpose
SX Interface Plate (PN 100- 6368) Supports the Juno 96.96 Genotyping IFC and has a
silver label.
TX Interface Plate (PN 101-6117) Supports the LP 192.24 IFC and has a blue label.
HX Interface Plate (PN 101-6116) Supports 96.96 Dynamic Array™ and Flex Six™ IFCs and
has a green label.
RX Interface Plate (PN 101-6114) Supports 24.192 Dynamic Array IFC for Gene
Expression and 192.24 Genotyping and Gene
Expression IFCs and has a red label.

Juno System: User Guide
Chapter 1: Introducing the Juno System
System Functions
16
System Functions
The Juno system is an electrically and pneumatically operated desktop instrument. Its
vacuum pump holds the IFC in position, and its embedded PC regulates the instrument's
functions and monitors its performance. The system has a touch panel LCD display. All user-
specific instructions and functions can be controlled through the touchscreen.
The system uses a thermal stack to provide rapid, accurate, uniform heating and cooling.
Air Options
The Juno system has an internal compressor to generate compressed air and draws in
ambient air by default. To use in-house compressed air, attach 1/4-inch tubing into the air
inlet on the back of the system. The allowable pressure input is listed on the back of the
instrument.
For detailed instructions on enabling use of in-house air, see Enable In-House Air on page 46
Regulatory Compliance
The following directives and harmonized standards were used to evaluate the safety and
performance of the Juno system:
General Regulations and Requirements
•2014/35/EU European Parliament Low Voltage Directive
•2014/30/EU European Parliament Directive: Electromagnetic Compatibility
Harmonized Standards
•IEC/EN 61326-1
•IEC/EN 61010-1
•IEC/EN 61010-2-010
•IEC/EN 61010-2-081
•UL Standard Number 61010-1 2nd Edition
•CAN/CSA-C22.2 No. 61010-1-04
•CAN/CSA-C22.2 No. 61010-2-010:4
•CAN/CSA-C22.2 No. 61010-2-081-04

Juno System: User Guide
Chapter 1: Introducing the Juno System
Regulatory Compliance
17
Conformity Symbols on the Instrument
The instrument is labeled with the following conformity markings:
Refer to the Juno System Site Requirements Guide (PN 100-7072) for more detailed
information on the recommended environmental conditions.
Conformity mark Description
Indicates conformity with safety requirements for Canada and the
United States.
Indicates conformity with European Union requirements for safety and
electromagnetic compatibility.

Juno System: User Guide
18
Chapter 2: Getting Started with Juno
To run the basic features of Juno, use the instrument as a guest. To use advanced features,
log in as an administrator. (See Using Advanced Features of Juno on page 36.)
NOTE Ensure that you have installed the Juno system software v3.1 or later if you are using
the Juno 96.96 Genotyping IFC. Install software v3.5 or later if you are using the Juno 96.96
Genotyping IFC or an IFC for the Targeted DNA Sequencing Library application. Install
software v3.11.1 or later if you are using the 24.192 Dynamic Array™ IFC for Gene Expression.
To get the latest system software, go to fluidigm.com/software.
Start the Juno System
1Plug the power cable into the power socket. Connect to the network.
The instrument has a connection to protective earth through the power cord
provided by Fluidigm. Ensure that the electrical receptacle provides an earth
ground before connecting the power cord.
2Power on the toggle switch on the back of the Juno system:
NOTE Switching the back power button on or off turns on or off all components of the
system. In contrast, pushing the front power button for ~2 seconds wakes up the
instrument if it is in sleep mode and prompts the system to display the system shutdown
menu. (See Shut Down the System and Then the Instrument on page 34.)
Power switch

Juno System: User Guide
Chapter 2: Getting Started with Juno
Start the Juno System
19
The startup screen displays after 10–15 seconds:
Next, the Start screen displays:
The instrument initializes all system components, including communication protocol,
vacuum and temperature sensors, software parameters, instrument configuration, and
calibration data.

Juno System: User Guide
Chapter 2: Getting Started with Juno
How to Use the Juno Touchscreen
20
How to Use the Juno Touchscreen
Start a Run
Load an IFC
1See the appropriate Fluidigm documentation to prepare an IFC for loading the
instrument. For related documentation, go to fluidigm.com/documents
2Install the appropriate interface plate according to Table 1 on page 10. (See Components
of the Juno System on page 8, Install an Interface Plate on page 29, and Switch an
Interface Plate on page 26.)
Other manuals for Juno
1
Table of contents
Other Fluidigm Laboratory Equipment manuals
Popular Laboratory Equipment manuals by other brands
Master Water Conditioning
Master Water Conditioning MWC-EM Series Installation and operation manual
PASCO
PASCO CI-6538 instruction manual
PI
PI L-738 Series user manual
Creek Audio
Creek Audio UV-C FLOW 72W MONO user manual
Thermo Scientific
Thermo Scientific TEOM 1405 manual
Biohit
Biohit mLINE m10 instruction manual

