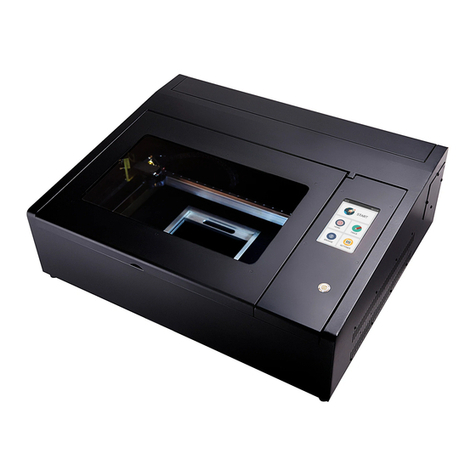
Flux beamo User manual


WELCOME TO THE FLUX COMMUNITY!
FLUX started with a passion for digital creation and making
easy-to-use and affordable tools for makers and designers.
2,500 backers helped us successfully raise $1.6M on Kickstarter
for our rst modular 3D printer, FLUX Delta, back in 2014.
Having received numerous requests from our users for a more
accessible laser cutter, we decided to take on this challenge and
dove into the world of laser technology. In the last couple of
months we have worked hard for this moment and put a lot of
heart and soul into development and production.
We proudly present beamo, the laser cutter that will help you
create things that you'll love, and have fun during the process,
too. With the hashtag #madewithbeamo, you will nd inspiration
from other members of the FLUX Community. Please share your
creations online with us, we can't wait to see how you will use
your beamo and all the amazing things you will make!
In pursuit of the same goal we’ve had since day one, we work
closely with our users. So please do not hesitate to contact us,
we are looking forward to your feedback. You can always reach
us at support@ux3dp.com.
Enjoy!
Team FLUX

TABLE OF CONTENTS
Welcome
1.1 Using This User Manual..............................................09
1.2 CO2 Laser Basics........................................................10
1.3 Safety & Conformity................................................... 12
Unboxing
2.1 What’s In The Box...................................................... 17
2.2Assembly.....................................................................20
2.3 Network Setup............................................................21
2.4 Software Download & Setup......................................22
2.5 First Task.................................................................... 24
Software Beam Studio
3.1 Software User Interface..............................................29
3.2 Touch Screen User Interface.......................................32
3.3 Bitmap Engraving.......................................................33
3.4 Vector Engraving........................................................34
3.5 Comparison Between Bitmap & Vector Format.........35
3.6 Layer Setting...............................................................35
3.7 Save Scene.................................................................35
3.8 Recommended Design Software................................36
3.9 Smart Trace.................................................................37

TABLE OF CONTENTS
Material Technique
4.1 Testing New Material..................................................41
4.2 Wood......................................................................... 42
4.3 Leather........................................................................43
4.4 Acrylic.........................................................................44
4.5 Paper...........................................................................45
4.6 Glass...........................................................................46
4.7 Metal...........................................................................46
4.8 Other Safe Material....................................................47
4.9 Dangerous Material....................................................47
Project Ideas.....................................................................50
Maintenance & Care
6.1 Keep Everything Lubricated.......................................52
6.2 Cleaning Of The Workarea.........................................53
6.3 Wiping The Lens........................................................ 54
6.4 Water Cooler Maintenance........................................ 56
6.5 Optical Path Alignment..............................................59
6.6 Laser Tube Replacement............................................73

TABLE OF CONTENTS
Troubleshooting
7.1 No Laser Beam Output.......................................85
7.2 Cut Did Not Go Through Material.............................86
7.3 #900 Cooler Off.........................................................86
7.4 #901 Door Opened....................................................87
7.5 #902 Overheated.......................................................88
7.6 Laser Head Did Not Return To Rear Left Corner........88
7.7 Camera Alignment Issue............................................89
7.8 Camera Preview Speed Too Slow..............................89
7.9 Camera Preview Does Not Work...............................90
7.10 Connection Issue......................................................90
7.11 Software Quits Unexpectedly...................................94
Addtional Information
8.1 Technical Data............................................................96
8.2 Storage and Transport................................................96
8.3 FLUX Support.............................................................97
8.4 Disassembling & Dismantling................................97


8

9
1.1 USING THIS USER MANUAL
These operating instructions must be carefully read and ob-
served before using beamo for the rst time. Non-observance of
individually listed points in the instructions can cause personal
injury and/or property damage.
No part of this manual may be reproduced, edited or modied
in any form without the prior consent of FLUX Inc.. The rights for
reproduction in any form are reserved. FLUX Inc. reserves the
right to change specications of the hardware and software de-
scribed in the user manual at any time and without prior notice.
The following symbols are used to facilitate the understanding of
this manual:
Warning: This area represents a special danger for the user or
the person responsible for maintenance if the operating instruc-
tions are not observed.
Warning: In these areas, pay particular attention to the possible
dangers of laser light.
Additional accessories must be compatible with the base unit (if
you have any questions, please contact FLUX Support:
support@ux3dp.com).
Please keep this user manual for future reference.

10
1.2 CO2 LASER BASICS

11

12
1.3 SAFETY & CONFORMITY
Be sure to read the following safety precautions carefully be-
fore starting to operate beamo. beamo uses a high-power laser
beam. Improper handling can result in re, visual impairment,
skin burns, or inhalation of toxic substances, and other personal
safety hazards.
Important Precautions
1. Never leave the machine unattended while operating.
2. Be sure to have a re extinguisher in the work area.
3. Do not try to service, repair, or modify the machine with-
out authorization from FLUX Support.
4. Do not stare at the ame generated by the laser.
5. Please make sure that the processed material does not
pose a hazard when burned at high temperatures.
User Safety
1. All personnel who will operate the machine shoud read the
safety precautions and follow the instructions. Conrm with
FLUX Support if you have any questions regarding use and
safety: support@ux3dp.com.
2. Children require the supervision and assistance of an adult at
all times.

13
3. Operating environment:
a. Place the machine in a well-ventilated area.
b. Avoid rain, moisture, liquids, or direct sunlight.
c. The ambient temperature should be between 5°C and
35°C (41°F and 95°F), and humidity between 10% and
75%.
d. If venting outdoors, make sure that changing conditions
do not cause extreme temperatures or humidity to affect
the machine through the exhaust duct. Disconnect the
duct from the outside air when the machine is not in use.
e. Place the machine on a stable surface to prevent it from
moving or overturning.
Electrical Safety
1. The machine comes in 2 versions, 110V and 220V. Do not use
a power source other than the AC rated voltage. If in doubt,
contact FLUX Support. (110V: 100 - 127V / 220V: 200 - 240V)
2. Make sure that the grounding pin is properly connected. If
not grounded properly, static electricity might be generated
that could affect performance and even increase the risk of
electric shock.
3. Do not use the power cord if it is damaged.
4. When maintaining or disassembling the machine with the
consent of FLUX Support, be sure to turn the power off and
unplug the unit.

14
Fire Safety
1. Do not put anything inside the machine that is not laser-
compatible. Learn more about laser-compatible materials.
2. Do not stack materials; for example, do not attempt to cut
two or more sheets of material at a time.
3. Clean out leftover debris inside the unit when it builds up.
4. Never leave the unit unattended while operating; always
keep it within sight. Look inside frequently.
5. If there is a lasting ame inside the unit that does not
extinguish after the laser has moved:
a. Turn off the machine and pull the plug on the back of the
unit.
b. If it is safe to do so, extinguish the re with a wet towel.
Note that water may damage the machine.
c. Alternatively, extinguish the re with a re extinguisher.
Note that re extinguishers may damage the machine.
d. If the re cannot be extinguished or if it spreads outside
the machine, call your local emergency number.
Smoke and Fume Safety
1. When exhausting outdoors, be sure that the exhaust location
won’t be bothersome to neighbors or passers-by, and don’t
forget to check local air quality regulations that may apply.
2. If a strong, sharp smell -- that also causes eyes, nose, or
throat irritation -- is detected, or visible smoke is escaping
the machine while the lid is closed, stop immediately and re-

15
check your exhaust setup.
Operation Safety
1. Do not stare at the ame generated by the laser.
2. Stabilize the unit to prevent it from moving or overturning.
3. In case of burn injury, seek medical advice.
4. Wear gloves when cleaning leftover debris.
5. Have two people lift the unit when moving the machine.
Stop using your beamo if...
1. There is a re in the unit which persists after the laser
turns off.
2. The head stops moving but the laser is on.
3. An unusual sound or unusual light is coming from the unit.
4. You see any damage to the interior components of the
unit.
Conformity
The beamo unit is a Class 1 laser product containing an embed-
ded Class 4 CO2 laser and a Class 1 laser diode. Because the
Class 4 laser is fully contained in a Class 1 enclosure, this laser
product is designated as a Class 1 laser product during all proce-
dures of operation.

16

17
2.1 WHAT’S IN THE BOX
1. Place the box on the oor and open it.
2. Remove the packing foam ion the four corners and take the
machine out of the box. Have two people lift it out of the
box. Keep the packaging in case you need to transport the
machine in the future.

18
3. Open the lid and take out the vent hose, then take out the
Accessory Kit.
4. Content of the Accessory Kit: : ① Wi-Fi dongle ②lubricant
③ duct clamp ④ double-sided tape ⑤power cord ⑥small
wrenches ⑦ hex key ⑧funnel ⑨sample material

19
5. Front view: ①laser head ②focus bar ③honeycomb plate
④touchscreen ⑤power button ⑥transparent lid
6. Rear view: ①USB ports ②Ethernet port ③power
connector ④ exhaust fan
⑥
④
⑤
①
② ③

20
2.2 ASSEMBLY
1. Connect the power cable.
2. Plug the Wi-Fi dongle into one of the two USB ports in the
back of the machine. Turn the antenna upwards 90° for a
better connection.
3. Use the duct provided. Slide the duct clamp around the
bigger end of the duct then install the duct and clamp over
the fan exhaust on the back of your beamo. Use the small
wrench to tighten the clamp.
Table of contents
Other Flux Measuring Instrument manuals
Popular Measuring Instrument manuals by other brands

HT
HT D40 user manual

Dr. A. Kuntze
Dr. A. Kuntze K 100 PR manual

PCB Piezotronics
PCB Piezotronics IMI SENSORS ICP EX608A11/050BZ Installation and operating manual

Pfeuffer
Pfeuffer GTM 800 Installation and operating instructions

PerfectFlite
PerfectFlite Pnut user manual

Gems Sensors
Gems Sensors DM21 Series Technical manual