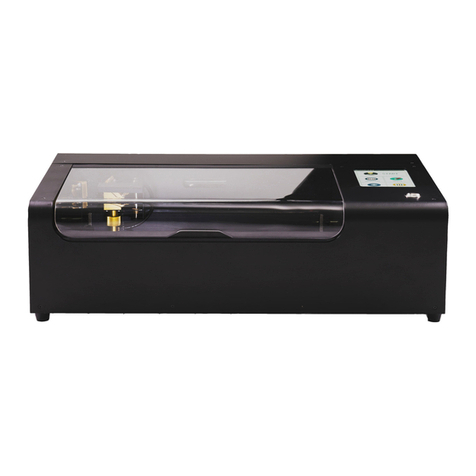
Flux Beambox User manual


We started with a passion for digital creation and a goal
to make tools for makers and designers that are easy-to-
use and affordable. After almost 2,500 backers helped
us successfully raised $1.6M on Kickstarter, it took us
a year to take FLUX Delta from prototype to a product
embraced by users around the world. Our users loved
the laser cutter on the FLUX Delta, since it enabled
them to cut and engrave materials beyond plastic, and
wanted more. In fact, one of the most frequent requests
we received from our supporters was to make the laser
engraving module more powerful. Our team plunged
deeper into the world of laser technology and decided
to take on this challenge. We gained substantial expe-
rience in manufacturing when we made a 3D printer
from scratch. Now, in pursuit of the same goal we’ve
had since day one, we’re leveraging our experience from
FLUX Delta to make something just as fantastic. Beam-
box is the laser cutter and engraver that you’ve been
waiting for, it is intuitive, intelligent, and accessible.
FLUX Team
September, 2019
PREFACE

CH1 CO2 LASER BASICS ................................. 008
CH2 UNBOXING ............................................ 010
2.1 Before You Start.................................... 010
2.2 What's In the Box.................................. 016
2.3 Assembly............................................... 019
2.4 Network Setup....................................... 021
2.5 Software Download............................... 022
2.6 Software Setup...................................... 023
CH3 FIRST ENGRAVING .................................. 024
3.1 Adjusting Focus.................................... 024
3.2 Camera Preview.................................... 025
3.3 Importing Test File............................... 026
3.4 Test Result............................................ 028
CH4 SOFTWARE ............................................. 029
4.1 User Inteface......................................... 029
4.2 Bitmap Engraving.................................. 032
TABLE OF CONTENTS

4.2.1 Engraving Resolution............ 032
4.2.2 Threshold............................... 033
4.3 Vector Engraving................................... 034
4.4 Bitmap and Vector Comparison............ 035
4.5 Layer Settings........................................ 035
4.6 Save Scene........................................... 036
4.7 Recommended Design Software............ 036
4.8 Smart Trace............................................037
CH5 MATERIAL TECHNIQUES ......................... 040
5.1 Testing New Materials........................... 040
5.2 Wood.................................................... 041
5.3 Leather.................................................. 042
5.4 Acrylic................................................... 044
5.5 Paper..................................................... 045
5.6 Glass..................................................... 046
5.7 Metal..................................................... 046
5.8 Other Materials..................................... 046
5.9 Dangerous Materials............................. 047
CH6 PROJECT IDEAS ................................. 049

CH7 MAINTENACE ......................................... 051
7.1 Touch Panel - Maintenacne................... 051
7.2 Keep Everything Lubricated.................. 052
7.3 Cleaning The Work Area....................... 053
7.4 Wiping The Lens................................... 054
7.5 Water Cooler Maintenance.................... 057
7.6 Optical Path Adjustment....................... 060
7.6.1 First Reflecting Mirror............ 062
7.6.2 Second Reflecting Mirror....... 065
7.6.3 Laser Head Adjustment.......... 069
7.6.4 Third Reflecting Mirror........... 071
7.6.5 Verticality of the Optical Path. 073
7.7 Laser Tube Replacement...................... 077
CH 8 TROUBLESHOOTING ............................. 090
8.1 No Laser Beam Output ..........................091
8.2 Cut Didn’t Go Through Material............ 091
8.3 #900 Cooler Off..................................... 091
8.4 #901 Door Opened ............................... 092
8.5 #902 Overheated................................... 093
8.6 Laser Head Doesn’t Return Home......... 094
8.7 Camera Alignment Issue....................... 095
8.8 Camera Preview Speed Is Too Slow....... 095

8.9 Camera Preview Doesn’t Work.............. 096
8.10 Connection Issue................................. 096
8.11 Software Quits Unexpectedly.............. 100
CH 9 TERMS OF USE ..................................... 102

8
CO2 LASER BASICS

9

10
2.1 Before You Start
Read the following safety precautions carefully before
operating Beambox. Beambox produces high-powered
laser beam. Improper handling can result in fire, visual
impairment, skin burns, or inhalation of toxic substances
and other personal safety hazards.
Important Precautions
Never leave the machine unattended while operating.
Be sure to prepare a re extinguisher in the work area.
Do not try to service, repair, or modify the machine
without authorization from FLUX Support.
Do not stare at the ame generated by the laser.
Please make sure that the processed material does not
pose a hazard when burned at high temperatures.
UNBOXING

11
User Safety
All personnel who will operate the machine shoud read
the safety precautions and follow the instructions. Conrm
with FLUX Support if you have any questions regarding use
and safety. support@flux3dp.com
Children require the supervision and assistance of an
adult at all times.
Operating Environment
Place the machine in a well-ventilated area.
Avoid rain, moisture, liquids or direct sunlight.
The ambient temperature and humidity should be
within 5°C - 35°C (41°F - 95°F), 10% - 75%.
If venting outdoors, ensure that changing conditions
do not cause extreme temperatures or humidity to enter
the machine through the vent hose. Disconnect the hose
from the outside air when the machine is not in use.
Place the machine on a stable surface to prevent
overturning.

12
Electrical Safety
The machine comes in 2 models, 110V and 220V. Do
not use a power source other than the AC rated voltage.
If in doubt, contact FLUX Support. (110V: 100 - 127V /
220V: 200 - 240V)
Make sure that the grounding pin is properly plugged-
in. If not grounded properly, static electricity might be
generated to affect the performance and even increase
the risk of electric shock.
Do not continue to use the power cord if it is found to
be damaged.
When maintaining or disassembling the machine with
the consent of FLUX Support, be sure to turn off the pow-
er and unplug the unit.
Fire Safety
Do not put anything inside the machine that is not la-
ser-compatible. Learn more about laser-compatible mate-
rials (p.41).
Do not stack materials; for example attempting to cut
two or more sheets of material at a time.

13
Clean out leftover bits inside the unit when it builds
up.
Never leave the unit unattended while operating
always stay within sight. Look inside frequently.
If there is a lasting ame inside the unit that does not
extinguish when the laser has moved past. Turn off the
machine and pull the plug on the back of the unit.
If it is safe to do so, extinguish the fire with a wet
towel. Note that water may damage the machine.
Extinguish the fire with a fire extinguisher. Note that
re extinguishers may cause damage to the machine.
If the fire cannot be extinguished or if it spreads
outside the machine, call your local emergency number
Smoke and Fume Safety
When exhausting outdoors, be sure that the exhaust
location won’t be bothersome to neighbors or passers-by,
and don’t forget to check local air quality regulations that
may apply.
If a strong, sharp smell that also causes eyes, nose,
or throat irritation, is detected, or visible smoke escaping
while the lid is closed, stop immediately and re-check your
exhaust setup.

14
Operation Safety
Do not stare at the ame generated by the laser.
Stabilize the unit to prevent performance failure.
In case of burn injury, seek medical advice.
Wear gloves when cleaning leftover bits.
Have two people lift the unit when moving the
machine.
Safety Switch
The safety interlock switche on the front door
turn off the laser immediately if they are opened. Do
not try to defeat the switches.
Keep body parts out of the workarea to prevent
injuries.
Make sure the front door is closed when adjust-
ing the optical path.

15
Stop Using Your Beambox If...
There is a fire in the unit which persists after the
laser turns off.
The head stops moving but the laser is on.
An unusual sound or unusual light coming from
the unit that was not occurring previously.
You see any damage to the interior components
of the unit.
Now, let's get started!

16
2.2 What's In The Box
Place the box on the floor and unseal the box.
Remove the cushions on the four corners and
take out the machine. Have two people lift the
unit out of the box. Keep the packaging in case
of transportation in the future.

17
Open the front door and take out the duct.
Remove the foam on the air pump then take out
the accessory box.
In the accessory box are Wi-Fi dongle
lubricant duct clamp double-sided tape
power cord small wrench magnets
dampers washers nuts

18
Front view: focus probe honeycomb
platform level adjustment knob touch
panel power button
Rear view: main switch power inlet Ether-
net port USB port grounding cable exhaust
fan

19
2.3 Assembly
Remove the release paper of the magnet and
stick the two magnets on the edge of the door.
Peel off the cover paper on both side of the
acrylic window and install the window with one
washer and one nut on each bolt.
Install the two dampers to the holes on the
edge of the machine.

20
Plug in the power cord to the power inlet of the
machine and the wall socket as well. Plug in the
Wi-Fi dongle to the USB port on the back. Bend
the antenna upward for better signal.
Match the duct clamp to the bigger end of the
duct then connect it to the exhaust fan outlet.
Tighten the clamp using the little wrench by
screwing clockwise.
Other manuals for Beambox
1
This manual suits for next models
1
Table of contents
Other Flux Measuring Instrument manuals
Popular Measuring Instrument manuals by other brands

Radians Innova
Radians Innova EnviroMentor Field Finder User instructions

RainWise
RainWise Weather Oracle MKIII user guide

General Sleep
General Sleep Zmachine Insight+ DT-200 Service manual

IRIMO
IRIMO 984-6D-1 owner's manual

Vega
Vega VEGACAP 63 Supplementary instructions

Dwyer Instruments
Dwyer Instruments RP2 Specifications-installation and operating instructions