ENGLISH
7
OVERVIEW OF THE WING
03.02 Features
Extra Handles
The special grip position has been developed for low-eort
driving in strong winds. Gripping the Extra Handles reduces the
pressure on the arms and the wing can be moved more easily
overhead. In addition, we recommend using the handles for jibes
and turns.
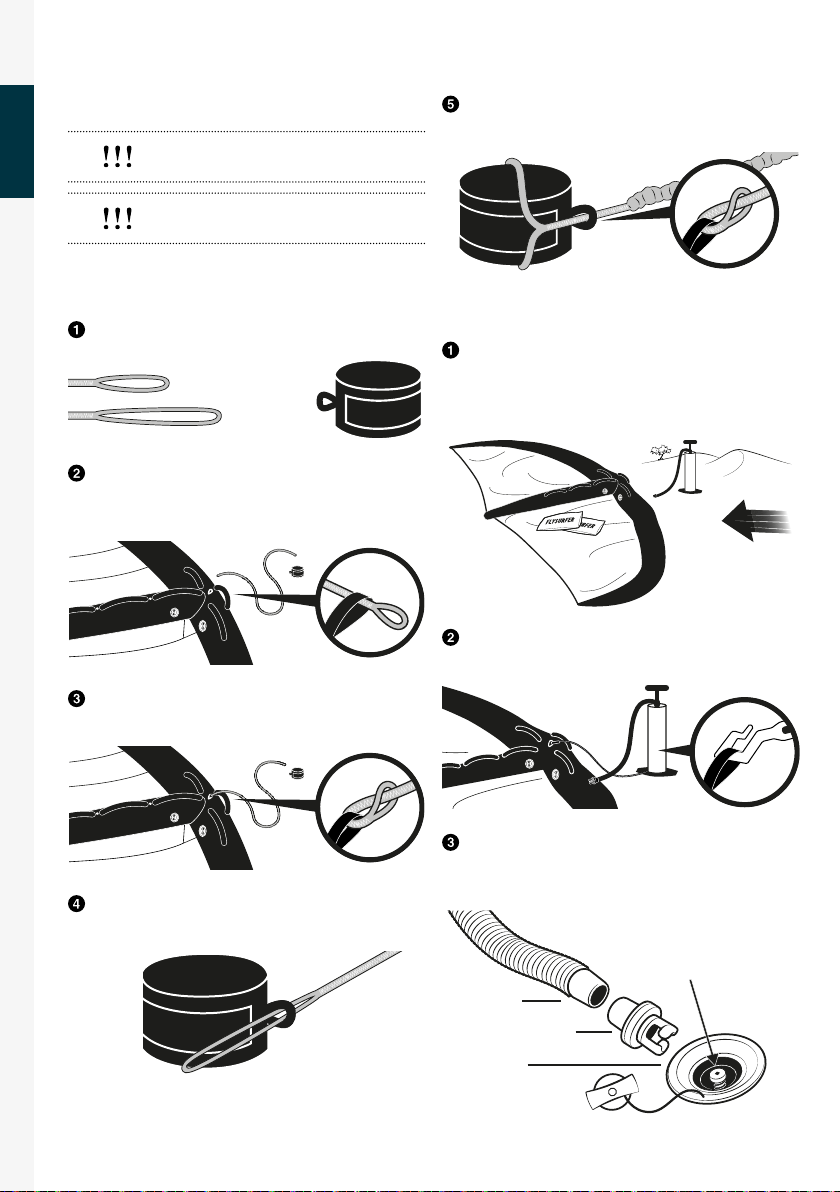
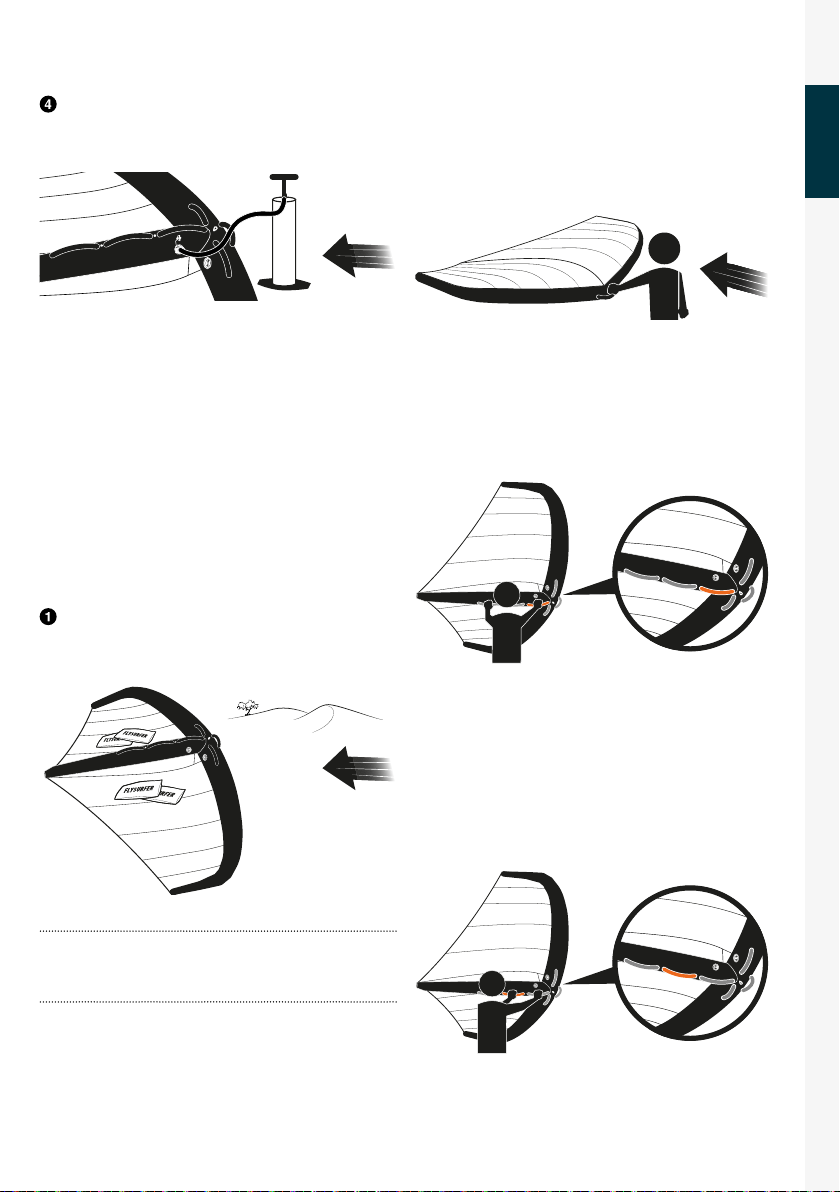
Free Flow Valve
Adapted SUP valve for quick air supply and air discharge. Protects
the bladder with a special, flexible base plate. To ensure maximum
rigidity, the Free Flow Valve is attached to the front tube and the
center strut.
Harness Leash Attachment Points
There are attachment points on the strut to attach the connec-
tion to the trapezoid. A rope can be attached to the harness hook
to drive the wing with less eort. Using a harness is recommen-
ded for advanced riders, and only in shallow water.
Reinforced Wingtips
The MOJO is an all-terrain product and the wingtips have been
specially reinforced against abrasion. This feature increases
durability and delays damage that can occur on asphalt or ice,
for example.
Wrist/Waist Leash Attachment Point
Connection point in the middle of the leading edge. Stabilizes the
wing after letting go, can be used to fix it to the ground.
Viewing Windows
The UV-resistant transparent windows give you an overview of
the surroundings at all times. We recommend avoiding kinking
the window when packing.
Non-Slip Handles
Non-slip segmentation, oval cut and handles to keep the best
control of the wing.
Profile Support
The fabric wall between the strut and the upper sail regulates
the tension in the sail. The power is not lost when pumping and
is converted into propulsion. The profile support also serves as
a tail unit for self-stabilization in the hover state.
Self-stabilizing Drift
The V-shape of the MOJO supports its flight stability, the roll axis
regulates itself. Wave riding becomes a real pleasure.
Superb Wind Range
The sail tension gives the MOJO its functional profile. The wing‘s
power is accessible and can be easily controlled in stronger wind.
The handling is exceptionally good not only in the sweet spot but
also when pushing the limits.
Balanced Center of Gravity
The basic shape of the MOJO creates the center of lift further for-
ward and only moves minimally in comparison to other products.
The pressure / force distribution is always homogeneous, even
if the handle position or the angle of attack change significantly.
The constant propulsion is generated by the wing and does not
have to be generated by the hydrofoil. The wing powers/depow-
ers very eciently and runs eortlessly upwind.
Rigid Construction
The stiness of a wing is crucial for its performance. The MOJO
is equipped with two separate free flow valves on the strut and
leading edge to keep the perfect pressure in the bladder. The
diameters are selected so that the basic shape and profile are
prevented from buckling and maximum performance can be
called up at any time.
03.01 Description & rider requirements
The MOJO gives you a safe access into the world of wind-powered sports. The versatile wing requires previous knowledge of wind
and weather, as well as an average level of physical fitness. The MOJO is designed for quick learning success, a durable sports
equipment for fun on land, water and snow.