Flytec 5020 User manual

Flytec 5020 Technical Manual
- 1 -
5020 GPS User Manual Vers.1.18
Flytec AG
Ebenaustrasse 18 , CH – 6048 Horw Switzerland

Flytec 5020 technical manual
1 Operation
1.1 Turning the Unit On and Off
The unit is switched on by pressing the key. You must confirm the switch on, by
pressing the “Enter” key.
To switch it off, you need to press the same key for three seconds. The unit will then display
the question ‘switch off?? Press Enter’ Confirm by pressing “Enter”. After a long flight with
short record intervals the calculation of the digital signature can take up to one or two
minutes. Please wait until this process is finished. Press O/ESC key again to turn off the
unit.
1.2 Keypad
Main Setup Menu
===============
Factory Settings
Opt. SW-Packages
================↑
0%
25%
50%
Choose a
waypoint
Esc→Quit
©→Map display
on/of
f
Enter, accept
Choose a
route
75%
100%
Main Setup Menu
===============
Flightmemory
Waypoints
Routes
Restricted Areas
Simulation
Basic Settings
================↓
Set Marker
User Screen 1
Choose a user
selectable field
Nxt ↓----
Fnc ↓Mod A1↑↓ QNH/Gps
↓Mod A2↑↓ SET0
↓S.Thr –0.8 SNK OFF/ON
↓HT auto Man Wnd
User Screen 3
User Screen 2
Press short
Press long
- 2 -

Flytec 5020 technical manual
1.3 Main Screen
Direction of wind
Bearing to next waypoint
Direction to last
thermal
Function of F2
Function of F1
Dig. Variometer
Mode
Analogue Variometer
User selectable field User selectable field
Altitude
Digitale Variometer
User selectable field
Number. of received
satellites from the
GPS system
Remaining battery
capacity of battery
bank 1 and 2
Unit of analogue vario
Information lines
1.4 Map Screen
Restricted area Waypoint of a
route with cylinder
Digitale
Variometer
Altitude
Scale
Track, of
the actual
f
li
g
ht
Waypoint of a
route with cylinder
(Restricted area)
not implemeted yet
Route in case of a
competition route
Function of F2Function of F1
Information lines
The flight route of saved flights can also be shown on the display and viewed. Flight
Analysis is reached by pressing F1 to display the function Show Map. The screen-optimized
flight route is shown on the display. (North is located at the top) Additionally, stored way-
points are plotted with a cross and name. The map scale is displayed too.
The graph can now be changed as follows:
- 3 -

Flytec 5020 technical manual
F2: Zoom in: The map scale is gradually increased to approx. 0.5-1.0km. Thus, individual
circles during a climbing period are clearly recognizable
(This is dependent on the set recording interval).
F1: Zoom out: The map scale is gradually decreased until the screen display is optimized.
Enter: From each graph back again to the screen optimized graph.
ESC: Back to the main setup menu. All other keys cause the track in the current selection
to be redrawn.
Arrow keys: Pan: With these keys, the plotted area can be shifted up, down, left and right.
This function is only enabled in flight memory mode. During flight, the actual position is in the
center of the map. If the position reaches a border, the map pans automatic.
Note: As the picture takes a few seconds to appear, depending on the amount of data, Wait
and Ready appear on the status line as user information; if a zoom or pan key is touched
during the process then it will be broken off and will start over again with new values. You
can thus obtain the desired graph quickly. Even past flights can be graphed as long as they
are still saved.
During the flight, touching the ESC key briefly will bring you a real-time track and map
display. Vario and height appear digitally under the map. For competition routes, the cylinder
of the active waypoint, WP names, and a thin dotted line to the next WP are also displayed.
During the flight the Zoom In/Out functions are accessible.
1.5 Final glide screen
Recommendation for track
Remaining battery
capacity of battery
bank 1 and 2
This point points to the goal
(Bearing)
Difference between required L/D
and best glide to goal. 1 Division
= 0.5 L/D. Example Best glide 8
Req. L/D to goal 6.3
Angle between Track and Bearing
1Division = 10° Example 22°
Point of best glide
Information lines
Function of key F2Function of key F1
User selectable field User selectable field
User selectable field
Number. of
received satellites
from the GPS
Analog Variometer°
The final approach - screen serves as an assistance for the final glide. It is less suitable for
the normal flight. It will be normally activated in the last thermal before the goal. The
horizontal scale shows the deviation between current track and bearing (the direction to the
goal). 1 division line is 10°, between two large lines is 20°. The vertical scale shows the
deviation of the necessary lift/drag ratio to the goal by the number of best glide of the aircraft,
which will is set in the basic Settings. A division line corresponds to 0,5 lift/drag ratio.
Between two large division lines is 1 lift/drag ratio.
- 4 -

Flytec 5020 technical manual
- 5 -
The example shows an aircraft with lift/drag ratio 8. The necessary lift/drag ratio to the goal
is 6.3. The aircraft symbol is around 2.3 units above the point of best glide.
The strategy is, to hold the symbol in the crossover during the final glide. In order to hold
something reserve, experienced pilots will fly rather above the point of best gliding. During
thermalling the symbol remains in the center. As long as the deviation is larger than approx.
20 lift/drag ratios, the symbol appears grey in the center. Below that margin, the symbol
disappears to approximately 20 lift/drag ratios deviation. With approximately 6 lift/drag ratio it
appears then again from down in the window. If it comes upward over the delimitation, it
appears again grey.
A small arrow appears ^ above with the increase as a heading assistance, if track and
bearing are within +/- 10°. When sinking the arrows < ^ > indicate a recommendation, where
one should hold. If the symbol leaves the range of approximately plus minus 60°, the symbol
is grey again. One should switch then with the Esc key to the Vario screen, in order to see
the compass with the direction markers.
1.6 Main Setup Menu
Flightmemory List of the flights in memory.
Waypoints List of the waypoints with the possibility to edit waypoints and
coordinates
Routes List of the routes with the possibility to edit
Restricted Areas List of the restricted areas with the possibility to edit
Simulation Here you can simulate most of the important flight parameters.
Basic Settings Here you can change the most important parameters
Factory Settings Only for service
Opt. SW-Packages Here you can enable SW packages you bought from Flytec.
1.7 Basic Settings
A series of settings permit the unit to be programmed according to the user’s wishes. Every
pilot can realize his/her own ideas. If too much information bogs you down and causes
confusion, it is always possible to reset the unit at Basic Settings/ Init EEPROM, which are
the manufacturer’s tested basic settings. You are basically starting again.
But please note! All WP and routes will be a deleted too. As a minimum, settings possible
and default values set will be shown at the setting points. Should these values be changed,
you move to the change mode by pressing Enter. The value to be changed will blink and can
be modified with the help of the ▼and ▲keys. Pressing the Enter key confirms the new
value. Pressing the ESC key recalls the previous setting.
Term Meaning Referen
ce
Factory Setting
Display contrast Range 0 ... 100 % 70 %
Record-Interval Time interval per recorded (track
log) point
10 Sec
Recording mode Autom. or manual flight recording Aut.
Digital Variomode Averager ; Averager time delay 1 sec 30 sec
Vario tone Frequency of Climb and Sink tone,
Pitch Modulation, Acoustic
Integrator
1200 Hz ; 700 Hz
Mod = 5 ;Pi=3; 8
Battery type Type of battery used. This has an
influence on the bargraph and the
switching thresholds
Alcaline

Flytec 5020 technical manual
- 6 -
Audio threshold Fine tuning of climbing tone max
20 cm
2 cm/sec
Sink tone thres. Activation point of sink tone 0,8 m/s (ft/m)
L.thermal thres Threshold for the last thermal 0.5 to 3.0 m/s
Vario/Spd delay Response time delay for Analogue
Vario and Speed
12 ( » 1,2 sec)
Best L/D Best glide ratio with according
speed
Stallspeed Use of stall alarm and altitude limit 0 km/h (mph)
Spd corr. vane Windwheel 70 ... 150 %
correction
100 %
Units Meter or feet; Km/h or mph or
knots Temp.: In Grd C or Grd F
m ; km/h ; Grd C
Coordinate Format * dd°mm,mmm or dd,ddddd or
dd°mm’ss” UTM ; Suisse Grid #
dd,mm,mmm
Time Date Year Time difference to UTC Present
Pilotname Pilot name entry; max 25 letters not set
Glider type Name of glider for OLC not set
Glider ID Glider registration for OLC not set
Del all records Deletion of flight memory (all
records)
no
Del all WP& Rts Deletion of all WPs and Routes no
Init EEPROM Back to factory settings No
Init CTRs Reorganization of the memory
Attention: The deletion of waypoints, routes or records needs a few seconds to perform.
Please wait until the confirmation shows up.
1.8 User selectable fields
The main screen as well as the final approach screen can show up to three pages with user
selectable fields. The pages can be selected with the ►key and the page number is
displayed under the battery status as P1 to P3.
Alt a. BG Safety height above the best glide path* (Not available in first
SW release 1.10 and 1.11)
FL (ft) Flight Level not adjustable by the user
Airspeed Speed measured with the vane wheel, true air speed or calculated
airspeed
Alt a. Gl Calculated height above goal, calculated for a route, including
Windspeed an direction*
Dist Gl Distance to goal calculated along a route*
WindSpd Wind strength*
Vario The digital vario as userfield for the final glide screen
A1 The altitude A1 as userfield for the final glide screen
Dst Toff Distannce to start or flight recognition (acceptance)
Dist Cyl Distance to the radius of a waypoint cylinder in case of a competition route
Dist to WP Distance to chosen destination (waypoint)*
Fl.Time Flight time since take off
GND speed ground speed*(=GS)
Time Time
Bearing Direction to chosen destination*
Wind Spd The calculated windspeed, derived from a circle.
Spd-Diff Wind component (ground speed minus true airspeed)*
Track Flight direction (course)*
Temp Internal temperature

Flytec 5020 technical manual
Alt 2 Reference height (if desired can be set at 0)
Alt 3 Cumulated gained height
QNH hPa Air pressure in hector-Pascal
L/D gnd Actual L/D over ground (=Ground Speed/Sink)*
L/D air Actual L/D in air, only available with vane wheel connected
L/D req L/D required to reach a WP*
L/D r. Gl L/D required to goal over the next waypoints
Dist to^ Distance to last thermal*
* Only active when the GPS receiver is switched on
1.9 Battery management
Two bar graph scales indicate the capacity of the batteries. The Flytec 5020 has 2 banks
with 2 batteries each. Bank 1 must always be equipped. Bank 2 can remain free. However,
we recommend to equip bank 2 also. As soon as the first bank is used up, the instrument
switches automatically to the second bank. If the second bank is not yet used up, and bank 1
is equipped with new batteries, the instrument switches to the first bank again. After a long
flight we recommend to insert the partly used batteries of the bank 2 into bank 1 and to equip
bank 2 with new batteries. Thus it is ensured that the instrument can use up the batteries
always completely, without the danger of having empty batteries during a flight. Before S/N
5500 the two banks in the battery compartment where changed.
Bank 2
Before S/N 5500
- 7 -
Bank 1 From S/N 5500
Bank 1 Bank 2
Bank 1
Bank 2
The following battery types could be used
2 pieces per bank Alkaline High Power Batteries 1.5 Size AA. Estimated life time 2 * 13h =
26 h together (recommended types: VARTA or Duracell)
2 pieces per bank NiMH Accu 2100mAh, 1.2V Size AA. Estimated life time 2 * 11h = 22h
together. The bargraph shows only the actual battery voltage, not the capacity.
We don’t recommend NiCd Accu because they have clearly smaller capacities and are not
pollution free. The battery thresholds are optimized for NiMH Accus.
Please dispose of the batteries properly.
The estimated life time bases on normal temperature conditions. If the batteries are hotter or
colder they have another capacity, and therefore another life time. The bargraph shows only
the actual battery voltage, not the capacity.
The inserted battery type is not recognized automatically. Because the battery types have
different voltages and a different temperature behavior, the battery type must be entered into
the basic Settings. If the wrong battery type is specified, it is possible that the instrument
switches off during switching between bank 1 and bank 2.
1.10Data Exchange Via PC
The 5020’s basic equipment includes a data cable for a serial PC interface (9 pol Sub D
plug). Data transfer can occur in both directions. The connection occurs with: 57.600 baud; 1
startbit; 8 databit; 1 stopbit; no parity, Xon/Xoff

Flytec 5020 technical manual
The following can be read via this RS232 interface:
Serial numbers and pilot names
Waypoint list
Route list
A selected flight (track)
CTRs, restricted areas
The following can be uploaded to the 5020:
Waypoints and routes
Important: the unit must first be switched on before plugging in the connection cable to the
unit and the computer.
Before you transfer the waypoints and route data switch the 5020 to the Setup Menu. You
should make sure that the waypoints show up in the unit’s waypoint list before you transfer a
route from your computer.
If you wish to download flight data, switch the unit to the Flight memory mode, and display
the desired flight on the Flight Analysis screen before transferring it to your computer. There
are a number of PC programs on the market that allow communication with the 5020.
We recommend the program Flychart which you can download from the Flytec Website
www.flytec.ch
Other programs that permit data transfer with the 5020:
Trackview (Freeware) Daniel Zuppinger (for OLC und CCC) www.softtoys.com/
Compe-GPS www.compegps.com
Seeyou Program well liked by sailplane pilots www.seeyou.ws
Maxpunkte Free program from DHV for reading flight data for evaluation
and submission to OLC.
http://www.flugplatz-beilrode.de/maxpunkte/download.html
GPSDump Stein Sorensen . A simple program for IGC File dump.
http://www.multinett.no/~stein.sorensen/
1.11Transferring New Firmware to the 5020
As is the case with many other new developments, particularly during the introduction phase,
improvements or feature enhancements may be expected. Periodically Flytec will post
firmware updates at www.flytec.ch, which can be downloaded by the user free of charge, and
then uploaded to the 5020.
To be able to write to the 5020’s flash memory with a PC, it is necessary to use a
compressed file named “Flasher.exe” that is available in zipped form flasher.zip. In addition,
the actual firmware to be uploaded must be obtained. It is called “5020vxxx.moc” which
corresponds to the version X.XX. Both of these are available from the download page at
www.flytec.ch
We recommend that you store all the related files in a separate subdirectory. (e.g.
c:\programs\FlytecFlasher\). After decompressing the ZIP file a number of files are created.
Double clicking on the file “flasher.exe” starts the program. Under “Setup”, the serial port
(COM1 or COM2) can be chosen. You select the file to be transferred with the extension
“.moc” by pressing on the “Start” key. The data transfer starts automatically. The numbers
shown on the right side are the answers of the instrument.
- 8 -

Flytec 5020 technical manual
Sometimes the Flasher will give an error. In this case, the cable must be unplugged, and the
5020 turned off before making another attempt to flash the memory.
Important: Contrary to the instructions for data transfer of waypoints or routes, be sure
that the 5020 is turned off when plugging the cable into the computer and the 5020.
Important: Never leave the PC cable hooked up to the unit when it is turned off. If this is
done energy is consumed, and the battery can be drained.
2 Technical Data
Measurements: 165 x 73 x 38 mm
Weight: 286 grams (with 4 Alkaline batteries, without harness)
Electrical supply: 2 or 4 alkaline batteries AA or Nickel metal hydride
accumulator 2 Ah; 1.2V
Battery life: > 30 hrs with 4 alkaline batteries
Altimeter: Max. 8000 m; 1 m (3 ft) steps
Variometer: Analog+/-8 m/s; (1600 ft/m); 0.2m/s (20 ft/m) steps
Variometer Digital +/-70m/s; (14.000 ft/m); 0.1m/s (20 ft/m) steps
Speed (vane wheel) Digital 0 - 120km/h (or mph or kts)
Waypoints: 200 WP
Routes: 20 routes with max. 30 WP in each
Restricted areas 20 CTR’s free, 150 CTRs due to costs
Max. memory time: 55 hrs flying time at 10 sec intervals
Number of track log points: 24 000
Number of registered flights: 100
Data memory and transfer according to the IGC format
Screen resolution 240 x 160 pixel (=1/8 VGA)
Operating temperature -15...45 °C
Brackets for hang-gliders or paragliders are available.
The technical details may be altered without notification. Software upgrades can be made by
downloading the latest firmware version from our homepage
3 Guarantee and liability
Our instruments carry a 24-month guarantee. However, physical damage such as a broken
casing or glass breakage as well as damage resulting from water landings are excluded from
this guarantee. Flytec can accept no liability for faults arising from any abuse or unapproved
use of your instruments.
WARNING
In very rare cases it can happen that a flight instrument does not provide any data at all or
the data is incorrect. Flytec AG will not be held responsible for accepting any damage
claims arising from a malfunctioning unit. Responsibility for ensuring the safe execution of
his/her flights lies with the pilot alone.
- 9 -

Flytec 5020 technical manual
- 10 -
4 Contents
1Operation ........................................................................................................................................ 2
1.1 Turning the Unit On and Off ................................................................................................................. 2
1.2 Keypad ................................................................................................................................................. 2
1.3 Main Screen ......................................................................................................................................... 3
1.4 Map Screen .......................................................................................................................................... 3
1.5 Final glide screen ................................................................................................................................4
1.6 Main Setup Menu ................................................................................................................................. 5
1.7 Basic Settings....................................................................................................................................... 5
1.8 User selectable fields ........................................................................................................................... 6
1.9 Battery management ............................................................................................................................ 7
1.10 Data Exchange Via PC......................................................................................................................... 7
1.11 Transferring New Firmware to the 5020 ............................................................................................... 8
2Technical Data ................................................................................................................................9
3Guarantee and liability .................................................................................................................... 9
4Contents........................................................................................................................................ 10
5Analog Vario ................................................................................................................................. 11
5.1 Altimeter and Air Pressure.................................................................................................................. 11
5.2 Acoustics and Volume Level .............................................................................................................. 11
5.3 Digital Vario ........................................................................................................................................ 13
6Speed............................................................................................................................................ 13
6.1 Stall Alarm .......................................................................................................................................... 14
7GPS Functions.............................................................................................................................. 14
7.1 Assessment of Reception Quality....................................................................................................... 14
7.2 Compass and Flight Direction ............................................................................................................ 14
7.3 Track and Bearing .............................................................................................................................. 15
7.4 Groundspeed...................................................................................................................................... 15
7.5 Glide Ratio (=L/D Ratio) ..................................................................................................................... 15
7.6 Head, Cross and Tail Winds; the Wind Component ........................................................................... 16
7.7 Wind Direction and Strength............................................................................................................... 17
7.8 Waypoints and Co-ordinates .............................................................................................................. 17
7.8.1 Waypoints - Alter, Delete, or Add................................................................................................... 18
7.8.2 Current Coordinate Indicator ......................................................................................................... 18
7.8.3 Distance to Waypoint ..................................................................................................................... 19
7.8.4 Distance to goal ............................................................................................................................. 19
7.8.5 Distance to the waypoint cylinder radius........................................................................................ 19
7.8.6 Distance to Takeoff........................................................................................................................ 19
7.8.7 Saving the Current Position ........................................................................................................... 19
7.9 Goto—Function .................................................................................................................................. 20
7.10 Flying Routes ..................................................................................................................................... 20
7.11 Routes Set - Delete - Alter.................................................................................................................. 22
7.11.1 Setting a New Route ................................................................................................................. 22
7.11.2 Altering a Route: ....................................................................................................................... 22
7.11.3 Deleting a Route: ...................................................................................................................... 23
7.11.4 Changing a route into Competition Route: ................................................................................ 23
7.12 The Competition Route....................................................................................................................... 23
7.12.1 Competition - Route Set - Alter - Delete.................................................................................. 23
7.13 Flying a competition route .................................................................................................................. 23
7.14 Final glide screen and final glide calculations..................................................................................... 26
7.15 Relocating Thermals........................................................................................................................... 27
7.16 Restricted Area................................................................................................................................... 27
8Flight Memory and Flight Analysis................................................................................................ 29
9User selectable fields.................................................................................................................... 30
9.1 Temperature....................................................................................................................................... 30
9.2 Time and Date.................................................................................................................................... 30
9.3 Flight time........................................................................................................................................... 31
10 Other functions.............................................................................................................................. 31
10.1 Simulation........................................................................................................................................... 31
10.2 Battery management .......................................................................................................................... 32
10.3 Factory Settings, Unit Specific Parameters ....................................................................................... 32
10.4 Optional SW- Packages ..................................................................................................................... 32
10.5 Data Transfer ..................................................................................................................................... 33
10.6 Data Exchange via PC ....................................................................................................................... 33
10.7 Transferring New Firmware to the 5020 ............................................................................................. 34
11 Landing in Water........................................................................................................................... 34
12 Guarantee and liability .................................................................................................................. 34

Flytec 5020 technical manual
- 11 -
5 Analog Vario
The resolution of analogue vario is 40 fpm or 0.2 m/s.
The first full-scale range is from +/- 0 to 800 fpm (+/-4 m/s) after which the display switches
automatically to a second range from 800 to 2000 fpm (4 to 10 m/s).
The time interval (damping) over which the measured climb rates are averaged for the
analogue (and associated sounds) is factory set at 1.2 seconds. This can be changed to any
value between 0.6 sec and 4 sec. in Menu/Basic Settings/Vario-Speed-Average. If the time
interval is too short, the vario is very twitchy; if too long, it’s rather sluggish. A lower
dampening value is preferable for smooth light conditions. A greater dampening value may
be desirable in rough turbulent conditions. Note: This setting should not be confused with
vario integration (averager) that can be set for the digital vario display.
A small pre filter can be adjusted to be used as a turbulence filter. It can be adjusted from
0.1s to 1 s. (Settings 1 to 10)
5.1 Altimeter and Air Pressure
The Flytec 5020 has 3 altitude displays.
Alt1 is always the altitude above sea level (QNH).
Alt2 is a reference height; it can be altered or zeroed at any time
Press F1 several times until „Mod A2“ appears. The arrow keys change A2.
F2 resets A2 to zero.
Alt3 cumulates the gained height over one flight
Among the user selectable fields there is another altimeter called “Flight-Level” FL (ft) ; It
cannot be adjusted by the user and is based on an air pressure of 1013 hPa at mean sea
level.
Altimeter Alt1 should be adjusted to display the correct height above sea level. It is originally
set by the manufacturer to a sea level pressure of 1013hPa. Since this is seldom the case,
the correct altitude should be set before commencing each flight by using the arrow keys,
increases altitude, decreases altitude. he Info line is telling Mod Alt1 . By means of
this adjustment the air pressure display changes too. This air pressure (QNH) always refers
to sea level.
During flight recording Alt1 adjusting is blocked.
The user can obtain the altitude of a location even if this is unknown by setting the sea level
air pressure (QNH) (rec. from the radio) in the set up menu. Or he/she can press the F2
key. If the unit receives satellites the GPS altitude is taken over to Alt1. If there is no Satellite
reception the 1013 hPa altitude will be used. (Same as FL (ft))
A2, A3, FL (ft) and QNH can be displayed within the user selectable fields
If Alt1 is set to zero for any planned landing area, then the height above this location will
always be indicated after starting. The associated air pressure (QFE) is the actual air
pressure in hPa at this spot, which deviates from QNH, the pressure at sea level, according
to the difference in altitude.
5.2 Acoustics and Volume Level
In the acoustic menu, most of the parameters can be set to fulfill most of the pilots wishes.
Each time the key /Route is pressed briefly, the volume level is increased by 25%. The
adjustable sound levels are: 0- 25% - 50% - 75% - 100% - 0. The value of the chosen
volume level is displayed on the status line.

Flytec 5020 technical manual
Automatic volume control: The basic setting levels 25%, 50%, and 75% will be slowly
increased automatically once the airspeed exceeds 40 km/h (25 mph). It is impossible for the
volume to exceed 100%.
The following settings can be made in the menu under ‘Basic Settings /Vario tone’.
Audio thresh.
Threshold To avoid the climb acoustic starting on the ground or during very slow
climbs in flight, the starting point can be set from 0.2m/s to 0.4m/s.
Asc. F
Beep frequency The basic frequency will be heard when the vario is at 0m/s, except
when it is suppressed at the starting point.
Mod.
Modulation (see graphic below)
Pit.
Pitch, broken tone interval (see graphic below). The broken tone intervals increase in pitch
with height
- 12 -

Flytec 5020 technical manual
- 13 -
damp
Dampening The vario value is re-calculated every 0.2s. Rapid vario changes may
result in wide variations in tone frequency (pitch). The ear registers it
as a fast piano effect. In order to change this, a damping may be
added. Damping the rapid tone and frequency results in the vario
being more settled.
Sink tone thres.
Threshold The starting point can be chosen as in climb acoustic. This function
can also be choisen during flight with the F1 key “Nxt Fnc”. If this
function is avtivated, the sink tone threshold can be adjusted with the
S/Tkeys. With F2 „SNK OFF“ or „SNK ON“ it is possible to switch
on or off the sink tone. If the sink tone is activated, there is „SNK OFF
visible and the sink tone can be switched off by pressing F2. If the sink
tone is switched off, „SNK ON“ is visible and the sink tone can be
switched on with the F2 key.
SinkF
Sink tone/alarm The basic tone deepens when sink increases. It cannot be set
Frequecy base to a higher frequency than the climb acoustic frequency.
The basic tone acoustic may be set lower.
The warning tone for stall alarm is a midrange tone with a fast interval and full volume.
All this settings can be controlled in simulation mode.
All of these settings can be tested in simulation mode.
If a low and quiet random noise can be heard at the beeper, even if it is set to 0%, this is a
normal effect of operation.
5.3 Digital Vario
The digital vario has a resolution of 10 cm/s (20 ft/m) and a very wide measuring range of +/-
70 m/s.
The digital vario can be set to function as an averager (also called integrated vario), with an
average time delay between 1 and 30 seconds. This is very useful in determining the actual
strength of a rough thermal.
6 Speed
The 5020 has an input for a vane wheel speed sensor. It shows the true air speed and
begins to make correct measurements above 1km/h; it is also well-suited in determining the
wind strength at take-off. In the Basic Settings > Speed Correction vane it is possible to
calibrate the displayed speed from 70% to 150% (default is 100%).
The wind wheel sensor measures the true air speed. True air speed = TAS.
Speed readings are only in digital displays.
Many paraglider pilots fly without a speed sensor. In this case we recommend displaying only
the GPS-Speed (ground speed). From SW Version 1.12 up it is possible to display the Air
Speed, even when flying without the vane sensor. The value is found by a vector addition of
Gnd Spd and Wind. To get the wind in strength and direction, the pilot has to fly a full circle
regularly.

Flytec 5020 technical manual
6.1 Stall Alarm
This Alarm is audible, consisting of short beeps with 100% volume.
The speed for activating the stall alarm can be adjusted in the Basic Settings, and likewise,
the altitude can be set to the point from where up the alarm is active. If the stall alarm is set
at the lowest adjustable value of 0 km/h (mph), it is turned off.
7 GPS Functions
The use of GPS receivers has become indispensable for navigation today. A chain of
satellites circles the Earth. It is possible to determine your position very precisely anywhere
in the world by receiving several satellites at the same time.
7.1 Assessment of Reception Quality
The integrated GPS Receiver can follow up to 16 satellites at the same time. After turning on
the unit it is necessary to receive at least 4 satellites to fix position for the first time. Once
logged on, 3 satellites (for 2D positioning) are sufficient for further navigation. However, if
you want to record altitude too (3D positioning), then four satellites are required. For
competition flights its always nescessery to have 3D positioning There is a table in the
receiver, The Satellite Almanac, in which the path, place, and time of all satellites are kept
with reference to the receiver. The Almanac is continuously updated during signal reception.
However, if the signal to the Almanac memory is disrupted completely or the unit is taken
200 km or more from the last reception point, then the Almanac has to be re-established; it
can take 10 minutes to determine the new position. Power is still supplied to the almanac’s
memory even when the unit is turned off.
The instrument looses the Almanc if both battery banks are removed.
When the receiver has been moved a great distance, you can help facilitate the connection
with the Almanac by putting in the approximate new position (whole number coordinates
suffice) in the Set Up mode under “Basic settings/GPS Init”. With the antenna unobstructed
the unit will normally recognize its position after a few minutes.
If the receiver is turned off for only a short period of time (less than 2 hours), it takes less
than a minute to determine the location. Buildings, mountains or thick forest affect reception
quality. Therefore, you should always look for the best possible visibility around you and the
antenna under the Compeo label should point upwards. When the units is fastened, it should
not have more than 45° deviation from a horizontal position.
Because the receiving strength of the satellite signal is only 1/1000 of mobile radios, these
radio receivers and other disruptive factors (like notebooks) should be kept as far away as
possible from the Flytec 5020.
Together with the navigation signal, information about the number of received satellites is
shown on the right side of the bar scale. One angle is equal to one satellite with good
reception. The longer the bar, the better is the reception.
7.2 Compass and Flight Direction
In contrast to a normal magnetic compass which is oriented to magnetic north, the GPS
compass can show direction only when the user moves about. However, it has the
- 14 -

Flytec 5020 technical manual
advantage that it is not subject to any grid deviation and does not show any deviation as a
result of iron or any magnetic material either. Its zero point always corresponds with true
geographic north (0 or 360 degrees). The course that is the flight direction (= Track), is
calculated from your movements.
If the user remains stationary at the same location, then the course and compass needles
are inoperative. The exact course (that is the direction in which the user travels over ground)
is always at the top of the compass, but can also be read in the display “Track”. When
circling in a thermal the compass rose appears to turn; in reality the needle does not move;
the unit along with the aircraft, moves around the rose.
7.3 Track and Bearing
As is the convention with GPS receivers, the Track is defined as the route of the aircraft over
ground. Geographic true North is always 0 or 360 degrees (East 90, South 180, West 270
degrees). The bearing is the direction to a specific destination or waypoint from the aircraft,
expressed in the same way as above.
Note: A Tracklog is the result of recording many different position points during a flight.
7.4 Groundspeed
The GPS receiver fixes its position once every second. Speed over ground is derived from
the distance between these positions. Only from the difference between airspeed and
groundspeed can one make conclusions about the wind’s influence, and ultimately these are
the most important pieces of information a pilot needs during flight. The ground speed should
appear at all times in an user selected field.
7.5 Glide Ratio (=L/D Ratio)
By definition, the glide ratio is calculated by taking the horizontal distance travelled and
dividing it by the height lost.
- 15 -

Flytec 5020 technical manual
Following different types of Glide ratio can be selected within the user-selectable fields.
•Glide ratio through the air:
L/D air =TAS / Sink True airspeed divided by sink
•Glide ratio over the ground:
L/D gnd = GS/Sink Ground speed divided by sink
•Required glide ratio in order to reach the chosen destination from the present
position.
L/D req. = Distance to the waypoint divided by the height difference to the waypoint.
Best glide 8
Act. Distance to goal 5.45 km
Best glide –leave
point 931m over
goal
Akt. Höhe
956m
Alt a BG
275m
681m
2km
L/D req 5.7
•Required glide ratio in order to reach the goal of an active route, from the present
position.
L/D r.Gl. = Distance to the goal over the next waypoints of a route divided by the height
difference to the waypoint. This userfield is only active if a route is active. With this L/D the
pilot can decide if he would fly directly to the goal or if he need to take altitude in a thermal.
The calculation does not take into account if one ore more waypoints between the actual
position and goal are higher than the direct beam from the actual position into goal. The
distance to goal is calculated as described in chapter 7.10.
7.6 Head, Cross and Tail Winds; the Wind Component
During a goal flight or in calculating a final glide, it is the wind component (i.e. the difference
between Ground speed and Air speed) that is important. In most cases the wind does not
blow directly from the front or from behind, but from the side. If the wind component “Spd-
Diff’ (in the user defined fields) is positive, then the pilot will fly with a tail wind and the glide
ratio over the ground will improve. If it is negative the glide ratio will worsen. The Flytec 5020
takes the wind into consideration when calculating the final glide. (In order to find the correct
angle between the destination and the wind when a strong cross wind is present, please
refer to the section Goto function.) The calculated wind speed can be displayed in a user
selectable field.
Note: If the wind sack covers the wind directions N E S or W, the letter disappears.
- 16 -

Flytec 5020 technical manual
7.7 Wind Direction and Strength
It is very important to know the wind direction and strength
before an out landing.
The wind strength can be selected within the user defined
fields. It is necessary to fly one or two complete circles as
steadily as possible. Whilst circling, the Flytec 5020
determines the wind direction and strength. The calculated
wind speed can be displayed in a user selectable field.
The instrument calculates the wind from the difference
between Airspeed and Groundspeed. Wind direction is shown
in the compass rose by a small windsock. During the landing
approach this symbol must always be at the top.
7.8 Waypoints and Co-ordinates
A waypoint is any single point on the earth’s surface that you would like to go to. The Flytec
5020 can save up to 200 different waypoints. Each waypoint can have up to 16 characters,
e.g. “Laber Airfield”. In determining the waypoint, it is also necessary to enter the altitude,
i.e. “1865” meters above sea level. We still need the waypoint co-ordinates. (Please also
refer to C3 Waypoints — Alter, Delete or Add.)
For this the Flytec 5020 utilizes the most international and commonly used geographical
maps with the name WGS84 (World Geodetic System 1984). This reference system
assumes that latitude is measured from the equator (0 degrees) to the North Pole, 90
degrees North, and to the South Pole, 90 degrees South. Longitude is measured from the
Greenwich meridian (London 0 degrees). East is positive (up to 180 degrees). West is
negative (-180 degrees).
UTM and Swiss Grid are also possible.
The Flytec 5020 also understands waypoints entered according to the standardized
convention of using 3 letters and 3 numbers. (Created by Brauniger) Example: LAB167
indicates a waypoint with the name LABxxx and an altitude of 1670 metres amsl.
In Basic settings/Coordinate format one chooses the following Input or Display formats
1) Degrees Minutes Decimal places of minutes dd°mm.mmm
2) Degrees Minutes Seconds dd°mm’ss”
3) Degrees Decimal places of degrees dd.ddddd
4) UTM ( a grid with a 1km raster in both E-W and N-S direction )
5) Swiss grid
Basically one should always try to use Nr 1) (=factory setting) because only this format is
using exactly the same calculation format as the GPS receivers do and guaranty the highest
accuracy. With the other formats rounding errors could sum up to 15 m in worst case.
The instrument calculates positions only in the WGS84 geodetic system. It is not possible to
chose other geodetic datii.
- 17 -

Flytec 5020 technical manual
7.8.1 Waypoints - Alter, Delete, or Add
Waypoints
--------------
Flytec
Fiesch
Flims, Station
Cassons Grat
---------------⇓
Waypoint 2
Fiesch
Alti 1048 m
N 46’ 24.446
E 008’ 08.264
----------------
Ins Del
WP WP
Waypoints can be managed at this location of the Main Setup
Menu. Waypoints can be managed very easy with Flychart 4.52
on the PC.
After briefly pressing the Enter key the display shows the list of
logged waypoints (WPs).
All WPs are arranged in alphabetical order.
If this list contains more than 6 visible WPs, a down arrow at the
right lower edge of the list shows that additional pages follow.
To scroll down to the next page, press the arrow; WP 7 to 12
are now shown, and so on. You can select an individual WP with
the or keys, and edit it by pressing the Enter key.
The first letter of the WP name will blink; again with the and
arrow keys you can select the desired letter. There are
numbers and letters, as well as a set of special symbols to
choose from. By pressing the arrow you move forward to the
next letter. With the F1 key you can switch between capital and
small letters and numbers. You can enter up to a maximum of
16 characters.
Once the name has been entered correctly, confirm by pressing Enter. Now the waypoint
altitude blinks, asking for any alterations. Again you confirm by pressing Enter. The WP
position comes next. First the latitude is entered in degrees and minutes, and is confirmed
by pressing Enter. Next are the decimals of the minutes. (Depending on the Co-ordinate-
Format set in the Basic Settings) The same occurs with the longitude. Holding the key down
longer changes the values to be set faster.
Deletion of Waypoints:
Selecting the waypoint to be deleted is done with the and arrow keys. Pressing the F2
key (Del WP) activates the delete function. To be on the safe side, the Flytec 5020 asks
once again, “Delete Waypoint?” Yes or No are the choices available. It is possible, however,
to stop the deletion process by pressing Esc and returning to a previous level.
Insertion of Waypoints
Pressing the F1 key (Ins WP) activates this function. Entering WP names, altitude, and
position happens in the same way as described above. After confirming all entries with the
Enter key, the new WP is inserted alphabetically in the list.
Altogether 200 WPs can be stored by the Flytec 5020.
Note: After entering the new waypoints (for example, for inputting them into a route) these
can be used only after you have switched back to the normal flight mode by briefly pressing
the /Menu key. In addition, the route into which the new waypoint should be inserted must
not be active. Therefore, first change into route selection by prolonged pressing of the
/Route key and with the help of the F2 key (Cancel Route) deactivate the route.
7.8.2 Current Coordinate Indicator
Provided the Flytec 5020 receives GPS signals, the actual position is displayed by pressing
the Enter key in the unit’s information field. After 20 seconds the previous display will
automatically reappear. This function is useful in relaying your location after landing to a
person coming to retrieve you. Every time the Marker function is called, the coordinates are
also displayed
- 18 -

Flytec 5020 technical manual
7.8.3 Distance to Waypoint
The horizontal distance is displayed for the viewer to the chosen waypoint as long as the
destination has been input automatically or manually with the Goto function. For distances
under 10km the resolution is 10m, if farther it is 0.1km. (Please read “ Goto-Function”)
The distance to a WP is always measured to the centre of a WP cylinder an not its circum-
ference.
7.8.4 Distance to goal
This userfield shows the distance between the actual position and goal calculated over the
next waypoints in a route.
Goal
WP2
WP1
Start
7.8.5 Distance to the waypoint cylinder radius
To ease the decision, when to turn and head for the next waypoint in a competition route, the
distance to the cylinder radius can be showed as user selectable field. This is specially useful
with starcylinders, because the pilot does not always remember the actual radius of the
startcylinder.
7.8.6 Distance to Takeoff
The same applies for the distance to the start place. The instrument stores the coordinates of
the point when it recognizes a valid flight. Flight recognition is performed if the speed is more
then 10km/h for at least 5 seconds. This is normally valid near the start place
7.8.7 Saving the Current Position
(Not available in V1.10)
Every now and then a pilot may want to save the immediate position as a waypoint. To do
this press the key for 3 seconds. As confirmation you will hear a double peep and
those current co-ordinates will be stored in the memory as a waypoint and displayed in the
two bottom lines. The Flytec 5020 uses the letter M (for marker) for the waypoint designation
and then the date and time.
Example: M.22.04 11:16:49 for 22 April 11 hrs.16 minutes 49 seconds. (UTC). Of course this
WP name can be changed later into a more meaningful name, i.e. “Aunt Renate”.
- 19 -

Flytec 5020 technical manual
7.9 Goto—Function
Prolonged pressure on the Enter/Goto key switches the
lower half of the display into the ‘Goto’ mode. This function
allows you to search for a waypoint stored in the memory of
the Flytec 5020 and choose it for a flight to goal. At the same
time the next five waypoints are listed in alphabetical order.
The number after the WPs names indicates the distance in
km, the 2. number shows the direction to WP (Bearing). After
pressing the F1 (Displ.AIti.) key the precalculated arrival
altitudes to the 5 WPs are shown in place of distance.
In practice there are 5 final approach (final glide) calculations
to the WPs made at the same time.
Note: Only the WP the pilot is directly flying to ( ±/20
degrees ) , the wind component is taken into consideration
for the calculation.
Key Fl (Displ. dist) switches back to the distances. If you
search for a WP with the key, it will be selected when
Enter is pressed. The Goto function can be deactivated with
the key F2 (Cancel Goto).
The big black arrow in the center of the compass is pointing
directly towards goal.
If a strong cross wind is encountered on the way to goal, the correct angle between the
destination and the wind can be found as long as one carefully changes the direction of flight
against the wind, until the directional pointer in the compass rose points directly upwards.
The large arrow in the compass will now look like the one at the title foto. By doing this you
can be sure that the flight path over ground is in a straight line to goal and thereby the
shortest one. The well known “pursuit curve”’ is thus avoided.
Also amongst the user-selected displays is the safety height above the best glide path (Alt a.
BG). While circling upwards before approaching the WP, this height will show 0 when the
pilot should be able to reach the goal by flying at the best glide speed. Every meter above
that means a greater safety margin.
The Alt a. BG then shows how much ‘security height’ the pilot will have available to use if
necessary in order to compensate for unexpected sink. Under no circumstances should the
pilot go ahead and fly towards goal if the Alt a. BG (Height) shows zero or negative numbers
(reaching goal would then be impossible without finding lift on the way).
7.10Flying Routes
A route is an arrangement of various waypoints. Of course, the
waypoints used on a route have to be saved in the unit’s
memory.
In contrast to the Goto function where you have to choose
the next waypoint from a long list by prolonged pressing of
the Goto button, you can fly along a route by briefly
pressing (next WP) or (previous WP). This function
must be choosen with F1. (Next Function) Only routes with
at least one waypoint can be chosen.
To choose a route, you press the button / Route for a
few seconds.
Each route should also be assigned a route name, such as
“Karwendel Triangle”.
- 20 -
240 153
Other manuals for 5020
2
Table of contents
Other Flytec GPS manuals
Flytec
Flytec 6015 User manual

Flytec
Flytec 6020 User manual
Flytec
Flytec 6040 User manual
Flytec
Flytec 5030 GPS User manual
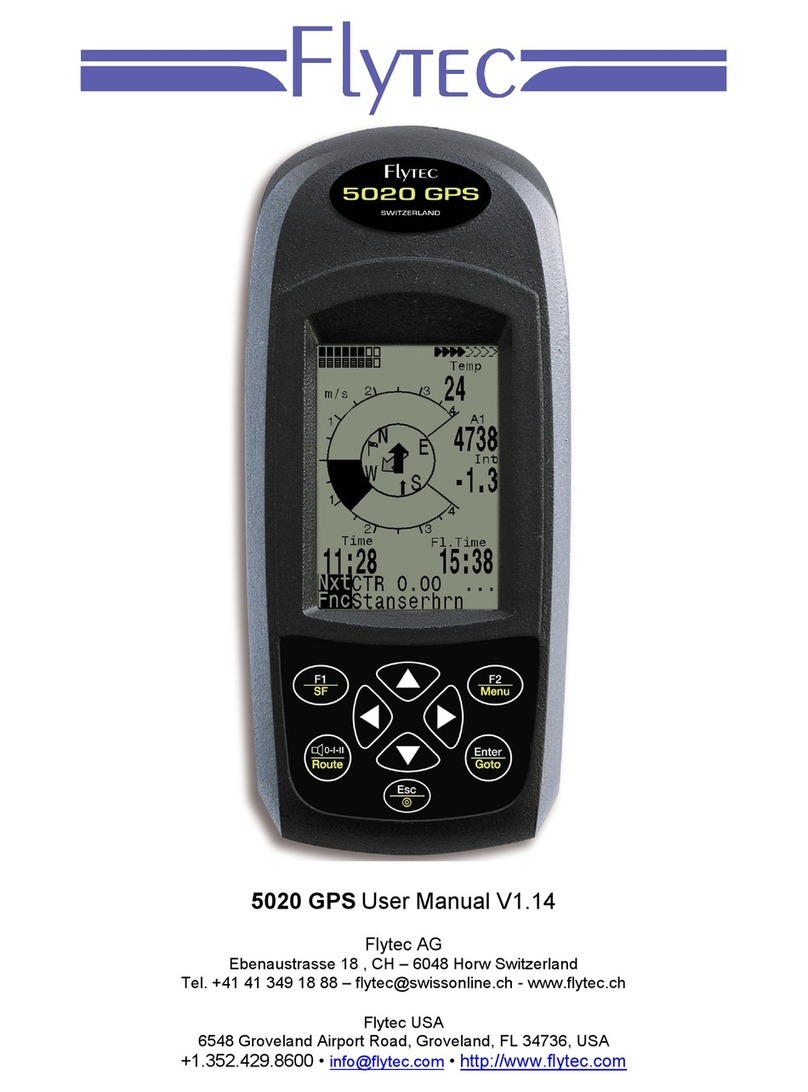
Flytec
Flytec 5020 User manual
Flytec
Flytec ELEMENT User manual

Flytec
Flytec 5030 GPS User manual

Flytec
Flytec 6040 User manual
Flytec
Flytec 6015 User manual

Flytec
Flytec 5020 How to use
