Focal Point BI600SS Assembly Instructions

I STALLATIO & USER I STRUCTIO S
All instructions must be handed to the user
for safekeeping.
FREESTA DI G OVE
Revision B - 01/18
© 2018 Focal Point Fires plc
GB IE
1
Please note : Except where otherwise stated, all rights,
including copyright in the text, images and layout of this
booklet is owned by Focal Point Fires plc. You are not per-
mitted to copy or adapt any of the content without the
prior written permission of Focal Point Fires plc.
Focal Point Fires plc.
Christchurch, Dorset BH23 2BT
Tel: 01202 499330
Fax: 01202 499326
www.focalpointfires.co.uk
email : [email protected].uk
MODELS COVERED BY THESE I STRUCTIO S
BI600SS - BLACK GLASS WITH STAI LESS STEEL
BI600SI - SILVER GLASS WITH E AMEL TOP
BI600BL - BLACK GLASS WITH E AMEL TOP
I THE UK ALWAYS USE A GAS SAFE REGISTERED E GI EER TO I STALL, REPAIR OR SERVICE THIS APPLIA CE
MODEL SHOW : BI600BL
Image used for illustration purposes only

This product is designed as a domestic cooking appliance for the preparation and cooking of domestic food prod-
ucts, and should not be used for any other purpose.
• Remove all packaging, protective films and oils from the appliance before using for the first time.
• Using the appliance for the first time, wash the oven shelves in hot soapy water, to remove their protective coating of oil. Even so,
when you first turn on the oven or grill you may notice a smell and some smoke.
• ake sure you read and understand the instructions before using the appliance.
• Keep electrical leads short so they do not drape over the appliance or the edge of the worktop.
• Immediately after installation, carry out a quick test on the appliance following the instructions provided later in this manual. Should
the appliance not function, disconnect it from the power supply and call the nearest technical assistance centre. Never attempt to repair
the appliance.
• Keep all flammable materials (such as curtains, furnishings & clothing) away from the appliance.
• Parts of the appliance may be hot during or immediately after use. Allow sufficient time for the appliance to cool after switching off.
• Never use the appliance for heating the room.
• Always check that the control knobs are in the OFF position when you finish using the appliance.
• Do not drape tea towels or any flammable object over the flue vents or doors, as this creates a fire hazard.
• When opening the appliance door, be aware that steam and heat from th e cooking could escape and cause burns.
• Do not use aluminium foil to cover the grill pan, or put items wrapped in foil under the grill as this creates a fire hazard.
• Do not use the oven with the door inner glass panel removed.
• Use oven gloves when removing hot food / dishes from the oven or grill. The oven / grill and utensils will be very hot when in use.
• Do not use foil on oven shelves, or allow it to block the oven flue, as this creates a fire hazard, and prevents heat circulation.
• When cooking heavy items - eg; turkeys - do not pull the oven shelf out with the item still on the shelf.
• Switch off the electricity supply before replacing the oven light bulb, to avoid the risk of electric shock.
• During use the appliance becomes very hot. Take care never to touch the burners when in use.
• The use of this appliance is not permitted by people (including children) of a reduced physical and mental ability, or lacking in experi-
ence in the use of gas appliances, unless they are supervised or instructed by adults or people responsible for the their safety.
• Do not use any high-pressure cleaners or steam cleaners, which can result in an electric shock or other damage.
• A defective appliance may cause electric shock. Never switch on a defective appliance. Unplug the appliance from the mains or switch
off the circuit breaker in the fuse box. Contact the after-sales service.
The manufacturer cannot be held liable for damage caused by failure to comply with the above requirements or by
tampering with any part of the appliance or by the use of non-original spare parts.
I S T A L L A T I O I S T R U C T I O S
2
GB IE
Section
1.0
2.0
3.0
4.0
4.1
4.2
4.3
Contents
Important Notes
Environmental
Appliance Data
Installation The Appliance
Room Ventilation
Clearances
Electrical Connection
Page No.
2
3
3
4
4
4
5
Section
4.4
4.5
4.6
4.7
4.8
5.0
6.0
7.0
Contents
Gas Connection
Using The Hob
Using The Grill
Using The Oven
Baking Guide
Cleaning and aintenance
Troubleshooting
Guarantee - Terms and Conditions
Page No.
5
5
6
7
10
12
14
15
1.0 IMPORTA T OTES
© 2018 Focal Point Fires plc.

Data badge
On the right hand side of the oven, behind the oven door.
Type of gas
This cooker must only be used with LPG only, as specified on the appliance data badge.
Pressure test point
Use the oven injector
Aeration - Fixed
Electrical supply/Load
220 - 240V ~ 50Hz
37 Watts
Spark generator: ains operated 6 outlet controlled by a single button at the left hand side of the facia to individual
electrodes. 2 outlets shorted to earth.
Warning: This cooker must be earthed.
Hob - Burners have heads and caps which are removable for cleaning, note position of concealed electrodes.
2.0 E VIRO ME TAL GB IE
OTE: Before discarding an old appliance, switch off and disconnect it from the power supply. Cut off and render any plug unusable.
Cut the cable off directly behind the appliance to prevent misuse. This should be undertaken by a competent person. Disable any door
lock to make sure that children cannot get trapped inside the appliance.
This appliance is marked according to the European directive 2002/96/EC on Waste Electrical and Electronic Equipment (WEEE).
By ensuring this product is disposed of correctly, you will help prevent potential negative consequences for the environment, human
and health, which could otherwise be caused by inappropriate waste handling of this appliance.
The symbol shown in figure 1 on the product or on the documents accompanying the product indicates that this appliance may not
be treated as household waste. Instead it shall be handed over to the applicable collection point for recycling of electrical and elec-
tronic equipment.
Disposal must be carried out in accordance with the local environmental regulations for waste disposal.
For more detailed information about treatment, recovery and recycling of this product, please contact your local authority household
waste disposal service or the shop where you purchased the product.
Your safety is of the utmost importance to FOCAL POI T.
Please make sure that you read this instruction booklet before attempting to install or use the appliance. If you are unsure of any of
the information contained in this booklet, please phone the FOCAL POI T advice line.
IMPORTA T: Any installation work must be carried out by a gas safe registered installer, a qualified electrician or competent per-
son.
Use of the appliance
Your appliance is only designed to be used in the home. It is not suitable for storing food. If it is used for any other pur-
pose or it is not used correctly, FOCAL POI T will accept no liability for any damage that may be caused.
Altering the specifications of the appliance must not be attempted for reasons concerning your safety.
Before using the appliance
Check the appliance for any signs of transport damage. If you notice any damage then you should not connect the appliance
to the main power supply, also contact the manufacturer.
3© 2018 Focal Point Fires plc.
3.0 APPLIA CE DATA
Model Destination
Country
Cat Gas
Type
Operating/Inlet
Pressure (±2.0 mbar)
Small Medium Large Oven Grill
BI600SS
B1600S1
BI600BL
GB - IE II2H3+
G30
G31
28 - 30mbar
37mbar
Hi 0.81kW 1.44kW 2.61kW 2.12kW 1.22kW
Hs 0.90kW 1.60kW 2.90kW 2.35kW 1.35kW
Injector mm 0.50 0.65 0.85 0.72 0.60
figure 1

Before you start: Please read the instructions. Planning your installation will save you time and effort.
• Prior to installation, ensure that the local distribution conditions (nature of the gas and gas pressure) and the adjustment of the appli-
ance are compatible. The adjustment conditions are stated on the data badge.
• This appliance is not connected to a combustion evacuation device. It shall be installed and connected in accordance with current instal-
lation regulation. Particular attention shall be given to the relevant requirements regarding ventilation.
• In your own interest and that of safety, it is the law that all gas appliances be installed and serviced by competent persons. Gas Safe
registered installers undertake to work to satisfactory standards.
• In the UK this cooker must be installed in accordance with all relevant British standards and codes of practice, in particular BS 5440
part 2 and BS 5482-1 / BS5482-2 .
• In the Republic of Ireland the cooker must be installed by a competent person in accordance with the current edition of IS 813
Domestic Gas Installations.
Moving the cooker: Please note that the weight of this appliance is approximately 47kg (unpacked). Do not lift on own.
• Take care if the appliance needs to be lifted during installation - always use an appropriate method of lifting.
• DO OT ATTEMPT TO MOVE THE COOKER BY PULLI G O THE DOOR OR HA DLE. Open the door and grasp
the frame of the cooker, taking care that the door does not shut on your fingers.
• Take care to avoid damage to soft or uneven floor coverings when moving the appliance. Some cushioned vinyl floor coverings
may not be designed to withstand sliding appliances without marking or damage.
• When the oven is installed and supported by the side runners at the top edge, it should be secured to the side cabinets with
the six screws provided one on each side, behind the grill door and two on each side, behind the oven door.
4.0 I STALLI G THE APPLIA CE GB IE
4.1 ROOM VE TILATIO
The room containing the appliance should have an air supply in accordance with the current version of BS 5440:part 2:
• All rooms require an openable window, or equivalent, and some rooms will require a permanent vent as well.
• For room volumes up to 5m³ an air vent of 100cm² is required.
• For room volumes between 5m³and 10m³ an air vent of 50cm² is required.
• If the room has a door that opens directly to the outside, or the room exceeds 10m³, O AIR VE T is required.
• If there are other fuel burning appliances in the same room, BS 5440: Part 2: should be consulted to determine the air vent require-
ments.
• This appliance must not be installed in a bed sitting room of less than 20m³ or in a bathroom or shower room.
Windows and permanent vents should therefore not be blocked or removed without first consulting a Gas Safe registered installer.
Failure to install appliances correctly is dangerous and could lead to prosecution.
The room where the appliance is installed must have enough air flow as required for normal combustion of gas and by the necessary
air exchange of the same room. The air vents, protected by grills, must be suitably dimensioned in compliance with the current regula-
tions and positioned so that no part of them is obstructed.The use of a gas cooking appliance results in the production of heat and mois-
ture in the room in which it is installed. Ensure that the kitchen is well ventilated: keep natural ventilation holes open or install a mechan-
ical ventilation device (mechanical extractor hood). Prolonged intensive use of the appliance may call for additional ventilation, for exam-
ple, opening of a window, or more effective ventilation, for example increasing the level of mechanical ventilation where present.
4.2 CLEARA CES
No shelf or overhang or cooker hood should be closer than a minimum of 650mm, but check with
cooker hood manufacturer’s recommendations. The cooker must have a side clearance above hob
level of 90mm up to a height of 400mm.
This cooker may be fitted flush to base units.
Clearances & dimensions: All sizes are nominal, and some variation is to be expected.
The ‘depth’ of the cooker, as given below, is to the front of the door and excluding knobs and
handles.
Depth: 600mm, Width: 600mm, Height (adjustable): 900 - 915mm
This is a class 1 appliance regarding installation requirements meaning itmust be earth. Important:
Ensure that you route all mains cables well clear of any adjacent heat source.
4© 2018 Focal Point Fires plc.
650mm
90mm
400mm

4.3 ELECTRICAL CO ECTIO GB IE
© 2018 Focal Point Fires plc.
5
There are no internal user serviceable parts.
Check regularly for security of wall fixings as appropriate. Also check security of supply cable and connections. If the supply cable
becomes damaged, it must be replaced by a service agent or competent person, such as a qualified electrician.
This appliance is supplied with a BS1363 3 pin plug fitted with a 13 Amp fuse. Should
the fuse require replacing, it must be replaced with a fuse rated at 13 Amp and
approved to BS1362. In the event of the mains plug being removed/ replaced for any
reason, please note : IMPORTA T: The wires in the mains lead are coloured in
accordance with the following code:
Blue - Neutral
Brown - Live
Green/ Yellow - Earth
As the colours of the wires in the mains lead of this appliance may not correspond
with the colour markings identifying the terminals in your plug, proceed as follows.
The blue wire must be connected to the terminal marked with an N or coloured
black. The brown wire must be connected to the terminal marked with an L or coloured red. The green/yellow wire must be
connected to the earth terminal which is marked with an E or with the earth symbol. WAR I G: Never connect live or
neutral wires to the earth terminal of the plug.
NOTE: If a moulded plug is fitted and has to be removed take great care in disposing of the plug and severed cable, it must be
destroyed to prevent engaging into a socket.
Excluding fuses, use only genuine manufacturers spare parts available from your supplier.
4.4 GAS CO ECTIO
The inlet to the cooker is a 8mm pipe.
Ensure that all pipe work is of the correct rating for both size and temperature.
Please check that all gas connection are good after installation.
Burner aeration: All burners have fixed aeration and no adjustment is possible.
Pressure setting: I3+ LPG at 37 mbar for G31, 28 - 30mbar for G30.
Pressure test point: Use the oven injector
Hob: Turn the control knob to the FULL O position, wait a second before pressing the ignition switch or holding a lighted
match or taper to the burner.
4.5 USI G THE HOB
Ignition: Push in and turn the selected control knob anticlockwise to the ‘full on’ position and press the ignition switch
at the same time, or hold a lighted match or taper to the burner, until the burner lights. It is necessary to hold the con-
trol knob in for up to ten seconds to establish the safety device. Turn the control knob to the required setting.Adjust the burn-
er flame so that it does not extend over the pan base.
To turn off, push in the control knob and turn clockwise until the dot on the control knob is below the dot on the facia panel.
To simmer: The simmer position is marked by the small flame symbol.
Once lit turn the selected control knob anticlockwise past the large flame symbol (FULL ON) to the small flame symbol.
You may hear a slight popping noise when the hob burners are operating and this is quite normal, but if anything about the cook-
er appears unusual, such as change in flame appearance, or the operation of controls - seek expert advice.

4.5 USI G THE HOB - CO TI UED GB IE
6© 2018 Focal Point Fires plc.
Pans: For optimum safety and performance, we recommend the use of flat bottomed pans with a base diameter of minimum
100mm (4”) and maximum 250mm (10”).
Do not use traditional style double pans (excluding steamer pans), rim based pans, old misshapen pans or any pan which is unsta-
ble when placed on a flat surface.
Position pans over the centre of the burners, resting on the pan supports. If positioned off centre, smaller pans may be unstable.
When cooking with fat or oil, never leave unattended.
Turn pan handles to a safe position, so they are out of reach of children, not overhanging the appliance, and cannot be caught acci-
dentally.
Commercial simmering aids should not be used as they create excessive temperatures that can damage the surface and may
cause a hazard.
Pan supports: Always make sure the pan supports are replaced correctly, and located in the hob spillage well.
To save gas:
• Use the size of pan most suited to the size of the burner - ie; larger pans on the larger burners, smaller pans on the smaller burners.
• Adjust the flames so that they do not lick up the sides of the pan.
• Put lids on saucepans and only heat the amount of liquid you need.
• When liquids boil, reduce the control setting to maintain a simmer.
• Consider the use of a pressure cooker for the cooking of a complete meal.
• Potatoes and vegetables will cook quicker if chopped into smaller pieces.
4.6 USI G THE GRILL
WAR I G: Accessible parts may be hot when the grill is used, young
children should be kept away.
Detachable grill pan handle
Place the handle over the edge of the grill pan as shown.
Grid
Handle Grill pan

4.6 USI G THE GRILL - CO TI UED
© 2018 Focal Point Fires plc.
The handle should be removed from the pan during grilling, to prevent overheating.
The handle is designed for removing / inserting the grill pan under the grill when grilling.
If cleaning the grill pan when it is hot, use oven gloves to move it. Do not use the handle to pour hot fats from the grill pan.
Food for grilling should be positioned centrally on the trivet.
Aluminium foil: Using aluminium foil to cover the grill pan, or putting items wrapped in foil under the grill can create a fire haz-
ard, and the high reflectivity can damage the grill burner.
The cooling fan: When the grill is switched on, you will hear the cooling fan operates - this keeps the fascia and control knobs
of the appliance cool during grilling. The fan may continue to operate for a period after the grill control has been switched off.
WAR I G: Accessible parts may be hot when the grill is used, young children should be kept away.
Pre heating: For best results, preheat the grill for 3 - 5 minutes.
To switch on the grill: Open the grill door. Push in and turn the grill control knob anticlockwise to the ‘full on’ position and
press the ignition switch at the same time, or hold a lighted match or taper to
the burner, until the burner lights. It is necessary to hold the control knob in for up
to ten seconds to establish the safety device. Turn the control knob to the required
setting.
IMPORTA T: THE DOOR MUST BE KEPT OPE WHE THE GRILL IS
USED.
To switch off, return the control knob to the “off” position.
For grilling larger quantities of food, the full grill can be utilised.
When using the grill, the speed of grilling can be controlled by adjusting the grill set-
ting or by selecting a higher or lower shelf position. For toasting, and for grilling
foods such as bacon, sausages or steaks, use a higher shelf position.
For thicker foods such as chops or chicken joint pieces, use the low shelf position.
WAR I G: Accessible parts may be hot when the oven is used. Pets, children, and the elderly
or infirm should be kept away.
Please note: As part of the cooking process, hot air is expelled through a vent at the top of the oven(s). When opening the
oven door, care should be taken to avoid any possible contact with potentially hot air, since this may cause discomfort to people
with sensitive skin. We recommend that you hold the underneath of the oven door handle. Important: Never put items direct-
ly on the base of the oven with foil, as this may damage the burner or cause a fire hazard. Always position items on the shelf.
GB IE
4.7 USI G THE OVE
7

4.7 USI G THE OVE - CO TI UED
© 2018 Focal Point Fires plc.
Pre heating:
The oven must be preheated when cooking frozen or chilled foods, and we recommend preheating for yeast mixtures, batters, soufflés
and whisked sponges.
If you are not preheating the oven, the cooking times in the baking guide may need to be extended, as they are based on a preheated
oven.
The cooling fan
When the oven is switched on, you will hear the cooling fan operate at high oven temperatures - this keeps the fascia and con-
trol knobs of the appliance cool during cooking or grilling only.
The fan will continue to operate for a period after the oven control has been switched off.
Should any fault occur with the cooling fan, the appliance will need to be serviced - contact Focal Point.
Cooking times: These times are based on cooking in a preheated oven. These cooking times are approximate, because the size
and type of cooking dish will influence time as will personal preferences.
Shelf positions: As a general guide, when cooking frozen or chilled food, use the highest possible shelf position, while allowing
some clearance between the food and the top element. Follow the instructions given on packaging.
Cooking temperatures: The temperature settings and times given in the Baking Guides are based on dishes made with block
margarine. If soft tub margarine is used, it may be necessary to reduce the temperature setting. If a recipe gives a different tem-
perature setting to that shown in the guide, the recipe instruction should be followed.
Use the baking guide as a reference for determining which temperatures to use.
GB IE
8

4.7 USI G THE OVE - CO TI UED GB IE
© 2018 Focal Point Fires plc.
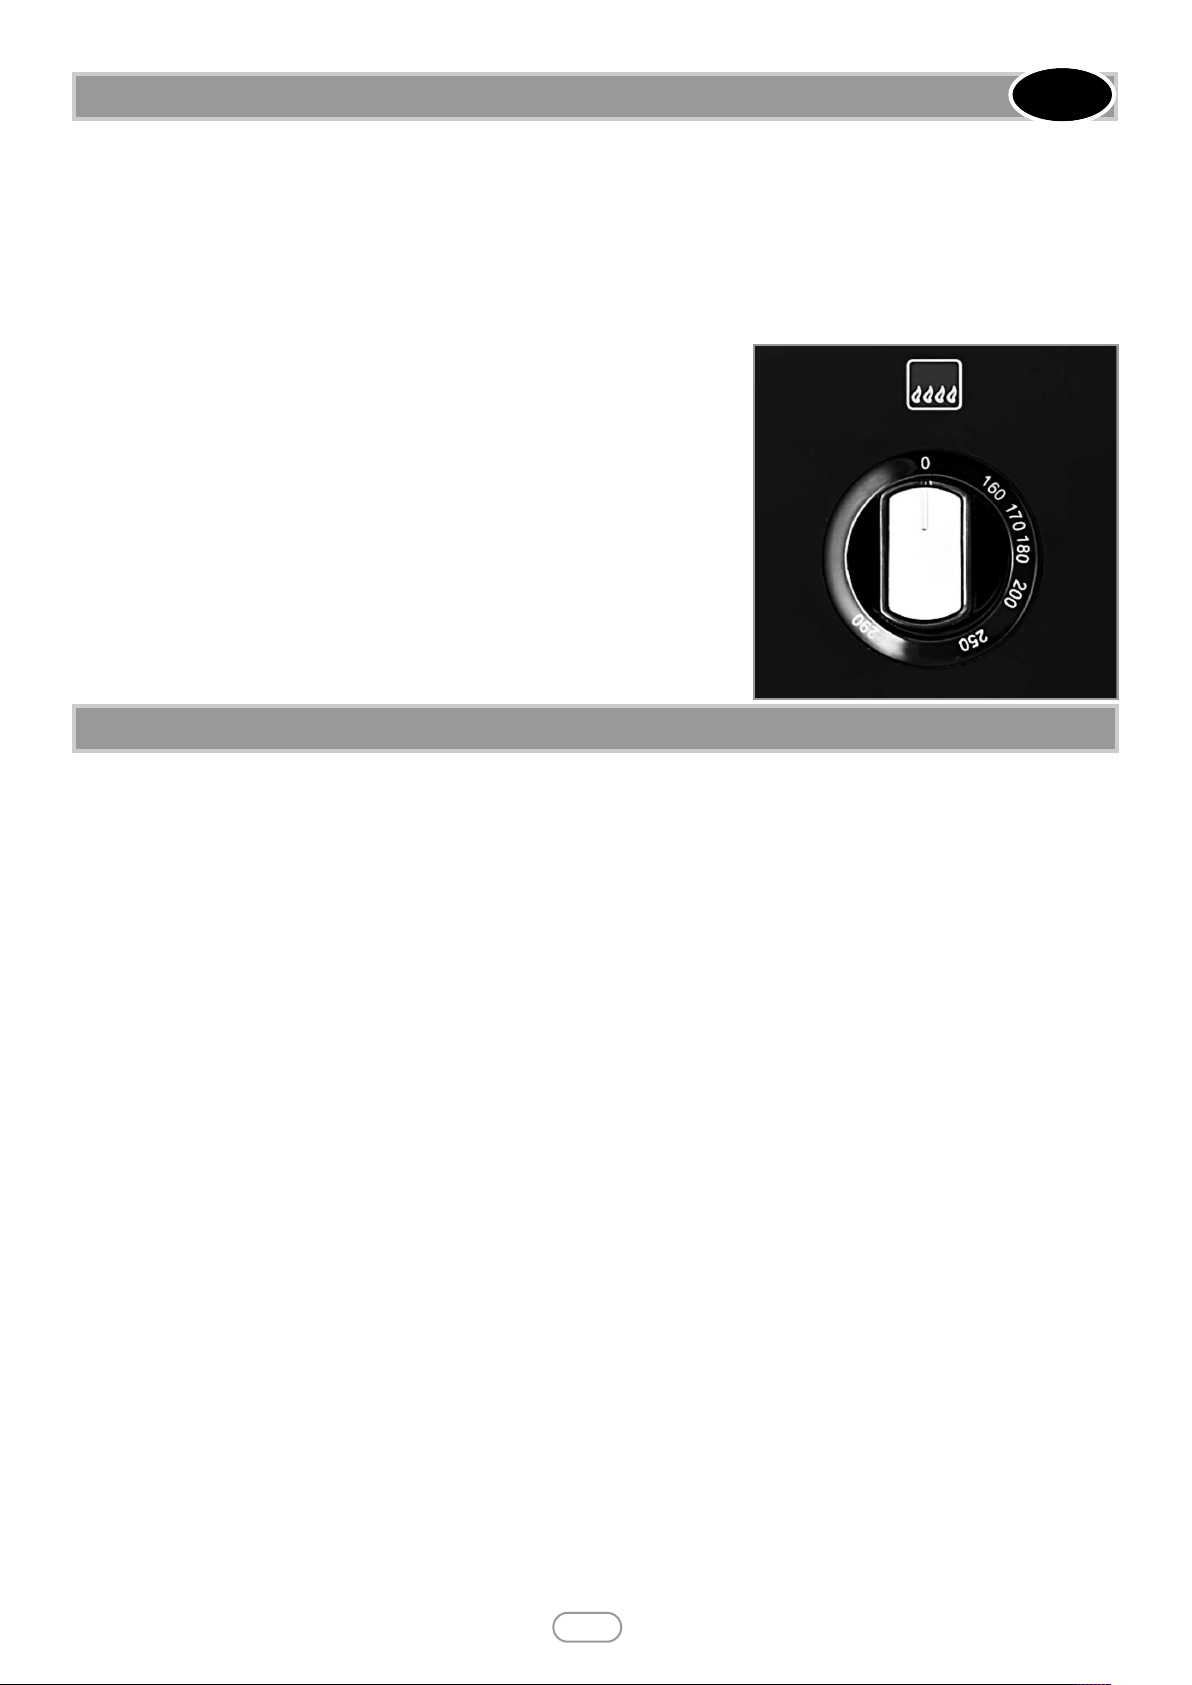
To switch on the oven: Push in and turn the oven control knob anticlockwise to the ‘full on’ position and press the ignition
switch at the same time, or hold a lighted match or taper to the burner, until the burner lights. It is necessary to hold the
control knob in for up to ten seconds to establish the safety device. Turn the control knob to the required setting.
To switch off, return the control knob to the “off” position.
To turn the oven light on and off: Press the light button on the front fascia.
When using the oven: When cooking sensitive items such as souffle and Yorkshire puddings or, when cooking bread, we rec-
ommend that the oven is pre-heated. For any other types of cooking, a pre-heat is not required.
Oven shelves: Position baking trays and roasting tins on the middle of the shelves, and leave one clear shelf position between
shelves, to allow for circulation of heat.
Baking tray and roasting tins: For best cooked results and even browning, the maximum size baking trays and roasting tins
that should be used are 400 x 350mm we recommend that you use good quality cookware. Poor quality trays and tins may warp
when heated, leading to uneven baking results.
Aluminium foil: Use foil only to cover food or cooking dishes, using foil to cover the shelves or oven base creates a fire haz-
ard.
As this is a high efficiency oven, you may notice the emission of steam from the oven when the door is opened.
Please take care when opening the door.
If you are used to cooking with a conventional oven you will find a number of differences to cooking with a high efficiency oven
which will require a different approach:
Foods are cooked at a lower temperature than a conventional oven, so conventional recipe temperature may have to be reduced.
Please refer to the conversion chart.
When batch baking foods that will rise during cooking - eg; bread - always ensure that enough space has been left between the
shelves to allow for the rise.
otes:
When 2 or more shelves are being used, it may be necessary to increase the cooking time slightly.
Because the 2 oven shelves are wider than in many ovens, it is possible to cook 2 items per shelf - eg; 2 victoria sandwiches or
2 casseroles.
Although you need to keep in mind the points ‘To help the air circulate freely’ with careful choice of dishes and tins, it is possi-
ble to cook a complete meal, and perhaps something else for the freezer, in the oven at the same time.
When roasting meats, you will notice that fat splashing is reduced, which is due in part to the lower oven temperatures, and will
help keep cleaning of the oven to a minimum.
9
4.7 USI G THE OVE - CO TI UED GB IE
10 © 2018 Focal Point Fires plc.
To help the air circulate freely
Position the shelves evenly within the oven and maintain a clearance from the oven roof and base.
If more than one cooking dish or baking tray is to be used on a shelf, leave a gap of at least 25mm between the items themselves
and the oven interior.
Main oven conversion guide
ote: this is a high efficiency oven, therefore some adjustment will have to be made to conventional cooking temperatures. The
table below shows conventional temperatures
Setting Temperature °C
1 160
2 170
3 180
4 200
5 250
6 290
Advice for cooking meat
• Cooking times, especially for meat, vary according to the thickness and quality of the food and to consumer taste.
• We recommend using a meat thermometer for meat when roasting it.
Advice for cooking desserts and biscuits
• Use dark coloured metal moulds for desserts: they help to absorb the heat better.
• Check whether the dessert is cooked all the way through: at the end of the cooking time, put a toothpick into the highest point of the
dessert. If the dough does not stick to the toothpick, the dessert is cooked.
• If the dessert collapses when it comes out of the oven, on the next occasion reduce the set temperature by about 10°C, selecting a
longer cooking time if necessary.
Advice for defrosting and proving
• We recommend positioning frozen foods in a lidless container on the first runner of the oven.
• The food must be defrosted without its wrapping.
• Lay out the foodstuffs to be defrosted evenly, not overlapping.
• When defrosting meat, we recommend using a rack positioned on the second runner with the food on it and a tray positioned on the
first runner. In this way, the liquid from the defrosting food drains away from the food.
• The most delicate parts can be covered with aluminium foil.
To save energy
To save energy during use of the appliance, the following instructions may be followed:
• Stop cooking a few minutes before the time normally used. Cooking will continue for the remaining minutes with the heat which has
accumulated inside the oven.
• Reduce any opening of the door to a minimum to avoid heat dispersal.
• Keep the inside of the appliance clean at all times.
4.8 BAKI G GUIDE

4.8 BAKI G GUIDE - CO TI UED
Dish Recommended
temperature °C
Approximate cooking
time (pre heated oven)
Scones 180 8 - 15
Cakes
Small cakes
Whisked sponge
Swiss roll
Victoria sandwich
(2 x 180mm / 7”)
Genoese sponge
adeira (180mm / 7”)
160
160
170
160
160
160
15 - 25mins
15 - 20mins
10 - 12mins
20 - 30mins
20 - 25mins
1hr - 1:15hrs
Pastry
Flaky / Puff
Shortcrust
Choux
Plate tarts
(2 x 180mm / 7”)
180
170
170
170
Depending on recipe and
type of filling
Biscuits
Shortbread rounds
Nut brownies
Brandy snaps
Flapjacks
Ginger nuts
160
170
160
160
160
20 - 25mins
20 - 25mins
10 - 12mins
20 - 25mins
10 - 20mins
GB IE
11 © 2018 Focal Point Fires plc.
Roast turkey:
Roasting turkey involves cooking two different types of meat - the delicate light breast meat, which must not be allowed to dry
out, and the darker leg meat, which takes longer to cook.
The turkey must be roasted long enough for the legs to cook, so frequent basting is necessary. The breast meat can be covered
once browned.
• Always make sure that the turkey is completely thawed and that the giblets are removed before cooking.
• Turkey should be roasted at 160˚C (fanned) or 160˚C for 20 minutes per 1lb, plus 20 minutes, unless packaging advises other-
wise.
• The turkey can be open roasted, breast side down, for half of the cook time, and then turned over for the remainder of the
cooking time.
• If the turkey is stuffed, add 5 minutes per 1lb to cook time.
•If roasting turkey covered with foil, add 5 minutes per 1lb to cook time.
To test if the turkey is cooked, push a fine skewer into the thickest part of the thigh. If the juices run clear, the turkey is cooked.
If the juices are still pink, the turkey will need longer cooking.

4.8 BAKI G GUIDE - CO TI UED GB IE
12 © 2018 Focal Point Fires plc.
Roasting guide
The times given in the roasting guide are only approximate, because the size and age of the bird will influence cooking times as
will the shape of a joint and the proportion of the bone. Frozen meat should be thoroughly thawed before cooking. For large
joints it is advisable to thaw overnight. Frozen poultry should be thoroughly thawed before cooking. The time required depends
on the size of the bird - eg; a large turkey may take up to 48 hours to thaw.
Use of a trivet with a roasting tin will reduce fat splashing and will help to keep the oven interior clean. Alternatively, to help
reduce fat splashing, potatoes or other vegetables can be roasted around the meat / poultry.
otes:
• When cooking stuffed meat or poultry calculate the cooking time from the total weight of the meat plus the stuffing.
• For joints cooked in foil or covered roasters, and for lidded casseroles, add 5 minutes per 450g (1lb) to the calculated cooking
time.
• Smaller joints weighing less than1.25kg (21⁄2lb) may require 5 minutes per 450g (1lb) extra cooking time.
• Position the oven shelf so that the meat or poultry will be in the centre of the oven.
• It is recommended that the oven is cleaned after open roasting.
Cook in oven at:
160°C - ain Oven
Approximate cooking
time (pre heated oven)
Beef Rare
edium
Well Done
20 minutes per 450g (1lb), plus 20 minutes
25 minutes per 450g (1lb), plus 20 minutes
30 minutes per 450g (1lb), plus 30 minutes
Lamb edium
Well Done
25 minutes per 450g (1lb), plus 25 minutes
30 minutes per 450g (1lb), plus 30 minutes
Pork 35 minutes per 450g (1lb), plus 35 minutes
Poultry 20 minutes per 450g (1lb), plus 20 minutes
5.0 CLEA I G A D MAI TE A CE
Any cleaning agent used incorrectly may damage the appliance.
Do not use any high-pressure cleaners or steam cleaners, which can result in an electric shock or damage to the appliance.
Always let the cooker cool before cleaning.
Some cooking operations generate considerable amount of grease, this combined with spillage can become a hazard if allowed to
accumulate on the cooker through lack of cleaning. In extreme cases this may amount to misuse of the appliance and could inval-
idate your guarantee.
It is recommended that the appliance is cleaned after open roasting.
Do not use caustic pastes, abrasive cleaning powders, coarse wire wool or any hard implements, as they will damage the surfaces.
All parts of the appliance can be safely cleaned with a cloth wrung out in hot soapy water.
Enamel parts (grill pan, hob top & pan supports, main oven compartment floor, top oven / grill compartment)
Use a mild cream cleaner - eg; “Cif”. Stubborn marks may be removed with a moistened “Brillo” pad. The pan supports and grill
pan may be cleaned in a dishwasher, or with a nylon brush in hot soapy water.
Ensure that the burners are correctly located as above.

5.0 CLEA I G A D MAI TE A CE GB IE
13 © 2018 Focal Point Fires plc.
Surface cleaning (main oven sides and back) Some cooking operations generate considerable amount of grease, this com-
bined with spillage can become a hazard if allowed to accumulate on the cooker through lack of cleaning. In extreme cases this
may amount to misuse of the appliance and could invalidate your guarantee.
Painted, plastic and metal finish parts (oven door frame & handle, grill pan handle, facia panel & control knobs)
Only use a clean cloth wrung out in hot soapy water.
Glass parts (oven door panels)
Do not use abrasives or polishes as they will scratch and damage the glass. Use a mild cream cleaner for ceramic ovens - eg;
“Hob Brite”. Rinse away excess cleaner and dry with a soft cloth.
The internal glass on the grill door can be removed by opening the grill door
down flat and pushing outwards on the end of the glass to un hook the glass
from the tabs in each of the far corners and carefully lifting out.
With the grill glass removed the door may spring up without the addition-
al weight of the glass.
The internal glass on the oven door can be removed by opening the oven
door down flat and pushing outwards on the end of the glass to un hook
the glass from the tabs in each of the far corners and carefully lifting out.
With the oven glass removed the door may spring up without the addition-
al weight of the glass.
Chrome plated parts (oven shelves)
Do not use abrasives or polishes, use a moist soapy cloth.
Please note: These items may also be cleaned in a dishwasher.
Replacing the light bulb: Remove the bulb protector A by turning it anti-
clockwise and replace bulb B with a similar one (25 W).
Re-fit bulb protector A.
Warning - Ensure that the appliance is switched off before replacing
the lamp to avoid the possibility of electric shock.
14 © 2018 Focal Point Fires plc.
5.0 CLEA I G A D MAI TE A CE - CO TI UED
We recommend preheating the oven before putting the food in.
• For cooking on several levels, we recommend using a fan-assisted function to achieve uniform cooking at all heights.
• In general, it is not possible to shorten the cooking times by increasing the temperature (the food could be well-cooked on the out-
side and undercooked on the inside).
If the ignition fails - Check there is a spark when the ignition button is depressed. If there is no spark, check that the electricity sup-
ply is switched on at the cooker control box. Check that the gas supply is switched on. Check that the LPG bottle is not empty.
If the oven light does not come on - Check the mains supply and fuse. If this is satisfactory then replace the bulb.
Flame does not burn evenly around the burner - After the hob has been allowed to cool down check that none of the ports in
the burner under the burner cap are clogged. Clean using detergent and dry before refitting.
Flame goes out after igniting successfully when the control knob is released - Try relighting and hold in the control knob for
slightly longer so that the Flame Suppression Device (FSD) is sufficiently hot. If the problem persists contact Supplier.
Fan not operating - (The fan should come on if the oven has been on for a while) – Check mains supply to the oven. If the oven light
is ON this suggests a possible fan problem which cannot be replaced. Contact Supplier.
GB IE
6.0 TROUBLESHOOTI G
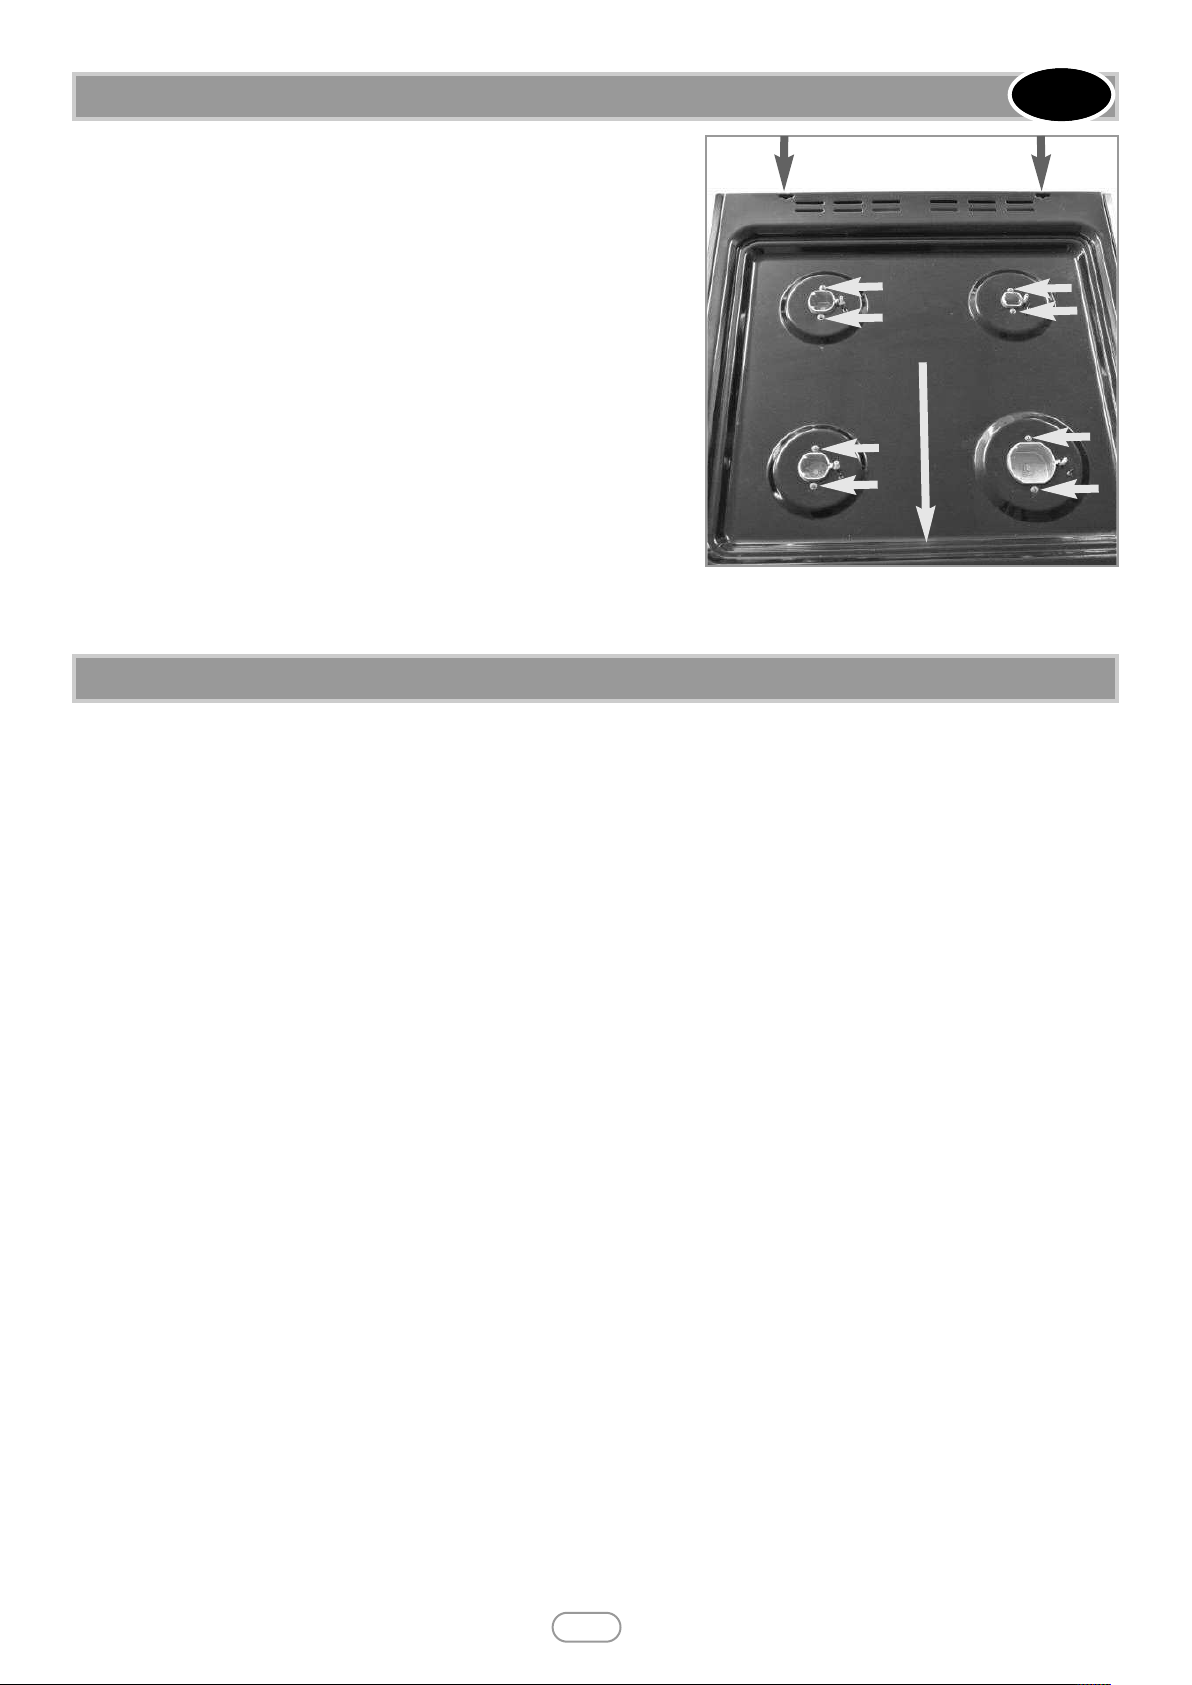
Removing the pan bed
Ensure the appliance is off and cool.
1. Carefully lift off the pan supports, burner caps and hob burners and place
to one side.
2. Remove the 2 screws from the rear of the appliance.
3. Next, remove the 2 screws from each of the 4 hobs.
4. Once all of the screws have been removed, gently lift the pan bed from the
rear, over the 4 hobs and ease forward towards the front by around 1 inch, to
release the pan bed from the front fixings hidden below.
The pan bed is now free.
Repeat in reverse to reassemble.
2.
3.
4.

15 © 2018 Focal Point Fires plc.
7.0 GUARA TEE - TERMS A D CO DITIO S
F861349
GB IE
As our policy is one of continuous improvement and development, we therefore hope that you will understand we must retain the right to amend details and/or specifica-
tions without prior notice.
Waste electrical products should not be disposed of with household waste. Please recycle where facilities exist. Check with your local authority or retailer for recycling advice.
Registration is not required.
3 Year Guarantee Terms and Conditions
The 3 year guarantee is only applicable to purchases made through an authorised stockist/retailer.
For all gas ovens purchased the 3 year guarantee commences from the date of purchase, provided that the following 4 terms
and conditions are adhered to:
1. For any claim to be made within the 3 years from date of purchase you will be required to provide and supply us with your
original proof of purchase.
2. Your gas oven must have been commissioned by Gas Safe registered installer, evidence of which you must provide together
with the registration number.
3. Your appliance must have been serviced annually by Gas Safe registered installer, evidence of which must be provided, such as
the receipt.
4. Purchase(s) must be made through an authorised stockist/retailer.
Please note all consumable items such as light bulbs are not covered by the 3 year guarantee.
During the guarantee period any product or component which is proved to be faulty or defective in manufacture, will be
repaired or replaced free of material and labour charges, providing that we have authorised or carried out the repair or
replacement.
We will not accept or reimburse the costs of any third party who undertakes any work carried on the product or fits parts,
unless we have approved such work in advance of it being carried out.
The guarantee period will not be extended even if we repair or replace any product or part.
For all gas ovens purchased the 3 year guarantee commences from the date of purchase, providing that you can supply the
proof of purchase. This does not cover consumable items such as light bulbs. Purchase(s) must be made through an authorised
stockist.
Making a claim:
If you wish to make a warranty claim under our guarantee and all of the terms and conditions for your product have been met
then please contact the retailer you purchased your mobile home from.
Details required:
1. Name, full address including postal code and contact telephone number.
2. A copy of your proof of purchase e.g. receipt or bank statement.
3. Original installers Gas Safe registration number.
4. Annual service receipt for every 12 months.
Please note that this does not affect your statutory rights.
This manual suits for next models
2
Table of contents
Popular Oven manuals by other brands


 Operating insructions")

Miele
Miele H 7870 BMX Operating and installation instructions

Berner
Berner Hot-Star BHS1 user manual

Stanley
Stanley BRANDON DRY Installation and commissioning instructions

NEFF
NEFF C15FS24 0 Series instruction manual

Vulcan-Hart
Vulcan-Hart VSX24G Service manual

Miele
Miele H 4540 Pyrolytic operating instructions

Moffat
Moffat MSC5061S Operating & installation instructions

Steba
Steba KB E300 Instructions for use

Logik
Logik LBPCKX10 Instruction & installation manual

CTC Union
CTC Union Clatronic MBG 2788 Instruction manual & guarantee

Blaupunkt
Blaupunkt 5B60M8690GB instruction manual

G. Paniz
G. Paniz FCR 04 instruction manual