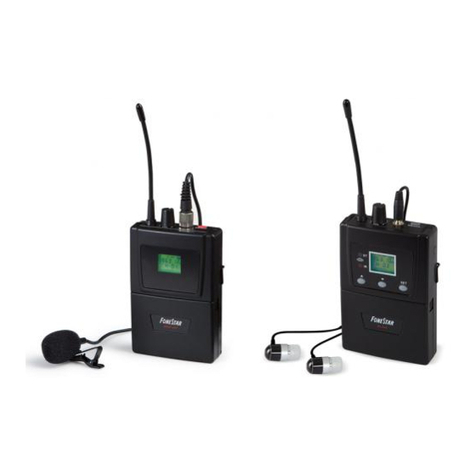
FONESTAR MSH-883 User manual

MSH-883, MSH-887, MSH-892,
MSH-895, MSH-898
TRUE DIVERSITY WIRELESS MICROPHONE SYSTEM PLL UHF
SISTEMA DE MICRÓFONOS INALÁMBRICOS TRUE DIVERSITY PLL UHF
SYSTÈME DE MICROPHONES SANS FIL TRUE DIVERSITY PLL UHF
SISTEMA DE MICROFONES SEM FIOS TRUE DIVERSITY PLL UHF
INSTRUCTION MANUAL/MANUAL DE USUARIO/
MODE D’EMPLOI/MANUAL DE INSTRUÇÕES
MSH-883-887-892-895-898_MANUAL_(EN_ES_FR_PT)_20201211-2020.qxp_MSH-883, 887, 892, 895, 898 11/12/20 10:28 Página 1

THIS MANUAL IS FOR THE FOLLOWING MODELS:
MSH-883 Wireless system with 1 tie-clip microphone and wireless belt-pack transmitter.
MSH-887 Wireless system with 1 hand-held wireless microphone.
MSH-892 Wireless system with 2 tie-clip microphones and 2 wireless belt-pack transmitters.
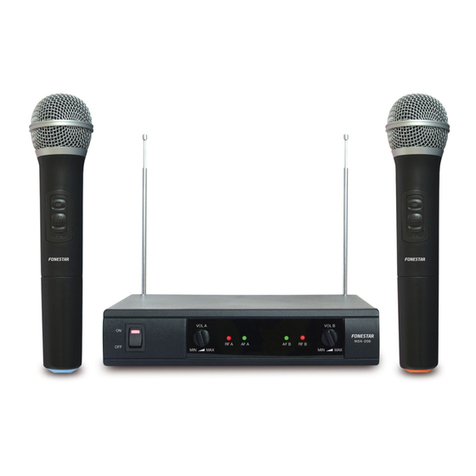
MSH-895 Wireless system with 2 hand-held wireless microphones.
MSH-898 Wireless system with 1 hand-held wireless microphone and 1 tie-clip microphone.
OPTIONAL MODELS:
MSHR-45 Individual True Diversity receiver.
MSHR-46D Double True Diversity receiver.
MSHT-40M Wireless hand-held microphone.
MSHT-45P Tie-clip microphone and wireless belt-pack transmitter.
ANG-5L Mountt for assembly in a 1 U 19” rack.
DESCRIPTION
Wireless microphone system for the transmission of the audio signal in the UHF band 863-865 MHz.
Composed of a receiver/transmitter or a pair of receivers/transmitters according to the model. Each
receiver/transmitter set can work independently.
Both the receiver and the transmitter have an LCD display incorporated,allowing you to set and visualize the
state of the equipment at all times.
The wireless system receiver has 2 aerials and 1 True Diversity circuit that continually compares and selects
the best signal from the aerial.
CONTROLS AND FUNCTIONS
INDIVIDUAL RECEIVER (models MSH-883 and MSH-887)
- 2 -
EN
MSH-883-887-892-895-898_MANUAL_(EN_ES_FR_PT)_20201211-2020.qxp_MSH-883, 887, 892, 895, 898 11/12/20 10:28 Página 2

DOUBLE RECEIVER (models MSH-892, MSH-895 and MSH-898))
1.- STANDBY: on/off button for the receiver in standby mode.
2.- IR: infrared receiver.
3.- IR-SW: by pressing this button the receiver transmission channel is sent to the transmitter microphone.
Then, place both the IR receivers opposite each other. The transmitter as well as the receiver will be
tuned into the same frequency and the same channel number.
4.- SCAN: this lets you automatically select an interference free channel
5.- Information display.
6.- Channel number and transmission frequency indicator.
7.- Volume level indicator.
8.- Wireless microphone battery level indicator. The battery level is shown when the microphone has been
tuned into the same channel as the receiver.If the level is low, the display lights up red.
9.- Receiver lock indicator.
10.- Radiofrequecy signal level indicator.
11.- Audio signal level indicator.
12.- w: for selecting the following channel on the list.
13.- SET: manual mode channel selection. Press the button and then press the w/sbuttons to choose the
desired channel. Once the channel has been selected, wait approximately 2 seconds until the option
stops blinking on the display and the channel will have been automatically selected. The channel can
also be locked by pressing this button after the channel selection option has been blinking.
14.- s: for selecting the previous channel on the list.
15.- VOLUME: controls for regulating the audio output volume.
16.- DC IN: DC power supply input. With 230 V AC/12.8 V DC adapter included.
17.- ANTENNA: female TNC aerial connector allowing the connection of the aerials supplied.
18.- BALANCED: balanced audio output, XLR connector.
19.- UNBALANCED: unbalanced audio output, 6.3 mm mono jack connector.
20.- MIX OUTPUT: mixed audio output for the 2 receivers, 6.3 mm mono jack connector.
- 3 -
EN
MSH-883-887-892-895-898_MANUAL_(EN_ES_FR_PT)_20201211-2020.qxp_MSH-883, 887, 892, 895, 898 11/12/20 10:28 Página 3

HAND-HELD MICROPHONE (mod. MSHT-40M)
1.- Grille: for protecting the microphone capsule and helping to reduce breathing noises and the wind.
2.- Display: this shows information on the tuned frequency,such as the channel number, battery level, RF
signal level and audio signal. If the battery level is low, the display will light up red.
3.- Battery cover: unscrew this cover to get to the battery compartment.
4.- GAIN: the audio input sensitivity adjustment.
5.- q: on/off switch for the hand-held microphone.
6.- IR: wireless hand-held microphone infrared receiver. For tuning the receiver and the wireless hand-held
microphone, press the IR-SW button on the receiver and then place this IR receiver opposite the one
on the receiver.
7.- Battery compartment: use two 1.5 V LR6-AA type batteries, alkalines or rechargeable.When you insert
the batteries, make sure that the polarity is correct.
8.- SET: this button lets you select between the following setup options: channel number and frequency,
RF transmission level (high/low), battery type selection (1.2 V - rechargeable/1.5 V - alkaline) to show
the battery level correctly and the microphone transmitter lock. To do this, press the SET button con-
secutively and use the w/sbuttons to select the options.
9.- w/s: for selecting menu options to set the hand-held wireless microphone.
10.- Contacts for recharging the rechargeable batteries in the wireless microphone in the recharge docking
station mod. MSC-2.
Note: when you press the SET button to setup the different microphone parameters, a MUTE indicator ap-
pears on the display and the microphone no transmits audio when the parameters are being set.
- 4 -
EN
MSH-883-887-892-895-898_MANUAL_(EN_ES_FR_PT)_20201211-2020.qxp_MSH-883, 887, 892, 895, 898 11/12/20 10:28 Página 4

BELT-PACK MICROPHONE (mod. MSHT-45P)
1.- Display:This shows information on the tuned frequency,such as the channel number, battery level, RF
signal level and audio signal. If the battery level is low, the display will light up red.
2.- w/s: for selecting desired options to set the wireless belt-pack microphone.
3.- SET: This button lets you select between the following setup options: channel number and frequency,
RF transmission level (high/low), battery type selection (1.2 V - rechargeable/1.5 V - alkaline) to show
the battery level correctly and the microphone transmitter lock. To do this, press the SET button con-
secutively and use the w/sbuttons to select the options.
4.- IR: Wireless hand-held microphone infrared receiver.For tuning the receiver and the wireless hand-held
microphone, press the IR-SW button on the receiver and then place this IR receiver opposite the one
on the receiver.
5.- Battery compartment: Use two 1.5 V LR6-AA type batteries, alkalines or rechargeable.When you in-
sert the batteries, make sure that the polarity is correct.
6.- Aerial.
7.- VOL: Wireless belt-pack transmitter volume control.
8.- 3.5 mm mono jack connector for connecting a microphone or a desired audio source.
9.- ON/OFF:Transmitter on/off switch.
10.- GUITAR LINE/MIC.: input sensitivity selector.
11.- Contacts for recharging the rechargeable batteries in the wireless microphone in the recharge docking
station mod. MSC-2.
Note: when you press the SET button to setup the different microphone parameters, a MUTE indicator ap-
pears on the display and the microphone does not transmit audio when the parameters are being set.
- 5 -
EN
MSH-883-887-892-895-898_MANUAL_(EN_ES_FR_PT)_20201211-2020.qxp_MSH-883, 887, 892, 895, 898 11/12/20 10:28 Página 5

CONNECTION
SITUATION
Place the receiver on a horizontal surface at a distance of 1m minimum from the floor, walls or metal surfa-
ces.
Keep the equipment away from sources of electric noise, such as lighting fixtures, motors, digital equipment,
etc.
CONNECTION
Connect the audio output to the input on a mixer or amplifier with connection best adapted to your needs:
Using the balanced XLR connector or the unbalanced 6.3 mmmono jack connector. The unbalanced 6.3 mm
mono jack mixed line signal can also be used.
Do not use the 3 outputs at the same time as it could cause signal loss and noise.
Connect the aerials and position them as a V.
Dismountable aerials: Ocassionally the aerials will need to be installed apart from the receiver, to avoid an
obstacle or to use the microphone at a distance from the receiver (auditorium, stadiums, etc.). In this case
we recommend you use 1 aerial cable (for example, mod. CAB-1M) and 1 amplifier and signal splitter (mods.
AMP-800S and DA-868).
- 6 -
EN
MSH-883-887-892-895-898_MANUAL_(EN_ES_FR_PT)_20201211-2020.qxp_MSH-883, 887, 892, 895, 898 11/12/20 10:28 Página 6

INSTALLATION IN 19” RACK
The individual receivers (mods. MSH-883 and MSH-887) are supplied with a short bracket for assembly in
a 19” rack and a connection plate to join 2 individual receivers, so that you can combine 2 receivers to be
iinstalled in a 1 U 19” rack cabinet.
Note: Remove the excess connection plate as it is not necessary for assembly.
If you want to install just one individual receiver in a 1 U 19” rack cabinet, you will need a long bracket
(mod. ANG-5L).
The double receivers (mods. MSH-892, MSH-895 and MSH-898) are supplied with some short front brac-
kets allowing assembly in 19” rack cabinets.
- 7 -
EN
ANG-5L
MSH-883-887-892-895-898_MANUAL_(EN_ES_FR_PT)_20201211-2020.qxp_MSH-883, 887, 892, 895, 898 11/12/20 10:28 Página 7

INSTRUCTIONS FOR USE
1.- Install the receiver and make the connections in accordance with the CONNECTION section.
2.- After making the connections, switch on the wireless microphone.
3.- Select the receiver output volume.
Do not use balanced and unbalanced outputs at the same time as it could cause signal loss and
noise.
4.- Insert the batteries in the wireless microphone (hand-held or belt-pack): open the battery compartment
cover and insert the batteries respecting the polarity.
Switch the wireless microphone on and observe the battery level on the display. If the battery level is
too low, the charge indicator will be at its minimum and will light up red. In this case, change the batteries
or use the wireless microphone recharge docking station mod. MSC-2, MSC-12 or MSC-24 to charge
them if they are rechargeable.
5.- Transmission channel selection (frequency):
The transmitter (wireless microphone) and the receiver must be tuned into the same channel. Select a
channel that is free from interference in the receiver and select the same channel in the transmitter
(wireless microphone). For more information on the different ways to select a channel, see the the section
SELECTING CHANNELS IN THE RECEIVER.
2 transmitters (wireless microphones) cannot be used in the same channel (frequency).
If you are using 2 or more transmitters (wireless microphones) simultaneously, leave at least 4 channels
between the channel being used by the transmitter and the other, to avoid interference. A maximum of
8 transmitters being used simultaneously is recommended.
6.- Hand-held microphone adjustments:
- Switch the receiver on and check the channel (frequency).
- Adjust the receiver volume to an intermediate position.
- Switch the microphone and the amplifier on (or the mixer and the power amp).
- Test the microphone and adjust the amplifier levels (or the mixer levels).
7.- Belt-pack transmitter adjustments:
-.Switch on the receiver and check the channel (frequency).
- Adjust the receiver volume to an intermediate position.
- Connect the microphone to the audio input connector.
- Switch on the microphone and the amplifier (or the mixer and the power amp.)
- Check the microphone and adjust the levels in the amplifier (or in the mixer) or in the microphone itself.
- 8 -
EN
MSH-883-887-892-895-898_MANUAL_(EN_ES_FR_PT)_20201211-2020.qxp_MSH-883, 887, 892, 895, 898 11/12/20 10:28 Página 8

CHANNEL SELECTION MODES IN THE RECEIVER
MANUAL MODE
To select an interference-free channel manually, follow the steps below:
Press the on/off button to switch the receiver on.
Press the SET button on the receiver.
Use the w/sbuttons to select a channel and a certain frequency.
AUTO-SCAN MODE
To select an interference-free channel automatically, follow the steps below:
Press the on/off switch to switch the receiver on.
Press the SCAN button on the receiver and the receiver will
automatically scan for and select an interference-free channel.
Press the IR-SW button on the reciever and position the infrared
receivers from the receiver opposite those on the transmitter to
synchronize the frequency in both.
- 9 -
EN
MSH-883-887-892-895-898_MANUAL_(EN_ES_FR_PT)_20201211-2020.qxp_MSH-883, 887, 892, 895, 898 11/12/20 10:28 Página 9

TROUBLE SHOOTING
TECHNICAL SPECIFICATIONS
PROBLEM SOLUTION
No audio - Check the power suppply to the microphone and receiver.
- Check that the transmitter and the receiver are tuned into the same frequency/channel.
-Check that the amplifier is on and the receiver audio output is connected to an amplifier
input.
- Check if the transmitter is too far from the receiver.
-Check if the receiver is positioned close to metal objects or there are obstacles between the
receiver and the transmitter.
Interference - Check the positioning of the aerial.
-When using two or more transmitters simultaneously, check that the selected channels do
not interfere with each other.
- Check if the interference comes from another wireless microphone system, TV, radio, etc
Distortion - Check if the receiver volume is too high or too low.
- Check if the interference comes from another wireless microphone system, TV, radio, etc
MSH-883 MSH-887
CHARACTERISTICS True diversity receiver with tie-clip
microphone with unidirectional electret
condenser capsule and wireless
belt-pack transmitter.
Auto-scan function.
Channel transmission to the
microphone through IR.
Dismountable aerials.
True diversity receiver with wireless
hand-held microphone with unidirectional
electret condenser capsule.
Auto-scan function.
Channel transmission to the microphone
through IR.
Dismountable aerials.
RECEIVER/
MICROPHONE
3 bands of frequency PLL UHF available:
512-525 MHz (32 channels), 631-645 MHz (32 channels) or 570-582 MHz (32 channels)
RESPONSE 40-18,000 Hz
OUTPUTS
Audio:
1 balanced, XLR
1 unbalanced, 6.3 mm mono jack
S/N RATIO > 105 dB
MICROPHONES MSHT-45P: 1 tie-clip microphone with
unidirectional electret condenser capsule
and wireless belt-pack transmitter with
mic./line input sensitivity selector
MSHT-40M: 1 wireless hand-held
microphone with unidirectional electret
condenser capsule.
POWER 10 mW maximum
POWER SUPPLY
Receiver: 12.8 V DC, 250 mA
Microphone transmitter: 2 x LR6-AA batteries
Accepts rechargeable batteries
DIMENSIONS Receiver: 210 x 45 x 156 mm depth
ACCESSORIES
Mounts for assembly of 2 receivers in 1 U 19” rack
6.3 mm mono jack cable
Rechargeable batteries
OPTIONAL MSC-2, MSC-12, MSC-24: recharge docking station for wireless microphones
ANG-5L: mount for assembly in 19” rack
- 10 -
EN
MSH-883-887-892-895-898_MANUAL_(EN_ES_FR_PT)_20201211-2020.qxp_MSH-883, 887, 892, 895, 898 11/12/20 10:28 Página 10

- 11 -
EN
MSH-892 MSH-895 MSH-898
CHARACTERISTICS True Diversity double
receiver with 2 tie-clip
microphones with
unidirectional electret
condenser capsule and 2
wireless belt-pack
transmitters.
Auto scan function.
Infrared channel to
microphone transmission.
Detachable aerials.
True Diversity double
receiver with 2 wireless
hand-held microphones
with unidirectional electret
condenser capsule.
Auto scan function.
Infrared channel to
microphone transmission.
Detachable aerials.
True Diversity receiver with
1 hand-held wireless
microphone with
unidirectional electret
condenser capsule and 1
tie-clip microphone with
unidirectional electret
condenser capsule and
wireless belt-pack
transmitter.
Auto scan function.
Infrared channel to
microphone transmission.
Detachable aerials.
RECEIVER/
MICROPHONE
3 bancos de frecuencias PLL UHF disponibles:
512-525 MHz (32 canales), 631-645 MHz (32 canales) o 570-582 MHz (32 canales)
RESPONSE 40-18.000 Hz
OUTPUTS Audio:
2 balanceadas, XLR
2 desbalanceadas, jack 6’3 mm mono
1 señal mezclada de línea desbalanceada, jack 6’3 mm mono
S/N RATIO > 105 dB
MICROPHONES MSHT-45P: 2 tie-clip
microphones with
unidirectional electret
condenser capsule and
wireless belt-pack
transmitter
MSHT-40M: 2 wireless
hand-held microphones
with unidirectional electret
condenser capsule.
MSHT-40M: 1 wireless
hand-held microphone with
unidirectional electret
condenser capsule.
MSHT-45P: 1 tie-clip
microphone with
unidirectional electret
condenser capsule and
wireless belt-pack
transmitter
POWER 10 mW maximum
POWER SUPPLY Receiver: 230 V AC/12.8 V DC, 450 mA
Transmitter microphone: 2 x LR6-AA batteries.
Accepts rechargeable batteries
DIMENSIONS Receiver: 420 x 45 x 187 mm depth
ACCESSORIES Mounts for assembling in 1 U 19" rack
2 x 6.3 mm mono jack cable
Rechargeable batteries
OPTIONAL MSC-2, MSC-12, MSC-24: recharge docking station for wireless microphones
MSH-883-887-892-895-898_MANUAL_(EN_ES_FR_PT)_20201211-2020.qxp_MSH-883, 887, 892, 895, 898 11/12/20 10:28 Página 11

CHANNEL TABLE 512-525 MHz CHANNEL TABLE 570-582 MHz
CHANNEL TABLE 631-645 MHz
CHANNE FREQUENCY
17 518.95 MHz
18 519.35 MHz
19 519.75 MHz
20 520.15 MHz
21 520.55 MHz
22 520.95 MHz
23 521.35 MHz
24 521.75 MHz
25 522.15 MHz
26 522.55 MHz
27 522.95 MHz
28 523.35 MHz
29 523.75 MHz
30 524.15 MHz
31 524.55 MHz
32 524.95 MHz
CHANNE FREQUENCY
1 512.55 MHz
2 512.95 MHz
3 513.35 MHz
4 513.75 MHz
5 514.15 MHz
6 514.55 MHz
7 514.95 MHz
8 515.35 MHz
9 515.75 MHz
10 516.15 MHz
11 516.55 MHz
12 516.95 MHz
13 517.35 MHz
14 517.75 MHz
15 518.15 MHz
16 518.55 MHz
CHANNE FREQUENCY
17 576.55 MHz
18 576.95 MHz
19 577.35 MHz
20 577.75 MHz
21 578.15 MHz
22 578.55 MHz
23 578.95 MHz
24 579.35 MHz
25 579.75 MHz
26 580.15 MHz
27 580.55 MHz
28 580.95 MHz
29 581.35 MHz
30 581.75 MHz
31 582.15 MHz
32 582.55 MHz
CHANNE FREQUENCY
1 570.15 MHz
2 570.55 MHz
3 570.95 MHz
4 571.35 MHz
5 571.75 MHz
6 572.15 MHz
7 572.55 MHz
8 572.95 MHz
9 573.35 MHz
10 573.75 MHz
11 574.15 MHz
12 574.55 MHz
13 574.95 MHz
14 575.35 MHz
15 575.75 MHz
16 576.15 MHz
CHANNE FREQUENCY
17 637.95 MHz
18 638.35 MHz
19 638.75 MHz
20 639.15 MHz
21 639.55 MHz
22 639.95 MHz
23 640.35 MHz
24 640.75 MHz
25 641.15 MHz
26 641.55 MHz
27 641.95 MHz
28 642.35 MHz
29 642.75 MHz
30 643.15 MHz
31 643.55 MHz
32 643.95 MHz
CHANNE FREQUENCY
1 631.55 MHz
2 631.95 MHz
3 632.35 MHz
4 632.75 MHz
5 633.15 MHz
6 633.55 MHz
7 633.95 MHz
8 634.35 MHz
9 634.75 MHz
10 635.15 MHz
11 635.55 MHz
12 635.95 MHz
13 636.35 MHz
14 636.75 MHz
15 637.15 MHz
16 637.55 MHz
- 12 -
EN
MSH-883-887-892-895-898_MANUAL_(EN_ES_FR_PT)_20201211-2020.qxp_MSH-883, 887, 892, 895, 898 11/12/20 10:28 Página 12

ESTE MANUAL CORRESPONDE A LOS SIGUIENTES MODELOS:
MSH-883 Sistema inalámbrico de 1 micrófono de solapa y transmisor inalámbrico de petaca.
MSH-887 Sistema inalámbrico de 1 micrófono inalámbrico de mano.
MSH-892 Sistema inalámbrico de 2 micrófonos de solapa y 2 transmisores inalámbricos de petaca.
MSH-895 Sistema inalámbrico de 2 micrófonos inalámbricos de mano.
MSH-898 Sistema inalámbrico de 1 micrófono inalámbrico de mano y 1 micrófono de solapa.
MODELOS OPCIONALES:
MSHR-45 Receptor individual true diversity.
MSHR-46D Receptor doble true diversity.
MSHT-40M Micrófono inalámbrico de mano.
MSHT-45P Micrófono de solapa y transmisor inalámbrico de petaca.
ANG-5L Soporte para montaje en 1 U rack 19”.
DESCRIPCIÓN
Sistema de micrófonos inalámbricos para transmisión de señal de audio en la banda UHF. Compuesto por
un receptor/emisor o por una pareja de receptores/emisores según modelo. Cada conjunto de
receptor/emisor puede funcionar independientemente.
Tanto el receptor como el transmisor incorporan una pantalla LCD que permite configurarlos y visualizar en
todo momento el estado de los equipos.
El receptor del sistema inalámbrico dispone de 2 antenas y 1 circuito true diversity que compara y selecciona
contínuamente la mejor señal de la antena recibida.
CONTROLES Y FUNCIONES
RECEPTOR INDIVIDUAL (mods. MSH-883 y MSH-887)
- 13 -
ES
MSH-883-887-892-895-898_MANUAL_(EN_ES_FR_PT)_20201211-2020.qxp_MSH-883, 887, 892, 895, 898 11/12/20 10:28 Página 13

RECEPTOR DOBLE (mods. MSH-892, MSH-895 y MSH-898)
1.- STANDBY: pulsador de encendido/apagado del receptor en modo de reposo standby.
2.- IR: receptor infrarrojos.
3.- IR-SW: una pulsación de este botón realiza el envío del canal de transmisión del receptor al micrófono
transmisor. A continuación, enfrente el receptor IR de ambos. Tanto el transmisor como el receptor
quedarán sintonizados en la misma frecuencia y el mismo número de canal.
4.- SCAN: permite seleccionar de modo automático un canal libre de interferencias.
5.- Pantalla de información.
6.- Indicador del número de canal y la frecuencia de transmisión.
7.- Indicador del nivel de volumen.
8.- Indicador del nivel de batería del micrófono inalámbrico. El nivel de batería se muesta cuando el
micrófono está sintonizado en el mismo canal que el receptor. Si el nivel es bajo, la pantalla se ilumina
en color rojo.
9.- Indicador de bloqueo del receptor.
10.- Indicador de nivel de señal de radiofrecuencia.
11.- Indicador de nivel de señal de audio.
12.- w: permite seleccionar el siguiente canal de la lista.
13.- SET: selección de canales en modo manual. Pulse el botón y a continuación presione los botones w/s
para escoger el canal deseado. Una vez seleccionado el canal, espere 2 segundos aproximadamente
hasta que la opción deje de parpadear en pantalla y el canal quedará fijado automáticamente. Asimismo,
permite bloquear el canal pulsando seguidamente este botón tras parpadear la opción de seleccionar
canal.
14.- s: permite seleccionar el anterior canal de la lista.
15.- VOLUME: controles para regular el volumen de la salida de audio.
16.- DC IN: entrada de alimentación de CC.
17.- ANTENNA: conector de antena tipo TNC hembra que permite la conexión de las antenas suministradas.
18.- BALANCED: salida de audio balanceada, conector XLR.
19.- UNBALANCED: salida de audio desbalanceada, conector jack 6’3 mm mono.
20.- MIX OUTPUT: salida de audio de los 2 receptores mezclada, conector jack 6’3 mm mono.
- 14 -
ES
MSH-883-887-892-895-898_MANUAL_(EN_ES_FR_PT)_20201211-2020.qxp_MSH-883, 887, 892, 895, 898 11/12/20 10:28 Página 14

- 15 -
ES
MICRÓFONO DE MANO (mod. MSHT-40M)
1.- Rejilla: protege la cápsula del micrófono y ayuda a reducir los ruidos de respiración o soplidos y del
viento.
2.- Pantalla: muestra información sobre la frecuencia sintonizada, número de canal, nivel de las baterías,
nivel de señal de RF y nivel de señal de audio. Si el nivel de las baterías es bajo, la pantalla se ilumina
en color rojo.
3.- Cubierta portapilas: desenrosque esta cubierta para acceder al portapilas.
4.- GAIN: ajuste de la sensibilidad de la entrada de audio.
5.- q: interruptor de encendido/apagado del micrófono de mano.
6.- IR: receptor infrarrojos del micrófono inalámbrico de mano. Para sincronizar el receptor y el micrófono
de mano inalámbrico, pulse el botón IR-SW del receptor y a continuación enfrente este receptor IR con
el del receptor.
7.- Portapilas: utilice dos pilas de 1’5 V tipo LR6-AA, alcalinas o recargables. Cuando coloque las baterías,
asegúrese que la polaridad es la correcta.
8.- SET: permite seleccionar entre las siguientes opciones de configuración: número de canal y frecuencia,
nivel de emisión de RF (alto/bajo), selección de tipo de baterías (1’2 V - recargables/1’5 V - alcalinas)
para mostrar el nivel de batería correctamente y bloqueo del micrófono transmisor. Para ello, pulse
sucesivamente el botón SET y utilice los botones w/spara seleccionar las opciones.
9.- w/s: permiten seleccionar las opciones de menú para configurar el micrófono inalámbrico de mano.
10.- Contactos para recargar las baterías recargables del micrófono inalámbrico en las estaciones de recarga
mods. MSC-2, MSC-12 o MSC-24.
Nota: cuando se pulsa el botón SET para configurar los distintos parámetros del micrófono, aparece en la
pantalla un indicador de MUTE y el micrófono no transmite audio cuando se están configurando los
parámetros.
MSH-883-887-892-895-898_MANUAL_(EN_ES_FR_PT)_20201211-2020.qxp_MSH-883, 887, 892, 895, 898 11/12/20 10:28 Página 15

MICRÓFONO DE PETACA (mod. MSHT-45P)
1.- Pantalla: muestra información sobre la frecuencia sintonizada, número de canal, nivel de las baterías,
nivel de señal de RF y nivel de señal de audio. Si el nivel de las baterías es bajo, la pantalla se ilumina
en color rojo.
2.- w/s: permiten seleccionar las opciones deseadas para configurar el micrófono inalámbrico de petaca.
3.- SET: permite seleccionar entre las siguientes opciones de configuración: número de canal y frecuencia,
nivel de emisión de RF (alto/bajo), selección de alimentación de las baterías (1’2 V/1’5 V) para mostrar
el nivel de batería correctamente y bloqueo del micrófono transmisor. Para ello, pulse sucesivamente
el botón SET y utilice los botones w/spara seleccionar las opciones.
4.- IR: receptor infrarrojos del micrófono inalámbrico de petaca. Para sincronizar el receptor y el micrófono
inalámbrico de petaca, pulse el botón IR-SW del receptor y a continuación enfrente este receptor IR con
el del receptor.
5.- Portapilas: utilice dos pilas de 1’5 V tipo LR6-AA, alcalinas o recargables. Cuando coloque las pilas,
asegúrese la polaridad es la correcta.
6.- Antena.
7.- VOL: control de volumen del transmisor inalámbrico de petaca.
8.- Conector jack 3’5 mm mono para conexión del micrófono o de la fuente de audio deseada.
9.- POWER: interruptor de encendido/apagado del transmisor.
10.- LINE/MIC: selector de sensibilidad de entrada.
11.- Contactos para recargar las pilas recargables del micrófono inalámbrico en las estaciones de recarga
mods. MSC-2, MSC-12 o MSC-24.
Nota: cuando se pulsa el botón SET para configurar los distintos parámetros del micrófono, aparece en la
pantalla un indicador de MUTE y el micrófono no transmite audio cuando se están configurando los
parámetros.
- 16 -
ES
MSH-883-887-892-895-898_MANUAL_(EN_ES_FR_PT)_20201211-2020.qxp_MSH-883, 887, 892, 895, 898 11/12/20 10:28 Página 16

CONEXIÓN
UBICACIÓN
Coloque el receptor en una superficie horizontal a una distancia mínima de 1 m del suelo, paredes o
superficies metálicas.
Mantenga el equipo alejado de fuentes de ruido eléctrico como luminarias, motores, equipos digitales, etc.
CONEXIÓN
Conecte la salida de audio a la entrada de un mezclador o amplificador con la conexión que mejor se adapte
a sus necesidades: mediante el conector XLR balanceado o mediante el conector jack 6’3 mm mono
desbalanceado. Puede utilizar también la señal mezclada de línea jack 6’3 mm mono desbalanceada.
No utilice las 3 salidas al mismo tiempo, puede causar pérdida de señal y ruido.
Conecte las antenas y colóquelas en forma de V.
Antenas desmontables: en algunas ocasiones es preciso instalar las antenas separadas del receptor, para
salvar un obstáculo o utilizar el micrófono lejos del receptor (auditorio, estadios, etc.). En este caso se
recomienda utilizar 1 cable de antena (por ejemplo, mod. CAB-1M) y 1 amplificador y distribuidor de señal
(mods. AMP-800S y DA-868).
- 17 -
ES
MSH-883-887-892-895-898_MANUAL_(EN_ES_FR_PT)_20201211-2020.qxp_MSH-883, 887, 892, 895, 898 11/12/20 10:29 Página 17

INSTALACIÓN EN RACK 19”
Los receptores individuales (mods. MSH-883 y MSH-887) se suministran con un soporte corto para montaje
en rack 19” y una placa de conexión para unir 2 receptores individuales, de manera que puede combinar 2
receptores para instalarlos en 1 U de mueble rack de 19”.
Nota: deseche la placa de conexión sobrante ya que no es necesaria para el montaje.
Si quiere instalar 1 solo receptor individual en 1 U de mueble rack 19” necesitará un soporte largo
(mod. ANG-5L).
Los receptores dobles (mods. MSH-892, MSH-895 y MSH-898) se suministran con unos soportes cortos
frontales que permiten su montaje en muebles rack de 19”.
- 18 -
ES
ANG-5L
MSH-883-887-892-895-898_MANUAL_(EN_ES_FR_PT)_20201211-2020.qxp_MSH-883, 887, 892, 895, 898 11/12/20 10:29 Página 18

INSTRUCCIONES DE USO
1.- Instale y realice las conexiones del receptor según el apartado de CONEXIÓN.
2.- Encienda el receptor de micrófono inalámbrico, tras realizar las conexiones.
3.- Seleccione el volumen de salida del receptor.
No utilice las salidas balanceada y desbalanceada al mismo tiempo, puede causar pérdida de
señal y ruido.
4.- Coloque las baterías en el micrófono inalámbrico (de mano o petaca): abra la cubierta del portapilas y
coloque las baterías respetando la polaridad.
Encienda el micrófono inalámbrico y observe el nivel de las baterías en pantalla. Si el nivel de las baterías
no es suficiente, el indicador de carga estará al mínimo y la pantalla se iluminará en color rojo. En este
caso, cambie las baterías o utilice una de las estaciones de recarga de micrófonos inalámbricos mods.
MSC-2, MSC-12 o MSC-24 para cargar las mismas si estas son recargables.
5.- Selección del canal de transmisión (frecuencia):
El transmisor (micrófono inalámbrico) y el receptor deben estar sintonizados en el mismo canal.
Seleccione un canal libre de interferencias en el receptor y seleccione el mismo canal en el transmisor
(micrófono inalámbrico). Para más información sobre las distintas maneras de seleccionar un canal
consulte el apartado MODOS DE SELECCIÓN DE CANALES EN EL RECEPTOR.
No se pueden utilizar 2 transmisores (micrófonos inalámbricos) en el mismo canal (frecuencia).
Si está utilizando 2 o más transmisores (micrófonos inalámbricos) simultáneamente, deje por lo menos
4 canales entre el canal usado por un transmisor y otro para evitar interferencias. Es recomendable
utilizar un máximo de 8 transmisores simultáneamente.
6.- Ajustes del micrófono de mano:
- Encienda el receptor y compruebe el canal (frecuencia).
- Ajuste el volumen del receptor a una posición intermedia.
- Encienda el micrófono y el amplificador (o el mezclador y la etapa de potencia).
- Pruebe el micrófono y ajuste los niveles en el amplificador (o en el mezclador).
7.- Ajustes del transmisor de petaca:
- Encienda el receptor y compruebe el canal (frecuencia).
- Ajuste el volumen del receptor a una posición intermedia.
- Conecte el micrófono al conector de entrada de audio.
- Encienda el micrófono y el amplificador (o el mezclador y la etapa de potencia).
- Pruebe el micrófono y ajuste los niveles en el amplificador (o en el mezclador) o en el propio micrófono.
- 19 -
ES
MSH-883-887-892-895-898_MANUAL_(EN_ES_FR_PT)_20201211-2020.qxp_MSH-883, 887, 892, 895, 898 11/12/20 10:29 Página 19

MODOS DE SELECCIÓN DE CANALES EN EL RECEPTOR
MODO MANUAL
Permite seleccionar un canal libre de interferencias de modo manual. Siga los siguientes pasos:
Pulse el botón de encendido/apagado para encender el receptor.
Pulse el botón SET del receptor.
Utilice los botones w/spara seleccionar un canal y una frecuencia
determinada.
MODO AUTO-SCAN
Permite seleccionar un canal libre de interferencias de modo automático. Siga los siguientes pasos:
Pulse el botón de encendido/apagado para encender el receptor.
Pulse el botón SCAN del receptor y el receptor buscará y
seleccionará automáticamente un canal libre de interferencias.
Presione el botón IR-SW del receptor y enfrente los receptores
infrarrojos del receptor y del transmisor para sincronizar la
frecuencia de ambos.
- 20 -
ES
MSH-883-887-892-895-898_MANUAL_(EN_ES_FR_PT)_20201211-2020.qxp_MSH-883, 887, 892, 895, 898 11/12/20 10:29 Página 20
Other manuals for MSH-883
1
This manual suits for next models
8
Table of contents
Languages:
Other FONESTAR Microphone System manuals