ForPro 391443 User manual

Premium See-Through Door Hot Towel Warmer
Item #391443 • New Hudson, MI 48165
www.tngworldwide.com • 800.520.6000
Made in China • ©2018 TNG
Troubleshooting
1. There is excessive moisture when the towel warmer is ON or the towels are heating up very
slowly.
• Check to see that the towels are only slightly damp. Excess moisture and/or slow heating
time may be a result of soaked towels.
2. The door is not closing properly and/or steam is escaping
• Check that the silicone door seal is in place. Push into door groove to assure proper fit.
Safety Precautions
Caution and proper procedures must be practiced at all times when using electrical appliances.
Basic safety precautions should always be followed, including the following:
• Do not use appliance for other than intended use.
• Do not place poisonous, flammable, explosive and evaporative chemicals into the towel
warmer.
• Do not touch hot surfaces. Use handle or knobs.
• To protect against electrical shock, do not immerse cord, plugs or appliance in water or
other liquid.
• Unplug from outlet when not in use and before cleaning. Cool the machine before
maintenance.
• Do not operate any appliance with a damaged cord or plug or after the appliance
malfunctions or has been damaged in any manner. If the product is defective, stop using it at
once and contact supplier for service.
• Do not use outdoors. This appliance is intended for indoor use only.
• Do not let cord hang over edge of table or counter, or touch hot surfaces.
• Close supervision is necessary when any appliance is used by or near children.
• Do not leave the appliance unattended when switched on.
• Extreme caution must be used when moving an appliance containing hot liquids.
• The temperature of accessible surfaces may be high when the appliance is operating.
• If using an extension cord, the marked electrical rating of the extension cord should be at
least as great as the electrical rating of the appliance.
Internal surfaces, wire baskets, towels and steam may be hot. Use with extreme caution
when removing hot towels or baskets. Always use protective heat-resistant gloves or
mitts to avoid steam or other burns. Ignoring the warnings may result in harm or serious
injury.
Premium
See-Through Door
Hot Towel Warmer
Premium See-Through Door Hot Towel Warmer Operation Manual
Congratulations on your purchase of the ForPro Premium See-Through Door Hot Towel
Warmer. Please read the instructions and safety tips before use. Your Hot Towel Warmer
comes with a two-year limited warranty. If for any reason you need service, please call
800-520-6000.
Product Specification
Rated Volume: 23L
Rated Power: 200W
Rated Voltage: 110V
Rated Frequency: 60Hz
Set Temperature: 180°F
Towel Load: 24 Facial-Sized Towels
External Dimensions: 17.75”W x 11”D x 14”H
Inside Dimensions: 14.5”W x 7.5”D x 9.75”H
Components
Before Operation
• Be sure to remove all packing material before use.
• Place the unit on a well ventilated, flat, sturdy surface away from heat sources. The unit should
not be used in the immediate vicinity of water (such as bathtub, washbowls, etc.) where the
likelihood of immersion may occur. Keep at least 30mm away from walls and other objects.
• Plug cord into a 110V power outlet.
• Remove the wire basket and set aside.
Operation
1. Run towels briefly under water.
2. Wring out excess water from the towels. Towels should be damp, not soaked. You may
need to wring out several times.
3. Fold or roll towel and place towels into the wire basket. Do not overload the wire basket or
directly place towels into the towel warmer.
4. Insert the basket with towels into towel warmer.
5. Close the door firmly.
6. Press the power switch to the lock position. The indicator near the switch will be on to
show that the towel cabinet has started heating with the UV light on. In about 30 minutes,
the temperature inside the cabinet will heat up to approximately 180°F and will be kept
automatically. (When the temperature reaches 167°F the UV light will turn off automatically
and if the temperature drops to 140°F it will automatically turn back on. It is normal for UV
light to alternate on and off.) Avoid opening cabinet before towels are heated.
7. lf a towel is needed for use, press the power switch and wait for the indicator to turn off
to open the cabinet door. Stay a safe distance from cabinet door opening to avoid being
burned by high temperature steam from the cabinet. Remove towels with tongs or heat-
resistant gloves.
8. Towels may be too hot to apply immediately, and caution should be used before applying
to the face or body.
Maintenance
1. Turn OFF the unit.
2. Unplug the cord from the outlet.
3. Wait for contents to cool before handling. Contents may be hot. Remove the wire basket
and towels. Set the wire basket aside to dry.
4. With a soft cloth, wipe down the internal surfaces. Do not use harsh chemicals or abrasives.
To clean exterior, use a soft cloth and mild soap.
5. Pull the drip tray forward and empty contents. Set the drip tray aside to dry.
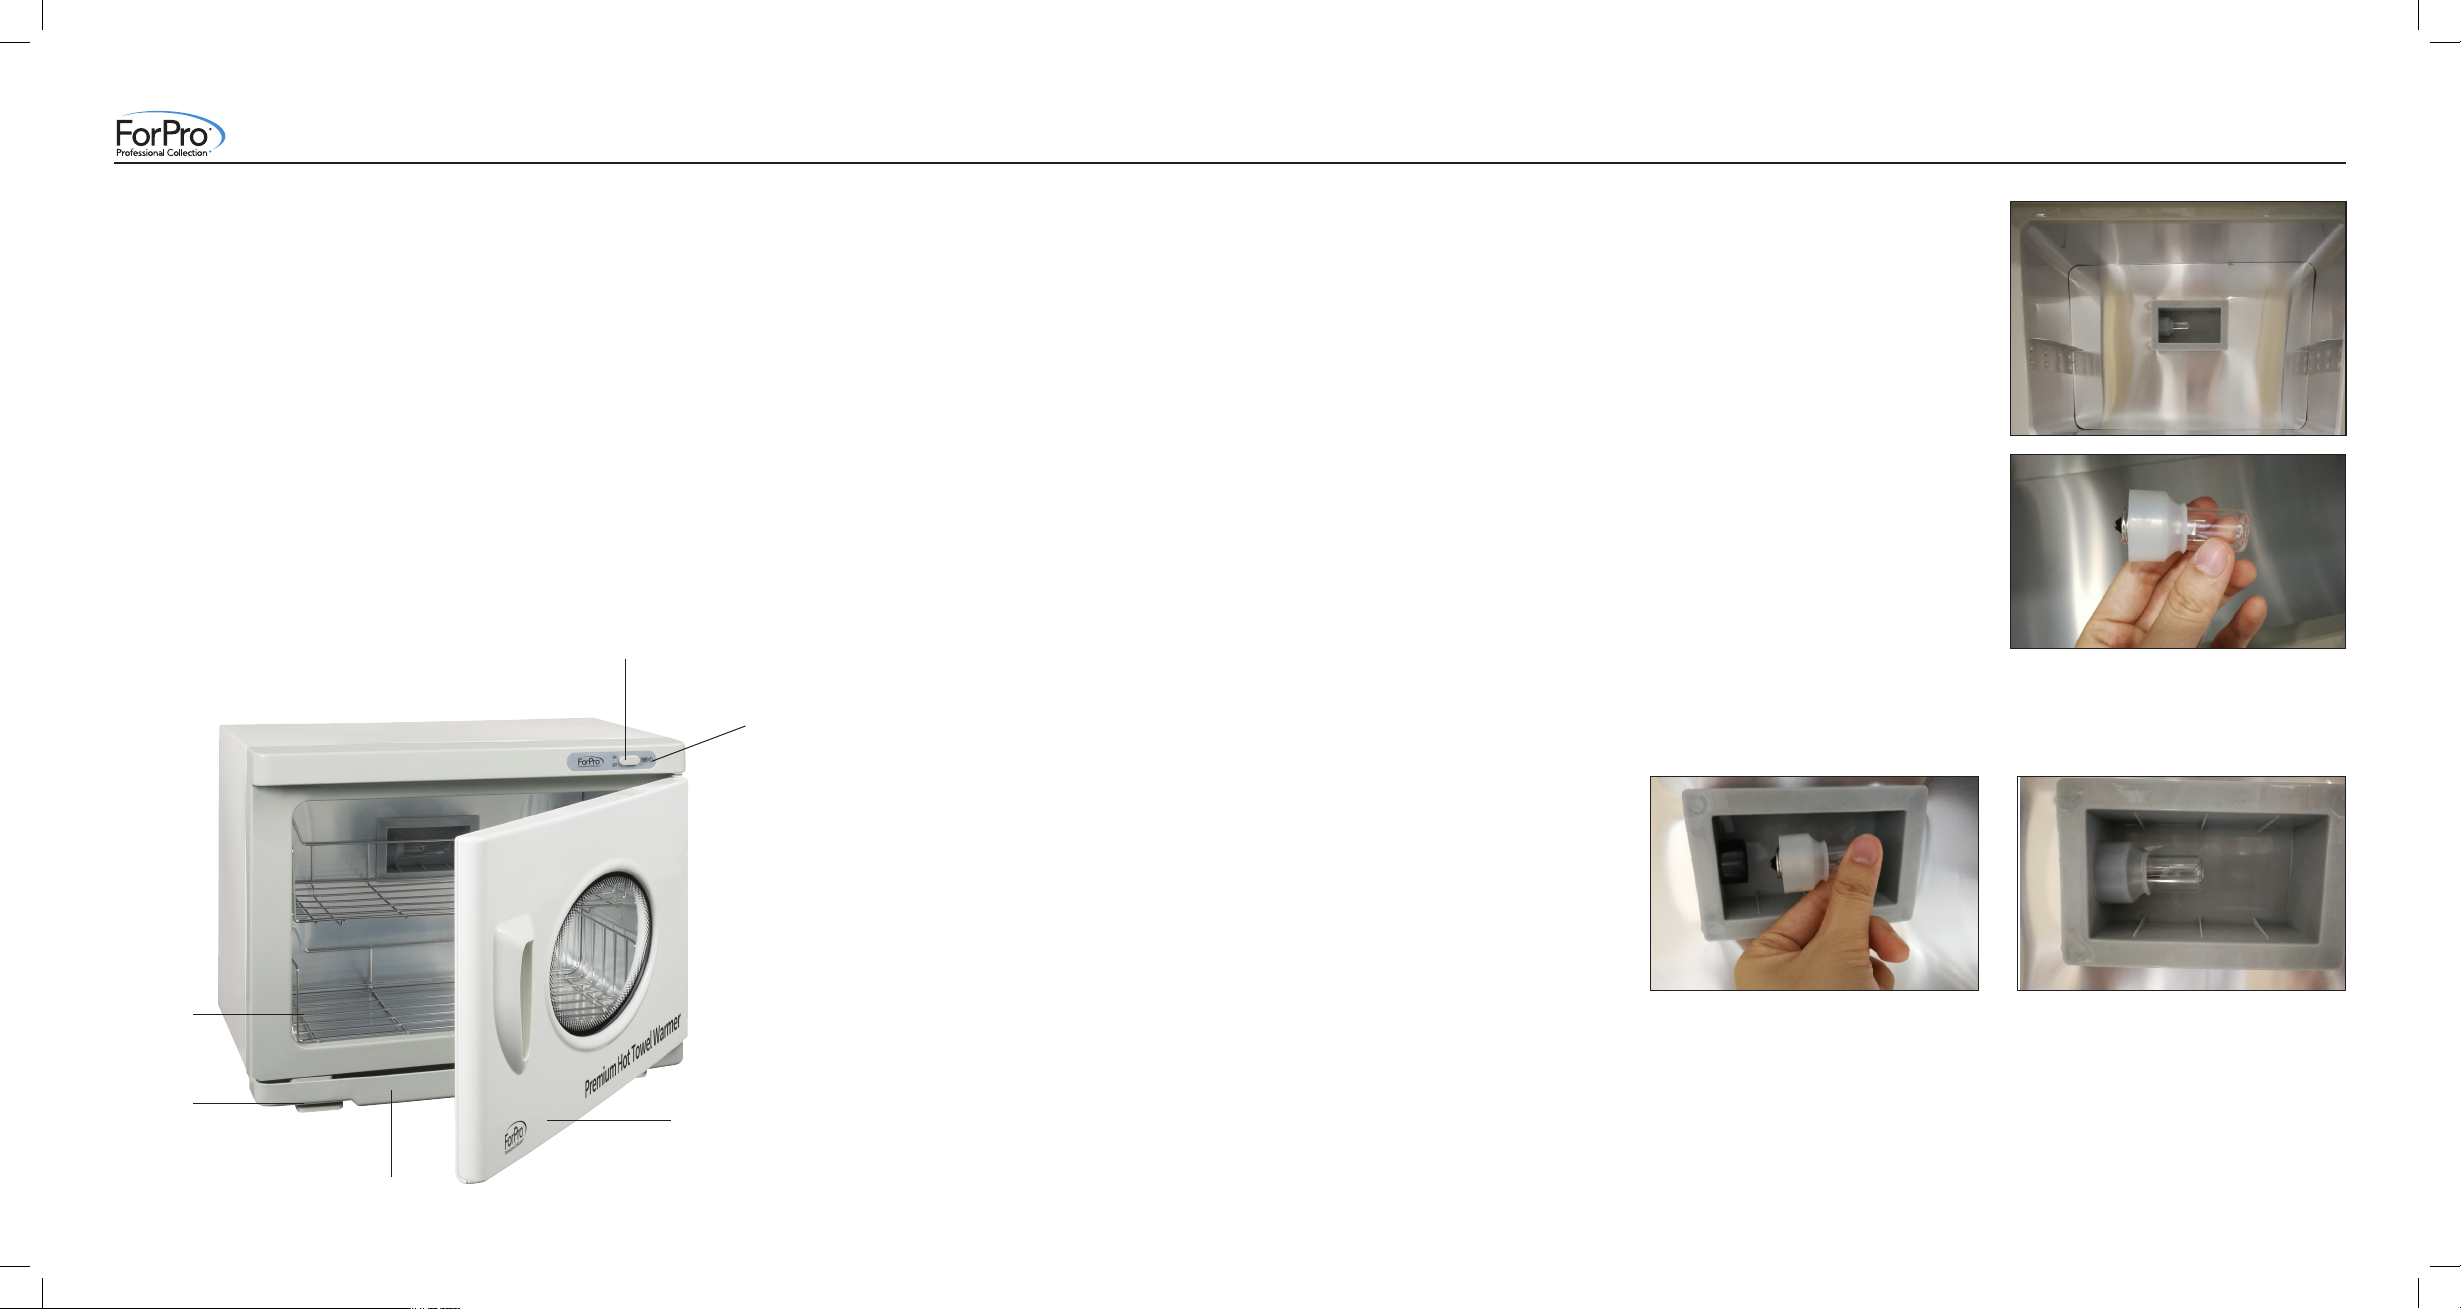
Replacing the UV Bulb
1. Turn OFF the unit.
2. Unplug the cord from the outlet.
3. Open the door and remove the shelf
to see the light bulb. See Fig. 1.
4. Screw out the bulb, and a white jacket
will be placed on the bulb. See Fig. 2.
5. Remove the white sheath and place it
over the new UV bulb (Replacement bulb
Item #391447).
6. Screw the new bulb back into the lamp holder. The white jacket should be placed over the
black lamp holder. See Fig. 3a & 3b.
Power Switch
Power
Indicator Light
Wire basket
Water Drip Tray
Cabinet Leg
Cabinet Door
26A 毛巾柜更换灯泡步骤如下:
The steps for replacing the bulb in the 26A towel cabinet are as follows:
1. Open the door and remove the shelf to see the light bulb:
2. Screw out the bulb directly, and a white jacket will be placed on the bulb, as shown
below:
3. Remove the white sheath and place it over the new bulb
Fig. 1
26A 毛巾柜更换灯泡步骤如下:
The steps for replacing the bulb in the 26A towel cabinet are as follows:
1. Open the door and remove the shelf to see the light bulb:
2. Screw out the bulb directly, and a white jacket will be placed on the bulb, as shown
below:
3. Remove the white sheath and place it over the new bulb
Fig. 2
4. Screw the new bulb back into the lamp holder. The white jacket should be placed over
the black lamp holder as shown below:
4. Screw the new bulb back into the lamp holder. The white jacket should be placed over
the black lamp holder as shown below:
Fig. 3a Fig. 3b
Other ForPro Food Warmer manuals


