Fostex CR300 User manual

Service Manual
Model
COMPACT DISC RECORDER
FOR U.S. MODELS
NECESSARY INFORMATION FOR DHHS
RULES MARKEDONTHEREARBASEAND ON
THE TOP OF CD MECHANISM AS BELOW.
DANGER - LASER RADIATION WHEN OPEN.
AVOID DIRECT EXPOSURETO BEAM.

SAFETY INSTRUCTIONS
Read instructions - All the safety and operating instruc-
tions should be read before the appliance is operated.
Retain instructions - The safety and operating instructions
should be retained for future reference.
Heed warnings - All warnings on the appliance and in the
operating instructions should be adhered to.
Follow instructions - All operating and use instructions
should be followed.
Water and Moisture - The appliance should not be used
near water - for example, near a bathtub, washbowl,
kitchen sink, laundry tub, in a wet basement, or near a
swimming pool, and the like.
Carts and Stands - The appliance should be used only
with a cart or stand that is recommended by the manufac-
turer.
An appliance and cart combination should be moved with
care. Quick stops, excessive force, and uneven surfaces
may cause the appliance and cart combination to over-
turn.
Wall or Ceiling Mounting - The appliance should be
mounted to a wall or ceiling only as recommended by the
manufacturer.
Ventilation - The appliance should be situated so that its
location or position does not interfere with its proper ven-
tilation. For example, the appliance should not be situ-
ated on a bed, sofa, rug, or similar surface that may block
the ventilation openings; or, placed in a built-in installa-
tion, such as a bookcase or cabinet that may impede the
flow of air through the ventilation openings.
Heat - The appliance should be situated away from heat
sources such as radiators, heat registers, stoves, or other
appliances (including amplifiers) that produce heat.
Power Sources - The appliance should be connected to a
power supply only of the type described in the operating
instructions or as marked on the appliance.
Grounding or Polarization - The precautions that should
be taken so that the grounding or polarization means of
an appliance is not defeated.
Power Cord Protection - Power supply cords should be
routed so that they are not likely to be walked on or
pinched by items placed upon or against them, paying
particular attention to cords at plugs, convenience recep-
tacles, and the point where they exit from the appliance.
Cleaning - The appliance should be cleaned only as rec-
ommended by the manufacturer.
Nonuse Periods - The power cord of the appliance should
be unplugged from the outlet when left unused for a long
period of time.
Object and Liquid Entry - Care should be taken so that
objects do not fall and liquids are not spilled into the en-
closure through openings.
Damage requiring Service - The appliance should be ser-
viced by qualified service personnel when:
A.
B.
C.
D.
E.
Servicing - The user should not attempt to service the ap-
pliance beyond that described in the operating instruc-
tions. All other servicing should be referred to qualified
service personnel.
REFER SERVICING TO QUALIFIED SERVICE PERSONNEL.
CAUTION
RISK OF ELECTRIC SHOCK
DO NOT OPEN
CAUTION: TO REDUCE THE RISK OF ELECTRIC SHOCK,
DO NOT REMOVE COVER (OR BACK).
NO USER-SERVICEABLE PARTS INSIDE.
TO PREVENT ELECTRIC SHOCK, MATCH
WIDE BLADE OF PLUG TO WIDE SLOT,
FULLY INSERT.
POUR ÉVITER LES CHOCS ÉLECTRIQUES,
INTRODUIRE LA LAME LA PLUS LARGE DE
LA FICHE DANS LA BORNE CORRE-
SPONDANTE DE LA PRISE ET POUSSER
JUSQU' AU FOND.
CAUTION:
ATTENTION:
The exclamation point within an equilateral
triangle is intended to alert the user to the
presence of important operating and mainte-
nance (servicing) instructions in the literature
accompanying the appliance.
The lightening flash with arrowhead symbol,
within an equilateral triangle, is intended to
alert the user to the presence of uninsulated
“dangerous voltage” within the product's en-
closure that may be of sufficient magnitude to
constitute a risk of electric shock to persons.
“WARNING”
“TO REDUCE THE RISK OF FIRE OR ELECTRIC SHOCK,
DO NOT EXPOSE THIS APPLIANCE TO RAIN OR MOIS-
TURE.”
1.
2.
3.
4.
5.
6.
7.
8.
The power supply cord or the plug has been damaged;
or
Objects have fallen, or liquid has been spilled into the
appliance; or
The appliance has been exposed to rain; or
The appliance does not appear to operate normally or
exhibits a marked changed in performance; or
The appliance has been dropped, or the enclosure
damaged.
9.
10.
11.
12.
13.
14.
15.
16.
17.

CR300
3
The following check should be performed for the continued
protection of the customer and service technician.
LEAKAGE CURRENT CHECK
Measure leakage current to a known earth ground (water
pipe, conduit, etc.) by connecting a leakage current tester
such as Simpson Model 229-2 or equivalent between the
earth ground and all exposed metal parts of the appliance
(input/output terminals, screw heads, metal overlays,
control shaft, etc.). Plug the AC line cord of the appliance
directly into a 120V AC 60Hz outlet and turn the AC power
switch on. Any current measured must not exceed 0.5mA.
SAFETY PRECAUTIONS
Leakage
current
tester
Reading should
not be above
0.5mA
Device
under
test
Test all
exposed metal
surfaces
Also test with
plug reversed
(Using AC adapter
plug as required)
Earth
ground
AC Leakage Test
ANY MEASUREMENTS NOT WITHIN THE LIMITS
OUTLINED ABOVE ARE INDICATIVE OF A POTENTIAL
SHOCK HAZARD AND MUST BE CORRECTED BEFORE
RETURNING THE APPLIANCE TO THE CUSTOMER.
Many electrical and mechanical parts in the appliance have
special safety related characteristics. These are often not
evident from visual inspection nor the protection afforded
by them necessarily can be obtained by using replacement
components rated for voltage, wattage, etc. Replacement
parts which have these special safety characteristics are
identified in this Service Manual.
Electrical components having such features are identified
by marking with a on the schematics and on the parts list
in this Service Manual.
The use of a substitute replacement component which does
not have the same safety characteristics as the PIONEER
recommended replacement one, shown in the parts list in
this Service Manual, may create shock, fire, or other
hazards.
Product Safety is continuously under review and new
instructions are issued from time to time. For the latest
information, always consult the current PIONEER Service
Manual. A subscription to, or additional copies of, PIONEER
Service Manual may be obtained at a nominal charge from
PIONEER.
2. PRODUCT SAFETY NOTICE
(FOR USA MODEL ONLY)
NOTICE
(FOR CANADIAN MODEL ONLY)
Fuse symbols (fast operating fuse) and/or (slow operating fuse) on PCB indicate that replacement parts must
be of identical designation.
REMARQUE
(POUR MODÉLE CANADIEN SEULEMENT)
Les symboles de fusible (fusible de type rapide) et/ou (fusible de type lent) sur CCI indiquent que les pièces
de remplacement doivent avoir la même désignation.
This service manual is intended for qualified service technicians ; it is not meant for the casual do-
it-yourselfer. Qualified technicians have the necessary test equipment and tools, and have been
trained to properly and safely repair complex products such as those covered by this manual.
Improperly performed repairs can adversely affect the safety and reliability of the product and may
void the warranty. If you are not qualified to perform the repair of this product properly and safely,
you should not risk trying to do so and refer the repair to a qualified service technician.
WARNING
This product contains lead in solder and certain electrical parts contain chemicals which are known to the state of California to
cause cancer, birth defects or other reproductive harm. Health & Safety Code Section 25249.6 Ð Proposition 65

CR300
4
1. Laser Interlock Mechanism
The position of the switch (S601) for detecting loading
state is detected by the system microprocessor, and the
design prevents laser diode oscillation when the switch
(S601) is not on CLMP terminal side (CLMP signal is OFF
or high level.). Thus, the interlock will no longer function if
the switch (S601) is deliberately set to CLMP terminal side
(low level).
The interlock also does not function in the test mode
*
.
Laser diode oscillation will continue, if pin 1 of M51593FP
(IC101) on the PRE-AMP BOARD ASSY mounted on the
pickup assembly is connected to GND, or pin 19 is
connected to low level (ON), or else the terminals of Q101
are shorted to each other (fault condition).
2. When the cover is opened with the servo mechanism block
removed and turned over, close viewing of the objective
lens with the naked eye will cause exposure to a Class 1
laser beam.
Additional Laser Caution
*Refer to page 13.
IMPORTANT
THIS PIONEER APPARATUS CONTAINS
LASER OF CLASS ΙΙΙ b.
SERVICING OPERATION OF THE APPARATUS
SHOULD BE DONE BY A SPECIALLY
INSTRUCTED PERSON.
LASER DIODE CHARACTERISTICS
MAXIMUM OUTPUT POWER: 23 mW
WAVELENGTH: 778 - 787 nm
LABEL CHECK
CR300 USA
Printed on Rear Panel
Printed on Rear Panel
CR300 EUR
CR300 EUR
CR300 EUR

CR300
5
Parts marked with this sign are safety critical components. They must always be replaced with identical
components. Refer to the Fostex Parts List and ensure exact replacement.
CAUTION
TABLE OF CONTENTS
1. SPECIFICATIONS . . . . . . . . . . . . . . . . . . . . . . . . . . . . . . . . . .
2. CONTROLS, INDICATORS & CONNECTORS . . . . . . . . . . .
3. ADJUSTMENT PROCEDURES . . . . . . . . . . . . . . . . . . . . . . . . .
4. ASSEMBLING & DISASSEMBLING . . . . . . . . . . . . . . . . . .
5. EXPLODED VIEW, PCB ASSEMBLY & PARTS LIST . . . . .
6. CIRCUIT DIAGRAMS . . . . . . . . . . . . . . . . . . . . . . . . . . . . .
7. GENERAL INFORMATION . . . . . . . . . . . . . . . . . . . . . . . .
Adjusting procedures, assembling & disassembling, exploded view, PCB assembly, parts list, circuit diagrams
and general information are given in this manual to assist the service technician in maintaining the Model
CR300.
NOTES
*
6
9
13
19
25
37
50

CR300
6
1. SPECIFICATIONS
FUNCTION LIST
Automatic Disk Recognition
Sampling Rate Converter Automatic conversion (48 kHz, 32 kHz →44.1 kHz)
ON/OFF switchable (44.1 kHz)
Synchronous Recording Synchronous to one song / all songs / DAT ID
Auto Stop Delay in Digital Synchro 0 sec, 10 sec, off
Copy Bit Setting No restriction / one time only / prohibited
Auto Track Increment 6 levels
Manual Track Increment
REC MUTE
Fade In / Fade Out Fade time: 6 sec, 9 sec, 12 sec, 18 sec
PREVIOUS End section of previous track can be played back while in
REC PAUSE mode
Erase Mode (CD-RW) Last Track, All Track, Disc, TOC
Direct Search Operational through remote controller only
Track Search
Manual Search
One Song / All Song / Program Repeat Operational through remote controller only
Program Playback
Skip Playback
Sampling Monitor
Displayed Time Elapsed playback time, Remaining playback time,
Total remaining playback time, Total playback time,
Elapsed recording time, Remaining recording time,
Total recording time
Laser Hour Meter
Margin Display
Auto Pause
Auto Power Calibration
Remote Controller On / Off
Digital Out On / Off
Balanced Input Sensitivity Switching + 4 dBu / -10 dBV
DISPLAY
FL Display Play, Pause, REC (Rec), RPT-1 (Repeat, 1-Repeat),
AUTO TRACK (Auto Track No.), PGM (Program),
FADER (Fader), SKIP ON (Skip ON/OFF),
32/44/48 (Input sampling frequency),
SYNC (Digital Synchronous Recording),
CD-RW/FINALIZE (Disc Type)
LED Display Track number, Level meter, Elapsed playback time,
Remaining playback time, Total remaining playback time,
Total playback time, Elapsed recording time,
Remaining recording time, Total recording time
INPUT/OUTPUT TERMINAL
Audio Input (Input Impedance) RCA pin (27 kΩor more)
Balanced XLR-3 (10 kΩ)
Audio Output (Output Impedance) RCA pin (1 kΩ)
Balanced XLR-3 (1 kΩor less)

CR300
7
DIMENSIONS & WEIGHT
Maximum Dimensions 482 (W) x 105 (H) x 393 (D) mm
19 (W) x 4 - 1/8 (H) x 15 - 1/2 (D) inch
Weight (w/o package) 7.0 kg (15.4 lb)
POWER REQUIREMENT
Power Supply AC120 V, 60 Hz
AC220 ~ 230 V, 50/60 Hz
Power Consumption 24 W
AUDIO UNIT CHARACTERISTICS
CD Playback (Analog RCA Output)
Frequency Response 4 Hz ~ 20 kHz ± 1.0 dB (EIAJ)
S/N 100 dB or more (EIAJ)
Dynamic Range 90 dB or more (EIAJ)
Total Harmonic Distortion 0.01 % or less (EIAJ)
Channel Separation 90 dB or more (EIAJ)
De-emphasis Deviation 0 ± 1.5 dB or less (EIAJ)
Level Difference between Channels 1 dB or less (EIAJ)
Output Voltage 2.0 ± 0.3 Vrms (Load impedance: 10 kΩ, EIAJ)
Monitor (Analog RCA Input →→
→→
→Analog RCA Output)
Frequency Response 4 Hz ~ 20 kHz ± 1.0 dB (EIAJ)
S/N 83 dB or more (EIAJ)
Dynamic Range 83 dB or more (EIAJ)
Total Harmonic Distortion 0.01 % or less (EIAJ)
Maximum Input Level 3.2 Vrms or more (EIAJ)
Minimum Input Level 0.4 Vrms or less (EIAJ)
5
6
781
2
3
4
PLAY
GND
PAUSE
MANUAL TRACK
No.WRITE
STOP
REC
PARALLEL REMOTE TERMINAL
INPUT/OUTPUT TERMINAL (continued)
Digital Input (Input Impedance) Optical EIAJ CP-1201 TYPE2
Coaxial RCA IEC958 (75 Ω)
AES/EBU XLR-3 (110 Ω)
Digital Output (Output Impedance) Optical EIAJ CP-1201 TYPE2
Coaxial RCA IEC958 (75 Ω)
Headphone Output ∅6 (1/4 inch) standard stereo phone jack
Paralell Remote Control DIN 8-pin

CR300
8
AUDIO UNIT CHARACTERISTICS (continued)
Record & Playback (Analog RCA Input →→
→→
→Analog RCA Output)
Frequency Response 4 Hz ~ 20 kHz ± 1.0 dB (EIAJ)
S/N 83 dB or more
Dynamic Range 83 dB or more
Total Harmonic Distortion 0.01 % or less
Monitor (Digital Coaxial Input →→
→→
→Analog RCA Output)
Frequency Response 4 Hz ~ 20 kHz ± 1.0 dB (EIAJ)
S/N 95 dB or more (EIAJ)
Dynamic Range 90 dB or more (EIAJ)
Total Harmonic Distortion 0.01 % or less (EIAJ)
Maximum Input Level 0.6 Vp-p or more (EIAJ)
Minimum Input Level 0.2 Vp-p or less (EIAJ)
Record & Playback (Digital Coaxial Input →→
→→
→Analog RCA Output)
Frequency Response 4 Hz ~ 20 kHz ± 1.0 dB (EIAJ)
S/N 95 dB or more
Dynamic Range 90 dB or more
Total Harmonic Distortion 0.01 % or less
CD Playback (Analog XLR-3 +4 dBu Output)
Frequency Response 4 Hz ~ 20 kHz + 1.0, -1.5 dB (EIAJ)
S/N 100 dB or more (EIAJ)
Dynamic Range 90 dB or more (EIAJ)
Total Harmonic Distortion 0.01 % or less (EIAJ)
Channel Separation 90 dB or more (EIAJ)
De-emphasis Deviation 0 ± 1.5 dB or less (EIAJ)
Level Difference between Channels 1 dB or less (EIAJ)
Output Voltage 20 ± 1.5 dBm (Load impedance: 100 kΩ, EIAJ)
Output Voltage (-10 dBV) 8 ± 1.0 dBm (Load impedance: 100 kΩ, EIAJ)
Monitor (Analog XLR-3 +4 dBu Input →→
→→
→Analog XLR-3 +4 dBu Output)
Frequency Response 4 Hz ~ 20 kHz + 1.0, -1.5 dB (EIAJ)
S/N 83 dB or more (EIAJ)
Dynamic Range 83 dB or more (EIAJ)
Total Harmonic Distortion 0.01 % or less (EIAJ)
Maximum Input Level 13 Vrms or more (EIAJ)
Minimum Input Level (-10 dBV) 0.4 Vrms or less (EIAJ)
Record & Playback (Analog XLR-3 +4 dBu Input →→
→→
→Analog XLR-3 +4 dBu Output)
Frequency Response 4 Hz ~ 20 kHz + 1.0, -1.5 dB (EIAJ)
S/N 83 dB or more
Dynamic Range 83 dB or more
Total Harmonic Distortion 0.01 % or less
Specifications and appearance are subject to change without notice for product improvement.

CR300
9
2. CONTROLS, INDICATORS & CONNECTORS
TIME
/MARGIN DIGITAL
SYCHRO
1 2 3 4 5 6 8 10 11 1213 1614 159
17 18 20 21 22 23 25 26 27 2924 28
19
7
ANALOG
0
8
6
7
9
5
10
4
1
2
3
DIGITAL
REC
MUTE
OPEN/
CLOSE RECORD
INPUT SELECTOR REC LEVELREC LEVEL
OPT
AES /
EBU
LINE
LR
COAX XLR/-10
XLR/+4
•
•
•
•
••••
•
•
•
•
•
•
•
•
PHONES LEVEL
MAXMIN
MENUSET
POWER
OFF ON
COMPACT DISC RECORDER
CLEAR SKIPPLAY
FINALIZE ERASE
AUTO /
MANUAL WRITE
(MANUAL)
SKIPID
TRACKNO.
< FRONT PANEL >
1. Rack mount angle
2. Power switch [POWER]
3. SKIP ID set button [SKIP ID SET]
4. SKIP ID clear button [SKIP ID CLEAR]
5. SKIP PLAY button [SKIP PLAY]
6. Menu button [MENU]
7. Copy bit indicator
8. Function indicator
Recording : Light in read
Recording mute : Blinks in red
Playback : Lights in green
Erasing : Lights in orange
9. Disc tray
10. Open / close button [OPEN/CLOSE ]
11. Record button [RECORD ]
12. Time / margin button [TIME/MARGIN]
13. Record mute button [REC MUTE ]
14. Digital synchro button [DIGITAL SYNCHRO]
15. Input selector
[INPUT SELECTOR - DIGITAL (AES/EBU, OPT, COAX)
ANALOG (XLR/+4, XLR/-10, LINE)]
16. Record level knobs (outer: L ch, inner: R ch) [REC LEVEL]
17. Track number auto / manual button [TRACK NO. AUTO/MANUAL]
18. Track number write (manual) button [TRACK NO. WRITE (MANUAL)]
19. Track number write (manual) indicator
20. Finalize button [FINALIZE]
21. Erase button [ERASE]
22. Remote control sensor
23. Display panel
24. Track / manual search buttons [ ]
25. Play button [ ]
26. Pause button [ ]
27. Stop button [ ]
28. Headphones jacks [PHONES]
29. Headphones level control [LEVEL MIN/MAX]

CR300
10
< DISPLAY PANEL >
Lights when automatic digital-
source synchro recording is
activated.
Lights during repeat
playback.
Lights in the program
mode.
Lights during random
playback.
Lights during
playback.
Blinks during fade-in/out.
Lights or blinks
during pause.
Displays the track No.
Displays messages.
Blinks during disc identification and
lights steadily.
CD: Lights when a disc is loaded.
CD-R: Lights if the loaded disc is a
CD-R disc before finalization.
CD-RW: Lights if the loaded disc is a
CD-RW disc
Lights if the loaded disc is a
finalized CD-RW disc.
Displays the sampling
frequency (Fs) of the
current digital input.
All indicators are off
when the input signal
is interrupted.
Lights during record mode.
Blinks in the record muting
mode.
Lights when automatic track
number write during recording
is activated.
Displays the elapsed playing time, remaining
playing time, total playing time, elapsed
recording time, remaining recording time,
total recording time and remaining time
until the end of finalization. (See below.)
Lights, goes off or blinks during skip ID setting or
clearing.
The disc contains skip ID data, the SKIP ON indicator
lights automatically.
Displays the input level during record
or the play level during playback
Switching the time display
The following operation allows you to check the recording time information during recording or playing time information
during playback. Every time the TIME button is pressed, the time information contents are switched in the order of A →B
→C →D →A • • •.
The display mode varies depending on whether the current operation is recording or playing back (in the order of A →B →
C →A → • • • during recording).
A : Elapsed recording time
(2 min. 16 sec. after the
start of track No. 2)
C : Total recording time
(3 min. 50 sec. of 2-
track recording )
B : Remaining recording
time (56 min. 10 sec.
remaining on the disc)
A : Elapsed playing time
(2 min. 16 sec. after the
start of track No. 1)
D :Total playing time
(60 min. 0 sec. for 8
tracks)
B : Remaining playing time of track
being played (3 min. 20 sec.
remaining for track No.1)
C : Remainingplayingtimeofalltrack
on disc being played (46 min. 40
sec. remaining on the disc)
During recording During playback

CR300
11
< REAR PANEL (USA version) >
< REAR PANEL (EUR version) >
1. AES/EBU digital input [AES/EBU DIGITAL IN]
2. XLR balanced input [BALANCED IN]
3. XLR balanced output [BALANCED OUT]
4. Parallel remote connector
5. Earth terminal
6. Optical digital input [S/P DIF OPTICAL DIGITAL IN]
7. Coaxial digital input [S/P DIF COAXIAL DIGITAL IN]
8. Optical digital output [S/P DIF OPTICAL DIGITAL OUT]
9. Coaxial digital output [S/P DIF COAXIAL DIGITAL IN]
10. Line input [LINE IN]
11. Line output [LINE OUT]
12. AC inlet [AC IN]
1 2 3 4 5
12
11
10
9
87
6
12
11
10
9
87
6
1 2 3 4 5

CR300
12
123
456
789
10 10
TIME
PGM CHECK CLEAR
REPEAT
FADER
TRACK NO.
WRITE
MODEL 8317
REC
CHECK button
PGM (Program) button
*Record buttons ( REC)
*Manual search buttons
( )
*Record muting button ( )
,
*Track search buttons
( )
*Play button ( )
*Pause button ( )
*TIME button
CLEAR button
FADER button
*TRACK No.WRITE
(MANUAL) button
REPEAT button
*Stop button ( )
Numeric buttons
(1 to 10, >10)
,
For recording, press the two
buttons simultaneously.
< REMOTE CONTROL UNIT MODEL 8317 >
30
30
7m(23 ft)
Remote control may be impossible if there is an obstacle between the
remote control unit and main unit or if the remote control unit is operated
at too great of an angle from the remote control sensor.
Erroneous operation may occur if strong light such as direct sunlight or
fluorescent lamp light is incident to the remote control sensor.
The main unit may operate erroneously if it is used near equipment
radiating infrared rays or if it is used near control unit of other equipment
is used near the unit. On the contrary, if this remote control unit is operated
near another piece of equipment which can be control wit infrared rays,
the equipment may operate erroneously.
Replace batteries when the remote controllable range decreases noticeably.
·
·
·
·
Remote controllable range

CR300
13
3. ADJUSTMENT PROCEDURES
3-1. TEST DISCS
When adjusting the servo system, the following CD test discs should be used.
STD-903 or equivalent
STD-914 or equivalent
3-2. TEST EQUIPMENT
Laser Power Meter
The following power meter manufactured by Advantest Corporation, LEADER Corporation or equivalent:
TQ8210 + TQ82017 (Advantest Corporation)
TQ8215 + TQ82021 (Advantest Corporation)
TQ8215 + TQ82010 + TQ82017 (Advantest Corporation)
LE8010 (LEADER Corporation)
Audio Analyzer
Oscilloscope
Distortion Factor Meter
CD Jitter Meter
Block Error Rate Counter
(1)
(2)
(3)
(4)
(5)
(6)
3-3. TEST MODE
For adjustment, set the unit to the Test Mode. Referring to the Fig.
1 on the right, turn on the unit with the Test Mode short-circuit
pattern on the FUNCTION PCB Ass’y to enter the Test Mode. In
the Test Mode, all the displays (FL, LEDs) on the unit should be
lit. If not, turn the power off and repeat the same steps again.
3-3-1. Test Mode
Short-circuit
Fig. 1 Enter the Test mode
SIDE B
FUNCTION ASSY
In the Test Mode, the following adjustment functions are assigned
to the buttons, as explained in the Fig. 2 & 3.
3-3-2. Operation in Test Mode
LED for confirmation of
LD emission LD emitting
LD not emitting
Switching CD, CD-R and CD-RW
Fig.2 During adjustment of LD power (Input selector: analog)
ERASE button
(RECORD) and
(REC MUTE)
buttons
(STOP) button
TIME
/MARGIN DIGITAL
SYCHRO
ANALOG
0
8
6
7
9
5
10
4
1
2
3
DIGITAL
REC
MUTE
OPEN/
CLOSE RECORD
INPUT SELECTOR REC LEVELREC LEVEL
OPT
AES /
EBU
LINE
LR
COAX XLR/ -10
XLR/ +4
•
•
•
•
••••
•
•
•
•
•
•
•
•
PHONES LEVEL
MAXMIN
MENUSET
POWER
OFF ON
COMPACTDISC RECORDER
CLEAR SKIPPLAY
FINALIZE ERASE
AUTO /
MANUAL WRITE
(MANUAL)
SKIPID
TRACKNO.
+ key
– key
Stop
Focus in
Fig.3 During adjustment of servo system (Input selector: optical)
FINALIZE button
Set
SET button Average
DIGITAL
SYNCHRO
button
Mode switch
AUTO/MANUAL
button
(RECORD)
button
Sled move
buttons (REC MUTE)
button
(STOP) button
Tracking close
(PAUSE) button
Spindle kick
(PLAY) button
,
TIME
/MARGIN DIGITAL
SYCHRO
ANALOG
0
8
6
7
9
5
10
4
1
2
3
DIGITAL
REC
MUTE
OPEN/
CLOSE RECORD
INPUT SELECTOR REC LEVELREC LEVEL
OPT
AES /
EBU
LINE
LR
COAX XLR/ -10
XLR/ +4
•
•
•
•
••••
•
•
•
•
•
•
•
•
PHONES LEVEL
MAXMIN
MENUSET
POWER
OFF ON
COMPACT DISC RECORDER
CLEAR SKIPPLAY
FINALIZE ERASE
AUTO /
MANUAL WRITE
(MANUAL)
SKIPID
TRACKNO.

CR300
14
In the Test Mode, since each servo circuit operates independently, playing back a disc
requires that your operate the keys in the correct order to close the servo circuits.
Here is the key operation sequence for playing back a disc in the Test Mode.
Wait at least 2 ~ 3 seconds between each of these operations.
3-3-3. How to Playback a Disc in Test Mode
FINALIZE
3-4. ADJUSTMENT 1 (LASER DIODE POWER ADJUSTMENT)
Test Point
Adjustment Point
Adjustment Value
[Procedure]
3-4-1. Playback Power Adjustment
Pickup objective lens
VR101 (PB. PW)
0.60 mW ± 0.05 mW
Check that “CD” is displayed on the FL display. If “CD-R” or “CD-RW” is displayed, press the STOP button repeatedly
until “CD” is displayed.
Press the RECORD button. The LED for confirmation of LD emission will light in orange.
Press the REC MUTE button. The LED for confirmation of LD emission will light in red. The LD is emitting in this
status.
Turn VR101 clockwise until the adjustment value to be reached is obtained.
Press the STOP button to shut off the LD.
(1)
(2)
(3)
(4)
(5)
CN102
Fig. 4 Adjustment points
VR104
RW REC.PW0
VR101
PB. PW VR103
R REC.PW2
VR102
R REC. PW1
VR105
RW REC.
PW1
VR106
RW REC.
PW2
CN354
1
1
6
6
SERVO DIGITAL ASSY
Playback power
Playback CD-R recording
CD-R overdrive
CD-R record
power
CD-RW record power
CD-RW bias
power
CD-RW recording
Fig.5 Output power of the laser diode
CD-RW erase
power
Note 1: Attach the remote sensor of the laser power meter to a point angled away
about 10 degrees against the pickup lens and where the maximum power
is detected, so that there will be no light reflected onto the pickup.
Note 2: When adjusting with VR101 to VR106, first turn them completely counter-
clockwise and then adjust clockwise, so that the value to be reached is not
exceeded.
Note 3: Set the wavelength of laser power meter to 780 nm.
Note 4: The following adjustments 1 through 3 must be
done with the Input Selector set to the Analog position
(LD power adjustment mode).
ANALOGDIGITAL
INPUT SELECTOR
OPT
AES /
EBU
LINE
COAX XLR/ -10
XLR/ +4
•
•
•
•
••
DANGER - LASER RADIATION WHEN OPEN.
AVOID DIRECT EXPOSURE TO BEAM.

CR300
15
Test Point
Adjustment Point
Adjustment Value
[Procedure]
3-4-2. CD-R Record Power Adjustment
Pickup objective lens
VR102 (R REC. PW1), VR103 (R REC. PW2)
VR102: 4.60 mW ± 0.1 mW
VR103: Addition of 0.1 mW ± 0.01 mW to the adjustment value of VR102
Turn VR102 and VR103 fully counterclockwise to set their power output to minimum.
Press the ERASE button once so that “CD-R” appears on the FL display. If the indication is “CD” or “CD-RW”,
press the ERASE button repeatedly until “CD-R” is displayed on the FL display.
Press the RECORD button. The LED for confirmation of LD emission will light in orange.
Press the REC MUTE button. The LED for confirmation of LD emission will light in red. The LD is emitting in this
status.
(1)
(2)
(3)
(4)
CD-R record power adjustment
Turn VR102 clockwise until the adjusted value is 4.60 mW ± 0.1 mW.(5)
CD-RW overdrive power adjustment
Turn VR103 clockwise until the adjusted value becomes adjusted value at Step 5 above + (0.1 mW ± 0.01 mW).
Press the STOP button to shut off the LD.
(6)
(7)
Test Point
Adjustment Point
Adjustment Value
[Procedure]
3-4-3. CD-RW Record Power Adjustment
Turn VR104, VR105 and VR106 fully counterclockwise to set their power output to minimum.
Press the ERASE button twice so that “CD-RW” appears on the FL display. If the indication is “CD” or “CD-R”,
press the ERASE button repeatedly until “CD-RW” is displayed on the FL display.
Press the RECORD button. The LED for confirmation of LD emission will light in orange.
Press the REC MUTE button. The LED for confirmation of LD emission will light in red. The LD is emitting in this
status.
Turn the VR104 clockwise until the adjusted value is 0.40 mW ± 0.05 mW.
(1)
(2)
(3)
(4)
(5)
CD-RW record power adjustment
Turn VR106 clockwise until the adjusted value is 2.40 mW ± 0.1 mW.(6)
CD-RW erase power adjustment
Turn VR105 clockwise until the adjusted value is 5.90 mW ± 0.1 mW.
Press the STOP button to shut off the LD.
(7)
(8)
DANGER - LASER RADIATION WHEN OPEN.
AVOID DIRECT EXPOSURE TO BEAM.
Pickup objective lens
VR104 (RW REC. PW0), VR106 (RW REC. PW2), VR105 (RW REC. PW1)
VR104: 0.40 mW ± 0.05 mW
VR106: 2.40 mW ± 0.1 mW
VR105: 5.90 mW ± 0.1 mW
DANGER - LASER RADIATION WHEN OPEN.
AVOID DIRECT EXPOSURE TO BEAM.

CR300
16
3-5. ADJUSTMENT 2 (SERVO SYSTEM ADJUSTMENT)
CN102
CN102
1 : VC
2 : TESTEQRFP
3 : TE
4 : MPP
5 : MPXOUT
6 : FMOUT
CN354
1 : RF
2 : TE
3 : TEIN
4 : VC
5 : FEIN
6 : FE
Fig. 6 Adjustment points
CN354 (TP201)
1
1
6
6
SERVO DIGITAL ASSY
For servo adjustment, set the INPUT SELECTOR to OPTICAL.
Use the RECORD and REC MUTE buttons to make the adjustments.
To reset the adjusted values to the initial settings, press and hold the
(SKIP ID) CLEAR button for 4 seconds.
To register an adjustment, press the (SKIP ID) SET button.
ANALOGDIGITAL
INPUT SELECTOR
OPT
AES /
EBU
LINE
COAX XLR/ -10
XLR/+4
•
•
•
•
••
REC
MUTE
RECORD
SET CLEAR
SKIPID
Test Point
Adjustment Point
Adjustment Value
[Procedure]
3-5-1. Focus Offset Adjustment
CN354 - pin 6 (FE)
RECORD and REC MUTE buttons
0 mW ± 10 mW
Press the AUTO/MANUAL button until “01_F4” appears on the FL display.(1)
Adjust with the RECORD and REC MUTE buttons until the value for Pin 6 of CN354 is 0 mV ± 10 mV.
Press the SET button to register the adjustment. Once the adjustment is registered with the SET button, “?” will
disappear.
(2)
(3)
Oscilloscope
10:1 probe
10 : 1
FE
VC

CR300
17
Test Point
Adjustment Point
Adjustment Value
[Procedure]
3-5-2. M-S Mix Ratio Adjustment
CN102 - pin 3 (TE) and pin 4 (MPP)
RECORD and REC MUTE buttons
Adjust until the value of output signal from pin 3 (TE) and pin 4 (MPP) of CN102 are the same,
or the differential output of these signals is minimal.
Press the AUTO/MANUAL button so that “02_F3” appears on the FL display.
Press the FINALIZE button for focus-in.
Press the PLAY button for CAV-servo spindle kick (the status where the spindle rotates with the focus servo on and
tracking servo off).
Adjust with the RECORD and REC MUTE buttons until the value to be reached is obtained.
Press the SET button to register the adjustment.
Once the adjustment is registered with the SET button, “?” on the FL display will disappear.
Press the STOP button to stop the unit.
(1)
(2)
(3)
(4)
(5)
(6)
Oscilloscope
10:1 probe
10 : 1
10 : 1
TE CH1
CH2
39kΩ
39kΩ
VC
MPP
0.001µF
0.001µF
NOTE: For adjustment, use the following circuits.
NOTE: Adjustment must be done around mid-radius on a disc.
Test Point
Adjustment Point
Adjustment Value
[Procedure]
3-5-3. Tracking Offset Adjustment
CN354 - pin 2 (TE) or CN102 - pin 3 (TE)
RECORD and REC MUTE buttons
0 mV ± 10 mV
Press the AUTO/MANUAL button so that “03_F6” appears on the FL display.
Press the RECORD and REC MUTE buttons until the above adjustment value to be reached is obtained.
Press the SET button to register the adjustment.
Once the adjustment is registered with the SET button, “?” on the FL display will disappear.
(1)
(2)
(3)
Oscilloscope
10:1 probe
10 : 1
FE
VC
NOTE: Perform the adjustment in STOP mode.
This adjustment is possible with the low-pass filter used in adjustment 5 above attached.

CR300
18
Test Point
Adjustment Point
Adjustment Value
[Procedure]
3-5-4. Focus Bias Adjustment
CN354 - pin 1 (RF)
DIGITAL SYNCHRO, RECORD and REC MUTE buttons
Adjust until the RF jitter is minimal or that the eye pattern of the RF waveform is most open.
Press the DIGITAL SYNCHRO button in Stop mode.
NOTE: Make sure that the unit is in Stop mode.
Check that “48” appears on the FL display.
Press the AUTO/MANUAL button so that “04_34” appears on the FL display.
Press the FINALIZE button for focus-in.
Press the PLAY button for CAV-servo spindle kick.
Press the PAUSE button to close the tracking servo, then set the unit to Playback mode.
Adjust with the RECORD and REC MUTE buttons until the above adjustment value to be reached is obtained.
Press the SET button to register the adjustment. Once the adjustment is registered with the SET button, “?” on the FL
display will disappear.
Press the STOP button to stop the unit.
(1)
(2)
(3)
(4)
(5)
(6)
(7)
(8)
NOTE: Perform the adjustment in STOP mode.
This adjustment is possible with the low-pass filter used in adjustment 5 above attached.
Jitter Meter
10:1 probe or
10 : 1
Oscilloscope
RF
VC

CR300
19
4. ASSEMBLING & DISASSEMBLING
Please refer to the following drawings for assembling & disassembling the CR300.
4-1. Under Base, PCB Mold & Insulator
4-2. Under Base, Mecha Base & Rear Base
Label, caution, EUR *
(8218764000)
Label, caution, HE, CR300 *
(8218787000) Screw, ABA1011
(8204178000)
Rear base
(EUR: 8221307006)
(USA: 8221307003)
Screw, PBA1112
(8204188000)
Clamper, cord
(8221114000)
Mecha base
(N/A)
*: EUR version only
PCB mold (N/A)
Under base (N/A)
Insulator, CR300
(8207013100)
Screw, ABA1011
(8204178000)

CR300
20
4-3. Transformer PCB Assy
4-4. Power, Audio & Servo Digital PCB Assys
B12 J2
Power PCB assy
(EUR: 8274236006)
(USA: 8274236003)
Fuse, T500mA/250V, EUR
(8239119000)
Fuse, 1A/250V, USA
(8239118000)
Audio PCB assy
(EUR: 8274235006)
(USA: 8274235003)
Servo Digital PCB assy
(EUR: 8274232006)
(USA: 8274232003)
Screw, ABA1011
(8204178000)
Terminal, screw, SI-A2475
(8245316000)
Screw,
BBZ30P080FCC
(8214379000)
Cord stopper
(N/A) Screw, RBA1132
(8204179000)
Transformer PCB assy
(8274241000)
Transformer cover
(N/A)
Rivet
(8207012700)
Transformer, power
(EUR: 8242267006)
(USA: 8242267003)
Other manuals for CR300
2
Table of contents
Other Fostex Recording Equipment manuals
Fostex
Fostex D-108 User manual
Fostex
Fostex CR200 User manual
Fostex
Fostex MR-16HD User manual
Fostex
Fostex DMT-8VL User manual
Fostex
Fostex FD-8 User guide
Fostex
Fostex D-160 User manual
Fostex
Fostex DV-824 User manual
Fostex
Fostex 280 User manual

Fostex
Fostex VF160EX User manual
Fostex
Fostex D-90 User manual
Fostex
Fostex RD-8 User manual
Fostex
Fostex 450 User manual
Fostex
Fostex MR-8 MKII User manual
Fostex
Fostex A-2 User manual
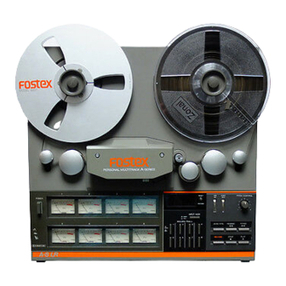
Fostex
Fostex A-8 User manual
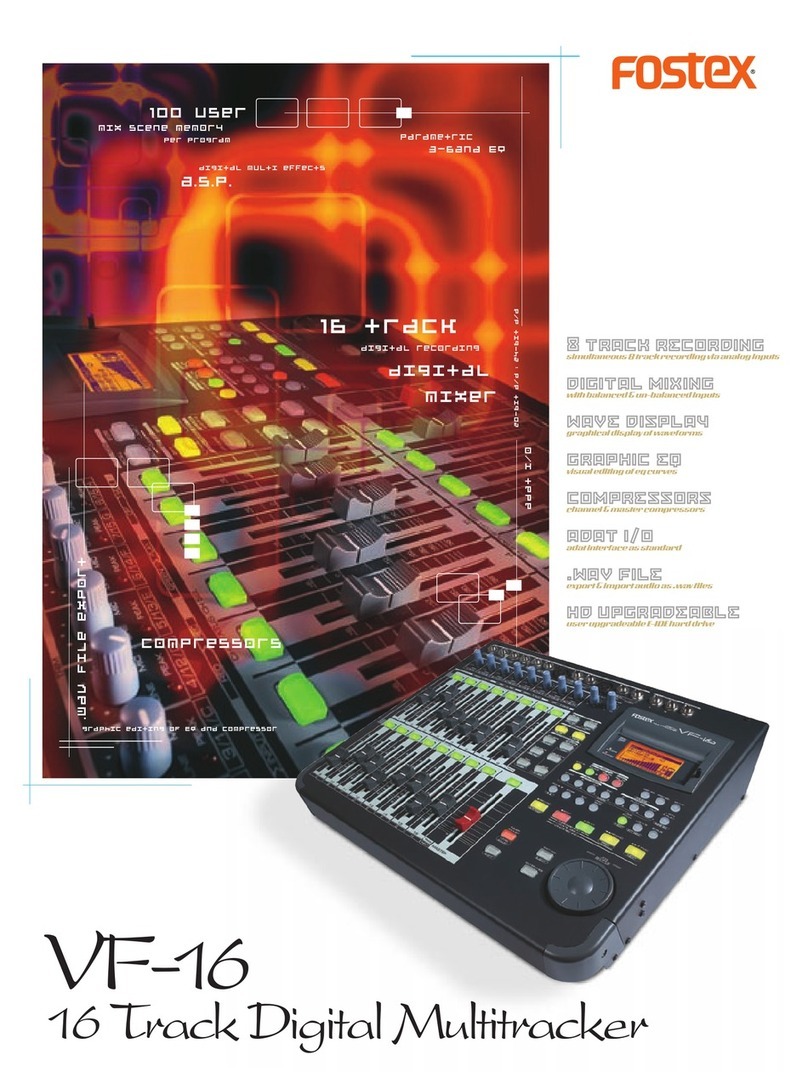
Fostex
Fostex VF-16 User manual
Fostex
Fostex FR-2 Technical manual
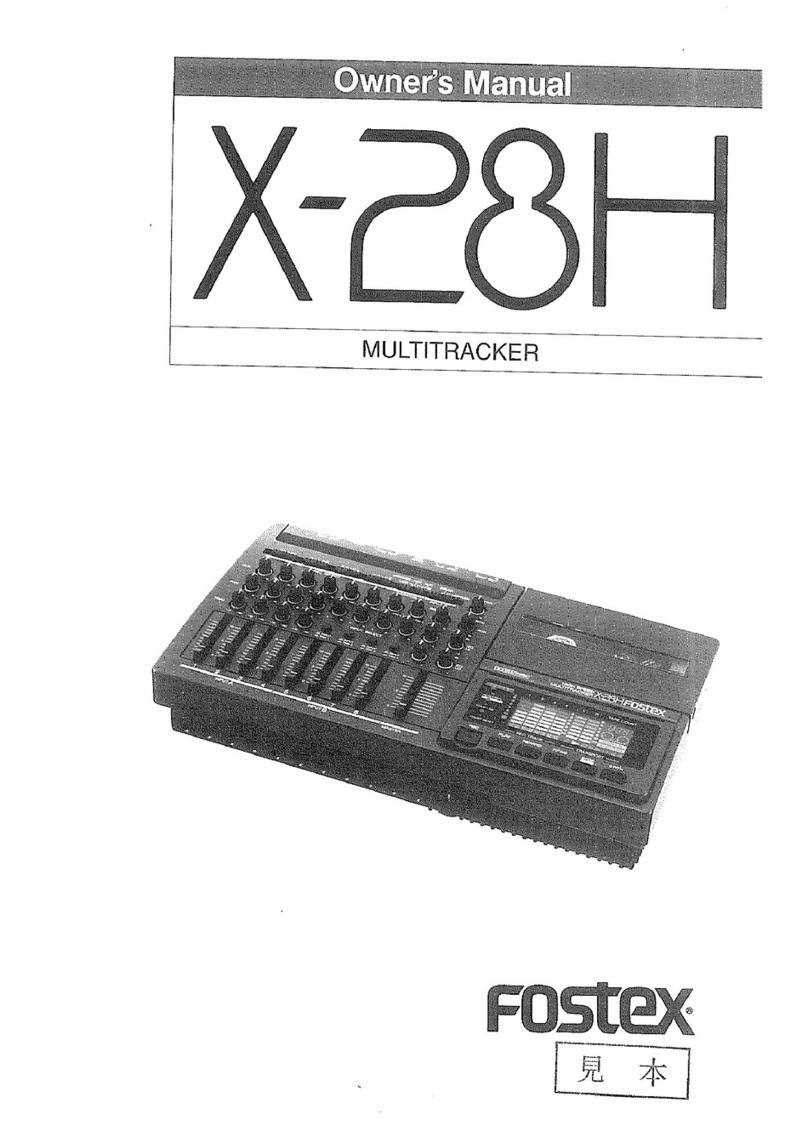
Fostex
Fostex X-28H User manual
Fostex
Fostex D-30 User manual
Fostex
Fostex LIVE RECORDING MIXER LR16 User manual
