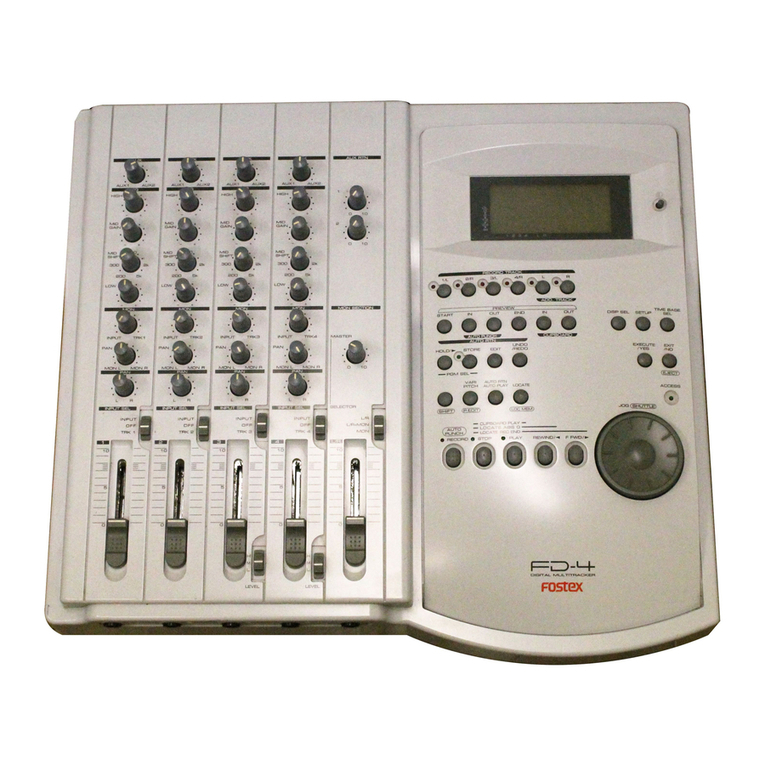
Fostex FD-4 User manual

8288 665 000
Model FD-4
Ownerís Manual Supplement
By updating the software to V1.10, the FD-4 save/load functions will be extended. In
addition to the current save/load functions using a DAT, saving/loading song data
to/from either a removable or fixed external SCSI drive is possible.
In accordance with the above improvement, a new menu [Bk Format ?] which for-
mats the diskette for backup purpose is newly added in the SETUP mode.
In this supplement, the way to save/load song data using an external SCSI drive
and [Bk Format ?] are only mentioned. For save/load function using a DAT and
other SETUP mode, please refer to the original FD-4 Ownerís Manual.
Safety Instructions . . . . . . . . . . . . . . . . . . . . . . . . . . . . . . . . . . . . . . . . . . . . . . . . . . . . . ..
Saving/Loading Song Data using SCSI Drive . . . . . . . . . . . . . . . . . . . . . . . . . . . . . . .
Extension of SETUP Mode . . . . . . . . . . . . . . . . . . . . . . . . . . . . . . . . . . . . . . . . . . . . . . .
Extension of other SETUP menu . . . . . . . . . . . . . . . . . . . . . . . . . . . . . . . . . . . . . . . . . .
Backup SCSI drive connection . . . . . . . . . . . . . . . . . . . . . . . . . . . . . . . . . . . . . . .
Saving/Loading data using a SCSI drive as the current drive . . . . . . . . . . . . .
Saving/Loading data using a 2.5-inch internal hard disk as the current drive . . .
Reformatting a formatted disk (removable type) for backup . . . . . . . . . . . . . .
Reformatting a formatted disk (fixed type) for backup . . . . . . . . . . . . . . . . . . . .
2
3
3
4
8
10
10
11
11

2
FD-4 Ownerís Manual Supplement
SAFETY INSTRUCTIONS
Read instructions - All the safety and operating instruc-
tions should be read before the appliance is operated.
Retain instructions - The safety and operating instructions
should be retained for future reference.
Heed warnings - All warnings on the appliance and in the
operating instructions should be adhered to.
Follow instructions - All operating and use instructions
should be followed.
Water and Moisture - The appliance should not be used
near water - for example, near a bathtub, washbowl,
kitchen sink, laundry tub, in a wet basement, or near a
swimming pool, and the like.
Carts and Stands - The appliance should be used only
with a cart or stand that is recommended by the manufac-
turer.
An appliance and cart combination should be moved with
care. Quick stops, excessive force, and uneven surfaces
may cause the appliance and cart combination to over-
turn.
Wall or Ceiling Mounting - The appliance should be
mounted to a wall or ceiling only as recommended by the
manufacturer.
Ventilation - The appliance should be situated so that its
location or position does not interfere with its proper ven-
tilation. For example, the appliance should not be situ-
ated on a bed, sofa, rug, or similar surface that may block
the ventilation openings; or, placed in a built-in installa-
tion, such as a bookcase or cabinet that may impede the
flow of air through the ventilation openings.
Heat - The appliance should be situated away from heat
sources such as radiators, heat registers, stoves, or other
appliances (including amplifiers) that produce heat.
Power Sources - The appliance should be connected to a
power supply only of the type described in the operating
instructions or as marked on the appliance.
Grounding or Polarization - The precautions that should
be taken so that the grounding or polarization means of
an appliance is not defeated.
Power Cord Protection - Power supply cords should be
routed so that they are not likely to be walked on or
pinched by items placed upon or against them, paying
particular attention to cords at plugs, convenience recep-
tacles, and the point where they exit from the appliance.
Cleaning - The appliance should be cleaned only as rec-
ommended by the manufacturer.
Nonuse Periods - The power cord of the appliance should
be unplugged from the outlet when left unused for a long
period of time.
Object and Liquid Entry - Care should be taken so that
objects do not fall and liquids are not spilled into the en-
closure through openings.
Damage requiring Service - The appliance should be ser-
viced by qualified service personnel when:
A.
B.
C.
D.
E.
Servicing - The user should not attempt to service the ap-
pliance beyond that described in the operating instruc-
tions. All other servicing should be referred to qualified
service personnel.
REFER SERVICING TO QUALIFIED SERVICE PERSONNEL.
CAUTION
RISK OF ELECTRIC SHOCK
DO NOT OPEN
CAUTION: TO REDUCE THE RISK OF ELECTRIC SHOCK,
DO NOT REMOVE COVER (OR BACK).
NO USER-SERVICEABLE PARTS INSIDE.
TO PREVENT ELECTRIC SHOCK, MATCH
WIDE BLADE OF PLUG TO WIDE SLOT,
FULLY INSERT.
POUR …VITER LES CHOCS …LECTRIQUES,
INTRODUIRE LA LAME LA PLUS LARGE DE
LA FICHE DANS LA BORNE CORRE-
SPONDANTE DE LA PRISE ET POUSSER
JUSQU' AU FOND.
CAUTION:
ATTENTION:
The exclamation point within an equilateral
triangle is intended to alert the user to the
presence of important operating and mainte-
nance (servicing) instructions in the literature
accompanying the appliance.
The lightening flash with arrowhead symbol,
within an equilateral triangle, is intended to
alert the user to the presence of uninsulated
ìdangerous voltageî within the product's en-
closure that may be of sufficient magnitude to
constitute a risk of electric shock to persons.
ìWARNINGî
ìTO REDUCE THE RISK OF FIRE OR ELECTRIC SHOCK,
DO NOT EXPOSE THIS APPLIANCE TO RAIN OR MOIS-
TURE.î
1.
2.
3.
4.
5.
6.
7.
8.
The power supply cord or the plug has been damaged;
or
Objects have fallen, or liquid has been spilled into the
appliance; or
The appliance has been exposed to rain; or
The appliance does not appear to operate normally or
exhibits a marked changed in performance; or
The appliance has been dropped, or the enclosure
damaged.
9.
10.
11.
12.
13.
14.
15.
16.
17.

3
FD-4 Ownerís Manual Supplement
INPUT 3
R MON OUT L R ST OUT L AUX RTN 1
R MONO/L
AUX RTN 2
R MONO/L
2 AUX SEND 1 4 INSERT 3
INPUT 4
SCSI OUTIN DATA R
RECORDER IN
LIN MIDI
OUT
PUNCH
IN/OUT
DATA MIDI
As indicated below, saving/loading song data procedures using a SCSI backup drive differ from that using a DAT.
Saving/Loading Song Data using SCSI Drive
Following about five seconds of pilot signal (shown in gray in the diagram below), song data in the current drive is
output to a connected DAT. Two tracks of audio data (shown in black in the diagram) are output. To save data from
Real tracks 1-4, two-track data will be output twice, which takes twice as much time as the song duration (ABS 0 to
REC END). To save all data including Additional tracks 5-6, two-track data will be output three times, which takes
three times the song duration. Save data is also loaded two tracks at a time.
Using a DAT (S/P DIF digital signal) (Saving/Loading individual Program data: only in Mastering mode)
DAT tape
All Real Track data and Additional track data is output simultaneously to a SCSI disk as shown in black in the
diagram. Therefore, saving and loading a Program takes much less relative to a DAT. No pilot signal or beep is
recorded. If the available disk space is smaller than the song data size, you may use multiple disks (up to 99 disks)
to save and load an entire song.
Using a SCSI disk (Saving/Loading individual Program Data: in any mode)
SCSI disk
Backup SCSI Drive Connection
SCSI Drive to be used as Current Drive
SCSI Drive to be used for Backup
< SCSI ID Number Setting > Set the ID number to an elective one among ì1 through 5î.
Set the ID number to ì6î.
SCSI drive for backup
(ID number = 6)
Current SCSI Drive
(ID number = 1, 2, 3, 4, or 5)
Be sure to attach a terminator
on the second SCSI drive
SCSI terminal
The FD-4 with updated software allows you to connect a backup SCSI drive in addition to the current SCSI drive at the same
time. For those who use the SCSI drive as the current drive, referring to the diagram below, connect the two SCSI drives in chain
regardless of the connection order.
When connecting the two SCSI drives, set the SCSI ID number as listed below. Also be sure to attach a terminator on the second
SCSI drive to terminate the SCSI chain. For your information, the backup SCSI drives which can be used on the FD-4 are listed
in the <List of SCSI drive and media checked for function> in the first page of original ownerís manual.
Trk 1&2 Trk 3&4 Trk 5&6
Program 1 (P01) Program 2 (P02) Program 99 (P99)
Trk 1 & 2 & 3 & 4 & 5 & 6
Program 1 (P01) Program 2 (P02) Program 99 (P99)

4
FD-4 Ownerís Manual Supplement
INPUT 3
R MON OUT L R ST OUT L AUX RTN 1
R MONO/L
AUX RTN 2
R MONO/L
2 AUX SEND 1 4 INSERT 3
INPUT 4
SCSI OUTIN DATA R
RECORDER IN
LIN MIDI
OUT
PUNCH
IN/OUT
DATA MIDI
INPUT 3
R MON OUT L R ST OUT L AUX RTN 1
R MONO/L
AUX RTN 2
R MONO/L
2 AUX SEND 1 4 INSERT 3
INPUT 4
SCSI OUTIN DATA R
RECORDER IN
LIN MIDI
OUT
PUNCH
IN/OUT
DATA MIDI
For those who use an optional 2.5î internal hard disk drive, saving and loading song data is realized by simply connecting a
backup SCSI drive shown below. As mentioned before, the ID number for backup SCSI drive must be set to ì6î and attach the
terminator .
SCSI drive for backup
(ID number = 6)
Be sure to attach a terminator to
one of either SCSI terminals.
FD-4 with an optional 2.5î hard disk
drive retrofitted
Saving/loading data using a SCSI drive as the current drive
This section explains how to save and load data between a current SCSI drive (removable or fixed) and a backup SCSI drive.
Turn off the power of all the connected devices before you make connections.
Save
Load
Current drive
Backup drive
(ID number = ì6î)
FD-4
SCSI drive connection and preparation
<Title of data to be saved to a backup SCSI disk>
Data recorded in the current drive has a name, such as
Program 1 or Program 2. (These titles appear abbrevi-
ated, such as [P01], [P02].)
On the other hand, a backup disk manages data using
different titles, such as Backup 1 or Backup 2. (These
appear abbreviated, such as [B01] or [B02] on the dis-
play.)
For example, Program 1 (P01) on the current drive disk
is saved as Backup 1 (B01) for the backup disk.
Connect your backup SCSI drive to the SCSI connector
on the current drive. Be sure to attach a terminator on the
second SCSI drive to terminate the SCSI chain regardless
of connection order.
Be sure to set the ID number for the backup SCSI drive to
ì6î. Also be sure to set the ID number for the current
drive to an elective one among ì1 through 5î.
Prepare the disk recorded as the current drive and a backup
disk (unformatted at this stage).
*
*
*
Unlike the save/load operation using a DAT, you cannot abort the save/load operation that uses a SCSI drive
while in process. Nor can you monitor audio data during operation. Also, you cannot load data to a disk
formatted in a recording mode that differs from that on the backup disk. For example, you cannot load data
from a backup disk in Normal mode to a disk in Mastering mode.
Note:

5
FD-4 Ownerís Manual Supplement
CLK
SYNC OUT DRIVESCSI
AUTO A.PUNCH
SETUP44.1kHz
CLK
SYNC OUT DRIVESCSI
AUTO A.PUNCH
SETUP44.1kHz
CLK
SYNC OUT DRIVESCSI
AUTO A.PUNCH
SETUP
?
SURE
44.1kHz
CLK
SYNC OUT DRIVESCSI
AUTO A.PUNCH
REMAIN
SETUP
MB
44.1kHz
CLK
SYNC OUT DRIVESCSI
AUTO A.PUNCH
ABS
44.1kHz
CLK
SYNC OUT DRIVESCSI
AUTO A.PUNCH
REMAIN
SETUP
MB
44.1kHz
SETUP
DRIVE
AUTO A.PUNCH
SYNC OUT
CLK SCSI
44.1kHz
COMPLETED !
CLK
SYNC OUT DRIVESCSI
AUTO A.PUNCH
SETUP44.1kHz
Saving data
You can back up data using the ìSave PGM ?î menu in
SETUP mode. The following procedures assume that a
recorded disk has been inserted in the current SCSI drive,
Program 1 (P01) has been selected, and an unformatted
disk will be used as the backup disk.
*
< [Save PGM?] menu>
* Output signal options: [dAT], [SCSi id-6]
* Program options: P01 - P99 (an individual Program)
* Track options
DAT: track 1 - 4, track 1 - 6
SCSI disk: All tracks will be automatically selected.
Insert an unformatted disk into the backup drive.
Press the SETUP key to enter SETUP mode, then
use the JOG dial to select [Save PGM ?] menu.
Press the EXECUTE/YES key.
[Save Device ?] appears and the selected output signal
option flashes. ([dAT] flashes.)
1.
2.
3.
Flashing
Flashing
Turn the JOG dial to select a flashing [SCSi id-6]
to select the connected SCSI device as a save
destination.
4.
Press the EXECUTE/YES key.
The FD-4 recognizes that a disk in the backup drive is
unformatted, and displays [Unformat?], then proceeds to
the [Bk Format ?] menu (backup disk format) in SETUP
mode, then displays the following.
5.
Flashing
Flashing
Press and hold down the RECORD button, and
press the EXECUTE/YES key.
The FD-4 displays the following and starts formatting the
disk. The unformatted disk area size will count down as
the format operation progresses.
6.
When the formatting operation is completed, [COM-
PLETED!] lights up, [SCSi id-6] flashes, then the FD-4
displays the following.
This example shows that the data to be saved is Program 1
on the current drive. If the current drive has multiple Pro-
grams, use the JOG dial to select the desired Program. (If
only one program exists, [P01] is the choice you can make.)
Use the JOG dial to select the desired Program
and press the EXECUTE/YES key.
The save operation starts and the following indication ap-
pears.
This example shows that Program 1 [P01] data is being saved
as Backup data 1 [B01]. As the save operation progresses,
the REMAIN value (e.g.: -58MB) counts down.
7.
When the save operation is completed, [COMPLETED!]
lights up and the following indication appears.
Press the EXIT/NO key to exit SETUP mode.
The FD-4 displays ABS 0 of the Program on the current
drive.
8.
Lights up
The backup data will use the number of the saved
Program. (e.g., if you save P01 [#0001] data, the
backup data will be named as B01 [#0001]. You
cannot edit the title of the backup data.
Note:
The above procedures assume that the saved data size is
smaller than the available backup disk space. Because of
this, only one disk is required to back up the data. To save
data larger than a single backup disk capacity, refer to the
<Memo> which explains about saving data using mul-
tiple backup disk in detail in the next page.

6
FD-4 Ownerís Manual Supplement
CLK
SYNC OUT DRIVESCSI
AUTO A.PUNCH
ABS
44.1kHz
CLK
SYNC OUT DRIVESCSI
AUTO A.PUNCH
ABS
44.1kHz
CLK
SYNC OUT DRIVESCSI
AUTO A.PUNCH
SETUP44.1kHz
DIGITAL
CLK
SYNC OUT DRIVESCSI
AUTO A.PUNCH
ABS
44.1kHz
CLK
SYNC OUT DRIVESCSI
AUTO A.PUNCH
SETUP
?
MB
SURE
44.1kHz
CLK
SYNC OUT DRIVESCSI
AUTO A.PUNCH
SETUP
DIGITAL
44.1kHz
CLK
SYNC OUT DRIVESCSI
AUTO A.PUNCH
SETUP44.1kHz
<Memo>
If program data to be saved is larger than the space available on one backup disk, the FD-4 tells you how many backup
disks are required when you select a Program in Step 6 of the ìSaving Dataî procedure in the previous page.
(e.g.)
Two backup disks are
required.
(e.g.)
Three backup disks are
required.
When you set the first disk, the save operation starts. When the disk is full, the FD-4 automatically ejects the disk and
displays [Ins. Disk 2], meaning ìPlease insert the second disk.î
Insert the second disk to continue the save operation.
Loading data
You can load data using the ìLoad PGM ?î menu in SETUP
mode. The following procedures assume that the backup disk
has been inserted into the backup SCSI drive, and a format-
ted disk has been inserted into the current SCSI drive.
*
< [Load PGM ?] menu>
* Input signal options: [dAT], [SCSi id-6]
* Program options: P01 - P99 (an individual Program)
* Track options
DAT: track 1 - 4, track 1 - 6
SCSI disk: All tracks will be automatically selected.
Press the SETUP key to enter SETUP mode, then
use the JOG dial to select [Load PGM ?] menu.
Press the EXECUTE/YES key.
[Device ?] appears, [DIGITAL] lights up, and the selected
input signal option flashes. ([dAT] flashes.)
1.
2.
Flashing
Lights up
Flashing
Turn the JOG dial to select a flashing [SCSi id-6]
to load data from the connected SCSI disk.
3.
Flashing
Press the EXECUTE/YES key.
The saved backup number (B01) flashes. This means that
B01 on the backup disk is selected to load.
If only this backup file exists on the disk, turning the JOG
dial will allow you to select [B01] or [Eject].
Select [Eject] if you wish to change the disk.
If there are multiple backup files on the disk, using the
JOG dial allows you to select the desired backup data (B01,
B02, B03, etc.) or [Eject].
4.
Flashing
Flashing
Press the EXECUTE/YES key.
The FD-4 indicates that the load destination disk (current
drive disk) does not have any data, then indicates a flash-
ing [SURE?].
5.
Mark the disks so that you can identify the order of the disks and you will be able to insert the disks
in the correct order to perform the load operation.
Note:

7
FD-4 Ownerís Manual Supplement
CLK
SYNC OUT DRIVESCSI
AUTO A.PUNCH
REMAIN
SETUP
MB
44.1kHz
CLK
SYNC OUT DRIVESCSI
AUTO A.PUNCH
44.1kHz
COMPLETED !
CLK
SYNC OUT DRIVESCSI
AUTO A.PUNCH
ABS
44.1kHz
CLK
SYNC OUT DRIVESCSI
AUTO A.PUNCH
SETUP
?
SURE
44.1kHz
Lights up
In this condition, using the JOG dial allows you to select
the load destination Program.
Since there is only one Program in the destination disk in
this example, you can select only [P01].
If the destination disk contains multiple Programs, see the
following <Memo>.
Use the JOG dial to select the load destination
Program and press the EXECUTE/YES key.
The FD-4 starts loading data.
Backup data [B01] is loaded to Program [P01] on the cur-
rent disk.As the operations progresses, the REMAIN value
counts down.
6.
When the load operation is completed, [COMPLETED!]
lights up.
Press the EXIT/NO key to exit SETUP mode.
The Time Base display of the loaded Program appears.
Press the EJECT button on the backup drive to
eject the backup disk.
7.
8.
<Memo>
If you saved one Program to multiple backup disks, the
FD-4 indicates that the disk in the drive is the ìfirstî disk,
as follows:
Confirm that this message appears, and execute the load
operation. When data in the first disk is loaded, the FD-4
automatically ejects the disk and displays [Inst. Disk 2],
meaning ìPlease insert the second disk.î Insert the sec-
ond disk and continue the load operation.
<Memo>
If the load destination disk contains multiple Programs,
the FD-4 asks whether you wish to set up a new Program
in the Step 5 of the procedure above. ([03] and [SURE?]
flash.)
This is because the existing Programs may already con-
tain data. If you do not mind overwriting the existing data
with the loaded data, select the desired Program number
as the load destination.
Flashing
In the above display example, the FD-4 asks you if
you wish to create a new Program 3, since Programs
1 and 2 on the current disk drive contain data.
Make sure that you insert the disks in the correct
order. If you insert the wrong disk, the FD-4 dis-
plays [Wrong disk] and ejects the disk. Follow the
disk markings you made during the save opera-
tion.
Note:

8
FD-4 Ownerís Manual Supplement
INPUT 3
R MON OUT L R ST OUT L AUX RTN 1
R MONO/L
AUX RTN 2
R MONO/L
2 AUX SEND 1 4 INSERT 3
INPUT 4
SCSI OUTIN DATA R
RECORDER IN
LIN MIDI
OUT
PUNCH
IN/OUT
DATA MIDI
CLK
SYNC OUT DRIVE
IDE
AUTO A.PUNCH
SMF
PGM
ABS
44.1kHz
INPUT3
R MONOUT L R ST OUT L AUXRTN 1
R MONO/L
AUXRTN 2
R MONO/L
2 AUXSEND 1 4 INSERT 3
INPUT4
SCSI OUTIN DATA R
RECORDERIN
LIN MIDI
OUT
PUNCH
IN/OUT
DATA MIDI
Saving/loading data using a 2.5-inch E-IDE internal hard disk as the current drive
This section explains how to save and load data between a SCSI backup drive and an optional 2.5-inch internal hard
disk. Recording mode on the current drive does not affect this operation. Refer to the before mentioned ìSaving/
Loading data using a SCSI drive as the current driveî for more information on the procedures.
<Note on the save/load operation using an optional 2.5-inch E-IDE internal hard disk>
When you are using an optional 2.5-inch E-IDE hard disk for the save and load operation, make sure that [IDE]
lights up in the current drive section of the display. If a SCSI drive is connected to the FD-4 as the current drive,
disconnect the drive. Alternatively, turn off the power to the SCSI drive before you turn on the power to the FD-4.
[IDE] lights up
Connect a SCSI backup drive (ID # = 6) to the SCSI connector on the FD-4 with a 2.5-inch E-IDE hard disk retrofitted.
< Note on connections>
Be sure to connect a SCSI backup drive to the FD-4 SCSI connector.
Make sure that the ID number for the SCSI backup drive is set to ì6î.
SCSI backup drive
(ID # = 6)
Save
Load
FD-4 with a 2.5-inch internal hard disk
Backup SCSI drive Current SCSI drive
FD-4 with a 2.5-inch internal hard disk
When the 2.5-inch hard disk is assigned as the current drive:
Switch on power to the FD-4 only and not to the two SCSI drives connected.
If save/load of song data is to be executed using the SCSI drive assigned for backup, switch on power to the SCSI
drive assigned for backup and then the FD-4. Do not switch on power to the SCSI drive assigned for the current drive.
By utilizing either method, the FD-4 will always recognize the internal 2.5-inch E-IDE hard disk as the current drive.
When the SCSI drive is assigned as the current drive:
Power to any equipment that is interconnected must, of course, be switched on. The SCSI drive will be automatically
recognized as the current drive.
As shown in the drawing, when the SCSI drive assigned for the current drive is daisy chained to the SCSI drive
for backup and also connected to the optional 2.5-inch E-IDE internal hard disk which is in the current drive
mode, please note the following items.
Note:

9
FD-4 Ownerís Manual Supplement
CLK
SYNC OUT DRIVE
IDE
AUTO A.PUNCH
SETUP
?
SURE
44.1kHz
CLK
SYNC OUT DRIVE
IDE
AUTO A.PUNCH
SETUP44.1kHz
CLK
SYNC OUT DRIVE
IDE
AUTO A.PUNCH
SETUP44.1kHz
CLK
SYNC OUT DRIVE
IDE
AUTO A.PUNCH
SETUP44.1kHz
< Quick Troubleshooting >
If you are stuck in one of the following situations while saving and loading song data using a SCSI backup drive, refer to
the explanations below for corrective actions.
The FD-4 displays the following during the save
operation using a SCSI backup drive.
#
Flashing
The backup disk contains some data and does not have
enough free space to record new data. The FD-4 is asking
you whether or not the existing data should be deleted.
Take one of the following actions.
* If you wish to delete the existing data:
Press the EXECUTE/YES key twice. Pressing the key once
causes [Del. All ?] and [SURE ?] to flash, and pressing it
again deletes the existing data so that you will be able to
continue the save operation.
* If you do not wish to delete the existing data:
Turn the JOG dial to display [Eject], then press the EX-
ECUTE/YES key. The disk will be ejected. Insert another
backup disk in the drive.
When you inserted a SCSI backup disk into the
backup drive to save data, the following messages
appeared in turn and the disk was ejected.
#
The FD-4 recognizes that the backup disk cannot be used in
its current condition. There are two reasons for this.
Current drive Backup drive
disk in Normal mode data recorded in
Normal mode
save
load
save
Current drive Backup drive
disk in
Mastering 1 or 2 mode disk used to save/load
data in Normal mode
To be able to use the ejected disk, you need to reformat it as
described below.
Quit SETUP mode and return to the Time Base dis-
play of the current disk, then insert the disk in the
backup drive.
Select the [Bk Format ?] menu in SETUP mode and
reformat the backup disk.
*
*
*
*
For example, the disk used to save or load data in Mastering 1
or 2 mode is inserted to save data in Normal mode. That is,
you tried to use a disk (that was once used to save or load data
in a particular recording mode) to save data in a different re-
cording mode.
You inserted a disk that was used for the current
drive.
The diskís recording mode differs from that of the
data to save or load.

10
FD-4 Ownerís Manual Supplement
CLK
SYNC OUT DRIVESCSI
AUTO A.PUNCH
SMF
PGM
ABS
44.1kHz
CLK
SYNC OUT DRIVESCSI
AUTO A.PUNCH
SETUP44.1kHz
CLK
SYNC OUT DRIVESCSI
AUTO A.PUNCH
SETUP44.1kHz
Extension of SETUP mode
As mentioned in the beginning, by updating the software, a SCSI drive for backup can be connected to the FD-4. In accordance
with this improvement, a SETUP menu [Bk Format ?] is newly added. If save/load operation is executed with an unformatted
disk inserted to the SCSI backup drive, the FD-4 automatically advances to the [Bk Format ?] SETUP menu. However, when
reformatting a pre-formatted disk for backing up purpose, you need to select the [Bk Format ?] menu to execute.
With addition of [Bk Format ?] menu, please note that the arrangement of SETUP menu has been altered as indicated
below.
Before updating software After updating software
[Bk Format ?] menu location
Reformatting a formatted disk (removable type) for backup
This section explains how to reformat a backup or current drive disk (Mastering 1, 2 or Normal mode) as a backup disk. (The
FD-4 recognizes a disk formatted by a computer as an ìunformatî disk.) The following procedures assume that removable type
SCSI drives are used for a current drive as well as a backup drive and that the FD-4 display shows the Time Base for the current
drive.
Before reformatting a formatted disk, first make sure that the disk does not contain data that you want to keep.
Otherwise, you may lose your important archives.
To cancel the format operation, press the EXIT/NO key or STOP button prior to the Step 4 mentioned later to
return to the previous level the menu hierarchy and exit SETUP mode.
The alternative way is to turn the JOG dial and select [Eject] in Step 3 to eject the disk before formatting.
Please refer to the following procedures in detail.
Note:
Insert a formatted disk into the backup drive.
The display continues to show the Time Base indication
for the current drive. (The example below indicates the
Time Base display for the current drive Program 2.)
1. Press the SETUP key to enter SETUP mode, and
turn the JOG dial to select the [Bk Format ?] menu.
2.
The [Bk Format ?] is the disk format menu exclusively used for backing up purpose. Formatting the disk used
for current drive is executed by the [Format ?] menu in the SETUP mode.
Note:

11
FD-4 Ownerís Manual Supplement
CLK
SYNC OUT DRIVESCSI
AUTO A.PUNCH
SETUP
SURE ?
44.1kHz
CLK
SYNC OUT DRIVESCSI
AUTO A.PUNCH
SETUP
SURE ?
44.1kHz
Press the EXECUTE/YES key.
The FD-4 displays the recording mode that corresponds
to the disk format. The [SCSi id-6] message appears and
[SURE?] flashes.
Adifferent message appears depending on the type of for-
mat used by the disk.
In this condition, if you turn the JOG dial, [Eject] appears,
and pressing the EXECUTE/YES key ejects the disk.
3.
(e.g.) Disk formatted for backup
(e.g.) Disk formatted by Mastering 1 mode
Press and hold the RECORD button and press
the EXECUTE/YES key.
The FD-4 starts formatting.
[REMAIN] lights up on the display, and the negative value
of the unformatted disk area will count down as the for-
mat operation progresses.
Please wait a while.
When formatting is completed, [COMPLETED!] lights
up on the display, and the FD-4 stops spinning the disk.
At the same time, the FD-4 shows the maximum record-
able space. To check the REMAIN time and space, refer
to the < Memo > below.
4.
Press the EXIT/NO key or the STOP button.
The display will change from the REMAIN indication for
the backup disk to the Time Base indication for the cur-
rent drive.
5.
<Memo>
To check the REMAIN time for the backup disk after for-
matting, eject the disk, then replace it with the disk in the
current drive (removable type). Next, press the DISP SEL
key to show the REMAIN display. You can check the RE-
MAIN time of the backup disk in this way. However, you
cannot perform another operation using the backup disk
at this time. Attempting to do so will cause the FD-4 to
display [Illegal FM] and ignore your operation.
To eject a disk from the backup drive or the current drive
after the format operation, follow the procedure below:
Reformatting a formatted disk (fixed type) for backup
You can use a fixed disk for backing up purpose by setting its ID number to ì6î. The formatting procedures described before
also applies to formatting a fixed disk as a backup disk.
< Extension of other SETUP menu >
Besides the addition of [Bk Format ?] menu, part of [Save PGM ?] and [Load PGM ?] menus have been altered. As already
described previously, the selection of output (input) signals when executing SAVE (LOAD) operation was [dAT] only before
updating the software. However, after updating the software, the selection has become either [dAT] or [SCSi id-6].
Select [dAT] when saving/loading song data to and from a DAT recorder.
When using a SCSI drive for backup, select [SCSi id-6].
* To eject a disk from the backup drive:
* To eject a disk from the current drive:
Press the Eject button on the drive.
Press and hold the SHIFT key and press the EXIT/
NO key.

FOSTEX CORPORATION
3-2-35 Musashino, Akishima-shi, Tokyo 196-0021, Japan
FOSTEX CORPORATION OF AMERICA
15431 Blackburn Ave., Norwalk, CA 90650, USA
C
PRINTED IN JAPAN JAN. 1999 8288 665 000 FX
Other manuals for FD-4
2
Table of contents
Other Fostex Recording Equipment manuals
Fostex
Fostex R8 User manual
Fostex
Fostex FD-4 User manual
Fostex
Fostex DC-R302 User manual
Fostex
Fostex FR-2 Technical manual
Fostex
Fostex CR200 User manual
Fostex
Fostex 4010 User manual
Fostex
Fostex X-55 User manual
Fostex
Fostex CR200 User manual
Fostex
Fostex VF160EX User manual
Fostex
Fostex DV-824 Configuration guide
