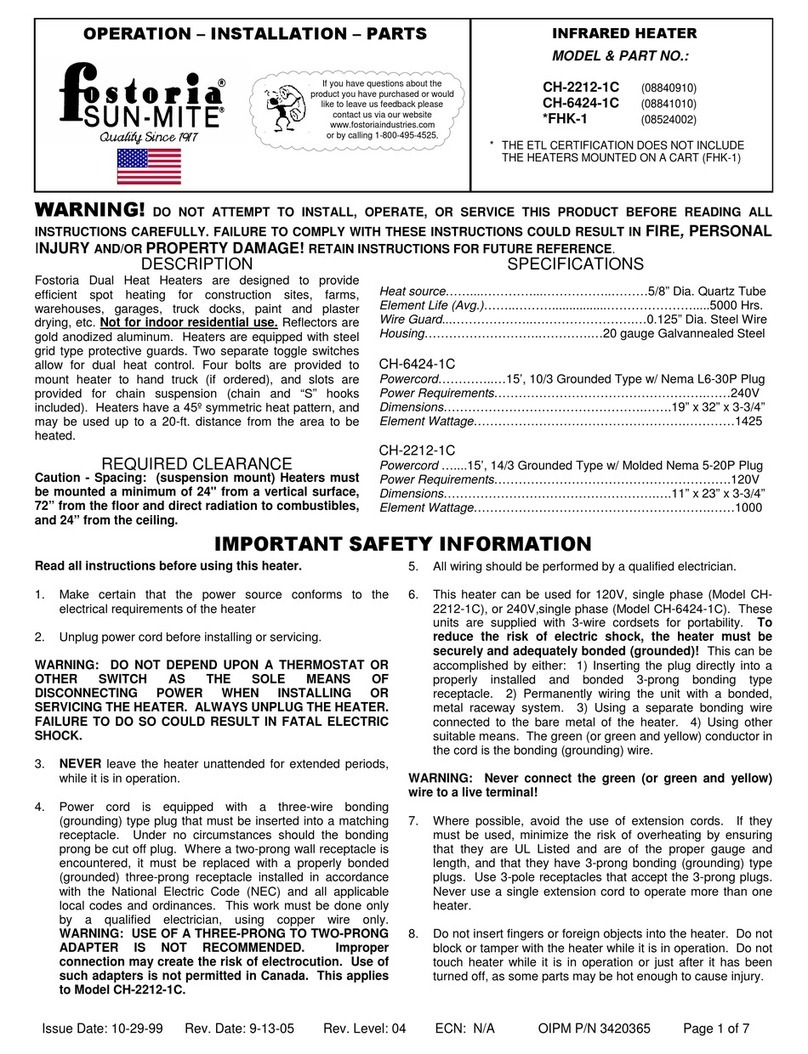
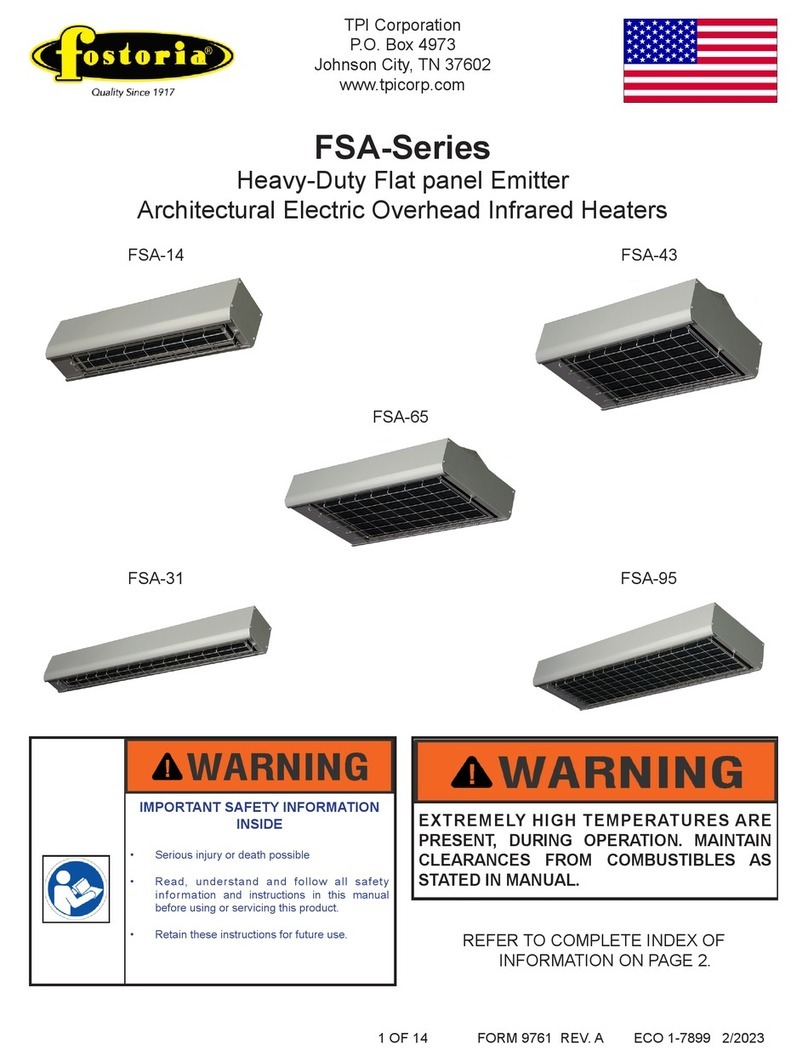
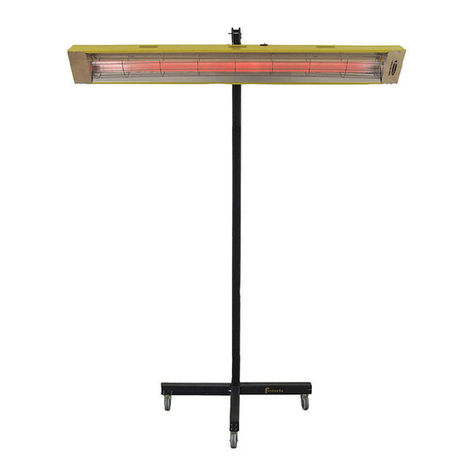
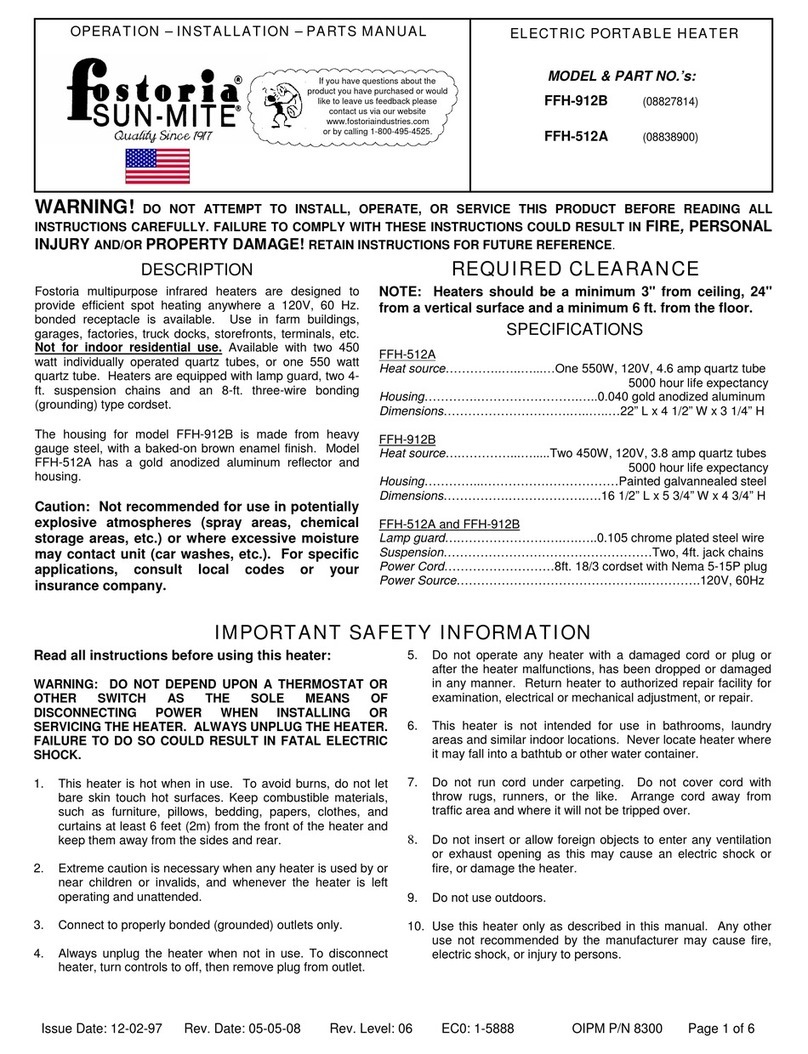
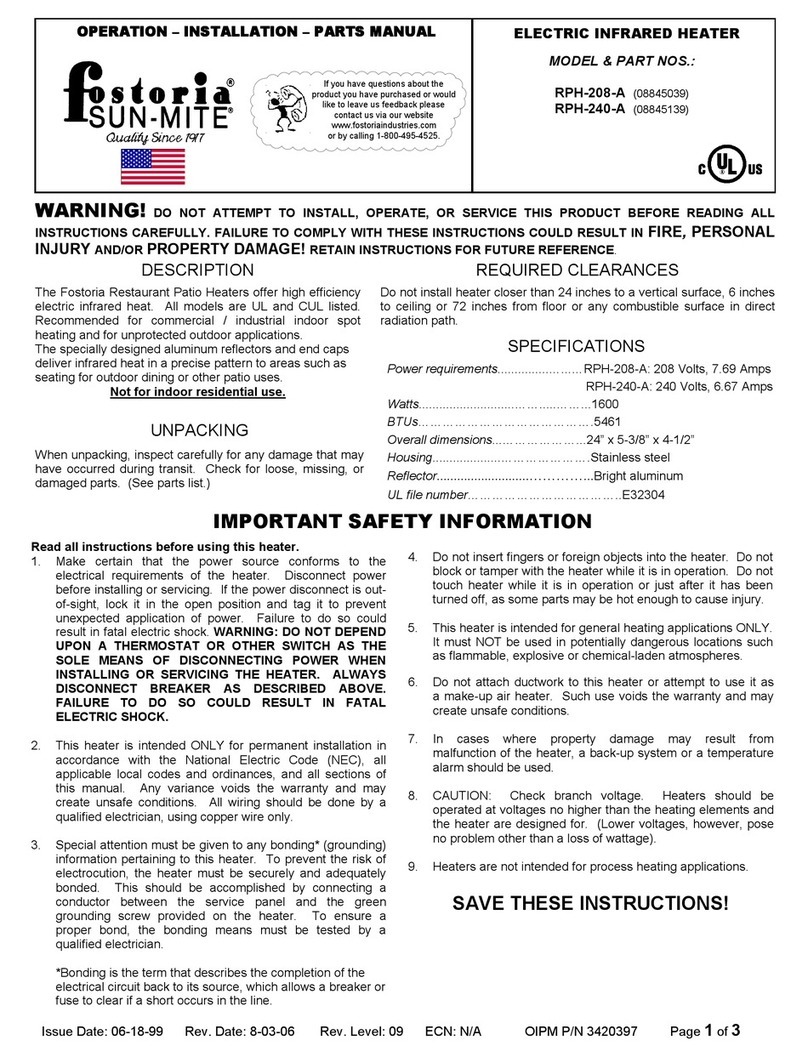
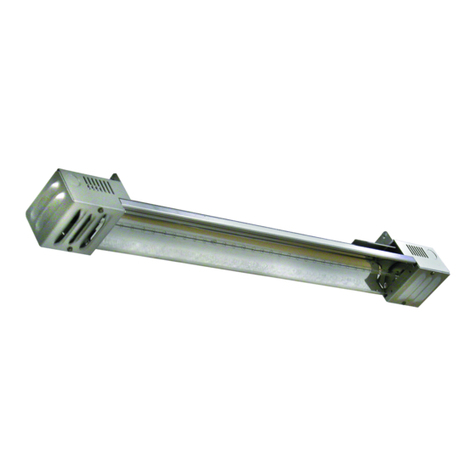
Fostoria OCH-SS series User manual

Issue Date: 09-25-07 Rev. Date: 04-24-08 Rev. Level: 03 ECN: n/a OIPM P/N: 3420203 Page 1 of 8
IMPORTANT SAFETY
INFORMATION INSIDE
• Serious injury or death possible
• Read, understand, and follow all
safety information and
instructions in this manual
before using or servicing this
product.
• Retain these instructions for
future reference.
*EXCLUDING RESIDENCES
1200 North Main Street
Fostoria, OH 44830
Phone: 800-495-4525
Fax: 419-435-0842
www.fostoriaindustries.com
OCH-SS series
Direct Wired Units
Indoor * and Outdoor Comfort Heaters
A DIVISION OF
REFER TO COMPLETE
INDEX OF
INFORMATION ON
PAGE 2
If you have questions about the
product you have purchased o
r
would like to leave us feedback,
please contact us via our website
www.fostoriaindustries.com or b
y
calling 1-800-495-4525.

Issue Date: 09-18-07 Rev. Date: 04-24-08 Rev. Level: 04 ECN: n/a OIPM P/N: 3420204 Page 1 of 9
IMPORTANT SAFETY
INFORMATION INSIDE
• Serious injury or death possible
• Read, understand, and follow all
safety information and
instructions in this manual
before using or servicing this
product.
• Retain these instructions for
future reference.
*EXCLUDING RESIDENCES
1200 North Main Street
Fostoria, OH 44830
Phone: 800-495-4525
Fax: 419-435-0842
www.fostoriaindustries.com
OCH-series
Direct Wired Units
Indoor * and Outdoor Comfort Heaters
A DIVISION OF
REFER TO COMPLETE
INDEX OF
INFORMATION ON
PAGE 2
If you have questions about the
product you have purchased o
r
would like to leave us feedback,
please contact us via our website
www.fostoriaindustries.com or b
y
calling 1-800-495-4525.

Issue Date: 09-18-07 Rev. Date: 04-24-08 Rev. Level: 04 ECN: n/a OIPM P/N: 3420204 Page 2 of 9
INDEX
Index Page 2
Safety Signal Word Definitions Page 2
Specifications Page 3
Quartz Tube Installation Page 4
Heater Installation Pages 4 & 5
Wiring Page 6
Optional OCH-EBK Installation Instructions Page 7 & 8
Replacement Parts Page 8
Maintenance Page 9
Troubleshooting Page 9
Warranty Page 9
ATTENTION:
The table to the right provides
definitions of the signal words tha
t
can be found throughout this
manual. These signal words are
used to express the severity of the
hazard at hand. The signal words
are generally used in conjunction
with safety symbols that correspon
d
to the text for that particular hazard.
As you read this manual, refer bac
k
to this table when you are unsure o
f
the signal word definition.

Issue Date: 09-18-07 Rev. Date: 04-24-08 Rev. Level: 04 ECN: n/a OIPM P/N: 3420204 Page 3 of 9
SPECIFICATIONS
DESCRIPTION
Fostoria multi-purpose OCH series electric infrare
d
heaters are designed to provide efficient spot heating
for many commercial and industrial applications. All
models operate with a single quartz tube emitte
r
included with the heater, are easily installed, and are
equipped with spectral reflectors for excellent radian
t
output. They are built with corrosion-resistan
t
materials and are U.L. listed for both INDOO
R
(excluding residences) AND OUTDOO
R
applications in the USA and Canada.
EXPLOSION HAZARD
FIRE HAZARD
• Serious injury or death
may occur.
• Do not use in locations
containing hazardous
atmospheres.
• Do not use inside
residences.
Housing 24 ga. Galvannealed
Finish Hi Temp. Brown powder coat
Reflectors, end caps 0.040” gold anodized aluminum
Suspension Adjustable Mounting Bracket or Chain
U.L. file number E32304
A
B
C
Model P/N Tube P/N Watts Volts Amps Dim A* Dim B Dim C
OCH–46-120V 04804402 04432302 1500 120 12.5 42.0” 5.375” 6.500”
OCH–46-208V 04804502 04418102 2000 208 9.6 42.0” 5.375” 6.500”
OCH–46-240V 04804602 04418002 2000 240 8.3 42.0” 5.375” 6.500”
OCH–46-277V 04804702 04419302 2000 277 7.2 42.0” 5.375” 6.500”
OCH-57-208V 04804902 04416602 3000 208 14.4 53.0” 5.375” 6.500”
OCH-57-240V 04804802 04414702 3000 240 12.5 53.0” 5.375” 6.500”
OCH-57-277V 04805002 04419402 3000 277 10.8 53.0” 5.375” 6.500”
OCH-57-480V 04805102 04419502 2250 480 4.7 53.0” 5.375” 6.500”
* The optional Electrical Box
Accessory adds 2.384” to Dim A.

Issue Date: 09-18-07 Rev. Date: 04-24-08 Rev. Level: 04 ECN: n/a OIPM P/N: 3420204 Page 4 of 9
Q
UARTZ TUBE INSTALLATION
ELECTRICAL SHOCK
HAZARD
• Serious injury or death
may occur.
• Disconnect from electrical
supply before installing or
servicing this heater.
• Reflector end caps must be
installed prior to powerin
g
the unit; refer to note #3.
Each heater is equipped with two black hi-temperature silicone lea
d
wires and one green lead wire for ground termination. Make sure
power source conforms to the heater requirements. Use onl
y
Fostoria quartz tubes.
1. Insert quartz tube in the “L”-shaped slots in heater housing.
2. On each end of the quartz tube, place (1) lead wire ring
terminal, (1) lock washer and (1) hex nut on the threaded stu
d
and tighten securely (see image below). Lock washers an
d
hex nuts are provided in hardware package.
One lead wire is already installed in your heater, the
second lead wire is located in the hardware package.
NOTE – Use a second wrench to hold the inner hex nut in place
while tightening the outer hex nut. Failure to securel
y
ti
g
hten this
connection will cause the element to fail prematurely.
3. Attach reflector end caps to both ends of housing using the
(4) screws provided in hardware package.
HEATER INSTALLATION
Install heater so that the quartz tubes are
horizontal. Failure to do this ma
y
cause the
heatin
g
element within the tube to sa
g
and cause
premature burnout.
FIRE HAZARD
• Serious injury or death may
occur.
• Read and follow clearances
shown in box at left for ALL
OCH series heater
installations.
• Do not use inside residences.
MINIMUM INSTALLATION CLEARANCES
These heaters MUST be installed as follows:
12 inches minimum from a vertical surface
72 inches minimum from ANY combustible
material
3 inches minimum from the ceiling
36 inches minimum from other heaters
N
OTE: For optimum spot heating performance, it is recommended that the distance from the floor
should be approximately 7 to 9 feet for OCH-46 models, and 8 to 10 feet for OCH-57 models.
QUARTZ TUBE
LOCK WASHER HEX NUT
RING TERMINAL

Issue Date: 09-18-07 Rev. Date: 04-24-08 Rev. Level: 04 ECN: n/a OIPM P/N: 3420204 Page 5 of 9
HEATER INSTALLATION continued
SUSPENSION ALTERNATIVES
Your OCH series heater can be mounted with eithe
r
adjustable mounting brackets or chain suspension. Both
options are included with your heater.
Standard Mounting:
In the hardware bag shipped with your heater you will
find two adjustable mounting brackets and fastening
hardware. Using the mounting centers specified i
n
figures 1 & 2, mount your adjustable mounting
b
rackets (bends to the inside). Once mounted,
assemble the heater to brackets (figure 3) with
mounting hardware, these brackets enable the heater to
be angled in 15-degree increments up to 45 degrees.
Chain Suspension:
The heater can also be chain-hung as shown in figure
4. Cut the 16ga. chains (two 4 foot chains are
p
rovided) to desired length. Attach chains to heate
r
with “S”-hooks provided and suspend from overhea
d
structure. Crimp “S”-hooks closed after assembly.
Figure 1: end view
Figure 2: side view
Figure 4: end view
Install heater so that the quartz tubes are
horizontal. Failure to do this ma
y
cause the heatin
g
element within the tube to sa
g
and cause premature
burnout.
ELECTRICAL SHOCK
HAZARD
• Serious injury or death
may occur.
• Disconnect from electrical
supply before installing or
servicing this heater.
• Read and follow
installation clearance
requirements on page 4.
Adjustable mounting brackets
OCH46 = 41.0
OCH57 = 52.0
Figure 3: mounting view
10-32 Nylon
Lock Nut
Mounting
Bracket
10-32 x ½”
Screws

Issue Date: 09-18-07 Rev. Date: 04-24-08 Rev. Level: 04 ECN: n/a OIPM P/N: 3420204 Page 6 of 9
INTERNAL WIRING DIAGRAM
OCH heaters are equipped with two (2) hi-temperature
silicone lead wires and one (1) bonding* (ground) lea
d
wire. Supply wires must be copper and rated for at least 90º C.
1. Terminate field bonding wire to the bonding
(ground) wire of the heater with wire nuts
(customer supplied)
2. Terminate L1 and L2 field wires to the powe
r
wires of the heater with wire nuts (custome
r
supplied)
ELECTRICAL SHOCK
HAZARD
• Serious injury or death
may occur.
• Disconnect from electrical
supply before installing or
servicing this heater.
• This appliance must be
connected to a properly
bonded (grounded)
electrical source.
• Read and follow all safety
information in box below.
Do not make wirin
g
connections
inside of heater housing.
Use proper conduit fittin
g
s to prevent
wires from touchin
g
the housin
g
’s
metal edges.
Make certain the power source
conforms to specifications on the
heater label.
Do not depend on a thermostat or
other switch as the sole means o
f
disconnectin
g
power when installin
g
or servicin
g
heater. Alwa
y
s open the
safety switch and lock it open.
All wirin
g
must be performed b
y
a
licensed electrician.
Never connect the green or green-
y
ellow wire to a live or “hot”
conductor.
*Bonding is the term that describes the completion o
f
the electrical circuit back to its source, which allows a
breaker or fuse to clear if a short occurs in the line.
For totally exposed outdoor applications (not ceiling
p
rotected) all conduit, fittings and junction boxes must
be NEMA Type 4 or equal.
WIRING INSTRUCTIONS
Required conduit size: ½”
All conduit, fittings and junction boxes are supplie
d
by the customer.
Do not make wiring connections inside of heate
r
housing. All connections must be made in
a
customer supplied junction box.
See page 7 for optional electrical box kits available
from Fostoria Industries.
JUNCTION BOX and CONDUIT
TOTALLY EXPOSED OUTDOOR APPLICATIONS
Power
Supply
Hi-temp. wires
Junction Box
(customer supplied)
Quartz Lamp
Hi-temp. lead wire from
hardware package

Issue Date: 09-18-07 Rev. Date: 04-24-08 Rev. Level: 04 ECN: n/a OIPM P/N: 3420204 Page 7 of 9
WIRING INSTRUCTIONS continued
Loosen and remove the nut
and bolt securing the green
lead to the housing end cap
and discard the wire and all
hardware.
OPTIONAL ELECTRICAL BOX ASSEMBLY
STEP #1
Heater Housing
has been removed
for clarity of
instructions
From the inside of the housing; inser
t
the chase nipple into hole and thread i
t
into the back of the electrical box
assembly. Tighten securely.
Position the electrical box
assembly on the end of the heate
r
housing as shown.
From the inside of the housing;
insert the #8 screw thru the slot i
n
the housing into (1) of the 4
corner holes in the electrical box.
Tighten securely.
STEP #2 Attach the electrical box assembly to the end of the heater housing using the chase nipple and
screw provided.
Model No. Part No. Voltage Plug Configuration
OCH-EBK-120 08715502 120V NEMA 5-15P
OCH-EBK-208 08715602 208V N/A
OCH-EBK-240 08715702 240V NEMA 6-20P
OCH-EBK-480 08715802 277 & 480V N/A
OCH-EBK kits consist of:
(1) Electrical box assembly (2) Wire Nuts
-120V & 240V: Supplied with a cordset (1) Electrical box cover
-208V: Supplied with a cord (no plug) (1) #8-32 Screw
-277V & 480V: Direct wire only (1) Chase Nipple

Issue Date: 09-18-07 Rev. Date: 04-24-08 Rev. Level: 04 ECN: n/a OIPM P/N: 3420204 Page 8 of 9
REPLACEMENT PARTS LIST
ITEM QTY VOLTAGE OCH-46
PART NO. OCH-57
PART NO. DESCRIPTION
1 1 N/A 8561801 8560401
REFLECTOR
2 2
4 N/A 8561201
2326500 REFLECTOR END CAP
SCREW 8-32 X 3/8
3 1
120
208
240
277
480
04432302
04418102
04418002
04419302
N/A
N/A
04416602
04414702
04419402
04419502
QUARTZ TUBE
4 2
4
4 N/A 8561000
2402739
3447239
ADJUSTABLE MOUNTING BRACKETS
SCREW 10-32 X ½
NUT STOP 10-32
5 1 N/A 3440300 CHAIN KIT
STEP #3 Wiring
1. Factory installed black lead:
a. Route the lead wire thru the chase nipple into the electrical box assembly.
b. Trim lead wire to approx 6 inches in length and strip end approx 1/2 inch.
c. 120V, 208V and 240V units: Using one of the supplied wire nuts, attach this lead wire to the
black lead wire of the cordset.
d. 277V and 480V units: Using one of the supplied wire nuts, attach this lead to L1 of your
power supply.
2. Lead wire supplied in the hardware package:
a. Trim the lead wire to approx 6 inches in length; DO NOT cut off the ring terminal.
b. Strip end opposite of the ring terminal approx. 1/2 inch.
c. 120V, 208V and 240V units: Using the remaining wire nut, attach this lead wire to the white
lead wire of the cord or cordset.
d. 277V and 480V units: Using the remaining wire nut, attach this lead to L2 of your power
supply.
3. 480V units only: Attach a bonding* (ground) lead to the green screw located in the electrical box
assembly.
STEP #4 Attach the cover supplied with kit to the electrical box assembly.
STEP #5 Follow the installation instruction starting on page 4 of this manual.
WIRING INSTRUCTIONS continued

Issue Date: 09-18-07 Rev. Date: 04-24-08 Rev. Level: 04 ECN: n/a OIPM P/N: 3420204 Page 9 of 9
MAINTENANCE
1. Alwa
y
s disconnect heater from power
suppl
y
before performin
g
an
y
maintenance
or service.
2. Periodically clean the reflector with
a
dampened soft cloth using mild detergent.
Rinse with water and wipe dry with a clea
n
soft cloth.
ELECTRICAL SHOCK
HAZARD
• Serious injury or death
may occur.
• Disconnect from electrical
supply before installing or
servicing this heater.
TROUBLESHOOTING
The obligation of Fostoria Industries, Inc. under the terms of this warranty, shall be to
supply a new part, repair of defective part, or a refund, at the company’s option with no
cost to owner for the new or repaired part. Such parts are to be returned to the factory, o
r
such other location as the company may designate. This warranty does not obligate
Fostoria Industries, Inc. to bear the cost of labor in replacing any assembly, unit o
r
component part thereof, nor does the company assume any liability for secondar
y
charges, expenses for installing or removal, or any other consequential losses. The
company’s maximum liability shall not in any case exceed the list price for the produc
t
claimed to be defective.
The warranty shall not apply to any product or parts of products which have been repaired
or altered outside of Seller’s factory in any manner. Warranty is void on products that have
been determined to have been subjected to misuse, negligence or accident or which have
been used in a manner contrary to Seller’s instructions.
The warranty herein set forth is in lieu of all other warranties expressed o
r
implied.
Fostoria Industries, Inc. of Fostoria, Ohio 44830, warrants its products to the
owner against defects in material and workmanship for a twelve (12) month
period under normal use and service following date of manufacture or installation
when proof of such is provided to seller.
This Warranty requires that the owner, or his agent, install the equipment in
accordance with the National Electrical Code, any other applicable heating or
electrical codes and the manufacturer’s installation instructions. It further requires
that he perform reasonable and necessary maintenance on the unit. The
company is not liable for abuse or misuse of product as may be finally
determined by the company.
FOSTORIA INDUSTRIES, INC. – 1200 North Main Street - Fostoria, Ohio 44830 - (419) 435-9201
LIMITED WARRANTY
SYMPTOM POSSIBLE CAUSE(S) CORRECTIVE ACTION
Element does not energize.
Not enough heat.
Too much heat.
Hot spot in tube.
1. Defective element.
2. Improper connection.
1. Heater too small for application.
2. Heater mounted too high or too far.
1. Heater too large for application.
2. Heater mounted too low or too close.
1. Heater is not level.
2. Grease or moisture on tube.
1. Replace element.
2. Check connection to power outlet.
1. Add additional heater(s)
2. Decrease mounting height or
distance.
1. Replace with smaller heater.
2. Increase mounting height or distance.
1. Adjust to a level mount.
2. Clean tube-replace if problem
persists.

Issue Date: 09-25-07 Rev. Date: 04-24-08 Rev. Level: 03 ECN: n/a OIPM P/N: 3420203 Page 2 of 8
INDEX
Index Page 2
Safety Signal Word Definitions Page 2
Specifications Page 3
Quartz Tube Installation Page 4
Heater Installation Pages 4 & 5
Wiring Page 6
Replacement Parts Page 7
Maintenance Page 8
Troubleshooting Page 8
Warranty Page 8
ATTENTION:
The table to the right provides
definitions of the signal words tha
t
can be found throughout this
manual. These signal words are
used to express the severity of the
hazard at hand. The signal words
are generally used in conjunction
with safety symbols that correspon
d
to the text for that particular hazard.
As you read this manual, refer bac
k
to this table when you are unsure o
f
the signal word definition.

Issue Date: 09-25-07 Rev. Date: 04-24-08 Rev. Level: 03 ECN: n/a OIPM P/N: 3420203 Page 3 of 8
SPECIFICATIONS
DESCRIPTION
Fostoria multi-purpose OCH-SS series electric
infrared heaters are designed to provide efficient spo
t
heating for many commercial and industrial
applications. All models operate with a single quartz
tube emitter included with the heater, are easily
installed, and are equipped with spectral reflectors fo
r
excellent radiant output. They are built with
corrosion-resistant materials and are U.L. listed fo
r
both INDOOR (excludin
g
residences) AND
OUTDOOR applications in the USA and Canada.
EXPLOSION HAZARD
FIRE HAZARD
• Serious injury or death
may occur.
• Do not use in locations
containing hazardous
atmospheres.
• Do not use inside
residences.
Housing 24 ga. Type 304 Grain line Stainless Steel
Finish No. 3
Reflectors, end caps 0.040” gold anodized aluminum
Suspension Adjustable Mounting Bracket or Chain
U.L. file number E32304
A
B
C
Model P/N Tube P/N Watts Volts Amps Dim A* Dim B Dim C
OCH–46-120V-SS 04805202 04432302 1500 120 12.5 42.0” 5.375” 6.500”
OCH–46-208V-SS 04805302 04418102 2000 208 9.6 42.0” 5.375” 6.500”
OCH–46-240V-SS 04805402 04418002 2000 240 8.3 42.0” 5.375” 6.500”
OCH–46-277V-SS 04805502 04419302 2000 277 7.2 42.0” 5.375” 6.500”
OCH-57-208V-SS 04805702 04416602 3000 208 14.4 53.0” 5.375” 6.500”
OCH-57-240V-SS 04805602 04414702 3000 240 12.5 53.0” 5.375” 6.500”
OCH-57-277V-SS 04805802 04419402 3000 277 10.8 53.0” 5.375” 6.500”
OCH-57-480V-SS 04805902 04419502 2250 480 4.7 53.0” 5.375” 6.500”
* Electrical Box adds
2.384” to Dim A.

Issue Date: 09-25-07 Rev. Date: 04-24-08 Rev. Level: 03 ECN: n/a OIPM P/N: 3420203 Page 4 of 8
Q
UARTZ TUBE INSTALLATION
ELECTRICAL SHOCK
HAZARD
• Serious injury or death
may occur.
• Disconnect from electrical
supply before installing or
servicing this heater.
• Reflector end caps must be
installed prior to powerin
g
the unit; refer to note #3.
HEATER INSTALLATION
Install heater so that the quartz tubes are
horizontal. Failure to do this ma
y
cause the
heatin
g
element within the tube to sa
g
and cause
premature burnout.
FIRE HAZARD
• Serious injury or death may
occur.
• Read and follow clearances
shown in box at left for ALL
OCH series heater
installations.
• Do not use inside residences.
MINIMUM INSTALLATION CLEARANCES
These heaters MUST be installed as follows:
12 inches minimum from a vertical surface
72 inches minimum from ANY combustible
material
3 inches minimum from the ceiling
36 inches minimum from other heaters
N
OTE: For optimum spot heating performance, it is recommended that the distance from the floor
should be approximately 7 to 9 feet for OCH-46 models, and 8 to 10 feet for OCH-57 models.
Each heater is equipped with two black hi-temperature silicone lea
d
wires and one green lead wire for ground termination. Make sure
power source conforms to the heater requirements. Use onl
y
Fostoria quartz tubes.
1. Insert quartz tube in the “L”-shaped slots in heate
r
housing.
2. On each end of the quartz tube, place (1) lead wire ring
terminal, (1) lock washer and (1) hex nut on the threaded stu
d
and tighten securely (see image below). Lock washers an
d
hex nuts are provided in hardware package.
One lead wire is already installed in your heater, the
second lead wire is located in the hardware package.
NOTE – Use a second wrench to hold the inner hex nut in place
while tightening the outer hex nut. Failure to securel
y
ti
g
hten this
connection will cause the element to fail prematurely.
3. Attach reflector end caps to both ends of housing using
the (4) screws provided in hardware package.
QUARTZ TUBE
LOCK WASHER HEX NUT
RING TERMINAL

Issue Date: 09-25-07 Rev. Date: 04-24-08 Rev. Level: 03 ECN: n/a OIPM P/N: 3420203 Page 5 of 8
HEATER INSTALLATION continued
SUSPENSION ALTERNATIVES
Your OCH-SS series heater can be mounted with eithe
r
adjustable mounting brackets or chain suspension. Both
options are included with your heater.
Standard Mounting:
In the hardware bag shipped with your heater you will
find two adjustable mounting brackets and fastening
hardware. Using the mounting centers specified i
n
figures 1 & 2, mount your adjustable mounting
b
rackets (bends to the inside). Once mounted,
assemble the heater to brackets (figure 3) with
mounting hardware, these brackets enable the heater to
be angled in 15-degree increments up to 45 degrees.
Chain Suspension:
The heater can also be chain-hung as shown in figure
4. Cut the 16ga. chains (two 4 foot chains are
provided) to desired length. Attach chains to heate
r
with “S”-hooks provided and suspend from overhea
d
structure. Crimp “S”-hooks closed after assembly.
Figure 1: end view
Figure 2: side view
Figure 4: end view
Install heater so that the quartz tubes are
horizontal. Failure to do this ma
y
cause the heatin
g
element within the tube to sa
g
and cause premature
burnout.
ELECTRICAL SHOCK
HAZARD
• Serious injury or death
may occur.
• Disconnect from electrical
supply before installing or
servicing this heater.
• Read and follow
installation clearance
requirements on page 4.
Adjustable mounting brackets
OCH46 = 41.0
OCH57 = 52.0
Figure 3: mounting view
10-32 Nylon
Lock Nut
Mounting
Bracket
10-32 x ½”
Screws

Issue Date: 09-25-07 Rev. Date: 04-24-08 Rev. Level: 03 ECN: n/a OIPM P/N: 3420203 Page 6 of 8
INTERNAL WIRING DIAGRAM
OCH-SS heaters are equipped with two hi-temperature
silicone lead wires and a bonding* (ground)
termination. Supply wires must be copper and rated for a
t
least 90º C.
1. Fasten field bonding wire to the ground scre
w
and assure tight connection.
2. Terminate L1 and L2 field wires to the powe
r
wires of the heater with wire nuts (custome
r
supplied)
ELECTRICAL SHOCK
HAZARD
• Serious injury or death
may occur.
• Disconnect from electrical
supply before installing or
servicing this heater.
• This appliance must be
connected to a properly
bonded (grounded)
electrical source.
• Read and follow all safety
information in box below.
Make certain the power source
conforms to specifications on the
heater label.
Do not depend on a thermostat or
other switch as the sole means o
f
disconnectin
g
power when installin
g
or servicin
g
heater. Alwa
y
s open the
safety switch and lock it open.
All wirin
g
must be performed b
y
a
licensed electrician.
Never connect the green or green-
y
ellow wire to a live or “hot”
conductor.
*Bonding is the term that describes the completio
n
of the electrical circuit back to its source, which
allows a breaker or fuse to clear if a short occurs i
n
the line.
For totally exposed outdoor applications (not ceiling
p
rotected) all conduit and fittings must be NEMA
Type 4 or equal.
The junction box cover gasket (supplied with unit)
must be used to maintain the outdoor rating of the
heater.
WIRING
TOTALLY EXPOSED OUTDOOR APPLICATIONS
Power
Supply
Hi-temp. wires
Junction Box
(located on end of
heater)
Quartz Lamp
Hi-temp. lead wire from
hardware package
Required conduit size: ½”
All conduit fittings and conduit are supplied by the
customer.
CONDUIT

Issue Date: 09-25-07 Rev. Date: 04-24-08 Rev. Level: 03 ECN: n/a OIPM P/N: 3420203 Page 7 of 8
REPLACEMENT PARTS LIST
ITEM QTY VOLTAGE OCH-46
PART NO. OCH-57
PART NO. DESCRIPTION
1 1 N/A 8561801 8560401 REFLECTOR
2 2
4 N/A 8561201
2326500 REFLECTOR END CAP
SCREW 8-32 X 3/8
3 1
120
208
240
277
480
04432302
04418102
04418002
04419302
N/A
N/A
04416602
04414702
04419402
04419502
QUARTZ TUBE
4 2
4
4 N/A 8561039
2402739
3447239
ADJUSTABLE MOUNTING BRACKETS
SCREW 10-32 X ½
NUT STOP 10-32
5 1 N/A 3440300 CHAIN KIT
6 1 N/A 3102600 JUNCTION BOX COVER

Issue Date: 09-25-07 Rev. Date: 04-24-08 Rev. Level: 03 ECN: n/a OIPM P/N: 3420203 Page 8 of 8
MAINTENANCE
1. Alwa
y
s disconnect heater from power
suppl
y
before performin
g
an
y
maintenance
or service.
2. Periodically clean the reflector with
a
dampened soft cloth using mild detergent.
Rinse with water and wipe dry with a clea
n
soft cloth.
ELECTRICAL SHOCK
HAZARD
• Serious injury or death
may occur.
• Disconnect from electrical
supply before installing or
servicing this heater.
TROUBLESHOOTING
The obligation of Fostoria Industries, Inc. under the terms of this warranty, shall be to
supply a new part, repair of defective part, or a refund, at the company’s option with no
cost to owner for the new or repaired part. Such parts are to be returned to the factory, o
r
such other location as the company may designate. This warranty does not obligate
Fostoria Industries, Inc. to bear the cost of labor in replacing any assembly, unit o
r
component part thereof, nor does the company assume any liability for secondar
y
charges, expenses for installing or removal, or any other consequential losses. The
company’s maximum liability shall not in any case exceed the list price for the produc
t
claimed to be defective.
The warranty shall not apply to any product or parts of products which have been repaired
or altered outside of Seller’s factory in any manner. Warranty is void on products that have
been determined to have been subjected to misuse, negligence or accident or which have
been used in a manner contrary to Seller’s instructions.
The warranty herein set forth is in lieu of all other warranties expressed o
r
implied.
Fostoria Industries, Inc. of Fostoria, Ohio 44830, warrants its products to the
owner against defects in material and workmanship for a twelve (12) month
period under normal use and service following date of manufacture or installation
when proof of such is provided to seller.
This Warranty requires that the owner, or his agent, install the equipment in
accordance with the National Electrical Code, any other applicable heating or
electrical codes and the manufacturer’s installation instructions. It further requires
that he perform reasonable and necessary maintenance on the unit. The
company is not liable for abuse or misuse of product as may be finally
determined by the company.
FOSTORIA INDUSTRIES, INC. – 1200 North Main Street - Fostoria, Ohio 44830 - (419) 435-9201
LIMITED WARRANTY
SYMPTOM POSSIBLE CAUSE(S) CORRECTIVE ACTION
Element does not energize.
Not enough heat.
Too much heat.
Hot spot in tube.
1. Defective element.
2. Improper connection.
1. Heater too small for application.
2. Heater mounted too high or too far.
1. Heater too large for application.
2. Heater mounted too low or too close.
1. Heater is not level.
2. Grease or moisture on tube.
1. Replace element.
2. Check connection to power outlet.
1. Add additional heater(s)
2. Decrease mounting height or
distance.
1. Replace with smaller heater.
2. Increase mounting height or distance.
1. Adjust to a level mount.
2. Clean tube-replace if problem
persists.

Issue Date: 08-27-07 Rev. Date: 04-24-08 Rev. Level: 07 ECN: n/a OIPM P/N: 3420486 Page 1 of 8
1200 North Main Street
Fostoria, OH 44830
Phone: 800-495-4525
Fax: 419-435-0842
IMPORTANT SAFETY
INFORMATION INSIDE
• Serious injury or death possible
• Read, understand, and follow all
safety information and
instructions in this manual
before using or servicing this
product.
• Retain these instructions for
future reference.
A DIVISION OF
*EXCLUDING RESIDENCES
**COVERED APPLICATIONS
CH Series
COMFORT HEATERS
for
INDOOR* and Semi-Protected** OUTDOOR USE
www.fostoriaindustries.com
REFER TO COMPLETE
INDEX OF
INFORMATION ON
PAGE 2
If you have questions about the
product you have purchased o
r
would like to leave us feedback,
please contact us via our website
www.fostoriaindustries.com or b
y
calling 1-800-495-4525.

Issue Date: 08-27-07 Rev. Date: 04-24-08 Rev. Level: 07 ECN: n/a OIPM P/N: 3420486 Page 2 of 8
INDEX
Index Page 2
Safety Signal Word Definitions Page 2
Specifications Page 3
Quartz Tube Installation Page 4
Heater Installation Pages 4 & 5
Wiring Page 6
Replacement Parts Page 7
Maintenance Page 8
Troubleshooting Page 8
Warranty Page 8
ATTENTION:
The table to the right provides
definitions of the signal words tha
t
can be found throughout this
manual. These signal words are
used to express the severity of the
hazard at hand. The signal words
are generally used in conjunction
with safety symbols that correspon
d
to the text for that particular hazard.
As you read this manual, refer bac
k
to this table when you are unsure o
f
the signal word definition.

Issue Date: 08-27-07 Rev. Date: 04-24-08 Rev. Level: 07 ECN: n/a OIPM P/N: 3420486 Page 3 of 8
SPECIFICATIONS
DESCRIPTION
Fostoria multi-purpose CH series electric infrare
d
heaters are designed to provide efficient spot heating
for many commercial and industrial applications. All
models operate with a single quartz tube emitte
r
included with the heater, are easily installed, and are
equipped with spectral reflectors for excellent radian
t
output. They are built with corrosion-resistan
t
materials and are U.L. listed for INDOOR and
Semi-Protected OUTDOOR applications in the
USA and Canada. When used outdoors, they shoul
d
b
e installed under a canopy or other similar type
installation that is semi-protected.
EXPLOSION HAZARD
FIRE HAZARD
• Serious injury or death
may occur.
• Do not use in locations
containing hazardous
atmospheres.
• Do not use as a residential
or household heater.
Housing 24 ga. Galvannealed
Finish Hi temp. brown powder coat
Reflectors, end
caps 0.040” gold anodized aluminum
Suspension Chain or Optional Adjustment
Mounting Bracket(CH-MB)
U.L. file
number E32304
SPECIFICATIONS
A
B
C
Model P/N Tube P/N Watts Volts Amps Cordset Dim A Dim B Dim C
CH–46C 04860002 04432302 1500 120 12.5 YES 42.0” 5.375” 6.500”
CH-57C 04860102 04414702 3000 240 12.5 YES 53.0” 5.375” 6.500”
Voltage Cordset Plugs Matching
Receptacle
120V NEMA 5-15P NEMA 5-15R
240V NEMA 6-15P NEMA 6-15R
6FT. CORDSET EXITS
END OF HEATER.
(
NOT SHOWN
)
OPTIONAL MOUNTING
BRACKET SHOWN
Table of contents
Other Fostoria Heater manuals

Fostoria
Fostoria MITEY MIDGET User manual

Fostoria
Fostoria FFH-912B Specification sheet

Fostoria
Fostoria RPH-208-A Specification sheet

Fostoria
Fostoria FSS Series User manual

Fostoria
Fostoria MTM 222 User manual

Fostoria
Fostoria CH-6424-1C User manual
Fostoria
Fostoria SUN-MITE RPH-240-A User manual

Fostoria
Fostoria OCH–46-120V User manual
Fostoria
Fostoria FSA Series User manual
Fostoria
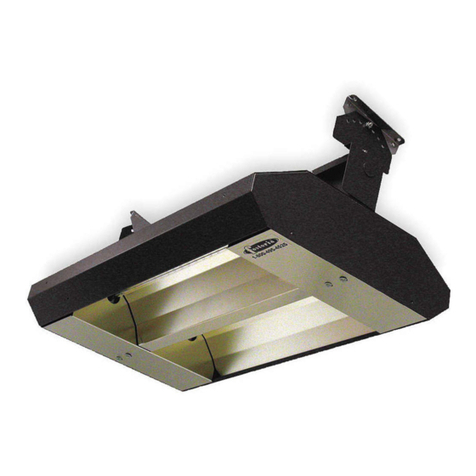
Fostoria 222 Series User manual