FREEDOM INNOVATIONS
Download the Kinnex App from the iTunes store
or Google Play store for the Android App.
1
2
Patient User Guide
Check Battery Status: Battery status is indicated in Status Screen and also is displayed by
battery symbol in bottom right of screen. The number of bars indicates the battery status.
To Add or Change Footwear: Tap the Shoe icon at the bottom of the screen. To add a pair of
shoes, tap the (+) button in the top right of the screen. Follow instructions on the
screens to name and calibrate shoes.
To change to a dierent pair of shoes, tap the Shoe icon which will provide a list of saved
shoes. Tap the name of the desired shoes. Any resistance changes made will be saved under
that shoe setting.
*Note: The name of the current pair of shoes to which the Kinnex is calibrated is shown at the
bottom of the screen.
To Engage the Manual Lock: This feature is designed to assist with driving a car, putting
on clothes or footwear, or any activity where a xed ankle position is desired. To engage,
tap the“Tools”icon at the bottom of the screen. Tap“Manual Lock”then slide the switch
to the right to turn on (indicated by green). To turn o the “Manual Lock” feature, slide
switch back to the left.
It is required to engage the lock when driving.
CAUTION: When the battery is completely depleted, the Manual Lock feature is not
available and driving is NOT recommended.
Disconnect from App
To disconnect the app from the ankle, tap on the“Tools”icon on the bot-
tom of the screen.
Then tap“Disconnect.”
*Bilateral Kinnex wearers will need to disconnect from one ankle to connect and
to the other ankle.
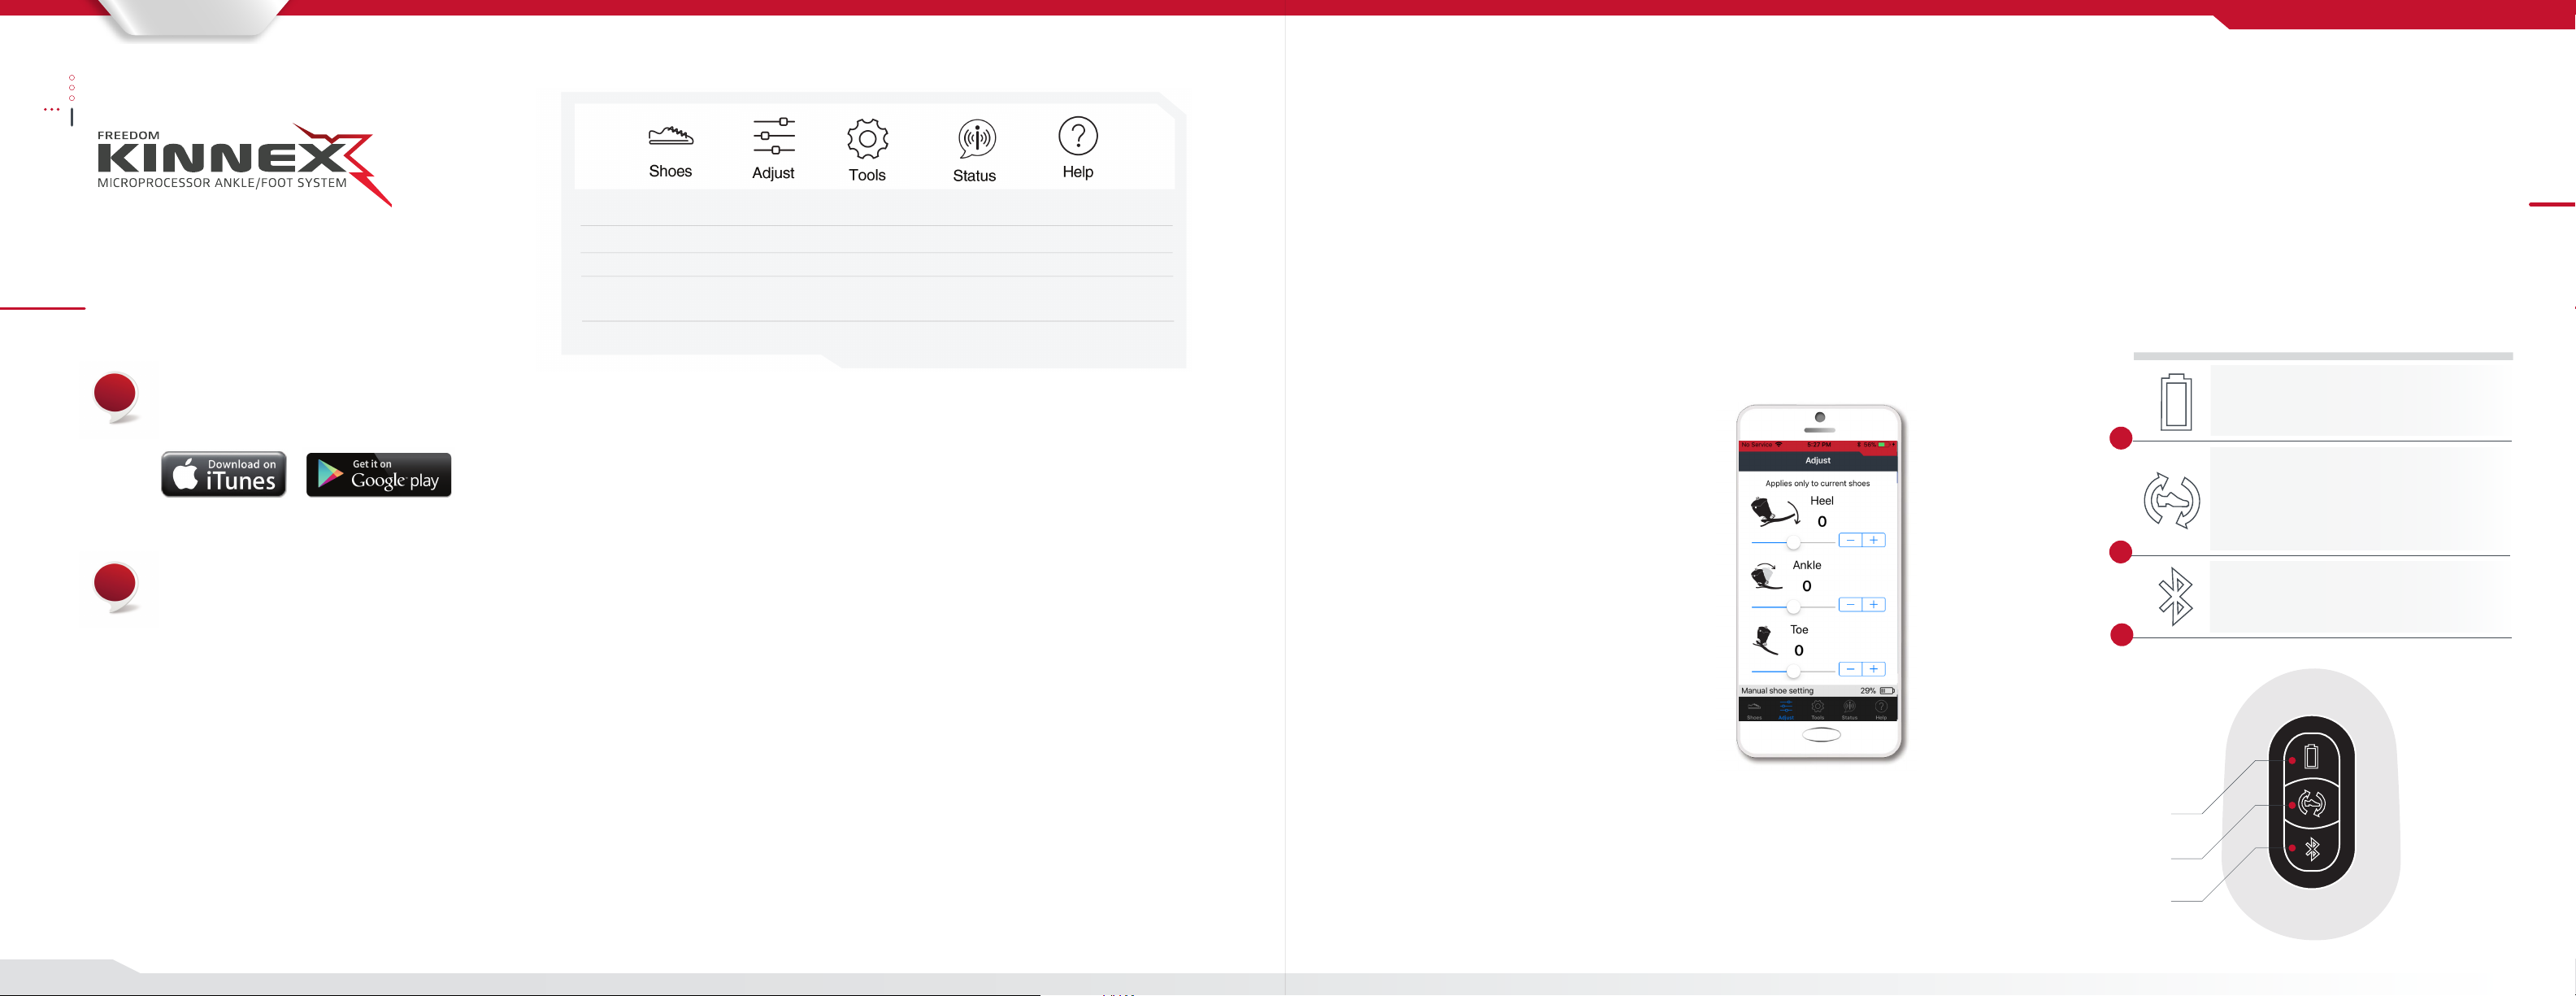
Resistance adjustments
Fine tuning resistance adjustments can be made by the patient as needed.
To adjust the stiness of the ankle, tap“Adjust” at the bottom of the
screen. Any adjustments made will be saved under this shoe (if you change
shoes and would like to keep these same resistance changes, you will
need to manually change them again once switching to the other shoes).
(Figure 1)
For use with Kinnex™App
Start the Kinnex App and tap“Connect”. Tap the
serial number (or custom name) of the ankle to
connect. The rst time you connect, you will be
prompted to press and release the Bluetooth
Button on the ankle unit, pairing the app with
the ankle.
*Note: The patient app will not be able to connect
when the ankle unit is in “clinician mode”.
(When it is in this mode, the blue light will be on
or blinking. To exit this mode, press and hold the
Bluetooth button until the blue light turns o.)
Shoes: Allows user to manage shoes (select, add, rename, delete)
Adjust: Allows user to make minor resistance settings that are specic to each shoe
Tools: Allows user to engage Manual Lock, Disconnect or Unpair device
Status: Displays ankle name, battery status, total steps, serial number, part number, rmware and App
versions
Help: Navigates user to appropriate help
Heel: Adjusts stiness of heel
Ankle: Adjusts stiness as the ankle rotates forward
Toe: Adjusts stiness of the toe
A
B
C
Figure 2
Keypad Buttons
There are three buttons on the front of the Kinnex ankle.
From top to bottom they are the Battery Status Button,
Change Footwear Button, and the Bluetooth Button. The
buttons are used to control and interact with the Kinnex
ankle when a mobile device is not available or desired.
(Figure 2)
Key Pad Button Functions
Battery / Power Status Button
• Check battery power levels
Change Footwear Button
• Change footwear and calibrate ankle to new
shoes
• Manual Lock feature
Bluetooth Button
• Pair ankle to smart device
A
B
C
™2.0
Figure 1
* Sliding to the right will increase stiness,
sliding to the left will decrease stiness
* These adjustments will be saved for cur-
rent pair of shoes and will return to other
settings saved under dierent shoes


