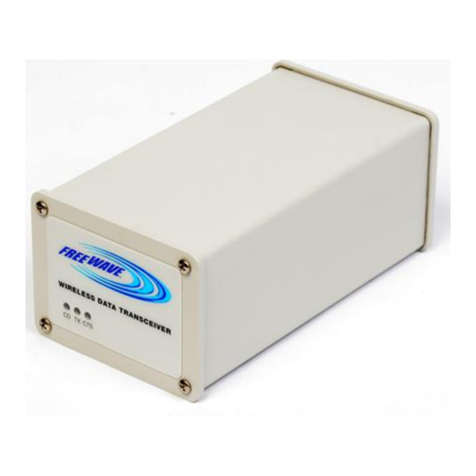
FreeWave FGR2-PE User manual

Part Number: LUM0024AB
Revision: A
Last Updated:12/7/2011
FGR2-PE Wireless Data Transceiver
Firmware 2.22
User Manual and Reference Guide
For use with Baseline Irrigaon Controllers

Safety Information
The products described in this manual can fail in a variety of modes due to misuse, age, or malfunction. Systems
with these products must be designed to prevent personal injury and property damage during product operation
and in the event of product failure.
Warning! Do not remove or insert diagnostics cable while circuit is live unless the areais
known to be free of ignition concentrations of flammable gases or vapors.
Warranty
FreeWave Technologies, Inc. warrants your FreeWave® Wireless Data Transceiver against defects in materials
and manufacturing for a period of two years from the date of shipment. In the event of a Product failure due to
materials or workmanship, FreeWave will, at its option, repair or replace the Product. The Product must be returned
to FreeWave upon receiving a Return Material Authorization (RMA) for evaluation of Warranty Coverage.
In no event will FreeWave Technologies, Inc., its suppliers, and its licensors be liable for any damages arising from
the use of or inability to use this Product. This includes business interruption, loss of business information, or other
loss which may arise from the use of this Product. Please be advised that OEM customer’s warranty periods may
vary.
Warranty Policy may not apply:
1. If Product repair, adjustments or parts replacements is required due to accident, neglect, unusual
physical, electrical or electromagnetic stress.
2. If Product is used outside of FreeWave specifications.
3. If Product has been modified, repaired, or altered by Customer unless FreeWave specifically
authorized such alterations in each instance in writing. This includes the addition of conformal coating.
Special Rate Replacement Option
A special rate replacement option is offered to non-warranty returns or upgrades. The option to purchase the
replacement unit at this special rate is only valid for that RMA. The special replacement rate option expires if not
exercised within 30 days of final disposition of RMA.
Restricted Rights
Any product names mentioned in this manual may be trademarks or registered trademarks of their respective
companies and are hereby acknowledged. Information in this manual is subject to change without notice and is
proprietary and confidential to FreeWave Technologies, Inc..
This manual is for use by purchasers and other authorized users of FreeWave® tranceivers.
No part of this manual may be reproduced or transmitted in any form or by any means, electronic or mechanical, or
for any purpose without the express written permission of FreeWave Technologies, Inc.. FreeWave reserves the
right to make changes to this manual without notice. Unless otherwise agreed to in writing,FreeWave assumes no
responsibility or liability for the use of this manual or the infringement of any copyright or other proprietary
right.FreeWave shall deem nothing contained in this manual as warranty or guarantee.
FreeWave's Wireless Data Transceivers are designed and manufactured in the United States of America.
FreeWave Technologies, Inc.
1800 South Flatiron Court
Boulder, CO 80301
303.444.3862
Toll Free: 1.866.923.6168
Printed in the United States of America. 303.786.9948
Copyright © 2011 by FreeWave Technologies, Inc. All rights reserved. www.freewave.com
LUM0024AB Rev A ii
This product is licensed by The United States. Diversion contrary to U.S. law is prohibited. Shipment or re-
export of this product outside of The United States may require authorization by the U.S. Bureau of Export
Administration. Please contact FreeWave Technologies, Inc. for assistance and further information.
UL Specifications
The FGR2-PE transceiver is suitable for use in Class I, Division 2, Groups A, B, C, and D or non-hazardous
locations only.
Warning! Explosion Hazard! Substitution of components may impair suitability for Class I,
Division 2.
The diagnostics port and cable do not have a latching connector and cannot be used in a hazardous location.
Important: UL approved devices must be connected to a Class 2 power source.
LUM0024AB Rev A iii

FCC Notifications
This device complies with part 15 of the FCC rules. Operation is subject to the following two conditions: 1) This
device may not cause harmful interference and 2) this device must accept any interference received, including
interference that may cause undesired operation.
This device must be operated as supplied by FreeWave Technologies, Inc.. Any changes or modifications made to
the device without the express written approval of FreeWave Technologies, Inc. may void the user's authority to
operate the device.
Warning! The FGR2-PE has a maximum transmitted output power of 1 W. It is
recommended that the transmit antenna be kept at least 23 cm away from nearby persons
to satisfy FCC RF exposure requirements.
Whenever any FreeWave Technologies, Inc. module is placed inside an enclosure a label must be placed on
the outside of that enclosure which includes the module's FCC ID.
GNU Notification
Some of the software in the firmware is licensed under the GNU General Public License and other Open
Source and Free Software licenses. You can obtain corresponding source by contacting FreeWave and
requesting the source on CD.
LUM0024AB Rev A iv

Document RevisionHistory
Date Rev Letter Updates Made
12/07/2011 A Updates include but are not limited to:
lDocument is now broken into chapters and a series of appendices to help
make information easier to file. See the table of contents.
lAll parameters that are available to set are listed in alphabetical order in
their respective chapters. Each parameter is also listed in the added index.
lFirmware revision information is available in Appendix A.
lDiscovery Server procedures are now in Appendix C.
lAdded Windows 7 instructions for changing an IP address.
lAdded Tool Suite procedures where appropriate throughout.
lConverted to the current FreeWave look and feel.
LUM0024AB Rev A v

LUM0024AB Rev A vi

Table Of Contents
Chapter 1: Introduction 1
Getting to Know Your Plus-Style Transceiver 1
Boot-Up LED Sequence 2
Ethernet Port Conditions 2
Error LED Conditions 3
Com Port LED Conditions 3
Choosing a Location for the Transceivers 3
Choosing Point-to-Point or Point-to-MultiPoint Operation 3
Chapter 2: Setting Up and Programming Transceivers 7
Basic Steps to Programming Plus-Style Transceivers 7
MultiPoint Network Considerations 8
Powering the Transceiver 8
Determining and Setting a Transceiver's IP Address 9
Using HyperTerminal 9
Using Discovery Server 14
Resetting Transceivers to the Factory Default Settings 15
ConfigurationTool Options 16
Reading Plus-Style Transceivers in Tool Suite 18
Accessing Configuration Web Pages 19
Navigating the Web Pages 19
Providing Site Information 20
Using the MultiPoint Gateway to Change All Connected Transceivers 21
Creating User Logins 22
Defining User Groups 22
Adding and Deleting Users 23
Changing User Passwords 24
Upgrading Plus-Style Transceiver Firmware Using TFTPServer 24
Before You Get Started Upgrading Firmware Using the TFTPServer 25
Configuring the TFTP Server 25
Upgrading Firmware Using the Web Configuration Pages 26
Upgrading Plus-Style Firmware Globally 27
Verifying Firmware Upgrades 28
Common Firmware Upgrade Issues and Solutions 28
Chapter 3: IP and Network Communication Settings 31
LUM0024AB Rev A vii

IP Parameter Reference 31
Default Gateway 32
IP Address 32
NTP Client Enable 33
NTP IP Address 33
Push to Syslog Server 33
Spanning Tree 33
Subnet Mask 34
Syslog Server 1 34
Syslog Server 2 34
VLAN Data ID 35
VLAN Default Gateway 35
VLAN IP Address 35
VLAN Management ID 35
VLAN Mode 36
VLAN Subnet Mask 36
Web Page Port (http) 36
Chapter 4: Serial Port Settings 39
Setting a Serial Port's Mode 39
Disabling Serial Ports 40
Using the Serial Port as an Alarm Client 41
Viewing a Serial Port's Status 41
Ethernet (Rx and Tx) 42
Serial (Rx and Tx) 42
Status 42
Serial Port Parameter Reference 42
Alarm IP & Port 42
Alarm Retry Limit (Attempts) 43
Drop Link 43
Multicast IP 43
Multicast Port 44
Serial Baud Rate 44
Serial CD Mode 44
Serial Data Bits 45
Serial Flow Control 45
Serial Interface 45
LUM0024AB Rev A viii

Serial Modbus RTU 45
Serial Parity 46
Stop Bits 46
TCP Client Enable 46
TCP Client IP 47
TCP Client Port 47
TCP Server Enable 47
TCPServer Inactivity Timeout 47
TCPServer Port 48
UDP Local IP Port 48
UDP Power Up IP 48
UDP Power Up Port 49
UDP/Multicast Enable 49
Utilize For Alarm 50
Chapter 5: Radio Settings 51
Radio Setup Parameter Reference 52
Addressed Repeat 52
Broadcast Repeat 52
Broadcast Repeat in MultiPoint Networks with Repeaters 53
Frequency Key 54
Frequency Zones 54
Network ID 54
Master Tx Beacon 55
Max Packet Size and Min Packet Size 55
Modem Mode 58
Network Type 59
Repeaters 60
Retry Timeout 60
RF Data Rate 61
Slave Attempts 61
Slave Connect Odds 62
Subnet ID 62
Subnet ID Example 63
Transmit Power 65
Transmit Rate 65
About the Call Book 66
LUM0024AB Rev A ix

Programming Point-To-Point Extended Call Book to Use Three or Four Repeaters 66
Programming Point-to-MultiPoint Call Book 67
Programming Point-to-MultiPoint Extended Call Book 68
Chapter 6: Security Settings 71
Viewing the System Log 71
Security Parameter Reference 72
AES Encryption Key 72
Detach Local Ethernet 73
Force SSL (https) 73
MAC Filter 73
Peer To Peer 74
RADIUS Enable 74
RADIUS IP Address 75
RADIUS Port 75
Shared Secret 75
User Password 75
Chapter 7: SNMP Settings 77
SNMP Parameter Reference 77
Auth Method 78
Auth Password (v3) 78
Privacy Method 78
Privacy Password (v3) 79
Read Community 79
SNMP Version 79
Trap Community 79
Trap Manager IP 80
Trap Version 80
Write Community 80
SNMP Trap Limit Parameter Reference 80
Delta Alarm Enable 81
Delta Alarm Below 81
Min Fault Time 81
Noise Alarm Above 81
Noise Alarm Enable 82
Rx Rate Alarm Below 82
Rx Rate Alarm Enable 82
LUM0024AB Rev A x

Signal Alarm Below 82
Signal Alarm Enable 83
Tx Rate Alarm Below 83
Tx Rate Alarm Enable 83
VSWR Alarm Above 83
VSWR Alarm Enable 84
Voltage Alarm Above 84
Voltage Alarm Below 84
Voltage Alarm Enable 84
Chapter 8: Viewing Transceiver Status and Statistics 85
Refreshing and Resetting Statistics 86
Available Statistics 86
Bad Packets 86
Broadcast Packets 86
Connected To 86
Disconnect Count 86
Distance 86
Firmware Version 86
Hardware Version 86
Noise 86
Notes 87
Packets Dropped 87
Packets Sent 87
Peer to Peer Packets 87
Radio Addressed Packets 87
Radio Parse Error 87
Received 87
Reflected Power 87
RX Success Rate 87
RX Throughput 87
Signal 88
Site Contact 88
Site Name 88
Software Boot Version 88
System Name 88
Temperature 88
LUM0024AB Rev A xi

TX Success Rate 88
TX Throughput 88
Un-Acked Packets 88
Upstream Noise 89
Upstream Signal 89
Uptime 89
Voltage 89
Wireless Version 89
Chapter 9: Data Communication Link Examples 91
Chapter 10: Additional Transceiver Information 95
Operational RS422 and RS485 Information 95
RS422 and RS485 Full Duplex Pinouts 96
RS485 Half Duplex Pinouts 96
RJ45 to DB9 Cable 96
Com1 and Com2 RJ45 Pin Assignments 96
DB9 Connector Pin Assignments 97
FGR2-PE Specifications 99
Transmitter 99
Receiver 99
Data Transmission 99
Power Requirements 99
Factory Default Settings 101
Mechanical Drawing 106
Appendix A: Firmware Updates 107
Version 2.22 107
Version 2.21 108
Appendix B: Using the FreeWave TFTP Server 111
Installing and Running the TFTP Sever 112
TFTP Server Client Connections 112
TFTP Control Options 113
TFTP Server Log 113
Moving and Renaming the TFTP Server Log 113
Clearing the TFTP Server File 114
Setting the TFTP Server Root Folder 114
Appendix C: Using the Discovery Server 115
Adding Transceivers Manually to the Discovery Server List 116
LUM0024AB Rev A xii

Deleting Transceivers from the Discovery Server List 116
Changing Basic Settings Using Discovery Server 116
Accessing a Transceiver's Web Page from Discovery Server 117
Rebooting All Transceivers in the Discovery Server List 117
Viewing Diagnostic Information in Discovery Server 117
Working with Network Files in Discovery Server 118
Exporting Transceiver Information from Discovery Server 119
Upgrading Firmware from Discovery Server 119
Appendix D: Changing the Computer IP Address in Windows 121
Changing the Computer IP Address in Windows XP 121
Changing the IP Address in Windows 7 122
Appendix E: Object Tree for FREEWAVE-TECHNOLOGIES-MIB 125
Object List for FREEWAVE-TECHNOLOGIES-MIB 128
Index 135
LUM0024AB Rev A xiii

LUM0024AB Rev A xiv

LUM0024AB Rev A
Preface
This document includes the following regarding your FreeWave FGR2-PE transceiver:
lAn introduction to the transceiver, its ports and LEDs, and how to determine the mode you want to
run it in.
lBasic programming information including the interfaces you can use to program the transceiver,
determining a transceiver's IPaddress, and setting up permissions to access the transceiver
setup information, and how to perform firmware upgrades.
lDescriptions of each parameter available when defining IP information, serial port setup, general
transceiver setup, SNMP information, and security.
lDescriptions of each statistic that is available about the transceivers state and performance.
lExamples of how FreeWave transceivers can exist in a network with other transceivers.
lPin outs, specifications, and other mechanical information.
lInformation additional tools you might use when working with your Plus-style transceiver.
For information about the firmware releases that apply to the transceiver, see Appendix A.
Notational Conventions
This guide uses the following notational conventions:
lBold - Indicates items that you select, parameter settings, and parameter names.
lWarning! - Indicates a situation that might cause damage to your radio, your data, or your
network.
l- Provides time saving or informative suggestions about using the product.
xv

FGR2-PE Wirelss Data Transceiver
LUM0024AB Rev A
The term "radio" and "transceiver" are used throughout this manual to refer to the FGR2-PE.
Contacting FreeWave Technical Support
For up-to-date troubleshooting information, check the Support page at www.freewave.com.
FreeWave provides technical support Monday through Friday, 7:30 AM to 5:30 PM Mountain Time (GMT -7).
Call toll-free at 1.866.923.6168, within Colorado call 303.381.9200, or contact us through email at
moreinfo@freewave.com.
Documentation Feedback
Your feedback is important to us! FreeWave Technologies, Inc. is committed to continually improving the
quality of our documentation. If you have any comments or suggestions about this document, send them to us
at techpubs@freewave.com. Please include the title of the document or the document's part number in your
email.
xvi

LUM0024AB Rev A
Chapter 1: Introduction
The FGR2-PE offers industrial serial and Ethernet wireless connectivity using the license-free spread
spectrum for data communication over long distances. The transceiver is compatible with other FreeWave
FGR plus family radios and has two Ethernet ports and two serial ports, providing the ability to transition from
serial to Ethernet data communications without having to replace your wireless communications
infrastructure.
Important: The FGR2-PE is compatible over the air with the FGRplusRE and the
MM2-P-T radios. It is not compatible over the air with any other FreeWave radio
products.
Getting to Know Your Plus-Style Transceiver
Your FGR2-PE transceiver has the following components:
lA power connector
lTwo Ethernet ports, outlined in blue on the back of the transceiver
lTwo Com ports, outlined in red on the back of the transceiver
lA diagnostic port
1

FGR2-PE Wirelss Data Transceiver
LUM0024AB Rev A
This port is currently non-functioning. No settings and no diagnostics are delivered to this port. All
Plus-style transceivers must be programmed using Ethernet, either through the configuration Web
pages or using FreeWave Tool Suite. For more information about the setup tools available, see
"ConfigurationTool Options" on page 16.
lAn antenna port
In addition, the transceiver includes LEDs to help you determine when data is being received or sent from the
transceiver, as well as to provide additional information about the transceiver's state.
Label # Above Description
1 CD
2 TX
3 CTS
4 Ethernet 1 10 BaseT Link/Activity
5 Ethernet 1 100 BaseT Link
6 Ethernet 2 10 BaseT Link/Activity
7 Ethernet 2 100 BaseT Link
8 COM 1 Data (C1)
9 Error 1 (E1)
10 COM 2 Data (C2)
11 Error 2 (E2)
Boot-Up LED Sequence
The LEDs on the Ethernet transceiver follow the sequence below when the transceiver powers up:
1. C1 lights solid green
2. C2 lights solid green , C1 remains lit
3. E2 lights solid green , C1 and C2 remain lit
4. C1 turns off
5. C2 turns off
6. E2 turns off
Ethernet Port Conditions
2

User Manual and Reference Guide
LUM0024AB Rev A
Status 10 BaseT Link/Activity 100 Baste T Link LED
Linked, data activity Blinking/Flickering green Solid green (100 BaseT /Off (10 BaseT )
Linked, no data activity Solid green Solid green (100 BaseT /Off (10 BaseT )
Not linked. Check that cable is in
good condition and plugged in.
Off Off
Error LED Conditions
Condition Error Light (E1/E2)
Buffer overflow locally E1 LED is solid green
Buffer overflow in network E2 LED is solid green
Com Port LED Conditions
Condition Communications Port 1 (C1) or 2 (C2)
Data streaming into RX Solid red bright
Data streaming out TX Solid red bright
Choosing a Location for the Transceivers
Placement of the FreeWave transceiver is likely to have a significant impact on its performance. The key to
the overall robustness of the radio link is the height of the antenna. In general, FreeWave units with a higher
antenna placement will have a better communication link. In practice, the transceiver should be placed away
from computers, telephones, answering machines, and other similar equipment. The 6-foot Ethernet cable
included with the transceiver usually provides ample distance for placement away from other equipment.
FreeWave offers directional and Omni directional antennas with cable lengths ranging from 3 to 200 feet.
When using an external antenna, placement of that antenna is critical to a solid data link. Other antennas in
close proximity are a potential source of interference. Use the Radio Statistics to help identify potential
problems.
An adjustment as little as 2 feet in antenna placement can resolve some noise problems. In extreme cases,
such as when interference is due to a Pager or Cellular Telephone tower, the band pass filters that FreeWave
offers may reduce this out-of-band noise.
Choosing Point-to-Point or Point-to-MultiPoint Operation
A Point-to-Point network is best suited when your network consists of one Gateway and one Endpoint
transceiver. You can add Repeaters to extend the reach of the network, but no other Gateway or Endpoint
may be added.
In a Point-to-MultiPoint network (also referred to as MultiPoint network) the transceiver, designated as a
Gateway, is able to simultaneously communicate with numerous Endpoints. In its simplest form, a MultiPoint
network functions with the Gateway broadcasting its messages to all Endpoints. If requested by the Master,
the Endpoints respond to the Gateway when given data by the device connected to the data port. This
response depends on your setup.
It is important to note the differences between Point-to-Point and MultiPoint networks. In a Point-to-Point
network all packets are acknowledged, whether sent from the Gateway to the Endpoint or from the Endpoint
3

FGR2-PE Wirelss Data Transceiver
LUM0024AB Rev A
to the Gateway. In a MultiPoint network, you determine the set number of times outbound packets from the
Gateway or Repeater to Endpoints or other Repeaters are sent. The receiving transceiver, Endpoint or
Repeater, accepts the first packet received that passes the 32 bit CRC. However, the packet is not
acknowledged. On the return trip to the Gateway, all packets sent are acknowledged or retransmitted until
they are acknowledged. Therefore, the return link in a MultiPoint network is generally very robust.
Traditionally, a MultiPoint network is used in applications where data is collected from many instruments and
reported back to one central site. As such, the architecture of such a network is different from Point-to-Point
applications. The following parameters influence the number of transceivers that can exist in a MultiPoint
network:
1. Size of the blocks of data. The longer the data blocks, the fewer number of deployed Endpoints
can exist in the network.
2. Baud rate. The data rate between the transceiver and the device to which it is connected could
limit the amount of data and the number of transceivers that can exist in a network
3. The amount of contention between SlavesEndpoints. Polled Endpoints vs. timed
SlavesEndpoints.
4. Use of Repeaters. Using the Repeater setting in a MultiPoint network decreases overall network
capacity by 50%.
For example, if the network polls Endpoints once a day to retrieve sparse data, several hundred Endpoints
could be configured to a single Gateway. However, if each Endpoint transmits larger amounts of data or data
more frequently, then fewer Endpoints can link to the Gateway while receiving the same network
performance. When larger amounts of data are sent more frequently, the overall network bandwidth is closer
to capacity with fewer Endpoints.
For examples and additional information about data communication links, see the Examples of Data
Communication Links section later in this document.
Point-to-Point Operation LEDs
Gateway Endpoint Repeater
Condition
Carrier
Detect
(CD)
Transmit
(Tx)
Clear to
Send
(CTS)
Carrier
Detect
(CD)
Transmit
(Tx)
Clear to
Send
(CTS)
Carrier
Detect
(CD)
Transmit
(Tx)
Clear to
Send
(CTS)
Powered, no link Solid red
bright
Solid red
bright
Solid red
bright
Solid red
bright
Off Blinking
red
Solid red
bright
Off Blinking
red
Linked, no Repeater,
sending sparse data
Solid
green
Intermittent
flash red
Intermittent
flash red
Solid
green
Intermittent
flash red
Intermittent
flash red
n/a n/a n/a
Gateway calling End-
point through
Repeater
Solid red
bright
Solid red
dim
Solid red
bright
Solid red
bright
Off Blinking
red
Solid red
bright
Off Blinking
red
MasterGateway
linked to Repeater,
not to Endpoint
Flashing
orange
Solid red
dim
Solid red
bright
Solid red
bright
Off Blinking
red
Solid Red
bright
Solid red
dim
Solid red
bright
Repeater linked to
Endpoint
Solid
green
Intermittent
flash red
Intermittent
flash red
Solid
green
Intermittent
flash red
Intermittent
flash red
Solid
green
Intermittent
flash red
Intermittent
flash red
Mode 6 - waiting for
ATD command
Solid red
bright
Off Blinking
red
Solid red
bright
Off Blinking
red
n/a n/a n/a
Setup Mode Solid
green
Solid
green
Solid
green
Solid
green
Solid
green
Solid
green
Solid
green
Solid
green
Solid
green
4
Other manuals for FGR2-PE
2
Table of contents
Other FreeWave Transceiver manuals

FreeWave
FreeWave LRS455 SERIES User manual

FreeWave
FreeWave Spread Spectrum User manual

FreeWave
FreeWave LRS-455-EU User manual

FreeWave
FreeWave Spread Spectrum User manual

FreeWave
FreeWave FGR2-PE User manual

FreeWave
FreeWave MM2 User manual

FreeWave
FreeWave FGR2 Use and care manual

FreeWave
FreeWave FGR09 Series User manual

FreeWave
FreeWave LRS400S User manual

FreeWave
FreeWave FGRO9CSU User manual