II.
Filling the Vessel with Filter Media & Start-Up Commissioning
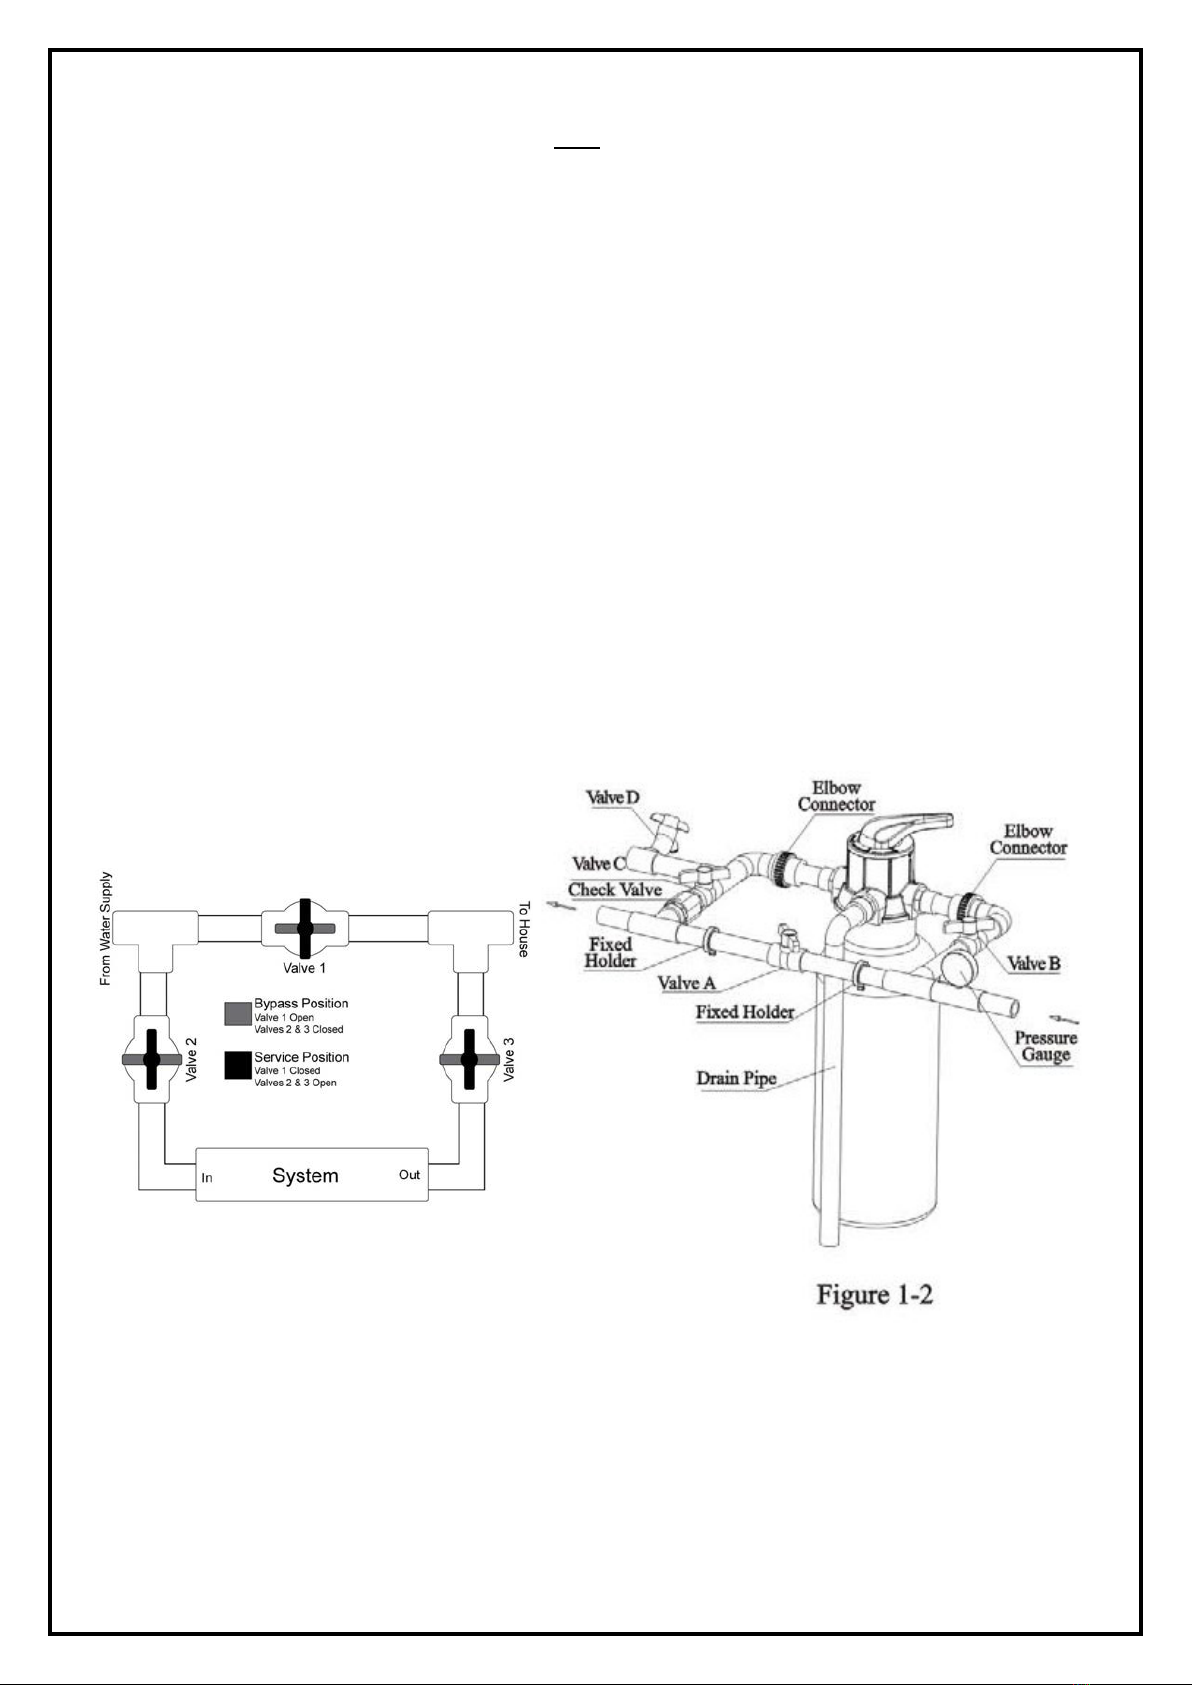
We strongly recommend to position the vessel in the installation location before filling with media – once
the vessel is filled it will be very heavy and hard to move! Coupling or union-style fittings are recommended
for easy installation and maintenance, to allow the Runxin Valve to be removed and the vessel to be
moved if required (i.e. for filling with media/emptying).
Calcite/Magnesium Media
Calcite and Magnesium media are commonly used for pH adjustment in Rain or Bore Water.
1. Lower the drop tube (riser pipe) into the vessel, dome end first, and centre it into the depression at
the bottom of the vessel. Using the funnel (sold separately), fill the bottom of the vessel slowly with
the supplied amount of filter gravel. NOTE: Be careful not to spill any gravel/media in the centre of
the drop tube.
2. Add 75kg of Calcite Media (Approx. 3 bags). Ensure the drop tube stays centred during the filling
process.
If using Magnesium pH Booster (Corosex):
a. If the source water’s pH is around 5, add 1/3 of a bag of Magnesium.
b. If the source water’s pH is around 4.5, add 1/2 of a bag of Magnesium.
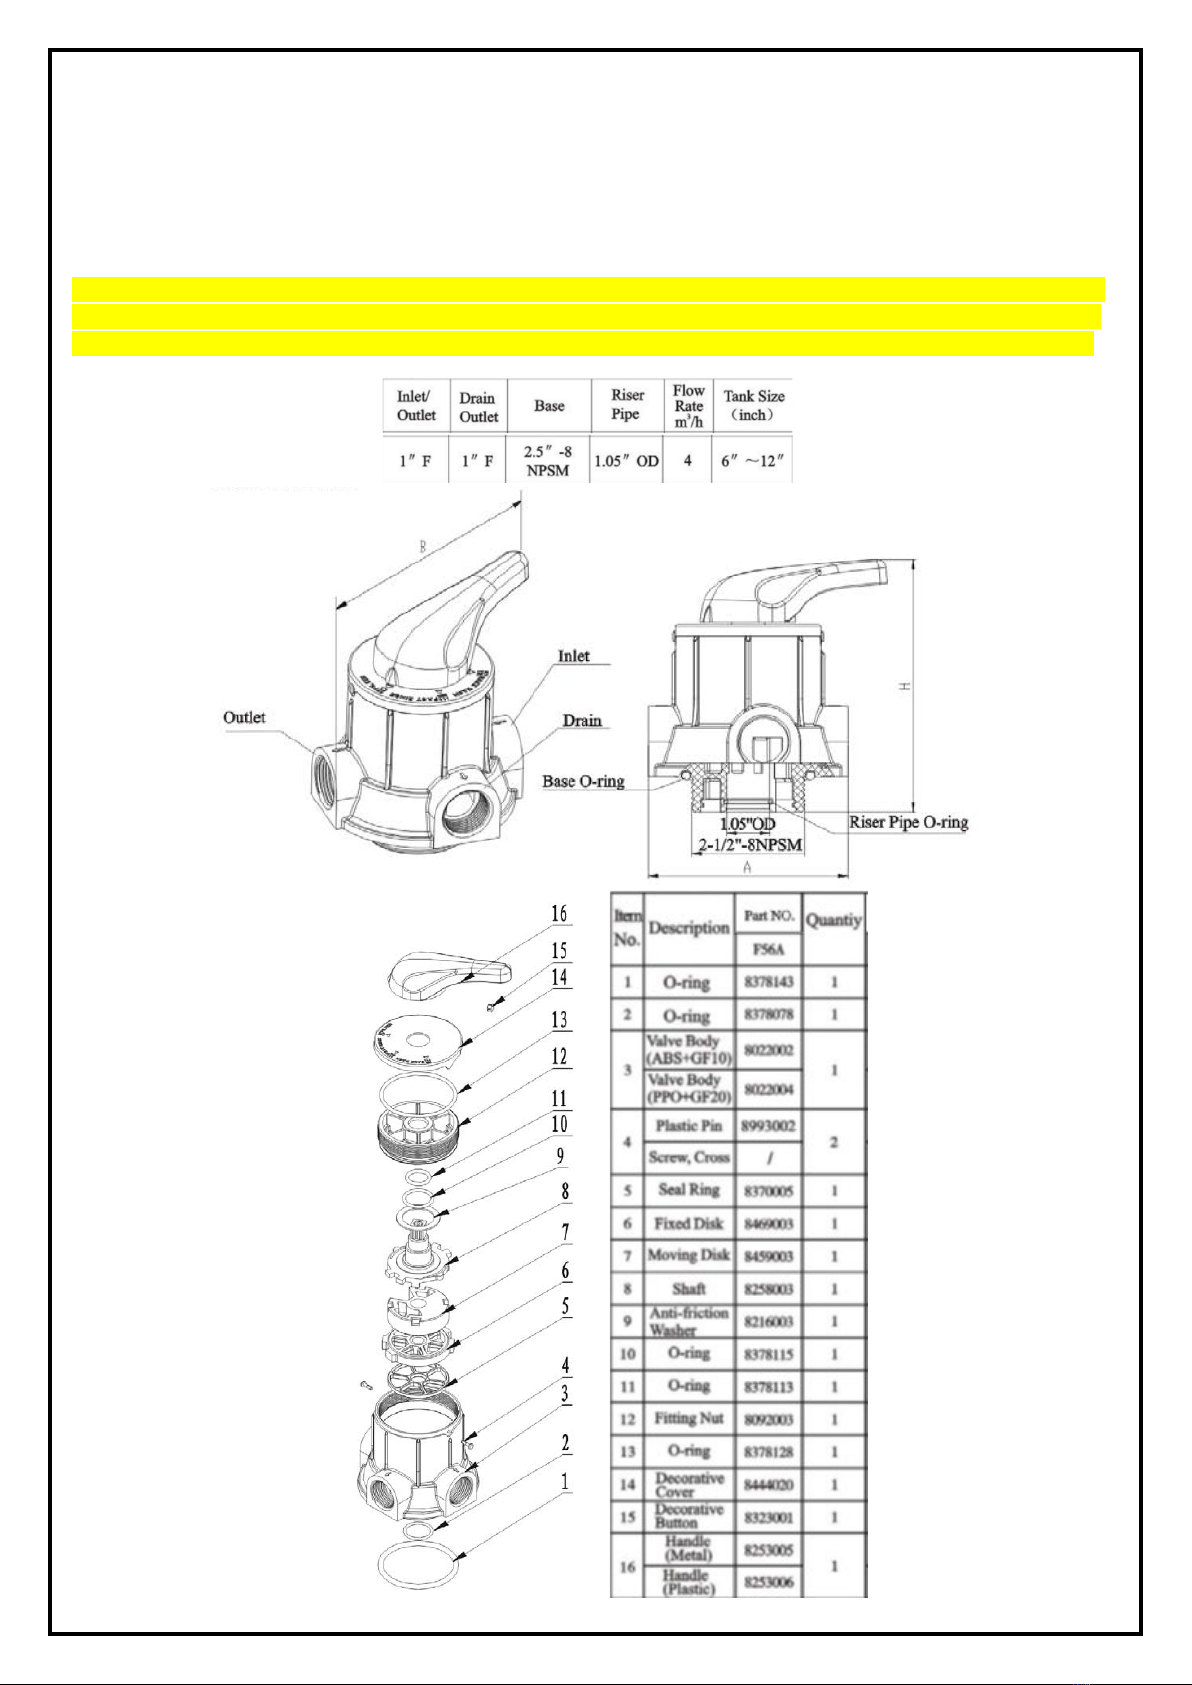
3. Fit the top screen to the Runxin Valve and lock into place.
4. Install the base seal ring then fit the valve to the vessel, ensure that the o-ring stays in place while
tightening the valve.
5. Connect the plumbing to the valve head ready for start-up.
6. Set the valve to the “Back Wash” setting (refer to diagram on page 5).
7. Turn on water and back wash the system for 10-15 minutes, or until the water runs sufficiently clear.
8. After back washing has completed, open the nearest tap downstream of the filter to purge air from
the system.
9. Move the valve to the “Filter” setting. Once the lines have been sufficiently purged of air, close the
downstream tap. Your system should now be fully operational.
10. Optional: Conduct a pH Test after the filter to ensure pH has reached the desired level.
Granular Activated Carbon (“GAC”) Media
GAC media produces a fine black powder which tends to discolour water, and may clog up appliances
when first installed. Thus, it will need to be thoroughly backwashed to ensure that all carbon fines are
removed. Acid Washed Coconut Carbon is the preferred type of media for use in a media vessel
application, as it produces less carbon dust which makes the flushing process quicker and more efficient.
1. Lower the drop tube (riser pipe) into the vessel, dome end first, and centre it into the depression at
the bottom of the vessel. Using the funnel (sold separately), fill the bottom of the vessel slowly with
the supplied amount of filter gravel. NOTE: Be careful not to spill any gravel/media in the centre of
the drop tube.
2. Add Carbon Media to the vessel (Approx. 25kg unless specified otherwise). Ensure the drop tube
stays centred during the filling process.
3. Fit the top screen to the Runxin Valve and lock into place.
4. Install the base seal ring then fit the valve to the vessel, ensure that the o-ring stays in place while
tightening the valve.
5. Connect the plumbing to the valve head ready for start-up.
6. Set the valve to the “Back Wash” setting (refer to diagram on page 5).
7. Turn on water and back wash the system for 10-15 minutes, until the water runs sufficiently clear and
the presence of carbon dust has significantly reduced.
8. Then, set to “Fast Rinse” until the water runs completely clear.
9. After back washing and fast rinsing has completed and the water is running clear, open the nearest tap
downstream of the filter to prepare for purging air from the system.
10. Move the valve to the “Filter” setting. Once the lines have been sufficiently purged of air, close the
downstream tap. Your system should now be fully operational.