Page 8of 10
3. pH testing equipment can range from a cheap test pen right
up to lab grade equipment. Before coming to a conclusion on
pH issues, it is best to ensure the equipment used to measure
the pH of the RO water is of high standards and suitable for
reading pH levels in low EC water (i.e. The guy at the pool
shop is not going to cut it). We have access to high quality
testing equipment and frequently test our units and conduct
research. If you feel that there is an issue with your pH, please
the water (New
System)
2. Residue
3. Contamination
1. If you are using an alkaline filter system, the unit requires
adequate flushing before first use. Usually all taste is gone
within a week of use. This taste is normal and in most cases is
your body adjusting to the high pH water (which some people
can describe as a slight metallic taste).
2. The filters are dry packed, the carbons, alkaline filters will
have ‘fines’ on them as they are granular medias, this will go
away with flushing. The membrane has a food grade preserve
inside it to prevent contamination during storage, this will also
flush away quickly.
3. Bacterial contamination is highly unlikely, but not
impossible. If there is a strong ‘foul smell’ or organic taste to
the water, it is possible that there is some form of
contamination. Contact us straight away so we can rectify (or
diagnose) the problem if there is one present.
Higher than the
inlet water (or the
same).
2. Alkaline Filter
3. Expired Filters
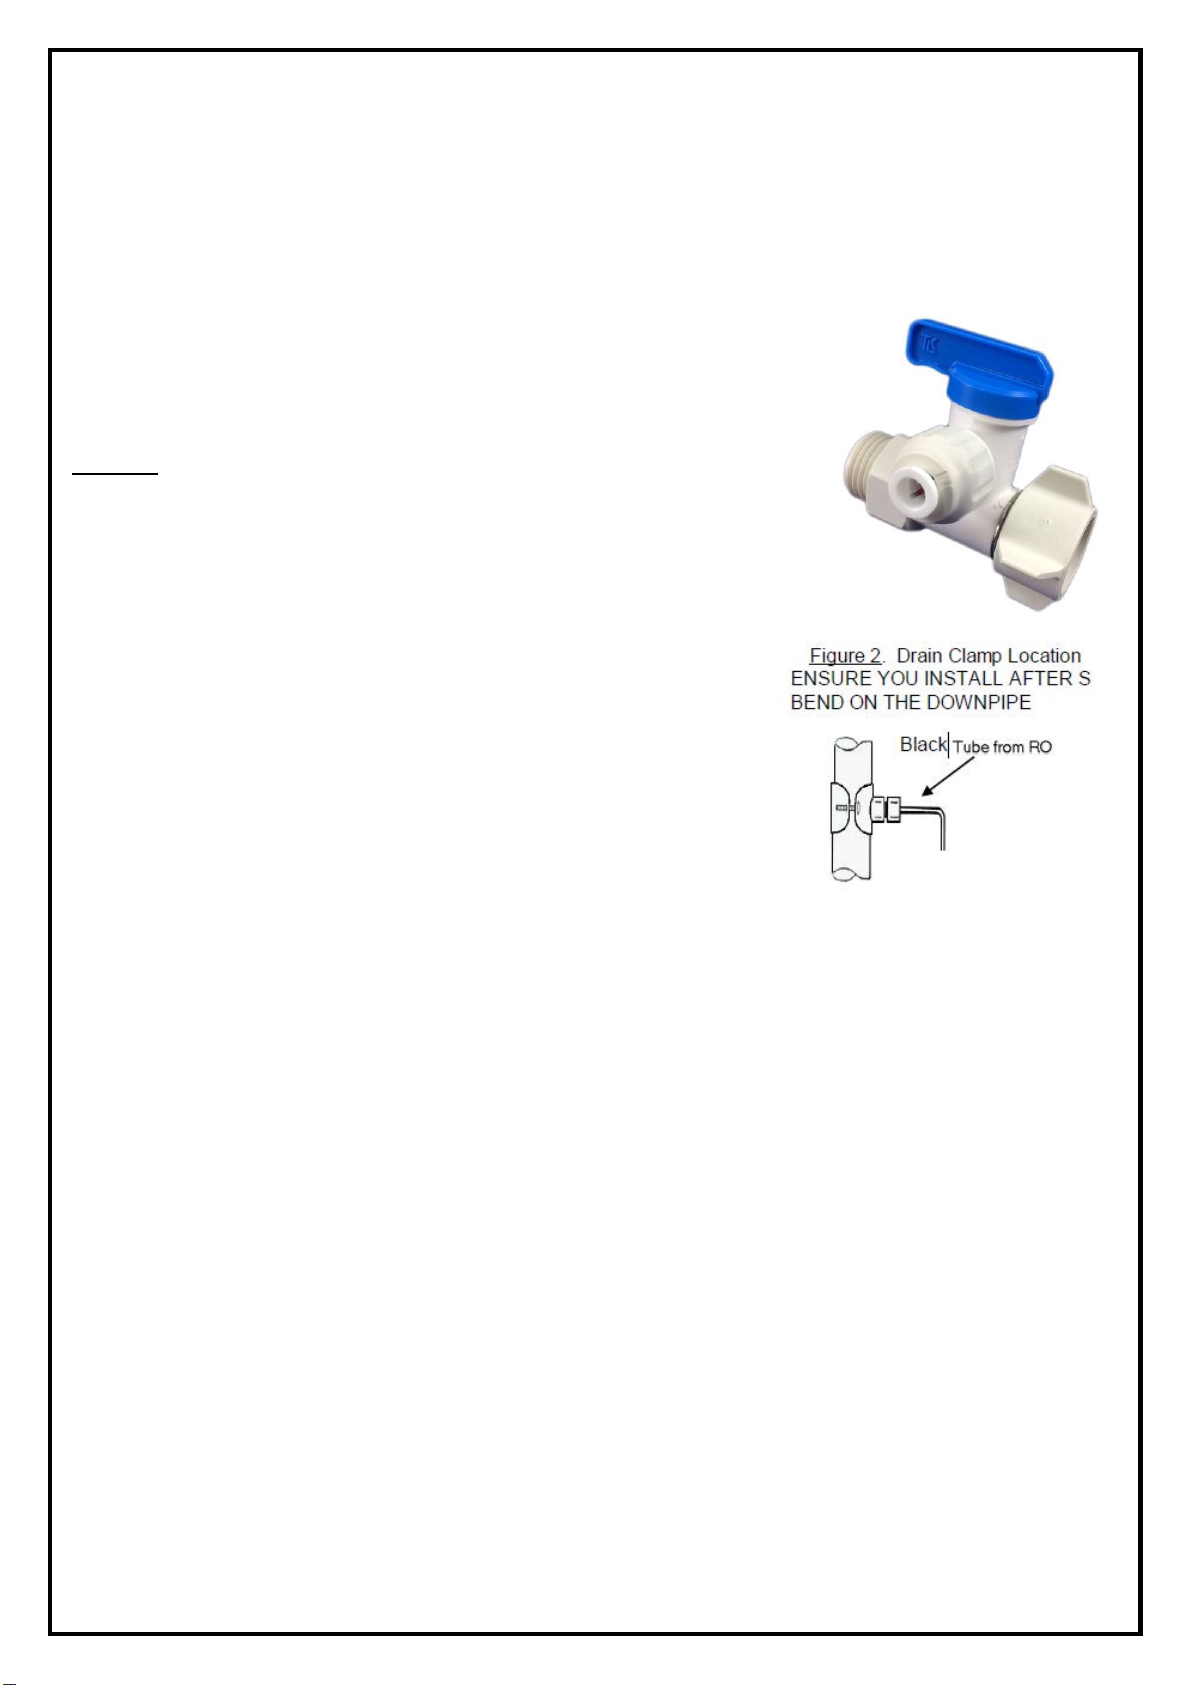
4. Mixed Up Drain
Line and Drinking
Line
1. While filters are new, it is normal for the TDS to be elevated
while the system is flushing. Continue flushing the system &
contact support if the high TDS persists.
2. Alkaline filters will naturally increase the TDS of the water,
especially when new. If you have low TDS water already, it is
possible for the TDS level out of the alkaline filter to be higher
than your inlet water. This is because you are adding minerals
back into the water therefore increasing the TDS and alkalinity.
3. If the filters have not been changed as per the
recommendations, it is likely that the increased TDS is due to
the filters needing replacing.
4. This is common as sometimes the lines may be mixed up.
Make sure that the tubing connected to the ‘Drain Line’ flow
restrictor is being run to waste, do not use this water for
drinking. Your drinking water line should be marked with either
‘outlet’, ‘Drinking Water’ or ‘Aquarium Water’.
suddenly slowed
down to a trickle
pressure
2. Tank Bladder
Rupture
3. Blocked filters
1. Over time, air can slowly leak out of a RO tank. Sometimes
this is more noticeable at the time you change your filters. An
indication that this has occurred is that the tank will be very
heavy (full of water) but no water comes out the tap. The
solution is to disconnect the tank (after shutting down the
system). Then empty all water from the tank, or as much as
possible. Add air pressure into the tank equal to 7psi.
Reconnect the tank and let it fill and try again.
2. Depress the air valve on the side of the tank – if water
comes out the air valve the bladder is ruptured. Or if you add
air to the tank and the air comes out the inlet/outlet valve it is
also ruptured. – The tank will need to be replaced.
3. It is unlikely that the filters would be totally blocked but it is
possible. Check the feed water conditions and replace the
filters if they are passed the recommended change times.
running to waste
1. When the system is newly installed or you have just
changed the filters, there is a considerable amount of air in the
system. This air can become trapped in air pockets and if they