manuals.online logo
Brands
  1. Home
  2. •
  3. Brands
  4. •
  5. Fuji Electric
  6. •
  7. Temperature Controllers
  8. •
  9. Fuji Electric PUMCE User manual

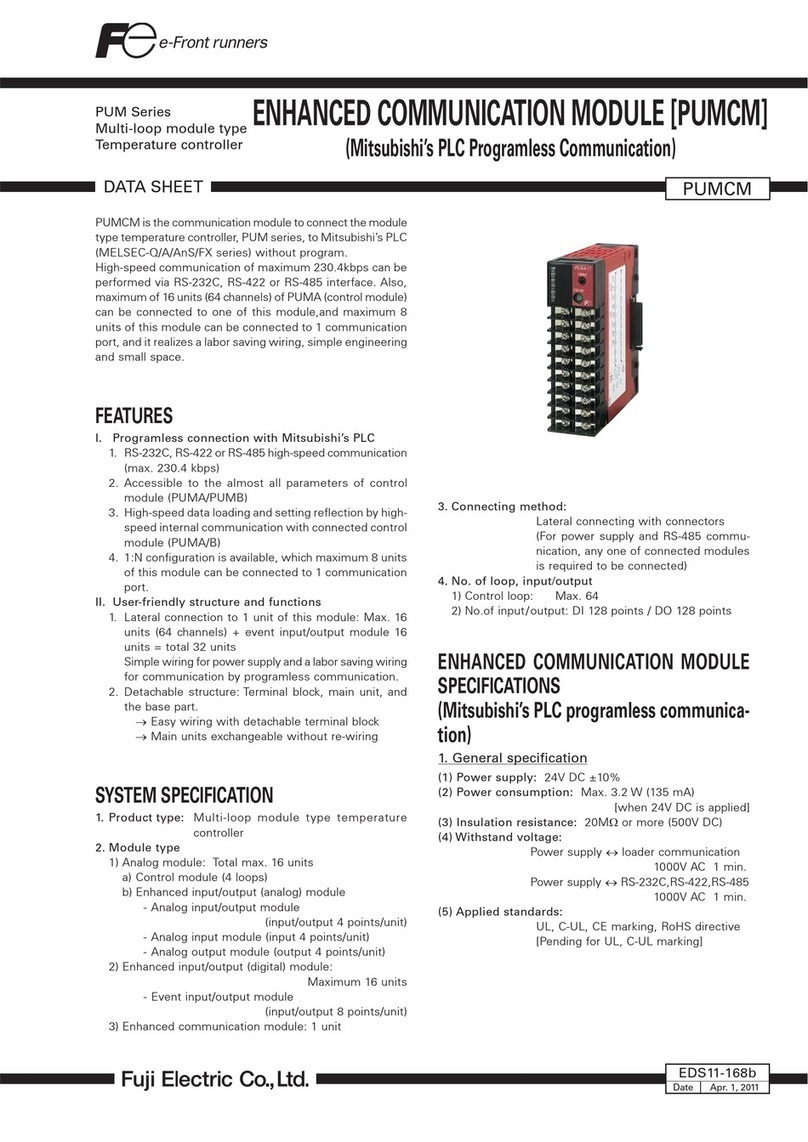
Fuji Electric PUMCE User manual

- 1 - - 2 -
Thank you for purchasing the Fuji module type temperature controller.
Once you have conrmed that this is the product you ordered, please use it in accor-
dance with the following instructions.
For detailed information on operating this equipment, please refer to the separate
user’s manual.
In addition, please keep this instruction manual within easy reach of the actual person
using this equipment.
.
Instruction Manual (Installation)
Multi-loop module type Temperature Controller
Enhanced Communication Module
(Ethernet communication)
Model: PUMCE
The contents of this manual are subjected to change without notice.
This manual is compiled with possible care in the interests of accuracy, however,
Fuji Electric shall not be held liable for any damages, including indirect damage,
caused by typographical errors, absence of information or use of information in
this manual.
Conrming Specications and Accessories
Before using the product, conrm that it
matches the type ordered.
(Refer to page 4 for model codes.)
Conrm that all of the following accesso-
ries are included.
Temperature Controller Enhanced
Communication Module (Ethernet Com-
munication) 1 Unit
Instruction Manual 1 Copy
Related Information
Refer to "Module Type Temperature
Controller Enhanced Communication
Module (Ethernet Communication)
User’s Manual" for details about the
items described in this manual.
Content Material
name Material No.
Specication Catalog 21B1-E-
0054
Operating
instruction Ethernet
Communi-
cation Mod-
ule User's
manual
INP-
TN5A2052-E
Tool PUM
parameter
loader
INP-
TN5A1634-E
Please Read First (Safety Warnings)
Please read this section thoroughly before use and observe the mentioned safety
warnings fully.
Safety warnings are classied into "Warning", "Caution" and "Risk of Electrical Shock".
Warning Improper use of the equipment may result in death or serious injuries.
Caution Improper use of the equipment may cause injury or property damage.
Risk of
Electrical
Shock
A risk of electrical shock is present and the associated warning should
be observed.
1 Warranty
1-1 Period of warranty
Warranty period for this product including accessories is one year after delivery.
1-2 Scope of warranty
(1) If any failure or malfunction attributable to Fuji Electric occurs in the period of war-
ranty, we will replace the product or failed parts without charge. Please note that, in
the case where our engineer needs to visit your place for replacement, we cannot
provide commissioning and/or readjustment for whole system using our products.
The warranty does not apply to failure or malfunction resulting from:
a) inappropriate conditions, environment, handling or usage that is not instructed in
a catalog, instruction book or user’s manual, or overuse of the product,
b) other devices or software not originate in Fuji Electric,
c) improper use, or an alteration or repair that is not performed by Fuji Electric,
d) factors that do not originate in the purchased or delivered product,
e) damages incurred during transportation or fall after purchase,
f) factors that were not foreseeable by the practical application of science and
technology at the time of purchase or delivery,
g) any reason that Fuji Electric is not responsible for, including a disaster or natural
disaster such as earthquake, thunder, storm and ood damage, or inevitable
accidents such as abnormal voltage.
(2) Regardless of the time period of the occurrence, Fuji Electric is not liable for the
damage caused by the factors Fuji Electric is not responsible for, opportunity loss
of the purchaser caused by malfunction of Fuji Electric product, passive damages,
damage caused due to special situations regardless of whether it was foreseeable
or not, and secondary damage, accident compensation, damage to products that
were not manufactured by Fuji Electric, and compensation towards other opera-
tions.
1-3
Period for repair and provision of spare parts after product discontinuation (maintenance period)
The discontinued models (products) can be repaired for ve years from the date of
discontinuation.
Also, most spare parts used for repair are provided for ve years from the date of dis-
continuation. However, some electric parts may not be obtained due to their short life
cycle. In this case, repair or provision of the parts may be difcult in the above period.
Please contact Fuji Electric or its service providers for further information.
2 Warning
2-1 Installation and Wiring
• This equipment is intended to be used under the following conditions.
Ambient temperature -10 to 50 degree C
Ambient humidity 90% RH or below (with no condensation)
Warm-up time 30 min. or more
Installation category IEC61010-1: class II
Pollution level IEC61010-1: degree 2
• The insulation class of the equipment is as below. Before installing, conrm that the
insulation class for the equipment meets usage requirements.
Functional insulation (AC1000V) Functional insulation (AC500V)
Power source
Loader communication
Ethernet communication
- In cases where damages or problems with this equipment may lead to serious ac-
cidents, install appropriate external protective circuit.
- To avoid product failure or damage, provide the rated power voltage.
- To prevent electric shock and equipment failure, do not turn the power ON until all
wiring is completed.
- Before turning the power ON, make sure clearance space has been secured for
shock or re prevention.
- Do not touch the terminal while the machine is ON. There are risks of shock or equip-
ment errors.
- Never disassemble, convert, modify or repair this equipment. There are risks of
abnormal operation, shock or re.
- All of the wiring should be class 1 type wiring, or the low voltage wires should be
routed separately from the hazardous voltage wires to ensure separation of circuits.
- When using a AWG-16 cable, you should use the crimp terminal that material thick-
ness is 0.9mm or less.
- Do not use any electrical components that have gotten wet. Otherwise, you may get
electric shock or it may result in re.
2-2 Maintenance
- Turn OFF the power when installing or removing the equipment. Otherwise, it may
cause shock, abnormal operation, or equipment failure.
- Periodic maintenance is recommended for continuous and safe use of this equip-
ment.
- Some parts installed on this equipment have a limited life and/or may deteriorate with
age.
2-3 Service life
- This product, excluding limited-life parts, is designed for a service life of 10 years
under general operating conditions.
- The warranty period for this unit (including accessories) is one year with appropriate
use.
2-4 Limited-life parts and consumable parts
This product contains the following limited-life parts and consumable parts which may
affect the service life of the product itself.
(1) Aluminum electrolytic capacitor
- Designed service life: 10 years under general working conditions
- Symptoms when a capacitor loses its capacity: deterioration of power quality, mal-
function
- Factors which affect capacitor life: temperature
The life is shortened by half when the temperature rises by 10°C. (Arrhenius’ law)
- Replacement: Estimate the lifetime of capacitor according to your operating environ-
ment, and have the capacitor replaced or overhauled at appropriate time, at least
once in 10 years.
Part names and functions
-Main unit
LOADER
PUM-C
BUS
TX/RX
PWR
Ethernet
LINK
Loader communication port
Display LED
Connector Ethernet
-Base part
Module connector
(Connect modules
laterally)
Power terminal block
See [Wiring]
Module
connector
Mounting
screw hole
Mounting
screw hole
See [Installation] Locking tab
INP-TN1PUMCEa-E
CAUTION
Display LED
Six LED lamps indicate the following operation conditions.
Bridge communication
LED Green Red Orange
PWR ON: Normal operation – –
BUS ON: inter-module communication (receiving) – ON: inter-module communication
(transmitting)
LINK ON: normal Ethernet communication link – –
TX/RX – – ON: Ethernet communication data receiving
or transmitting
Mapping communication
LED Green Red Orange
PWR
ON: Normal operation
Blinking (0.5-sec. intervals):
Performing initial polling with PUM
Blinking (1.0-sec. intervals):
No communication established due to
inter-device communication fault
Blinking (0.5-sec. intervals):
Registered parameter is out of range
Switch setting is out of range
EEPROM failure
Invalid MAC address
–
BUS ON: inter-module communication (receiving) – ON: inter-module communication
(transmitting)
LINK ON: normal Ethernet communication link – –
TX/RX – – ON: Ethernet communication data receiving
or transmitting
Programless communication
LED Green Red Orange
PWR
ON: Normal operation
Blinking (0.5-sec. intervals):
Performing initial polling with PUM
ON: faulty communication with Micrex-SX
Blinking (1.0-sec. intervals):
No communication established due to
inter-device communication fault
Blinking (0.5-sec. intervals):
Registered parameter is out of range
Switch setting is out of range
EEPROM failure
Invalid MAC address
–
BUS ON: inter-module communication (receiving) – ON: inter-module communication
(transmitting)
LINK ON: normal Ethernet communication link – –
TX/RX – – ON: Ethernet communication data receiving
or transmitting
Do not use capacitors beyond its lifetime. Otherwise, electrolyte leakage or depletion
may cause odor, smoke, or re. Please contact Fuji Electric or its service providers
when an overhaul is required.
3 Caution
3-1 Cautions when Installing
Install in a UL listed enclosure only.
Please avoid installing in the following locations.
- Where the ambient temperature is beyond the range of -10 to 50 degree C when the
equipment is in use.
- Where the ambient humidity is beyond 90% RH when the equipment is in use.
- With rapid temperature changes, leading to dew condensation.
- Where corrosive gas (especially sulde gas and ammonia) or ammable gas is gen-
erated.
- With direct vibration or shock to the equipment.
- Where they may be contact with water, oil, chemicals, steam or hot water.
(If the equipment gets wet, since there is a risk of electric leakage or re, have it
inspected by Fuji distributor.)
- With high concentration of atmospheric dust, salt or iron particles.
- With inductive interference, resulting in static electricity, magnetic elds or noise.
- In direct sunlight.
- Where accumulation of heat due to radiant heat is generated.
- A switch or circuit Breaker shall be included in the building installation.
Please be it in close proximately to the equipment and within easy reach of the op-
erator, and mark it as the disconnecting device for the equipment.
3-2 Cautions when Mounting to Cabinets / DIN rails
- After mounting modules onto DIN rails, make sure to fasten them rmly by pushing
up the locking tabs.
- When connecting modules, rst, connect them with release of all modules’ locking
tabs, and then push all of them up to lock.
- Make sure to turn the power OFF, when removing the front terminal block from the
main body or removing the main body from the base part.
Scope of application
• This equipment must be used under the following conditions:
- the use of the equipment incurs no risk of a serious accident even if a failure or mal-
function occurs on the equipment, and
- in case of product failure or malfunction, safety measures such as redundant design,
prevention of malfunction, fail safe system, foolproof mechanism are provided outside
of the equipment.
• This product is designed and manufactured as a general-purpose product for general
industrial applications.
• The warranty does not apply to the following cases:
- for the use not described in or beyond the conditions or environment specied in the
instruction manual or the user manual,
- for the use which has large inuence on publicity including nuclear power and other
power generation, gas, and/or water,
- for the use in which safety is especially required, because it may seriously affect rail-
roads, vehicles, combustion equipment, medical equipment, entertainment devices,
safety equipment, defense equipment, and/or human lives and property.
However, we will study the possibility of application of the equipment for the above
use, if the user limits the usage of it and agrees to require no special quality. Please
consult us.
- In order not to disturb heat dissipation, do not block the air vents on the top and bot-
tom of the equipment.
- For mounting / dismounting modules to / from DIN rails, space more than 30mm
should be provided.
- Use only the screws supplied with the product.
3-3 Cautions for Wiring
- For wiring to the terminal block, use solderless terminals of screw size M3.
The screw size of the terminal block: M3 × 7 ( with a square washer)
Cramp torque: 0.78N-m (8kgf-cm)
- To avoid the inuence of inductive noise, signal wires should be separated from elec-
tric power lines or load lines.
- If you use RS-232C communication, use it with the noise lter attached to AC power
line. (This is not necessary if implementating the complete preparation for noise of
power line.
- To comply with CE marking (EMC), it is recommended to add ferrite cores to the com-
munication cable and the power supply cable.
3-4 Error Operation
- The alarm function does not work properly when an error occurs unless the correct
settings are made. Make sure to verify its setting prior to starting operation.
3-5 Other cautions
- Do not wipe the equipment with organic solvent, such as alcohol or benzene, etc.
Use a neutral cleaning agent for cleaning it.
- Do not use mobile phones near the equipment (within 50cm). Otherwise the malfunc-
tion may result.
- The use of the equipment near radios, TVs, or wireless devices may cause malfunc-
tions.
- After the power is turned ON, it needs 5 to 20 sec. until the equipment starts commu-
nication.
- Prior to wiring / connecting the equipment, always take appropriate measures to
eliminate static electricity (ESD).
- Prevent dust or contaminants getting into the equipment. Otherwise, it may result in
re.
- 3 - - 4 -
Terminal Figure
-Front face terminal block
LOADER
PUM-C
BUS
TX/RX
PWR
Ethernet
LINK
Ethernet
RJ-45 connector
-Base part (power terminal)
DC 24V (-)
Power terminal
DC 24V (+)
Note 1: Power cables more than one should not be connected between power terminals.
Note 2: Do not use terminals 3, 4, and 5.
Specication
General Specication
Power Supply : 24V DC ±10%
Power Consumption : Maximum 3.2W (135mA) [when 24Vdc is applied]
Dimensions : 30(W)×100(H)×85(D) mm (excluding projection and terminal cover)
Weight : Approx. 110g
Installation Method : DIN rail mounting inside a cabinet / wall mounting with M3 screws
Ambient Temperature* : -10 to 50 degrees C
Note: "Ambient temperature" means the temperature underneath the
equipment installed inside a dvice or a cabinet.
Ambient Humidity: : 90%RH or less (no condensing)
Storage temperature/humidity: -20 to 60°C, 90%RH
Memory Backup: : Backup by nonvolatile memory (EEPROM)
The number of rewriting: 100,000 times
Communication Functions
Communication specications : Ethernet 10BASE-T/100BASE-TX compliance
The number of port : 1 port
Recommended hub :
Industrial hub
Communication protocol : IEEE802.3/IEEE802.3u compliance
Communication speed : 10/100Mbps Auto-negotiation
Communication distance :100m (between a hub and the device)
Recommended cable: Ethernet cable : Catgory 5e
Crimp terminal size
Please prepare cables and crimp terminals of the size indicated below.
Cable type Size
Power supply, output, others 0.25 to 1.25mm2 (AWG 22 to 16)
Crimp terminal
Cable size Screw tightening torque
0.25 to 1.25mm2 (AWG 22 to 16) 0.8 N•m
φ3.2mm
6.0mm or less
Round-shaped solderless terminal Y-shaped solderless terminal
3.2mm
6.0mm or less
* Material thickness
0.9mm or less.
Model code
Enhanced communication module (Ethernet communication)
12345678 910
P U 1 −0 C Contents
M Y Y
C
Module type
Enhanced communication module
Communication functions
EEthernet communication
Model code (Optional)
123456 78
P U M Z *Contents
A 0 2 DIN rail mounting endplate
A 0 3
Side connector termination cover (right & left 1 set)
L 0 1 Loader connecting cable (RS232C)
Mounting
-Dimensions
30
100
50
1.5
5
6
When mounted/dismounted
to/from the DIN rail
(8)
85
DIN rail
Main unit (When detached
from the base part)
(30)
Hole for screw
Locking tab
Terminal screw
M3
Hole for screw
base part
(When detached from the main unit )
LOADER
PUM-C
BUS
TX/RX
PWR
Ethernet
LINK
-Cautions when mounting
Make sure to leave a minimum space of 30 mm (50mm is recommended) both above
and below the equipment.
30 or more30 or more
-Mounting to DIN rails
1. Pull down the locking tab of the base part.
Hook the back part of the unit onto the upper
part of the DIN rails.
2. Push the unit towards the direction of the ar-
row 2.
3. Pull up the locking tab of the base part to
fasten the equipment onto the DIN rails.
- When connecting the equipment after
mounting it to the DIN rail, do not pull the
locking tab up at this point yet.
Lock lever
Main unit
Projection
How to detach the base part
1. Press the lock lever on the top of the
equipment.
2. Pull forward the upper part of main
unit.
3. Detach the cutout on the lower end
of the back of the main unit from the
projection on the base part.
- To attach the main unit to the base
part, reverse the above procedure.
- Make sure the lock lever on the main
unit is tted into the base part after
attaching.
Gate City Ohsaki, East Tower, 11-2, Osaki 1-chome,
Shinagawa-ku, Tokyo 141-0032, Japan
http://www.fujielectric.com
Phone: 81-3-5435-7280, 7281 Fax: 81-3-5435-7425
http://www.fujielectric.com/products/instruments/
International Sales Div
Sales Group
-Attaching the endplates
If you want to x the equipment onto the DIN rails more rmly, use endplates (optional)
and a pair of side connector termination covers (optional).
LOADER
PUM-E
PWR
COM
STATION
4
3
2
1
0
F
E
D
C
B
A
9
8
7
6
5
Di1
Di2
Di3
Di4
Di5
Di6
Di7
Di8
Do1
Do2
Do3
Do4
Do5
Do6
Do7
Do8
LOADER
PUM-E
PWR
COM
STATION
4
3
2
1
0
F
E
D
C
B
A
9
8
7
6
5
Di1
Di2
Di3
Di4
Di5
Di6
Di7
Di8
Do1
Do2
Do3
Do4
Do5
Do6
Do7
Do8
LOADER
PUM-E
PWR
COM
STATION
4
3
2
1
0
F
E
D
C
B
A
9
8
7
6
5
Di1
Di2
Di3
Di4
Di5
Di6
Di7
Di8
Do1
Do2
Do3
Do4
Do5
Do6
Do7
Do8
LOADER
PUM-A
PWR
COM
OUT1
OUT2
OUT3
OUT4
STATION
4
3
2
1
0
F
E
D
C
B
A
9
8
7
6
5
LOADER
PUM-C
BUS
TX/RX
PWR
Ethernet
LINK
Side connector termination covers
(right & left 1 set)
DIN rail mounting
endplate
DIN rail mounting
endplate
-Fixing with screws
When xing the equipment on the wall using screws, connect module base parts rst.
*Fixing screws are to be prepared by customers.
1. Decide the mounting position, referring to the gure below for the mounting screw
hole.
(30)
90.2
±
88.5 0.2
(100)
(3)
30+0.7
+0.2
2-M3
Unit [mm]
2. Remove the main unit from the base part.
- See [How to detach the base part]
3. Connect the base part, and then pull all the locking tabs up to fasten.
4. Fix the base part onto the mounting position on the wall with screws.
5. Attach the module main unit to the base part.
-Connecting modules
1. Check the locking tab is pulled down.
2. Connect modules by connecting the side connectors with each other.
LOADER
PUM-A
PWR
COM
OUT1
OUT2
OUT3
OUT4
STATION
4
3
2
1
0
F
E
D
C
B
A
9
8
7
6
5
LOADER
PUM-C
BUS
TX/RX
PWR
Ethernet
LINK
Locking tab
Side
connector
Hook
DIN rail
Locking tab
3. After mounting modules to the DIN rails, push up all the locking tabs.
Modules are fastened to the DIN rails and to each other at the same time.
4. The power supplies are connected each other inside connected modules.
LOADER
PUM-A
PWR
COM
OUT1
OUT2
OUT3
OUT4
STATION
4
3
2
1
0
F
E
D
C
B
A
9
8
7
6
5
LOADER
PUM-A
PWR
COM
OUT1
OUT2
OUT3
OUT4
STATION
4
3
2
1
0
F
E
D
C
B
A
9
8
7
6
5
LOADER
PUM-C
BUS
TX/RX
PWR
Ethernet
LINK
Setting
-Communication behavior setting
Set communication behavior by DIP switches on the back of the module (SW1 to SW6).
1 2 3 4 5 6
ON
Communication
behavior setting
Communication behavior SW No.
1 2 (Note 1) 3 (Note 1) 4 5 6
Modbus/TCP bridge communication
Note 2
OFF OFF
OFFModbus/TCP mapping communication OFF ON
Micrex-SX programless communciation ON OFF
Note 1: You cannot set both SW2 and SW3 to ON simultaneously.
Note 2: When you set SW1 to ON, the Ethernet communication setting will be restored to factory default.

Other Fuji Electric Temperature Controllers manuals

Fuji Electric PXG5 User manual

Fuji Electric

Fuji Electric PXG5 User manual

Fuji Electric PXH Series User manual

Fuji Electric

Fuji Electric PXH Series User manual

Fuji Electric Micro-Controller X Socket type User manual

Fuji Electric

Fuji Electric Micro-Controller X Socket type User manual

Fuji Electric PXR3 Series User manual

Fuji Electric

Fuji Electric PXR3 Series User manual

Fuji Electric PXZ Series User manual

Fuji Electric

Fuji Electric PXZ Series User manual

Fuji Electric PXR3 Series User manual

Fuji Electric

Fuji Electric PXR3 Series User manual

Fuji Electric PUM Series User manual

Fuji Electric

Fuji Electric PUM Series User manual

Fuji Electric PXF4 User manual

Fuji Electric

Fuji Electric PXF4 User manual

Fuji Electric PXE4 User manual

Fuji Electric

Fuji Electric PXE4 User manual

Fuji Electric PUMCL User manual

Fuji Electric

Fuji Electric PUMCL User manual

Popular Temperature Controllers manuals by other brands

Aqua Medic T controller twin Operation manual

Aqua Medic

Aqua Medic T controller twin Operation manual

Mark PINTHERM INFRA HE CONNECT Technical manual

Mark

Mark PINTHERM INFRA HE CONNECT Technical manual

Ink Bird ITC-106 user manual

Ink Bird

Ink Bird ITC-106 user manual

Honeywell T991A Specifications

Honeywell

Honeywell T991A Specifications

oventrop Unibox TQ-RTL R-Tronic operating instructions

oventrop

oventrop Unibox TQ-RTL R-Tronic operating instructions

Mydtcstore MAXDTC2-BT user manual

Mydtcstore

Mydtcstore MAXDTC2-BT user manual

Swegon LUNA c RE manual

Swegon

Swegon LUNA c RE manual

Liquidyn T10 Brief instructions

Liquidyn

Liquidyn T10 Brief instructions

Jung TR UD 231 Series operating instructions

Jung

Jung TR UD 231 Series operating instructions

Viessmann VITOSOIC 100 Installation and service instructions

Viessmann

Viessmann VITOSOIC 100 Installation and service instructions

Dimplex RTK 602 U quick start guide

Dimplex

Dimplex RTK 602 U quick start guide

S+S Regeltechnik THERMASGARD DTF Operating Instructions, Mounting & Installation

S+S Regeltechnik

S+S Regeltechnik THERMASGARD DTF Operating Instructions, Mounting & Installation

Omron E5C2 datasheet

Omron

Omron E5C2 datasheet

S+S Regeltechnik Frija I Series Operating Instructions, Mounting & Installation

S+S Regeltechnik

S+S Regeltechnik Frija I Series Operating Instructions, Mounting & Installation

Emerson Blue Wireless Easy Install 1F98EZ-1621 installation instructions

Emerson

Emerson Blue Wireless Easy Install 1F98EZ-1621 installation instructions

Eurotherm 216 user manual

Eurotherm

Eurotherm 216 user manual

Thermal Care Aquatherm RQE Operation, installation, and maintenance manual

Thermal Care

Thermal Care Aquatherm RQE Operation, installation, and maintenance manual

Elesta DOMOTESTA RDO353A series user manual

Elesta

Elesta DOMOTESTA RDO353A series user manual

manuals.online logo
manuals.online logoBrands
  • About & Mission
  • Contact us
  • Privacy Policy
  • Terms and Conditions

Copyright 2025 Manuals.Online. All Rights Reserved.