Fulgor Milano F7IWC24O1 User manual

F7IWC24O1 - R
F7IWC24O1 - L
F7SWC24S1 - R
F7SWC24S1 - L
EN
USER MANUAL
FR
MODE D’EMPLOI
ES
MANUAL DE USUARIO
WINE CELLAR
CAVE À VINS
ARMARIO CAVA

32
ENEN
1
1.1
1.2
1.3
IMPORTANT DIRECTIONS OF SAFETY AND THE ENVIRONMENT
For your safety.................................................................................................................................................................
Important information when using the appliance..................................................................................................
Caring for the environment..........................................................................................................................................
6
6
6
7
2
2.1
2.2
INSTALLATION
Installation.........................................................................................................................................................................
Connection to electrical power....................................................................................................................................
7
7
7
3
3.1
3.2
3.3
3.4
3.5
BEFORE STARTING
Know your appliance....................................................................................................................................................
Model / serial identification.........................................................................................................................................
Main components............................................................................................................................................................
Electronic control............................................................................................................................................................
Main control panel..........................................................................................................................................................
7
7
8
10
11
11
4
4.1
4.2
4.3
4.4
APPLIANCE ON / OFF AND TEMPERATURE SETTINGS
Turning the appliance on and o..............................................................................................................................
How to adjust the temperature for dierent requirements.........................................................................
Information signals of warning messages on the display.......................................................................
Wine Cellar temperatures...............................................................................................................................
12
12
14
15
16
5
5.1
5.2
FUNCTIONS AND SETTINGS
Functions............................................................................................................................................................
Settings...............................................................................................................................................................
17
17
18
6
6.1
INTERNAL LAYOUT
Internal layout (positioning, adjustment, removal)....................................................................................
24
24
7
7.1
LIGHTING
Interior lighting.......................................................................................................................................................
24
24
8
8.1
8.2
8.3
8.4
8.5
WINE STORAGE
General directions.........................................................................................................................................................
Conservation temperature.........................................................................................................................................
Time of conservation................................................................................................................................................
Consumption temperature.........................................................................................................................................
Position of bottles..........................................................................................................................................................
25
25
25
26
27
28
9
9.1
9.2
9.3
CARE AND CLEANING
Care and cleaning.....................................................................................................................................................
Cleaning of the grille and condenser.........................................................................................................................
Internal cleaning..............................................................................................................................................................
28
28
29
30
10
10.1
10.2
TROUBLESHOOTING GUIDE
Troubleshooting guide.................................................................................................................................................
Messages appearing on the display.......................................................................................................................
30
30
32
INDEX

54
ENEN
WARNING
IMPORTANT SAFETY INSTRUCTIONS
This manual contains operational instructions for the users of the appliance.
Keep this manual in an easily accessible place for future reference.
Improper installation, adjustment, alteration, service or maintenance can
cause property damage, injury, or death.
Read the installation, operating, and maintenance instructions thoroughly
before installing or servicing this equipment.
To reduce risk of fire, electric shock, or injury to persons when using your applian-
ce, follow basic precautions, including the following:
> Children should be supervised to ensure that they do not play with the appliance.
> This appliance is not intended for use by persons (including children) with reduced
physical, sensory or lack of experience and knowledge unless they have been given
supervision or instruction concerning use of the appliance by a person responsible for
their safety.
>
This appliance is designed to refrigerate wine and is intended for domestic use.
> This appliance is intended to be used in household and similar applications such as: sta
kitchen areas in shops, oces, and other working environments; farm houses and by
clients in hotels, motels, and other residential-type environments; bed and breakfast-
type environments; and catering and similar non-retail applications.
> Do NOT use an extension cord or adapter.
> Plug into a grounded 3 prong outlet.
> Do not remove ground prong.
WARNING
In the event of a power failure, do not attempt to operate this
appliance.
WARNING
Keep the appliance area free and clear from combustibles or
flammable materials and vapors.
WARNING
Keep ventilation openings, in the appliance enclosure or in the
built-in structure, clear of obstruction. Do not obstruct the air
intake or exhaust openings of the appliance.
WARNING
Do not store explosive substances such as aerosol cans with a
flammable propellant in this appliance.
WARNING
Do not use electrical appliances inside the food storage com-
partments of the appliance.
IMPORTANT SAFETY INSTRUCTIONS FOR MAINTENANCE
AND CARE
DANGER
Risk of fire or explosion due to puncture of refrigerant tubing; fol-
low handling instructions carefully. Flammable refrigerant used.
WARNING
To b
e repaired only by trained service personnel.
Use only manufacturer-authorized service parts, Do not use replacement parts that
have not been recommended by the manufacturer (e.g, parts made at home using a
3D printer). If power supply cord is damaged, it must be replaced by the manufac-
turer, its service agent, or a similarly qualified person in order to avoid a hazard.
Any repair equipment used must be designed for flammable refrigerants. Follow all
manufacturer repair instructions. Use nonflammable cleaner.
WARNING
Do not puncture refrigerant tubing, do not damage the refrige-
rant circuit.
WARNING
Do not use mechanical devices or other means to accelerate
the defrosting process, other than those recommended by the
manufacturer.
TIP OVER HAZARD
WARNING
Refrigerator is top heavy and tips easily when not completely
installed; to avoid a hazard due to instability of the appliance, it must be fixed in
accordance with the instructions (see installation manual provided).
Keep doors taped closed until refrigerator is completely installed especially while
unattended.
Use two or more people to move and install refrigerator.
Failure to do can result in death or serius injury.
WARNING
This is the safety alert symbol. This symbol alerts you to potential hazards that can kill or
hurt you and others. All safety messages will follow the safety alert symbol and either the
word “DANGER” or “WARNING.” These words mean:
WARNING
You can be killed or seriously injured if you don’t follow instructions.
DANGER
You can be killed or seriously injured if you don't immediately follow
instructions.
All safety messages will tell you what the potential hazard is, tell you how to reduce the chance of
injury, and tell you what can happen if the instructions are not followed.
SAVE THESE INSTRUCTIONS!
IMPORTANTSAFETYINSTRUCTIONSFORPROPERDISPOSAL
OF YOUR OLD REFRIGERATOR
WARNING
Suocation Hazard
Remove doors or lid from your old appliance.
Failure to do so can result in death or brain damage.
WARNING
Risk of child entrapment.
Before you throw away your old refrigerator or freezer:
> Take o the doors and cut o the power cord.
> Leave the shelves in place so that children may not easily climb inside.
> IMPORTANT: Child entrapment and suocation are not problems of the past. Junked or
abandoned refrigerators are still dangerous, even if they will sit for "just a few days."
If you are getting rid of your old refrigerator, please follow these instructions to help
prevent accidents.
Important information to know about disposal of refrigerants:
Dispose of refrigerator in accordance with federal and local regulations. Refrigerants
must be evacuated by a licensed. EPA-certified refrigerant technician in accordance with
established procedures.
SAFETY INSTRUCTIONS

76
ENEN
1.3 Caring for the environment
> Pay special attention to correct disposal procedure
for all the packaging materials.
> The appliance must not be disposed of with urban
waste. Contact local waste disposal centers for on
how to dispose of recyclable waste.
> Prior to disposal, cut the power supply cord and
remove the door.
> During disposal, avoid damage to the refrigeration
circuit.
> The appliance does not contain hazardous
substances for the atmospheric ozone layer, neither
in the refrigeration circuit nor in the insulation.
2.1 Installation
Make sure that installation is performed correctly,
adhering to all of the instructions in the specific
installation guide provided with the appliance.
2.2 Connection to electrical power
supply
The appliance operates at 115 V AC, 60 Hz and
is equipped with a power supply cord with a
3-prong grounded plug, which must be connected
to a corresponding 3-prong (15 Amp) grounding-
type wall receptacle.
Do not use extension cords and/or
multiple adapters for connection.
EN
1.1 For your safety
> If this appliance is replacing an existing appliance
which must be removed or disposed of, make
sure that it does not become a dangerous trap
for children by cutting its power supply cable and
rendering it impossible to close the door. Use the
same caution at the end of the lifespan of the new
appliance.
> The appliance must be installed by following the
instructions in the Installation Guide, particular
care should be taken not to obstruct the vent
openings of the appliance and of the built-in units.
> The appliance features a concentrated lighting
system with LED lamps. Do not stare into these
lamps when they are on to avoid possible eyesight
damage.
This warning is also contained on the label attached
to the inside of the refrigerator door.
> Do not use any type of electrical equipment inside
of the food conservation compartments.
> When positioning the shelves, do not place fingers
in the shelf slide guides.
> Do not position containers of flammable liquids
near the appliance.
> Completely switch o the appliance and unplug
the power supply cable during cleaning operations.
If the plug is not easily reached, it is a good idea to
turn o the breaker or remove the fuse that controls
the socket that the appliance is connected to.
> The packaging material can be dangerous for
children: do not allow children to play with the
plastic bags, plastic film or Styrofoam.
> Any repairs must be performed by a qualified
Fulgor Milano Service technician.
> Do not damage the appliance refrigerant circuit
pipes.
> Repairs may be performed by the manufacturer,
service company or a similarly qualified person
only.
> Plug into a grounded 3 prong outlet.
> Do not remove ground prong.
> Do not use an adapter.
> Do not use an extension cord.
> Disconnect power to all units before servicing.
1.2 Important information when using
the appliance
> Never use electrical appliances inside the
appliance (e.g. heater, electric ice maker, etc.).
Explosion hazard!
> Never defrost or clean the appliance with a steam
cleaner! The steam may penetrate electrical parts
and cause a short-circuit. Risk of electric shock!
> Do not use pointed and sharp-edged implements
to remove frost or layers of ice. You could damage
the refrigerant tubes. Leaking refrigerant may
cause eye injuries or ignite.
> Do not store products which contain flammable
propellants(e.g.spraycans)orexplosivesubstances
in the appliance.
Explosion hazard!
> Do not stand on or lean heavily against base of
appliance, drawers or doors, etc.
> Before cleaning the appliance, pull out the power
cord plug or switch o the breaker. Do not pull out
the power cord plug by tugging on the power cord.
> Store high-percentage alcohol tightly closed and
standing up.
> Keep plastic parts and the door seal free of oil and
grease. Otherwise, parts and door seal will become
porous.
> Never cover or block the ventilation openings for
the appliance.
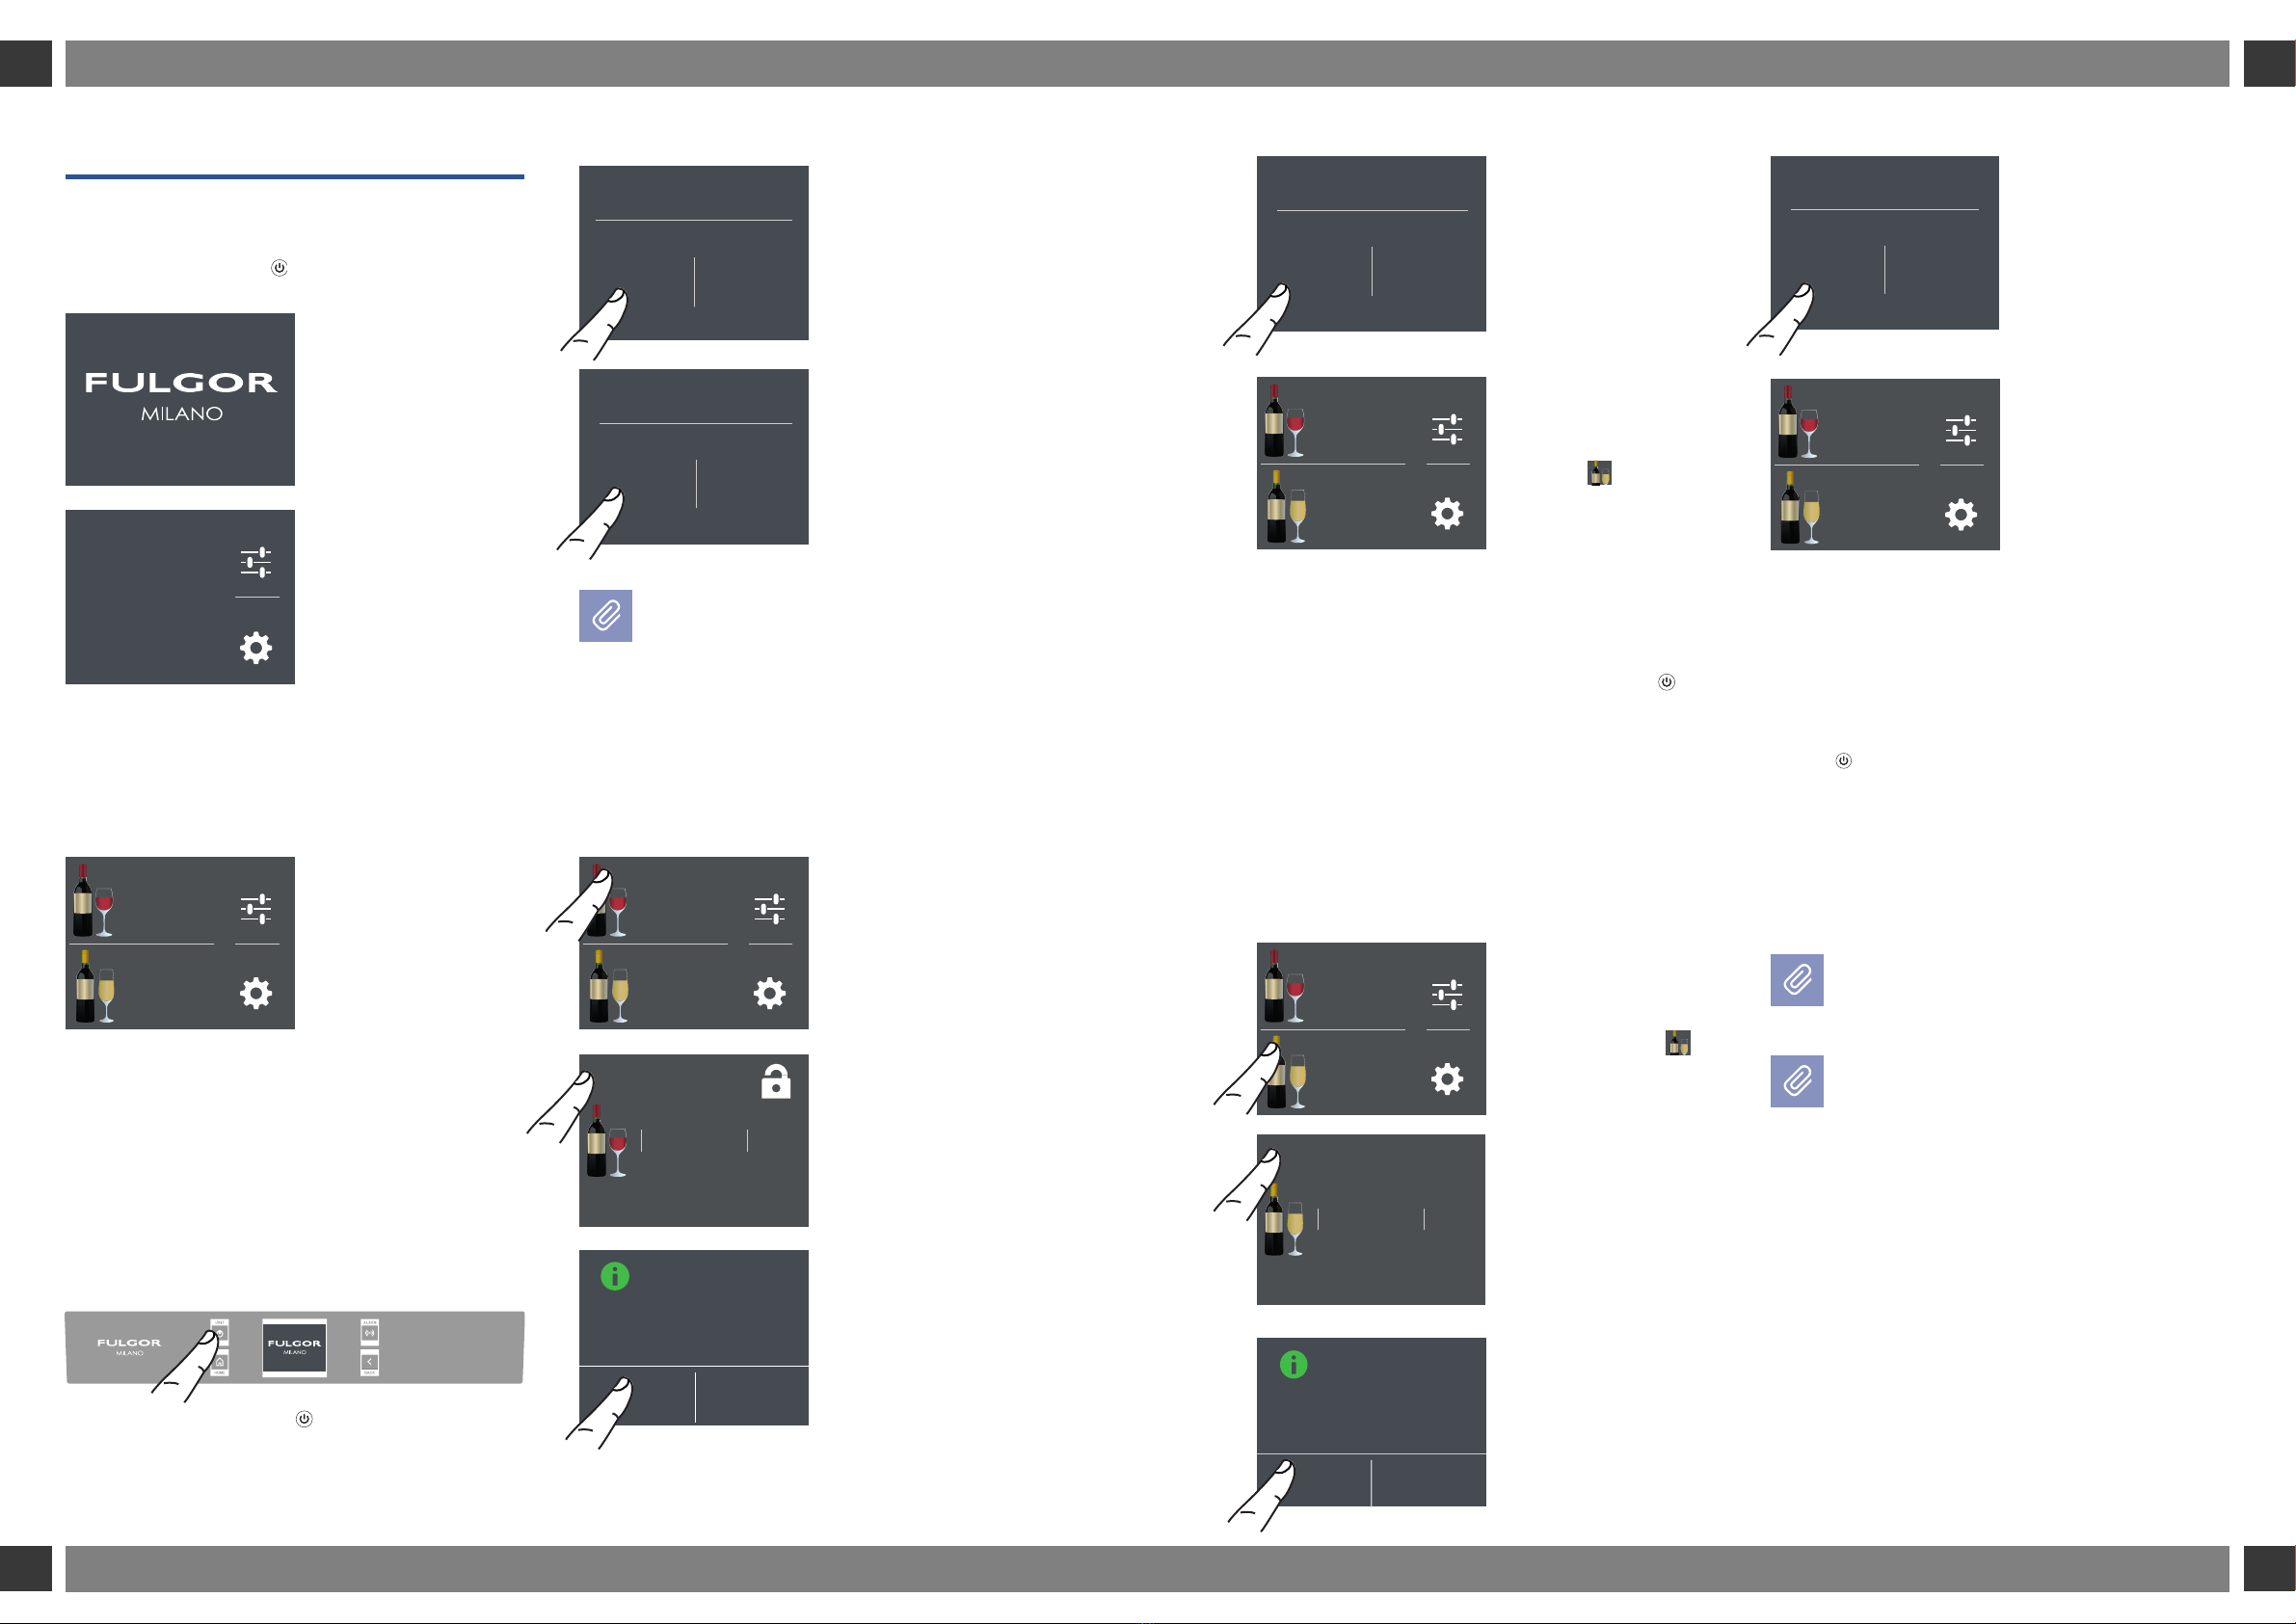
Symbols used in the Guide:
Note
Recommendations for correct use of the
appliance
Important
Directions for avoiding appliance damage
Warning
Indications for avoiding injury to people
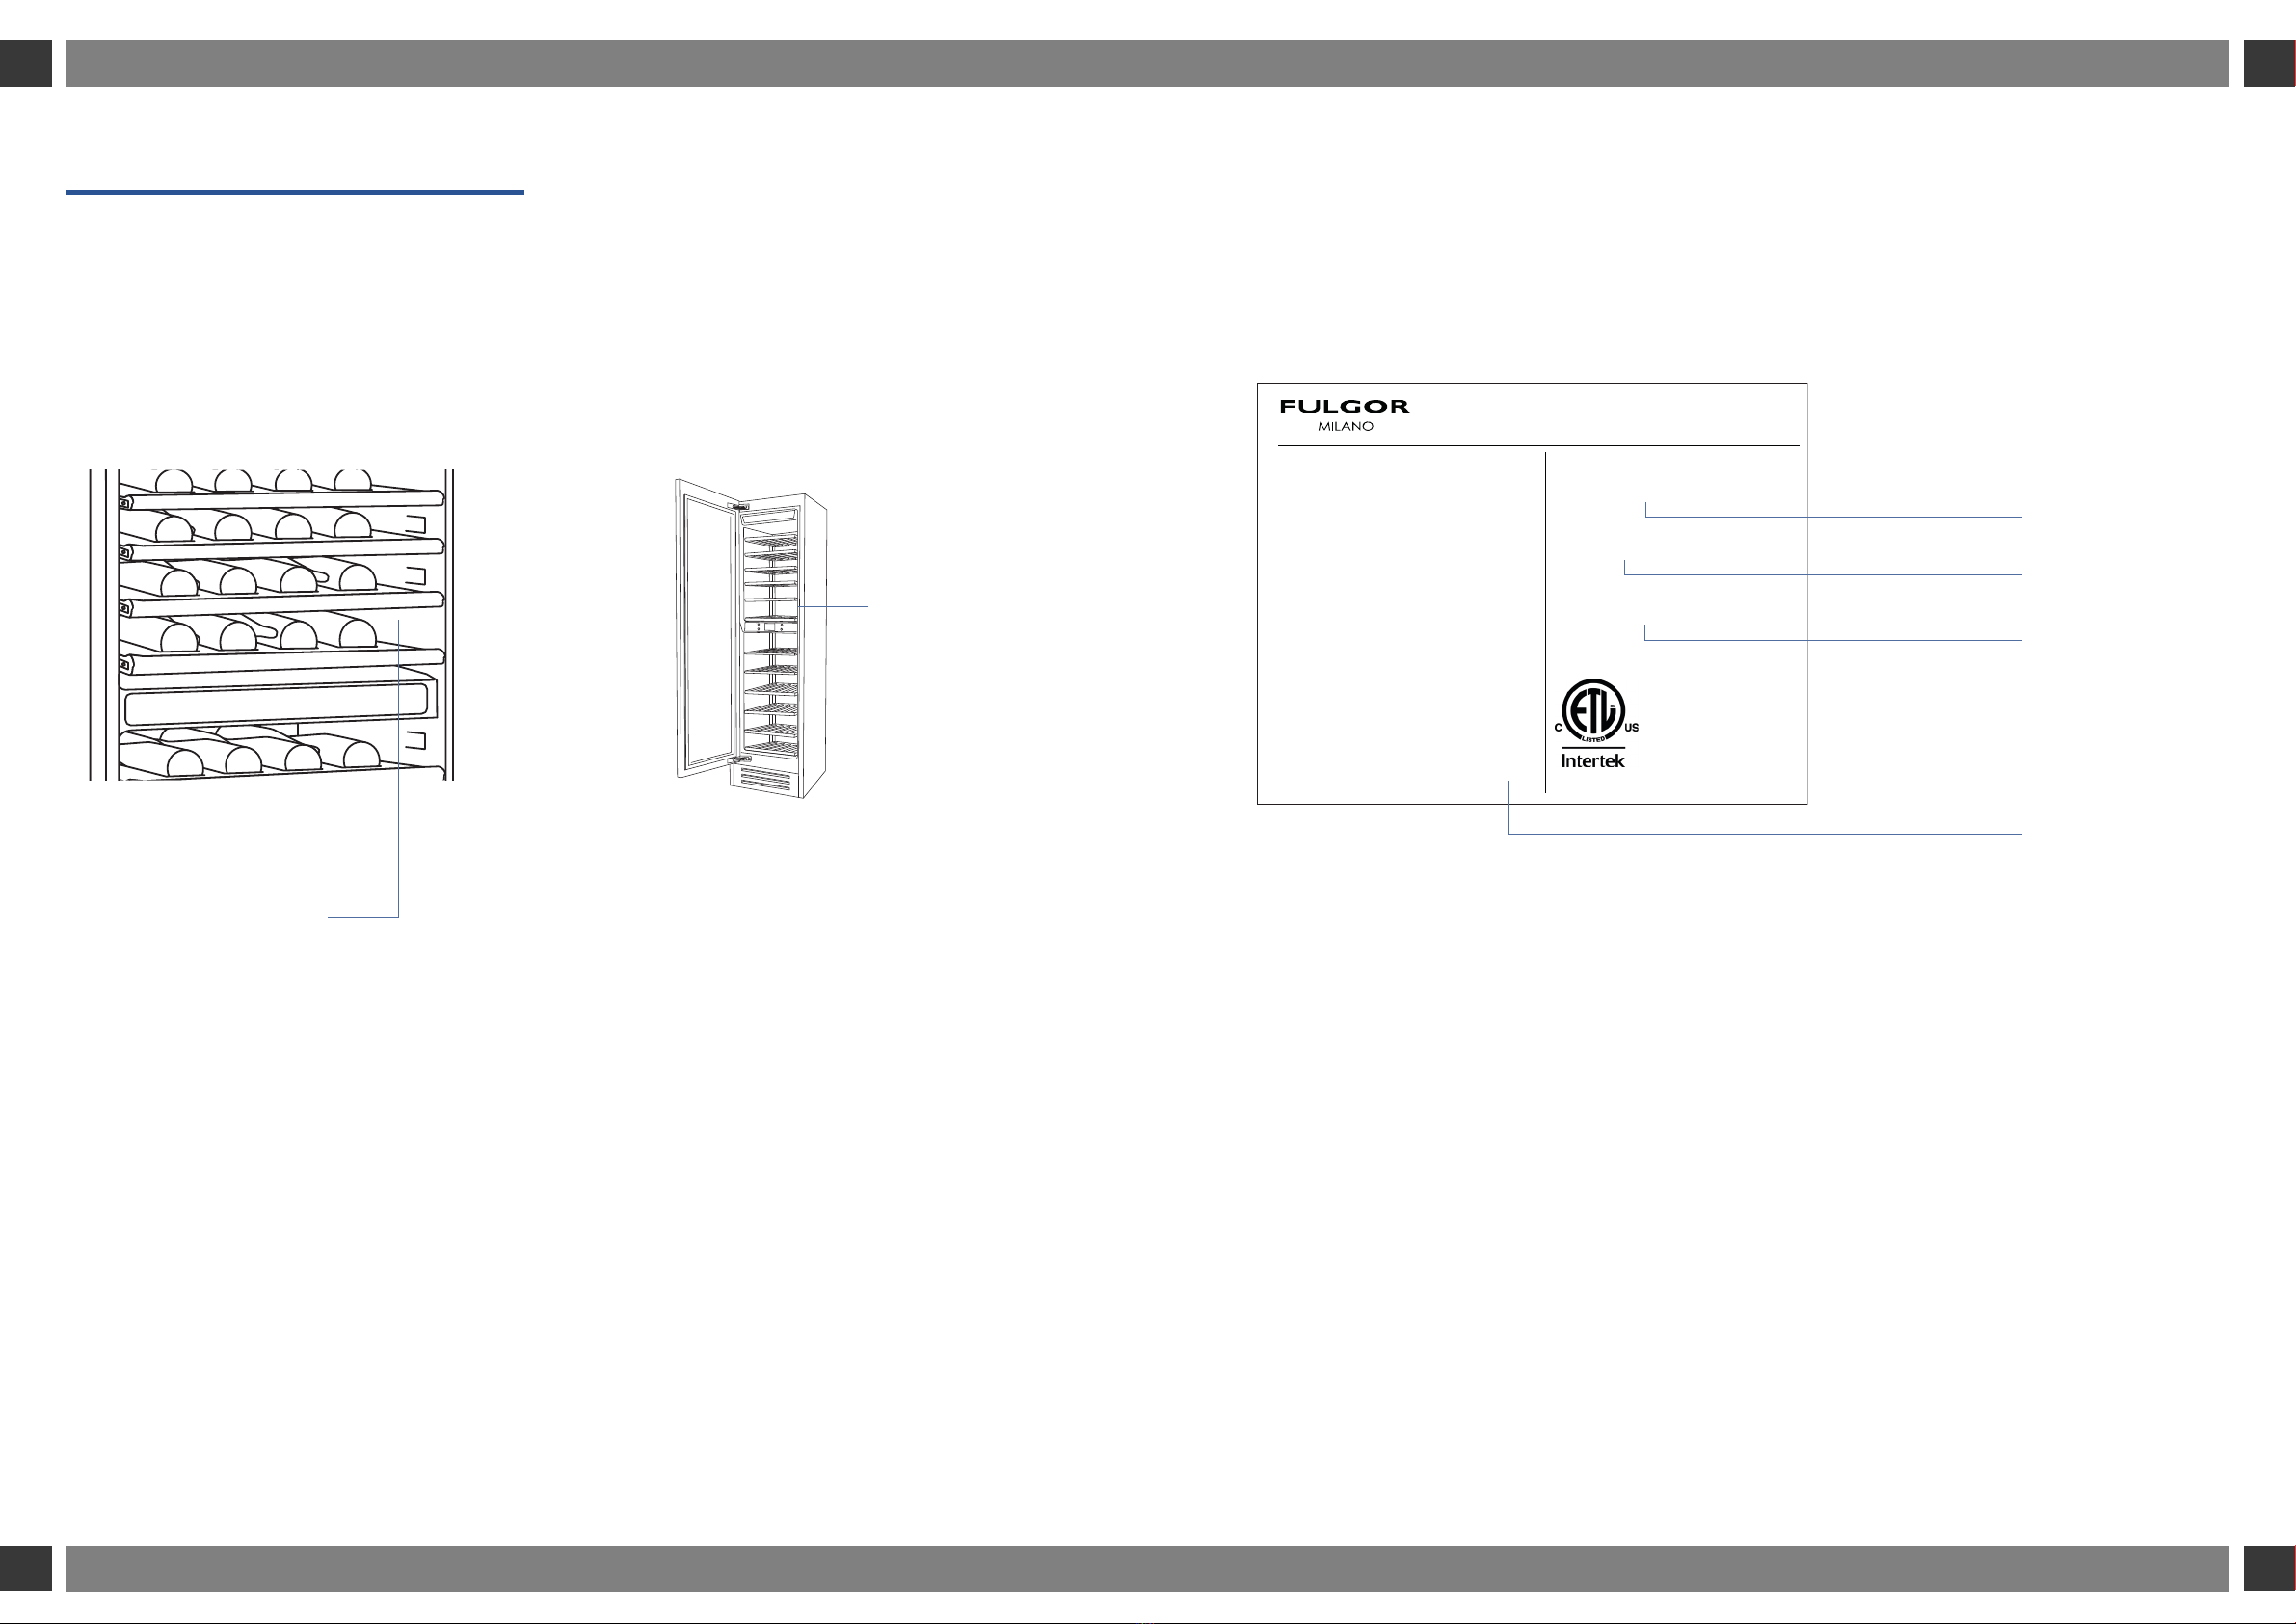
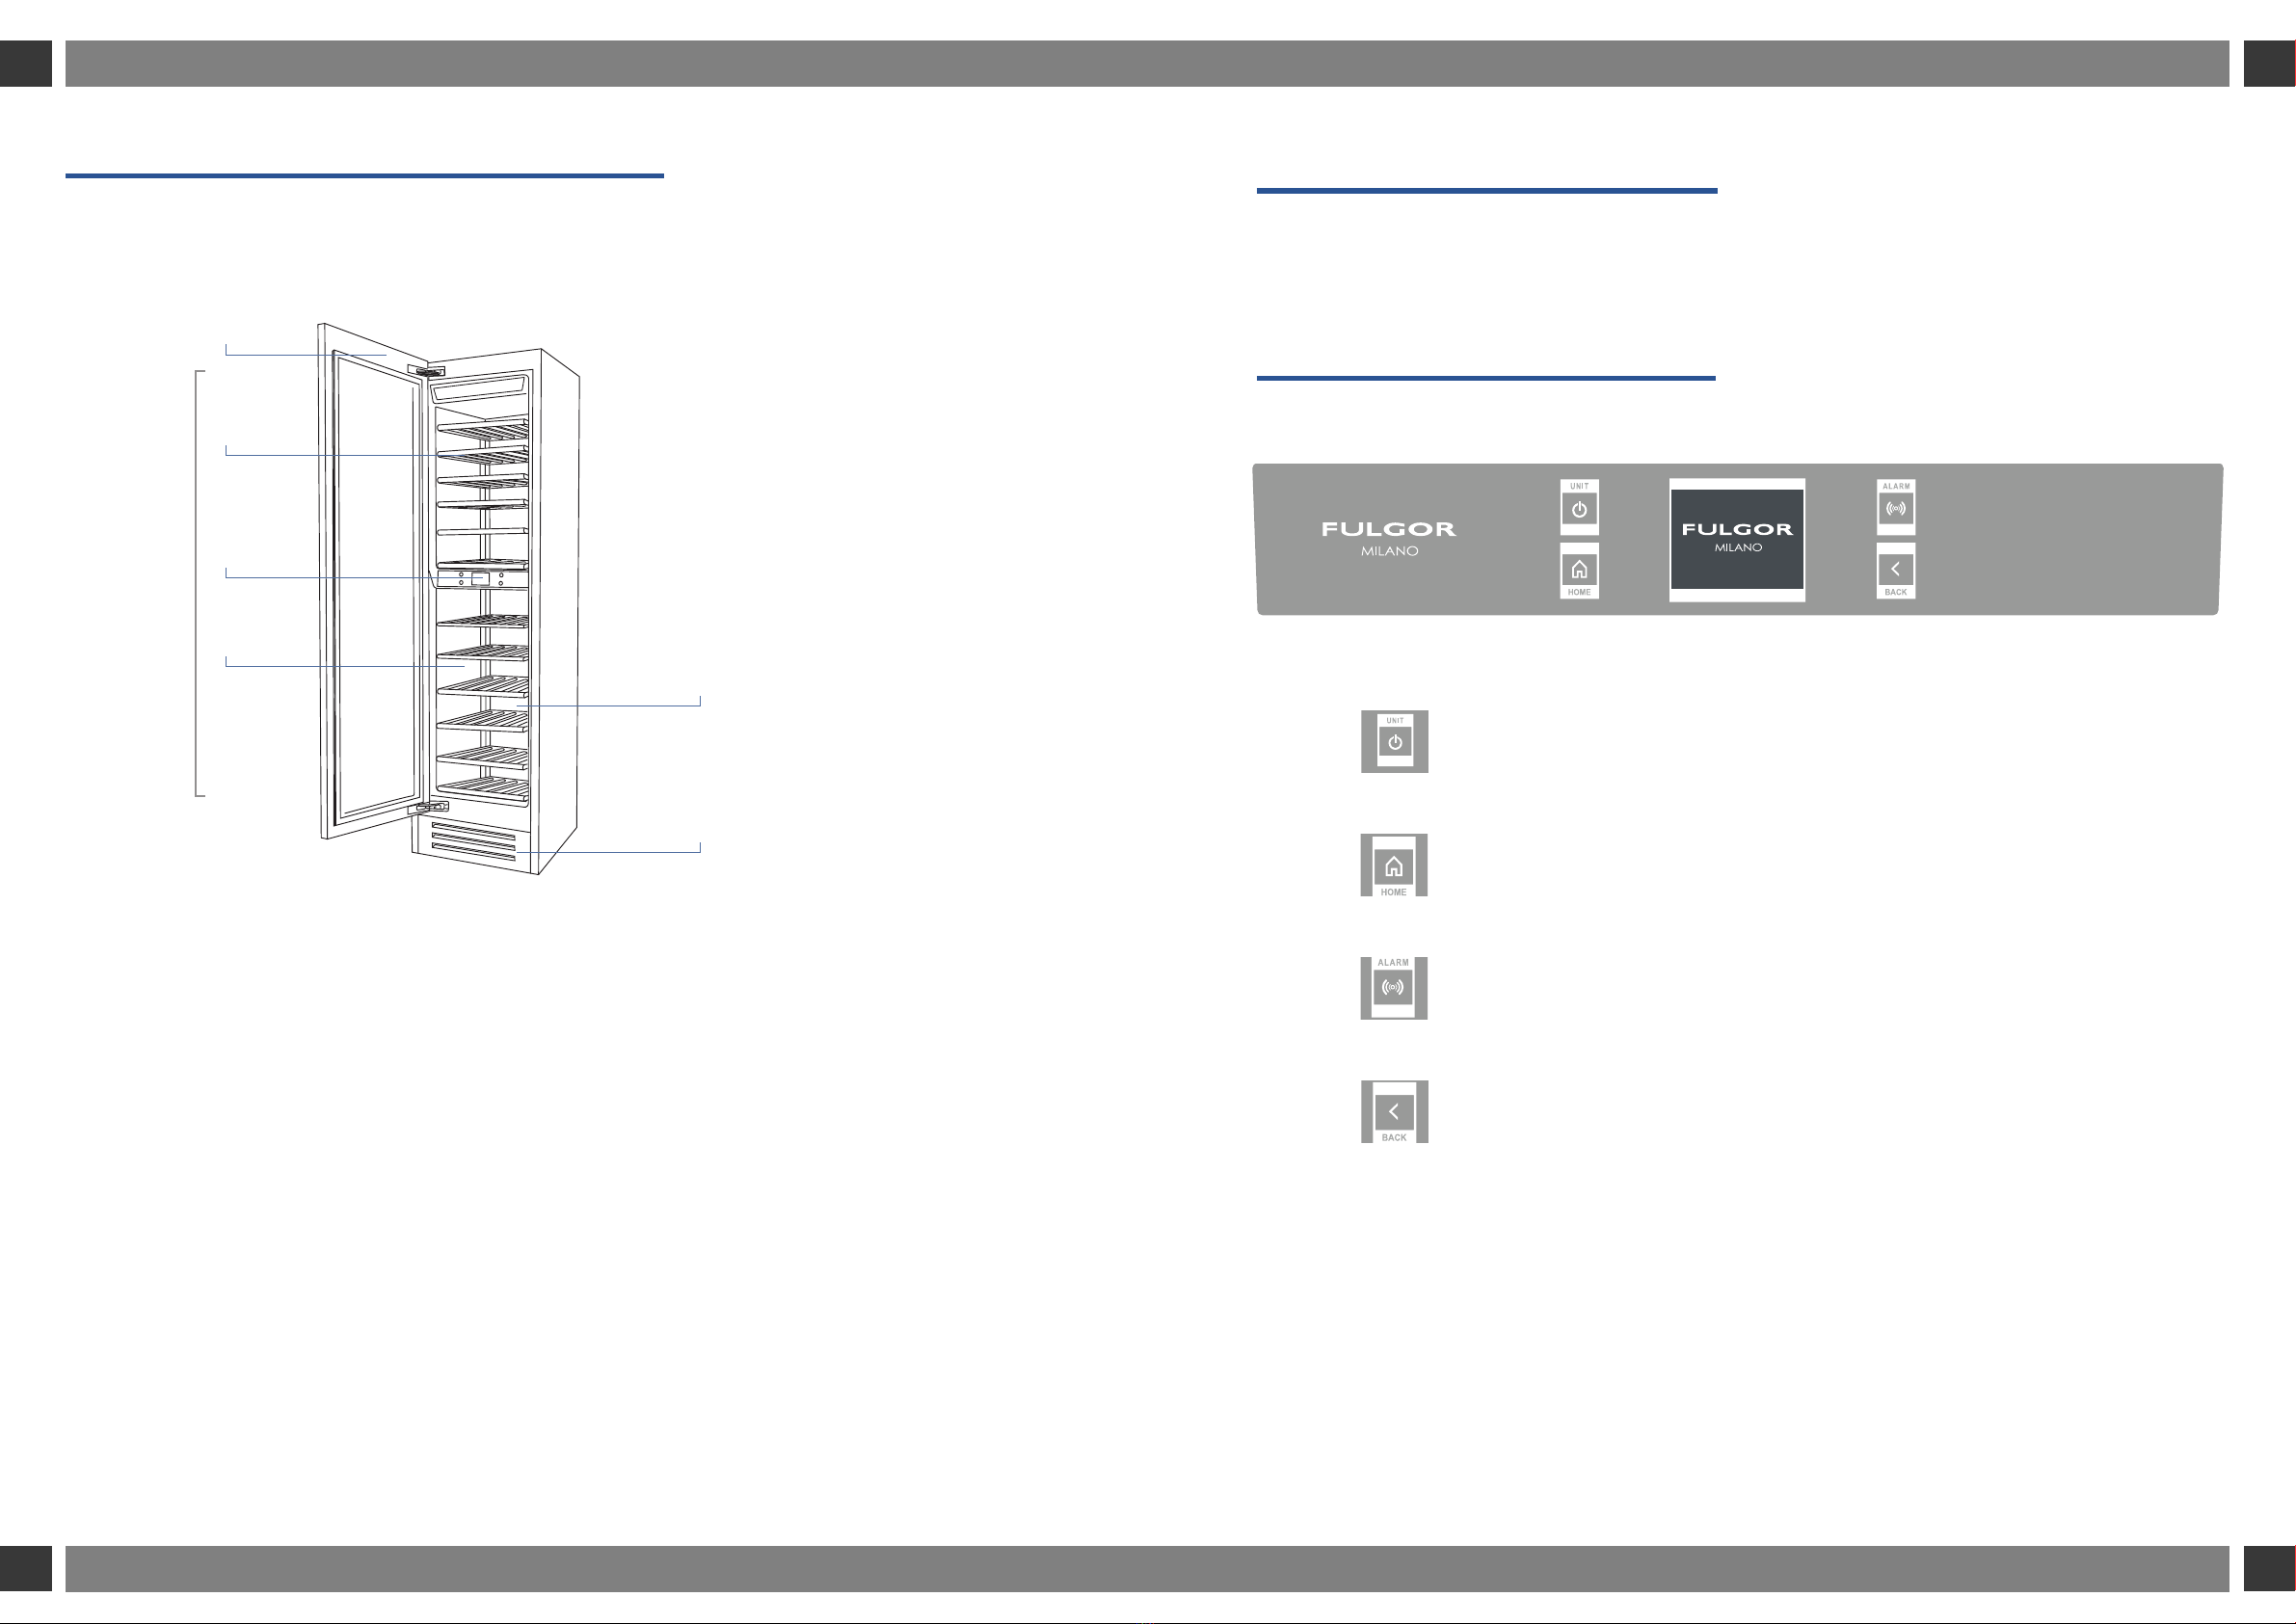
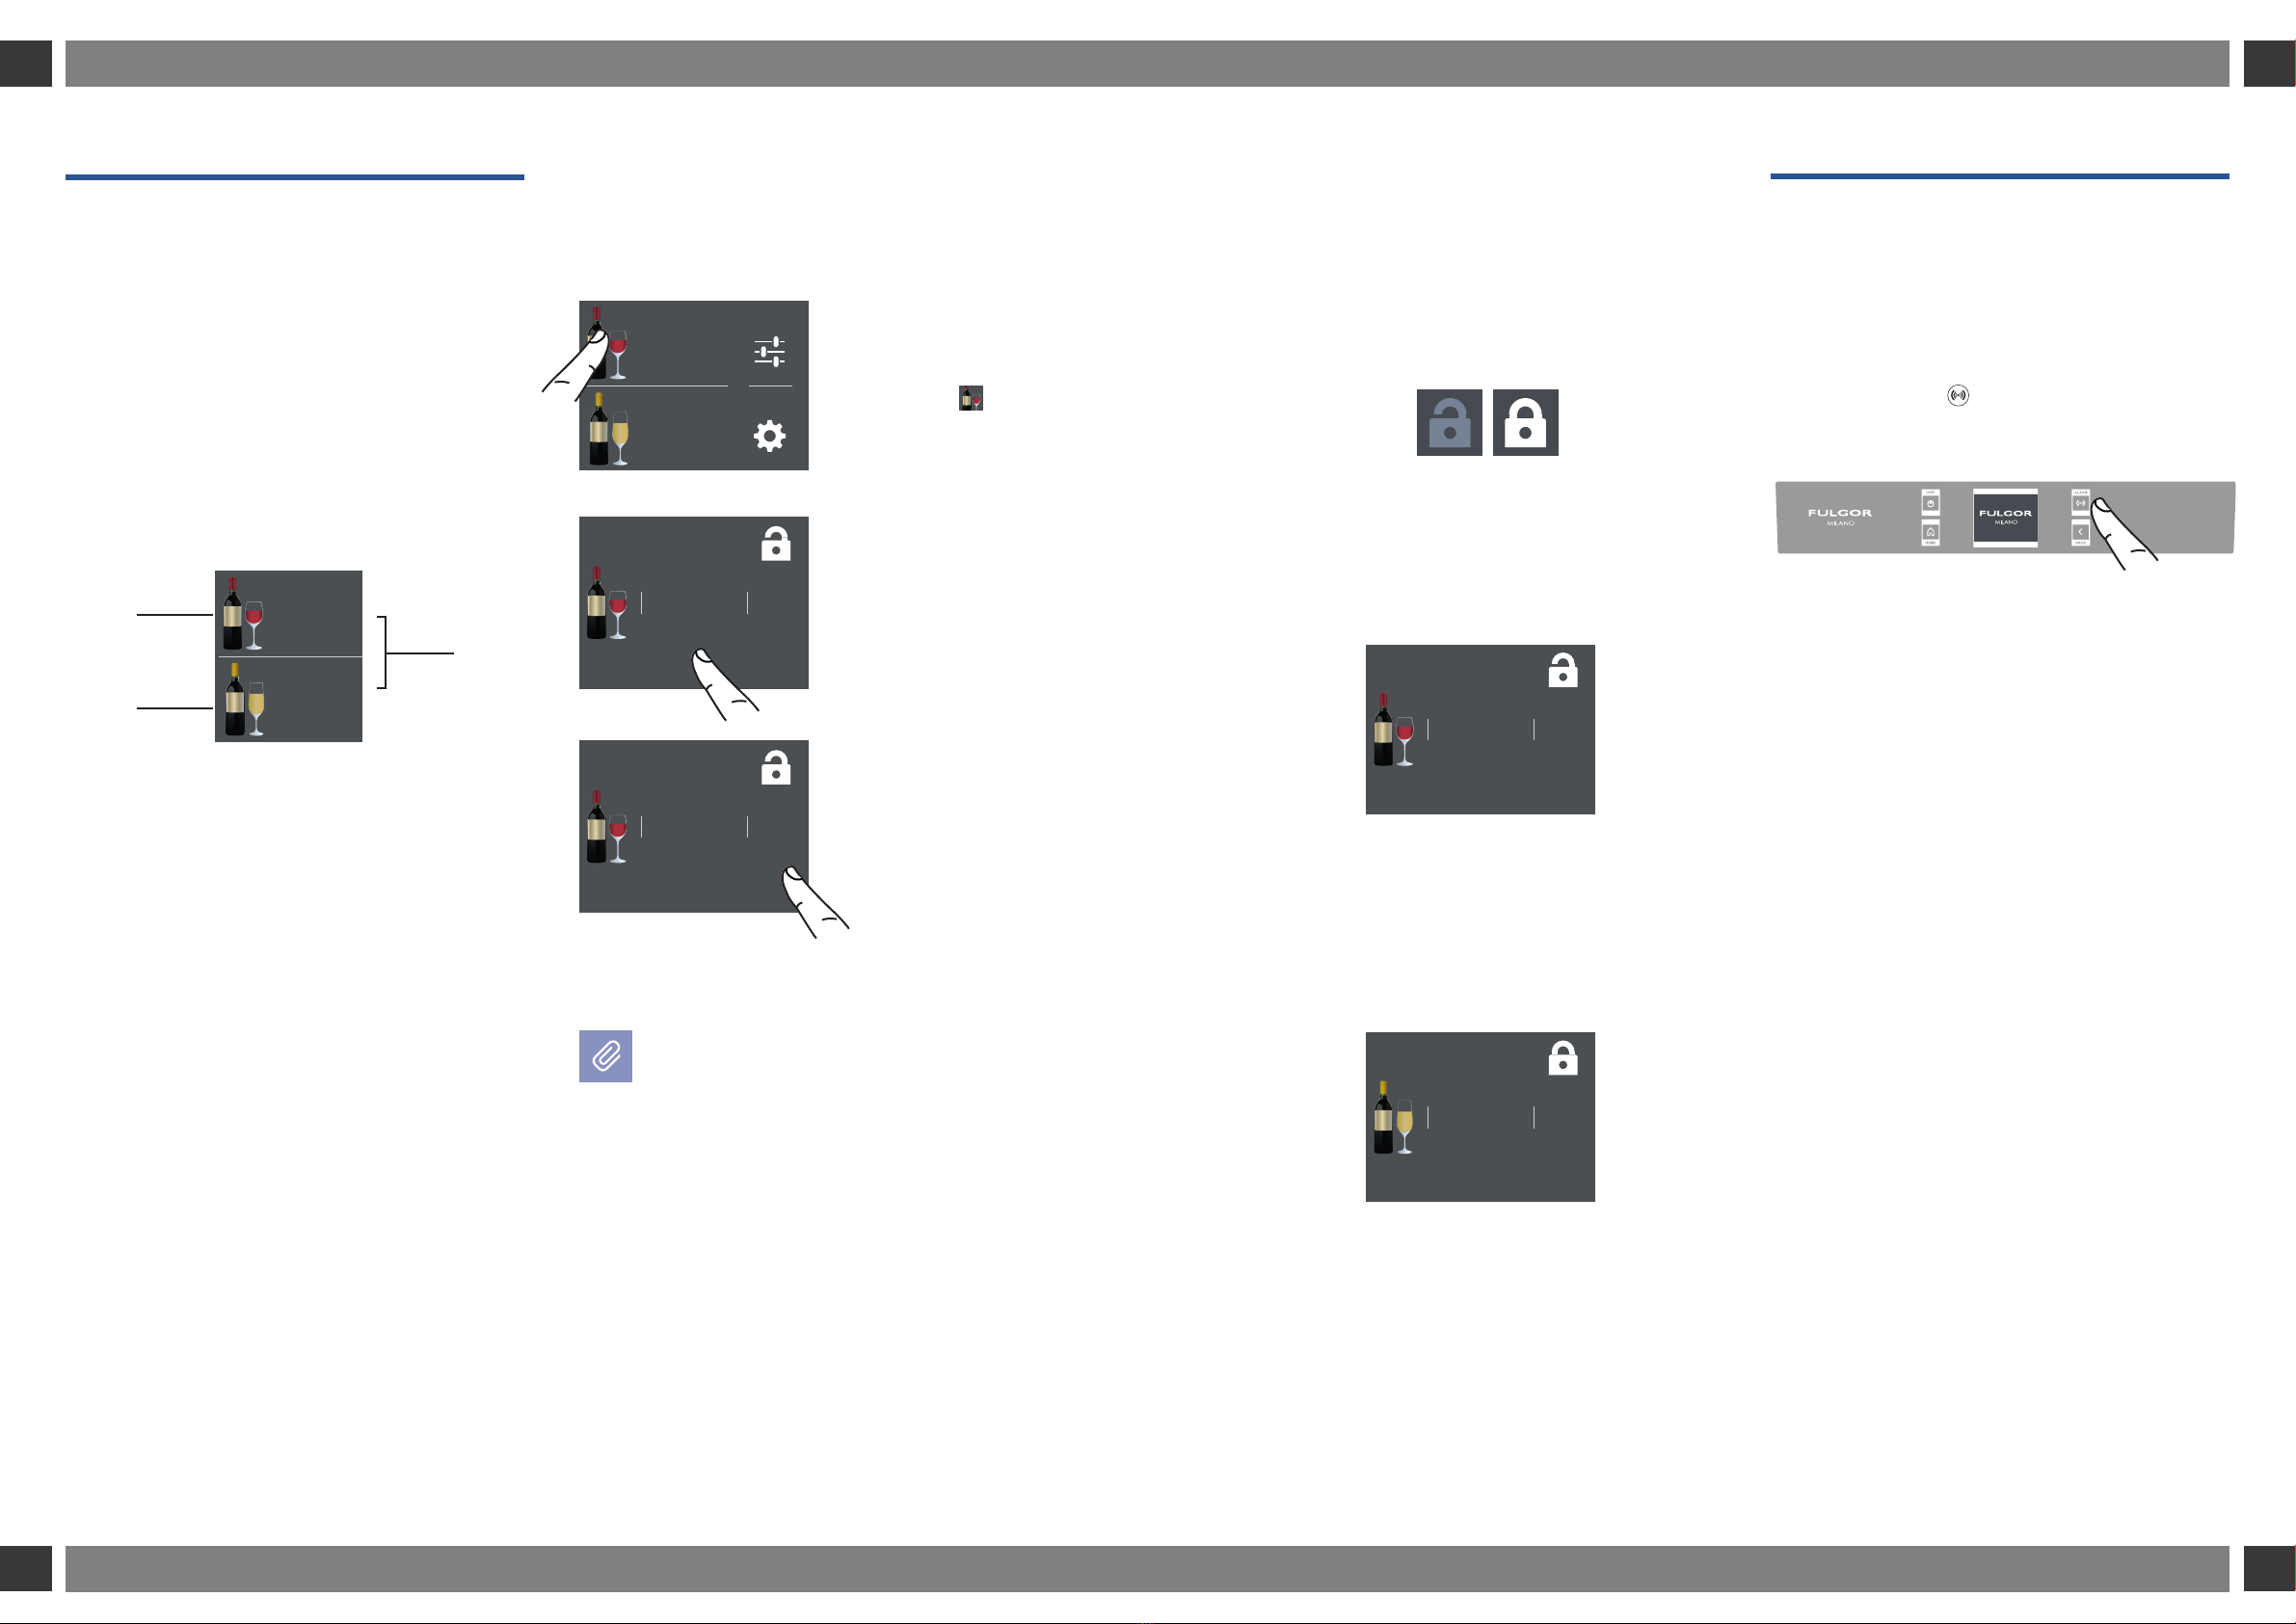
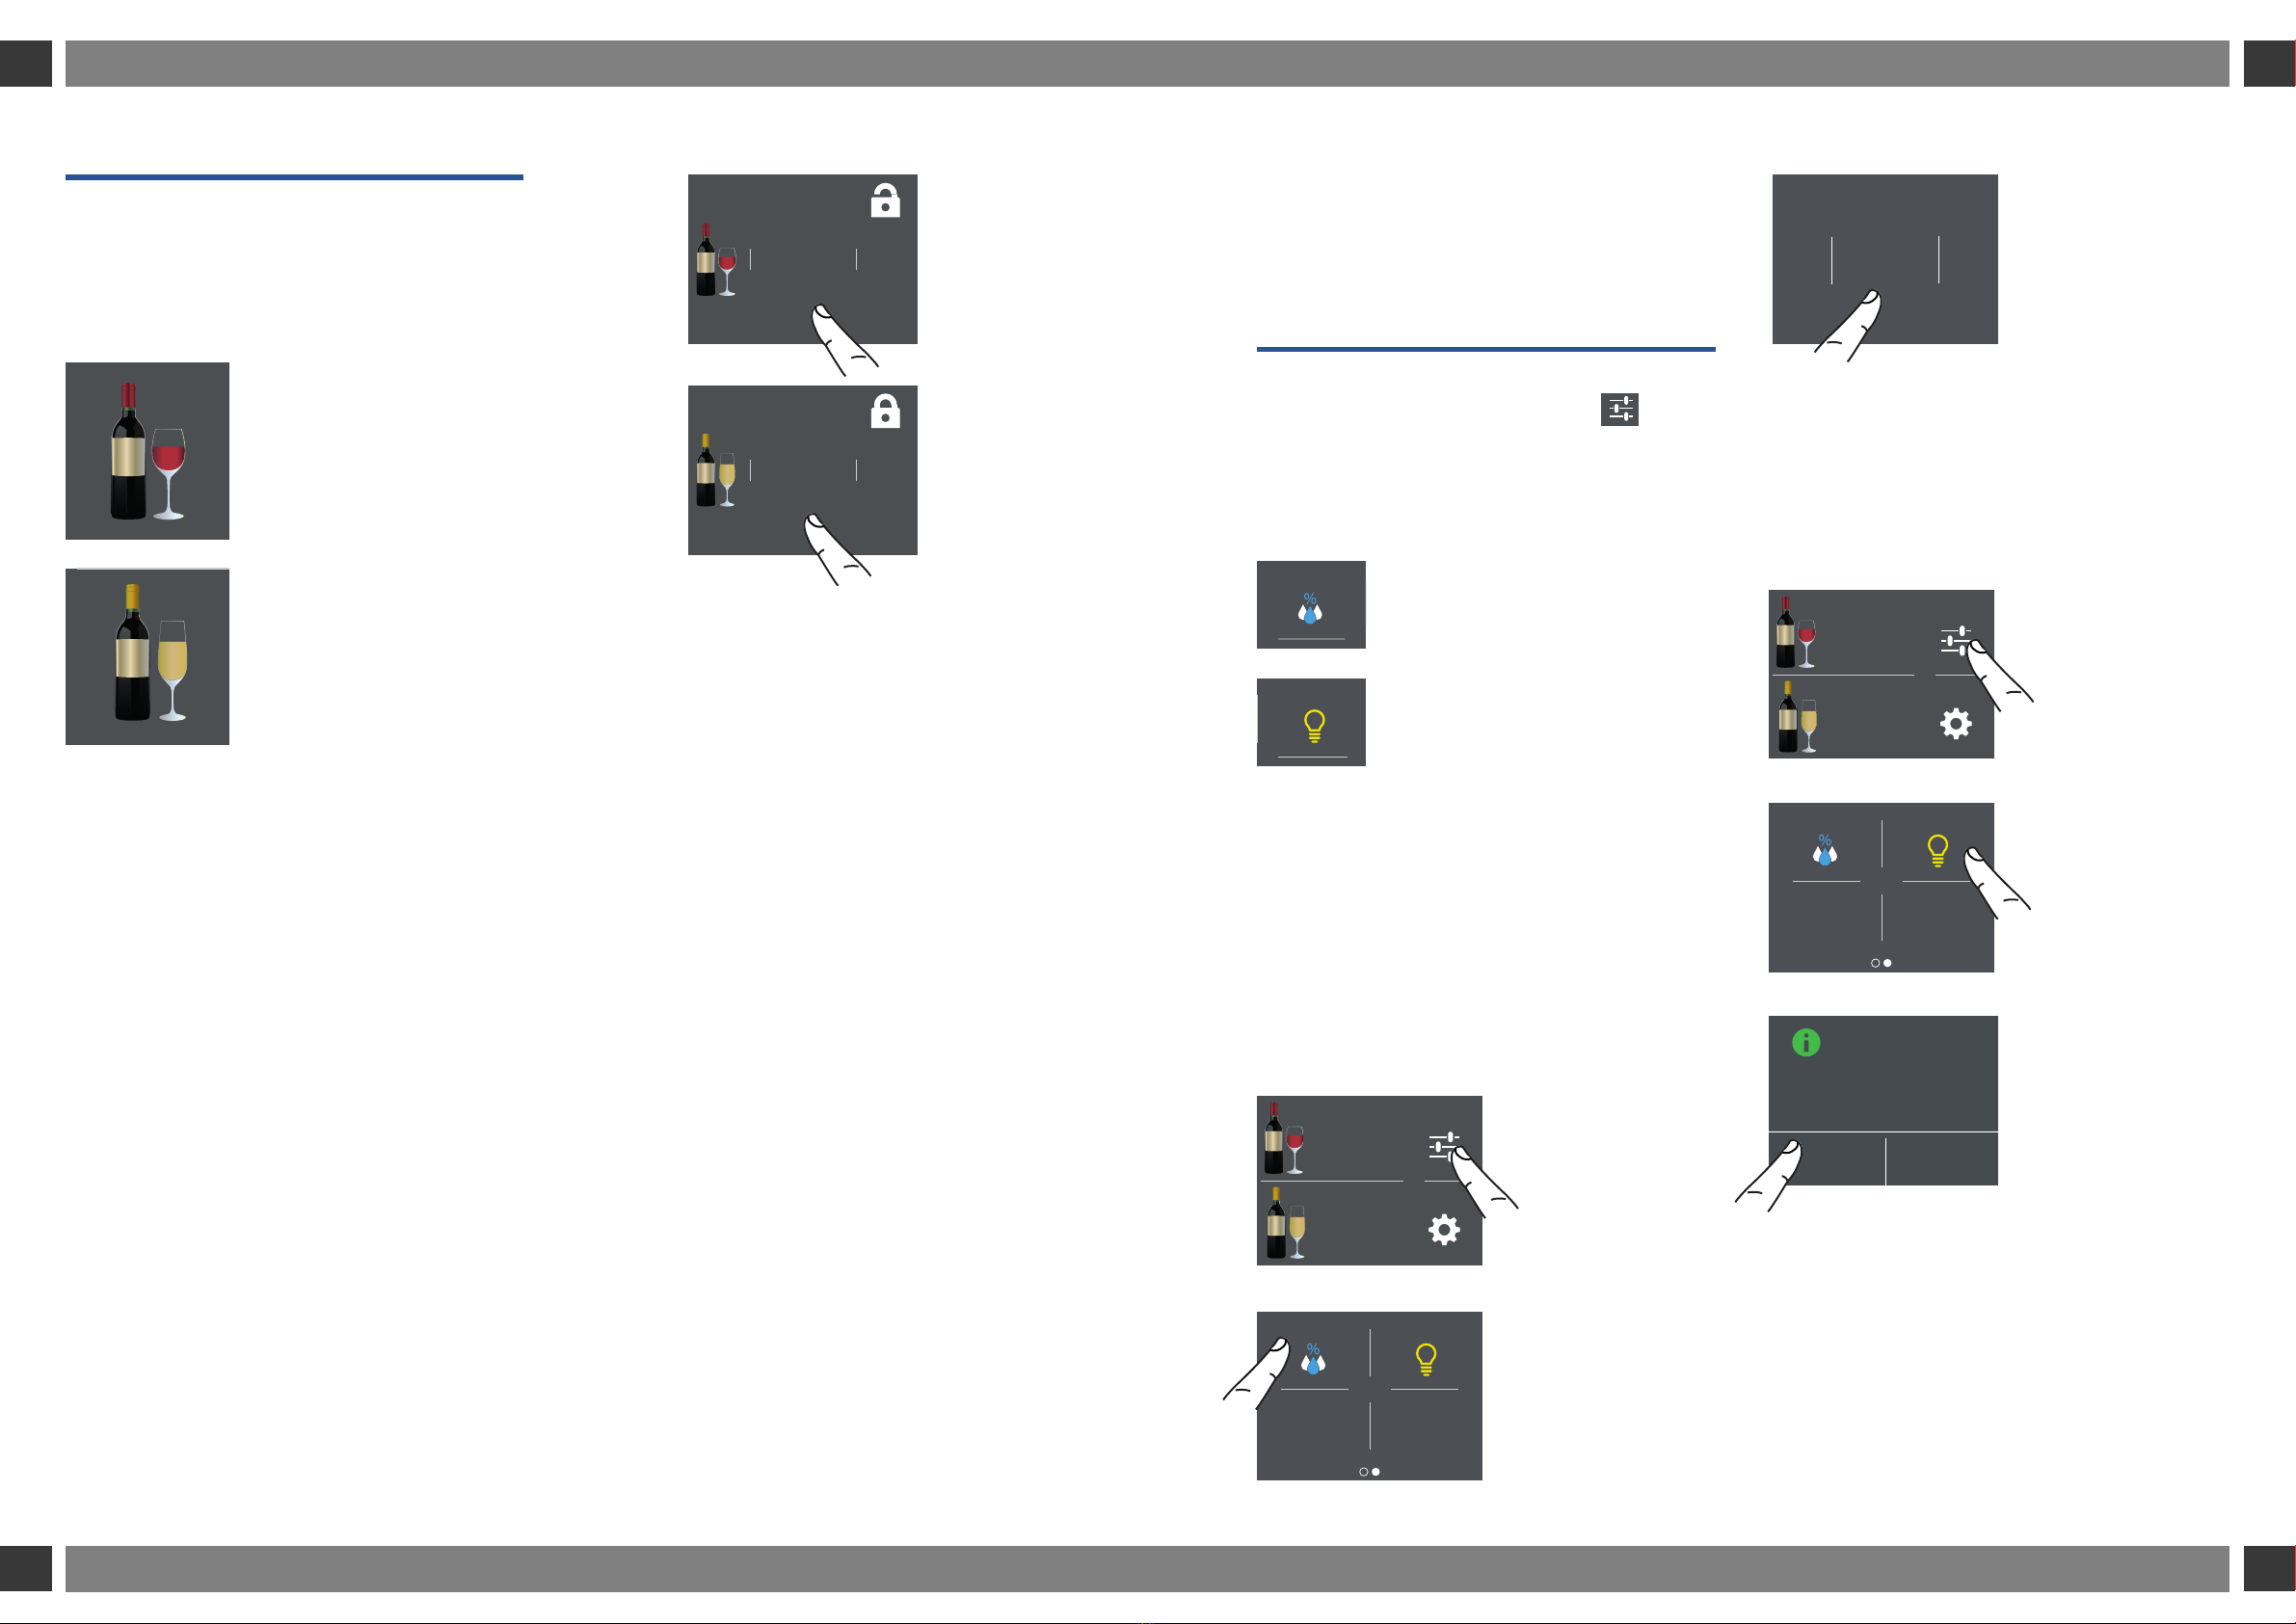
3.1 Know your appliance
Congratulations for having purchased your new
appliance: from now on you can use our innovative
conservation system, which will allow you to keep
wine in the best way possible.
This manual will answer most of your questions
about the product’s features. Should you require
further information, please
> call us 1-855-4FULGOR (1-855-438-5467)
> visit fulgor-milano.com/us/en/assistance
Before calling, write down the model
code and serial number which are
available with the manuals and on the
rating plate located on the bottom left-
hand corner of the appliance, behind the
bottom drawer.
Before calling, please make sure to have the
following information ready:
- Date of Purchase;
- Name of dealer where product was purchased.
2.4 Refrigerant
The refrigerant isobutane (R600a) is contained
within the refrigerant circuit of the appliance, a
natural gas with a high level of environmental
compatibility, which is nevertheless flammable.
> During transportation and installation of the
appliance, be certain that none of the components
of the refrigerant circuit become damaged.
> If the refrigerant circuit should become damaged:
– avoid open flames and sources of ignition;
– thoroughly ventilate the room in which the
appliance is situated.
2. INSTALLATION
1. IMPORTANT INSTRUCTIONS FOR SAFETY AND THE ENVIRONMENT

98
ENEN
S5990FW3U
FI24WCC-LO1
F20220101000006
70 oz MODEL
CODE
SER.NO./N° SERIE
3186660
ETL LISTED
CONFORMS TO
ANSI/UL STD 250
CERTIFIED TO CAN/CSA
STD C22.2 NO.63
oz
2.5 A
115 V
60 Hz
R600a
Fridge Gas Fill Charge
Quantité de Gaz Réfrigerateur
Freezer Gas Fill Charge
Quantité de Gaz Congélateur
Total Absorbed Current
Courant Absorbée Totale
Voltage
Tension
Frequency
Frequence
Refrigerant Gas Type
Type de Gaz Rèfrigerant
Defrost Heater
Chauage de Dégivrage
Made in Italy
W
3.2 Model / serial identification
The model / serial identification shows the technical
data, the serial number and the model. The product
plate must never be removed.
Climate Classes - this model is SN/T
>SN (Subnormal) from +50°F to +90°F (+10°C to +32°C)
>N (Normal) from +61°F to +90°F (+16°C to +32°C)
>ST (Subtropical) from +64°F to +100°F (+18°C to +38°C)
>T (Tropical) from +64°F to +109°F (+18°C to +43°C)
Position of the serial number
inside the compartment.
The product plate is positioned on
the side opposite door hinge.
Specifications
Internal factory code
North American Model Number
Serial Number
3. BEFORE STARTING

1110
ENEN
Serigraa VETRO LCD2.8
Limite per graca parti retro-illuminate - la parte bianca è trasparente
Testo e graca
00
°C+
Impostazioni
Funzioni
00
°C+
00
°C-
Colore AAAA
colore C71
Serigraa VETRO LCD2.8
Limite per graca parti retro-illuminate - la parte bianca è trasparente
Testo e graca
00
°C+
Impostazioni
Funzioni
00
°C+
00
°C-
Colore AAAA
colore C71
Serigraa VETRO LCD2.8
Limite per graca parti retro-illuminate - la parte bianca è trasparente
Testo e graca
00
°C+
Impostazioni
Funzioni
00
°C+
00
°C-
Colore AAAA
colore C71
Serigraa VETRO LCD2.8
Limite per graca parti retro-illuminate - la parte bianca è trasparente
Testo e graca
00
°C+
Impostazioni
Funzioni
00
°C+
00
°C-
Colore AAAA
colore C71
1
5
6
3
2
4
3.3 Main components
1Glass door.
2 Interactive control panel.
3Upper Compartment.
4Sliding bottle shelves,
mounted on wheels for
easy extraction.
5Lower compartment.
6Ventilation grille.
3.4 Electronic Control
The innovative electronic control system maintains constant temperature in the 2 temperature zones
and visualizes it on the control panel display. It also allows user interaction making it possible to person-
alize settings of the various functions and to receive sound and/or visual messages should any malfunc-
tion occur in the appliance.
3.5 Main control panel
On / Off:
Touch the icon to turn the unit on or off.
Home
Touch the Home icon for going back to the main display screen.
Alarm
Touch the icon to view the alarm tone functions and to deactivate them.
Back
Touch the arrow icon for going back to the previous display screen.
Wine Cellar
Wine Cellar
+39°F / +64°F
(+4°C /+18°C)
3. BEFORE STARTING
Serigraa VETRO LCD2.8
Limite per graca parti retro-illuminate - la parte bianca è trasparente
Testo e graca
00
°C+
Impostazioni
Funzioni
00
°C+
00
°C-
Colore AAAA
colore C71

1312
ENEN
SETTINGS
FUNCTIONS
°C
OFF
10 °C
+
SETTINGS
FUNCTIONS
°C
5
+
10 °C
+
SETTINGS
FUNCTIONS
°C
5
+
10 °C
+
+6 °C
+8
+7
+4
+5
OK
OFF
TURN
COMPARTMENT
OFF?
YES NO
ARE YOU SURE?
YES NO
ARE
YOU SURE YOU WANT
TO
POWER OFF THIS UNIT?
YES NO
SETTINGS
FUNCTIONS
°C
5
+
10 °C
+
+6 °C
+8
+7
+4
+5
OK
ON
ARE YOU SURE?
YES NO
ARE YOU SURE?
YES NO
TURN
COMPARTMENT
ON?
YES NO
SETTINGS
FUNCTIONS
°C
OFF
10 °C
+
SETTINGS
FUNCTIONS
INITIAL TEST
…
Serigraa VETRO LCD2.8
Limite per graca parti retro-illuminate - la parte bianca è trasparente
Testo e graca
00
°C+
Impostazioni
Funzioni
00
°C+
00
°C-
Colore AAAA
colore C71
4.1 Turning the appliance on and o
First time starting the unit
Touch the power icon . The display shows the
following launch screens:
Shutdown.
When the appliance is first switched on is
recommended to wait at least 12 hours without
opening the doors and before placing any bottles
inside the unit.During such period deactivate
any error message by pressing the Alarm button.
4) Home screen.
- upper compartment
+46°F (+8°C)
- lower compartment
+41°F (+5°C)
1) Touch the power icon off.
1) Logo.
2) Initial test
(lasts 3 minutes).
3) The display shows the main screen with
the temperatures measured inside the
compartments. Automatically the unit starts to
cool down until reaching the set temperatures.
When the wine cellar is o there are no
standby indications that the wine cellar is
plugged to a socket.
2) Touch YES to
continue.
3) Confirm
shutdown by
touching the
YES icon.
Switching off upper and lower compartments.
The upper compartment and the lower
compartment, can be shutdown individually.
1) Home screen.
Touch the wine icon
for the compartment
you wish to shut
down.
3) Touch YES to
continue with
shutdown.
2) Touch the OFF
icon.
4) Touch YES to
confirm shutdown.
2) Touch the icon
ON.
Turning the appliance on again
To turn the unit on again press the button , the
display will turn on and the launch screen will
appear again with the temperatures measured
inside the wine cellar compartments. The wine
cellar will start to cool down until reaching the
set temperatures.
5) On the home
screen OFF ap-
pears next to the
icon
SETTINGS
FUNCTIONS
°C
5
+
10 °C
+
, which in-
dicates that the
compartment is
off.
1) Home screen.
To turn the com-
partment on again,
touch the icon
SETTINGS
FUNCTIONS
°C
5
+
10 °C
+
.
3) Confirm with
YES to continue.
5) Turn on again
the lower
compartment.
Home screen will
open up.
4) Final confir-
mation to turn the
compartment on.
Switching off for long periods
During long absence periods it is recommended
to switch off the wine cellar by pressing the Unit
button for three seconds and disconnecting the
electricalplugorthebreakercontrollingthesocket.
Completely empty the wine cellar, clean and dry
it and leave the doors and drawers partially open
to prevent unpleasant odors.
During the first startup, it will not be possible
to use the Menu to modify the factory settings
until the preset temperature has been
reached.
Each time the appliance is switched on it goes
through a self-diagnosis procedure lasting
three minutes before completely starting up.
Restart the compartments.
In case you wish to turn the upper or lower
compartments on again.
4. APPLIANCE ON / OFF AND TEMPERATURE SETTING

1514
ENEN
SETTINGS
FUNCTIONS
°C
5
+
10 °C
+
+6 °C
+8
+7
+4
+5
OK
OFF
+6 °C
+8
+7
+4
+5
OK
OFF
SETTINGS
FUNCTIONS
°C
5
+
10 °C
+
+6 °C
+8
+7
+4
+5
OK
OFF
+6 °C
+8
+7
+4
+5
OK
OFF
SETTINGS
FUNCTIONS
°C
5
+
10 °C
+
Serigraa VETRO LCD2.8
Limite per graca parti retro-illuminate - la parte bianca è trasparente
Testo e graca
00
°C+
Impostazioni
Funzioni
00
°C+
00
°C-
Colore AAAA
colore C71
4.2 How to adjust the temperature for
dierent requirements.
Each model has been carefully tested before leaving
the factory and is adjusted in such a way to ensure
high performance and low power consumption.
Usually, it is not necessary to modify the settings.
Upper
compartment.
Lower
compartment.
Preset
temperatures
Follow the following on screen steps to
personalize the temperature settings:
1) Home screen.
Touch icon
for upper compart-
ment.
The temperature shown can vary slightly
in respect to the set temperature following
frequent openings of the doors or insertion of
room temperature items.
It might take between 6 to 12 hours for warm
items to reach the selected temperature.
2) Scoll up/down to
select the desired
temperature.
Upper Compartment
from +39°F to +64°F
(from +4°C to +18°C).
3) Touch OK to con-
firm the desired
temperature.
Modify the compartment temperatures
Example: How to modify the upper compartment
temperature.
An integrated control system will give information
through messages you will see on the display.
There is an alarm tone that occurs with some error
messages which can be turned off by touching
the alarm button on the main control panel.
You can find the list of the various messages at
the end of this manual.
4.3 Information signals of warning
messages on the display.
Padlock icon
The padlock icon shows up when the temperatures
are set up.
The padlock open/close shows that the
compartment’s temperatures can or cannot be
modified by the user.
Usually a grey padlock will show open, in
that case you can scroll up or down with a
finger on the display, selecting the desired
temperature and press OK to confirm.
Whereas a white closed padlock will be seen if
the user has activated a function that modifies
the settings of the refrigerator and prevents
the user from changing the temperature of the
compartment.
If the icon function is touched and a specific
function is set, the white padlock will be seen
closed and it won’t be possible to change the
temperature of the compartments as long as the
function won’t be completed or if it is manually
deactivated as long as the function is active.
4. APPLIANCE ON / OFF AND TEMPERATURE SETTING

1716
ENEN
+6 °C
+8
+7
+4
+5
OK
OFF
+6 °C
+8
+7
+4
+5
OK
OFF
HUMIDITY CONTROL
LIGHT 12H
HUMIDITY CONTROL
LIGHT 12H
SETTINGS
FUNCTIONS
°C
5
+
10 °C
+
HUMIDITY CONTROL LIGHT 12H
MEDIUM
LOW
HIGH
OK
SETTINGS
FUNCTIONS
5°C
+
10 °C
+
°C
18
-
SETTINGS
FUNCTIONS
5°C
+
10 °C
+
°C
18
-
4.4 Wine Cellar temperatures.
Most red wines are best stored a slightly warmer
temperatures.
Red Wine.
White Wine.
from +50°F to +64°F
(from +10°C to +18°C).
from +39°F to +48°F
(from +4°C to +9°C).
If a temperature higher than
+48°F (+9°C) is set, the display will change the
icon from white wine to red wine.
1) Humidity Control.
2) Light 12h.
INFORMATION FOR USING THE DISPLAY.
It is possible to personalize the operation of your
unit in order to adapt it to the different ways you
might want to use it.
5.1 Functions.
After touching the functions icon
SETTINGS
FUNCTIONS
°C
5
+
10 °C
+
on the
home screen, the user will be shown the icons of
the following available functions.
1) Humidity Control.
This function enables to set the humidity of the
upper and lower compartments. The default setting
is set to “Medium”.
B) Touch HUMIDI-
TY CONTROL.
C) Scroll until
setting the
desired humidity
and press Ok.
A) Home
screen. Touch
FUNCTIONS.
2) Interior light for 12 h.
This function enables the interior light staying on for
12 hours even when the wine cellar door is closed,
in order to see the interior lighted up, through the
glass.
SETTINGS
FUNCTIONS
°C
5
+
10 °C
+
HUMIDITY CONTROL LIGHT 12H
LIGHT 12h MODE
ON OFF
A) Home
screen. Touch
FUNCTIONS.
B) Touch the
LIGHT 12H icon.
C) Push ON if you
want to activate
Light 12h Mode.
4. APPLIANCE ON / OFF AND TEMPERATURE SETTING 5. FUNCTIONS AND SETTINGS

1918
ENEN
SABBATH MODE
DEMO MODERESET
MAINTENANCE SERVICE
INFORMATION
MAINTENANCE
SERVICE
INFORMATION
TIMEDATE
LANGUAGE°C / °F
TIMEDATE
LANGUAGE°C / °F
SETTINGS
FUNCTIONS
°C
5
+
10 °C
+
TIMEDATE
LANGUAGE°C / °F
9DAY
11
10
7
8
OK
9
MONTH
11
10
7
8
OK
2021YEAR
2023
2022
2019
2020
OK
37
MIN
39
38
35
36
OK
SETTINGS
FUNCTIONS
°C
5
+
10 °C
+
TIMEDATE
LANGUAGE°C / °F
CLOCK MODE?
12 24
9
HOUR
11
10
7
8
OK
TIMEDATE
LANGUAGE°C / °F
TIMEDATE
LANGUAGE°C / °F
SABBATH MODE
DEMO MODERESET
SABBATH MODE
DEMO MODERESET
MAINTENANCE SERVICE
INFORMATION
It is possible to personalize the settings of your
wine cellar or adapting it to the different ways
you might want to use it.
5.2 Settings.
1) Date.
2) Time.
3) Fahrenheit and Celsius.
4) Language.
5) Sabbath Mode.
6) Reset.
7) Demo Mode.
8) Maintenance.
9) Service.
10) Information.
1) Date
The display will show the date in the format
(day:month:year).
By touching the display you can modify the
settings.
E) Scroll up or down
until the desired
date appears and
press OK
D) Scroll up or down
until the desired
month appears and
press OK
B) Touch DATE.
A) Home screen.
Touch the
SETTINGS icon.
C) Scroll up or down
until the desired
year appears and
press OK
2) Time
The display shows the hours and minutes in the
format hh:mm.
This function selects the display at 12 or 24 h and
sets the time.
C) Touch the
desired method
which you want the
time to display: 12
hour or 24 hour.
B) Touch the TIME
icon.
A) Home screen.
Touch SETTINGS.
D) Scroll up /
down to set the
hour and then
press OK
E) Scroll up / down
to set the minutes
and then press OK
SETTINGS
FUNCTIONS
°C
5
+
10 °C
+
OK
°C
°F
TIMEDATE
LANGUAGE°C / °F
3) Set °F/°C
This function allows the temperature to be displayed
in Fahrenheit or Centigrade. The factory setting is
Fahrenheit.
C) Scroll up /
down to select
either fahrenheit
or centigrade
degrees and
press OK
B) Touch the
icon °C/°F.
A) Home screen.
Touch SETTINGS.
5. FUNCTIONS AND SETTINGS

2120
ENEN
SETTINGS
FUNCTIONS
°C
5
+
10 °C
+
FRANÇAIS
FRANÇAIS
ESPAÑOL
DEUTSCH
ITALIANO
ENGLISH
OK
TIMEDATE
LANGUAGE°C / °F
SABBATH MODE
DEMO MODERESET
SABBATH MODE
SETTINGS
FUNCTIONS
°C
5
+
10 °C
+
SABBATH MODE
ON OFF
YES NO
SABBATH MODE
SABBATH MODE
DEMO MODERESET
SETTINGS
FUNCTIONS
°C
5
+
10 °C
+
RESETTING TO
FACTORY DEFAULT
SETTING
YES NO
RESET
YES NO
RESET
RESET COMPLETE
4) Language
To set the language of the fridge, simply touch
the settings button on the display.
B) Touch the
LANGUAGE icon.
C) Scroll up /
down to select the
desired language
and press OK
A) Home screen.
Touch SETTINGS.
6) Sabbath Mode
The function makes it possible to comply to certain
religious observances requiring the operation of
the appliance to not be aected by the opening or
closing of the doors. The thermostatic control and
inner lighting are deactivated.
A) Home screen.
Touch SETTINGS.
B) Scroll right
once and touch
the SABBATH
MODE icon.
E) The wine cellar
will work accordingly
to this configuration.
C) Touch the ON
button to confirm
the Sabbath Mode.
D) Touch the YES
button to activate
the function.
7) Reset
It gives the possibility to restore the default
settings that were set in the factory, cancelling
all the changes that have been made from there
onward.
A) Home screen.
Touch SETTINGS.
B) Scroll right
once touch the
RESET icon.
D) Touch the YES
icon
E) The reset has
been performed.
The wine cellar's
factory settings
have been restored.
C) Touch the YES
icon to confirm the
selection of the
resetting of factory
default settings.
SABBATH MODE
DEMO MODERESET
SETTINGS
FUNCTIONS
°C
5
+
10 °C
+
DEMO MODE
1
3
2
4
DEMO MODE
ON OFF
8) Demo Mode
It is possible to simulate the functioning of the
appliance for showroom display or for trade
shows.
A) Home screen.
Touch SETTINGS.
B) Scroll right
once and touch
DEMO MODE.
C) Input the pass-
word for the activa-
tion.
Default password
1-2-3-4
D) Select either ON
or OFF.
5. FUNCTIONS AND SETTINGS
Note: Sabbath mode automatically expires after
72 hours. To deactivate prior to this, touch the
display to wake it up and choose the OFF option.

2322
ENEN
MAINTENANCE SERVICE
INFORMATION
SETTINGS
FUNCTIONS
°C
5
+
10 °C
+
SETTINGS
FUNCTIONS
°C
5
+
10 °C
+
MAINTENANCE SERVICE
INFORMATION
YES NO
CLEAN CONDENSER
ENABLE REMINDER?
YES NO
CLEAN CONDENSER
DISABLE REMINDER?
OFF RESET
CLEAN CONDENSER
NEXT REMINDER
LEFT DAYS...
365
SK Power
SK User
HW:
SW:
HW:
SW:
9) Maintenance
For the appliance to function as designed, it is
important to periodically clean the ventilation grille
and the condenser. The default setting of the unit
is"Warning disabled". Cleaning is recommended
every 12 months. If enabled, the appliance will
issue a reminder once per year to clean the grille
and condenser. It is possible to disable the warning
signal and see the time left before the next cleaning
that has to be done. For details see section 9.2.
B) Scroll to the
right three times
and touch MAIN-
TENANCE.
A) Home screen.
Touch SETTINGS.
11) Info System
The Info System function shows the product data,
for example the software code, serial number and
the factory code of the of the wine cellar.
B) Touch INFOR-
MATION.
C) The display
will show the
data specific
to the appliance.
A) Home screen.
Touch SETTINGS.
C) To enable it,
touch the YES icon.
E) To disable the
warning, touch the
YES button.
D) Here you can
RESET the count-
down for another
year or disable the
reminder altogeth-
er by touching OFF.
9) Service
The service function
MAINTENANCE SERVICE
INFORMATION
is reserved for the
Fulgor Milano service technicians.
If you choose to disable the reminder, you will see
the screen below.
5. FUNCTIONS AND SETTINGS

2524
ENEN
6.1 Internal Layout
(positioning, adjustment, removal)
Wine shelf
The shelves can be easily removed for cleaning.
Remove the bottles, completely extract the shelf,
tilt it upward until the wheels are free of their
seat and extract it.
7.1 Interior lighting
To provide optimum interior lighting, LED strips
illuminate both compartments from the sides.
In case of malfunction and/or failure of the
lighting system, you should contact an authorized
Fulgor Milano Service Agent.
Once activated, the light of the top
compartment will automatically shut off
after 12 hours.
8.1 General directions
Wine can stored for extended periods of time,
especially under the following conditions:
> Suitable temperature without significant mid to
long term temperature changes over time
> Controlled level of humidity
> Protection from light
> Absence of vibrations
> Absence of odours
> Bottle kept horizontal.
All of these conditions are fully met in the
Fulgor Milano Wine Cellar.
8.2 Conservation temperature
The space offered by the upper and lower
compartments, allows conservation of your
wines at two different temperatures.
The two compartments are initially set to the
following temperatures:
Upper compartment
+54°F (+12°C) - adjustable from +39°F to +64°F
(from +4°C to +18°C)
> Lower compartment
+50°F (+10°C) - adjustable from +39°F to +64°F
(from +4°C to +18°C)
All the temperatures can be modified according
to the characteristics of the wines and personal
preferences. However, you should attempt to
keep the temperature as constant as possible
over time.
Rapid and large-scale temperature variations
can in fact cause dilation of the liquid and early
aging of the wine.
You should also avoid very low temperatures
(below +39°F) which may lead to the formation
of deposits and damage the aesthetic qualities of
the wine.
All the compartments offer optimal conditions
and take into account all these needs. It should
however be noted that the upper compartment, in
particular, is thermostatically controlled in a very
precise manner and ensures the utmost care and
attention over time of your most prized bottles.
When the upper compartment is set below +54°F
(+12°C) the lower compartment must not be set
beyond +50°F (+10°C).
Cantina
Upper
Lower
> Upper compartment
+54°F (+12°C)
- adjustable from +39°F to +64°F
(from +4°C to +18°C)
> Lower compartment
+50°F (+10°C)
- adjustable from +39°F to +64°F
(from +4°C to +18°C)
6. INTERNAL LAYOUT 7. LIGHTING 8. WINE STORAGE

2726
ENEN
8.3 Time of conservation
Improvement of wine over time and its duration usually depends on the character of the variety and
its type. The following chart shows the best period of conservation and aging for various types in ideal
conservation conditions offered by your appliance.
However, you should always follow the instructions of the winemaker, especially for fine wines.
TYPE OF WINE CONSERVATION TEMPERATURE TIME OF CONSERVATION
New wines (Vin Nouveau) from +54° to +57°F 6 months
Sweet sparkling wines from +46° to +50°F 1 year
Rosé from +50° to +57°F 1 year
Semi-sparkling wines from +50° to +54°F 1-2 year
Normal white wines from +50° to +57°F 1-2 year
Light red wines from +54° to +57°F 2 year
Dry sparkling wines from +46° to +50°F 2 year
Classic sparkling wines from +46° to +50°F 3-4 year
Barrique and Vigorous white from +46° to +54°F 3-5 year
Normal red wines from +57° to +61°F 3-5 year
Barrique and Vigorous red wines from +57° to +64°F 7-10 year
Straw wines or Liquorous wines from +61° to +64°F 10-15 year
8.4 Consumption temperature
As a general rule, white wines should be served
at a temperature between +50°F and +54°F
(+10°C and +12°C) and red wines between +54°F
and +57°F (+12°C and +14°C).
Some wines may however be best enjoyed at
higher or lower temperatures.
You should also keep in mind that, during the
summer, wine is generally enjoyed at lower
temperatures than during the winter.
You should also consider the following:
White wines
White wines are normally not served at high
temperatures,sincetheyaregenerallymoreacidic
that red wines and not very tannic. Therefore they
are more enjoyable at low temperatures.
It is preferable to serve these wines between
+ 50°F and +57°F (+10°C and +14°C). Young, fresh
and aromatic wines can also be served at +50°F
(+10°C), while less aromatic ones are served at
+54°F (+12°C).
Temperatures between +54°F and +57°F (+12°C
and +14°C) are for soft, mature white wines that
have been aged for some years in the bottle.
Higher temperatures would favour the exaltation
of the sweet character of the wine, at the expense
of the acidity and flavour, which are considered
pleasant and desirable characteristics of this
type of wine.
Rosé
Rosé wine is served at the same temperature as
white wines. It should be noted that these wines
may include a certain amount of tannin and may
therefore be preferable at higher temperatures.
Therefore, they are served between +50°F and
+54°F (+10°C and +12°C), if young and fresh, and
between +54°F and +57°F (+12°C and +14°C) if
robust and mature.
New wines (Vin Nouveau)
Due to the special processing they undergo, new
vintage wines contain a low tannin content and
are therefore more enjoyable if served between
+54°F and +57°F (+12°C and +14°C).
Red wines
Since they contain more tannin and are less
acidic, red wines are normally served at higher
temperatures.
Younger wines with less tannin are normally
served between +57°F and +61°F (+14°C and
+16°C), while more full-bodied ones that are
more tannic may be served at up to +64°F
(+18°C). Some wines that have aged for years
in the bottle, still full-bodies and tannic, may be
served at +64°F (+18°C) or even +68°F (+20°C).
Young red wines with little tannin and
slightly structured may be enjoyable at lower
temperatures, between +54°F and +57°F (+12°C
and +14°C).
Sparkling wines
It is difficult to provide instructions to cover the
wide variety of sparkling wines in available.
As a general rule, sweeter and more aromatic
sparkling wines should be served at lower
temperatures, down to +46°F (+8°C), whereas
more tannic sparkling wines may be served at
higher temperatures, up to +57°F (+14°C).
Dry sparkling wines are usually served between
+46°F and +50°F (+8°C and +10°C).
“Classic” sparkling wines are normally served
at these temperatures, which may be as high as
+54°F (+12°C) for sparkling wines that have been
aged for some time.
It is however advisable, especially for finer wines,
to follow the suggestions and recommendations
of the winemaker on the bottle.
Liqueur and straw wines
These types of wines can be served at
temperatures between +61°F and +64°F (+16°C
and +18°C), depending on personal tastes, to
attenuate the sweet taste of straw wines, it can
also be served at +50°F (+10°C).
8. WINE STORAGE

2928
ENEN
Bor
deaux
BOTTLE
Bur
gundy
BOTTLE
Carefully follow the detailed directions
that can be found in the provided kit and
never use abrasive or metallic products
which could scratch and damage the satin
finishing on the appliance permanently.
Before performing any sort of cleaning,
disconnect the appliance from the
electrical power supply.
Make sure you do not damage the
refrigerant circuit in any way.
Do not use chlorine-based detergents or
cleaning agents.
9.1 Care and Cleaning
To clean the parts made of steel use a microfiber
cloth and the sponge provided in the kit with the
appliance. Always use the cloth and sponge in
the direction of the steel’s satin finish.
Every now and then, to polish the steel, wipe
with a slightly damp microfiber cloth.
You should use special care to keep the
ventilation openings in the appliance or in the
cabinet that houses it free of obstructions.
8.5 Position of bottles
The sliding shelves are made of fine wood and
contoured so as to hold bottles of the most
classical traditional shape or of the most modern
design.
Whether your collection holds fine bottles or
small bottles they will be right at home in the
Fulgor Milano Wine Cellar.
Also Magnum bottles can be stored, provided
you remove the shelf just above the one that will
hold them.
After a prolonged interruption of
electrical power, once the electrical
power is reactivated, an audible signal
will indicate if the temperature has been
raised above normal levels. In addition to
this the display will show for one minute
the highest temperature detected inside
the compartments, to allow the user to
decide how to better use the food items.
After one minute the display will resume
normal operation, while the Alarm button
will continue to blink.
Press the Alarm button to display the
highest recorded temperatures.
9.2 Cleaning of the ventilation grille and
condenser.
The unit requires, for a correct operation, the
cleaning of the toe kick cover, filter and
condenser.
It is recommended to perform the following cleaning
steps very 12 months. If enabled, an audio and visual
message on the display will serve as a reminder. It
is possible to disable the warning signal and see the
time left before the next cleaning has to be done.
Behind the frontal ventilation grille is the condenser.
To clean it use a vacuum cleaner with a soft brush
attachment at maximum power, sweeping it along in
the direction of the vent slits. In case of a significant
dust build up, the toe kick cover can be removed
to allow a more accurate cleaning of the filter.
On the mantenience settings, after the
installation of the unit and after it has been turned
on, you can set the condenser cleaning warning.
In the case the warning sign is enabled, there will
be an audible signal every 12 months, alerting that
it is time to clean the condenser.
After cleaning it, touch the reset icon in order to
reactivate the warning signal in 12 months.
If you do not want the cleaning signal alert for the
condenser, touch the O icon.
MAINTENANCE
SERVICE
INFORMATION
Lower condenser.
For cleaning the condenser follow the
instructions:
> Remove the magnetic grille behind the door.
> Clean it thoroughly of any dust build up as shown
in the picture, taking care not to damage the
condenser.
The edges of the condenser are extremely
thin and can be sharp, therefore use
adequate protection for hands and arms
when cleaning the condenser.
8. WINE STORAGE 9. CARE AND CLEANING

3130
ENEN
9.3 Internal cleaning
Clean the internal and removable parts by
washing them with a solution of lukewarm water
and a small amount of dishwashing detergent.
Rinse and dry right away.
Do not use mechanical devices or other methods
to speed up defrosting.
Do not use water on the electrical parts,
lights and control panel.
The use of chlorine-based detergents or
similar that contains it should be avoided
(bleach, hypochlorite, etc).
Do not bring cold glass parts into contact
with boiling water.
Do not wash any parts of the refrigerator
in a dishwashing machine since this could
damage or irreparably deform the parts.
10.1 Troubleshooting guide
If you notice malfunctions in your appliance, use
this guide before calling Service. This guide may
help you resolve the problem yourself or could
provide important information to ensure rapid
and effective service.
Malfunction message
A malfunction is usually indicated on the display.
Problems that cannot be resolved by the user
are signalled through an error code.
The appliance does not work
Is the appliance connected to the electrical power
supply?
Does electrical power arrive at the electrical
socket?
Is the Unit power activated?
Is the condenser clean?
The internal temperatures are
higher than normal
Does the display show a malfunction code?
Is the temperature adjusted correctly?
Is the condenser clean?
Were the doors or drawers open for a long period
of time?
Were large quantities of food recently inserted?
The compressor runs for a long time period
Bear in mind that during a very hot weather and
with very high temperatures in the room it is
normal that the compressor remains in operation
for prolonged periods of time.
Were the doors or drawers open for a long period
of time?
Were large quantities bottles recently inserted?
Is the condenser clean?
Check that the doors are closed and that the food
or containers do not obstruct the perfect closure
of the door.
If you hear strange noises
It is normal to hear noise from the fans or
compressors during the defrost phase.
Noise could be louder depending on the position of
the appliance and the surrounding environment.
Condensation forms both inside and out
If the climate is very humid, the formation of
condensation is normal. Opening the door or
drawers for prolonged periods of time can
contribute to the formation of condensation.
In any case, make sure that the doors are always
completely closed.
The doors are difficult to open
The appliance was designed to permit hermetic
closure.
When the door is closed, a vacuum situation
can occur: in this case it is necessary to wait a
few seconds until the pressure balances before
opening the door.
9. CARE AND CLEANING 10. TROUBLESHOOTING GUIDE

1
FR
32
EN
10.2 Malfunction indications appearing on the display
Display message Malfunction description
Power Failure Prolonged interruption of electrical power
The appliance starts up again automatically and indicates
the highest recorded temperatures.
Door open Door open
this message appears few minutes from the door opening.
Upper or lower zone
too warm See the troubleshooting guide.
Upper or lower zone
too cold Wait 12 hours. If the problem persists, contact Customer Care.
Error Code... Functional problems
call Customer Care who may help you to salve the problem or put you in
contact with the nearest Service Agent may help you solve the problem.
Check condenser
Check Condenser
Every 12 months the display shows the message “Check Cond”,
clean the condenser and follow the instructions above about how
to clean the condenser.
>In case of errors, touch the button Alarm and the display will show the error message with its error
number code.
> The message will be shown for 3 seconds, then it will go back to the home screen.
> To hold the message on the screen, press on the display, the button info ( ). The message will be on the
screen for 30 seconds, then it will go back to the home screen.
> In the case there is more than one error message, the display will show in timed sequence the dierent
messages.
Modalità
Bottle Cooler
On O
SOMMAIRE
10. TROUBLESHOOTING GUIDE
1
1.1
1.2
1.3
INDICATIONS IMPORTANTES CONCERNANT LA SÉCURITÉ
Pour votre sécurité.........................................................................................................................................................
Dans l’utilisation quotidienne......................................................................................................................................
Respect de l’environnement........................................................................................................................................
4
4
4
5
2
2.1
2.2
INSTALLATION
Installation.........................................................................................................................................................................
Branchement au réseau électrique............................................................................................................................
6
6
6
3
3.1
3.2
3.3
3.4
3.5
AVANT L’UTILISATION
Pour bien connaître l’appareil...............................................................................................................................
Identification du modèle / série...................................................................................................................................
Composants principaux.................................................................................................................................................
Contrôle électronique....................................................................................................................................................
Panneau de commande principal................................................................................................................................
7
7
8
10
11
11
4
4.1
4.2
4.3
4.4
MISE EN MARCHE DE L’APPAREIL
Mise en marche et arrêt................................................................................................................................................
Comment régler la température pour diérentes exigences............................................................................
Signaux d’information d’anomalies à l’écran.............................................................................................
Températures de la cave à vins.....................................................................................................................
12
12
14
15
16
5
5.1
5.2
PERSONNALISATION DES FONCTIONS ET DES CONFIGURATIONS
Fonctions............................................................................................................................................................
Réglages.............................................................................................................................................................
17
17
18
6
6.1
ÉQUIPEMENT INTERNE
Équipement interne (positionnement, réglage, retrait).............................................................................
24
24
7
7.1
ÉCLAIRAGE
Éclairage............................................................................................................................................................................
24
24
8
8.1
8.2
8.3
8.4
8.5
CONSERVATION DES VINS
Indications générales...................................................................................................................................................
Température de conservation..............................................................................................................................
Temps de conservation............................................................................................................................................
Température de dégustation......................................................................................................................................
Positionnement des bouteilles..................................................................................................................................
25
25
25
26
27
28
9
9.1
9.2
9.3
ENTRETIEN ET NETTOYAGE
Entretien et Nettoyage.............................................................................................................................................
Nettoyage de la grille de ventilation, du filtre et du condenseur.......................................................................
Nettoyage interne.......................................................................................................................................................
28
28
29
30
10
10.1
10.2
GUIDE DE RÉSOLUTION DES PROBLÈMES
Guide des solutions aux problèmes....................................................................................................................
Indications d’anomalie pouvant apparaître sur l’écran.............................................................................
31
31
32

32
FRFR
ATTENTION
CONSIGNES DE SÉCURITÉ IMPORTANTES
Le présent manuel contient des instructions d’utilisation pour les utilisateurs
de l’appareil. Conservez ce manuel dans un endroit facilement accessible pour
consultation future. L’installation, le réglage, la modification, la réparation ou
l’entretien inapproprié(e) peut causer des dommages matériels, des blessures
ou la mort. Lisez attentivement les instructions d’installation, d’utilisation et
de maintenance avant d’installer ou d’entretenir cet équipement.
Pour réduire les risques d’incendie, de choc électrique ou de blessure lors de
l’utilisation de votre appareil, suivez les précautions de base, notamment ceux-ci:
> Les enfants doivent être surveillés pour s’assurer qu’ils ne jouent pas avec l’appareil.
> Cet appareil n’est pas destiné à être utilisé par des personnes (y compris des enfants) ayant
des capacités physiques et sensorielles réduites ou un manque d’expérience et de con-
naissances, à moins qu’une personne responsable de leur sécurité ne leur ait donné une
supervision ou des instructions concernant l’utilisation de l’appareil.
>Cet appareil est conçu pour réfrigérer les boissons et les aliments et est destiné à un usage
domestique.
> Cet appareil est destiné à être utilisé à des fins domestiques et dans des applications simi-
laires telles que: les aires de cuisine du personnel dans les magasins, les bureaux et autres
environnements de travail; les maisons de ferme, et par les clients dans les hôtels, les mo-
tels et autres environnements de type résidentiel; les environnements de type «bed and
breakfast»; et les applications de restauration et autres.
> Ne PAS utiliser de rallonge ou d’adaptateur.
> Brancher sur une prise à 3 broches mise à la terre.
> Ne pas retirer la broche de terre.
ATTENTION
En cas de panne de courant, ne pas essayer de faire fonctionner
cet appareil.
ATTENTION
Garder la zone de l’appareil à l’abri des matières combustibles
ou inflammables et des vapeurs.
ATTENTION
Garder les ouvertures de ventilation, dans l’enceinte de l’appa
-
reil ou dans la structure intégrée, à l’abri de toute obstruction.
Ne pas obstruer l’entrée d’air ou les orifices d’évacuation de
l’appareil.
ATTENTION
Ne pas entreposer de substances explosives telles que des
bombes aérosols contenant un agent propulsif inflammable
dans cet appareil.
ATTENTION
Ne pas utiliser d’appareils électriques à l’intérieur des compar
-
timents de rangement des aliments de l’appareil.
CONSIGNES DE SÉCURITÉ
CONSIGNES DE SÉCURITÉ IMPORTANTES POUR L’ENTRETIEN
DANGER
Risque d’incendie ou d’explosion dû à la perforation de la
tubulure de frigorigène; suivre attentivement les instructions de
manipulation. Frigorigène inflammable utilisé.
ATTENTION
À f
aire réparer uniquement par un personnel de maintenance
formé.
Utiliser uniquement des pièces de maintenance autorisées par le fabricant; ne pas
utiliser des pièces de rechange qui n’ont pas été recommandées par le fabricant
(par exemple, des pièces fabriquées à la maison à l’aide d’une imprimante 3D).
Si le cordon d’alimentation est endommagé, il doit être remplacé par le fabricant,
son agent de maintenance ou une personne possédant les mêmes qualifications
afin d’éviter tout danger. Tout équipement de réparation utilisé doit être conçu pour
les frigorigènes inflammables. Suivre toutes les instructions de réparation du
fabricant. Utiliser un nettoyant non inflammable.
ATTENTION
Ne pas percer la tubulure de frigorigène, et ne pas
endommager le circuit de frigorigène.
ATTENTION
Ne pas utiliser de dispositifs mécaniques ou d’autres moyens
pour accélérer le processus de dégivrage, autres que ceux
recommandés par le fabricant.
DANGER DE BASCULEMENT
ATTENTION
Le réfrigérateur est lourd et se renverse facilement lorsqu’il n’est
pas complètement installé; pour éviter un danger dû à l’instabilité de l’appareil, il
doit être fixé conformément aux instructions (voir le manuel d’installation fourni).
Garder les portes fermées avec du ruban adhésif jusqu’à ce que le réfrigérateur
soit complètement installé surtout lorsqu'ils sont sans surveillance. Utiliser deux
personnes ou plus pour déplacer et installer le réfrigérateur. Le défaut de le faire
peut entraîner la mort ou des blessures graves.
WARNING
Il s’agit du symbole d’alerte de sécurité. Ce symbole vous avertit des dangers potentiels qui
peuvent vous tuer ou vous blesser vous-même et les autres. Tous les messages de sécurité
suivront le symbole d’alerte de sécurité et le mot «DANGER» ou «AVERTISSEMENT». Ces
mots signifient ceux-ci:
ATTENTION
Vous pouvez être tué ou grièvement blessé si vous ne suivez pas les
instructions.
DANGER
Vous pouvez être tué ou grièvement blessé si vous ne suivez pas
immédiatement les instructions.
Tous les messages de sécurité vous diront quel est le danger potentiel, comment réduire le risque
de blessure et ce qui peut arriver si les instructions ne sont pas suivies.
CONSERVEZ CES INSTRUCTIONS!
CONSIGNESDESÉCURITÉIMPORTANTESPOURL’ÉLIMINATION
APPROPRIÉE DE VOTRE ANCIEN RÉFRIGÉRATEUR
ATTENTION
Danger de suocation
Retirer les portes ou le couvercle de votre ancien appareil.
Le non-respect de cette consigne peut entraîner la mort ou des lésions
cérébrales.
ATTENTION
Risque de coincement pour les enfants.
Avant de jeter votre vieux réfrigérateur ou congélateur:
> Enlever les portes et couper le cordon d'alimentation.
> Laisser les étagères en place afin que les enfants ne puissent pas facilement monter à
l’intérieur.
> IMPORTANT: le coincement et l’étouement des enfants ne sont pas des problèmes
du passé. Les réfrigérateurs vides ou abandonnés sont toujours dangereux, même s’ils
reposent pendant «quelques jours seulement». Si vous vous débarrassez de votre vieux
réfrigérateur, veuillez suivre ces instructions pour aider à prévenir les accidents.
Renseignements importants à connaître sur l’élimination des frigorigènes:
Éliminer le réfrigérateur conformément aux réglementations fédérales et locales.
Les frigorigènes doivent être évacués par un titulaire de permis. Technicien en réfrigération
certifié par l’EPA conformément aux procédures établies.

54
FRFR
1.3 Respect de l’environnement
>Faire très attention aux correctes modalités
d’éliminationde touslescomposants de l’emballage.
>L’appareil ne doit pas être éliminé avec les déchets
urbains. S’informer auprès des centres de collecte
pour l’élimination des matériaux recyclables.
>En cas d’élimination, couper le câble d’alimentation
et retirer la porte.
>Durant l’élimination, éviter d’endommager le
circuit réfrigérant.
>L’appareilnecontientpas,danslecircuitréfrigérant
et dans l’isolation, de substances nocives pour la
couche d’ozone atmosphérique.
1.1 Pour votre sécurité
>Si cet appareil remplace un autre appareil déjà
existant qui doit être mis de côté ou éliminé, veiller à
ce que celui-ci ne devienne pas un dangereux piège
pour les enfants, en coupant le câble d’alimentation
et en rendant impossible la fermeture de la porte.
Prêter la même attention à la fin du cycle de vie du
nouvel appareil.
>Cet appareil est conçu pour refroidir les boissons
et les aliments et est destiné à un usage domesti-
que.
>L’appareil doit être installé en suivant les instruc-
tions reportées dans la Notice d’installation. Les
ouvertures prévues pour la ventilation de l’appa-
reil ou dans la structure à encastrement doivent
rester libres.
>L’appareil est doté d’un système d’éclairage à
lumière concentrée moyennant des lampes à Led.
Ne pas regarder à l’intérieur des lampes lorsque
celles-ci sont allumées afin d’éviter tout dommage
à la vue. Cette recommandation est également re-
portée sur l’étiquette collée à l’intérieur de la porte
du réfrigérateur.
>Lorsque le réfrigérateur fonctionne, ne pas
toucher les surfaces internes en acier avec les
mains humides ou mouillées, la peau pourrait re-
ster attachée aux surfaces particulièrement froi-
des.
>N’utiliser aucun appareil électrique à l’intérieur
des compartiments prévu pour la conservation des
aliments.
>Lors du repositionnement des clayettes ne pas
approcher les doigts des coulisses de la clayette.
>Ne pas positionner de récipients contenant des
liquides inflammables près de l’appareil.
>Durant les opérations d’entretien, arrêter
complètement l’appareil en le débranchant de la
prise de courant. Si la fiche est dicile à atteindre,
débrancher l’interrupteur omnipolaire correspon-
dant à la prise à laquelle l’appareil est branché.
>Les composants de l’emballage peuvent être
dangereux pour les enfants; ne pas les laisser
jouer avec les sachets, les films plastiques et le
polystyrène.
>Toute réparation doit être eectuée par un
technicien qualifié de Fulgor Milano.
>Cet appareil ne doit pas être utilisé par des
personnes (enfants compris) présentant des capa-
cités physiques, sensorielles ou mentales réduites,
ou sans expérience ni connaissance, sauf ci celles-
ci sont contrôlées ou si elles ont été auparavant
formées pour utiliser l’appareil par une personne
responsable de leur sécurité. Les enfants devraient
être contrôlé afin d’éviter qu’ils ne jouent avec l’ap-
pareil.
>N’endommagez pas les tubes du circuit réfri-
gérant du réfrigérateur.
>Ne pas placer de vaporisateurs ou de récipients
contenant des agents propulseurs ou des substan-
ces inflammables dans l’appareil.
>La quantité de gaz réfrigérant contenue dans vo-
tre appareil est indiquée sur la plaque d’identifica-
tion placée à l’intérieur de l’appareil. Au cas où le
câble de branchement électrique devait subir des
dommages,
il est nécessaire de le remplacer, contacter le SAV
agréé ou un électricien qualifié pour eectuer cette
opération.
>Toute installation ou réparation eectuée par
un personnel non autorisé, peut potentiellement
créer un danger pour l’utilisateur et endommager
l’appareil. Les réparations doivent être eectuées
par le SAV agréé.
>Il est autorisé d’utiliser uniquement des pièces
détachées d’origine du constructeur. Ce n’est qu’en
cas d’utilisation de ces composants que le con-
structeur garantit que les conditions requises de
sécurité du produit sont respectées.
>Brancher dans une prise avec mise à terre,
à 3 broches.
>Ne pas éliminer la mise à terre.
>Ne pas utiliser un adaptateur.
>Ne pas utiliser de rallonges électriques.
>Couper l’alimentation de toutes les appareils
avant toute intervention d’entretien.
>Si le CÂBLE D’ALIMENTATION est endommagé, il
doit être remplacé par le fabricant, un réparateur
agréé ou autre personne qualifiée afin d’éviter tout
risque.
>Il est recommandé de surveiller les enfants afin
d’éviter qu’ils ne jouent avec l’appareil.
1.2 Dans l’utilisation quotidienne
>Ne jamais utiliser un nettoyeur vapeur pour dégi-
vrer ou nettoyer votre appareil. La vapeur pourrait
atteindre des composants électriques et provoquer
un court-circuit. Danger de décharge électrique!
>Ne pas utiliser d’objets pointus ou tranchants
pour éliminer les couches de givre ou de glace.
Il est possible d’endommager les raccords du
circuit réfrigérant, ce qui rend l’appareil inutilisable.
La sortie du gaz, par eet de la pression, peut cau-
ser des irritations aux yeux.
Symboles utilisés, dans le Guide:
Note
Conseils pour une correcte utilisation de
l’appareil
Important
Indications afin d’éviter tout
endommagement de l’appareil
Attention
Indications afin d’éviter toute lésion aux
personnes
>Ne pas utiliser de manière inappropriée le socle,
les tiroirs extractibles, les portes etc. en tant que
point d’appui ou comme support.
>Pour le nettoyage retirer la fiche d’alimentation ou
bien déconnecter l’interrupteur de sécurité. Éviter
de tirer sur le câble électrique, mais saisir correcte-
ment la fiche électrique.
>Conserver l’alcool de haute graduation dans
un conteneur hermétiquement fermé et placé en
position verticale.
>Éviter que des huiles ou des graisses puissent
souiller des éléments plastiques ou les joints des
portes. Les graisses attaquent la matière plastique
et les joints des portes deviennent fragiles et po-
reux.
>Ne pas obstruer les passages de l’air de ventila-
tion de l’appareil.
>Il est recommandé d’autoriser l’utilisation de
l’appareil uniquement à des enfants d’au moins
8 ans. Surveiller les enfants pendant le nettoyage et
l’entretien.
1. INDICATIONS IMPORTANTES CONCERNANT LA SÉCURITÉ

76
FRFR 2. INSTALLATION 3. AVANT L’UTILISATION
2.1 Installation
Veillez à ce que l’installation soit correctement
effectuée, en respectant toutes les indications re-
portées dans la notice d’installation fournie avec
l’appareil.
2.2 Branchement au réseau électrique
L’appareil est doté d’une fiche de type Schuko
de 16A et doit être branché au réseau électrique
moyennant une prise Schuko correspondante.
N’utiliser ni rallonges ni adaptateurs multiples
pour le branchement.
N’utiliser ni rallonges ni adaptateurs
multiples pour le branchement.
3.1 Pour bien connaître l'appareil
Congratulations pour avoir acheté votre nouveau
appareil: vous pourrez maintenant utiliser notre
innovant système de conservation, qui vous
permettra de préserver au mieux les vins que vous
souhaitez.
Ce manuel d’utilisation répondra à la plupart de vos
questions pour ce qui concerne les caractéristiques
du produit. Pour toute autre information, n’hésitez
pas à nous contacter:
> ou par: 1-855-4FULGOR (1-855-438-5467)
> visitez fulgor-milano.com/us/en/assistance
Avant d’appeler prenez note du numéro
de série de l’appareil, reporté sur le
manuels et sur la plaque signalétique
qui se trouve dans le compartiment Réfri-
gérateur et des éventuels messages qui
apparaissent sur l’écran.
Avant d’appeler, prenez note des informations
suivantes:
- date d’achat;
- nom du distributeur où le produit a été acheté.
This manual suits for next models
1
Table of contents
Languages:
Other Fulgor Milano Wine Cooler manuals

Fulgor Milano
Fulgor Milano F7PBW24S1-R User manual

Fulgor Milano
Fulgor Milano FWC 8746 U TC X User manual

Fulgor Milano
Fulgor Milano FWC 4500 TCFO User manual

Fulgor Milano
Fulgor Milano F7PBW24S1-R User manual

Fulgor Milano
Fulgor Milano F7PBW24S2-R User manual

Fulgor Milano
Fulgor Milano FWC 8200 U TC User manual
Popular Wine Cooler manuals by other brands

Kucht
Kucht K430D Installation guide and user's manual

Thermador
Thermador T18IW900SP installation instructions

Tefcold
Tefcold TFW 365-2 instruction manual

Klarstein
Klarstein Botella Trium instruction manual

Eurofred
Eurofred VKG 511 Instructions for use

Wine Guardian
Wine Guardian TTW018 Installation, operation and maintenance guide