Fun & Function SP7193 User manual

Interactive Light Up Rainbow Panel
SP7193
14508-09
November 2022
Installation Manual

3
3
3
4-6
7-8
8
8
8
9
10
11
Warnings
Description
Includes
Installation
8 Way Remote
Troubleshooting
Cleaning
Maintenance
Guarantee
Information
Technical Contact
Contents
2

Carefully check all parts are included in your packaging. Contact us immediately if parts are missing.
Rainbow Panel is fitted with a power cord
Power Cord
*All our equipment is designed for users with special needs. We suggest supervision at all
times when using this equipment.
*For indoor use only. The panel uses a mains power supply. Do not use any other power
cord than the one supplied.
*This product was not designed to be free standing. It must be attached to a wall at least
4 feet (1220mm) from the floor. The electrical outlet should be placed next to the
rainbow. Professional installation is recommended.
*Turn off the panel when cleaning. Use a mild detergent and a lint free cloth. Never use
abrasive cleaning pads to clean this item.
Warnings
Description
Create a calming environment with a light up rainbow wall panel. This rainbow-shaped wall
panel has concealed LED strips, which add a colorful, ambient glow to any darkened room.
Use the included remote to have the lights cycle through an automatic sequence of colors
or press a colored button to choose the color of choice. Install in your sensory space to
help develop color recognition, practice cause and effect, improve visual tracking and
encourage self regulation.
Includes
+
8 Way Remote
(wood screws to be used
to attach the mirror plate
to the back of the panel)
3

4
Installation
The Rainbow Panel is designed to be installed on the wall with the supplied brackets. Screws
should be used that are recommended for the type of wall the panel will be installed on (wall
installation screws are not included). Professional installation is recommended. The panel
should be installed close to an electrical outlet.
Wall Brackets - pre-attached, ready for hanging.
Step 1
Attach the supplied mirror plate to
the bottom edge of the panel
using the two supplied wood
screws.
Step 2
Attach the two supplied
brackets to the wall using
suitable screws for the type of
wall to be installed on. Set the
top brackets at least 4 feet
(1220mm) above the floor
and the horizontal placement
at distance of “A” shown on
the drawing above. Make sure
all attachment hardware can
support up to 50 lbs. (22 kg)
of weight.
A
A
Draw a horizontal line. Make sure the brackets are level with each other.
Holes to bottom of bracket
Make sure there is a gap between the
wall and the bracket on the top edge.
Power Cord
Wall Gap

5
Step 3
Hook the brackets located on the back of the panel onto the wall brackets attached to
the wall. Note: Lift the panel gently and set slowly into place until the brackets are
securely and correctly connected.
Step 4
To keep the rainbow from moving, place a
screw into the wall through the mirror plate.

6
Connect the power cord to the electrical outlet.
Connect Power
When the power supply is connected the Rainbow will illuminate. This will go through an
automated color change until one of the buttons is pressed on the 8 way remote.
Press one of the buttons to change to the
desired color. If the switch is not pressed, it will
revert to the auto program after 45 seconds.
Troubleshooting
Q - My Rainbow Panel will not work.
A - Check the power supply is connected and operational and your 8 way remote is
charged and the LED on the underside is illuminating green when a button is pressed.
Cleaning
To clean your Rainbow Panel, wipe with a soft white cloth and mild detergent. Never
use an abrasive cloth or any solvent such as mineral spirits or chlorine based products.
Always unplug the power cord when cleaning.
Maintenance
Your Rainbow Panel requires no maintenance except a visual inspection for a damaged
front panel. Periodically, check all wall attachments and make sure the panel is secure.
Make sure all electrical cords are not damaged and still intact.

8 way remote
Power adapter/charger
Mains 240/110 v ac - 5 v dc
The remote has a status LED on the underside to inform you of the current state of
battery and transmission data:
8 Way Remote
The 8 way remote is an 8 channel remote designed to be used with SpaceKraft multi-sensory
equipment. It communicates using wireless technology on WiFi frequencies. It uses rechargeable
battery technology to give longer operational use and is supplied with a 5v dc a power adapter/
charger.
Operation
Press any one of the eight button buttons to activate.
The remote will turn off automatically when not in use.
Charging
Charging your remote. Plug the power adapter/charger
into the electrical outlet and then the adapter into the
rear of the switch. Charge until the status light glows
green. Please allow 12 hours for a full charge.
Button switches
8 Way Remote Instructions
7
• Five short yellow flashes after a button is pressed reports low battery.
• A steady yellow light reports that the charger is connected and the remote is successfully charging.
• A steady green light reports that the charger is connected and the switch is fully charged.
• A flashing red light when any of the 8 buttons are pressed indicates the signal from the remote is
not being received.
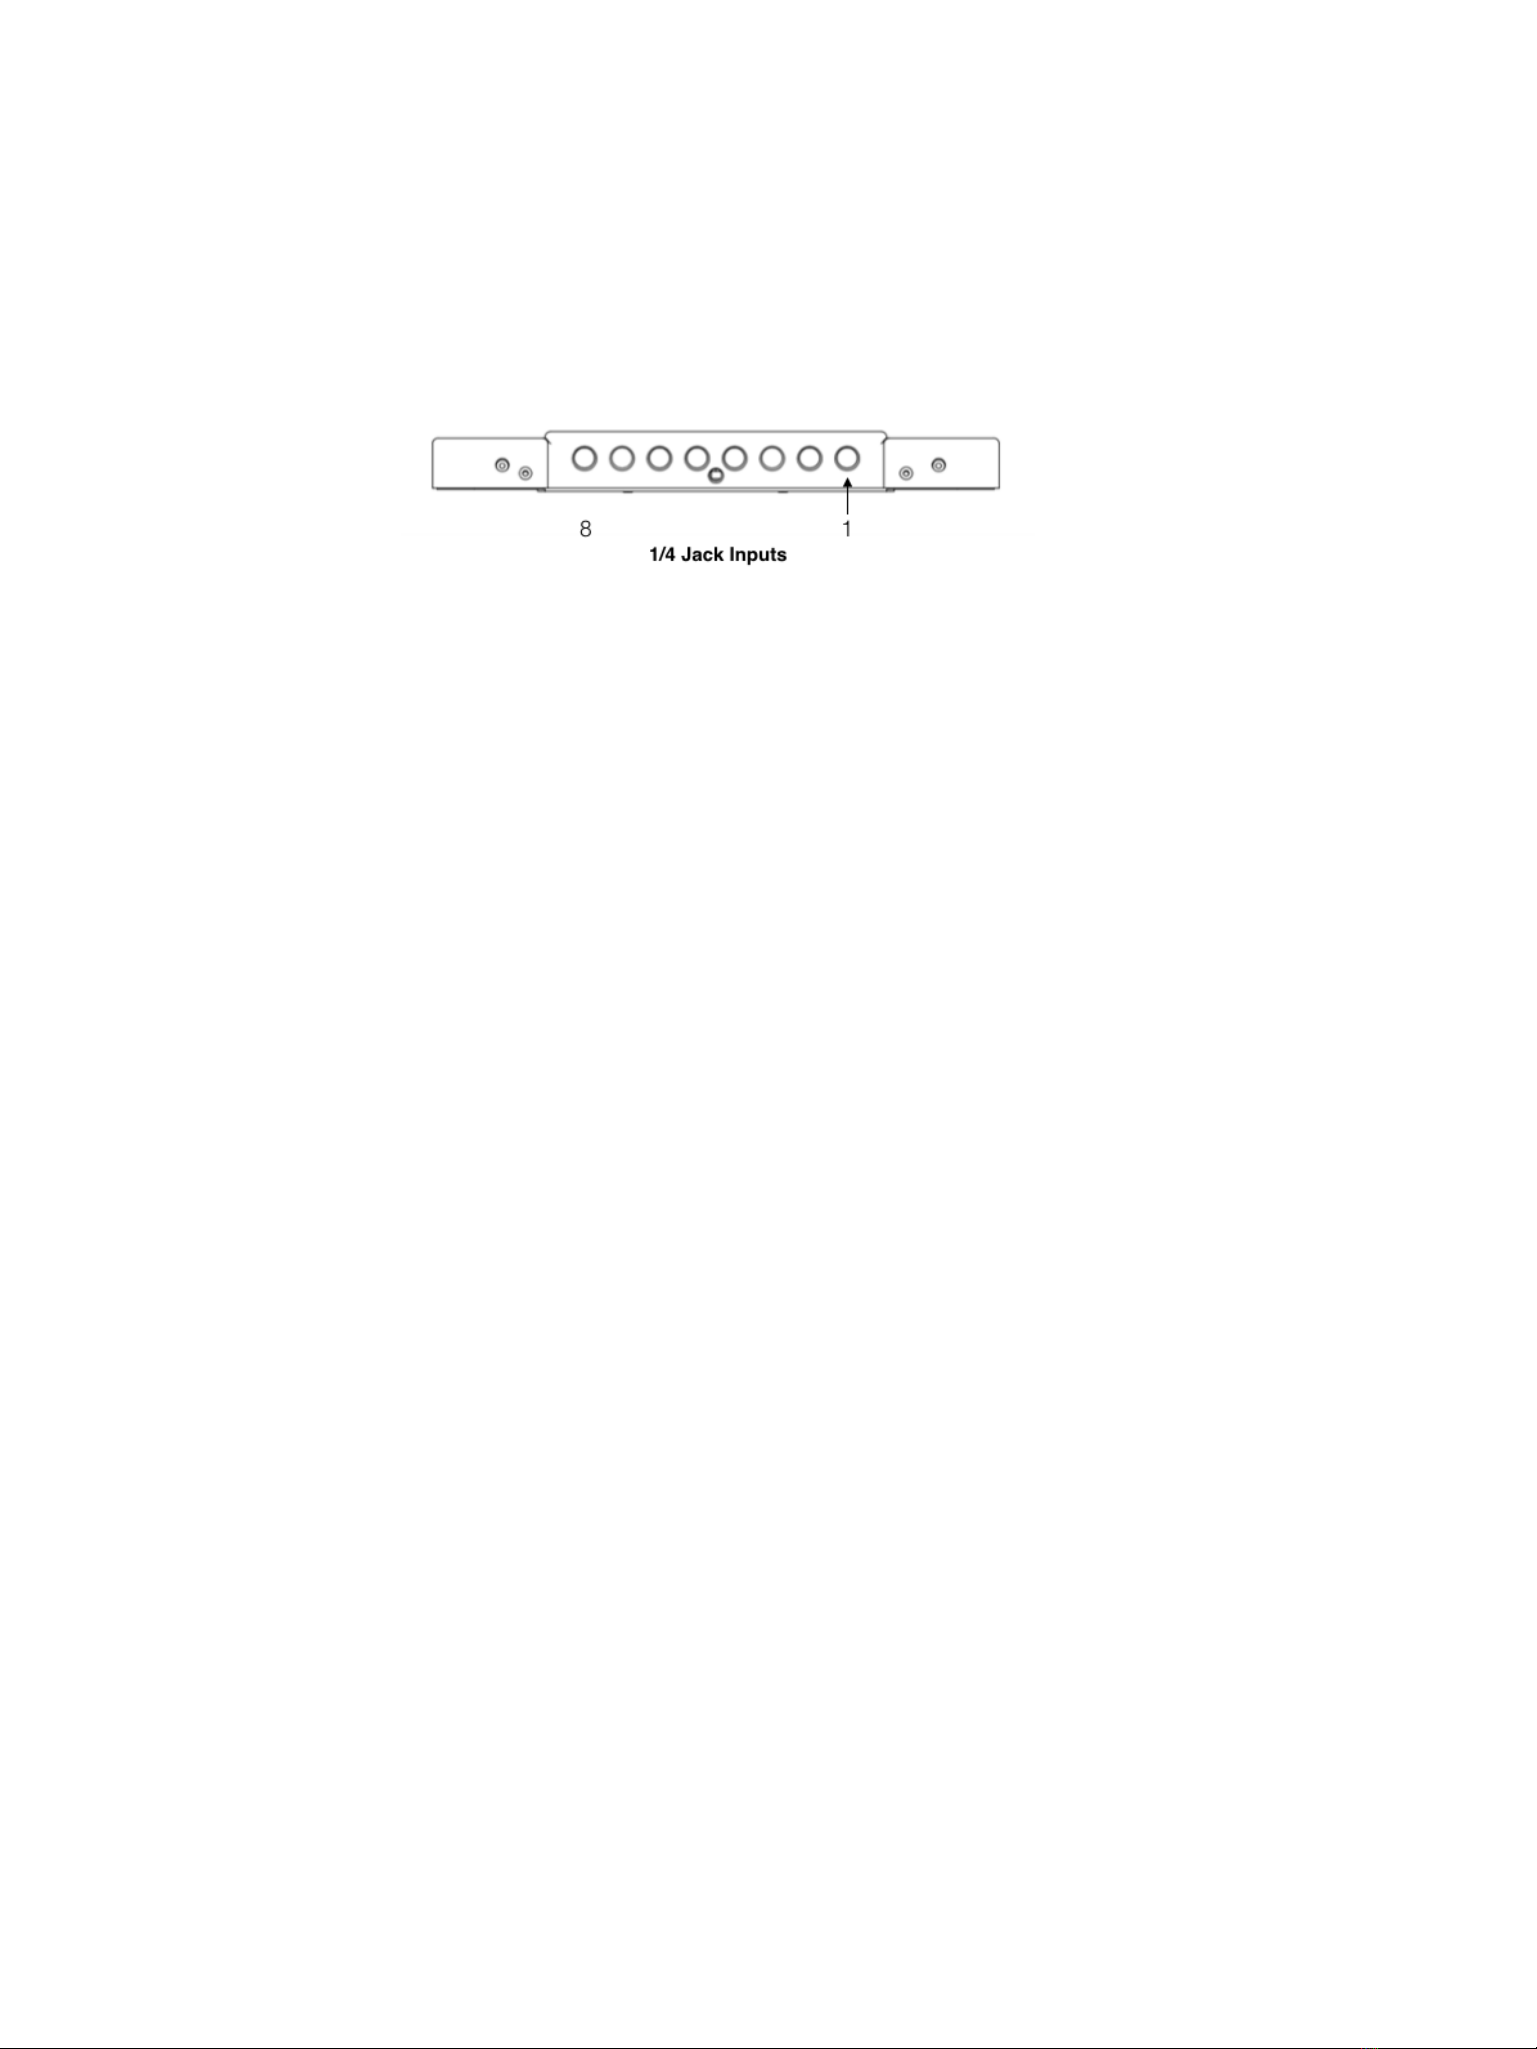
8
Jack Inputs
The rear of the remote is fitted with 8 x 6.3 mm Jack sockets . This allows users to plug in
their favourite remote. These start from the rear view as switch 1 on the right hand side .
Number 8 being on the left. The remote must be volt free and must be the normally open
type.
Remote Reset
The 8 way remote like all electronic equipment occasionally hangs or crashes. Should
this happen, perform a hard reset. On the underside of the remote, a reset switch is
clearly marked. Press a ball point pen into the reset switch and hold for 5 seconds and
release. The switch will now re-boot.
Troubleshooting
Q - My remote will not work.
A - Check the status LED on the underside . If nothing is illuminated when pressing the
button switch, reset the remote and charge for 12 hours.
Q - My remote will not work but the status LED flashes red.
A - The switch is working but the receiving piece of equipment is faulty or not turned on.
Q - My remote has been on charge and I have reset but the status led will not illuminate .
A - There is a problem with the charger.
Cleaning
To clean your remote wipe with a soft white cloth and mild detergent. Never use an
abrasive cloth or any solvent such as mineral spirits or chlorine based products. Always
unplug the power cord when cleaning.
Maintenance
We suggest your remote is tested every two years for correct operation and battery
replacement. For service and technical contact us using the contact detail on the last
page.

9
Guarantee
CONDITIONS OF GUARANTEE
This guarantee is in addition to and does not in any way affect any statutory or other rights of
consumer purchasers .If within the applicable guarantee period (as shown in 8 below) the
appliance proves to be defective by reason of faulty design, workmanship or materials, we
undertake subject to the following conditions to have the defective appliance (or any part or
parts thereof) repaired or at our discretion replaced free of charge.
1. The appliance shall have been purchased and used solely in accordance with Standard
operating instructions and the technical and/or Safety Standards required in the country where
this appliance is to be used
2. All enquiries must be through such dealers .For appliances used in the UK., U.S.A.,
Channel Islands, Isle of Man, and Republic of Ireland the appliance should be returned
together with this guarantee and proof of purchase promptly on being found defective, at the
purchasers risk and expense, to the authorised dealer from whom the appliance was
purchased.
3. This guarantee shall not apply to damage caused through fire, accident, misuse, Wear
and tear, neglect, incorrect adjustment or repair, to damage caused through where this
appliance is used, or to damage occurring during Installation, adaptation, modifications, or use
in an improper manner or inconsistent with the technical and/or safety standards required in the
country transit to or from the purchaser.
4. If at any time during the guarantee period any part or parts of the appliance are replaced
with a part or parts not supplied or approved by us or of an objective quality safe and suitable
for the appliance, or the appliance has been dismantled or repaired by a person not authorised
by us, the purchaser shall not be entitled to any rights and/or remedies under this guarantee.
5. The purchaser sole and exclusive remedy under this guarantee against us is for the repair
(or at our discretion the replacement) of the appliance or any part or parts and no other remedy,
including, but not limited to, incidental or consequential damage or loss of whatsoever nature
shall be available to the purchaser.
6. This guarantee shall not apply to lamps, batteries, color filters, cabinet parts or any other
parts of a limited natural life.
7. Our decision on all matters relating to complaints shall be final. Any appliance or
Defective part which has been replaced shall become our property until paid for in full.
8. The guarantee period applicable to all new appliances shall be 24 months.

10
Information about products that generate electrical noise
USA and Canada
This device complies with FCC and industry Canada RF radiate exposure limits set forth for
general population. It must not not be colocated or operating in conjunction with any other
antennas or transmitters."
This device complies with Part 15 of the FCC rules. Operation is subject to the following two
conditions: 1 This device must accept any interference received, including interference that may
cause undesired operation."
This equipment compiles with the limits for Class B digital device, pursuant to Part 15 of the
FCC Rules. These limits are designed to provide reasonable protection against harmful
interference in a residential installation. Should problems occur reorient or relocate the receiving
antenna. Increase the separation between the equipment and the receiver. Connect to a power
outlet on a circuit different from that to which the receiver is connected."
Table of contents
Other Fun & Function Lighting Equipment manuals

Fun & Function
Fun & Function CF7167 User manual

Fun & Function
Fun & Function SP7198 User manual

Fun & Function
Fun & Function SP8371 User manual

Fun & Function
Fun & Function SP7172 User manual

Fun & Function
Fun & Function SensaSoft MW7277 User manual

Fun & Function
Fun & Function SP7210 User manual

Fun & Function
Fun & Function SK7393 User manual
Popular Lighting Equipment manuals by other brands


Qazqa
Qazqa Suplux SL 3 Black 103062 instruction manual

Commercial Electric
Commercial Electric 54568141 Use and care guide

CREE LIGHTING
CREE LIGHTING 304 Series installation instructions

Goobay
Goobay 49867 user manual

ECOMAN ITALIA
ECOMAN ITALIA LED T8 instruction manual

Alkalite
Alkalite Krypton KT-81 user manual


