Funkwerk IP 50 User manual

Es-
pañol
funkwerk IP-50
English - Deutsch - Français - Italiano - Español - Português
Operating instructions
Bedienungsanleitung
Notice d'utilisation
Istruzioni per l'uso
Instrucciones de servicio
Manual de instruções

I
English . . . . . . . . . . . . . . . . . . . . . . . . . . . . . . . . . . . . . . 1
User interface . . . . . . . . . . . . . . . . . . . . . . . . . . . . . . . . . . . . . . . . . . . . . . . . . . . 3
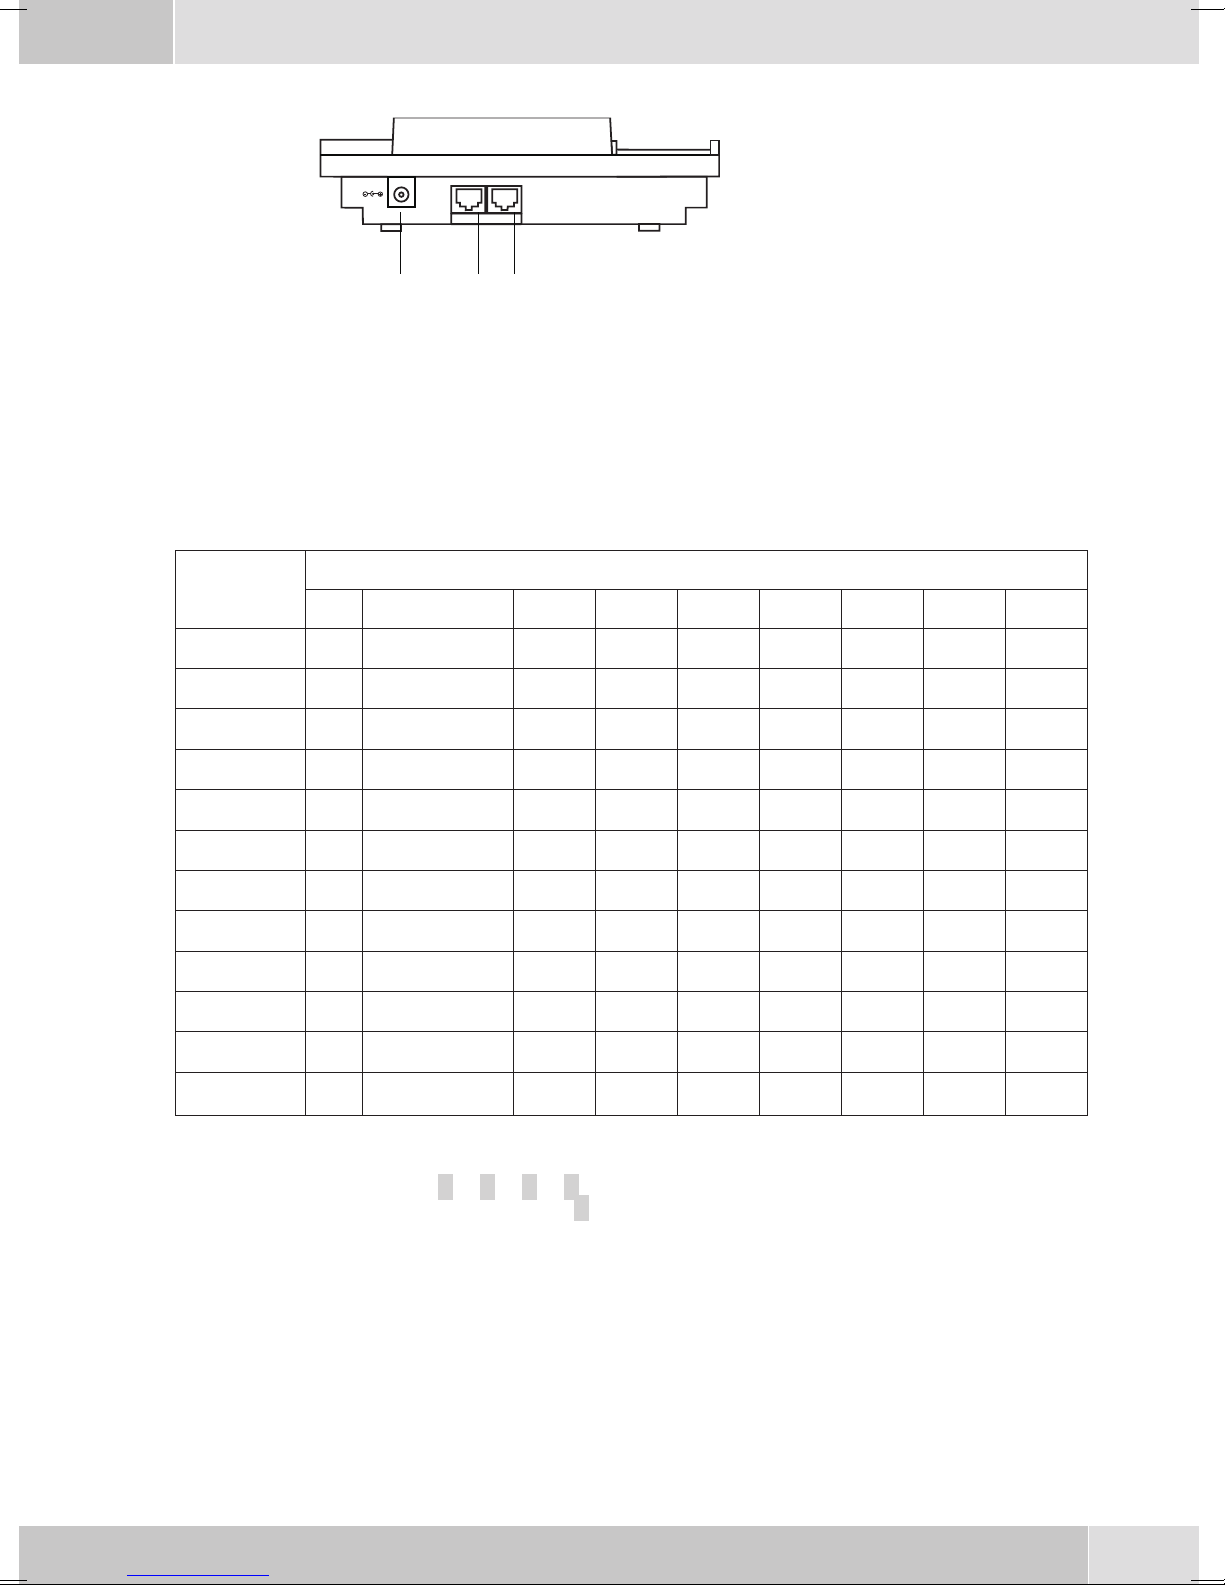
Connecting the IP phone . . . . . . . . . . . . . . . . . . . . . . . . . . . . . . . . . . . . . . . . . . . . . 4
Keypad features . . . . . . . . . . . . . . . . . . . . . . . . . . . . . . . . . . . . . . . . . . . . . . . . . . 5
Installing the IP Phone . . . . . . . . . . . . . . . . . . . . . . . . . . . . . . . . . . . . . . . . . . . . . . 5
Operation. . . . . . . . . . . . . . . . . . . . . . . . . . . . . . . . . . . . . . . . . . . . . . . . . . . . . . 7
Deutsch . . . . . . . . . . . . . . . . . . . . . . . . . . . . . . . . . . . . . . 1
Sicherheitshinweise . . . . . . . . . . . . . . . . . . . . . . . . . . . . . . . . . . . . . . . . . . . . . . . . 2
Telefon-Oberfläche . . . . . . . . . . . . . . . . . . . . . . . . . . . . . . . . . . . . . . . . . . . . . . . . 3
Anschluss des IP-Telefons . . . . . . . . . . . . . . . . . . . . . . . . . . . . . . . . . . . . . . . . . . . . 4
Tastenfunktionen . . . . . . . . . . . . . . . . . . . . . . . . . . . . . . . . . . . . . . . . . . . . . . . . . 5
Installation des IP-Telefons . . . . . . . . . . . . . . . . . . . . . . . . . . . . . . . . . . . . . . . . . . . 6
Bedienung . . . . . . . . . . . . . . . . . . . . . . . . . . . . . . . . . . . . . . . . . . . . . . . . . . . . . 8
Français . . . . . . . . . . . . . . . . . . . . . . . . . . . . . . . . . . . . . . 1
Panneau de commande . . . . . . . . . . . . . . . . . . . . . . . . . . . . . . . . . . . . . . . . . . . . . . 3
Connexion du téléphone IP. . . . . . . . . . . . . . . . . . . . . . . . . . . . . . . . . . . . . . . . . . . . 4
Fonctions des touches. . . . . . . . . . . . . . . . . . . . . . . . . . . . . . . . . . . . . . . . . . . . . . . 5
Installation du téléphone IP . . . . . . . . . . . . . . . . . . . . . . . . . . . . . . . . . . . . . . . . . . . 6
Utilisation . . . . . . . . . . . . . . . . . . . . . . . . . . . . . . . . . . . . . . . . . . . . . . . . . . . . . 8
Italiano . . . . . . . . . . . . . . . . . . . . . . . . . . . . . . . . . . . . . . 1
Interfaccia utente . . . . . . . . . . . . . . . . . . . . . . . . . . . . . . . . . . . . . . . . . . . . . . . . . 3
Collegare il telefono IP . . . . . . . . . . . . . . . . . . . . . . . . . . . . . . . . . . . . . . . . . . . . . . 4
Funzioni dei tasti . . . . . . . . . . . . . . . . . . . . . . . . . . . . . . . . . . . . . . . . . . . . . . . . . 5
Installazione del telefono . . . . . . . . . . . . . . . . . . . . . . . . . . . . . . . . . . . . . . . . . . . . . 6
Uso . . . . . . . . . . . . . . . . . . . . . . . . . . . . . . . . . . . . . . . . . . . . . . . . . . . . . . . . . 8
Español . . . . . . . . . . . . . . . . . . . . . . . . . . . . . . . . . . . . . . 1
Interfaz de teléfono . . . . . . . . . . . . . . . . . . . . . . . . . . . . . . . . . . . . . . . . . . . . . . . . 3
Conexión del teléfono IP . . . . . . . . . . . . . . . . . . . . . . . . . . . . . . . . . . . . . . . . . . . . . 4
Funciones de teclas . . . . . . . . . . . . . . . . . . . . . . . . . . . . . . . . . . . . . . . . . . . . . . . . 5
Instalación del teléfono IP . . . . . . . . . . . . . . . . . . . . . . . . . . . . . . . . . . . . . . . . . . . . 6
Manejo . . . . . . . . . . . . . . . . . . . . . . . . . . . . . . . . . . . . . . . . . . . . . . . . . . . . . . . 8
Português . . . . . . . . . . . . . . . . . . . . . . . . . . . . . . . . . . . . . 1
Superfície do telefone . . . . . . . . . . . . . . . . . . . . . . . . . . . . . . . . . . . . . . . . . . . . . . . 3
Ligação do telefone IP. . . . . . . . . . . . . . . . . . . . . . . . . . . . . . . . . . . . . . . . . . . . . . . 4
Funções das teclas . . . . . . . . . . . . . . . . . . . . . . . . . . . . . . . . . . . . . . . . . . . . . . . . . 5
Instalação do telefone IP . . . . . . . . . . . . . . . . . . . . . . . . . . . . . . . . . . . . . . . . . . . . . 6
Manuseamento . . . . . . . . . . . . . . . . . . . . . . . . . . . . . . . . . . . . . . . . . . . . . . . . . . 8

1
funkwerk IP-50
English
Operating instructions

Safety notes
•Mind the storage and operation temperatures for the device listed in the technical specifica-
tions.
Only connect the device when the permissible ambient operating temperature has been rea-
ched.
•Please note that condensation on or in the unit must be prevented when moving from cold to
warmsurroundings.Onlyremovetheunitfrom thepackage whenthepermissibleambientope-
rating temperature has been reached.
•You should not make calls or connect or disconnect any lines during thunderstorms.
•Only attach the connecting cords at the connections provided.
•Make sure phone cables are installed in a safe manner to prevent tripping.
•Avoid the following:
Direct sunlight
Sources of heat (for example radiators)
Electronic devices (for example stereo components, office equipment or microwave devices
Ingress of moisture or liquids
Aggressive fluids or vapors
Dusty environment
•Do not use the unit in excessively humid rooms or hazardous locations.
•Only open those sections of the device specified in the assembly / operating instructions.
•Do not touch plug connectors with pointed, metal, or moist objects.
•If you do not permanently mount the device or any accessories, be sure to place it/them on a
non-slip surface.
•When required, clean the unit with a slightly moistened cloth.
•Only use approved accessories.
•Only terminals with SELV and/or which comply with ETS 300047 may be connected to the unit.
This regulation is fulfilled when approved terminal devices are used as intended.
Plug-in power supply
•Use only approved power plug-in units.
•Do not use power plug-in units with visible defects or damage (fissures, cracks, etc).
Elektrostatic charges
The telephone is supplied with enhanced ESD protection against the effects of electrostatic discharge
that exceeds the protection level cited in the approval specification. Elevated ESD levels should never-
theless be avoided to the greatest possible extent. In some cases, electrostatic discharge levels can far ex-
ceed the approval limits or the resistance levels already implemented in your telephones. Eliminate the
causes or conditions that promote these elevated ESD levels, such as insufficient humidity or carpeting.
The telephone manufacturer does not assume any liability for damage caused under such circumstan-
ces.
2

User interface
1-Call in Completion of call with last caller
2-Call Out Completion of call with last called party
3-Phone Book Access to the telephone directory
4-Menu Access for polling/configuration
5-OK Confirmation of an entry
6-IP Retrieving the telephones IP-address
7-FWD »Call forwarding« on or off
8-DND »Silent signalling« on or off
9-M1 1st speed dial button
10 -M2 2nd speed dial button
11 -M3 3rd speed dial button
12 -L1 Communication using provider 1
13 -L2 Communication using provider 2
14 -L3 Communication using provider 3
15 -Mute Activating or deactivating the microphone (room inquiry)
16 -H/F Hands free calling on or off
17 -Conf. Conference on
18 -Transfer Transferring a call put on hold to another party
19 -Hold Room inquiriy / Broker’s call button
20 -Redial Redialing
21 -Selection buttons
22 -Dial buttons
English
3
2
1ABC DEF
GHI JKL MNO
PQRS TUV WXYZ
3
456
789
0
*#
Call in Call out
Phone book
Menue OK
IP
FWD
M1
M2
M3
L1
L2
L3
Mute
H/F
DND
12345
6
7
8
9
10
11
12
13
14
15
16
17 18
19 2
0
21
22
Conf.
Transfer
Hold
Redial

Unpacking and placing the telephone
Unpacking
•funkwerk IP 50
•Handset with handset connecting cord
•Cat.5 Connection cable, approx. 2 m.
•Brief description of functions
•CD-ROM with User Manual
Cleaning the telephone
The ISDN system telephone has been manufactured for normal, everyday use. When required, clean the
ISDN system telephone with a slightly moistened cloth, or with an anti-static cloth. Never use a solvent
to clean the phone! Never use a dry cloth; Electrostatic charges could damage the electronics in the sys-
tem. It is essential that no liquids penetrate into the inside of the ISDN system telephone, as this could
destroy the phone.
Installing the telephone
Please note that the plastic feet of your ISDN system telephone may leave marks on sensitive surfaces,
such as furniture. The manufacturer of the telephone is not liable for any such damage. Therefore, use
appropriate non-skidding pads under the phone.
Connecting the IP phone
Connecting the handset cord
Connectingthehandset tothe base
:
Insert handset cord into handset jack at the left side of the
base (1) and at the lower end of the handset (2).
Telephone rear view
Connectingthetelephonewith
theInternet:
Plug the RJ-45 Ethernet cable into the Ethernet jack named
»WAN« of the phone. Plug the other end of the cable into an
appropriate LAN or DSL/Cable router port or a HUB.
ConnectIPphone toa
computerif necessary.
Plug the RJ-45 Ethernet cable into the Ethernet jack named
»LAN« of the phone. Plug the other end of the cable to a
computer.
Activatingthe telephone: Plug the power adapter into the power jack of the phone.
Then plug the other end of the power adapter
into the appropriate 230 VAC wall outlet.
English
4
2
1

1-To the power
adaptor
2-PC-port
3-To the LAN- or
DSL/router
port or hub
Keypad features
The assignments for the keypad for entering letters, digits and special characters are as follows:
Button Number of actuations
1 2 3456789
11 - ,!?
22 a bcABC
33 d efDEF
44 g hiGHI
55 j klJKL
66 m noMNO
77 p qrsPQRS
88 t uvTUV
99 w xyzWXYZ
00 Space
**. :@
#Dial initiation
1Severalspecial characters areassignedto thebutton»1«.
Forex.: »-«,»,«,»!«,»?«
When you press the 1 button the first time a »1« is inserted. When you press this key a second time se-
veral special characters are shown in the display. Press the appropriate key to select the corresponding
special characters 1 … 9.
Installing the IP Phone
Before installing your IP phone, it is useful to know what kind of IP addressing your LAN or router is
using.
English
5
LAN WAN
1
23
DC 9V

What is the IP addressing of your network?
Most networks, including the Internet, use identification codes IP (Internet Protocol) addresses to iden-
tify and locate the devices that share their services.
DHCP-addressing
•With this system, your LAN or router automatically assigns all the required IP pa-
rameters to any device connected to it when the device logs on. (Some ISPs who
use DHCP require a host name, which must be entered manually.)
Your phone is shipped from the factory with DHCP on, or enabled. So, if your LAN or router is
configuredto useDHCPaddressing, yourIPPhone’sLANparameters will automatically be confi-
gured as soon as it is connected to the LAN or router and powered up.
Static addressing
•If your LAN does not use DHCP addressing, each device concurrently connected
to it must be assigned its own unique IP address. In this case, your LAN’s configu-
ration information must be manually entered into the phone. You will need to
know the following parameters:
•IP address
•Subnet mask
•Gateway address
•Primary DNS address
•Secondary DNS address (required by some systems)
Ifyour networkuses static addressing,askyournetworkadministrator for the parameters needed
for configuring your IP Phone.
Simple Log-in of a »funkwerk IP 50« to a PABX.
Enroll your telephone at the pabx and specify a number for the SIP-phone (e.g. 13); save the changes
made. If required enter all other information according to the pabx description.
Connect the pabx and the »funkwerk IP 50« through Ethernet. Connect the power supply for the »funk-
werk IP 50«.
Begin as follows:
aThehandsetremainsonhook.
MPressthe»Menu«button.
411 Selectthefunction»411«.Thedisplay shows »*DHCP Client«.
OConfirm»DHCP Client«usingthe»OK«button.
MPressthe»Menu«button.
74 Selectthefunction»74«.Thedisplay shows »Password:«.
English
6

tEnterthepassword: 24234880(factory default).
OConfirmyour entryusingthe»OK«button.
MPressthe»Menu«button.
5111 Selectthefunction»5111«. Thedisplay shows »*Enabled«.
OConfirm»*Enabled«usingthe»OK«button.
MPressthe»Menu«button.
<> Select»1.Activation «.
OConfirmusingthe»OK«button.
OConfirm»*Enabled«usingthe»OK«button.
MPressthe»Menu«button.
<> Select»2.User name «.Enteroneofthenumbersyouhavespecifiedwhenconfi-
guringthepabx.
OConfirmusingthe»OK«button.
<> Select»2.Display name «.Enterthenameyou wishtohave displayed.
OConfirmusingthe»OK«button.
After a restart your »funkwerk IP 50« will be ready for operation.
If required, enter all other information as desribed in the pabx manual.
English
7

Operation
Symbols
Symbol Reference
bThissymbolpromptsyou to liftupthehandsetofyour telephone.
gThissymbolindicatesthecallstatus.Youhaveliftedthehandset ofyourtelephone.
aThissymbolpromptsyoutoreplacethehandsetofyourphoneinthecarriage,orthete-
lephoneisidle.
lThis symbol indicates some kind of signaling activity at your terminal, for example,
thatyour phoneisringing.
tThissymbolpromptsyou to dialanumber.
19
*#
Oneofthesesymbolsindicatesthatyoushoulddialthedigitshown,oracertaincharac-
ter.
RThissymbolpromptsyou to pressthe»Hold«button.
Usethisbuttonto dialthelast numberonceagain(redialbutton).
TUsethisbuttonto initiateathree-party conferencecall.
Usethisbuttonto transfer acallto anotherparty.
OThissymbolpromptsyou to presstheOKbutton(Enter).
MUsethisbuttonto accesstheconfigurator.
S
Phone book
Usethisbuttonto accessthetelephonedirectory.
S
Call out
Usethisbuttonto accessthecalled party list.
S
Call in
Usethisbuttonto accessthecaller listforcalls.
qThissymbolindicatesthat anacknowledgementsignalcanbeheardinthehandset.
dThissymbolindicatesthat aconferencecall isactive.
English
8

Telephone display
Telephone display when not enrolled.
aWhen the telephone is idle (not yet enrolled) the
display shows the following:
Date (MM-TT) and time (hh:mm) in the upper
line, as for example 01.12 8:26 a.m.
»No service« signifies that none of the
performance features such as call transfer or
»Do not disturb« has been activated.
The green LED will be lit after enrolling the tele-
phone with a SIP-provider or with a pabx.
12-01 08:26
No service
Display for an enrolled telephone
aWhen the telephone is idle, the display shows
the following:
Daten and time on the first line.
The entered name (»Display Name«) on the se-
cond line.
The green LED is lit. The telephone has been en-
rolled with a SIP-provider or with a pabx.
12-01 08:26
< IP-50>
Lifting up the handset without dialing
bIf you lift up the handset but do not start dialing,
the dial mode will be switched off after approxi-
mately 20 seconds. The text shown here is then
displayed for around 10 seconds and you will
hear the busy tone. The display then returns to
idle state. However, you will not hear any tone
from the handset. Replace the handset.
Time out...
Call
aWith an incoming call, the numer of the caller is
displayed on the upper and the lower line. .
12
12
Whether or not the name of the caller is displayed depends on the provider. The number may be
displayed on both lines.
aThe display will be as shown here, if a caller ter-
minates the call without establishing a connecti-
on. In this example here two calls were not ac-
cepted.
English
9

The caller list contains more information on
these calls (»2.Call history«).
12-01 08:26
2 Missed Call
Making a call
bAfter lifting up the handset or activating the
hands-free mode you can start dialing. To have
the entered number dialed immediately, press
the # button. The user is called.
IP Dialing.. 1
12345
Ringback
1234
Call connection
gYou are connected with the other party. Des-
cription of the display:
L1:10 = Connected with call number 10.
Timer = Connected for 1 hour, 2 minutes and 3
seconds.
L1:10
Timer=01:02:03
Room inquiriy
gYou are connected with the other party. IP Dialing
Timer=01:02:03
Telephony
When subscribers are put on hold they hear waiting music, depending on the provider.
Note! When you press any of the numerical buttons, the phone will start dialing, even with the
handset on hook or hands-free mode switched off.
The following procedures often begin with »Lift up handset« and end with »Replace handset«. Activa-
ting or deactivating the hands-free mode has exactly the same effect.
Starting a call
bt
#ga
Lift up handset Dial call number Terminate dialing by
pressing the # key. Conduct your call Terminate your call
Dialing from the phone book
You can store up to 140 names and numbers in the telephone directory. To select a name, you can page
through the directory using the arrow buttons, or enter the specific first letter(s) of the name using the
push-button set.
bStO<> b
Handset on hook Phone book Please enter first
letter OK Select subscriber Lift up handset
Accepting calls
lbga
Telephone rings Lift up handset Conversation Terminate your call
English
10

Speed dial using the M1..M3 buttons
bor aga
Lift up handset or handset
on hook M1...M3 Conduct your call Terminate your call
Room inquiry
g
You are conducting a call.
You would like to call another
party.
Mute button
»Mute«
The other party can no longer hear you.
Mute button
»Mute«
The other party can hear you again.
Inquiry Call
You can call another party at any time during an ongoing call.
gRtg R
You are conducting a
call.
You would like to call
another party.
Press the System-parked in-
quiry button»Hold«.
You hear the dial tone from
the earpiece.
Dial the number of the party
you wish to call. Speak to
the desired party.
Press the System-parked in-
quiry button»Hold« once
again to return to the first
call.
Accepting a waiting call (room inquiry with waiting caller)
gRg
You are conducting a call.
A second party calls you. You hear the
call waiting signal.
Press the System-parked in-
quiry button»Hold«.
You hear the dial tone from the
earpiece.
You will be connected with the waiting
party. Your first call is put on hold (see
»Inquiry call«). For further procedures
refer also to »Broker’s call« or
»Three-party conference call«.
Broker’s Call
gRtg g
You are in a call but wish to
speak to a third party. Press the System-parked
inquiry button»Hold«.
You hear the dial tone from
the earpiece.
Dial the number of the
party you wish to call.
Speak to the desired party.
You are conducting the
call.
The first call is put on hold.
RPresstheSystem-parkedinquirybutton»Hold«,toreturntothefirstcaller,thesecond
caller will be put on hold. Press »Hold« to switch back and forth between thetwo cal-
lers.
If you switch back and forth between two external parties (broker’s call) and then hang up your
handset,thecurrent call is terminatedandthecalleronhold willcallyoubywayofthe »Recall«.
Call switching
gRtg g or a
You are conduct-
ing a call and
wish to transfer
the call to another
party.
Press »Transfer«.
You hear the dial
tone from the
earpiece.
Dial the number
of the party you
wish to call.
You can now
speak with that
person.
Replace the hand-
set. The two par-
ties are then con-
nected.
If the called party does not answer, press »Transfer« once again to return to the first party.
English
11

Three-Party Conferencing
gRtg
You are conducting a call
with one party and wish to
include a further party in
the call.
Press the System-parked
inquiry button»Hold«.
You hear the dial tone from
the earpiece.
Dial the number of the
party you wish to call. You would like to include
this party in the first call.
TPresstheSystem-parked inquirybutton»Hold«,Conductyour three-party conferen-
cecall.
dd
The conference is ended when you hang up your handset. A party included in the conference call can
hang up at any time and the party which initiated the call can then continue the conference with the re-
maining callers.
If you are in a conference call and you hang up, your call is terminated and the two parties from your
conference remain connected with each other!
English
12

Declaration of conformity and CE mark
This device meets the requirements of the following EC directive R&TTE 1999/5/EG:
»Directive 1999/5/EC of the European Parliament and of the Council of 9 March
1999 on radio equipment and telecommunications terminal equipment and the mu-
tual recognition of their conformity«.
You can also request this EC declaration of conformity at the following Internet
URL: http://www.funkwerk-ec.com.
The waste container symbol with the “X” through it on the device indicates that the
device must be disposed of separately from normal domestic waste at an appropriate
waste disposal facility at the end of its useful service life.
© 2007 Funkwerk Enterprise Communications gmbH - All rights reserved.
Reprinting of this document, even excerpts, is permitted only with the express consent of the publisher
and with precise source information, regardless of the media used (mechanical or electronic).
Function descriptions included in this documentation which refer to software products of other manu-
facturers are based on the software used and valid at the date the documentation was prepared or pub-
lished. The product and company names used in this documentation may be protected by trademarks.

Funkwerk Enterprise Communications GmbH
Südwestpark 94
D-90449 Nuremberg
For support and service information visit the Service / Support section of our Website at
www.funkwerk-ec.com
Phone: 0911 9673 0
Subject to changes
010707
14

1
funkwerk IP 50
Deutsch
Bedienungsanleitung

Sicherheitshinweise
•Beachten Sie die Umgebungstemperatur für Lagerung und Betrieb des Gerätes in den techni-
schen Daten. Das Gerät darf erst nach Erreichen der zulässigen Betriebs-Umgebungstempera-
tur angeschlossen werden.
•Beachten Sie bitte,dass beim Übergangvon kalten zu warmenTemperaturenBetauung am oder
im Gerät entstehen kann. EntnehmenSie das Gerät erst aus der Verpackung, wenn die zulässige
Betriebs-Umgebungstemperatur erreicht ist.
•WährendeinesGewitters sollten Sie keine Leitungenanschließenodertrennenund nicht telefonieren.
•Schließen Sie die Anschlussschnüre nur an den dafür vorgesehenen Anschlüssen an.
•Verlegen Sie die Anschlussschnüre unfallsicher.
•Vermeiden Sie die folgenden Einflüsse:
Direkte Sonneneinstrahlung
Wärmequellen (z.B. Heizkörper)
Elektronische Geräte (z.B. HiFi-Geräte, Bürogeräte oder Mikrowellengeräte)
Eindringende Feuchtigkeit oder Flüssigkeiten
Aggressive Flüssigkeiten oder Dämpfe
Starker Staub
•Benutzen Sie das Gerät nicht in Feuchträumen oder explosionsgefährdeten Bereichen.
•Öffnen Sie nur die Bereiche des Gerätes, die in der Montage- / Bedienungsanleitung vorgegeben
sind.
•Berühren Sie die Steckkontakte nicht mit spitzen, metallischen oder feuchten Gegenständen.
•Wird das Gerät nicht fest montiert, stellen Sie das Gerät oder das Zubehörs auf einer rutschfes-
ten Unterlage auf.
•Reinigen Sie das Gerät nur mit einem leicht angefeuchteten Tuch.
•Verwenden Sie nur das zugelassene Zubehör.
•An das Gerät dürfen nur Endgeräte angeschlossen werden, die SELV-Spannung (Sicher-
heits-Kleinspannungs-Stromkreis) liefern und/oder der ETS 300047 entsprechen. Die bestim-
mungsmäßige Verwendung von zugelassenen Endgeräten erfüllt diese Vorschrift.
Stecknetzgerät
•Verwenden Sie nur das im Lieferumfang enthaltene oder als Zubehör erhältliche Steckernetz-
gerät.
•Verwenden Sie keine Steckernetzgeräte, die sichtbare Beschädigung aufweisen (Brüche oder
Sprünge im Gehäuse).
Elektrostatische Aufladungen (ESD-Schutz)
•Das Telefon wird bereits mit einem über die Zulassungswerte erhöhten ESD-Schutz gegen Aus-
wirkungen von elektrostatischen Aufladungen ausgeliefert. Vermeiden Sie trotzdem erhöhte
statische Aufladungen. Die elektrostatische Aufladung kann bei verschiedenen Ursachen Wer-
te erreichen, die weit über den notwendigen Zulassungswerten und der bereits realisierten
Störfestigkeit des Telefons liegen. Die Ursachen oder Umstände, wie zum Beispiel zu geringe
Luftfeuchtigkeit oder Teppichböden sind zu beseitigen. Der Hersteller des Telefons übernimmt
keine Gewährleistung bei Schäden, die auf diese Ursachen zurückzuführen sind.
Sicherheitshinweise
2

Telefon-Oberfläche
1-Call In Rückruf zum letzten Anrufer
2-Call Out Rückruf zum letzten gewählten Teilnehmer
3-Phone Book Zugang zum Telefonbuch
4-Menu Zugang zur Abfrage / Konfiguration
5-OK Bestätigung einer Eingabe
6-IP Ansehen der IP-Adresse des Telefons
7-FWD »Anrufweiterschaltung« ein- und ausschalten
8-DND »Ruhe vor dem Telefon« ein- und ausschalten
9-M1 1. Kurzwahltaste
10 -M2 2. Kurzwahltaste
11 -M3 3. Kurzwahltaste
12 -L1 Wahl über Provider 1
13 -L2 Wahl über Provider 2
14 -L3 Wahl über Provider 3
15 -Mute Das Mikrofon wird ein- und ausgeschaltet (Raumrückfrage)
16 -H/F Freisprechen ein- und ausschalten
17 -Conf. Konferenz einschalten
18 -Transfer Gehaltenes Gespräch an einen Teilnehmer weitergeben
19 -Hold Rückfrage- / Makeltaste
20 -Redial Wahlwiederholung
21 -Auswahltasten
22 -Wähltasten
Deutsch
3
2
1ABC DEF
GHI JKL MNO
PQRS TUV WXYZ
3
456
789
0
*#
Call in Call out
Phone book
Menue OK
IP
FWD
M1
M2
M3
L1
L2
L3
Mute
H/F
DND
12345
6
7
8
9
10
11
12
13
14
15
16
17 18
19 2
0
21
22
Conf.
Transfer
Hold
Redial

Telefon auspacken und aufstellen
Auspacken
•funkwerk IP 50
•Hörer mit Hörerschnur
•Cat.5 Anschlussschnur ca. 2 m.
•Kurzbedienungsanleitung
•CD-ROM mit Bedienungsanleitung
Reinigen des Telefons
Das Telefon wurde für normale Gebrauchsbedingungen gefertigt. Reinigen Sie, wenn nötig, das Gerät
mit einem leicht feuchten Tuch oder verwenden Sie ein Antistatiktuch. Benutzen Sie niemals Lösungs-
mittel. Verwenden Sie niemals ein trockenes Tuch; die elektrostatische Aufladung könnte zu Defekten
in der Elektronik führen. Achten Sie auf jeden Fall darauf, dass keine Feuchtigkeit eindringen kann und
dadurch das Telefon Schaden nimmt.
Aufstellen des Telefons
Beachten Sie bitte, dass die Kunststofffüße Ihres Telefons auf empfindlichen Oberflächen z.B. von Mö-
beln, Spuren hinterlassen können. Der Hersteller des Telefons kann für solche Schäden nicht haften.
Verwenden Sie daher eine rutschfeste Unterlage für Ihr Telefon.
Anschluss des IP-Telefons
Anschluss der Hörerschnur
DenHörer am Grundgerät
anschließen:
Stecker der Hörerschnur in die Buchse an der linken Seite
des Grundgeräts (1) und am unteren Ende des Hörers (2)
einstecken.
Rückseite des Telefons
TelefonmitdemInternet
verbinden:
Ethernet Kabel mit RJ-45-Stecker mit der »WAN«-Buchse am
Telefon verbinden. Das andere Kabelende mit dem vorhan-
den LAN- oder DSL-/Router-Port oder einem HUB
verbinden.
Telefonggf.mit einem
Computerverbinden.
Ethernet Kabel mit RJ-45-Stecker mit der »LAN«-Buchse am
Telefon verbinden. Das andere Kabelende am Computer
anschließen.
Telefoneinschalten: Steckernetzgerät mit dem Telefon verbinden. Den Netzste-
cker des Steckernetzgerätes in eine
230 V~ Steckdose einstecken.
Deutsch
4
2
1
Other manuals for IP 50
2
Table of contents
Languages:
Other Funkwerk IP Phone manuals