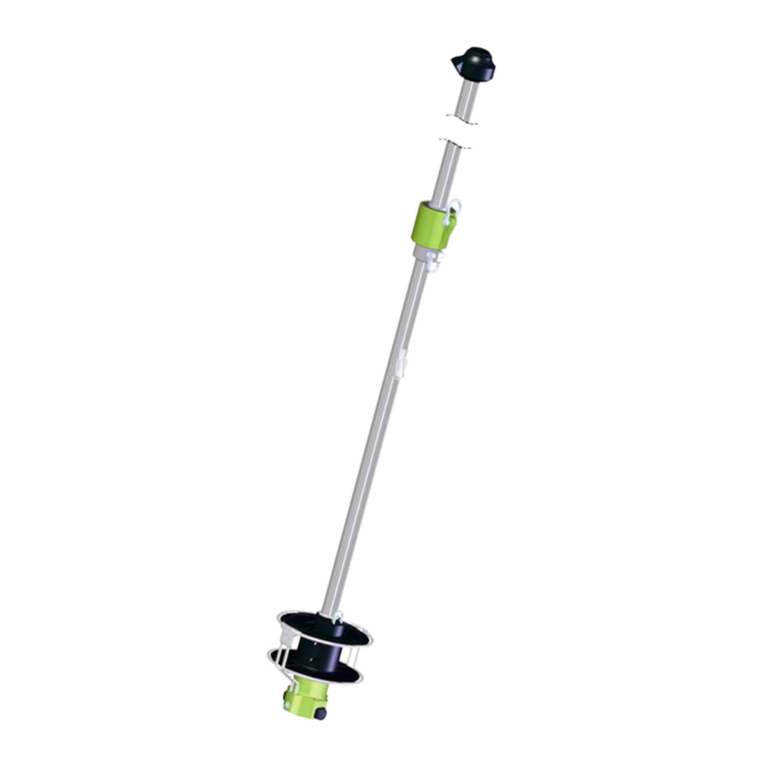
Furuno DS-80 User manual

DOPPLER SPEED LOG
DS-80
Marine Speed and Distance Measuring Equipment (SDME)

Your Local Agent/DealerYour Local Agent/Dealer
9-52 Ashihara-cho,9-52 Ashihara-cho,
Nishinomi
y
a, Ja
p
anNishinomi
y
a, Ja
p
an
Tele
p
hone :Tele
p
hone : 0798-65-21110798-65-2111
Telefax :Telefax : 0798-65-42000798-65-4200
F
IRST EDITION :
F
IRST EDITION : FEB.FEB. 20002000
Printed in JapanPrinted in Japan
A
ll ri
g
hts reserved.
A
ll ri
g
hts reserved. MM :: FEB.FEB. 12,200212,2002
PUB.No.PUB.No. IME-72470-MIME-72470-M
*00080889800**00080889800*
*00080889800**00080889800*
(( TATATATA )) DS-80DS-80 * 0 0 0 8 0 8 8 9 8 0 0 ** 0 0 0 8 0 8 8 9 8 0 0 *
*IME72470M00**IME72470M00*
* I M E 7 2 4 7 0 M 0 ** I M E 7 2 4 7 0 M 0 *

i
SAFETY INSTRUCTIONS
CAUTION
Confirm that the power supply voltage
is compatible with the voltage rating
of the equipment.
Connection to the wrong power supply
can cause fire or equipment damage. The
voltage rating appears on the label at the
rear of the display unit.
Ground the equipment.
Ungrounded equipment can give off or
receive electromagnetic interference or
cause electrical shock.
Keep the following compass safe
distances.
WARNING
Only qualified personnel
should work inside the
equipment.
This equipment uses high
voltage electricity which can
shock, burn, or cause serious
injury.
Turn off the power at the
mains switchboard before
beginning the installation.
Post a sign near the switch
to indicate it should not be
turned on while the equip-
ment is being installed.
Fire, electrical shock or
serious injury can result if the
power is left on or is applied
while the equipment is being
installed.
Display Unit
Digital Indicator
Distance Indicator
Distribution Box 3.10 m 2.10m
Transceiver Unit 2.05 m 1.40 m
Terminal Box 0.65 m 0.45 m
Standard Steering
0.50 m 0.40 m
Careful consideration is required to avoid
ingress of water through the transducer
tank. The tank shall be strong enough to
withstand the water pressure in fully loaded
conditions in rough weathers. FURUNO
Electric Co., Ltd. is not liable to any loss of
ship and personnel which is caused by in-
stallation procedures.

ii
TABLE OF CONTENTS
SYSTEM CONFIGURATION ................. iii
EQUIPMENT LISTS .............................. iv
1. MOUNTING ........................................ 1
1.1 Category of Equipment ...........................1
1.2 Display Unit ............................................2
1.3 Transceiver Unit......................................3
1.4 Transducer Unit ......................................4
1.5 Distribution Box ....................................12
1.6 Terminal Box (option)............................13
1.7 Digital Indicator, Distance Indicator
(option)................................................13
1.8 Junction Box (option)............................14
1.9 Dimmer (option)....................................15
1.10 Range Switch Box, Analog Display Unit
(option)................................................15
2. WIRING ............................................ 16
2.1 Precautions for cable Installation...........16
2.2 Wiring of Distribution Box......................17
2.3 Wiring of Transceiver Unit.....................21
2.4 Wiring of Terminal Box ..........................23
2.5 Display Unit (Digital Indicator, Distance
Indicator) ............................................ 24
2.6 Dimmer, Analog Display Unit, Range
Switch Box.......................................... 24
2.7 Grounding............................................ 25
2.8 Wiring Check ....................................... 25
3. SYSTEM SETTINGS ........................ 26
3.1 Transducer Adjustment ........................ 26
3.2 Setting of System Menu 2 .................... 27
3.3 Checking the Interconnection............... 28
3.4 Setting of the Maximum Speed Range . 29
3.5 Ship's Speed Adjustment...................... 29
3.6 Setting for Analog Display .................... 30
3.7 DIP Switch S4 Settings ........................ 31
4. CHANGING AC POWER TAP .......... 33
APPENDIX CALIBRATION ..............AP-1
PACKING LISTS................................. A-1
OUTLINE DRAWINGS........................ D-1
INTERCONNECTION DIAGRAMS..... S-1

iii
SYSTEM CONFIGURATION
TRANSDUCER
DS-820
DISPLAY UNIT
DS-800
IEC 61162-1 Input
(Navigational equipment, GGA, VTG, VBW)
Power ON SW Signal
Distance Run Signal
IEC 61162-1 Output
DIGITAL INDICATOR DS-830
DISTANCE INDICATOR DS-840
: STANDARD SUPPLY
: OPTIONAL SUPPLY
DISTRIBUTION BOX
DS-801
TRANSCEIVER
UNIT DS-810
DIMMER MF-22L-1/MF-22L-2
TERMINAL BOX
DS-802
TERMINAL BOX
DS-802
DIMMER MF22L-1/MF22-2
SHIP'S MAINS
115 VAC or 230 VAC
1φ, 50/60 Hz
RANGE SWITCH BOX
DS-389
DIMMER MF-22L-1/MF-22-2
ANALOG DISPLAY
MF-22A-1
115 VAC or
230 VAC
JUNCTION BOX
CI-630
: LOCAL SUPPLY

iv
EQUIPMENT LISTS
Standard supply
Name Type Code No. Qty Remarks
Display Unit DS-800 - 1
DS-801-100 - 100 VAC
DS-801-110 - 110 VAC
DS-801-115 - 115 VAC
DS-801-200 - 200 VAC
DS-801-220 - 220 VAC
Distribution Box
DS-801-230 -
1
230 VAC
Transceiver Unit DS-810 - 1
Transducer Unit DS-820 - 1 with 10/20/30m cable
Terminal Box DS-802 - 1
Spare Parts SP65-00700 000-029-046 1 set
w/SP65-00701,
SP65-00702, SP65-00601
Installation
Materials CP65-00900 000-029-047 1 set
w/CP65-00901,
CP65-00902, CP65-903
Optional equipment
Digital Indicator (000-029-020)
Name Type Code No. Qty Remarks
Digital Indicator DS-830 - 1
Spare Parts SP65-00601 002-889-730 1 set Fuse
Accessories FP65-00400 000-029-028 1 set FP65-00401, FP65-00402,
FP65-00403
Installation
Materials CP65-00800 000-029-027 1 set
CP65-00801,
MJ-A7SPF-005-020,
MJ-A6SPF-003-020
Remote Distance Indicator (000-029-022)
Name Type Code No. Qty Remarks
Distance Indicator DS-840 - 1
Spare Parts SP65-00601 002-889-730 1 set Fuse
Accessories FP65-00400 000-029-028 1 set FP65-00401, FP65-00402,
FP65-00403
Installation
Materials CP65-00800 000-029-027 1 set
CP65-00801,
MJ-A7SPF-005-020,
MJ-A6SPF-003-020

v
Optional equipment
Name Type Code No. Qty Remarks
Terminal Box DS-802 000-029-048 1 set w/CP65-00903
DS-389 000-028-039 1 set w/CP66-01000
MF-22R-1 000-069-391 1 set Flush mount type
Range Switch Box
MF-22R-2 000-069-392 1 set Bulkhead type
MF22L-1-100V 000-069-401 1 set flush mount
MF22L-1-200V 000-069-402 1 set flush mount
MF22L-2-100V 000-069-403 1 set bulkhead
Dimmer
MF22L-2-200V 000-069-404 1 set bulkhead
Junction Box CI-630 - 1 set w/CP66-00703
DS-850 000-029-050 1 set w/tightening handle
DS-781 000-029-051 1 set
Projection type
Through-hull Pipe [TFB-5000
(1)]
DS-782 000-029-052 1 set Gate valve, projection type
DS-784 000-029-054 1 set Flush type
Seachest
DS-786 000-029-055 1 set Gate valve type
Analog Display MF22A-1 000-069-381 1 set -10 to +30 knots, compact type

This page is intentionally left blank.

1
1 MOUNTING
1.1 Category of Equipment
Equipment for protected area
• Display Unit
• Distribution Box
• Transceiver Unit
• Terminal Box (one standard, other optional)
• Digital Indicator (option)
• Distance Indicator (option)
• Range Switch Box (option)
• Dimmer (option)
• Junction Box (option)
• Analog Display (option)
Equipment to be submerged
• Transducer

2
1.2 Display Unit
1.2.1 Mounting considerations
The display unit can be installed on a tabletop, on the overhead, on the bulkhead or flush
mounted in a console or panel.
When selecting a mounting location for the display unit keep the following in mind.
• Keep the display unit out of direct sunlight.
• The temperature and humidity of the mounting location should be moderate and stable.
• Locate the unit away from exhaust pipes and vents.
• Keep the unit away from electromagnetic field-generating equipment such as motors and
generators.
• For maintenance and checking purposes, leave sufficient space at the sides and rear of the
unit and leave slack in cables.
• A magnetic compass will be affected if the display unit is too close to it. Observe the
compass safe distances to prevent disturbance to the magnetic compass.
Tabletop Overhead
Display unit, tabletop and overhead mounting method
1.2.3 Mounting procedure (tabletop, overhead)
1. Fix the hanger with four tapping screws (M5x20).
2. Screw knob bolts in display unit, set it to hanger, and tighten knob bolts.
1.2.4 Flush mounting
There are two types of flush mount kits, F type and S type. For details, see the outline diagrams
at the back of this manual.

3
F type
1. Make a cutout of 167 X 92 mm.
2. Attach the cosmetic panel (supplied) to the display unit with hex bolts (M6X12, supplied)
and spring washers (M6, supplied).
3. Fix the display unit to the mounting location with four tapping screws (5X20, supplied).
S type
1. Make a cutout 167 X 92 mm.
2. Attach two fixing metals (supplied) to the display unit with hex bolts (M6X12, supplied) and
spring washers (M6, supplied).
3. Screw four wing bolts (supplied) to wing nuts (supplied).
4. Fasten the display unit to the mounting location with four wing bolts and nuts assembled at
step 3.
1.3 Transceiver Unit
1.3.1 Mounting considerations
• Since the transceiver unit generates heat, install it in a dry, well-ventilated place. The cooling
fans at the top of the unit must not be obstructed, to allow heat to escape.
• This unit is designed for bulkhead mounting to permit dissipation of heat. If bulkhead
mounting is absolutely impossible, mount the unit on the floor leaving at least 50 mm
clearance between it and the floor to permit dissipation of heat.
• The unit weights 7.1 kg. Reinforce the mounting area, if necessary.
• Leave space around the unit for maintenance and checking. Refer to the drawing at the end
of this manual for minimum recommended maintenance space.
• A magnetic compass will be affected if the transceiver unit is placed too close to it. Observe
the compass safe distances to prevent disturbance to the magnetic compass.
1.3.2 Mounting procedure
Fasten the transceiver unit with four tapping screws (6X30, supplied).
For bulkhead mounting, make sure there is 5 mm clearance between lower edge screw head
and bulkhead.

4
1.4 Transducer Unit
The performance of this equipment is directly dependent on the installation of the transducer.
The installation of the transducer and the tank should be accomplished by a dockyard referring
to the installation drawings at the later part of this manual.
1.4.1 Mounting Location
To decide the location of the transducer, the following points should be taken into account.
• Locate the transducer of DS-80 at least 2.5 m from the transducer of an echo sounder.
STERN BOW
2500 mm or more
Recommended location
for echo sounder transducer ECHO SOUNDER TRANSDUCER
(a or b)
DOPPLER SPEED LOG TRANSDUCER
a
c
b
Transducer, mounting location
• Separate as far as possible from air bubble sources; e.g., side thruster and water disposal
pipes.
• Install in close proximity to the keel, for uniform water flow.
• Generally, best performance is obtained by mounting on the bow; the stern side is
influenced more easily by air bubbles and propeller caviation.
• Never apply ordinary paint to the transducer face. Whenever the ship is dry docked, the
transducer face should be cleaned off oysters and foreign materrial.

5
1.4.2 Mounting of transducer
Confirm that a metal cover is attached to the transducer. For seachest except DS-850, remove
the hose clamp from the top of transducer.
Mounting of FlushType Seachest DS-850
1. Fit the transducer (1) and spacer (7) to the bottom plate (3).
2. With the “FORE” mark on the fixing plate (8) facing upward, pass the transducer cable
through the slot in the fixing plate (8).
3. Face the fixing plate (8) and bottom plate (3) in the ship’s bow direction, and then screw
three bolts (4) in the holes of the bottom plate.
4. Fasten the fixing plate (8) with three flat washers (9), spring washers (10) and nuts (11) until
the fixing plate (8) contacts the spacer (7).
5. Set the tightening nut (12), washer (13) and gasket (14) to the transducer cable in that order
from the cable end.
6. Pass the transducer cable end through the though-hull pipe from below the hull.
7. Fasten the tightening nut (12) with the tightening handle (supplied) so that the length of the
cable between the tightening nut and the top of the transducer is 300 mm.
8. Mate the bottom plate (3) and barrel (2), and fasten them with six spring washers (6) and hex.
Bolts (5).
Note: The tank barrel needs not be filled with oil or any filler. Sea water will get into when the ship
is placed in the water.
Do not seal the bottom plate to stop ingress of water into the tank.
8
6
12
53
191+1
152
42
FORE
FORE
FORE
FORE
1. TRANSDUCER 1 pc
2. CASING 1 pc
3. FIXING FLANGE 1 pc
4. FIXING BOLT 3 pcs
5. HEX. BOLT 6 pcs
6. SPRING WASHER 6 pcs
7. SPACER 1 pc
8. FIXING PLATE 1 pc
9. FLAT WASHER 3 pcs
10. SPRING WASHER 3 pcs
11. HEX. NUT 6 pcs
12. TIGHTENING NUT 1 pc
13. WASHER 1 pc
14. GASKET 1 pc
FORWARD DIRECTION
A A
A-A view
A-A view
14
13
2
11
10
9
4
7
1
SOLDERING DIMMENSIONS
DECIDED BY SHIPYARD.
HULL PLATE
240
300
35
25
FORE
FORE

6
See Note
on page 6.
(4)
(5)
(7)
(6)
(9)
(10)
(3)
(1)
(8)
(2)
Mounting of Flush Type Seachest DS-784 (ref. Dwg. C7222-T06)
The seachest DS-784 is delivered temporarily assembled with the transducer.
1. Loosen lock nut (5) with a wrench (hex. size: 50 mm)
and take off cap nut (4) from top cover (3) together
with gasket (6) and flat washer (7). (It is not necessary
to draw the cap nut completely out from the cable.)
2. Unscrew hex socket head bolts (9) (M12X25, 4 pcs)
by using a socket screw wrench (size: 10 mm).
Separate the seachest (2) and transducer (1) from top
cover (3). Handle O-ring (8) carefully.
3. Weld the seachest (2) to the hull plate. Confirm that
the “FORE” alignment mark on the side of the
seachest faces the fore-aft line of the ship within 1
degree. The seachest should also be level with ship’s
normal trim within 1 degree.
4. Finish the outside hull plate with a grinder to ensure
smooth water-flow.
5. Apply “Kinoruster (Anti-crevice corrosive sealant)” to
face A of seachest (2), O-ring groove on the hull
flange, O-ring (8) and face A of the stop cover (3).
6. Fit O-ring (8) onto the O-ring groove.
7. Place transducer (1) into seachest (2) so that the
alignment nipple on the transducer face fits into the
notch on the hull flange.
8. Clean the hull flange face with a clean cloth and settle stop cover (3) on the hull flange.
9. Tighten hex socket bolts (9) with a socket screw wrench.
10. Put gasket (6) and flat washer (7) over the transducer flange and tighten cap nut (4) securely
with a wrench (hex. size: 50 mm). Screw lock nut (5).
11. When running the transducer cable inside the conduit pipe, screw the pipe onto the cap nut
(PS3/4) for watertightness.
Note : Never remove the four flat head screws which seal screw holes, to maintain
watertightness.

7
PS3/4
129 HULL PLATE
130
30 24
54
A
R5
48
Bottom View
120
A
(4)
(7)
(6)
(5)
(9)(10)
(2)
(3)
(8) (1)
Flush mount, Projection Type Seachest DS-783 (ref. Dwg. E7222-T-03)
1. Loosen lock nut (5) with a wrench (hex.
size: 50 mm) and take off cap nut (4)
from hull flange (3) together with gasket
(6) and flat washer (7). (It is not
necessary to draw the cap nut
completely out from the cable.)
2. Unscrew hex. socket head bolts (10)
(M12X32, 4 pcs.) by using a socket
screw wrench (size: 10 mm). Separate
flange (2) and transducer (1) from hull
flange (3). Handle O-ring (8) carefully.
3. Weld hull flange (3) to the hull plate.
Confirm that the “FORE” mark alignment
line on the side of the hull flange faces
the fore-aft line of the ship within 1
degree. The hull flange should also be
horizontal within 1 degree at ship’s
normal trim.
4. Finish the outside hull flange with a
grinder to ensure smooth water-flow.
5. Apply “Kinoruster (Anti-crevice corrosive sealant)” to face A of hull flange (3), O-ring groove
on the hull flange, O-ring (8) and face A of the flange.
6. Fit O-ring (8) onto the O-ring groove.
7. Place transducer (1) into hull flange (3) so that the alignment nipple on the transducer face
fits into the notch on the hull flange.
8. Clean the hull flange face with a clean cloth and settle flange (2) on the hull flange.
9. Tighten hex. socket bolts (10) with a socket screw wrench.
10. Put gasket (6) and flat washer (7) on top of the transducer flange and tighten cap nut (4)
securely with a wrench (hex. size: 50 mm). Screw lock nut (5).
11. When running the transducer cable inside the conduit pipe, screw the pipe end onto the cap
nut (PS3/4) for watertightness.
Note : Never remove the four flat head screws which seal screw holes, to preserve watertight
integrity.

8
Mounting of ProjectionType Seachest DS-781 (ref. Dwg. C72222-T05)
1. Weld doubling plate (supplied by shipyard) to hull plate.
2. Remove the M10 bolts, and take out transducer fixing flange (2) (including transducer) from
transducer housing (1).
3. Determine the projection distance, and cut transducer housing (1). The horizontal error
should be within 1°.
4. Before beginning this step, remove the rubber gasket inside the thru-hull pipe to prevent it
from melting. After cutting a hole through the hull plate for the thru-hull pipe (φ36), weld the
thru-hull pipe to the hull plate.
5. Weld transducer housing (1) to doubling plate. Direction error from fore-aft line should be
within 1°. At stern side of transducer housing, make air exhaust holes (φ10-20).
6. Through the thru-hull pipe, pull up the transducer cable into the ship. Be careful not to jam
the cable between the flange and housing. Next, using the two M10X30 bolts (“Kinoruster”
applied) fasten the transducer fixing flange to the transducer housing.
Note: Never remove the four flat head screws.

9
Mounting of Gate Valve Type Seachest DS-786 (ref. Dwg. E7222-T04)
1. Separate hull flange (2) and flange (4) (with transducer (1) and shaft (5) from gate valve (20)
by removing hex. nut.
2. Weld hull flange (2) to the hull plate. Confirm that the “FORE” and align marks on the side of
the hull flange face the fore-aft line of the ship within 1 degree.
3. Apply “Kinoruster (Anti-crevice corrosive sealant)” to face A of hull flang (2), both faces of
gasket (18) and flange of gate valve (20).
4. Put gasket (18) onto hull flange (2).
5. Mount gate valve (20), considering the direction of the handle (aft direction normally) so as
to allow enough space for operation.
6. Apply “Kinoruster” to face B of flange (4), both faces of gasket (18) and the flange of gate
valve (20).
7. Put gasket (18) onto the flange of gate valve (20).
8. Mount flange (4) (with transducer and shaft) to gate valve (20). Make sure the fore mark on
flange (4) and hull flange (2) are aligned.
9. Loosen the hex. socket head bolt, then check that shaft (5) moves upward and downward
smoothly by hand.
10. Lower shaft (5) completely and fasten hex. socket bolt (13).
(19)(7)(8)
(13)
(14)
(17)
(17)
(21)
(6)
(10)
(11)
(4)
(18)
(12)
(5)
(20)
(9)
(10)
(11)
(18)
(1) (3) (2)
(15)(16)

10
11. Confirm that the transducer is flush with the hull.
Note: Never weld the hull flange or transducer tank when the transducer is accommodated,
nor weld near the transducer of other equipment.
When the transducer 1 is replaced, or separated from the shaft 5
re-assemble as follows;
Fixing
Screws
(4)
Face C
Face D
1. Remove sealant from face C and face D.
2. Apply adhesive #1104 (Three Bond) to face
D and four fixing screws.
3. Re-assemble shaft and transducer.

11
Gate valve, Projection Type Transducer DS-782 (ref. Dwg. E7222-T02)
DS-782
1. Separate hull flange (3) and flange (4) (with transducer (1) and shaft (5)) from gate valve (2)
by removing hex. Nut (17).
2. Weld hull flange (3) to the hull plate. Confirm that the “FORE” and align marks on the side
of the hull flange face the fore-aft line of the ship within 1 degree. The hull flange should
also be horizontal within 1 degree at ship’s normal trim. Finish the outside hull plate flat with
a grinder.
3. Apply “Kinoruster (Anti-crevice corrosive sealant)” to face A of hull flange ③, both faces of
gasket (18) and flange of gate valve (2).
4. Put gasket (18) onto hull flange (13).
5. Mount gate valve (2), considering the direction of the handle (aft direction normally or
selectable every 45 degrees) so as to allow enough space for operation.
6. Apply “Kinoruster” to face B of flange (4), both faces of gasket (18) and the flange of gate
valve (2).
7. Put gasket (18) onto the flange of gate valve (2).
8. Mount flange (4) (with transducer and shaft) to gate valve.
9. Loosen the hex. socket head bolts (23)and (26), then check that shaft (5) moves upward
and downward smoothly by hand.

12
10. Lower shaft (5) completely and fasten hex. socket bolt (23) and (26)
11. Lower the transducer by turning the handle until the transducer case (6) touches the hull
flange (3).
12. Confirm that the hull plate projects by 24 mm.
Note: Never weld the hull flange or transducer tank when the transducer is being fitted, nor
weld near the transducer of other equipment.
1.5 Distribution Box
The distribution box can be mounted on the deck or on a bulkhead.
Consider the following points when selecting a mounting location.
• Select a location which is both well ventilated and low in humidity to keep the unit cool.
• The unit weighs 12 kg. For bulkhead mounting, be sure the mounting location is strong
enough to support the weight under the continued vibration normally encountered on the
vessel.
• A magnetic compass will be affected if the distribution box is too close. Observe the
compass safe distances to prevent disturbance to the magnetic compass.
Fasten the distribution box with four tapping screws (6X30, supplied).
Refer to the outline drawing at the end of this manual for mounting dimensions.
For bulkhead mounting;
1. Tighten lower tapping screws so there is 5 mm clearance between bottom of screw head
and bulkhead.
2. Screw slots of the unit with the tapping screws tightened at step 1.
3. Fasten the unit with upper tapping screws.
Other manuals for DS-80
2
Table of contents
Other Furuno Boating Equipment manuals
Popular Boating Equipment manuals by other brands

Westland
Westland T-Top Console Cover installation manual

Basta Boatlifts
Basta Boatlifts Over-Center 2x2k manual

CIPTA PERNIKA NUSANTARA
CIPTA PERNIKA NUSANTARA SMART VMS manual

Power-Pole
Power-Pole 8 instructions

Sierra
Sierra EVINRUDE-JOHNSON CARBURETOR Quick start quide

autobimini
autobimini lite Installation and user manual

Soluzioni Meccaniche
Soluzioni Meccaniche bamar RLG EVO instruction manual

PupGear
PupGear Original doggydocks installation instructions

Johnson Outdoors
Johnson Outdoors Minn Kota MKA-49 Installation

Humphree
Humphree HCS-5 Setup manual

Ultraflex
Ultraflex T93ZT Installation and maintenance manual

MINN KOTA
MINN KOTA MKA-51 manual