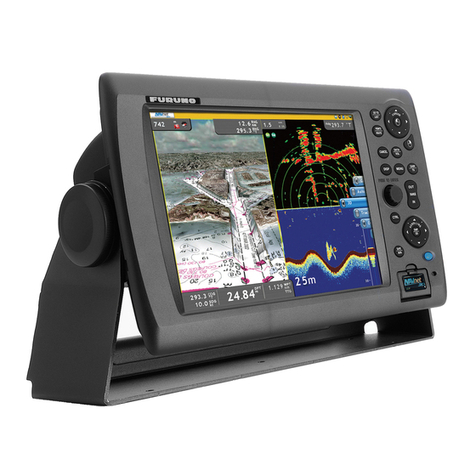
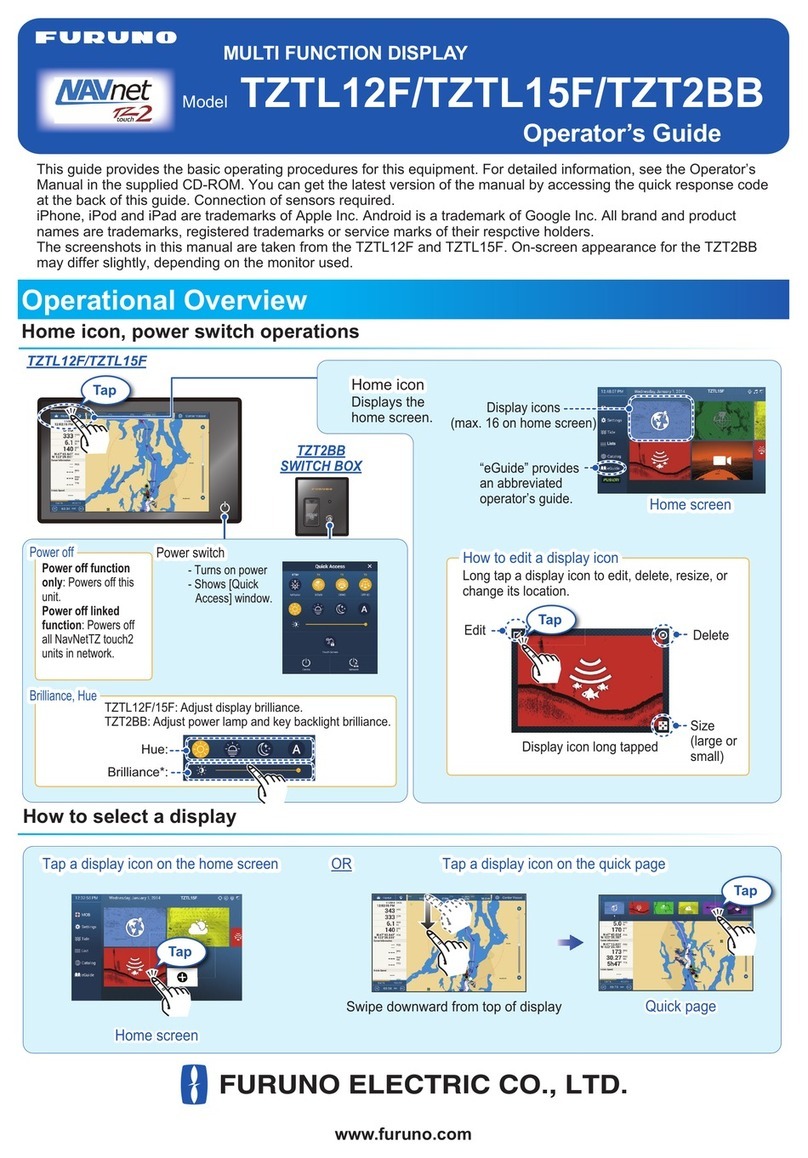
Furuno MFD12 User manual


i
Important Notices
General
• Do not copy any part of this manual without written permission.
• If this manual is lost or worn, contact your dealer about replacement.
• The contents of this manual and equipment specifications can change without notice.
• The example screens (or illustrations) shown in this manual can be different from the screens
you see on your display. The screen you see depends on your system configuration and equip-
ment settings.
• Save this manual for future reference.
• The wrong use or modification of the equipment (including software) by persons not authorized
by FURUNO will cancel the warranty.
• All brand and product names are trademarks, registered trademarks or service marks of their
respective holders.
How to discard this product
Discardthisproductaccordingtolocalregulationsforthedisposalofindustrialwaste.Fordisposal
in the USA, see the homepage of the Electronics Industries Alliance (http://www.eiae.org/) for the
correct method of disposal.
How to discard a used battery
In the European Union
The crossed-out trash can symbol indicates that all types of batteries
must not be discarded in standard trash, or at a trash site. Take the
used batteries to a battery collection site according to your national
legislation and the Batteries Directive 2006/66/EU.
In the USA
The Mobius loop symbol (three chasing arrows) indicates that Ni-Cd
and lead-acid rechargeable batteries must be recycled. Take the fin-
ished batteries to a battery collection site according to local laws.
In the other countries
There are no international standards for the battery recycle symbol. The number of symbols can
increase when the other countries make their own recycle symbols in the future.
Cd
Ni-Cd Pb

ii
SAFETY INSTRUCTIONS
WARNING
Indicates a condition that can cause death or serious injury if
not avoided.
CAUTION
Indicates a condition that can cause minor or moderate injury if
not avoided.
Warning, Caution Mandatory Action
Prohibitive Action
Read these safety instructions before you operate the equipment.
WARNING WARNING
The radar antenna sends the electro-
magnetic radio frequency (RF) energy.
This energy can be dangerous to you,
especially your eyes. Do not look at the
radiator or near the antenna when the
antenna is rotating.
The distances at which RF radiation
levels of 100 W/m
2
and 10 W/m
2
exist are shown in the table.
Do not open the equipment.
Only qualified persons can work inside
the equipment.
Check that no person is near the radar
antenna before you turn on the radar.
Serious injury or death can occur if a
person is hit by a rotating radar antenna.
Turn off the power immediately at the
switchboard if water leaks into the
equipment or smoke or fire is coming
from the equipment.
Failure to turn off the equipment can cause
fire or electrical shock.
Antenna
Model Distance to
100 W/m
2
point Distance to
10 W/m
2
point
DRS2D - 0.4
DRS4D 0.1 1.4
DRS4A - 1.2
DRS6A - 1.2
DRS12A
w/XN12A 0.2 2.4
DRS12A
w/XN13A 0.2 1.9
DRS25A
w/XN12A 0.5 5.3
DRS25A
w/XN13A 0.4 4.4

SAFETY INSTRUCTIONS
iii
WARNING
WARNING WARNING
Keep units other than the radar antenna
away from the rain and water.
Fire or electrical shock can occur if water
gets inside the equipment.
Do not disassemble or modify the
equipment.
Fire or electrical shock can occur if the
equipment is disassembled or modified.
Do not operate the equipment with wet
hands.
Electrical shock can occur.
Do not depend on one navigation device
for the navigation of the vessel.
Always check your position against all
available aids to navigation, for the safety
of vessel and crew.
A radar is an excellent anti-collision aid,
but remember to keep watch for possible
collision conditions.
Always keep a watch while underway.
Do not leave any objects near the radar
antenna.
Fire, electrical shock or injury can occur if
something gets caught in the radar antenna.
Use the correct fuse.
A wrong fuse can cause fire or serious
damage to the equipment.
Do not maneuver the vessel only from the
depth indication.
Grounding can occur.
WARNING
Radiation hazard. Only qualified
personnel should work inside scanner.
Confirm that TX has stopped before
opening scanner.
Name: Warning Sticker
Type: 3-142-3201-0
Code No.: 100-266-890

iv
TABLE OF CONTENTS
Introduction....................................................................................................................xi
System Configuration.................................................................................................xiii
1. System Introduction.............................................................................................1-1
1.1 The NavNet 3D System .............................................................................................1-1
1.1.1 How to sleep the equipment...........................................................................1-2
1.2 Controls......................................................................................................................1-2
1.2.1 Control Description.........................................................................................1-3
1.3 Power ON and OFF ...................................................................................................1-5
1.4 Panel Dimmer, Display Brilliance ..............................................................................1-5
1.5 How to Select a Display.............................................................................................1-6
1.6 SD Cards....................................................................................................................1-7
1.7 Chart Plotter Introduction...........................................................................................1-8
1.8 Radar Introduction......................................................................................................1-9
1.9 Fish Finder Introduction ...........................................................................................1-10
1.10 The Cursor...............................................................................................................1-11
1.11 Status Bar ................................................................................................................1-12
1.12 RotoKey and Soft Controls.......................................................................................1-13
1.13 Pop-up Menus..........................................................................................................1-14
1.14 Data Boxes...............................................................................................................1-15
1.15 Menu Introduction ....................................................................................................1-16
1.16 Language.................................................................................................................1-19
1.17 Boat Icon..................................................................................................................1-20
1.18 Man Overboard (MOB).............................................................................................1-21
1.19 Facsimile Receiver FAX-30......................................................................................1-23
1.20 AIS Transponder FA-30, FA-50 ...............................................................................1-24
2. Chart Plotter..........................................................................................................2-1
2.1 Charts.........................................................................................................................2-1
2.1.1 Chart Description ...........................................................................................2-1
2.1.2 How to Select a Chart Type...........................................................................2-1
2.2 Chart Scale ................................................................................................................2-4
2.3 Orientation Mode........................................................................................................2-5
2.4 How to Move the Chart ..............................................................................................2-5
2.5 The Boat Icon.............................................................................................................2-6
2.6 How to Find the Range and Bearing to a Location ...................................................2-7
2.7 Chart Object Information............................................................................................2-7
2.8 Multiple Chart Plotter Displays...................................................................................2-8
2.9 Cartographic Text and Objects on Vector Charts ......................................................2-9
2.9.1 Control Visibility of Text and Object Information............................................2-9
2.9.2 Control Visibility of Cartographic Objects.....................................................2-10
2.10 Alarms......................................................................................................................2-12
2.10.1 XTE Alarm....................................................................................................2-12
2.10.2 Anchor Watch Alarm....................................................................................2-12
2.10.3 Proximity Alarm............................................................................................2-13
2.10.4 Depth Alarm.................................................................................................2-13
2.10.5 SST Alarm....................................................................................................2-13
2.10.6 Speed...........................................................................................................2-13
2.10.7 Trip Log Alarm..............................................................................................2-13
2.10.8 Countdown Timer.........................................................................................2-13
2.10.9 Alarm Clock..................................................................................................2-13
2.10.10How to Set an Alarm....................................................................................2-14

TABLE OF CONTENTS
v
2.10.11Internal/External Alarm.................................................................................2-15
2.10.12Alarm Audio Options ....................................................................................2-15
2.10.13Alarm Log.....................................................................................................2-16
2.11 Track.........................................................................................................................2-17
2.11.1 How to Show or Hide the Track Display.......................................................2-17
2.11.2 Track Recording Method, Interval ................................................................2-17
2.11.3 Track Thickness ...........................................................................................2-18
2.11.4 Track Color...................................................................................................2-19
2.11.5 How to Clear the Active Track......................................................................2-21
2.11.6 How to Save Active Track ............................................................................2-21
2.11.7 How to Replay a Saved Track......................................................................2-22
2.11.8 How to Remove a Replayed Track...............................................................2-22
2.11.9 How to Find Information About a Track........................................................2-23
2.11.10Track Pop-up Menu......................................................................................2-23
3. 3D Display, Overlays............................................................................................3-1
3.1 3D Display..................................................................................................................3-1
3.1.1 Aerial View .....................................................................................................3-1
3.1.2 Underwater Display........................................................................................3-3
3.1.3 How to Make the 3D View Clearer .................................................................3-4
3.2 Overlays .....................................................................................................................3-5
3.2.1 Depth Shading Overlay ..................................................................................3-5
3.2.2 Weather Overlays...........................................................................................3-6
3.2.3 Satellite Photo Overlay.................................................................................3-10
3.2.4 Animation Overlay........................................................................................3-10
3.2.5 Radar Overlay ..............................................................................................3-11
3.2.6 Tidal Information Overlay .............................................................................3-12
3.2.7 Tidal Current Overlay ...................................................................................3-14
4. Points ....................................................................................................................4-1
4.1 About Points...............................................................................................................4-1
4.2 How to Mark a Point...................................................................................................4-2
4.2.1 How to Mark a Point at Current Position ........................................................4-2
4.2.2 How to Mark a Point at Cursor Position .........................................................4-2
4.2.3 How to Mark a Point from the Points List .......................................................4-3
4.3 How to Find Information About an On-screen Point...................................................4-4
4.4 Default Point Settings.................................................................................................4-5
4.5 How to Move a Point ..................................................................................................4-6
4.5.1 How to Move an On-screen Point ..................................................................4-6
4.5.2 How to Move a Point from the Points List ......................................................4-6
4.6 How to Delete a Point.................................................................................................4-7
4.6.1 How to Delete a Point on the Screen .............................................................4-7
4.6.2 How to Delete a Point from the Points List.....................................................4-7
4.6.3 How to Delete All Points.................................................................................4-7
4.7 How to Edit a Point from the Points List.....................................................................4-8
4.8 How to Find a Point..................................................................................................4-10
4.8.1 How to Show a Point at the Center of the Screen........................................4-10
4.8.2 How to Find the Location of a Point from the Points Menu ..........................4-10
4.9 Point Groups.............................................................................................................4-10
4.10 How to Show or Hide All Points................................................................................4-11
4.11 How to Go to a Point ................................................................................................4-12
4.11.1 How to go to an On-screen Point .................................................................4-12
4.11.2 How to go to Cursor Position........................................................................4-13
4.11.3 How to go to a Point Selected from the Points List ......................................4-15
4.11.4 How to Extend a Route Made with a Single Point........................................4-15
4.12 How to Restart and Cancel Navigation to a Point ....................................................4-16

TABLE OF CONTENTS
vi
4.12.1 Restart Navigation........................................................................................4-16
4.12.2 How to Cancel Navigation to a Point............................................................4-16
5. Routes....................................................................................................................5-1
5.1 What is a Route?........................................................................................................5-1
5.2 How to Create a Route...............................................................................................5-2
5.2.1 How to Create a New Route ..........................................................................5-2
5.2.2 How to Insert a Point on a Route...................................................................5-3
5.2.3 How to Delete a Point ....................................................................................5-3
5.2.4 How to Extend a Route..................................................................................5-4
5.2.5 How to Split a Route ......................................................................................5-4
5.2.6 How to Join Two Routes................................................................................5-5
5.3 Routes List.................................................................................................................5-6
5.4 How to Find Information About a Route on the Screen..............................................5-7
5.5 How to Find a Route on the Chart..............................................................................5-7
5.6 How to Change the Name of a Route........................................................................5-8
5.7 How to Delete a Route...............................................................................................5-8
5.7.1 How to Delete an Individual Route.................................................................5-8
5.7.2 How to Delete All Routes...............................................................................5-8
5.8 How to Show or Hide All Routes................................................................................5-9
5.9 How to Follow a Route...............................................................................................5-9
5.9.1 How to Follow an On-screen Route...............................................................5-9
5.9.2 How to Follow a Route Selected from the Routes List.................................5-10
5.9.3 How to Start Navigation from a Point...........................................................5-10
5.9.4 How to Show Information About a Route.....................................................5-11
5.9.5 Flyover .........................................................................................................5-11
5.10 Operations When You Follow a Route.....................................................................5-12
5.10.1 Restart Navigation........................................................................................5-12
5.10.2 Follow a Route in the Reverse Direction......................................................5-12
5.10.3 Stop Following a Route................................................................................5-13
5.10.4 Skip a Leg on a Route..................................................................................5-13
5.10.5 Waypoint Switching Mode............................................................................5-14
5.10.6 Route Auto Zoom.........................................................................................5-15
5.10.7 XTE Alarm Lines..........................................................................................5-15
5.10.8 Waypoint Arrival Notification........................................................................5-16
5.11 Navigation Calculator..............................................................................................5-16
6. Radar......................................................................................................................6-1
6.1 How to Transmit, Set the Radar in Stand-by..............................................................6-1
6.2 How to Adjust the Gain ..............................................................................................6-2
6.3 How to Reduce Sea Clutter........................................................................................6-3
6.4 How to Reduce Rain Clutter.......................................................................................6-4
6.5 Range Scale...............................................................................................................6-5
6.6 Orientation Mode........................................................................................................6-6
6.6.1 Description of Orientation Modes...................................................................6-6
6.7 How to Measure the Range to a Target.....................................................................6-8
6.7.1 How to Display the Range Rings ...................................................................6-8
6.7.2 How to Measure the Range with a VRM........................................................6-8
6.7.3 How to Deactivate a VRM..............................................................................6-9
6.8 How to Measure the Bearing to a Target.................................................................6-10
6.8.1 How to Measure the Bearing with an EBL ...................................................6-10
6.8.2 How to Erase an EBL...................................................................................6-11
6.8.3 How to Select True or Relative Bearing.......................................................6-11
6.9 How to Off-center the Picture...................................................................................6-12
6.10 Heading Line............................................................................................................6-13
6.11 How to Reduce Radar Interference..........................................................................6-14

TABLE OF CONTENTS
vii
6.11 How to Reduce Radar Interference..........................................................................6-14
6.12 Guard Alarm.............................................................................................................6-15
6.12.1 How to Set a Guard Zone.............................................................................6-15
6.12.2 How to Activate or Deactivate a Guard Zone...............................................6-16
6.12.3 How to Erase a Guard Zone.........................................................................6-16
6.13 Watchman ................................................................................................................6-16
6.14 Echo Trails................................................................................................................6-17
6.14.1 How to Hide or Show Echo Trails.................................................................6-17
6.14.2 How to Clear Echo Trails to Start New Trails...............................................6-17
6.14.3 Echo Trail Time............................................................................................6-17
6.14.4 Echo Trail Reference....................................................................................6-18
6.14.5 Echo Trail Color............................................................................................6-18
6.14.6 Echo Trail Style............................................................................................6-18
6.15 Echo Stretch.............................................................................................................6-19
6.16 Echo Average...........................................................................................................6-19
6.17 Automatic Shift .........................................................................................................6-20
6.17.1 How to Set Auto Shift Speed........................................................................6-20
6.17.2 How to Activate or Deactivate Auto Shift......................................................6-20
6.18 Sweep Fade .............................................................................................................6-20
6.19 How to Show, Hide, Cancel an Active Route ...........................................................6-21
6.20 How to Show or Hide the Boat Icon..........................................................................6-21
6.21 Echo Color................................................................................................................6-22
6.22 Background Color.....................................................................................................6-22
6.23 Radar Overlay Range Link.......................................................................................6-22
6.24 Dual-Range Display..................................................................................................6-23
6.25 FAR-2107 Radar Series and NavNet 3D..................................................................6-24
6.26 How to Understand the Radar Display.....................................................................6-25
6.26.1 False Echoes................................................................................................6-25
6.26.2 Search and Rescue Transponder (SART) ...................................................6-27
6.27 ARPA Operation.......................................................................................................6-29
6.27.1 How to Show or Hide the ARPA Display......................................................6-29
6.27.2 How to Manually Acquire a Target ...............................................................6-30
6.27.3 How to Display Target Data .........................................................................6-31
6.27.4 How to Stop Tracking Targets......................................................................6-31
6.27.5 How to Clear a Lost Target ..........................................................................6-31
6.27.6 CPA/TCPA Alarm.........................................................................................6-31
6.27.7 How to Set an ARPA Acquisition Area.........................................................6-32
6.27.8 Track History Display ...................................................................................6-34
7. Fish Finder............................................................................................................7-1
7.1 How the Fish Finder Operates....................................................................................7-1
7.2 How to Select a Display..............................................................................................7-2
7.2.1 Single Frequency Display...............................................................................7-2
7.2.2 Dual Frequency Display .................................................................................7-3
7.2.3 Zoom Displays................................................................................................7-4
7.2.4 A-scope Display (display only) .......................................................................7-6
7.3 Automatic Fish Finder Operation................................................................................7-7
7.3.1 How the Automatic Fish Finder Operates ......................................................7-7
7.3.2 How to Select an Automatic Fish Finder Mode ..............................................7-7
7.4 Manual Fish Finder Operation....................................................................................7-8
7.4.1 How to Select the Manual Mode ....................................................................7-8
7.4.2 How to Select a Display Range......................................................................7-8
7.4.3 How to Shift the Range ..................................................................................7-8
7.4.4 How to Adjust the Gain...................................................................................7-9
7.4.5 How to Reduce Clutter ...................................................................................7-9
7.5 Picture Advance Speed............................................................................................7-10
TABLE OF CONTENTS
viii
7.6 How to Reduce Interference ....................................................................................7-11
7.7 How to Measure Depth, Time Between Locations...................................................7-12
7.8 How to Erase Weak Echoes ....................................................................................7-13
7.9 How to Balance Echo Strength................................................................................7-14
7.10 White Marker............................................................................................................7-15
7.11 Fish Finder Alarms...................................................................................................7-15
7.11.1 How to Set an Alarm....................................................................................7-15
7.11.2 How to Activate or Deactivate an Alarm.......................................................7-16
7.11.3 Alarm Sensitivity...........................................................................................7-16
7.12 ACCU-FISH..............................................................................................................7-17
7.12.1 How to Set ACCU-FISH...............................................................................7-18
7.12.2 Fish Size Correction.....................................................................................7-19
7.13 Water Temperature Graph.......................................................................................7-19
7.14 Fish Finder Menu Operation ....................................................................................7-20
7.14.1 Fish Finder-General Menu...........................................................................7-20
7.14.2 Fish Finder-DFF1, DFF3/FCV, -ETR-6/10N and -ETR-30N Menus.............7-21
7.15 NavNet 3D and LCD Color Sounder FCV-1150.......................................................7-23
7.16 Interpreting the Display............................................................................................7-25
8. File Operations......................................................................................................8-1
8.1 How to Format SD Cards...........................................................................................8-1
8.2 Files Menu Operation.................................................................................................8-1
8.2.1 Files Menu Description...................................................................................8-2
8.3 How to Export Tracks, Points and Routes, User Setup .............................................8-3
8.4 How to Import Tracks, Points and Routes, User Setup..............................................8-4
8.5 How to Delete Files....................................................................................................8-4
8.6 How to Update the System Software.........................................................................8-6
9. Camera/Video........................................................................................................9-1
9.1 How to Display a Video Image...................................................................................9-1
9.2 How to Set the Video Display.....................................................................................9-2
9.2.1 How to Select the Input Source......................................................................9-2
9.2.2 How to Cycle Your Video Inputs ....................................................................9-2
9.2.3 How to Set the Cycle Period..........................................................................9-3
9.3 How to Show Video ID...............................................................................................9-3
9.4 How to Adjust the Video Image..................................................................................9-4
9.5 How to Control an Axis IP Camera ............................................................................9-4
10. Instrument Display .............................................................................................10-1
10.1 How to Prepare the Hot Page..................................................................................10-2
10.2 How to Show the Instrument Display.......................................................................10-2
10.3 How to Select an Instrument Display.......................................................................10-3
10.4 Instrument Displays..................................................................................................10-3
10.4.1 Steering Display...........................................................................................10-3
10.4.2 Engine Display.............................................................................................10-4
10.4.3 Wind and Weather Display...........................................................................10-5
10.4.4 True Wind Display........................................................................................10-6
10.4.5 Apparent Wind Display.................................................................................10-6
11. Sirius Weather Receiver.....................................................................................11-1
11.1 Weather Display Introduction...................................................................................11-1
11.2 Weather Icons..........................................................................................................11-2
11.3 Weather Menu..........................................................................................................11-3
11.3.1 How to Display the Weather Menu...............................................................11-3
11.3.2 Weather Menu Description...........................................................................11-4

TABLE OF CONTENTS
ix
11.4.2 Marine Warning..........................................................................................11-13
11.4.3 Tropical Weather Statement.......................................................................11-13
11.4.4 Marine WatchBox.......................................................................................11-14
11.5 Sirius Satellite Radio ..............................................................................................11-15
12. Automatic Identification System (AIS) .............................................................12-1
12.1 AIS Introduction........................................................................................................12-1
12.2 How to Show or Hide the AIS Display......................................................................12-1
12.3 AIS Target Symbols..................................................................................................12-2
12.4 Proximity AIS Target Alarm......................................................................................12-2
12.5 How to Ignore AIS Targets.......................................................................................12-4
12.6 How to Display Target Data......................................................................................12-5
12.7 Track History Display................................................................................................12-5
12.8 How to Show and Hide Target IDs...........................................................................12-5
13. How to Adjust Settings......................................................................................13-1
13.1 RotoKey....................................................................................................................13-2
13.1.1 How to Select the RotoKey Set to Use.........................................................13-5
13.1.2 How to Set the RotoKey...............................................................................13-6
13.2 Data Boxes...............................................................................................................13-7
13.2.1 How to Set the Data Boxes ..........................................................................13-7
13.2.2 How to Show or Hide all Data Boxes ...........................................................13-9
13.2.3 How to Adjust Transparency of Data Boxes.................................................13-9
13.3 How to Set the Display Selection Window................................................................13-9
13.3.1 How to Set the Number of Hotpages to Show..............................................13-9
13.3.2 How to Set a Hotpage ................................................................................13-10
13.4 Global Menu...........................................................................................................13-12
13.4.1 Global-General Menu.................................................................................13-12
13.4.2 Global-Units Menu......................................................................................13-15
13.5 System Menu..........................................................................................................13-16
13.5.1 System-General Menu ...............................................................................13-16
13.5.2 System-Calibration Menu...........................................................................13-17
13.5.3 System-Radar Menu ..................................................................................13-18
13.5.4 System-DFF/FCV Menu.............................................................................13-19
13.5.5 System-ETR-6/10N Menu ..........................................................................13-20
13.5.6 System-ETR-30N Menu .............................................................................13-21
13.6 My NavNet-General Menu......................................................................................13-22
13.7 How to Control Charts............................................................................................13-24
13.7.1 How to View Your Charts...........................................................................13-24
13.7.2 How to Update Charts................................................................................13-25
13.7.3 How to Add a Chart ...................................................................................13-26
13.7.4 How to Delete a Chart................................................................................13-26
14. Maintenance, Troubleshooting .........................................................................14-1
14.1 Maintenance.............................................................................................................14-1
14.2 Fuses........................................................................................................................14-2
14.3 The Magnetron.........................................................................................................14-2
14.4 Troubleshooting........................................................................................................14-3
14.4.1 General Troubleshooting..............................................................................14-3
14.4.2 Radar Troubleshooting.................................................................................14-3
14.4.3 Chart Plotter Troubleshooting ......................................................................14-4
14.4.4 Fish Finder Troubleshooting.........................................................................14-4
14.5 GPS Status Display..................................................................................................14-5

TABLE OF CONTENTS
x
APPENDIX 1 Menu Tree...........................................................................................AP-1
SPECIFICATIONS .....................................................................................................SP-1
INDEX..........................................................................................................................IN-1

xi
Introduction
A Word to the Owner of the MFD8, MFD12
Congratulations on your choice of the MFD8, MFD12 Multi Function Display, an integral part of
our new NavNet 3D series of multi-function displays. We are confident you will see why the FU-
RUNO name has become synonymous with quality and reliability.
For over 60 years FURUNO Electric Company has enjoyed an enviable reputation for innovative
and dependable marine electronics equipment. This dedication to excellence is furthered by our
extensive global network of agents and dealers.
Your equipment is designed and constructed to meet the rigorous demands of the marine envi-
ronment. However, no machine can perform its intended function unless properly installed and
maintained. Please carefully read and follow the operation and maintenance procedures set forth
in this manual.
We would appreciate feedback from you, the end-user, about whether we are achieving our pur-
poses.
Thank you for considering and purchasing FURUNO.
Features
The NavNet 3D series is a networked navigation system that gives you radar, chart plotter, fish
finder, AIS receiver, etc. Information is transferred between NavNet 3D units through a lightning
fast Ethernet. The plug and play format allows expansion and you can connect a maximum of 10
NavNet devices.
The RotoKey, a rotary knob that controls an on-screen, turning menu of soft controls, gives you
fast access to full control of NavNet 3D.
Chart plotter
• TimeZero technology displays charts immediately with no load time.
• Loaded with full scale, complete Mapmedia NOAA raster and vector charts for all the United
States.
• 3D display with controls for pitch and orientation.
• Way points, routes, tracks, etc. are transferred between NavNet 3D units through the Ethernet.
• Large memory stores 10,000 track points, 2,000 way points, and 200 routes.
• The overlay displays show depth shading, tide, tidal current, and satellite photo (North America
only).
Radar sensor (option)
• The radar antenna are in radome or open-array type.
• The radar echoes appear in color or monochrome.
• Automatic control of sea clutter, tuning and gain for easier operation.
• Guard zone checks for targets within the area you indicate.
• ARPA provided standard.
• Dual-range display for watch on short and long distances at the same time.

Introduction
xii
Fish finder (option)
• Measures the depth to the bottom and displays underwater conditions in multi-colors according
to echo strength. A monochrome presentation shows the echoes in shades of gray.
(*Number of colors depends on network sounder.)
• The zoom mode enlarges the targets.
• Automatic and manual operation. Auto mode automatically adjusts range, gain and clutter ac-
cording to purpose, fishing or cruising.
• ACCU-FISH estimates length and depth of separate fish.
(Requires transducer 50/200-1T and DFF series network sounder or LCD Color Sounder FCV-
1150.)
Other
• TheAISfunctionreceivesAIS data from other vessels, shore stations and navigational aidsand
displays this data.
• USB port connects the plug and play USB devices (mouse, etc.).
• Instrument displays (steering, engine, weather, and wind) with connection of the correct sen-
sors:
• The weather information display available with connection of Sirius weather receiver.
• The Sensor data is transferred to units through the Ethernet.
• IP camera (local supply) monitors activity on the vessel.
• NMEA 2000 interface for the connection of GPS receiver, Weather Station, FI-50 (instrument
series), Satellite Compass, etc.
• 100 Megabit per second transfer rate.
NavNet 3D registration
To use all of all the features of your NavNet 3D, register your unit at the NavNet web site
(www.navnet.com). This site is full of information and news about the NavNet 3D system and has
a tutorial to help you understand your system. Registration is easy and free. When you register,
you get a personalized page where you can access the various benefits. These benefits include
online software and chart updates and personalized news services. Go to www.navnet.com and
register to get the most from your NavNet 3D system.

xiii
System Configuration
MFD8
RADAR SENSOR
DRS4A/DRS6A/DRS12A/DRS25A
OR
RADAR SENSOR
DRS2D/DRS4D
MONITOR
MU-155C/170C, etc.
VIDEO IN(CCD
CAMERA, MAX. 2)
LINE OUT
(SPKR, ETC.)
12-24 VDC*
2
HUB -101
GPS NAVIGATOR
GP-320B/330B
AIS RECEIVER,
HEADING SENSOR or
EXTERNAL BUZZER
USB DEVICE
(MOUSE, KYBD)
NMEA 2000
(GP-330B, ETC.)
POWER SUPPLY UNIT*
1
PSU-012 or PSU-013
: Standard Supply
: Optional Supply
: Local Supply
*1
PSU-012: w/DRS4A/6A/12A
PSU-013: w/DRS25A
*
2
See the figure below for rectifiers used in the system.
MULTI FUNCTION
DISPLAY MFD8
FISH FINDER
(DFF series, ETR-6/10N, ETR-30N, FCV-1150)
12-24 VDC*
2
DRS2D/4D
MFD8
RU-3423
DRS4A/6A/
12A
MFD8
PSU-012
RU-3423
PR-62
DRS25A
MFD8
PSU-013
RU-1746B
DRS4A/6A/
12A/25A
MFD8
PSU-012/013
RU-1746B
PR-62
LINE IN(MIC,
FUTURE USE)
FAX-30
FA- 50
Rectifiers used in the system

System Configuration
xiv
MFD12
RADAR SENSOR
DRS4A/DRS6A/DRS12A/DRS25A
OR
RADAR SENSOR
DRS2D/DRS4D
MONITOR
MU-155C/170C, etc.
VIDEO IN (CCD
CAMERA, MAX. 2)
LINE OUT
(SPKR, ETC.)
12-24 VDC*
2
HUB-101
GPS NAVIGATOR
GP-320B/330B
AIS RECEIVER,
HEADING SENSOR or
EXTERNAL BUZZER
USB DEVICE
(MOUSE, KYBD)
NMEA 2000
(GP-330B, ETC.)
POWER SUPPLY UNIT*
1
PSU-012 or PSU-013
: Standard Supply
: Optional Supply
: Local Supply
*1
PSU-012: w/DRS12A
PSU-013: w/DRS25A
*
2
See the table and figure below for
rectifiers used in the system.
MULTI FUNCTION
DISPLAY MFD12
12-24 VDC*
2
DR2D/4D/
4A/6A
MFD12
RU-3423
DRS25A
MFD12
PSU-013
RU-1746B-2
PR-62
DRS12A
MFD12
PSU-012
PR-62 RU-3423
LINE IN(MIC,
FUTURE USE)
FAX-30
FA-50
FISH FINDER
(DFF series, ETR-6/10N, ETR-30N, FCV-1150)
Rectifiers used in the system

1-1
1. System Introduction
This chapter provides the information necessary to get you started using your system.
Some of the topics are how to turn on the equipment and an introduction to the main
displays.
Standards used in this manual
• The keys and controls on the control panel are shown in bold face, for example the
DISP key. Other items that have a label, for example, the soft controls related to the
RotoKey, are shown in brackets in normal typeface. For example, [Head Up].
• The RotoKey controls the "soft controls", a revolving set of soft controls that gives
you access to full control of the NavNet 3D system. You rotate the RotoKey to se-
lect a soft control then push the RotoKey to do the function marked on the soft con-
trol. This manual states this operation procedure as "Use the RotoKey to select
[menu item name or soft control name].”
• The menu system has a maximum of 15 menus and related sub menus. When you
are asked to open a menu, the name of the menu and sub menu are given, sepa-
rated by a hyphen. For example, "Open the [Routes-General] menu".
• There is more than one method to do a function, Key operation, pop-up menu and
RotoKey.
1.1 The NavNet 3D System
The NavNet 3D network is a system where all parts use the same information (navi-
gationdata, settings, points, routes,etc.). Each unit in thesystem displays information
from other units and NMEA devices, like GPS navigator. Information is transferred
between MFDs through a high-speed Ethernet.
Each MFD has a special "sleep mode" that allows each MFD to operate while using
low power. The MFDs can be in three states:
• ON:Normalmodeofoperation. Thescreenisonandthe user canoperatetheMFD.
The MFD operates and transfers information across the network.
• Sleep Mode: The screen is turned OFF and only the power switch operates (to turn
the power OFF). The MFD in this state can process controls and transfer informa-
tion with other MFDs on the network. The MFD uses low current in this state.
• OFF: The MFD is turned OFF and does not control information. The MFD does not
use any current in this state.
When power is applied to an MFD (with the power switch), all the other MFDs start in
the sleep mode. If you operate the power switch on an MFD that is in the sleep mode,
the MFD turns on. If you press the power switch on an MFD more than three seconds,
all MFDs in the network are turned OFF.
Note: If you press a power switch more than 5-7 seconds, all MFDs turn OFF and
powersynchronizationislost.To restore power synchronization,firstturnoffallMFDs.
Then, hold down the power switch of the MFD that was responsible for loss of power
synchronization for three seconds.

1. System Introduction
1-2
1.1.1 How to sleep the equipment
You can sleep the equipment when its use is not required continuously. With the Stan-
dard or Full RotoKey set active, push the RotoKey, rotate the key to select [Sleep]
then push the key. To un-sleep the equipment, push the power key until the picture
appears.
1.2 Controls
The controller for this system is either the MFD8 or MFD12.
A key that has two text labels separated by a line has two functions. The top label is
the main function and the bottom label, the secondary function. Short-push to access
the main function and long-push (approximately three seconds) to access the second-
ary function.
You operate the chart plotter, radar, fish finder, etc. with
• Keys
• CursorPad
• ScrollingPad
• RotoKey
• Menus, where you select options
• Pop-up menus, where you select options
• Lists, where you can edit items
Whenyou operate a key, a singlebeep sounds to tell you correctoperation.For wrong
operation, three beeps sound. If you do not need the key beep, deactivate the beep
sound from the [Global-General] menu.

1. System Introduction
1-3
1.2.1 Control Description
The controls of your system are in the figure shown below. Controls are illuminated for
nighttime use.
MFD8
MFD12
Control description
No. Label Function Mouse
operation
1Short-push: Turn ON the power. Adjust the
panel dimmer.
Long-push: Turn the power ON and OFF.
-
2 Card drive Card drive for memory cards. -
3 SAVE/MOB SAVE: Save the current position as a point.
MOB: Save the current position as a MOB
position.
-
4 CTRL Select the active display in combination displays. -
1
2
4
5
812
13
15
16
17
10
11
14
9
6
7
3
1
2
3
4
5
6
7
8
910
11
12
13 14
15
16
17
BRILL

1. System Introduction
1-4
5 RotoKey • Rotate to display soft controls, the quantity
(basic, standard, full or custom) of which you
select from the menu, or select the menu item.
• Short-push to display soft controls, the quanti-
ty (basic, standard, full or custom) of which is
indicated on the menu, or validate a selection.
• Long-pushtodisplayall available softcontrols
for the current mode.
Scrollwheel.
Turn to dis-
play soft con-
trolsorselect
item.Pushto
validate se-
lection.
6 DISP Select a display. -
7 CANCEL Undo or cancel last operation. -
8POINTS/
ROUTE POINTS: Save the cursor position as a point.
ROUTE: Activate the route building tool. -
9 GO TO/LIST GO TO: Set the cursor position as the destina-
tion.
LIST: Open the Points menu.
-
10 CursorPad • Pad: Move the cursor.
• Functions like the "left-click" button on a
PC mouse. This button the name “left-click”
button in this manual.
• Move the
cursor.
• Left
mouse
button
11 (right-click
button) Show a pop-up menu. This button has the name
“right-click” button in this manual. Right mouse
button
12 DATA/VOL DATA: Show and hide the data boxes.
VOL: Change audio level. If you have the Sirius
weatherreceiver,theSiriussatelliteradioscreen
appears.
-
13 MENU Open and close the menu. -
14 GAIN/TX GAIN: Adjust the gain for the radar and the fish
finder.
TX: Change between stand-by and transmit on
the radar and fish finder.
-
15 RANGEOUT,
IN • Select range on the chart, radar and fish
finder.
• Zoom in and zoom out the Axis IP camera
image.
-
16 ScrollingPad • Pad: Scroll the chart, radar picture and AXIS
IP camera image.
• SHIP/3D button: Short-push to put your ves-
sel at the center of the screen. Long-push to
change between the 3D and 2D displays alter-
nately.
-
17 Power lamp Lights when the power is applied to the system. -
No. Label Function Mouse
operation

1. System Introduction
1-5
1.3 Power ON and OFF
Press to turn the power ON. To turn the power OFF, press and hold the same key
until the screen is black.
When you turn on the power, two or three beeps sound and the lamp near the power
switch lights. The start-up screen appears with the progress bar (at the bottom of the
screen). The progress bar moves to the right as the procedure continues. Approxi-
mately 90 seconds after you apply the power, the Navigation Warning message ap-
pears. Read the message then push the RotoKey to begin operation. (There is an
additional message if your NavNet has the Sirius weather feature.)
Note: Do not turn off the power during the start-up sequence. Wait until the procedure
is completed before you turn the power OFF.
1.4 Panel Dimmer, Display Brilliance
Adjust the illumination of the panel dimmer and the brilliance of the display as shown
below.
1) Push the key to display the [Brill/Dimmer] adjustment window.
2) Rotate the RotoKey to adjust the panel dimmer and display brilliance. The current
level is shown on the bar.
3) Push the RotoKey to validate the setting and close the window.
BRILL
BRILL
This manual suits for next models
3
Table of contents
Other Furuno Monitor manuals

Furuno
Furuno TZT19F User manual

Furuno
Furuno RD-50 User manual

Furuno
Furuno MU-155C Manual

Furuno
Furuno TZTL12F User manual

Furuno
Furuno ECDIS FEA-2100 User manual

Furuno
Furuno NavNet TZtouch3 TZT9F Manual

Furuno
Furuno FMD3100 User manual

Furuno
Furuno FMD-3200 Manual

Furuno
Furuno RD-30 User manual

Furuno
Furuno RD-20 User manual

Furuno
Furuno TZTL12F Manual

Furuno
Furuno MFD8 User manual

Furuno
Furuno RD-33 User manual

Furuno
Furuno Mu 120c User manual

Furuno
Furuno TZT12F User manual

Furuno
Furuno RD-30 User manual

Furuno
Furuno Multi Instrument FI-504 User manual

Furuno
Furuno TZT9 User manual

Furuno
Furuno MU-155C User manual

Furuno
Furuno MU-152 User manual