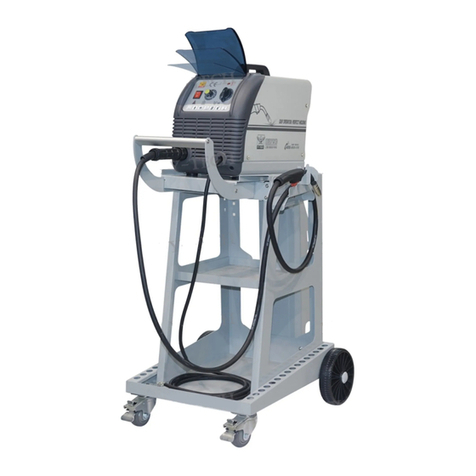
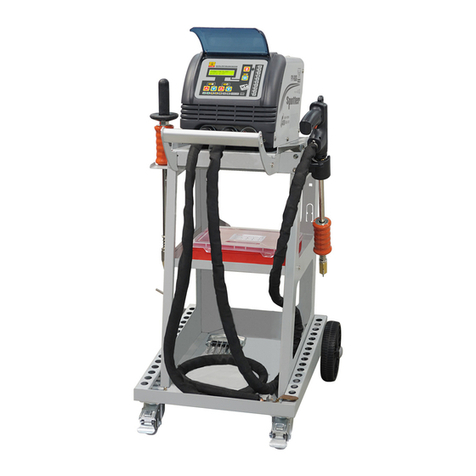
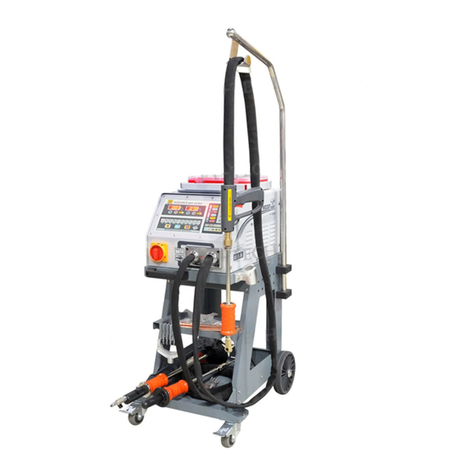
Fytech FY-4180/2E User manual

Owner’s Manual
FY-4180/2E
The equipment is approved by a number of car manufacturers(China)

CONTENTS
1.Safety Precautions Symbols
2. Symbols And Descriptions
3.Accessories And Spare Parts
4.Installation
4-1. Specifications
4-2. Duty Cycle And Overheating
4-3. Machine Installation
4-4. Selecting A Location
4-5. Installing Gas Supply
4-6. Connecting Input Power
4-7. Threading Welding Wire
4-8. Changing Drive Roll
4-9. Typical MIG process Connection
4-10.Welding Gun
5.Operation
5-1.Controls
5-2.Holding And Positioning Welding Gun
5-3.Conditions That Affect Weld Bead Shape
5-4.Gun Movement During Welding
5-5.Poor Weld Bead Characteristics
5-6.Good Weld Bead Characteristics
6.Troubshooting
6-1.Excessive Spatter
6-2.Porosity
6-3.Excess Penetration
6-4.Lack Of Penetration
6-5.Incomplete Fusion
6-6.Burn-Through
6-7.Waviness Of Bead
6-8.Distortion
6-9.Troubleshooting Guide For Semiautomatic Welding Equipment
7.Exploded View
8.Electrical Diagram
9.Packing List
1
2
3
4
5
6
7
8
9
10
11
12
13
14
15
16
17
18
19
20
21
22
23
24
25
26
27
28
29
30

Read instructions.
1、Read owner's Manual before using or
servicing unit。
2、Use only manufacturer’s supplied
replacement。
Exploding parts can injure.Always
wear a face shield and long sleeves。
Static can damage PC boards
1、Put on grounded wrist strap before
handing boards or parts。
2、Use proper static-proof bags and
boxes to store,move or ship PC boards。
Fire or explosion hazard.
Do not locate unit on,over,or near combustibe
surfaces.Do not install unit near flammables.
1、Wear approved face shield or safety
goggles with side shields。
2、Wear proper body protection to protect skin。
Do not weld in the height!
Flying metal can injure eyes。
1)Wear safety glasses with side shields or
face shield。
1、Magnetic fields can affect pacemakers.
Pacemaker wearers keep away.
2、Wearers should consult their doctor
before going near plasma arc cutting
operations。
Overuse can cause overheating
Allow cooling period ,follow rated duty
cycle before starting to weld again.
Cylinders can explode if damaged.Gas
cylinders contain gas under high pressure.
If damaged,a cylinder can explode .Be sure
to treat them carefully.
Electric shock can kill:
1、Do not touch live electrical parts。
2、Wear dry,hole-free insulating gloves
and body protection.
3、Do not wrap electrical cable around your body.
4、Ground the workpiece with a good elect-
rical ground。
Keep away from the torch tip.
Remove all flammables of the welding area.
Falling unit can cause injury.
Eye protection for welding:
Current level in amperage Minimum shade
Number
30-150A---------------------------- #8
150-300A--------------------------- #10
300-500A--------------------------- #12
The heat from the workpiece can cause serious
burns。
Never cut on pressurized cylinder.
Keep away from moving parts such as fans.
Fumes and gases can be hazardous.
welding produces fumes and gases. Breathing
these fumes and gases can be hazardous to
your health.
If inside,ventilate the area.
Do not weld in a confined space only if it
is well ventilated.
Moving parts can cause injury.
Maintenance regularly!
Factory safety!
Protect yourself Warn others
Page.1
Safety Precautions Symbols
Protect yourself and others from injury,
read and follow these precautions before
installation and operation.

Symbols And Descriptions
Symbols And Definitions
U1
U0
U2
I2
s1
HZ
A
V
Primary voltage
Hertz
IP
X
~
1
V
I
O
+-
%
Adjust Air/Gas
Pressure
Description:
Our semi-automatic welder is an all-in-one MIG shielding gases welder (GMAW) with high
efficiency that is an ideal substitute for manual arc welding.
Most advanced circuit design and technology are adopted.Excellent performances,supreme reliability,
quality welding requirements can be satisfied.Spot weld,groove weld,and fillet weld are available.Most
commonly used shielding gases are applicable such as Co2,AR,CO2+AR,CO2+O,etc.
Suitable for welding of variou metallic materials such as mild steel,low carbon steel,low alloy steel,
stainless steel, steel,iron,copper, aluminum,nicket,etc.
Extensively used in the welding and field operation of oil pipeline,chemical,car fabrication,shipyard,
etc.
Gas Input
Gas Output Do Not switch
While welding
Amperes
Volts
Gas Metal Arc
Welding(GMAW)
Gun On Percent
Wire Feed Off Increase
Line Connection
Loose Shield Cup
Protective Earth
(Ground)
Degree Of
Protection
Rated Welding
Current
No--Do Not DO
This
Single Phase
Power Rating,Products
Of Voltage And Current
Duty cycle
Direct Current
Wire Feed
Spool Gun
Input
Constant Current
Voltage Input
Temperature
Rated No Load
Voltage(Average)
Conventional Load
Voltage
Page.2

Accessories And Spare Parts
Accessories And Spare Parts List
Pressure Regulator NO.C001
Contact Tip NO.C004
Welding Gun NO.C007
Front Adaptor NO.C010
Trigger Potentiometer NO.C013
Capacitor NO.C016
Feeder Potentiometer NO.C019
Anti-Clogging Ointment NO.C022
Panel Socket NO.C025
Back Wheel NO.C028
Adjustment Switch NO.C002 European Connector NO.C003
Ouput Cable NO.C005
Collect Body NO.C008
Wire Guide NO.C011
Fuse Socket NO.C014
Electromagnetism NO.C017
15AK Gooseneck NO.C020
24AK Gooseneck NO.C018
Control Transformer NO.C023
Digital Display NO.C026
Hose NO.C029
Spool Spindle NO.C006
Fan NO.C009
Shield Cup NO.C012
Chain NO.C015
Feeder Motor NO.C021
NO.C024
Front Wheel NO.C027
Circuit Board NO.C030
Remarks:
1.Optional orders for above accessories and components are available.
2.Model and part number required when ordering parts from your local distributor.
European Connector
Shield
Page.3

Installation Instruction
Side panel
Gun holder
6" torx screw
6" nut
Wheel
Wheel axle
Rubber mat
Wheel washer
Wheel cap
6" torx screw
Side plate
Fender panel
Caster bracket
Caster
8" inner-
hexangular screw
Install the gun holer to the side panel; install the side plates to the fender panel; install the wheel
axle and wheels to the fender panel; install the fender panel to the back panel (using 6" torx screws
and nuts); install casters to the caster bracket (using 8" inner-hexagonal screws); put the rubber
mat on the fender panel.
Page.4

1.Specifications
INSTALLATION
Page.5
Model
Parameter
Voltage
(V)
Frequency
(Hz)
Rated Max
Input Current
(A)
Max Effective
Input Current
(A)
No-load Voltage
(V)
Welding Current
(A)
Output
Current/Voltage
Insulation Grade
Wire Diameter
Type
Dimensions
(mm)
Voltage
Adjustment
Weight
(kg)
Duty Cycle
35%
F
850×380×890
96
10.3
35A/17V-
250A/26.5V
13.6
20-32
35-250A
AC 380V/3ph
50 / 60
10 stages
One-piece
Mild Steel
Solid Wire
0.8/1.0mm
FY 4220 2E- /
9.6
35A/17V-
220A/24V
850×380×770
85
10.8
20-30
35-220A
35%
F
AC 380V/3ph
50 / 60
7 stages
One-piece
Mild Steel
Solid Wire
0.8/1.0mm
FY-4180/2E

2.Duty Cycle And Overheating
1.Overheat protection is installed on the aluminium board of main
transformer and rectifier.The unit products heat while welding.
2.If unit overheats ,output stops, and cooling fan runs.
3.Wait fifteen minutes for unit to cool.Reduce amperage or voltage,
or duty cycle before welding.
Overheating Stop working Wait 15 minutes
for unit to cool
Reduce amperage
or reduce duty
cycle
0
15
A
Weld again
Page.6

3.Machine Installation
1.Open the package and find out the Owner's Manual.
2.Check the details of accessories according to packing list
that attached to this manual.
3.Properly install this equipment as following diagram.Inspect the
unit for any damage. If so,contact your local distributor or service
agency.
4)The unit should not be located under sunshine.The worksite should
be in low humidity and without dust.
5)Operating Temperature range:-10℃-+40℃.
6)Storage Temperature range:-25℃-+56℃.
7)At least 20cm of space for airflow,30cm of space for two units
located side by side.
8)Use tent to protect the machine from stormy weather when operate
outdoor.
9)Welding produces fumes and gases,Breathing these fumes and gases
3
can be hazardous to your health.If inside,less than 300m,Venti-
late the area.
10)Properly ground this equipment.
11 )The input power cord gradient should not more than 15°.
Page.7

4、Selecting a Location
1)Select a correct location to place the unit。
2)Determine input power cord length according to its actual operation
requirement.Input power cord must have a minimum inside diameter of
2
6mm。
3)Do not move or operate unit where it could tip。
4)Use cart or unit handle to move unit .Do not pull the cords to move
unit.
5)Moving gas cylinder and main unit to hight sparaely.Use lifting eye
to lift unit only ,not running gear,gas cylinders,or any other ac-
cessories.
6)Optional order for individual wire feeder is available.The wire fe-
eder and welding gun divide from the main unit.It is more convenient
to operate.
Page.8

1)、Cap
2)、Cylinder valve
(Remove cap,stand to side of valve,and open valve slightly.Gas flow
blows dust and dirt from vavle.Close vavle)
3)、Cylinder
4)、Regulator/Flowmeter
(Install so face is vertical)
5)、Flow Adjust
(Typical pressure is 0.05-0.15MPa)
6)、Hose
7)、Hose Connection
(Connect gas hose between regulator/flowmeter and the unit) )
8)、Regulator/Flowmeter heating socket
(For low temperature worksite,please plug the regulator/flowmeter
to the socket for heating.)
5、Installing Gas Supply
DO NOT use other gases regulator/flowmeter
with Co2 shielding gas.
Rear Panel
Page.9
7
8
ON
OFF
CO2
1
2
3
4
5
6

2
1. Input power cord (not less than 6mm copper cord).
2. Over-current protection.
3. Disconnect device line terminals.
4. Ground wire L1/L2 input conductors
Disconnect and lockout/tagount input power
before connecting input conductors from
unit.
Select type and size of over-current
protection.
Ground the earth cable.
Close and secure door on disconnect device .
Remove lockout/tagout device,and place
switch in the "on" position.
6、Connecting Input Power
Page.10
1
2
3
L1
L2
1
4
3
2
L3
L1
L2
Th e power sup ply must ha ve a ground co n nection .
Th e w elder mus t a lso be conn e cted to cir c u it breake r .
Th e p o w e r supply mu s t h a v e a ground co n n e c tion.
Th e w e l d er must als o b e c o n nected to c i r c u it breake r .
ON
OFF
CO2
National and Local standards(Circuit breaker
must be installed).Only qualified persons are
allowed to make this installation.

7、Threading Welding Wire
1 、Wire spool spindle
2 、Welding Wire
3 、Pressure adjustment knob
1.Open wire spool spindle;install wire spool;release pressure adjustment knob;pull and hold wire.
Push wire thru guides into drive roll.Close wire spool spindle tightly to prevent slipping (Feed
wire to check wire spool installation).
2.Set a desired drive roll pressure, close and tighten pressure adjustment knob.
3.Press gun trigger and let go of wire.
4. Remove gun nozzle and contact tip.
5. Press gun trigger until wire comes out of gun. Reinstall contact tip and nozzle.
6. Feed wire to check drive roll pressure ,tighten knob enough to prevent slipping.
7. Cut off wire if welding wire extends too far beyond nozzle.
Page.11
1
2
3

8、Changing Drive Roll
1
2
3
4
1、Drive roll securing nut
2、Drive roll
3、Pressure adjustment knob
4、Press device
Changing Drive roll:
1、Release pressure adjustment knob .Press wire device springs open.
2、Loosen securing nut ,Remove drive roll.
3、The drive roll consists of two different sized grooves.Reinstall the desired wire sized groove
close to the motor shaft.
4、Tighten securing nut.
5、Replace press wire device,and set a desired pressure.
6、Make sure drive roll groove lines up with wire guide.
Page.12

9、Typical MIG Process Connection
Shielding gas
Weld current can damage electronic parts in vehicles. Disconnect both battery cables before welding
on a vehicle .Place work clamp as close to the weld as possible.
Regulator/Flowmeter
Wire feeder
Gun
Work clamp and
workpiece
Hose
Page.13
ON
OFF
CO2

10、
12
3
4
5
6
1、Shield cup C012
2、Contact tip C004
3、Front adaptor C010
4、Gooseneck(15/24AK) C020/018
5、Trigger
6、Spanner
Welding Gun
Page.14

1、Controls
Operation
Page.15
1. Display
2. Wire speed adjustment
3. Weld time extension
4. Weld current adjustment
5. Indicator light
5
4
2
3
1

0°-15°
0°-15°
45°
45°
90°
90°
2、Holding And Positioning Welding Gun
5
1
2
3
4
1、Hold Gun and Control Gun Trigger
2、Workpiece
3、Work Clamp
4、Electrode Extension (Stickout)
5、Cradle Gun and R est Hand on Workpiece
End View Of Work Angle Side View Of Gun Angle
GROOVE WELDS
End View Of Work Angle Side View Of Gun Angle
FILLET WELDS
Welding wire is energized when gun trigger is pressed.Before lowering helmet and pressing trigger,be
sure wire size is correct to past end of contact tip, and tip of wire is positioned correctly on seam.
Page.16

10°
10°
3、Conditions That Affect Weld Bead Shape
Push
Perpendicular Drag
GUN ANGLES AND WELD BEAD PROFILES
Short Normal Long
ELECTRODE EXTENSIONS(STICKOUT)
Short Normal Long
FILLET WELD ELECTRODE EXTENSIONS(STICKOUT)
Slow Normal Fast
GUN TRAVEL SPEED
Weld bead shape depends on gun angle ,direction of travel,electrode extension(stickout),travel speed,
thickness of base metal,wire feed speed(weld current),and voltage.
Page.17

4、Gun Movement During Welding
1
2
3
1、Stringer Bead
Steady Movement Along Seam
2、Weave Bead
Side To Side Movement Along Seam
3、Weave Patterns
Use weave patterns to cover a wide area
in one pass of the electrode.
Page.18
Table of contents
Other Fytech Welding System manuals

Fytech
Fytech FY-3180A User manual
Fytech
Fytech FYMIG230L User manual

Fytech
Fytech FYMIG306XL User manual

Fytech
Fytech FY-9000A User manual

Fytech
Fytech FYMIG306L User manual

Fytech
Fytech FYMIG200L-3 User manual

Fytech
Fytech FY-4500 User manual

Fytech
Fytech FY-6G User manual

Fytech
Fytech FY-4DM User manual

Fytech
Fytech FY-9028 User manual

Fytech
Fytech FY-6000 User manual

Fytech
Fytech FYMIG305L User manual

Fytech
Fytech FYMIG210X User manual

Fytech
Fytech FY-5015L User manual

Fytech
Fytech FY-5000 User manual

Fytech
Fytech FYMIG5215X User manual

Fytech
Fytech FY-92G User manual
Fytech
Fytech FYMIG270X User manual

Fytech
Fytech FY-2270/2E User manual

Fytech
Fytech FYMIG307 User manual