g-lites Moon Light User manual


Moon Lite User Manual 1
CONTENTS
1. General information 2
2. Safetyinstructions 3
3. Performancetraitandskillspecifications 4
4. Operationpanel 6
5. Dimensionaldrawings 7
6. Photometricdata 8
7. Mounting and installation 9
8. Power supply and signal connection 10
9. Displaymenu 13
10. DMX traits 21
11. Cleaning and maintenance 23
12. Troubledispose 24
13. Circuit connecting diagram 26
14. Explode diagram and list 27

Moon Lite User Manual 2
1. GENERAL INFORMATION
INTRODUCTION: Congratulations, you have just purchased one of the
most innovative and reliable LED fixtures on the market today. Our
company has been designed to perform reliably for years when the
guidelines in this booklet are followed. Please read and understand the
instructions in this manual carefully and thoroughly before attempting to
operate this unit. These instructions contain important information
regarding safety during use and maintenance.
UNPACKING: Thank you for purchasing our company products. Every
product has been thoroughly tested and has been shipped in perfect
operating condition. Carefully check the shipping carton for damage that
may have occurred during shipping. If the carton appears to be damaged,
carefully inspect your fixture for damage and be sure all accessories
necessary to operate the fixture have arrived intact. In the event damage
has been found or parts are missing, please contact our customer support
team for further instructions. Inside the box you should find: the fixture,
a DMX XLR cable, a power cable, and this user manual. MoonLite
Series with two hangers.
Please do not discard the shipping carton in the trash. Please recycle
whenever possible.
Notice: As part of our ongoing commitment to continuous
products update, company will keep the right to improve
this products, the information in this menu may be
changed in the future, the company reserves the right to
change the data without any advises.

Moon Lite User Manual 3
2. SAFETY INSTRUCTIONS
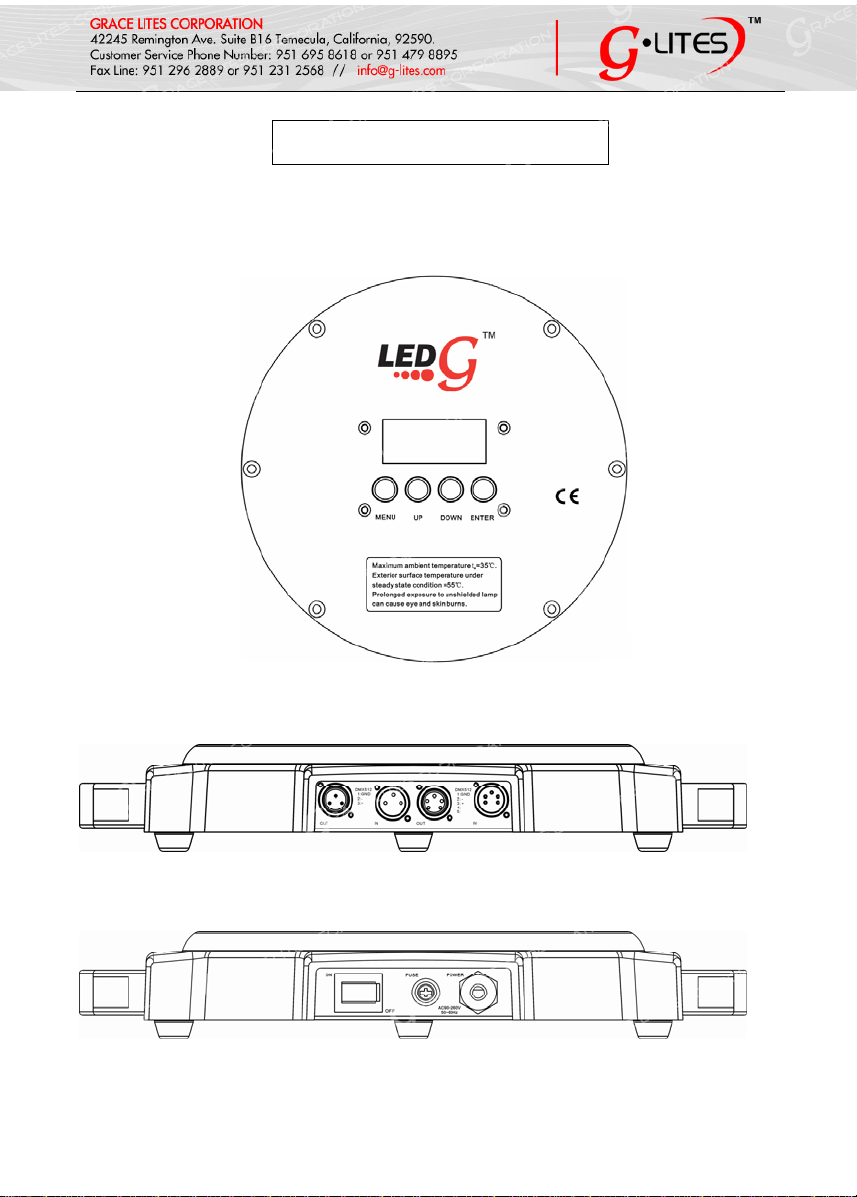
●1. In order to ensure the light could operate normally, the ambient
temperature couldn't be higher than 35 degree and no lower than 2
degree.
●2. Under normal condition, the highest sectional surface temperature
may be up to 55-75 degree.
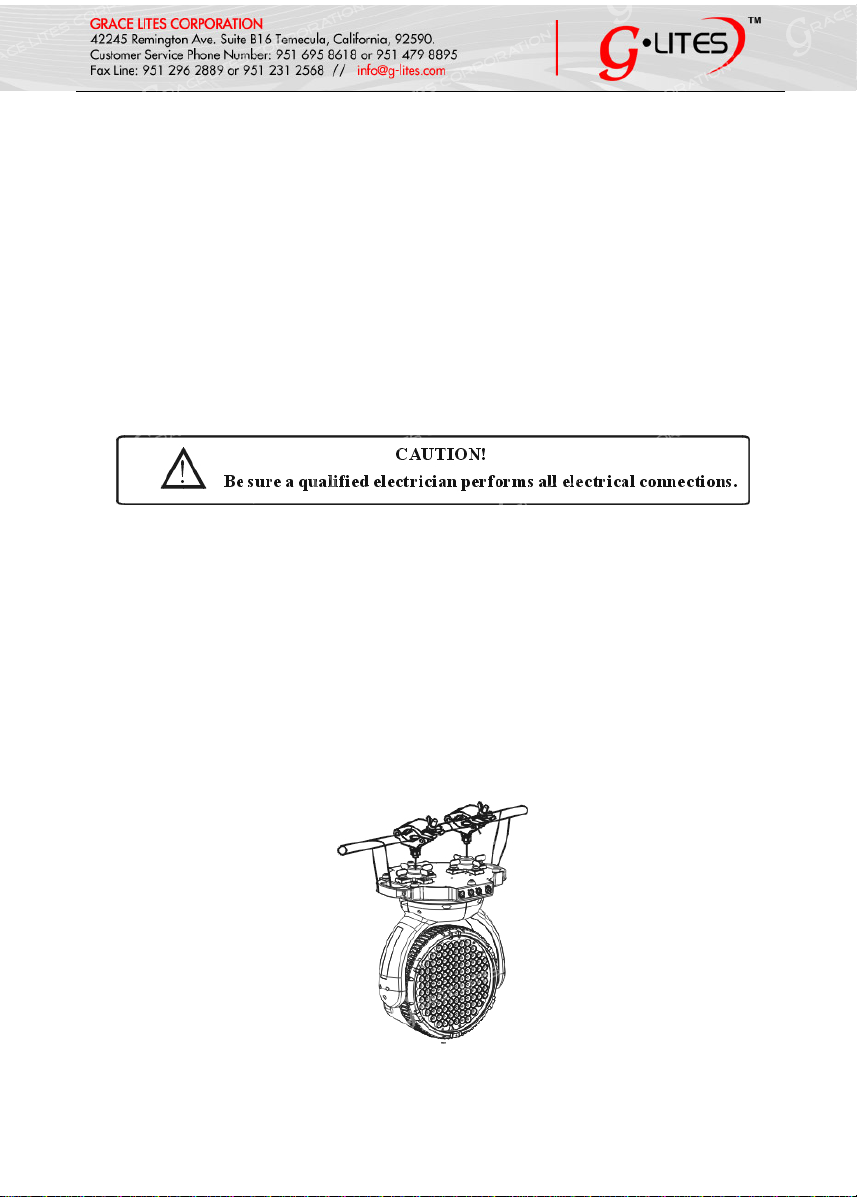
●3.These projectors are designed depends on the electric shock
protection, the projector should be connected with the power supply
system which connected ground enough. The projector's ground
cable should be connected with the ground cable of the power
supply system as well. The ground mark of the light metal cover
should be connecting with the installation bricked steadily.
●4.Connecting the main power supply should be done by a professional
person.
●5.Please check the voltage, frequency data of power supply system is
suitable for the mentioned on the projector. Please avoid
the different voltage between them and burn the projector.
●6.Do not attempt to operate this fixture if the power cord has become
damaged or frayed.
●7.Never open this fixture while in use.
●8.Never look directly into the light source. You risk injury to your
retina, which may induce blindness.
●9.Please be aware that damages caused by modifications to the device
are not subject to warranty.
Notice: To guarantee proper and consistent operation, it is
important to follow the guidelines in this manual. Our
company will not accept responsibility for damages
resulting from the misuse of this fixture due to the
disregard of the information printed in this manual.

Moon Lite User Manual 4
3. PERFORMANCE TRAITAND SKILL SPECIFICATIONS
PERFORMANCE TRAIT:
◎Lighting equipment is installed with 120pcs LED. We use EDISON
LED chip as default LED chip. Client also can choose LUXEON K2
high power LED chip.
◎Low power consumption, super luminance, rich and splendid color.
◎It adopt the LCD display ,as its operating in terrace, the words can also
be plus or reverse settled by 180°,very easy for using on the floor or
hang on.
◎With inner automatic run function, master/slave setting very easy to
operate by users.
◎The fixture´s shape adopts pressed construction design and strong
wind refrigeration system which be know as a good cooling system.
◎DMX channel: Three different DMX modes.
◎Standard DMX-512.
◎Color Mixing: RGBW color additive mixing.
◎Beam Angle: 15°lens / optional 45°Lens.
◎Dimmer: Continuous dimming 0~100%.
◎Strobe: Electronic strobe 0~18 Fps.
◎Life Span: 50,000 to 100,000 hours.

Moon Lite User Manual 5

Moon Lite User Manual 6
4. OPERATION PANEL
MOON LITE 120 DIP:
Display board at a fixed plate
At the end of cartons XLR plate
Box at the end of the power board

Moon Lite User Manual
7
5. DIMENSIONAL DRAWINGS
MOON LITE 120 DIP:

Moon Lite User Manual 8
6. PHOTOMETRIC DATA
15°lens
7. MOUNTINGAND INSTALLATION
Cautions:
For added protection mount the fixtures in areas outside walking
paths, seating areas, and away from areas were unauthorized personnel
might reach the fixture. Before mounting the fixture to any surface, make
sure that the installation area can hold a minimum point load of 10 times
the device's weight. Fixture installation must always be secured with a
secondary safety attachment, such as an appropriate safety cable. To
avoid injury, never stand directly below the device when mounting,
removing, or servicing the fixture.

Moon Lite User Manual 9
Mounting points:
Overhead mounting requires extensive experience, including among
others calculating working load limits, a fine knowledge of the
installation materials being used, and do periodic safety inspection of all
installation materials of the fixture. If you lack these qualifications, do
not attempt the installation by yourself. Improper installation can result
in bodily injury. Be sure to complete all rigging and installation
procedures before connecting the main power cord to the appropriate
wall outlet.
Mounting
Our company is fully operational in any mounting position, hanging
upside-down, side mounted, or set on a flat level surface, etc. Be sure this
fixture is kept at least 0.5m (1.5feet) away from any flammable materials
(decoration etc.).
When clamp serves as a support; always use and install the supplied
safety cable as an added safety measure to prevent accidental damage in
the event of a clamp fails. See the image below.

Moon Lite User Manual 10
8. POWER SUPPLYAND SIGNAL CONNECTION
1. Power supply
Use the professional plug to connect the projector and main power
supply. Please pay attention to the voltage, frequency the same as the
mentioned on the projector. Suggest each light has separately switched of
the power supply so that could turn on or turn off each projector
desultorily.
2. Signal connection
Please use the round 3-pin or 5-pin XLR plugs &sockets offered
by menu facture to connect the first projector's output to the second
projector' input and connect the second projector's output to the third
projector's input. And in the same way for the rest, eventually connect the
last projector's output, all the projectors are together as the following
figure.
The projectors’ control signal output or input by using the 3-pin or 5- pin
XLR pug and socket. If need to long then the communication cable,
please make sure the both side of 3-pin or 5-pin plug is one to one. (one
to one, two to two, three to three). Otherwise, the communication cable
will be interrupted. The communicate cable is 2-pin shielded cable 75Ω

Moon Lite User Manual 11
Resistance with each core is at least a 0.5mm diameter. (Caution: All the
inside leading wire of 3-pin XLR plug couldn't touch each other or
plinth).
Recommend to use the DMX signal terminator for the installation to
avoid the electronic noise damage the digital control signal. Simply
speaking, DMX terminator is an XLR connector with a 120Ω/1w resistor
connected across pin 2 and 3. Which is then plugged into the output
socket on the last projector in the chain. Refer to the connection as above:
(Picture). We suggest using the DMX signal distributor when the
distance of the lights over 15meter,In case of effect the light
communication because of the signal feeble.
3. Light power connection:
After doing the above operation and making sure all the projectors
have been installed with natural operate, press the power switch to check
whether everything is working normally.

Moon Lite User Manual 12
9. DISPLAY MENU
1、MOON LITE 120 DIP:

Moon Lite User Manual 13

Moon Lite User Manual 14
10. DMX TRAITS
MOON LITE 120 DIP DMX channel

Moon Lite User Manual 15
11. CLEANINGAND MAINTENANCE
■1. In order to ensure the projector could work normally. It should be
kept clean always .The lens should also be regularly cleaned to
maintain an optimum light output. Do not use any type of solvent on
lens. It will damage the projector.
■2. Suggestion: The continue usage of the light don't exceed 4 hours. Or
it will shorter the usage of the lamp. Please use the alternative
operation to solve this problem.
■3. Please disconnect the power supply when begin to maintenance take
down the light. Please let the parts cool down 10 minute at least
then begin to install.
■4. Please inspect the lens or other moving parts timing and keep them
clear and static. If find anything damaged or looseness must change
a lamp or fix the lamp in order to avoid the accident.

Moon Lite User Manual 16
12. TROUBLE DISPOSE
It is recommended some solution for some normal trouble shooting.
Any inextricability problems should always be handling by the
professional person. Disconnect the power supply before maintenance
the light.
●LED off:
1. Please check if install the suitable voltage
2. Please check whether the led will reach the end of their life can
explode; please replace a same description led.
3. Please check if the power supply is enough.
4. Please check whether the DMX 512 controller pass the "turn on"
order.
●Though the light is lighting, but it couldn't accept the control order:
1. Please check the start code address and the function option are
correct.
2. Please check whether the communicate control cable is on good
connection or the cable is too long or interrupt.
3. Please check the control system is not valid, check the signal
amplifier of chain connected is valid.
4. Please check whether the communicate cable is too long or the
other equipment is mutually conjugate.
5. Please arrange the wire well, shorter the signal cable, put the high
voltage cable and low voltage cable separately.
6. Add the signal amplify isolator.
7. Signal cable is used the excellent screening doublet (Resistance 75
OHM)
8. The end of the light ends and the end resistance.

Moon Lite User Manual 1
7
●The light can't move:
1. Please check if the power supply is suitable for the light voltage
data.
2. Please check the fuse of input voltage is defective.
3. Please check the light if it deforms, inside part is broken, becomes
wet, etc. It will lead to lose contact.

Moon Lite User Manual 18
13. CIRCUIT CONNECTING DIAGRAM
Moon Lite 120 Dip

Moon Lite User Manual 19
14. EXPLODE DIAGRAM AND LIST
Moon Lite 120 Dip
Table of contents
Other g-lites Lighting Equipment manuals
Popular Lighting Equipment manuals by other brands

Nicols
Nicols PAR LED 1418 Z IP user manual

RSA Lighting
RSA Lighting MINI ACCURUS ACM512ICMH Specification sheet

Chauvet Professional
Chauvet Professional COLOR Strike M user manual

Urrea
Urrea RFRU2 quick start guide

Blizzard Lighting
Blizzard Lighting HUSH PAR Theatrik user guide

EuroLite
EuroLite LED Disco Strobe user manual