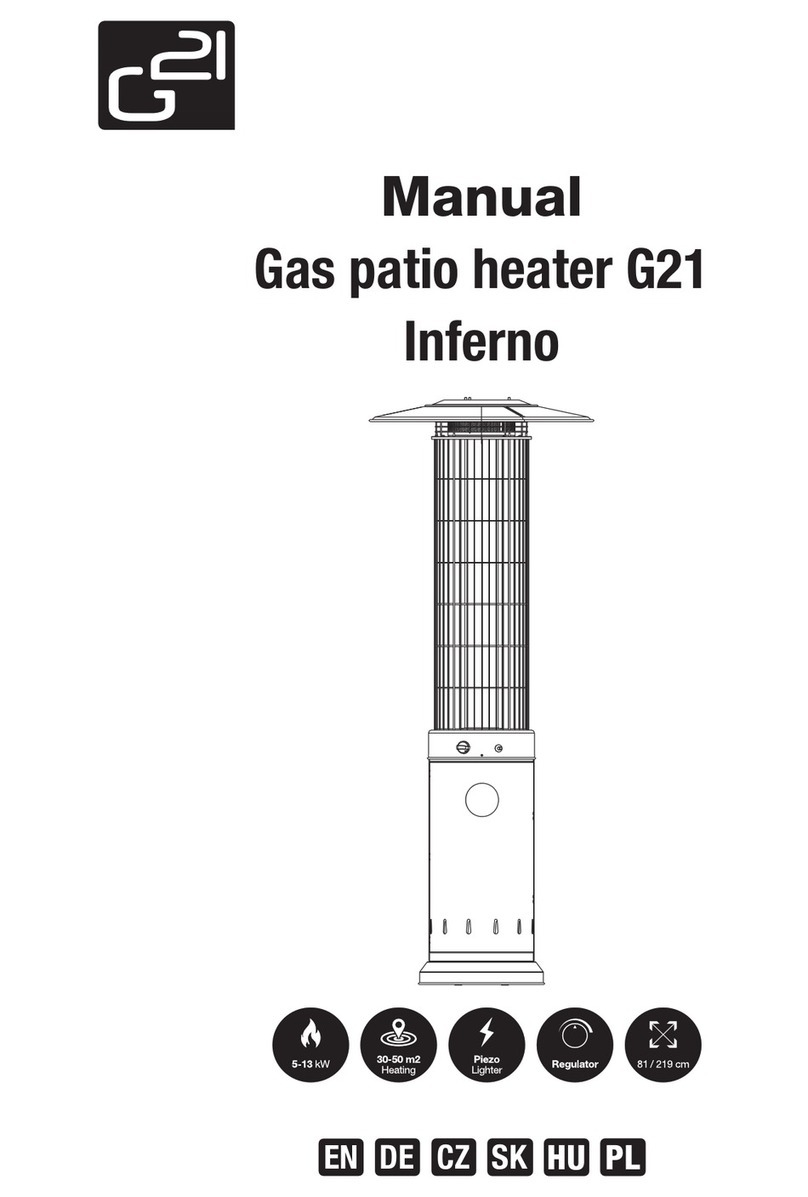
G21 Volcano User manual

HU PL
SK
DE
EN
CZ
Manual
Gas patio heater G21
Volcano


Thank you for purchasing our product.
Before using this unit, please read this manual.
Parts and specifications
1. Reflector
2. Top plate assy
3. Glass tube
4. Protective guard
5. Upper support
6. Front panel
7. Side panel
8. Lower support
9. Bottom plate
2270 mm
900 mm
455 mm
520 mm
1
2
3
4
5
6
7
8
9

Gas patio heater G21 Volcano
Warning
1. If you smell gas:
• Shut off gas supply to the appliance.
• If you still smell gas, immediately call your gas supplier or the fire department.
2. Do not store gasoline or any other flammable vapors/liquids near this appliance.
3. Designed for use outdoors or in amply ventilated areas
(minimum of 25 % of the surface area open – one open wall).
4. Improper installation, adjustment, alternation, service or
maintenance can cause injury or property damage. Read the
manual thoroughly before installing or using this appliance.
5. This appliance must be installed and stored in accordance
with the regulations in force.
6. Do not cover the ventilation holes of the cylinder housing.
Safety instructions
1. Do not use the patio heater for indoors, as it may cause personal injury or property damage.
2. This outdoor heater is not intended to be installed on recreational vehicles and/or boats.
3. Improper installation, adjustment, alteration can cause personal injury or property damage.
4. Do not attempt to alter the unit in any manner.
5. Never replace or substitute the regulator with any regulator other than the factory-suggested
replacement.
6. Do not store or use gasoline or other flammable vapors or liquids in the heater unit.
7. The whole gas system, hose, regulator, pilot or burner should be inspected for leaks or
damage before use, and at least annually by aqualified service person.
8. All leak tests should be done with asoap solution. Never use an open flame to check for
leaks. Do not use the heater until all connections have been leak tested.
9. Turn off the gas valve immediately if smell of gas is detected. Turn Cylinder Valve OFF. If
leak is at Hose/Regulator connection: tighten connection and perform another leak test.
If bubbles continue appearing should be returned to hose’splace of purchase. If leak is
at Regulator/Cylinder Valve connection: disconnect, reconnect, and perform another leak
7. Do not move the appliance when in use.
8. Shut off the valve of the gas cylinder or the regulator before moving the appliance.
9. The gas tube must be changed within the prescribed intervals.
10. Use only the type of gas and the type of cylinder specified by the manufacturer.
11. The gas tank used with this patio heater must meet the following requirements: 11-13 kg.
12. In case of strong wind blowing, attention must be taken against tilting of the appliance.
13. The injector in this appliance is not removable and is assembled by manufacturer only. It is
forbidden to convert from one gas pressure to another.
14. Do not connect the gas cylinder directly to the appliance without the regulator. Use only the
gas type and gas cylinder type specified in this manual.
• Use 30mbar regulator for butane/propane under the category I3B/P(30).
• Use 30mbar regulator for butane under the category I3+(28-30/37).
• Use 50mbar regulator for butane/propane under the category I3B/P(50).

check. If you continue to see bubbles after several attempts, cylinder valve is defective and
should be returned to cylinder’splace of purchase.
10. Do not transport heater while it’soperating.
11. Do not move the heater after it has been turned off until the temperature has cooled down.
12. Do not paint the radiant screen, control panel or top canopy reflector.
13. Control compartment, burner and circulation air passageways of the heater must be kept
clean.
14. Frequent cleaning may be required as necessary.
15. The LP tank should be turned off when the heater is not in use.
16. Check the heater immediately if any of the following occurs:
• The heater does not reach temperature.
• The burner makes popping noise during use (aslight noise is normal when the burner is
extinguished).
• Smell of gas in conjunction with extreme yellow tipping of the burner flames.
17. The LP regulator/hose assembly must be located out of pathways where people may trip
over it or in area where the hose will not be subject to accidental damage.
18. Any guard or other protective device removed for servicing the heater must be replaced
before operating the heater.
19. Adults and children should stay away from high temperature surface to avoid burns or
clothing ignition.
20. Children should be carefully supervised when they are in the area of the heater.
21. Clothing or other flammable materials should not be hung on the heater or placed on or near
the heater.
22. To change the gas cylinder in aamply ventilated area, away from any ignition source
(candle, cigarettes, other flame producing appliances).
23. To check that the regulator seal is correctly fitted and able to fulfill its function showed as
photo right;
24. To not obstruct the ventilation holes of the cylinder housing;
25. To close the gas supply at the valve of the gas cylinder or the regulator after use;
26. In the event of gas leakage, the appliance shall not be used or if alight, the gas supply shall
be shut off and the appliance shall be investigated and rectified before it is used again;
27. To check the hose at least once per month, each time the cylinder is changed or each time
before long time no use. If it shows signs of cracking, splitting or other deterioration it shall
be exchanged for new hose of the same length and of the equivalent quality;
28. Read the instructions before using
this appliance. The appliance must
be installed in accordance with the
instructions and local regulations.
29. For connection of hose and
regulator and connection of
regulator and hose, please refer to
photo showed below.

Heater position
The heater is primarily for outdoor use only. Always ensure that adequate fresh air ventilation is
provided.
Always maintain proper clearance to combustible materials, i.e. top 100 cm and sides 100 cm
minimum.
Heater must be placed on level firm ground.
Never operate heater in an explosive atmosphere like
in areas where gasoline or other flammable liquids or
vapors are stored.
Gas requirements
This heater is primarily designed to be used with propane gas tanks.
Butane gas tanks may also be used with the appropriate regulator.
The installation and use of this appliance must correspond with local standards, or in the
absence of local codes, with the standard for the storage and handling of liquid petroleum gases.
Adented, rusted or damaged propane tank may be hazardous and should be checked by your
tank supplier. Never use apropane tank with adamaged valve connection.
The propane tank must be arranged to provide for vapor withdrawal from the operating cylinder.
Never connect an unregulated propane tank to the heater.
Leakage test
Gas connections on the heater are leak tested at the factory prior to shipment. Acomplete gas
tightness check must be performed at the installation site due to possible mishandling in shipment
or excessive pressure being applied to the heater.
• Make asoap solution of one part liquid detergent and one part water. The soap solution can
be applied with aspray bottle, brush or rag. Soap bubbles will appear in case of aleak.
• The heater must be checked with afull cylinder.
• Make sure the safety
control valve is in the
OFF position.
• Turn the gas supply ON.
• In case of aleak, turn off
the gas supply. Tighten
any leaking fittings, then
turn the gas supply on
and recheck.
• Never leak test while
smoking.

Use and storage
To turn on:
Warning: Please ensure the glass tube has not been damaged during transportation.
1. Make sure the variable control knob is in OFF position.
2. Connect the gas regulator to acompatible gas cylinder.
3. Push and turn the variable control knob to PILOT position and hold it for 60 seconds. Whilst
still holding the control knob down, press the ignition button – apilot flame should appear.
4. Once the blue pilot flame stays lit up constantly, let go of the variable knob.
5. Turn the variable control knob to the desired temperature position.
• When lighting the heater on for the first time or aafter anew cylinder was connected, the air
inside the hose must be purged. This process will take afew minutes as liquefied petroleum
gas is heavier than air.
• To do so, press down the variable control knob down in PILOT position for about 3 minutes.
To turn off:
1. Turn the variable control knob to the PILOT position.
2. Press and turn it to OFF position.
3. Turn the regulator connected to the gas cylinder to the OFF position.
Storage
• Always turn the regulator connected to gas cylinder to OFF position after each use.
• Disconnect the regulator from the cylinder if the heater is not in use.
• Never store the gas cylinder indoors or without adequate air ventilation.
Cleaning and care
• Wipe off surfaces with soft, moist cloth. Do not clean the heater with cleaning products that
are combustible or corrosive.
• Remove debris and insects from the burner periodically to keep it clean and safe for use.
• Cover the burner unit with protective cover when the heater is not in use.
Construction and characteristics
• Transportable terrace/garden heater with cylinder housing.
• Constructed with aluminum, powder coated and stainless steel.
• Heat is emitted upwards through the glass tube and distributed via the top reflector.
Ignition Variable Control Knob

Specifications
• It is recommended to use propane gas tank only
• Max wattage: 13 000 watts
• Min wattage: 5 000 watts
• Consumption:
• Using the proper regulator according to the outlet pressure of regulator is explained above.
• The hose and regulator assembly must conform to local standard codes.
• The regulator outlet pressure should meet the corresponding gas category in the table of
injector.
• The appliance requires approved hose in 1.4 m length.
Technical details:
Appliance category: 3+(28-30/37) 3B/P(30) 3B/P(50) 3B/P(37)
Type of gas: Butane Propane
Butane,
propane,
their mixture
Butane,
propane, their
mixture
Butane,
propane, their
mixture
Gas pressure: 28 - 30
mbar 37 mbar 29 mbar 50 mbar 37 mbar
Outlet pressure of the
regulator:
30
mbar 37 mba 29 mbar 50 mbar 37 mbar
Injector:
Appliance category: 3+(28-30/37) 3B/P(30) 3B/P(50) 3B/P(37)
Type of gas: Butane Propane
Butane,
propane,
their mixture
Butane,
propane, their
mixture
Butane,
propane, their
mixture
Gas pressure: 28 - 30
mbar 37 mbar 29 mbar 50 mbar 37 mbar
Leistungsaufnahme gesamt: 13 kW (butan: 945 g/h, propan: 928 g/h
Injector size: 1,80 mm main burner
0,18 mm pilot burner
1,50 mm main
burner
0,18 mm pilot
burner
1,70 mm main
burner
0,18 mm pilot
burner
The marking (e.g. 1.90 on the injector) indicates that the
size of it is 1.90 mm. 0063/20

Problem Probable cause Solution
Pilot doesn’t light up • Gas regulator might be off
• Empty has tank
• Air in the hose/tube
• Loose connections
• Open it
• Replace it
• Clean or replace opening
• Control connections
Pilot doesn’t stay on • Debris around pilot
• Loose connections
• Bad thermocouple
• Gas leak in lines
• Low pressure
• Clean the area
• Control connections
• Replace it
• Control connections
• Tank nearly empty, refill it
Burner doesn’t work • Low pressure
• Control knob not on
• Bad thermocouple
• Dirty gas supply opening
• Tank nearly empty, refill it
• Open it
• Replace it
• Clean it
Řešení problémů
The English version of the manual is an exact translation of the original manufacturer‘sinstructions.
Images used in this manual are for illustrational purposes only and may differ from the actual product.

Danke dass Sie sich für unser Produkt entschieden haben.
Bevor Sie dieses Gerät verwenden, lesen Sie bitte diese Anleitung.
Beschreibung und Spezifikation
1. Reflektor
2. Oberteil
3. Glasrohr
4. Schutzhülle
5. Obere Stütze
6. Vorderteil
7. Seitenteil
8. Untere Stütze
9. Bodenplatte/Paneel
2270 mm
900 mm
455 mm
520 mm
1
2
3
4
5
6
7
8
9

Hinweise
1. Wenn Sie Gas riechen:
• Schalten Sie die Gasversorgung des Geräts aus.
• Wenn Sie immer noch Gas riechen, kontaktieren Sie Ihren Gasanbieter oder die Feuerwehr.
2. Lagern Sie keine brennbaren Substanzen oder nicht angeschlossenen Gasflaschen in der
Nähe des Geräts.
3. Verwenden Sie das Gerät nur im Freien oder in einem
ausreichend belüfteten Bereich (d.h. mindestens 25%
offener Fläche).
4. Eine unsachgemäße Installation, Einstellung, Änderung,
Wartung oder Instandhaltung kann zu Personen- oder
Sachschäden führen. Lesen Sie die Anweisungen zur
Installation, Betrieb und Wartung sorgfältig durch, bevor Sie
dieses Gerät installieren oder reparieren.
Sicherheitsanweisungen
1. Verwenden Sie das Gerät nicht in Innenräumen. Dies kann zu Verletzungen oder Schäden an
Ihrem Eigentum führen.
2. Das Gerät ist nicht für den Einbau in Freizeitfahrzeuge und/oder Boote vorgesehen.
3. Eine unsachgemäße Installation, Einstellung, Änderung, Wartung oder Instandhaltung kann
zu Personen- oder Sachschäden führen.
4. Versuchen Sie nicht, das Gerät in irgendeiner Weise zu modifizieren.
5. Ersetzen Sie den Regler nicht durch einen anderen als den vom Hersteller empfohlenen Typ.
6. Lagern oder verwenden Sie kein Benzin oder andere brennbare Dämpfe oder Flüssigkeiten
in dem Strahler.
7. Das gesamte Gassystem, die Schläuche, der Regler und der Zündbrenner sollten vor dem
ersten Gebrauch und dann einmal im Jahr auf Gasleckage oder Beschädigung überprüft
werden.
5. Dieses Gerät muss installiert und die Gasflasche gemäß den geltenden Vorschriften gelagert
werden.
6. Decken Sie die Belüftungsöffnungen der Abdeckung der Gasflasche nicht ab.
7. Bewegen Sie das Gerät nicht, während es in Betrieb ist.
8. Schließen Sie das Ventil an der Gasflasche oder trennen Sie den Gasregler, bevor Sie das
Gerät bewegen.
9. Der Gasschlauch muss innerhalb der vorgeschriebenen Frist ausgetauscht werden.
10. Verwenden Sie nur die vom Hersteller angegebenen Gas- und Gasflaschentyp.
11. Die Gasflasche für dieses Gerät muss den folgenden Gewichtsbereich erfüllen: 11-13 kg.
12. Bei starkem Wind im Freien muss besonders darauf geachtet werden, dass das Gerät nicht
umkippt.
13. Der Injektor in diesem Gerät ist nicht abnehmbar. Es ist verboten, dieses Gerät von einem
Gasdruck in einen anderen umzuwandeln.
14. Schließen Sie die Gasflasche nicht ohne Regler direkt an das Gerät an. Verwenden Sie nur
die in der Anleitung angegeben Art des Gases und der Gasflasche.
• Für Propan/Butan in der Kategorie I3B/P (30) ist ein Regler für 30 mbar zu nutzen.
• Für Butan ist ein Regler für 30mbar der Kategorie I3 + (28-30/37) zu nutzen.
• Für Propan ist ein Regler für 37 mbar der Kategorie I3 + (28-30/37) zu nutzen.
• Für Propan/Butan in der Kategorie I3B/P (50) ist ein Regler für 50 mbar zu nutzen.

8. Alle Dichtheitsprüfungen sollten mit einer Seifenlösung durchgeführt werden. Verwenden Sie
zur Überprüfung der Dichtigkeit niemals eine offene Flamme.
9. Wenn Sie Gas riechen, schließen Sie sofort das Ventil der Gasflasche. Wenn der Schlauch/
Regler undicht ist: Ziehen Sie die Verbindung fest und führen Sie eine weitere Überprüfung
durch. Wenn weiterhin Blasen auftreten, ersetzen Sie den Schlauch. Wenn die Verbindung
zwischen Regler und Gasflasche undicht ist: Trennen Sie diese, schließen Sie sie wieder an
und führen Sie eine erneute Überprüfung durch. Wenn Sie nach mehreren Versuchen immer
noch Blasen sehen, ist das Ventil der Gasflasche defekt - ersetzen Sie es.
10. Bewegen Sie das Gerät nicht, während es in Betrieb ist.
11. Bewegen Sie das Gerät nach dem Ausschalten erst, wenn es abgekühlt ist.
12. Halten Sie die Lüftungsöffnungen frei und frei von Schmutz.
13. Lackieren Sie nicht die Brennerabdeckung, das Bedienfeld oder die obere Abdeckung des
Reflektors.
14. Die Steuerkomponenten, der Brenner und die Luftzirkulationskanäle des Geräts müssen
sauber gehalten werden.
15. Reinigen Sie das Gerät regelmäßig.
16. Schließen Sie das Ventil der Gasflasche, wenn das Gerät nicht in Betrieb ist.
17. Schalten Sie das Gerät sofort aus und überprüfen Sie es, wenn eine der folgenden Situationen
eintritt:
• Der Strahler erreicht nicht die erforderliche Temperatur.
• Der Brenner macht während des Gebrauchs ein knackendes Geräusch (ein leichtes Geräusch
ist normal, wenn der Brenner ausgeht).
• Sie riechen Gas in Verbindung mit einer extrem gelben Farbe der Brennerflammen.
18. Der verbundene Regler/Schlauch der Gasflasche dürfen sich nicht in einem Bereich
befinden, in dem Personen darüber stolpern könnten.
19. Alle schützenden Teile des Geräts müssen nach dem Entfernen vor der weiteren
Verwendung ausgetauscht werden.
20. Halten Sie immer einen ausreichenden Abstand zum Strahler ein. Aufgrund der
Temperaturen, die bei Verwendung des Geräts erreicht werden, können Verbrennungen
auftreten.
21. Lassen Sie Kinder nicht unbeaufsichtigt in der Nähe des Geräts.
22. Hängen Sie keine Kleidung oder andere brennbare Gegenstände an oder in die Nähe des
Strahlers auf.
23. Wechseln Sie die Gasflasche in einer ausreichend belüfteten Umgebung in ausreichendem
Abstand zu brennbaren
Gegenständen (Kerzen, Zigaretten,
andere brennbare Gegenstände).
24. Überprüfen Sie, ob der Regler wie
gezeigt ordnungsgemäß montiert
ist.
25. Stellen Sie sicher, dass die
Belüftungsöffnungen der
Gasflasche immer offen sind.
26. Schalten Sie nach dem
Ausschalten des Geräts immer die
Gaszufuhr zur Gasflasche aus.

Überprüfung der Dichtheit
Für den Gasanschluss dieses Geräts
wird vom Hersteller immer eine
Dichtheitsprüfung durchgeführt,
bevor das Produkt an den Kunden
gesendet wird. Nach der Installation
des Geräts muss der Kunde jedoch
eine vollständige ordnungsgemäße
Dichtheitsprüfung durchführen.
Während des Transports können
Schäden auftreten.
• Mischen Sie eine 1: 2 Lösung aus Seife und Wasser. Die Lösung kann mit einem Spray,
Pinsel oder Tuch aufgetragen werden. Bei schlechter Dichtheit treten Blasen auf.
• Das Gerät muss mit einer vollen Gasflasche überprüft werden.
• Stellen Sie sicher, dass der Regulierknopf auf OFF steht.
• Schalten Sie die Gasversorgung ein.
Platzierung des Strahlers
Dieses Gerät ist für den Außenbereich vorgesehen. Stellen Sie daher sicher, dass während des
Betriebs eine ausreichende Frischluftzirkulation gewährleistet ist.
Halten Sie das Gerät immer von brennbaren Materialien fern (1 Meter an den Seiten und 1 Meter
von der Oberseite des Geräts nach oben).
Das Gerät muss auf einer ebenen und stabilen Oberfläche aufgestellt
werden.
Betreiben Sie das Gerät niemals in der Nähe explosiver Gegenstände
(z. B. an Orten, an denen Sie Benzin oder andere brennbare
Flüssigkeiten aufbewahren).
Anforderungen an das Gas
Verwenden Sie für dieses Gerät nur die vom Hersteller empfohlene
Gasart.
Die Installation und der Betrieb des Geräts müssen den örtlichen
Vorschriften entsprechen. Falls keine lokalen Vorschriften vorhanden
sind, halten Sie sich an die Standardverfahren für die Lagerung und
Handhabung von Flüssiggas.
Eine mangelhafte, verrostete oder beschädigte Gasflasche kann gefährlich sein und sollte von
einem Spezialisten auf Sicherheit überprüft werden. Verwenden Sie niemals eine Gasflasche mit
einem beschädigten Ventilanschluss.
Die Gasflasche muss so positioniert sein, dass Dämpfe aus der Flasche entweichen können.
Schließen Sie niemals eine ungeregelte Gasflasche an das Gerät an.
27. Schalten Sie im Falle eines Gaslecks das Gerät aus, trennen Sie die Gasversorgung
vorsichtig von der Flasche und überprüfen Sie das Gerät nach dem Abkühlen.
28. Überprüfen Sie den Schlauch mindestens einmal im Monat, jedes Mal, wenn Sie die
Gasflasche wechseln und wenn das Gerät längere Zeit nicht benutzt wurde. Wenn Sie
Anzeichen von Rissen oder anderen Schäden am Schlauch sehen, ersetzen Sie diesen
durch einen neuen Schlauch gleicher Länge und Qualität.
29. Das Gerät muss gemäß den geltenden Vorschriften installiert werden.
30. Verwenden Sie die obere Abbildung, um den Schlauch und den Regler anzuschließen.

• Schalten Sie bei einem Gasleck die Gasversorgung aus. Ziehen Sie die zuständige Dichtung
fest, schalten Sie das Gas wieder ein und wiederholen Sie den Test.
• Rauchen Sie niemals, wenn Sie die Dichtheitsprüfung durchführen.
Nutzung und Lagerung
Zündknopf Regulierknopf
Einschalten des Geräts:
Achtung: Stellen Sie sicher, dass das Glasrohr
während des Transports nicht beschädigt wurde.
1. Stellen Sie sicher, dass der Regulierknopf auf OFF
steht.
2. Schließen Sie den Regler an die Gasflasche an.
3. Drücken, drehen und halten Sie den Regulierknopf
60 Sekunden lang in der Position PILOT.
Drücken Sie dabei den Zündknopf - es sollte eine
Zündflamme erscheinen.
4. Sobald die ZÜNDFLAMME stabil ist, lassen Sie den Regulierknopf los.
5. Stellen Sie die gewünschte Temperatur mit dem Regulierknopf ein.
Wichtig:
• Wenn Sie das Gerät nach dem Anschließen an eine neue Gasflasche zum ersten Mal
einschalten, muss die Luft im Schlauch entfernt werden. Dieser Vorgang kann einige
Minuten dauern, da Flüssiggas schwerer als Luft ist.
• Um Luft aus dem Schlauch zu entfernen, halten Sie den Steuerknopf etwa 3 Minuten lang in
der Position PILOT.
Ausschalten der Geräts
• Drehen Sie den Regulierknopf in die Position PILOT.
• Drücken Sie und drehen Sie den Knopf in die Position OFF.
• Drehen Sie den Regler an der Gasflasche in die Position OFF.
Lagerung
• Drehen Sie den Regulator nach dem Ausschalten des Geräts immer in die Position OFF.
• Trennen Sie die Gasflasche vom Gerät, wenn Sie es nicht benutzen.
• Lagern Sie Gasflaschen niemals in unbelüfteten Bereichen.
Reinigung und Instandhaltung
• Wischen Sie das Gerät mit einem weichen, feuchten Tuch ab. Reinigen Sie das Gerät nicht
mit brennbaren oder ätzenden Reinigungsmitteln.
• Reinigen Sie das Gerät regelmäßig von Schmutz und Insekten, um es für weitere
Verwendung sauber und sicher zu halten.
• Wenn Sie das Gerät nicht verwenden, decken Sie es mit einer Schutzhülle ab.
Konstruktion und Eigenschaften
• Tragbarer Garten- / Terrassenstrahler mit Platz für eine Gasflasche.
• Aus pulverbeschichtetem Aluminium und Edelstahl.
• Wärmeerzeugung vom Gerät durch ein Glasrohr.

Spezifikation
• Für dieses Gerät eignet sich am meisten eine Propan-Gasflasche.
• max. Leistungsaufnahme: 13kw
• min. Leistungsaufnahme: 5kw
• Verbrauch:
• Die Verwendung des richtigen Reglers in Abhängigkeit vom Ausgangsdruck wird in der obigen
Tabelle erläutert.
• Der Schlauch und Regler müssen den örtlichen Vorschriften entsprechen.
• Der Reglerausgangsdruck sollte der entsprechenden Gaskategorie in der Tabelle des Injektor
entsprechen.
• Das Gerät benötigt einen 1 m langen Schlauch.
Technische details:
Gerätekategorie: 3+(28-30/37) 3B/P(30) 3B/P(50) 3B/P(37)
Gasart: Butan Propan Butan, Propan,
Gemisch
Butan, Propan,
Gemisch)
Butan,
Propan,
Gemisch
Gasdruck: 28 - 30
mbar
37
mbar 29 mbar 50 mbar 37 mbar
Reglerausgangsdruck: 30
mbar 37 mba 29 mbar 50 mbar 37 mbar
Tabelle für den Injektor
Gerätekategorie: 3+(28-30/37) 3B/P(30) 3B/P(50) 3B/P(37)
Gasart: Butan Propan Butan, Propan,
Gemisch
Butan, Propan,
Gemisch
Butan,
Propan,
Gemisch
Gasdruck: 28 - 30
mbar
37
mbar 29 mbar 50 mbar 37 mbar
Leistungsaufnahme gesamt: 13 kW (butan: 945 g/h, propan: 928 g/h
Injektor-Größe: 1,80 mm Hauptbrenner
0,18 mm Zündbrenner
1,50 mm
Hauptbrenner
0,18 mm
Zündbrenner
1,70 mm
Hauptbrenner
0,18 mm
Zündbrenner
Die Kennzeichnung z.B. 1,90 auf dem Injektor bedeutet
seine Größe.. 0063/20

Problem Wahrscheinliche Ursache Lösung
Zündbrenner
zündet nicht
• geschlossene
Gasversorgung
• Kein Gas in der Flasche
• Luft in der Säule/
Schlauch
• Lose Dichtung
• Öffnen Sie diese
• Gasflasche ersetzen
• Luft entfernen
• Alle Dichtungen
Kontrollieren
Zündbrenner
erlöscht nach
kurzer Zeit
• Schmutz in Nähe des
Zündbrenners
• lose Verbindungen
• Schlechtes
Thermoelement
• Gasleck in der Säule
• niedriger Druck
• Die Umgebung reinigen
• Dichtungen/Anschlüsse
prüfen
• Teil ersetzen
• Dichtungen/Anschlüsse
prüfen
• Gasflasche fast leer,
nachfüllen/ersetzen
Der Brenner zündet
nicht
• niedriger Druck
• Ventil geschlossen
• Schlechtes
Thermoelement
• verstopfte Gasversorgung
• Gasflasche fast leer,
nachfüllen/ersetzen
• Ventil öffnen
• Teil ersetzen
• Gasversorgung reinigen
Problemlösungen
Die deutsche Version der Anleitung ist eine genaue Übersetzung der Anleitung des Herstellers.
Die in diesem Handbuch verwendeten Bilder dienen nur zur Illustration und können nicht genau
das Produkt entsprechen.

Děkujeme za nákup našeho výrobku.
Před použitím přístroje si prosím přečtěte tento návod.
Popis aspecifikace
1. Reflektor
2. Sestava horní desky
3. Skleněná trubice
4. Ochranný kryt
5. Horní podpora
6. Přední panel
7. Boční panel
8. Spodní podpora
9. Spodní plát/panel
2270 mm
900 mm
455 mm
520 mm
1
2
3
4
5
6
7
8
9

Upozornění
Pokud cítíte plyn:
1. Vypněte přívod plynu do zařízení.
2. Pokud vznikl požár, uhaste jej.
3. Pokud inadále cítíte plyn, kontaktujte distributora plynu nebo hasiče.
4. Neskladujte vblízkosti zařízení žádné hořlavé látky ani nepřipojenou plynovou bombu.
5. Zařízení používejte pouze venku nebo vdostatečně větraném
prostoru (otevřený prostor minimálně 25 % plochy).
6. Nesprávná instalace, seřízení, úpravy, servis nebo údržba
může způsobit zranění nebo poškození majetku. Přečtěte si
důkladně pokyny kinstalaci, provozu aúdržbě před instalací
nebo opravou tohoto zařízení.
7. Tento spotřebič musí být nainstalován a plynová bomba
uskladněna vsouladu splatnými předpisy.
8. Nezakrývejte ventilační otvory krytu bomby.
Bezpečnostní instrukce
1. Nepoužívejte zařízení ve vnitřních prostorách. Mohlo by dojít ke zranění nebo poškození
vašeho majetku.
2. Zařízení není určeno kinstalaci na rekreační vozidla a/nebo lodě.
3. Nesprávná instalace, seřízení, úpravy, servis nebo údržba může způsobit zranění nebo
poškození majetku.
4. Nepokoušejte se jakýmkoli způsobem zařízení upravovat.
5. Nenahrazujte regulátor jiným typem než doporučeným od výrobce.
6. Vtopidle neskladujte ani nepoužívejte benzín nebo jiné hořlavé páry nebo kapaliny.
7. Celý plynový systém, hadice, regulátor azapalovací hořák by měly být před prvním užitím
zkontrolovány pro případné propuštění plynu nebo poškození, poté vždy jednou za rok.
8. Všechny zkoušky těsnosti by měly být prováděny smýdlovým roztokem. Nikdy ke kontrole
těsnosti nepoužívejte otevřený plamen.
9. Pokud cítíte zápach plynu, okamžitě vypněte plynový ventil avypněte ventil bomby. Pokud je
netěsnost na hadici/připojení regulátoru: utáhněte připojení aproveďte další zkoušku těsnosti.
Pokud se bubliny nadále objevují, vyměňte hadici. Pokud je netěsnost na připojení regulátoru/
9. Nehýbejte se spotřebičem, když je vprovozu.
10. Než budete se zařízením hýbat, uzavřete ventil na plynové bombě nebo regulátor zařízení.
11. Plynová hadice musí být vyměněna během předepsaného období.
12. Používejte pouze typ plynu atyp bomby specifikovaný výrobcem.
13. Plynová bomba pro toto zařízení musí splňovat následující váhové rozmezí: 11-13 kg.
14. Vpřípadě prudkého větru je třeba věnovat zvláštní pozornost naklonění spotřebiče.
15. Injektor (vstřikovač) v tomto zařízení není odnímatelný. Je zakázáno toto zařízení převést
zjednoho tlaku plynu na jiný tlak.
16. Nepřipojujte plynovou bombu přímo kzařízení bez regulátoru. Používejte pouze typ plynu
atyp bomby uvedené vpokynech.
• Pro butan/propan vkategorii I3B/P (30) použijte regulátor 30 mbar.
• Pro butan použijte regulátor 30mbar kategorie I3 + (28-30/37).
• Použijte regulátor 37 mbar pro propan kategorie I3 + (28-30/37).
• Pro kategorii butan/propan vkategorii I3B/P (50) použijte regulátor 50 mbar.

válce: odpojte jej, znovu jej připojte aproveďte další kontrolu těsnosti. Pokud nadále vidíte
bubliny ipo několika pokusech, ventil válce je vadný – vyměňte jej.
10. Se zařízením nehýbejte, když je vprovozu.
11. Po vypnutí se zařízením nehýbejte, dokud se neochladí.
12. Udržujte ventilační otvory válce volné abez nečistot.
13. Nebarvěte kryt hořáku, kontrolní panel ani vrchní kryt reflektoru.
14. Kontrolní/ovládací součásti, hořák acirkulační průchody vzduchu ohřívače musí být udržovány
čisté.
15. Zařízení pravidelně čistěte.
16. Vypněte plynovou bombu, pokud není zařízení vprovozu.
17. Okamžitě vypněte azkontrolujte zařízení, pokud nastane některá znásledujících situací:
• Ohřívač nedosahuje požadované teploty.
• Hořák vydává během používání praskavý zvuk (při zhasnutí hořáku je lehký hluk normální).
• Cítíte plyn ve spojení sextrémně žlutým zbarvením plamenů hořáku.
18. Sestava regulátoru/hadice plynové bomby nesmí být umístěna vprostoru, kde by oni lidé
mohli zakopnout.
19. Jakákoliv ochranná část zařízení musí být po vyjmutí nahrazena před jeho dalším používáním.
20. Vždy buďte vdostatečné vzdálenosti od topidla. Kvůli teplotám, kterých při užívání zařízení
dosahuje, by mohlo dojít kpopálení.
21. Nenechávejte děti bez dohledu vblízkosti zařízení.
22. Nevěšte oblečení ani jiné hořlavé věci na nebo vblízkosti topidla.
23. Plynovou bombu měňte v dostatečně větraném prostředí v dostatečné vzdálenosti od
hořlavých předmětů (svíčky, cigarety, jiné hořlavé předměty).
24. Zkontrolujte, že regulátor je řádně zajištěný dle obrázku.
25. Dbejte, aby ventilační otvory plynové bomby vždy byly otevřené.
26. Po vypnutí zařízení vždy uzavřete přívod plynu zbomby.
27. Vpřípadě unikání plynu zařízení vypněte, opatrně odpojte přívod plynu zbomby azařízení po
vychladnutí zkontrolujte.
28. Zkontrolujte hadici alespoň jednou měsíčně, pokaždé když měníte plynovou bombu akdyž
zařízení nebylo dlouho používáno. Pokud vidíte známky prasklin, rozdělení nebo jiné poškození
hadice, vyměňte ji za novou hadici stejné délky akvality.
29. Zařízení musí být nainstalováno vsouladu splatnými nařízeními.
30. Hadici aregulátor napojte podle tohoto obrázku.

Umístění topidla
• Toto zařízení je určeno pro venkovní použití. Ujistěte se tedy, že při provozu je zajištěna
adekvátní cirkulace čerstvého vzduchu.
• Zařízení vždy udržujte vdostatečné vzdálenosti od hořlavých materiálů (1 metr po stranách
a1 m od horní části zařízení nahoru).
• Zařízení musí být umístěno na rovném a stabilním
povrchu.
• Nikdy zařízení neprovozujte vpřítomnosti výbušných
předmětů (např. místa, kde skladujete benzín nebo
jiné hořlavé kapaliny).
Plynové požadavky
• Stímto zařízením používejte výhradně plynové bomby plněné propanem.
• Plynová bomba plněný butanem může být stímto zařízením také použita, ale pouze se
správným regulátorem.
• Instalace aprovoz zařízení musí odpovídat místním předpisům. Vpřípadě absence těchto
předpisů dodržujte standartní postupy pro skladování amanipulaci skapalnými ropnými
plyny.
• Potlučená, zrezivělá nebo poškozená plynová bomba může být nebezpečná aměla
by být zkontrolována pro bezpečnost použití odborníkem. Nikdy nepoužívejte bombu
spoškozeným připojením ventilu.
• Plynová bomba musí být nastavena tak, aby umožňovala odvod par zválce.
• Nikdy kzařízení nepřipojujte neregulovanou plynovou bombu.
Zkouška těsnosti
U plynového napojení tohoto zařízení je vždy provedena zkouška těsnosti dodavatelem před
odesláním zboží zákazníkovi. Nicméně kompletní řádná zkouška těsnosti musí být provedena
zákazníkem po instalaci zařízení. Pozor na možné poškození během přepravy – před použitím
napojení vždy důkladně zkontrolujte.
• Vytvořte si roztok
zmýdla avody
vpoměru 1:2. Roztok
může být aplikován
pomocí rozprašovače,
štětce nebo hadříku.
Vpřípadě špatné
těsnosti se objeví
bubliny.
• Zařízení musí být
kontrolováno splnou
plynovou bombou.
• Ujistěte se, že
bezpečností regulační
ventil je uveden do
Table of contents
Languages:
Other G21 Patio Heater manuals
Popular Patio Heater manuals by other brands

Hotspot
Hotspot Spiral user guide

Westinghouse
Westinghouse WES31-15110BLK instruction manual

Elnur
Elnur IDP-2000 Installation instructions and user guide

Paramount Fitness
Paramount Fitness 63049 manual

Optimum
Optimum GPS-2000 operating instructions

Nexgrill
Nexgrill 920-00330 Installation instructions and owner's manuals