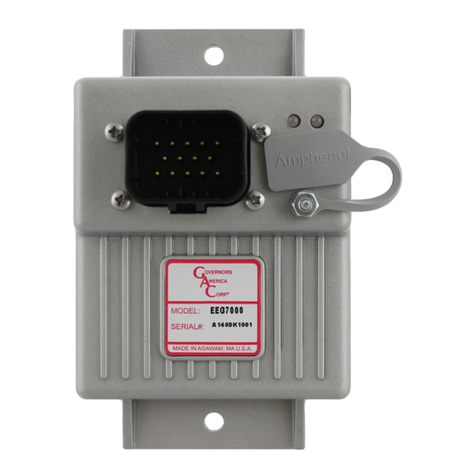
GAC EEG7500 User manual

1
Governors America Corp. © 2021 Copyright All Rights Reserved
EEG7500 Enhanced Electric Governor 1-2021-A6 PIB5115
EEG7500
Enhanced Electronic Speed Controller
1INTRODUCTION
GAC’s EEG7500 enhanced electronic speed controller is designed to regu-
late engine speed on diesel and gaseous fueled engines. When paired with
a GAC actuator the EEG is a suitable upgrade for any mechanical gover-
nor system that needs exibility, precision, or accurate control of governed
speed. The EEG7500 is designed for industrial engine applications from
generator sets, mechanical drives, pumps, and compressors to o-road mo-
bile equipment. Conguring is easy with GAC’s free GACong Tool software.
The EEG7500 supports:
Flexible actuator compatibility including bidirectional actuators with or
without actuator position feedback signal, bi-directional torque motors,
and Bosch-style throttle bodies.
Fully congurable digital and analog inputs and outputs
Inputs: 5 analog, 2 digital
Outputs: 1 analog, 3 digital
0 - 5 V DC, 4 - 20 mA, 0 - 10 V DC ±3 V Input Ranges
Speed Sync using CAN bus
Virtual Input/Output Routing
Feedback Speed Control Mode
Variable Speed Capability
Fuel Curve
EEG7500 supports three operating modes:
Non-Feedback Speed Control (NFSC) provides standard PID governing function for use with proportional actuators. No position
feedback sensor is required. PID (Proportional, Integral, Derivative) governor functions are optimized for best response and control
of the requested engine revolutions per minute (RPM).
Positioner Mode (PM) provides actuator positioning control and is used with proportional actuators or bidirectional (torque motor)
actuators. A position feedback sensor is required. PID positioner functions are optimized for best response and control of the
requested actuator position.
Feedback Speed Control (FSC) combines NFSC and PM modes for use with proportional or bidirectional (torque motor) actuators.
A position feedback sensor is required. The Speed PID position request is the input to the Positioner loop, the Position PID
optimizes response and control of the requested actuator position.
2
PERFORMANCE
Isochronous Operation ± 0.25 %
Governed Speed /
Sensor Frequency Range 100 - 12 kHz
Droop Range Up to 25 % regulation
COMPLIANCE / STANDARDS
Agency CE and RoHS Requirements
Communications USB, RS-232-C, SAE J1939
PHYSICAL
Dimension See Section 3, Controller Installation
Weight 18.4 oz [0.52 kgf]
Mounting Any position, vertical preferred
RELIABILITY
Vibration 10 - 2000 Hz @ 7 g, per SAE J1455
Shock 20 g, 11 ms per SAE J1455
Testing 100 % Functional Testing
LED
Solid Green Ready. Controller is powered on.
Blinking Green Warning. Engine service due, or other. Dis-
played in GACong Tool System Status.
Unlit No power.
INPUT / OUTPUT
Supply 12 - 24 V DC Battery systems
(6.5 to 32 V DC)
Polarity Negative Ground (Case Isolated)
Power Consumption 200 mA continuous plus actuator current
400 mA with excitation at MAX load current
Speed Sensor Signal Input 1.0 - 60.0 V RMS
Actuator Output 10 A Continuous
Load Share /
Synchronizer Input
0 - 10 V DC (5 V Nominal, Selectable
Polarity, 145 Hz / V Sensitivity)
or 0 V ± 3 V DC
Reverse Power Protection Protected to -40 V DC
Transient Voltage Protection 60 V DC
Digital Switch Output(s) Rated to 2 A DC
ENVIRONMENTAL
Ambient Temperature -40 to 85 °C [-40 to 180 °F]
Relative Humidity up to 90 % Non-Condensing
at 38 °C [100 °F] (per SAE J1455)
Salt Spray ASTM B117
All Surface Finishes Fungus Proof and Corrosion Resistant
EEG7500 SPECIFICATIONS

2
Governors America Corp. © 2021 Copyright All Rights Reserved
EEG7500 Enhanced Electric Governor 1-2021-A6 PIB5115
3EEG7500 CONTROLLER INSTALLATION
The following connectors are required when using the EEG7500.
ITEM NO. PART NUMBER DESCRIPTION NOTE
1EC02-01-0097 PLUG, 4 POS Included
2EC02-01-0094 PLUG, 11 POS, Included
3 EC12-04-0016 USB COVER Included
4 EC02-01-0098 PLUG, 12 POS Included
EEG7500 CONNECTORS
Mount in a cabinet,
engine enclosure, or
sealed metal box. En-
sure adequate ventila-
tion for cooling.
Do not mount directly on
engine.
Vertical orientation
allows for draining
of uids in moist
environments.
Avoid extreme heat.
Do not mount next to
turbocharger, exhaust
manifold, or other high
temperature equip-
ment.
Dimensions [mm] in
Use an overspeed shutdown device, independent of the governor system, to prevent loss of engine
control which may cause personal injury or equipment damage.
Do not rely exclusively on the governor system electronic actuator to prevent overspeed.
A secondary shuto device, such as a fuel solenoid must be used.

3
Governors America Corp. © 2021 Copyright All Rights Reserved
EEG7500 Enhanced Electric Governor 1-2021-A6 PIB5115
4EEG7500 CONTROLLER WIRING
TERMINAL DEFINITION CONNECTION GAUGE FIXED SPEED VARIABLE SPEED POSITIONER
AActuator (+) Actuator 16 REQUIRED REQUIRED REQUIRED
B Actuator (-) 16 REQUIRED REQUIRED REQUIRED
C Battery Ground (-) 12 or 24 V DC Battery 16 REQUIRED REQUIRED REQUIRED
D Battery Power (+) 16 REQUIRED REQUIRED REQUIRED
1 Magnetic Pick-up (+) Magnetic Pick-up magnetic
speed sensor input is not
polarity sensitive. Follow
Recommendation 3 in this
table.
20 REQUIRED REQUIRED
2
Magnetic Pick-up (-) 20 REQUIRED REQUIRED
3
Digital Input 1 Switch or jumper wire to
Terminal 5
20 REQUIRED with
more than 2 speed
settings
REQUIRED with Idle
speed setting used
REQUIRED with
position select
4
Digital Input 2 Switch or jumper wire to
Terminal 5
20 REQUIRED with
3 speed settings
used
REQUIRED when
using additional xed
settings
REQUIRED when
using additional
positions
5
Digital Ground
(GND)
20 REQUIRED when
Terminals 3 and 4
used
REQUIRED when
Terminals 3 and 4
used
REQUIRED when
Terminals 3 and 4
used
6Analog Ground
(GND)
20 REQUIRED REQUIRED
7
Analog Input 1 0 - 5 V DC, potentiometer
or 4-20 mA
(200 Ω resistor required)
20 REQUIRED REQUIRED IF
using POSITIONER
mode (Position 4)
8
Analog Input 2 0 - 10 V DC (5 V Nominal)
OR ±3 V DC (0 V Nominal).
Selectable polarity.
20
9 Analog Input 3 4 - 20 mA 20
10 Analog Input 4
0 - 5 V DC (4 - 20 mA with
200 Ω
external resistor)
20
11
+ 5 V Excitation 20 REQUIRED with
potentiometer on
Terminal 7
REQUIRED with
potentiometer on
Terminal 7
12 + 5 V Excitation Actuator Position
Feedback Sensor
20 REQUIRED with
POSITIONER Mode
(POS)
REQUIRED with
POSITIONER Mode
(POS)
REQUIRED
13 Analog Input 5 REQUIRED
14 Analog Reference
Ground
REQUIRED
15 Analog Output 0 - 5 V DC
(25 mA MAX)
20
16 Digital Switch
Output 1
Switch output 2 A MAX 20
17 Digital Switch
Output 2
Switch output 2 A MAX 20
18 Digital Switch
Output 3
Switch output 2 A MAX 20
19 CAN Low J1939 BUS, Non Terminat-
ed. Follow Recommenda-
tion 3 in this table.
20
20 CAN High 20
21 RS232
Ground Reference
20
22 RS232 TX 20
23 RS232 RX 20
RECOMMENDATIONS
1.
Use shielded cable on all external connections to the EEG7500 controller. Ground one end of each shield, including the speed sensor
shield, to a single point on the EEG case.
2. Ground controller case to battery (-)
3. For magnetic pickups and CAN bus, use twisted wires at 14 turns per foot in wire length.
The following wiring connections are available in the EEG7500. Items highlighted are the minimum connections required before starting.
Read this entire manual before wiring components to the engine. For information on using the EEG7500 out of the box, see Section 8,
Getting Started, in this manual.

4
Governors America Corp. © 2021 Copyright All Rights Reserved
EEG7500 Enhanced Electric Governor 1-2021-A6 PIB5115
WIRING FOR FEEDBACK SPEED CONTROL AND NON-FEEDBACK SPEED CONTROL MODE
4EEG7500 CONTROLLER WIRING (CONTINUED)

5
Governors America Corp. © 2021 Copyright All Rights Reserved
EEG7500 Enhanced Electric Governor 1-2021-A6 PIB5115
WIRING FOR POSITIONER MODE
4EEG7500 CONTROLLER WIRING (CONTINUED)

6
Governors America Corp. © 2021 Copyright All Rights Reserved
EEG7500 Enhanced Electric Governor 1-2021-A6 PIB5115
Terminals 5 and 6: Digital and Analog Ref
Terminal 7 : Analog Input
Terminal 7 is the analog input from external trim or variable speed potentiometers.
Speed trim uses a potentiometer to vary the engine speed remotely.
The GACong Tool Speed Trim parameter lets you adjust speed trim ±10 % based
on the minimum and maximum voltage congured for the variable speed input. Trim
speed logic is used with xed speed settings.
Terminal 5 is the digital ground. Terminal 6 provides the internal ground for use with external trim or variable speed potentiometers.
An external switch can be added between Terminals 3 and 4 to Terminal 5 to select assigned xed speed settings using the GACong Tool
Terminals 1 and 2: Speed In / Speed Ref - Magnetic Speed Pickup Signal
Wires must be twisted and/or shielded for their entire length (14 turns per foot).
Gap between speed sensor and gear teeth should be > 0.02 in [0.51 mm].
Speed sensor voltage should be at least 1 V AC RMS during crank.
If the EEG7500 detects no input from the magnetic (mag) pickup, the EEG will set the actuator to 0 V DC
and set the speed to 0 RPM.
Terminals A and B: Actuator Connection
Use Terminals A and B for bidirectional devices such as torque motors which require specic polarity settings. Proportional actuators
are not polarity sensitive. See your specic actuator manual for details.
Terminals C and D: Battery Connection
Connect the engine battery to the Terminals C and D.
Terminals 3 and 4: Digital Input 1 and 2 - Speed Input Routing
Terminals 3 and 4 are digital inputs that can be used for digital, analog, or virtual (J1939) discrete or analog for mats. An external switch
can be used between Terminals 3 and 4 to Terminal 5 to select assigned xed speed settings. From the Physical Input mapping box on
the Input Conguration tab, set the Run/Stop Input signal to ON from the GACong Tool.
The auxiliary (AUX) terminal accepts input signals from load sharing units, auto
synchronizers, and other governor system accessories. The AUX input enables or
disables the load sync input. GAC accessories connect directly to this terminal.
The AUX function decreases engine speed with increasing input voltage, while the
polarity shift function increases engine speed with increasing input voltage.
To decrease speed set above 5 V DC; set below 5V to increase speed. The AUX
input is a 0 - 10 V DC reverse polarity signal used to parallel to the mains, or load
share multiple generators together.
The AUX input also enables or disables the load sync input.
To use the AUX input at AI4, select Auxiliary Enable in the GACong Tool
Advanced Governor Settings menu. Select the desired Auxiliary Polarity in the Aux
/ Load Sharing box.
The AUX default input is nominally 5.0 ± 5.0 V DC. A ± 3.0 V DC range can be
selected from the Adjustments menu in the Adjustments tab of the GACong Tool.
Activate the auxiliary input function by selecting Auxiliary Enable in the Aux / Load
Sharing box on the Advanced Governors Settings menu of the GACong Tool.
Select the desired Auxiliary Polarity from the drop down box.
Terminal 8: Analog Input 2: Auxiliary Input
4EEG7500 CONTROLLER WIRING (CONTINUED)
A 15 A fuse and power switch must be installed on the positive battery lead going to Terminal D.

7
Governors America Corp. © 2021 Copyright All Rights Reserved
EEG7500 Enhanced Electric Governor 1-2021-A6 PIB5115
Terminals 12, 13 and 14: Position Feedback Sensor
Actuator position feedback sensor is required for Feedback Speed Control
and Positioner modes, but not for Non-Feedback Speed Control mode.
Terminal 12: 5 V Supply to Position Feedback Sensor
Terminal 13: 0 - 5 V DC Actuator Position Signal
Terminal 14: Position Sensor Ground Ref.
Terminal 15: 0 - 5 V Analog Output
Terminals 16, 17 and 18: Digital Output 1, 2, and 3
Terminals 19 and 20: CAN and Terminals 21-23: RS232
Supports CAN SAE J1939 Protocol or RS-232 communica-
tions.
The CAN bus must be terminated at both ends by a 120 Ω
resistor Termination resistance should be set in parallel (60 Ω),
2 X 120 Ω.
Terminal 19 = CAN Low, Terminal 20 = CAN High.
Terminals 21-23 = RS232.
Terminals 9 and 10: 4 - 20 mA Input and 0 - 5 V DC Input
Terminal 9, Analog Input 3, provides dedicated 4 - 20 mA input signal. Current versions of the GACong Tool may mistakenly label this
as 0 - 5VDC. This is incorrect. It should show a permanent setting of 4 - 20 mA.
Terminal 10, Analog Input 4, provides dedicated 0 - 5 V input signal, or 4 - 20 mA with external 200 Ω resistor.
4EEG7500 WIRING (CONTINUED)
Terminals 16 - 18 support 3 discrete digital outputs. Each digital output’s
polarity is congurable using the GACong Tool.
Terminal 15 supports one 0 - 5 V DC analog output.
Terminal 11: +5 Volt Power Supply
Terminal 11 provides +5 V DC excitation, power to potentiometers or oth-
er equipment requiring power. See GAC Governor System Potentiometer
list on the GAC website.
Potentiometer Terminal EEG7500 Terminal Location
111 +5V
2 7 Analog Input
36 Ref. Ground

8
Governors America Corp. © 2021 Copyright All Rights Reserved
EEG7500 Enhanced Electric Governor 1-2021-A6 PIB5115
5THE GAConfig TOOL
1. Download the EEG7500 interface tool .zip le from the GAC Download
page. Depending on your workplace the download installer ask for addi-
tional information. After installation the system will require a restart.
2. The zip le will be saved in the PCs default download area, unless you
tell it otherwise. Once downloaded, double-click the le name to start the
installation. You may need to double click again on the EEG7500 IT setup.
exe le to actually begin the installation.
3. The Welcome screen displays. Click Next. Note the default installation is
in the Governors America Corp program les area.
4. Click Next. Allow the installation to create a desktop icon. You can also
create a quick Launch icon. Click Next.
5. Click Next. The installation will create a Governors America Corp startup
folder location. Click Next. Click Install at the next screen. Click Finish
when complete. The GACong icon is placed on the desktop.
6. Connect the EEG7500 to the PC using a USB-A port and connect the
USB-B port on the EEG7500. Power for the controller comes from the
engine battery. Ensure the system is powered. Do not start the engine.
7. Double-click the GACong Tool icon on your desktop. On rst use, when
prompted, select EEG7500 from the drop-down list.
8. Connect the GACong Tool to the EEG7500 by clicking on the Connect
icon on the top left of the GACong window.
9. A pop-up dialogue window displays a drop-down list of available comm
ports. Select the appropriate port and click OK. If you are unsure of the
comm port, use the Windows Device manager to locate what device is
plugged in to which USB port.
10. The Connection Status indicator on the lower left corner of GACong Tool
window ashes yellow then turns green as the connection is completed.
The status bar displays Connected.
If the connection does not complete, a red Disconnected message displays.
Check your connections and note any error messages on the PC and try again.
INSTALLING GAC TOOL AND CONNECTING TO EEG7500
Power for the EEG7500 comes from the engine battery.
REMINDERREMINDER
EEG7500 speed controller uses the GACong Tool to update parameter values on the EEG7500 governor, adjust performance settings,
and view results. This PC tool provides a menu-driven user-friendly interface to update settings, and speed diagnostics and trouble-
shooting. The tool also allows you to set up multiple scenarios and save them for use later or for sharing with other sites using the
EEG7500.
The GACong Tool is downloaded from GAC’s website. The following is required to run the tool:
• A PC with at least Windows 7 or higher and at least one USB port
• An internet connection
• A 14 pin connector (GAC EC1502) or cable harness assembly (CH1520)

9
Governors America Corp. © 2021 Copyright All Rights Reserved
EEG7500 Enhanced Electric Governor 1-2021-A6 PIB5115
6USING THE GAConfig TOOL
EEG7500 digital controller uses the GACong Tool to enter parameter values, adjust performance settings, and view results.
Parameters are grouped by functionality at the main menu. The tool allows you to change controller parameters on the y. Initial setup is
completed from Engine Tuning on the main menu without the engine running, but powering the GACong Tool using the engine voltage.
Tool bar
Main
menu is
arranged
by
function
Connection
Status
displays con-
nection status
between
PC and the
EEG7500
Engine Status
displays
real-time
engine speed
and actuator
information.
Update parameter values by double-clicking the underline or existing value next to a parameter name. Type in the new value and
click the Enter key to save the change. A green check mark next to the change indicates the change was successful. No check or a
red or yellow warning icon indicates the change was not saved or caused a conict with another parameter setting.
For a short description of a parameter, hover the cursor over the parameter name and a description briey displays, or reference the
item in the Adjustment menu where a short description is available in its associated menu tab.
Errors and parameter information display when you change a value. Read all RED warning boxes error information, yellow
cautions, and other pop-up information. Setting some parameter values impact other parameter values, often displaying a caution.
One common message indicates the current Control Mode does not support the parameter changed.
The GACong Tool windows automatically re-sizes its window.
Some settings require a restart of the GACong Tool to take aect. A reset or power cycle is required after changing the following
settings. The tool will automatically reset the unit for the user.
• Control Mode and H-Bridge Mode
While using the tool, note the far right screen engine status bar, showing Engine Status information.
Selecting STOP sets the engine speed to 0 RPM and shuts down the EEG7500 controller. It does not shut down the engine directly.
The Engine Status
bar displays
EEG7500 parameters
in real-time.
STOP
Engine Shutdown
sets the engine speed
to 0 RPM and shuts
down the actuator. It
does not directly shut
down the engine.

10
Governors America Corp. © 2021 Copyright All Rights Reserved
EEG7500 Enhanced Electric Governor 1-2021-A6 PIB5115
6USING THE GAConfig TOOL (CONTINUED)
The main menu is divided by function. The Dashboard and Engine Status as well as the right hand Engine Status panel detail the current
engine status. The menus are:
Engine Tuning includes basic setup of initial and system safety settings including control mode (based on actuator type) overspeed,
ywheel teeth, fuel settings and acceleration rates. Engine Tuning also includes xed speed settings, PID (Gain, Stability, Deadtime)
tuning, Variable Speed setup. A fuel limiting table can also be built here.
Position Control sets xed and variable positioner settings, and allows a positioner table to be built.
Position Feedback Calibration allows for automatic or manual conguration of the feedback sensor.
Advanced Governor Settings include the auxiliary settings, droop, and speed trim.
assigns analog and digital devices.
assigns speed and position switches, and output devices.
Communication connects with output routing, diagnostic messaging and TSC1/J1939.
ENGINE TUNING
OUTPUT CONFIGURATION
Engine Tuning is the basic menu to store your engine startup and
tuning information.
Type of actuator: non-feedback (default) feedback, or positioner
(Control Mode)
Flywheel teeth, overspeed, fuel limit
Start fuel rate, Fuel ramp rate, starter cuto, acceleration and
deceleration
Fixed speeds
Variable speed settings
PID Tuning (Gain, Stability, Deadtime)
Lead circuit, Light force Governing, Speed anticipation
Fuel Limit Table
Output conguration allows the EEG7500 to connect to data
points from outside the system, most commonly from SAE
J1939.
ADVANCED GOVERNOR SETTINGS
AUX enable, aux polarity
Droop
Speed Trim
INPUT CONFIGURATION
Input conguration maps the hardware connections to the intend-
ed use of the actual hardware.
For example, if a potentiometer is wired to support Variable
Speed input, it would be wired at Terminal 7. The Analog Input
Mode should be set as Analog Input 1 to 0 - 5 V DC, and the
Variable Speed Input in the Physical mapping is set to Analog
Input 1.
Analog Input 3 is mistakenly labeled 0 - 5VDC in some GACong
Tool installations. This is incorrect. It should show as setting of
4 - 20 mA.
Conversion Formulas:
Hertz mAG PICKUP = (RPM x Flywheel Teeth)
60 s
RPM = (Hertz mAG PICKUP x 60 s)
Flywheel Teeth

11
Governors America Corp. © 2021 Copyright All Rights Reserved
EEG7500 Enhanced Electric Governor 1-2021-A6 PIB5115
COMMUNICATION
ADJUSTMENTS
POSITION CONTROL
Position control settings include:
Fixed position
Variable position
Trim speed and oset
Positioner Lookup Table
POSITION FEEDBACK CALIBRATION
Position Calibration allows you to manually or automatically
calculate the feedback of the actuator. At minimum the auto-
matic calibration must be performed before using a feedback
actuator.
The communication menu lets you:
Set base Internet address type
Set J1939 information and base settings
Acknowledge error messages
Map routing between the EEG7500 and the J1939 system
The adjustments menu includes all the menu settings for the
EEG7500 available in the GACong Tool. If you choose you
can use this menu with its multiple tabs to update parameter
settings:
Engine Tuning
Position Control
Position Feedback Calibration
Advanced Governor Settings
Input / Output Conguration
Communication
Status / System Information which includes System Re-
set, Engine Shutdown, and Factory Restore
6USING THE GAConfig TOOL (CONTINUED)

12
Governors America Corp. © 2021 Copyright All Rights Reserved
EEG7500 Enhanced Electric Governor 1-2021-A6 PIB5115
7GETTING STARTED
Wiring between the engine, the EEG7500 Governor, and the actuator
should be completed before starting the engine. See the wiring section
of this manual for details. The following are the minimum wiring require-
ments:
Connect Actuator to EEG7500 (Terminals A and B)
Connect Actuator to magnetic pickups (Terminals 1 and 2)
Connect EEG7500 to battery (Terminal C and D)
Connect USB from EEG7500 to PC
Once wiring is complete, open the GACong Tool by double-clicking the
GACong icon on your PC and select Engine Tuning from the main menu.
Begin by selecting the Actuator Control mode.
The EEG7500 can be set up and used out of the box, with an actuator attached, using default settings. This section details the initial
installation and setup using the default settings. Wiring between the engine and the EEG7500 is required, and reviewing this document
and default settings is advised.
There are two sets of parameters to work with: basic engine performance and engine tuning. Getting Started gets your engine started.
Engine Tuning improves performance.
To get started:
and connect the PC to the EEG7500 and the EEG7500 to the engine.
Install actuator between EEG7500 and engine.
Set the minimum settings in the GACong Tool:
Your actuator’s Control Mode
• Overspeed for automatic shutdown
• Number of engine ywheel teeth
• Fuel Limit
• Acceleration and Deceleration
• Actuator Ramp Rate
• Starter Cuto
• Fixed Speed Settings
MINIMUM WIRING SETUP
Actuator Type
Proportional Motor
Control Mode
Non-Feedback
Speed Control
Default Mode
Feedback Speed
Control
Positioner
Settings in GACong Tool must match the actuator type. Actuators use one of three operating control modes: non-feedback speed
control, feedback speed control, or positioner. These modes are further divided into half and full bridge modes.
SELECTING ACTUATOR CONTROL MODE
1. Actuators are connected Terminals A and B as
shown on the control mode wiring diagrams. An
actuator with a position feedback sensor is required
to use the GACong Tool settings feedback speed
control or positioner mode.
2. Power must be cycled to the EEG7500 controller
after the control mode is changed for the change
to take eect. The default setting is Non-Feedback
Speed Control (NFSC). Other parameter settings do
not need to have the power cycled.
3. Positioner Mode is further dened in Section 14 of
this manual.
(1) Half an H-bridge connects an output pin to either VCC (volt-
age common collector) or Ground, or disconnects. Use one to
turn a DC motor on or o or apply braking, but not to reverse the
motor. Half H-bridge actuators requires an actuator with a spring
return.
If H-Bridge Mode is set to Half Bridge, but the actuator does not support half an H-Bridge(1), attempting to run the engine
may harm the engine or actuator. The information in the Getting Started section is based on using a Non-Feedback Speed
Control actuator.

13
Governors America Corp. © 2021 Copyright All Rights Reserved
EEG7500 Enhanced Electric Governor 1-2021-A6 PIB5115
DEFAULT SIGNAL MAPPING SETTINGS
The Physical Input mapping enables you to
link settings between the terminal a device is
attached to and its use in the GACong Tool.
Use the Override box to set the physical input to
On or O.
By combining settings you can map signals to
specic uses.
Physical Output mapping lets you assign
external signals such as J1939 as detailed in
the Data Received. It is also useful for setting
external devices to complete tasks based on
overspeed or another event.
The EEG controller pairs physical input mapping of signals connected to the EEG with various input and output parameters. The
EEG7500 supports 5 analog and 2 digital inputs, and 1 analog and 3 digital outputs. Physical inputs are mapped to the parameter set-
tings in the GACong Tool. Depending on the signals being used you will need to map each to a parameter in the GACong Tool. The
Controller Wiring table in Section 5 shows the terminal to input/output mapping.
The Physical Input mapping block in the Input Conguration menu of the GACong Tool allows you to map each device to a specic
use. This assigns an analog or digital signal to a specic input. The tool oers the exibility to assign dierent input parameters for vari-
ous applications. Review the default Input Conguration parameters and note the following:
Actuator is wired to Terminals A and B
Speed A and Speed B defaults are set to be wired as Digital Input 1 and Digital Input 2 (Terminals 3 and 4)
Variable Speed Input is mapped to Analog Input 1 (Terminal 7)
This input combination sets Selected Speed Mode as 1 (shown in the Engine Status bar). Speed Mode 1 = idle.
The shutdown STOP button available on the GACong tool shuts down the actuator, but does not directly shutdown the engine. To shut
down the engine automatically at a set speed use the GACong Tool and a solenoid or other relay switch and complete the following set
up. The following describes adding a solenoid shutdown at a specic speed, shutting down the engine, not just the actuator.
ADD ENGINE OVERSPEED SHUTDOWN DIGITAL SWITCH
1. Connect a shutdown solenoid between the engine and an EEG7500 digital terminal.
2. In the GACong Tool, open the Output Conguration menu and set the following:
a. Map the solenoid switch location to the Digital Output. In this example the switch is attached to the Digital Output 1 (Terminal 16).
In the Physical Output mapping block, set Digital Output 1 Source to Speed Switch 1.
b. At the Speed Switches SSW1 Limit/Threshold set the RPM. This example shows 2400. Overspeed on the Engine Tuning menu
should be set above the engine shutdown switch speed.
c. Set the Select SSW1 Latch. This causes the latching relay to maintain its position after the switch has been released.
d. At Digital Output Mode, set Digital Output 1 to Normally Closed.
3. When the RPM shutdown is reached, the switch engages the solenoid, shutting down the engine.
NOTE Default settings include setting the Digital Output Mode to Normally Open, setting the switch to stay open.
7GETTING STARTED (CONTINUED)

14
Governors America Corp. © 2021 Copyright All Rights Reserved
EEG7500 Enhanced Electric Governor 1-2021-A6 PIB5115
START YOUR ENGINE
Once the parameter settings are reviewed and updated as required, start your engine.
1. Crank the engine with DC power applied to the governor system.
2. Set the engine at operating speed with no load.
3. The actuator/ fuel to the engine will be positioned to the level set by the Actuator Start Fuel parameter (default is MAX fuel). Actuator
Ramp Rate controls the rate at which fuel is increased to start the engine. Set it 10 % by default.
4. If the engine is unstable after starting, open the GACong Tool and adjust the Gain, Stability, and Deadtime in the Engine Tuning menu
in the PID Tuning block, until the engine is relatively stable.
5. Once the engine is stable you can connect additional devices and further optimization.
Use an overspeed shutdown device, independent of the governor system, to prevent loss of engine control which
may cause personal injury or equipment damage. Do not rely exclusively on the governor system electronic actu-
ator to prevent overspeed. A secondary shuto device, such as a fuel solenoid must be used.
PARAMETER RANGE DEFAULT DEFINITION
Control Mode
Operating Mode NFSC, FSC,
or positioner NFSC Operating mode of the actuator.
H-Bridge Mode Bridge Half Bridge
SET-UP
Flywheel Teeth 60 - 250 120 Number of teeth on the engine ywheel. This should be set prior to starting the engine.
Overspeed 600 - 6000 1800 RPM set to cause automatic engine shut down. Set this value low enough to prevent mechani-
cal damage but high enough to allow realistic load rejection speeds without stopping the engine.
Fuel Limit 0 - 100 100 % Maximum fuel output.
START-UP
Actuator Start Fuel 1 - 100 % 100 % Initial actuator position at start of crank.
Actuator Ramp Rate 1 - 100 % 10 % The rate of change for the actuator start from the throttle begin point to 100%, during the start/
crank cycle (% / s)
Starter Cuto 100 - 1000 400 The RPM at which governor switches from starting to governing. Also known as crank termination.
Acceleration 25 - 2000 300 Rate of acceleration controlled by the governor when a command to increase RPM is received.
Deceleration 25 - 2000 300 Rate of deceleration controlled by the governor when a command to decrease RPM is received.
Once the control mode for your actuator is selected, the following minimum parameters must be set, or the default settings used, before
starting the engine. GAC suggests using the default settings to rst ensure the engine runs smoothly before adding additional devices.
However, you may want to update default settings and additional parameter value depending on the engine, before starting the engine.
OTHER DEFAULT SETTINGS
PARAMETER DEFAULT PARAMETER DEFAULT
Speed 1 1500 Gain 1, 2, and 3 50
Speed 2 1500 Stability 50
Speed 3 1500 Deadtime High
Variable Speed Minimum 1500 Lead Circuit On
Variable Speed 1500 Light Force Governor Enable O
Variable Speed Gain 50 Variable Speed End Gain 50
Analog Input 1 0 - 5 V DC Input MIN 0 %
Speed Minimum 1500 Input MAX 100 %
Variable Speed Start Gain 50 Input Actual 0
Speed Maximum 1500
INPUT CONFIGURATION DEFAULT SETTINGS
7GETTING STARTED (CONTINUED)

15
Governors America Corp. © 2021 Copyright All Rights Reserved
EEG7500 Enhanced Electric Governor 1-2021-A6 PIB5115
To improve basic performance at no engine load:
1. Open the GACong Tool open the Engine Tuning menu, and at the PID Tuning block, perform the following:
a. Increase the Gain parameter by entering new parameter settings until instability develops. Gradually decrease the Gain until sta-
bility returns. Decrease the adjustment one count further to ensure stable performance.
b. Increase Stability parameter on the until instability develops. Gradually decrease the Stability until stability returns. Decrease the
parameter by one to ensure it is stable. If there is no instability leave set at 50.
c. Set the DEADTIME to Low. If instability develops, change to High.
ADJUSTING FOR BASIC STABILITY WITH FIXED SPEED
Once the engine is running at operating speed, with no load, use the GACong Tool to adjust the parameter settings to increase engine
stability. Each speed parameter, 1 through 3, has a separate Gain setting. The speed selection number and active Gain are shown in the
PID Tuning section.
Stability is achieved by balancing PID: Gain, Stability, and Deadtime.
Gain (Proportional) changes the initial response of the governor. Increasing gain makes the engine more responsive to load
changes while decreasing gain makes it less responsive to load changes. Avoid engine instability due to high gain when adjusting
this parameter.
Stability (Integral) changes the steady state response of the engine. Increasing stability allows the system to come to steady state
speed faster, while decreasing the stability results in a more gradual transition to steady state speed.
Deadtime (Derivative) sets the transient response of the engine to high or low and aects the stability parameter during transient
load changes. Increasing deadtime decreases the percent of overshoot and settling time during a transient load change while
decreasing deadtime increases them. Note that setting Deadtime to High can cause random speed instability during steady state
since small speed errors are amplied by this parameter.
Additional adjustments may be required after engine load is applied. Normally adjustments made at no load achieve satisfactory perfor-
mance.
8TUNING WITH THE EEG7500
1. For basic potentiometer connection, connect the 7500 to the potentiometer as follows:
Terminal 11 to potentiometer terminal 1
Terminal 6 to potentiometer terminal 3
Terminal 7 to potentiometer terminal 2
2. Set the potentiometer to the application you want to use it for. For example, if using the potentiometer for
variable speed, in Physical Input mapping set the following:
a. At Speed Select A, select Override and select On.
b. At Speed Select B, select Override and select On.
c. The Engine Status menu to the far right now says Selected Speed: Variable.
3. To calibrate the potentiometer:
a. Set the potentiometer to the full CCW position and click the Calibrate Minimum.
b. Turn the potentiometer CW all the way and click Calibrate Maximum.
ADDING A POTENTIOMETER
When using a potentiometer the following wiring ad settings are required on the EEG7500 controller. See the GAC potentiometer manual
for additional information on GAC potentiometers and the Wiring section in this manual.
Terminals
Potentiometer EEG7500
111
2 7
36

16
Governors America Corp. © 2021 Copyright All Rights Reserved
EEG7500 Enhanced Electric Governor 1-2021-A6 PIB5115
8TUNING WITH THE EEG7500 CONTROLLER (CONTINUED)
1. Review Analog Input device settings in the Input Conguration
menu. The analog voltage settings should map to the voltage of
the speed device. In this case the Analog Input 1 is set to map to
the 0 - 5 V DC potentiometer.
2. Set Selected Speed to Variable by completing the following:
a. In Physical Input mapping box at Speed Select A, select
Override and select On.
b. At Speed Select B, select Override and select On.
3. The Engine Status menu on the far right should now show .
Selected Speed Mode: Variable. Recheck Input Mapping and
wiring if Selected Speed Mode is not Variable.
4. If using resistive input, set the potentiometer to the full clockwise
position.
5. Set input Minimum and Input Maximum either manually or
automatically using the calibration buttons.
a. To set automatically, turn the potentiometer fully CCW and click
the Calibrate Minimum. Next set the potentiometer fully CW
and click the Calibrate Maximum.
b. To set each manually, set Input Minimum to between 0 to 75
% and set Input Maximum to at least 25 % greater than the
Minimum value. Values entered which are not 25 % dierent
are automatically reset to the closest accepted value by the
GACong Tool.
Input Actual shows the potentiometer value when a
potentiometer is used.
SETTING VARIABLE SPEED
NOTE
Use a single remote speed adjustment potentiometer to adjust the engine speed continuously over a specic speed range. Other variable
speed input devices include other controllers as well as J1939 data. Potentiometer wiring is shown in the Wiring section of this manual
and in the previous section Adding a Potentiometer.
Use the Adjust Gain parameters for each endpoint of the speed range to add additional stability. Start Gain and End Gain parameters. Gain
values for each speed set point on the speed range are linearly interpolated. Gain (P), Stability (I), Deadtime (D) and Lead are shared across
the entire speed range. Separate Gain settings are made fro each xed speed, for shared stability. These are controlled using the settings
in the Engine Tuning menu, in the PID Tuning block.
To maintain engine stability at the minimum speed setting, add a small amount of droop using the Droop adjustment in the Advanced
Governor Settings menu. At the maximum speed setting the governor performance will be near isochronous, regardless of the droop
adjustment setting.
1. At the Engine Tuning menu, Variable Speed box, set Speed Maximum and Variable Speed End Gain.
ADJUSTING FOR STABILITY WITH VARIABLE SPEED

17
Governors America Corp. © 2021 Copyright All Rights Reserved
EEG7500 Enhanced Electric Governor 1-2021-A6 PIB5115
8TUNING WITH THE EEG7500 CONTROLLER (CONTINUED)
The EEG7500 supports three xed speeds and one variable speed device.
The variable speed can also be used as a xed speed by setting speed
minimum and speed maximum to the same value.
By default, upon initial installation, the Selected Speed Mode input is set to
1 (Idle). By selecting various physical mappings you also set the selected
speed modes.
1. Open the GACong Tool Physical Input mapping menu. Note the
default settings:
• Speed Select A = Digital 1
• Speed Select B = Digital 2
• Variable Speed Input = Analog Input 1
• Auxiliary Input = Analog Input 2
• Selected Speed Mode = 1 in the engine status view
2. In the Physical Input mapping box, for Speed Select A, check the
Override and then check the O selection. At Speed Select B, check
Override and then check On.
3. Note the Select Speed Mode is now 2 in the Engine Status view.
4. Review the chart below for information on how the EEG7500 uses
Speed Select A and B input to determine speed settings based on the
state of switch inputs.
Speed Setting Override Speed Select A Speed Select B
Speed 1 (Idle) Checked O O
Speed 2 Checked O On
Speed 3 Checked On O
Variable Speed (4) Checked On On
5. Open the Engine Tuning menu and set the desired settings that map
the Selected Speed Input Mode 2. For each Selected Speed Mode
you can set the desired tuning parameter settings using the Engine
Tuning menu.
In the example below the Selected Speed Mode is 2 and the Fixed Speed
Setting for the device mapped to Selected Speed Mode 2 has Speed 2 set
to 1900, and Gain 2 set to 100.
MAPPING PHYSICAL INPUTS TO SPECIFIC SPEED MODE
Instead of using physical inputs, you can also check the Override box, and manually set On or O state of this input.
On equals a closed state while is the open state. The On/O state stays set even after the EEG7500 is disconnected from PC interface.

18
Governors America Corp. © 2021 Copyright All Rights Reserved
EEG7500 Enhanced Electric Governor 1-2021-A6 PIB5115
To set up an input (Positioner) routing, choose positioner mode as the
control mode. This example adding an analog potentiometer to make
incremental position changes.
1. Wire a potentiometer to the EEG7500. This will be used to control the
position of the actuator valve.
2. Open the Engine Tuning menu and select Positioner from the Oper-
ating Mode dropdown menu. Select Half or Full Bridge depending on
your actuator.
3. Shut down power to EEG7500 and shutdown the GACong Tool.
Restart the tool and add power to the EEG7500. This is the only pa-
rameter in the tool that requires you restart the tool and the controller
to congure.
4. Open the Input Conguration menu on the GACong Tool.
a. Select the appropriate input signal type for the device you are
controlling the actuator with. This example uses a 0 - 5 V DC
potentiometer.
b. In the Physical Input mapping box, for Position A Input, select
Analog Input 1 from the drop-down list. If the Override box is
checked, uncheck the box to show the drop-down list.
c. Select Analog Input 2 for Position B Input.
4. Turn the potentiometer and note if the variable Position Input Position
parameter on the Variable Positioner Settings in the Position Control
menu changes. This indicates the potentiometer is communicating
with the EEG7500.
BASIC POSITIONER MODE
The Position Increment and Position Decrement parameters control
the actuator position by a xed amount each time a switch is closed
then opened again. These inputs require the use of momentary switches. Contact
GAC if more information is required.
NOTE
9USING POSITIONER MODE
Position control is the ability to control position of a proportional or torque motor actuator device to a xed position, an analog input to a
variable position, or use a Positioner Table for automatic control. Wiring for the positioner is detailed in the Wiring section of this manual.
See your actuator documentation for details on its capability.
CALIBRATE THE POSITION FEEDBACK SENSOR
The position feedback actuator must be calibrated before starting the engine when using
either Feedback Speed Control or Positioner modes.
1. Ensure the engine is NOT cranking or running.
2. In the Position Feedback Calibration menu, clicking the Feedback Autocal button in the
Position Feedback Setup box. The EEG7500 controller directs the actuator to sweep
between the minimum and maximum positions to calibrate the sensor signal range.
This step takes approximately 3 s to complete.
3. In the Position PID Tuning box, click Position PID Autocal to automatically tune the
position control PID Gain and Stability. This is not the same as engine speed control
PID gain and stability. The EEG7500 controller uses an algorithm to determine the
optimum Gain and Stability settings for position control. While calibrating the EEG7500
will direct the actuator to move several times. This step may take up to 30 s to
complete.
4. Once calibration is complete you have a baseline for positioner mode.

19
Governors America Corp. © 2021 Copyright All Rights Reserved
EEG7500 Enhanced Electric Governor 1-2021-A6 PIB5115
1. Attach a position selector switch to the speed
controller.
2. From the GACong Tool, open the Position
Control menu.
3. Ensure the Enable Positioner Table is NOT
checked in the Positioner Control menu.
4. Enter the desired positions in the Fixed Posi-
tion Settings box.
Position Increment and Position Decrement adds control of the actuator position by a xed amount each time a switch is closed and then
opened again. These inputs require the use of momentary switches. Contact GAC if more information is required.
POSITIONER VARIABLE POSITION SETTINGS
1. Set the selected Speed Mode to Variable by setting Speed Select A
and Speed Select B in the Physical Input Mapping to On and check
Override for each.
2. In the Variable Positioner Settings box, set the Variable Position Start
and Variable Position End for the desired position control range. The
analog input signal for variable position is interpreted as a number
between 0 % to 100 %, regardless of signal type.
3. Set the position input signal, such as a potentiometer, to the start
position of the setting and click the Set Var Pos Start button.
4. Set the position input signal to the end position and click the Set Var
Pos End button.
5. Note the Variable Position Input Position calibration %.
6. Ensure the Enable Positioner Table is NOT checked in the Positioner
Control menu.
7. To ensure inputs are working as expected, review the selector switch
positions or sweep the analog input signal range, observing the
changes in the Engine Status information bar on the right side of the
tool.
Similar to speed and variable speed select, the position control can also be achieved using selector switches for xed position or analog
input for variable position. If only variable position control is desired, make sure both Position A Input and Position B Input are set to
Override and On (closed).
FIXED POSITION SETTINGS USING POSITION SELECTOR SWITCHES
9USING POSITIONER MODE (CONTINUED)

20
Governors America Corp. © 2021 Copyright All Rights Reserved
EEG7500 Enhanced Electric Governor 1-2021-A6 PIB5115
The GACong Tool allows settings in the tool to be stored, shared,
and imported back into the tool for use on multiple EEG7500 units.
Settings can be exported at any time while using the GACong Tool.
It is also useful if you change actuator types often, allowing you to
save settings and import settings as you must restart the EEG7500
unit to change Operating mode.
To Export Files:
1. EEG7500 must be turned on and connected to the GACong
tool.
2. At the Tool bar click the Export button. The windows le
explorer displays. Drill down to the le location where you want
to save the le.
3. Rename the default le name to something better suited for
your use.
4. Click Save. Record the le location.
To Import les:
1. EEG7500 must be turned on and connected to the GACong
tool.
2. At the Tool bar click the Import button. The windows le
explorer displays.
3. Locate the le you want to use and click on the name.
4. Click Open.
Best practice is to export engine settings information on a regular
basis, at a minimum monthly. Name the le with dates and intended
use as part of the le name. These les can also be shared with
the GAC support team to aid in producing the best results.
The system can also be restored to the original factory settings from
the Adjustments menu Status/Systems tab.
Auxiliary Input (Terminal 8) enables connections to synchronizing and load sharing equipment. AUX / Load Sharing in the GACong
Tool allows the adjustment of the speed requests through the auxiliary input voltage, accepting a ± 5V Nominal, 0 - 10 V DC and
selectable response polarity. In response the EEG can increase or decrease voltage to maintain constant engine speed. Accessories
tied to Aux must be shielded.
Light Force Governing provides ner adjustment resolution for smaller actuators. It is designed to work with low current small actuators,
like T1 ATB, ALR/ALN, 100/103/104 series and normally closed Cummins EFC actuators. Select the Light Force Governing block in the
PID Tuning block when using small actuators to improve adjustments as they respond very quickly to input changes over a smaller range
of operating current, using a fraction of the PID and current output of a normal actuator.
Lead Circuit (default is ON) enables the governor to be more responsive and typically increases the range of gain adjustment. This func-
tion allows for more active control to increase the performance in typically slow engines.
Speed Trim Control is used with a potentiometer (or voltage input for certain units) to vary the engine speed remotely.
Idle is part of the Speed 1 setting and is set in one of the speed control settings on the Engine Tuning menu.
Start Fuel is an adjustment in the Engine Tuning menu. Start Fuel sets the actuator % applied during crank to control visible exhaust
smoke.
Ramp Control and Speed Trim settings Acceleration and Deceleration and Trim Increase Rate and Trim Decrease Rate set the
RPM per sec when switching between speeds and to and from idle.
CAN JS1939 bus device communication is supported to receive and display JS1939 messages.
10 ADDITIONAL SETTINGS
11 IMPORTING AND EXPORTING GACONFIG TOOL SETTINGS
Other manuals for EEG7500
1
Table of contents
Other GAC Controllers manuals
Popular Controllers manuals by other brands

Kutai electronics
Kutai electronics ADVR-250 Operation manual

Centork
Centork 482 Series Installation and Maintenance user Manual

Mitsubishi
Mitsubishi FX3U-4LC installation manual

Aerotech
Aerotech MPG Hardware manual

Blueweld
Blueweld Speed Start 1212 instruction manual

Microchip Technology
Microchip Technology USB2422 General description

Panasonic
Panasonic FP0R Series user manual

Maxcess
Maxcess MAGPOWR DLCA NET-S1 user manual

Weathermatic
Weathermatic smartline SL800 owner's manual

EFI
EFI E-36A Installation and service guide

KONTRONIK
KONTRONIK KOSMIK 160 HV Operation manual

Ruckus Wireless
Ruckus Wireless ZoneDirector 1100 Configuration guide