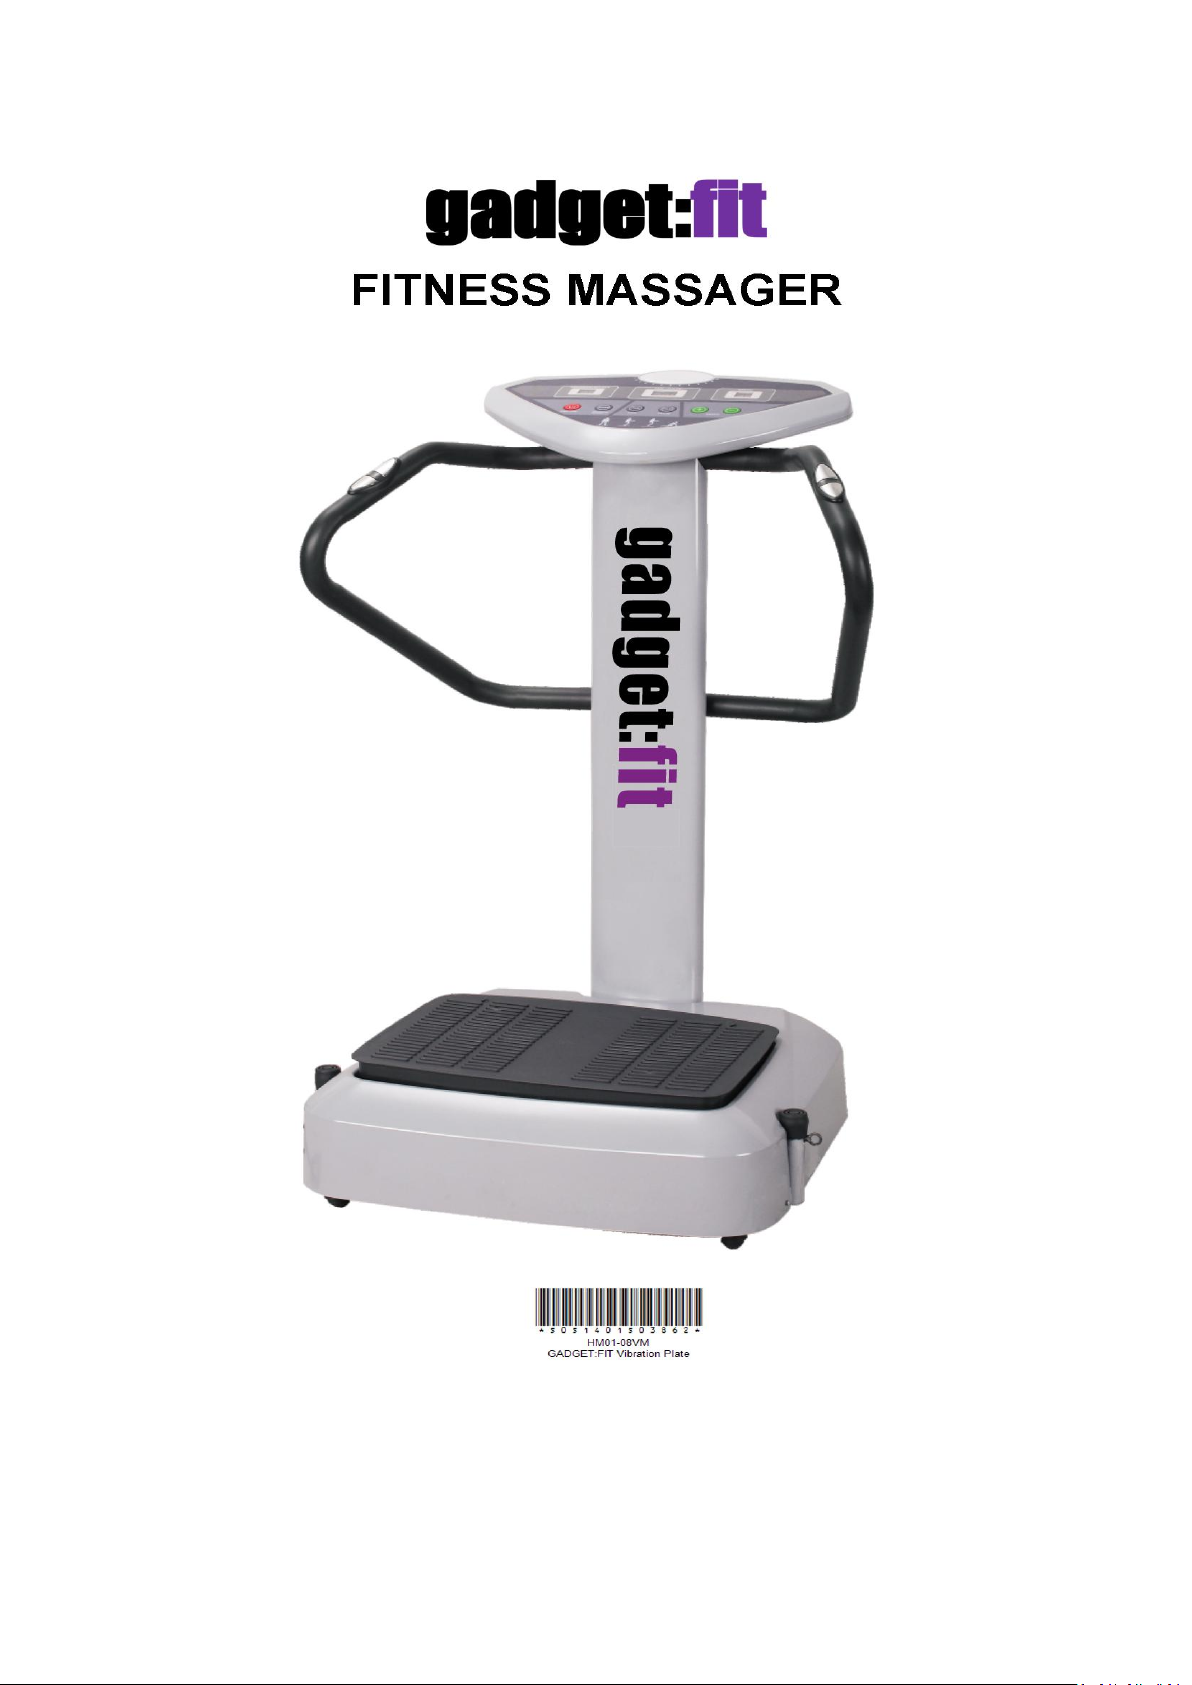
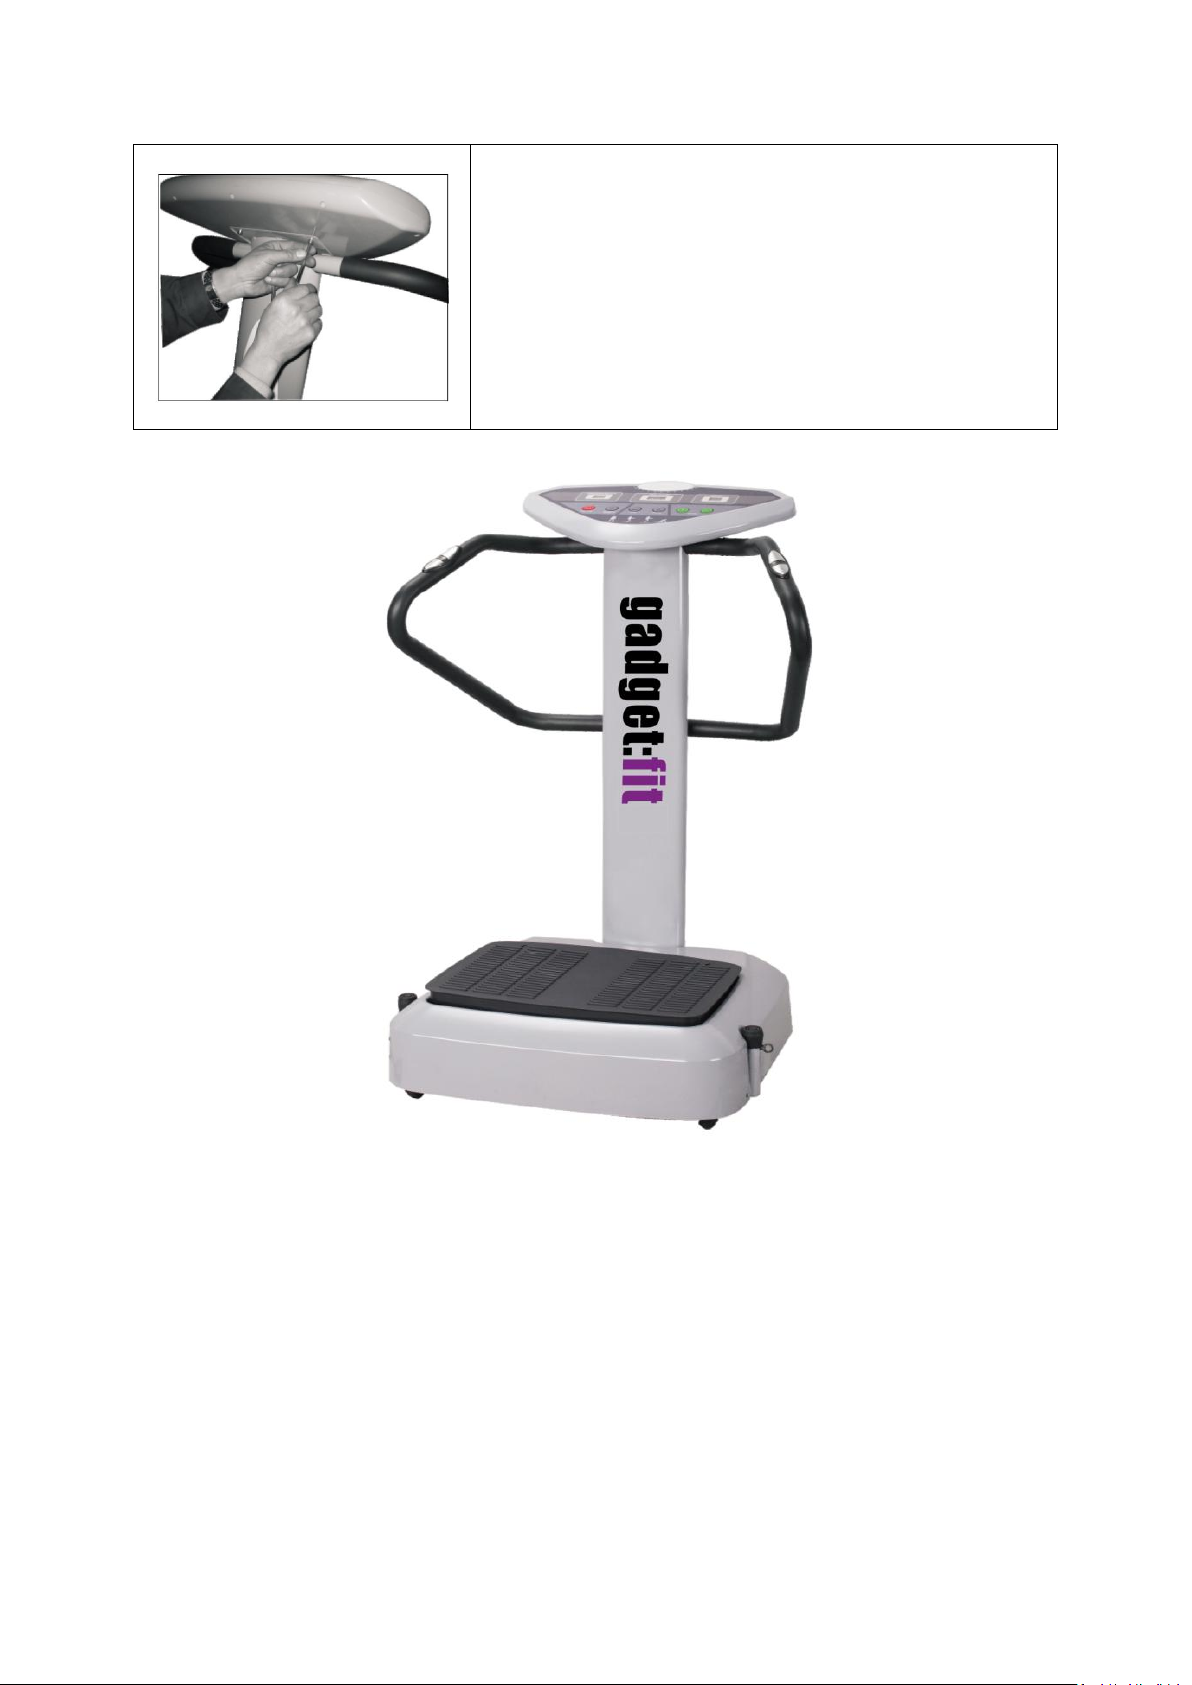
GADGET:FIT HM01-08VM User manual

BEFORE USING YOUR GADGET:FIT VIBRATION PLATE PLEASE READ THE INSTRUCTIONS
CAREFULLY AND KEEP IN A SAFE PLACE FOR FUTURE REFERENCE

2
SAFETY TIPS
Do not use your Gadget:fit Vibration machine with wet hands.
Always turn off the power at the mains socket after use.
Not to be used by pregnant woman.
DO NOT drink alcohol and then use the Vibration machine.
To achieve the best results, wait at least 1 hour after eating a meal before
using the Gadget:fit vibration machine.
Drink plenty of water before and after using the Vibration machine.
Never wrap the power cord around the power plate.
Keep children and pets away from the Vibration machine at ALL TIMES.
Maximum usage 4 times a day.
Maximum user weight 120Kg.
If you gave any of the following conditions, you must consult your doctor before
using your Gadget:fit Vibration Plate.
Heart Disease.
Fracture or Joint Problems.
Pregnant.
Brain Blood Clot.
Any Back Problems.
Cancer or Any Acute Disease.
Contagious Skin Disease.
Recovering from an Operation.
Mentally Handicapped/Imbalanced.
Neurological Condition.
Acute Thrombosis.
Severe Diabetes.
Epilepsy.
Pacemaker.
Tumours.
If you experience chest pains, nausea, dizziness or shortness of breath, stop
exercising immediately and consult your doctor before continuing.

3
PRE-ASSEMBLY INSTRUCTIONS.
Before starting to assemble your Gadget:fit
Vibration Plate, please make sure you have all
the parts listed below available:
Main base unit
Computer unit
Centre support tube (incl computer cable)
2x handle sections (incl pulse calbes)
1x black plastic cover
2x hand bands
2x eye hole screws
4 x Hexagonal Screws (M8x30) 4 x Washers 08 2 x Big Screws (M8x40)
(pre-fitted in back of base unit) (pre-fitted in back of base unit) (pre-fitted in support tube)
7 x Medium Screws (M6x10) 7 x Washers 06 1 x Hexagonal Die #6
(3 pre-fitted in computer unit) (3 pre-fitted in computer unit)
1 x Hexagonal Die #5

4
ASSEMBLY
PLEASE NOTE –All screws are already fitted in the machine and need to be removed
before assembly, please make note of where the screws were situated to avoid
misplacing them during assembly.
1. Lay the main unit on an even flat surface.
2. Take the computer wire and pass it down the
centre support tube if not already done.
3. When you assemble the centre support tube make
sure you connect the computer wires first.
Please note that the larger connector is at the top.
4. Position the base of the centre support into the
main base unit.
Use the correct tool and Hexagonal screws M8x30.

5
5. The image shows how the main support tube
should look like when connected and assembled.
6. Take the 2 handle sections and place the bottom
section in position on the centre support column,
line the holes up and fix in place using the stainless
steel screws M6x10.
7. Place the plastic cover over the screw section on
the back of the vibration plate.
8. The image shows the back section completely
assembled.

6
9. Fix the 2 top sections of the handles into the top of
the centre console using the M8x40 screws and
tighten securely. Make sure the pulse wires are
treated carefully and look out of top pole.
10. Connect the wires of the control panel to the
wires of the main support tube (computer cable +
pulse cables).
11. Be careful to feed the cables inside the holes of
the support column before screwing the control
panel on to avoid damage to the cables.
12. Place the control panel onto the main support
column.

7
13. Finally using screws M6x10 at the bottom side of
the control panel, securely fix the control panel to
the main support column securing the front screw
first followed by the remaining screws.
14. Screw the eye hole screws into the provided holes on the base unit and attach
the hand bands with aid of the karabiner, when needed for training.

8
MACHINE FEATURES/OPERATIONS.
1 –50 Different working speeds.
3 Specifically designed Programs.
3 Digital LED screens. One indicates the Program number (“Program Selection”) the
second screen shows the time elapsed and heart pulse (“Time/Pulse”) and the third
shows the speed select (“Speed”).
DESCRIPTION OF THE DISPLAY PANEL BUTTONS.
Program select Display Time/Pulse Display Speed Display
Time Pulse
Stop/Start Program Select Up Down

9
INSTRUCTIONS FOR USE.
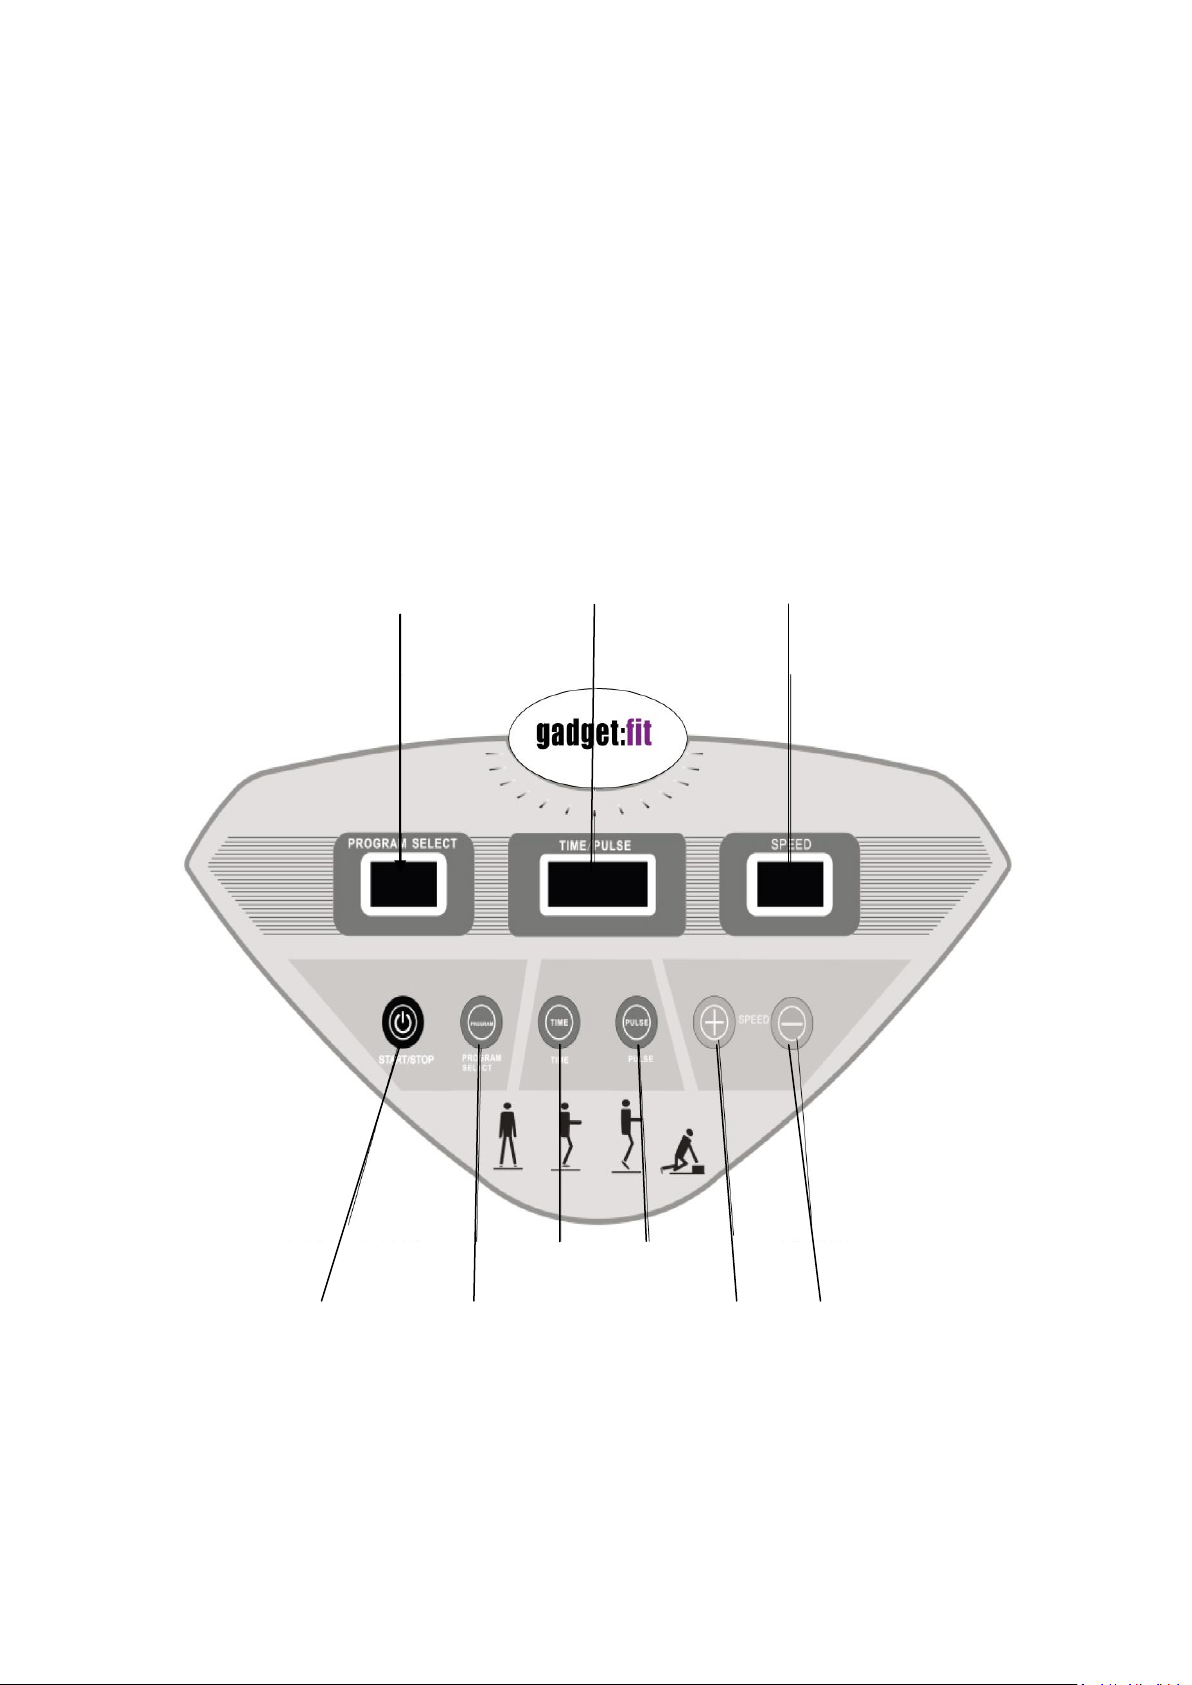
Press the Stop/Start button once to POWER ON.
The PROGRAM SELECT display will show ‘HL’ : The TIME/PULSE display will show
‘010’ (timing for 10 minutes) : The SPEED display will show ‘00’.
In any status press the TIME/PULSE key to change the time or pulse display in the
middle window.
In the standby status press the STOP/START button, the machine is now in the
working status. Press the STOP/START button again to return to the standby status.
In either the standby status or working status press the PROGRAM SELECT button to
choose the working program, ‘HL’ (manual mode) : ‘PI’ (automatic program)
‘P2’ (automatic program) and ‘P3’ (automatic program).
The maximum time for every program is 10 minutes. On the automatic programs the
SPEED button is INACTIVE.
In any status press the PULSE key and hold the heart rate sensors, the present heart
rate will be shown in the TIME/PULSE display.
Instructions for the Automatic Program Mode.
Automatic Program ‘P1’ : Slowly increases your bodies heart rate and vibration
resistance. Every 30 seconds, the speed changes from
Start to 10–15-20-25-30-35-40-35-30-25-20-15-10.
Automatic Program ‘P2’ : Keeps your heart rate in the fat burning mode.
Every 30 seconds, the speed changes from
Start to 10-15-20-25-30-35-40 and will then stay in the accelerate motion.
Automatic Program ‘P3’ : Variation mode for Advanced Athletes.
Every 30 seconds, the speed changes from
Start to 15-30-45 and will then stay in the accelerate motion.

10
TECHNICAL SPECIFICATIONS.
PRODUCT MODEL : HM01-08VM
PRODUCT NAME : GADGET:FIT FITNESS MASSAGER
RATED VOLTAGE : 220-240V
RATED POWER : 600W
PRODUCT NET WEIGHT : 27KGS
PRODUCT SIZE : 122 x 70 x 60cm
BOX SIZE (WHEN SHIPPED): 113 x 75 x 26cm
This appliance is not intended for use by persons (including children) with reduced
physical, sensory or mental capabilies, or lack of experience and knowledge, unless
they have been given supervision or instrucons concerning the use of the appliance
by a person responsible for their safety. Children should be supervised to ensure that
they do not play with the appliance.

11
CUSTOMER SERVICE HOTLINE UK - +44 (0)1527 598388-
CUSTOMER SERVICE HOTLINE USA – 1.800.603.0004
CUSTOMER SERVICE HOTLINE AUSTRALIA – 1300 132 151
Table of contents
Popular Massager manuals by other brands

Profi Care
Profi Care PC-FM 3027 instruction manual

Lifepro
Lifepro RelaxaTilt Pro user manual

Silvercrest
Silvercrest SSM 141 C3 Operation and safety notes

Silvercrest
Silvercrest 68846 operating instructions

BELLA VITA
BELLA VITA BVNKEMSMSGA user guide

Silvercrest
Silvercrest SSMN 2 A1 operating instructions

Feelgood
Feelgood 6104 user guide

Human Touch
Human Touch HT-3020 quick guide

HoMedics
HoMedics FMS-275H-CA Instruction manual and warranty information

Medisana
Medisana Massage office chair MSO manual

Sanyo
Sanyo HECSR1000K - Stiffness Sensor - Multi Roller Massage... parts list

Oregon Scientific
Oregon Scientific WS901 user manual