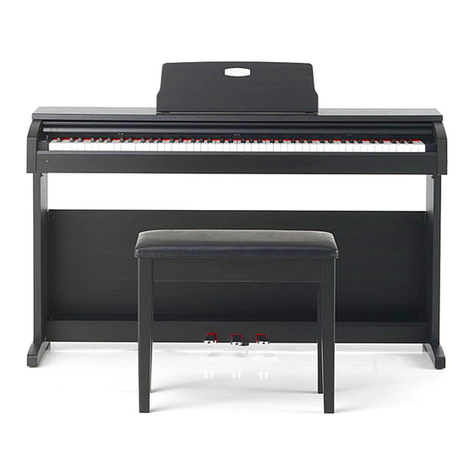
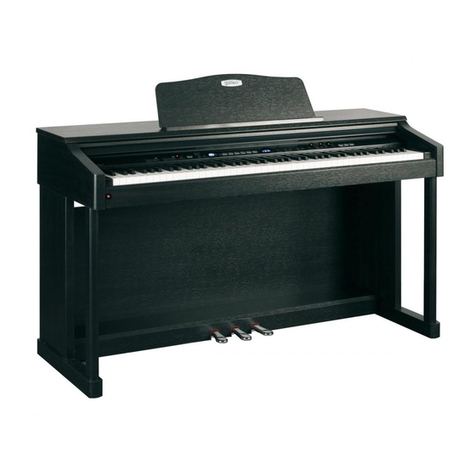
Galileo Milano 3G User manual


3
M
I
C
R
O
G
R
A
N
D
D
I
G
I
T
A
L
P
I
A
N
O
Table Of Contents
Important Safety Instructions ............................... 4
General Preautions ........................................................ 6
Welcome ............................................................................... 7
Connector Panel .............................................................. 8
Panel Controls .................................................................. 9
Pedals ................................................................................. 19
Demo ................................................................................... 20
Keyboard Voices ........................................................... 21
Voice Selection ................................................... 21
ser Defined Quick Selection Button ..... 22
Layer (dual) Voice .............................................. 22
Lower (split) Voice ............................................. 23
Keyboard Percussion ....................................... 23
Rhythm Style ................................................................... 25
Rhythm Style Selection .................................. 25
ser Defined Quick Selection Button ..... 26
uto ccompaniment ............................................... 27
Auto Accompaniment .................................... 27
Auto Bass Chord Fingering ........................... 27
Single Mode ................................................ 27
Fingered Mode .......................................... 28
Piano Chord Mode .................................. 29
Chord Display ............................................ 29
Manual Bass Chord Mode .................... 29
Auto Harmony ..................................................... 29
Playing the Auto Accompaniment .......... 30
Starting the Accompaniment ............ 30
Playing Chor and Bass ........................... 30
Variation ........................................................ 30
Fill-In ............................................................... 30
Stopping the Accompaniment .................. 30
The Split Point for the Auto Accomp ...... 31
Adjust the Tempo .............................................. 31
Accompaniment Volume ............................... 31
Auto Bass Chord Off ......................................... 31
Metronome ...................................................................... 32
Record ................................................................................. 33
Recording .............................................................. 33
Playback ................................................................. 35
Exit ............................................................................. 35
SD Card ................................................................................. 36
Enter the SD Card Mode and Play ............. 36
Play all songs ......................................................... 37
Repeat Playing Mode ........................................ 37
Deleting a MIDI file From the SD Card ..... 38
Saving a MIDI file onto the SD Card .......... 38
Error Messages ...................................................... 39
Volume of the SD Card Song ......................... 39
Setup ...................................................................................... 40
Equalization ........................................................... 40
Keyboard Percussion ......................................... 40
Master Tune ............................................................. 41
Split Point for Auto Accompaniment ....... 42
Split Point for Lower Voice ............................. 42
Auto Harmony Type Selecting ...................... 42
Reverb Type .Selecting ...................................... 43
Reverb Level Setting .......................................... 43
Chorus Type Selecting ....................................... 43
Chorus Level Setting .......................................... 44
Touch Response Setting ................................... 44
Vocal Grading ........................................................ 45
Local ............................................................................ 45
Contrast of LCD Display .................................... 45
Factory Setting ...................................................... 46
Registration Memory ................................................... 47
Play long Song ............................................................... 48
Engage the Song Mode ................................... 48
Playing the Play Along Songs ....................... 48
Check Your Progress ........................................... 49
iPod and iPad Connection ......................................... 50
MIDI ......................................................................................... 51
MIDI Implemetation Chart ....................................... 52
Voice List ............................................................................... 53
Style List ............................................................................... 56
Specifications .................................................................... 58
Warranty ............................................................................... 59

4
M
I
C
R
O
G
R
A
N
D
D
I
G
I
T
A
L
P
I
A
N
O
IMPORTANT SAFETY INSTRUCTIONS
Read all the instructions before using the product.
CAUTION
RI SK OF ELECTRI C SHOCK
K
DO NOT OPEN
AVIS : RISQUE DE CHOC ELECTRIQUE - NE PAS OUVRIR.
TO REDUCE THE RISK OF ELECTRIC SHOCK, DO NOT REMOVE COVER (OR BACK).
NO USER-SERVICEABLE PARTS INSIDE. REFER SERVICING TO QUALIFIED SERVICE PERSONNEL.
Th lighting flash with arrowh ad symbol, within an
quilat ral triangl , is int nd d to al rt th us r to
th pr s nc of uninsulat d “dang rous voltag ”
within th product’s nclosur that may b of
suffici nt magnitud to constitut a risk of l ctric
shock to p rsons.
Th xclamation point within an quilat ral triangl
is int nd d to al rt th us r to th pr s nc of
important op rating and maint nanc (s rvicing)
instructions in th lit ratur accompanying th
product.
WARNING
TO REDUCE THE RISK OF
FIRE OR ELECTRIC
SHOCK, DO NOT EXPOSE
THIS PRODUCT TO RAIN
OR MOISTURE.
INSTRUCTIONS PE RTAINING TO A RISK OF FIRE, ELECTRIC SHOCK, OR INJU RY TO PERSONS
SAVE THESE INSTRUCTIONS
1) R ad th s instructions.
2) K p th s instructions.
3) H d all warnings.
4) Follow all instructions.
5) Do not us this apparatus n ar wat r.
6) Cl an only with d ry cloth.
7) Do not block any v ntilation op nings. Install in
acco rdanc with th manufactu r r’s
instructions.
8) Do not install n ar any h at sou r
c s such as
radiators, h at r gist rs, stov s, or oth r
apparatus (including amplifi rs) that p roduc
h at.
9) Do not d f at th saf ty purpos of th
polariz d or g rounding-typ plug. A polariz d
plug has two blad s with on wid r than th
oth r. A g rounding typ plug has two blad s
and a third grounding prong. Th wid blad or
th thir d pr ongs ar provid d for your saf t y.
If th provid d plug do s not fit into your outl t,
consult an l ctrician for r plac m nt of th
obsol t outl t.
10) Prot ct th pow r co rd from b ing walk d on
or pinch d pa rticularly at plugs, conv ni nc
r c ptacl s, and th point wh r th y xit f rom
th apparatus.
11) Only us attachm nts/acc ssori s sp cifi d by
th manufactu r r.
12) Us only with th ca rt, stand, tripod, brack t, or
tabl sp cifi d by th manufactu r r, or
sold with th apparatus. Wh n a ca r t is us d,
us caution wh n moving th ca rt/apparatus
combination to avoid inju ry f rom tip-ov r.
13) Unplug this apparatus during lightning sto rms
or wh n unus d for long p riods of tim .
14) R f r all s rvicing to qualifi d s rvic
p rsonn l. S rvicing is r qui r d wh n th
apparatus has b n damag d in any wa y,
such as pow r-supply co rd or plug is
damag d, liquid has b n spill d or obj cts
hav fall n into th apparatus, th apparatus
has b n xpos d to rain or moistu r , do s not
op rat normall y, or has b n dropp d.
15) Apparatus shall not b xpos d to dripping or
splashing and no obj cts fill d with liquids, such
as vas s, shall b plac d on th apparatus.
16) Warning - To r duc th risk of fir or l ctric
shock, do not xpos this apparatus to rain or
moistur .
d not s that car should b tak n.
Th xampl instructs th us r to tak car not to allow fing rs to b trapp d.
d not s a prohibit d op ration.
Th xampl instructs that disass mbly of th product is prohibit d.
d not s an op ration that should b carri d out.
Th xampl instructs th us r to r mov th pow r cord plug from th AC outl t.
Examples of Picture Symbols

5
M
I
C
R
O
G
R
A
N
D
D
I
G
I
T
A
L
P
I
A
N
O
Th product is not compl t ly disconn ct d f rom th
pow r supply v n wh n th pow r switch is turn d
off. If th product will not b us d for a long tim ,
unplug th AC pow r cord from th AC outl t.
Failur to do so may caus fir in cas of
lightning.
Failur to do somay ov r-h at th product,
r sulting in fir .
This product may b quipp d with a polaris d lin plug (on blad
wid r than th oth r). This is a saf ty f atur .
If you ar unabl to ins rt th plug into th outl t, contact an
l ctrician to r plac your obsol t outl t.
Do not d f at th saf ty purpos of th plug.
Wh n disconn cting th AC pow r cord’s
plug, always hold th plug
and pull it to r mov it.
Pulling th AC pow r cord its lf may damag
th cord, causing a fir , l ctric shock or
short-circuit.
Doing so may caus th product to fall ov r,
r sulting in injury.
Do not l an against th k yboard.
Wh n using th h adphon s, do not
list n for long p riods of
tim at high volum l v ls.
Doing so may r sult in h aring probl ms.
It is a good practic to plac th instrum nt n ar th AC outl t and to plac th pow r cord plug in a
position that allows th plug to b disconn ct d asily in th v nt of an m rg ncy. El ctricity is always
charging whil th plug is in th AC outl t v n wh n th pow r switch is in th ‘OFF’ position.
Th chair must b us d prop rly (it must b
us d only wh n playing th product).
Do not play with it or stand on it.
Only on p rson is allow d to sit on it.
Do not sit on it wh n op ning th lid.
R -tight n th bolts occasionally.
Doing so may caus th chair to fall ov r or your
fing rs to b trapp d, r sulting in injury.
WARNING
Th pro duct sho uld b conn ct d to
an AC outl t of th sp cifi d voltag .
If you ar going to us an AC pow r cord,
mak sur that it has th corr ct plug shap
and conforms to th sp cifi d pow r voltag .
Failur to do so may r sult in fir .
120V 240V230V
Indicat s a pot ntial hazard that could r sult in d ath
or s rious injury if th product is handl d incorr ctly.
Do not ins rt or disconn ct th pow r
cord plug with w t hands. Doing so may caus l ctric shock.
WARNING - When using electric products, basic precautions should always be followed,
including the following.
Do not us oth r AC adaptors to pow r this
instrum nt.
Do not us th includ d AC adaptor or AC
pow r cord to pow r oth r quipm nt.
Us only th AC adaptor includ d with
this instrum nt to pow r th instrum nt.
Do not disass mbl , r pair or modify
th product. Doing so may r sult in product br akdown, l ctric
shock or short-circuit.

6
M
I
C
R
O
G
R
A
N
D
D
I
G
I
T
A
L
P
I
A
N
O
GEN
E
R
A
L
P
R
E
C
A
U
T
I
O
NS
CAUTION
RISK OF ELECTRIC SHOCK
DO NOT OPEN
CAUTION: TO REDUCE THE RISK OF ELECTRIC SHOCK,
DO NOT REMOVE COVER OR BACK
NO USER-SERVICEABLE PARTS INSIDE
REFER SERVICING TO QUALIFIED SERVICE PERSONNEL
INSTRUCTIONS PERTAINING TO A RISK OF FIRE, ELECTRIC SHOCK OR INJURY:
Th lightning flash with arrowh ad symbol, within an quilat ral triangl , is int nd d to al rt th us r to th
pr s nc of uninsulat d or “dang rous voltag ”within th product’s nclosur that may b of suffici nt
magnitud to constitut a risk of l ctric shock to p rsons.
Th xclamation point within an quilat ral triangl is int nd d to al rt th us r to th pr s nc of important
op ration and maint nanc or s rvicing instructions in th manual accompanying th product.
1. CAUTION: Any chang s or modifications in construction of this d vic which ar not xpr ssly approv d
by th party r sponsibl for complianc could void th us r’s authority to op rat th quipm nt.
2. NOTE: This quipm nt has b n t st d and found to comply with th limits for a Class B digital d vic ,
pursuant to Part 15 of th FCC Rul s. Th s limits ar d sign d to provid r asonabl prot ction against
harmful int rf r nc in a r sid ntial installation. This quipm nt g n rat s, us s, and can radiat radio
fr qu ncy n rgy and, if not install d and us d in accordanc with th instructions, may caus harmful
int rf r nc to radio communications. How v r, th r is no guarant that int rf r nc will not occur in a
particular installation. If this quipm nt do s caus harmful int rf r nc to radio or t l vision r c ption, which
can b d t rmin d by turning th quipm nt off and on, th us r is ncourag d to try to corr ct th int rf r-
nc by on or mor of th following m asur s :
- R ori nt or r locat th r c iving ant nna.
- Incr as th s paration b tw n th quipm nt and r c iv r.
- Conn ct th quipm nt into an outl t on a circuit diff r nt from that to which th r c iv r is conn ct d.
- Consult th d al r or an xp ri nc d radio/TV t chnician for h lp.”
!
!
THIS DEVICE COMPLIES WITH PART 15 OF THE FCC RULES.
OPERATION IS SUBJECT TO THE FOLLOWING TWO CONDITIONS :
(1)THIS DEVICE MAY NOT CAUSE HARMFUL INTERFERENCE, AND
(2)THIS DEVICE MUST ACCEPT ANY INTERFERENCE RECEIVED, INCLUDING INTERFERENCE
THAT MAY CAUSE UNDESIRED OPERETION.
General Precautions

7
M
I
C
R
O
G
R
A
N
D
D
I
G
I
T
A
L
P
I
A
N
O
We would like to express our app reciation and
congratulate you for purchasing this mini grand
digital piano. This piano has been designed to
provide you with years of musical enj o yment.
State of the a rt electronics a re combined with
an elega nt cabinet th at will add beau ty and
sophistic ation to any home e nvironme nt. Listed
Below are just a few of the features that your
new piano is equipped with:
Elegant Hand Rubbed La cquer G rand Piano•
Fits Any Sized Room –It’s Less Than 3 ’Deep!
Feature Packed E ntertainme nt Center is Fun•
For the Whole Family –It’s More Than Just a
Piano!
Play Hund reds of Optional Music Files. Jazz,•
Pop, Classica l, Rock, Country & More!
Compose and Store Your Own Songs with•
Built-in 3 Track Recorder
Choose From 138 Instrume nt Voices•
Including Stereo Grand Piano and 100
Accompanime nt Styles
Advanced Graded Hammer Action Keyboa rd•
Has Authentic Acoustic Piano Touch and Feel
–Teacher Recommended!
Built-In Music Teacher with Verbal and•
Screen G rading
Concert Hall Sound System Has 120 Watts of•
Power and 6 High Performan ce Speakers
SD Memo ry Card Plays Pre-recorded Music –•
You Can Even Record Practice Sessions
Interface Your Compu ter with On- Board MIDI•
and SB po rts
Never Needs Tuning•
Practice in Private with Headphones•
(optional)
listed within this owners manua l. In order to
fully app reciate all the imp ressive features of this
digital pian o, please take a few minu tes to read
the following pages of instru ction. We will cover
gene ral precaution s, assembl y, the fun ction of
each control but ton, and warranty information.
Welcome

8
M
I
C
R
O
G
R
A
N
D
D
I
G
I
T
A
L
P
I
A
N
O
2. PHONE 1 / PHONE 2 - You can play in total silence, without disturbing
others in the room, by plugging a set of headphones into one of the
appropriate sockets. When headphones are plugged into either of
these jacks the main speaker system is turned off. Two sets of head-
phones may be used simultaneously.
3. UDIO IN - These stereo audio input jacks will amplify the supplied
signal through the internal sound delivery system. They can be used to
hook up items such as CD player, MP3 player or Cassette player.
UDIO OUT - These stereo audio output jacks supplies the piano’s
output signal to external amplification, such as PA system or other stand
alone amplifiers.
4. MIDI IN / MIDI OUT - This piano contains MIDI in and MIDI output ports.
MIDI jacks allow communication with other products equipped with
MIDI interfaces. Please see the MIDI section of this manual for further
details.
5. USB - The SB connector allows you to connect the piano directly to
your computer’s SB port. Do not turn on the piano with the SB
cable connected to the computer to avoid having to restart your
computer. It can connected without driver installation under the Win-
dows XP, Windows Vista, Windows 7 and MAC OSX environment. The
piano wil be recognized as SB Audio device to receive and transmit
MIDI messages.
1. MIC - The Microphone Input is to connect a microphone to the
piano. When a microphone is connected it will amplify the output
of the Microphone through the piano’s sound system.
Connector Panel
This connector panel, with its various jacks, is located on the bottom left of the piano, under the
keybed.
PHONES
AUDIO
IN OUT
IN OUT
MIDI
USB
L L
RR
MIC
2 3 4 51

9
M
I
C
R
O
G
R
A
N
D
D
I
G
I
T
A
L
P
I
A
N
O
1. M STER VOLUME - se this sliding controller to adjust the overall
volume of the keyboard.
Note: At higher volumes there may be audio clipping or distortion
depending on the frequencies being played
2. CCOMP VOLUME - Slide this controller to adjust the volume of the
auto accompaniment, metronome and SD Card playing, the keyboard
instrument voice will not be affected.
3. TEMPO - Press one of the TEMPO buttons, the current tempo value will
appear on the display. You can use the TEMPO +, TEMPO – buttons, or
the DARA WHEEL to change the tempo range from 40 to 240 bpm (beats
per minute). Press the TEMPO + or TEMPO – buttons simultaneously to
recall the default tempo setting for the selected rhythm style. After
three seconds the display will revert to the selected voice.
There is a four-dot beat indicator above the tempo buttons. It indicates
the tempo and beat for the accompaniment that is playing.
SeetheAuto Accompaniment section of thismanual for moreinformation.
4. H RMONY - When selected, the single note played in the right-hand
section of the keyboard will sound with additional auto harmony notes.
The note played in the upper section of the piano determines the root
key of the harmony. It is recommended that one note be played at a
time. When the harmony is engaged, the engagement bar will appear
underneath the Harmony icon on the LCD Display and the harmony
number will be shown above the icon.
Auto harmony is only available when the auto accompaniment is
engaged. The harmony type selection is assigned in the Setup menu.
SeetheAuto Accompaniment section of thismanual for moreinformation.
The elegant control panel is divided into several distinct sections. The folowing is a brief descrip-
tion of all the features located on the control panel.
12
3
4
POWER SWITCH - The power switch is located to the left of the keyboard.
Press the button to turn the power on and off. There is an indicator light on
the left front portion of the piano. This light will be lit when power is on.
Note: When you turn the power off, do not turn it back on immediately.
Wait at least five seconds to turn the power back on so that the electronic
circuits can properly reset.
Hamony number
Hamony
icon
Engagement Bar
Panel Controls

1
0
M
I
C
R
O
G
R
A
N
D
D
I
G
I
T
A
L
P
I
A
N
O
5. L YER - Pressing the LAYER button will put the keyboard in the layer
(dual) mode. Layer, or dual, refers to an additional voice that is tone
mixed with the selected keyboard voice. The assigned layer voice will
be heard with the original voice. To select a new layered instrument
voice use the DATA WHEEL or +, - buttons within 3 seconds after the
LAYER button has been pressed.
When this mode is engaged, the engagement bar will appear under-
neath the Layer voice icon and the Layer voice number above the icon.
PleaseseetheKeyboard VoiceSection for moreinformation.
6. LOWER - With the LOWER feature engaged the keyboard operates in
split mode. The keyboard is divided into two sections. In the right
hand section the original or layered voice will sound, and in the left
hand section a different voice can be assigned. To select a new Lower
instrument voice use the DATA WHEELor +, - buttons within 3 seconds
after the LOWER button has been pressed.
When this mode is engaged, the engagement bar will appear under-
neath the Lower voice icon and the Lower voice number will be shown
above the icon.
PleaseseetheKeyboard VoiceSection for moreinformation.
7. SYNC ST RT - Synchronized Start mode sets the auto accompaniment
into standby mode. When the SYNC START button is pressed the
indicator lights above the TEMPO button will flash to the Tempo of the
selected rhythm style. The Auto Accompaniment will start with the first
recognized chord played in the auto accompaniment section of the
keyboard. Pressing the SYNC START button again will stop the auto
accompaniment and put the keyboard back into standby mode.
SeetheAuto Accompaniment section of thismanual for moreinformation.
8. ST RT/STOP - This button starts or stops the selected rhythm style. The
Drum Pattern and Rhythm Style will start immediately as soon as you
press this button
Press this button again to stop the Auto Accompaniment.
SeetheAuto Accompaniment section of thismanual for moreinformation.
7
65
8
Lower voice number
Lower
icon
Layer voice number
Layer
icon
Engagement Bar
Engagement Bar

1
1
M
I
C
R
O
G
R
A
N
D
D
I
G
I
T
A
L
P
I
A
N
O
9. INTRO/ENDING - All of the 100 rhythm styles can be started or finished
with a unique introduction or ending pattern. When selected, an intro-
duction of the style will start followed by the main style pattern.
When engaged, an introduction of rhythm pattern will start followed by
the main pattern. With a rhythm or accompaniment pattern already
engaged the accompaniment can be professionally completed with an
ending pattern from the next measure by pressing the INTRO/ENDING
button. If you press the fill-in button during the ending pattern it will
return to the main accompaniment pattern.
SeetheAuto Accompaniment section for moreinformation.
10. FILL IN - The fill-in provides the accompaniment with a short rhythm
pattern of one or two measures for each style. Press the FILL IN button at
any time while the accompaniment is playing to add a fill-in. If you hold
down the FILL IN button, the fill-in pattern will repeat until the button is
released, then the main pattern will play from the beginning of the next
measure.
SeetheAuto Accompaniment section for moreinformation.
11. V RI TION - All of the 100 rhythm styles include a variation of that style
that can be played simply by pressing the VARIATION button. Press the
VARIATION button again to disengage and return to the main pattern.
SeetheAuto Accompaniment section for moreinformation.
12. CCOMP - Each rhythm style has a fully orchestrated auto accompani-
ment pattern. These accompaniments are dedicated to the selected
rhythm style, and will create rhythm, bass and chord accompaniments.
The ACCOMP button selects the auto accompaniment mode. With this
function engaged, the keys to the left side of the split point are the auto
accompaniment section of the keyboard, while the keys to the right are
available for normal playing.
The auto accompaniment fingering modes are single, fingered, piano,
and off. Press the ACCOMP buton until the indicator LED that corre-
sponds to the fingering mode you desire turns on.
SeetheAuto Accompaniment section for moreinformation.
11 12109

1
2
M
I
C
R
O
G
R
A
N
D
D
I
G
I
T
A
L
P
I
A
N
O
13. /B BUTTON - The five quick select voice and five quick select style
buttons are each assigned to a line A and line B. Press the A/B button to
alternate between the two selection lines. The indicator light will be lit
when selection line B is active.
Pleaseseethequick select buttonsbelow for moreinformation.
14. QUICK SELECT VOICE BUTTONS - There are ten instrument voices
that can be selected quickly by pressing one of the five voice select
buttons. These voices are assigned to line A and line B. Each of these
selection lines consists of five voices. The voice name in the line A is
printed above the voice select button and the voice name on line B is
beneath the button. Press the A/B button to select the voice line of your
choice. When the indicator light is lit the B line or bottom line is active.
The selected voice name and its number will be shown on the display.
PleaseseetheKeyboard Voicessection for moreinformation.
15. QUICK SELECT STYLE BUTTONS - There are ten Rhythm Styles that
can be selected quickly by pressing one of the five style select buttons.
These rhythm styles are assigned to line A and line B. Each of these
selection lines consists of five rhythm styles. The style name in line A is
printed above the style select button and the rhythm style name on line
B is beneath the button. Press the A/B button to select the rhythm style
line of your choice. When the indicator light is lit the B line or bottom
line is active. The selected rhythm style name and its number will be
shown on the display.
Please see the Rhythm Styles section for more information.
16. METRONOME - Toggles the metronome feature on and off and
accesses the Metronome menu. When the metronome is engaged, the
pendulum rod of the metronome icon on the LCD Display will swing. If
the auto accompaniment is playing, the metronome sound will replace
the Drum Beat Rhythm Pattern. Time signature and tempo of the metro-
nome can be adjusted.
Please see the Metronome section for more information.
13
14
15 16

1
3
M
I
C
R
O
G
R
A
N
D
D
I
G
I
T
A
L
P
I
A
N
O
17. VOICE - There are 128 GM (General MIDI) instrument voices, plus ten
Asian folk instrument voices available on this piano. You can instantly
select an instrument voice by pressing one of the voice select buttons. Or
press the VOICE button to engage the voice selection mode then use the
DATA WHEEL or +, - button to select, the voice name and its number will
be shown on the display. There is a complete list of all 138 voices listed in
the back of the manual.
PleaseseetheKeyboard Voicesection of thismanual for moreinformation.
18. STYLE - To engage one of the 100 rhythm styles, and the corresponding
auto accompaniment, press one of the rhythm style buttons or presst he
STYLE button to engage the style selection mode then use the DATA
WHEEL or +, - button to select a style, the style name and its number will
be shown on the display.
There is a complete list of all100 rhythm accompaniment styles listed in
the back of the manual.
PleaseseetheRhythm Stylesection of thismanual for moreinformation.
19. SETUP - The SET P button is used to access the Setup menu. The Setup
menu can be used to adjust or change the parameters of a number of
settings such as Reverb level, chorus level, split point, reset the factory
default setting and so on.
PleaseseetheSetup section of thismanual for moreinformation.
20. USER REG - SER REG is used to store keyboard settings. Press the
SER REG button to engage the registration memory mode, the engage-
ment bar will appear underneath the Registration icon and the memory
number will be shown above the icon. se the DATA WHEEL or +, -
buttons to select a Registration memory from 0-10, the stored setting will
be recalled.
PleaseseetheRegistration Memory section of themanual for more
information.
Memory number
Registration
icon
Engagement Bar
19
17
18
20

1
4
M
I
C
R
O
G
R
A
N
D
D
I
G
I
T
A
L
P
I
A
N
O
21. DISPL Y SCREEN - Please see the description below.
Letter and Number display area
Metronome
Digital Effects On/Off indicator
Voice and Style
mode Indicator
Function icon
Parameter of
Function
Keyboard
indicator
Accompaniment
chord
Style and tempo,
Auto-Accomp
display
Engagement Bar
Layer voice Keyboard Voice: Layer Voice
Engagement Bar
Lower voice Keyboard Voice: Lower Voice
Transpose Panel Controls: Transpose the keyboard
Keyboard percussion Setup: Percussion select for the Piano keys
Auto Hamony Auto Accompaniment: Harmony
Equalizer Setup: Equalizer for Sound Delivery System
Play along song Play Alone Song
Registration memory Registration Memory to store piano settings
Icon Description
21
Sound effects Panel Controls: Reverb, Chorus

1
5
M
I
C
R
O
G
R
A
N
D
D
I
G
I
T
A
L
P
I
A
N
O
22. UP, DOWN - The P, DOWN buttons are used to access the different
menus in the Setup feature. When the SET P button has been pressed ,
use the P and DOWN buttons to access the setup menu selections.
These two buttons are also used for voice and style group selection.
23. ENTER - The ENTER button is used to confirm a selection or for con-
firming a function.
24. C NCEL - The CANCEL button is used to cancel the selection or
function.
25. D T WHEEL - se the wheel to select data when using the voice, style
or function settings. It is also used to access or alter many of the func-
tion features or when other numerical input is necessary. Rotate the dial
clockwise to increase the data and counter clockwise to decrease.
26. +, - - These buttons are used to increase or decrease the data number
by one. In the Setup mode, they are used to toggle and switch control
for some items.
27. TR NSPOSE - The transpose feature can shift the pitch of the keyboard
up or down in semitone intervals up to a maximum of 24 semitones.
Press one of the TRANSPOSE buttons and the current transpose value
will appear on the display. se the TRANSPOSE + or – buttons to set
the transpose value range from –12, one octave lower, to 12, one
octave higher. Press the TRANSPOSE+ and – buttons simultaneously
to recall the default value of 0. After three seconds the display will
return to the currently selected instrument voice. Transpose does not
affect notes that are currently playing. Transpose does not affect the
percussion.
When transpose is not set to zero, the engagement bar will appear
underneath the Transpose icon and its value will be displayed above
the icon.
25 27
Semitone of the
transpose
Transpose
icon
Engagement Bar
22
23
26
24

1
6
M
I
C
R
O
G
R
A
N
D
D
I
G
I
T
A
L
P
I
A
N
O
28. REVERB - The reverb effect is engaged automatically when the power
is turned on. Reverb simulates the effect of playing in a big room or hall
where the sound reverberates off the walls and ceiling. You can switch
the reverb feature on and off by pressing the REVERB button. When
reverb is On, the REVERB indicator at the upper right corner of the
display will appear. Reverb type and depth can be changed in the setup
menu “Reverb Type Selecting“ and“Reverb Level Setting“.
PleaseseetheSetup Section for moreinformation.
29. CHORUS - The Chorus effect adds depth and spaciousness to the
selected keyboard voice. Press the CHOR S button to engage the
chorus effect. Press the button again to turn off the chorus effect.
When chorus is On, the CHOR S indicator at the upper right corner of
the display will appear. Chorus type and depth can be changed in the
setup menu “Chorus Type Selecting“ and “Chorus Level Setting“.
PleaseseetheSetup Section for moreinformation.
30. SONG LEFT, SONG RIGHT - These buttons are used in conjunction
with the DEMO/SONG button. It allows the player to play along with
the prerecorded traditional songs contained within this piano. The LEFT
button will play the right hand of the selected song, so the user can
practice the left hand portion of the song. The RIGHT button will play
the left hand of the selected song, so that the user can practice the right
hand portion of the song.
When engaging the LEFT and RIGHT buttons simultaneously only
metronome will be heard as the user should play both the Left and
Right portions of the selected song. When the song mode is engaged,
the engagement bar will appear underneath the Play alone song icon
and the song number will appear above the icon.
PleaseseethePlay Along Song section of thismanual for more
information.
28 29 30
Semitone of the
transpose
Play alone
song icon
Engagement Bar

1
7
M
I
C
R
O
G
R
A
N
D
D
I
G
I
T
A
L
P
I
A
N
O
31. USER SONG - The SER SONG button accesses one of the four avail-
able song settings for recording or playback. se the +, –buttons to
select the song you wish, if there is recorded information on any of the
three tracks their indicator lights will light up. PleaseseetheRecord
section of thismanual for moreinformation.
32. CCOMP/PL Y LL - This is a dual function button.
CCOMP This button is used to select the auto accompaniment track of
a song for recording or playback in the record mode.
PL Y LL This button is used to play all MIDI files stored in the SD Card
in the SD Card mode.
PleaseseetheRecord andSDCard sectionsof thismanual for more
information.
33. MELODY 1/REPE T - This is a dual function button.
MELODY 1 There are two tracks for recording melody. The melody 1
track is assigned by this button in the record mode.
REPE T In the SD Card mode, this button is used to engage the way of
repeat playing.
PleaseseetheRecord and SD Card sectionsof thismanual for more
information.
34. MELODY 2/DELETE - This is a dual function button.
MELODY 2 There are two tracks for recording melody. The melody 2
track is assigned by this buttons in the record mode.
DELETE In the SD Card mode, this button is used to delete the selected
song stored in the SD Card.
PleaseseetheRecord and SD Card sectionsof thismanual for more
information.
33
31 32 34

1
8
M
I
C
R
O
G
R
A
N
D
D
I
G
I
T
A
L
P
I
A
N
O
37. SD C RD - Press the SD CARD buton to engage the SD memory card
function.
PleaseseetheSDCard section of thismanual for moreinformation.
38. DEMO/SONG - This piano has thirteen different demonstration songs.
DEMO The demo mode will play back all thirteen demo songs or select
the song individually. This button is used to engage the demonstration.
SONG The “music teacher“ feature can be used as an aid to learn the 55
songs built into this piano. To engage this mode, press this button
twice.
PleaseseetheDemo and Play Along Song sectionsof thismanual for more
information.
37
36
35. REC/S VE - This is a dual function button for Record and SD Card
modes.
REC This unit is able to record four songs, each with a 3-track sequencer.
It will record all note events and accompaniment patterns exactly as
they are performed. This recorded information is nonvolatile and
therefore will not be lost when the power is turned off.
To record press and hold down the REC button then press the track
button(s) you want to record in. Recording begins as soon as you start
to play.
Press the REC button again to stop recording.
S VE In the SD Card mode, this button is used to save the recorded
information to the SD Card.
PleaseseetheRecord and SD Card sectionsof thismanual for more
information.
36. PL Y/STOP - This is a dual function button.
PL Y/STOP In the record mode, press the PLAY/STOP button to hear
selected tracks that you have recorded on. Press the PLAY/STOP button
again to stop the playback.
PL Y/STOP In the SD Card mode, press the PLAY/STOP button to start
play the selected song from the SD card. Press the PLAY/STOP button
again to stop the playback.
PleaseseetheSDCard section of thismanual for moreinformation.
38
35

1
9
M
I
C
R
O
G
R
A
N
D
D
I
G
I
T
A
L
P
I
A
N
O
1. SOFT PED L - When the left pedal is engaged the piano volume is
reduced and the timbre slightly altered on the notes that are played.
2. SOSTENUTO PED L - When the center pedal is engaged, the keys that
were already held down will continue to sustain and the notes will
decay gradually after they are released. The other keys that are played
after the pedal has been pressed are not affected.
3. SUST IN PED L - When the right pedal is engaged the piano keys will
continue to sustain as they are played. Thereby the piano note will
decay gradually as if you were continuing to hold down the piano keys.
Pedals
1 32

2
0
M
I
C
R
O
G
R
A
N
D
D
I
G
I
T
A
L
P
I
A
N
O
Play ll Demo Songs - Press the DEMO/SONG, the indicator lights up. The
first demo song will playback instantly. This unit has thirteen demo songs.
All songs will play repeatedly until you press the DEMO/SONG button
again to stop the demonstration songs and to engage the Play Along
Song mode.
To Play a Single Demo Song - se the DATA WHEEL or the +, - buttons to
select a songs while the demo is playing. The song will play repeatedly
until you change the song or press the DEMO/SONG button again to stop
the demo.
Note: The playing can stop instantly once it has been finished. It is deter-
mined by Repeat mode setting. PleaseseetheSDCard section of this
manual for moreinformation.
Play long Song - There are 55 songs for the musical training course that
can also be played back for demonstration.
Press the DEMO/SONG button twice to enter the Play Along Song Mode,
the engagement bar underneath the Play Along Song icon will appear.
The Play Along Song name and its song number will appear on the top
row of the display name and its song number will appear above the Play
Along Song Icon.
.
Pleaseseethe Play along song section of thismanual for more information.
Exit - When you press the DEMO/SONG button for the third time the piano
will exit from the Demo/song mode.
Demo
Playing Demo Songs - This piano has thirteen different demonstration songs that are de-
signed to showcase some of the different sampled voices that are available. The display will show
the song number with a “d“ prefix. When playing all the songs, “All Demo“ will appear on the
display initially, and will change to the demo song number as it plays.
After exiting the demonstration mode the display will revert to its initial data.
The DEMO/SONG button is a dual function button used for both Demo and the Play Along Song
Mode.
So J a z z e d
Ro a d Ro c k
Play Along
Song icon
An n i e
Song number
Engagement Bar
Al l De mo
2nd Tim
3rd Tim

2
1
M
I
C
R
O
G
R
A
N
D
D
I
G
I
T
A
L
P
I
A
N
O
Quick Select - There are ten voices that can be selected quickly by pressing
one of the five voice select buttons. These voices are assigned to Instru-
ment Line A and Instrument Line B. Each Line consists of five voices. The
voice name in Line A is printed above the voice select button and the
voice name in Line B is beneath the button.
1. Press the A/B button to select a voice kit. Selection of the Instrument
Lines will alternate when the A/B button is pressed repeatedly. The
indicator will be lit when Line B is selected .
2. Press the voice select button that corresponds to the desired voice in the
Instrument Line you have selected. The voice name and its number
with a VOICE indicator in front will show on the display.
Selecting One Of The 138 Voices
1. Press the VOICE Button to have the VOICE indicator display in the upper
left corner of the display. The current selected voice will be shown and
the VOICE indicator will turn on.
2. se DATA WHEEL or the +, – buttons to select a voice. The voice name
and its number will show on the display. Please refer to the back of the
manual for a list of all available voices.
Selecting Voice Via Group
1. The the P and DOWN button can be used to select the voice group. The
group name in capital and its number with “ “notation will be shown
and it will blink.
2. Press the ENTER button to confirm the group selected. Press the CANCEL
button to exit from the group mode.
3. When the group selection mode is engaged, the first voice in this group
will be shown. se the DATA WHEEL or +, - buttons to select a single voice.
GUI TAR
Keyboard Voice
Voice Selection - There are 128 GM voices in 16 groups plus 10 Asian ethnic folk instrument
voices. There is a complete list of all 138 voices in the back of the manual.
Gr . Pi a n o
E. Pi a n o 1
G. Pi a no
Other manuals for Milano 3G
1
Table of contents
Other Galileo Musical Instrument manuals

Galileo
Galileo VP121 User manual

Galileo
Galileo Maestro II User manual

Galileo
Galileo YP300 User manual

Galileo
Galileo Milano 3G User manual

Galileo
Galileo VP111 User manual

Galileo
Galileo Milano II User manual

Galileo
Galileo YP200 User manual

Galileo
Galileo Organ User manual

Galileo
Galileo VP110 User manual

Galileo
Galileo my1stpiano User manual