EN - 4
VP110
Owner’s Manual
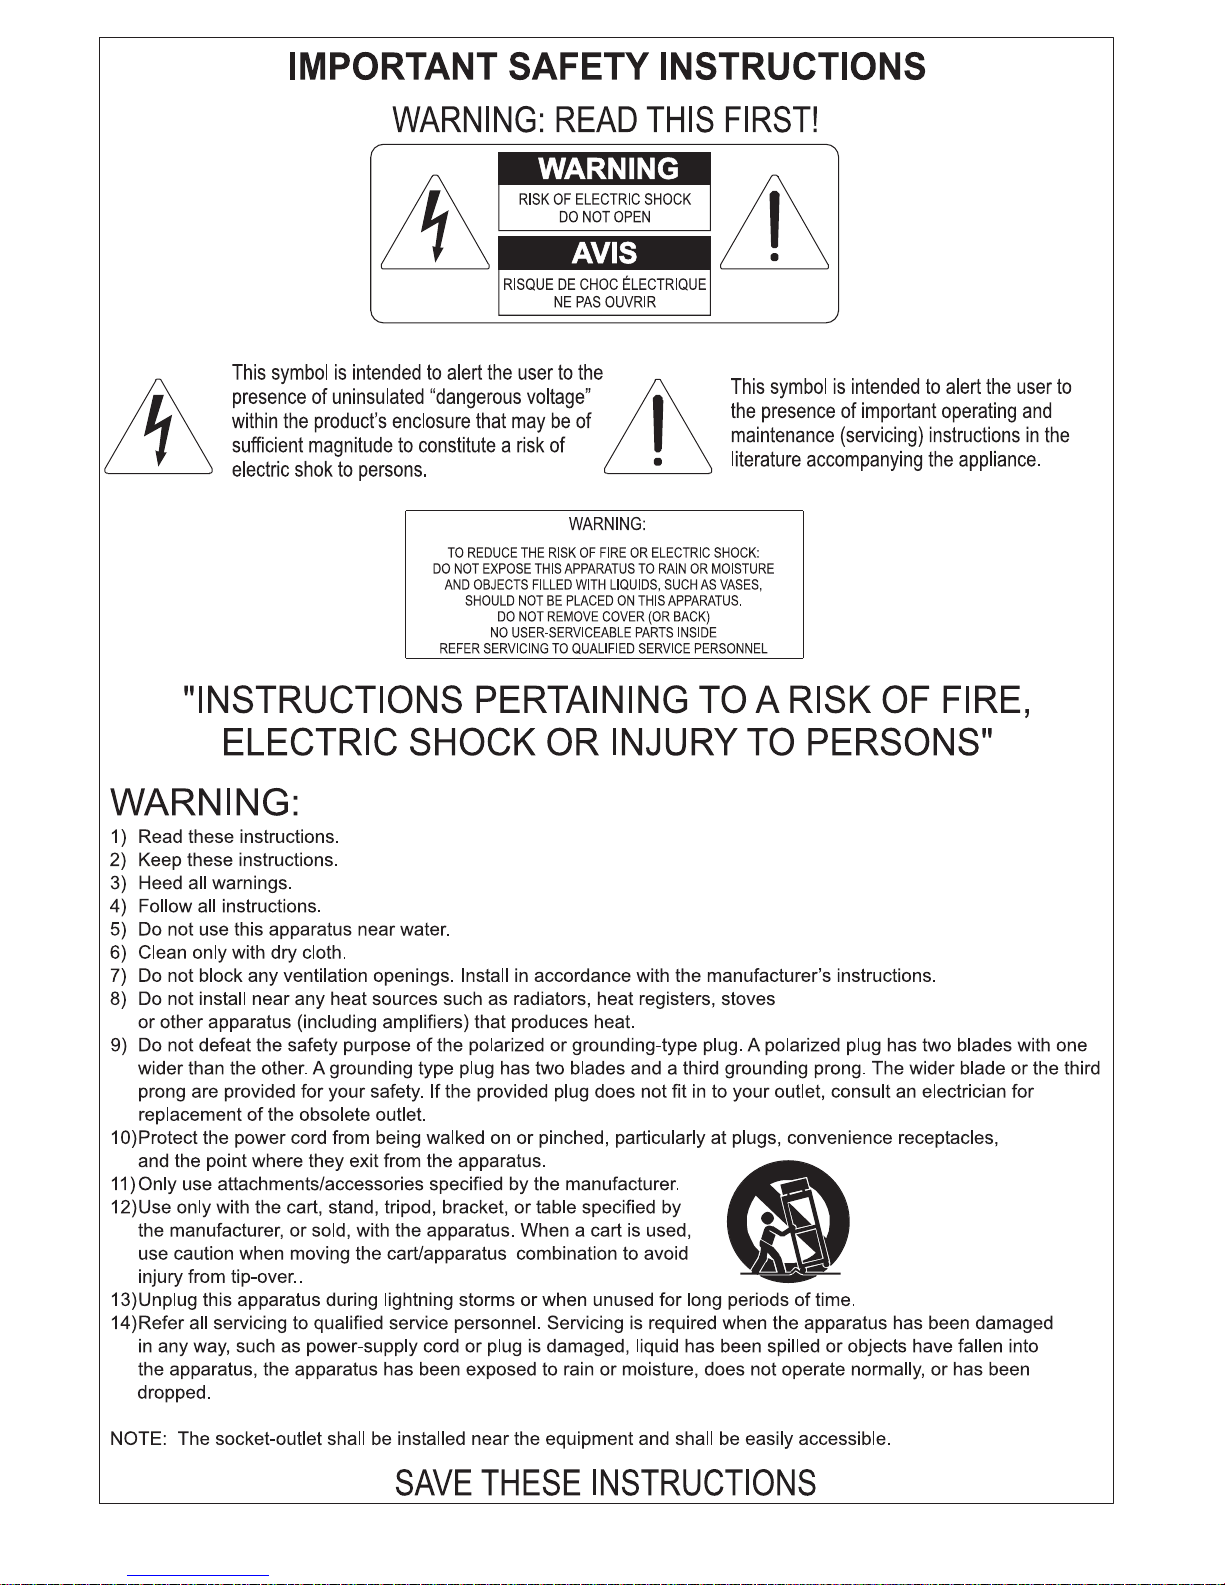
Function and controls
Your VP110 has functions and controls that allow you to adapt your piano to different operati-
ve needs and situations.
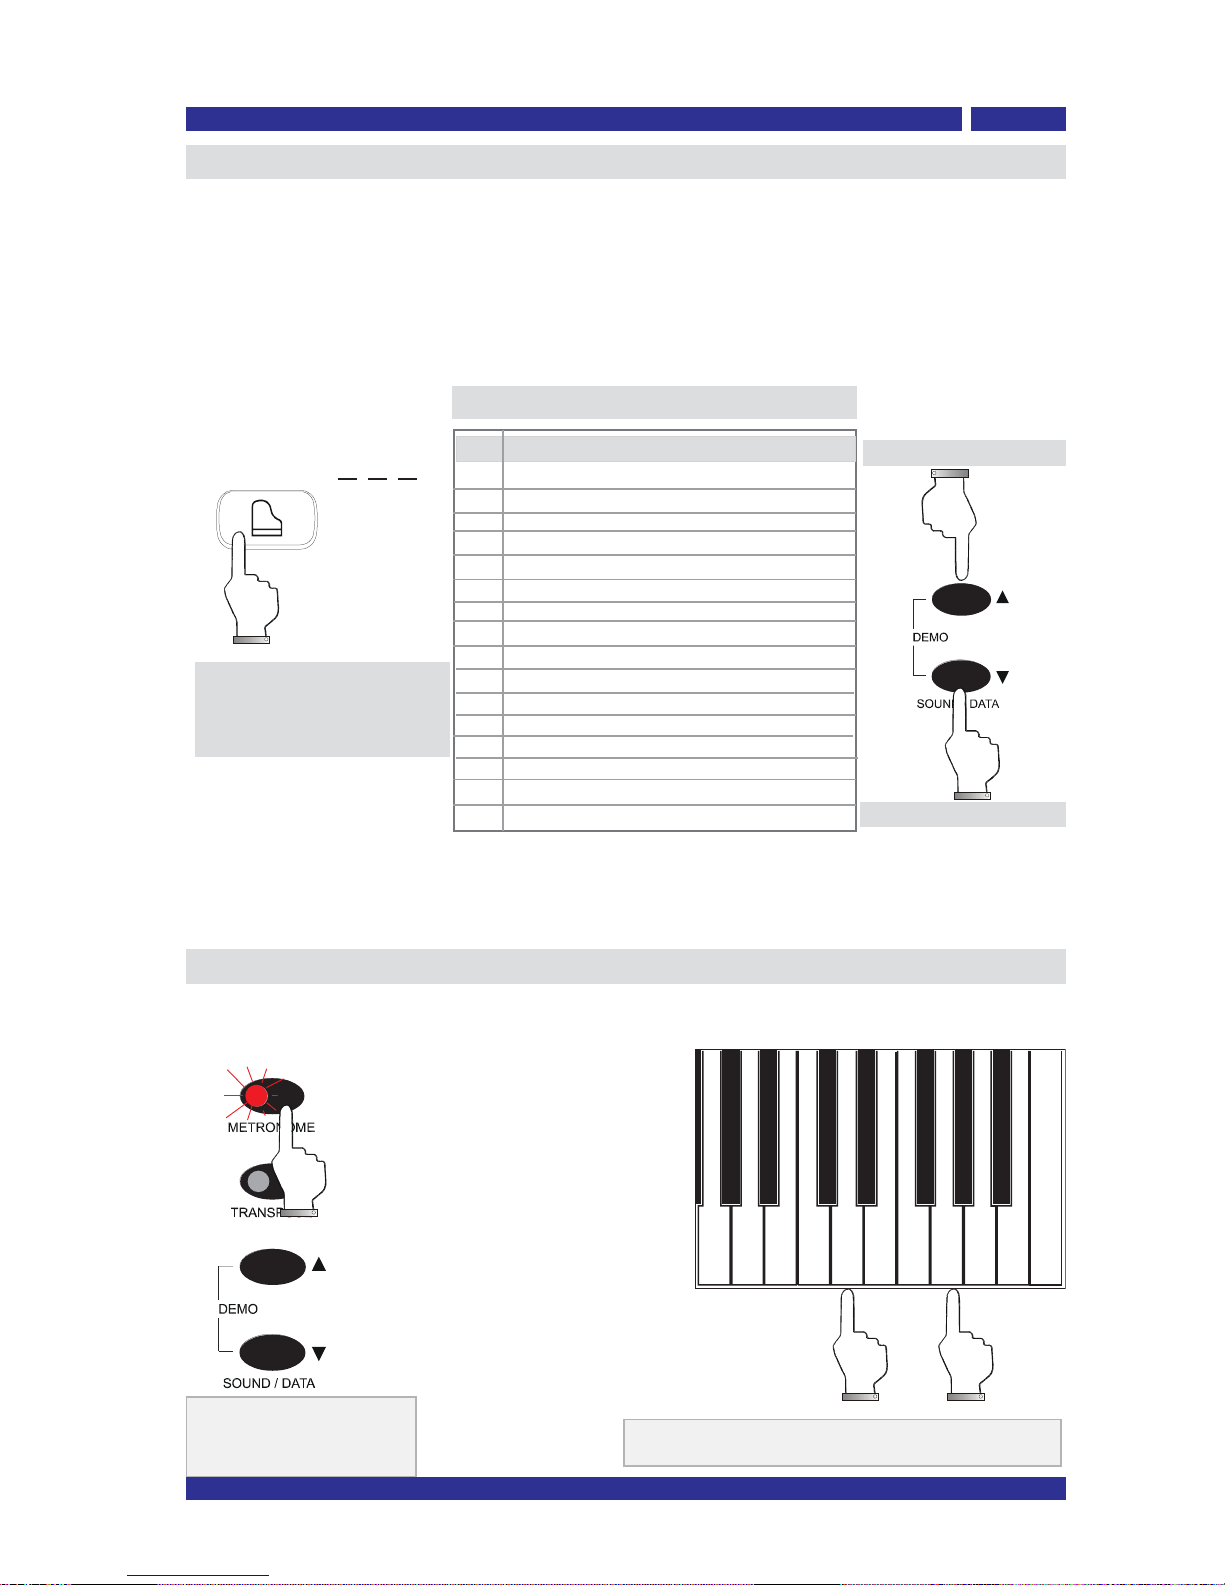
TRANSPOSE: to change the instruments tranposition
You can transpose your piano by +/-12 semitones. Keep the
TRANSPOSE button on the control panel pressed for more than 2
seconds (the corresponding button indicator blinks):
Press the SOUND/DATA buttons to change the current value.
Press the TRANSPOSE button to exit the transpose edit status. The
button indicator stops flashing but remains ON, to show the current
transposed status of the piano.
Press the TRANSPOSE button again, to exit transpose, restoring the
piano to normal status.
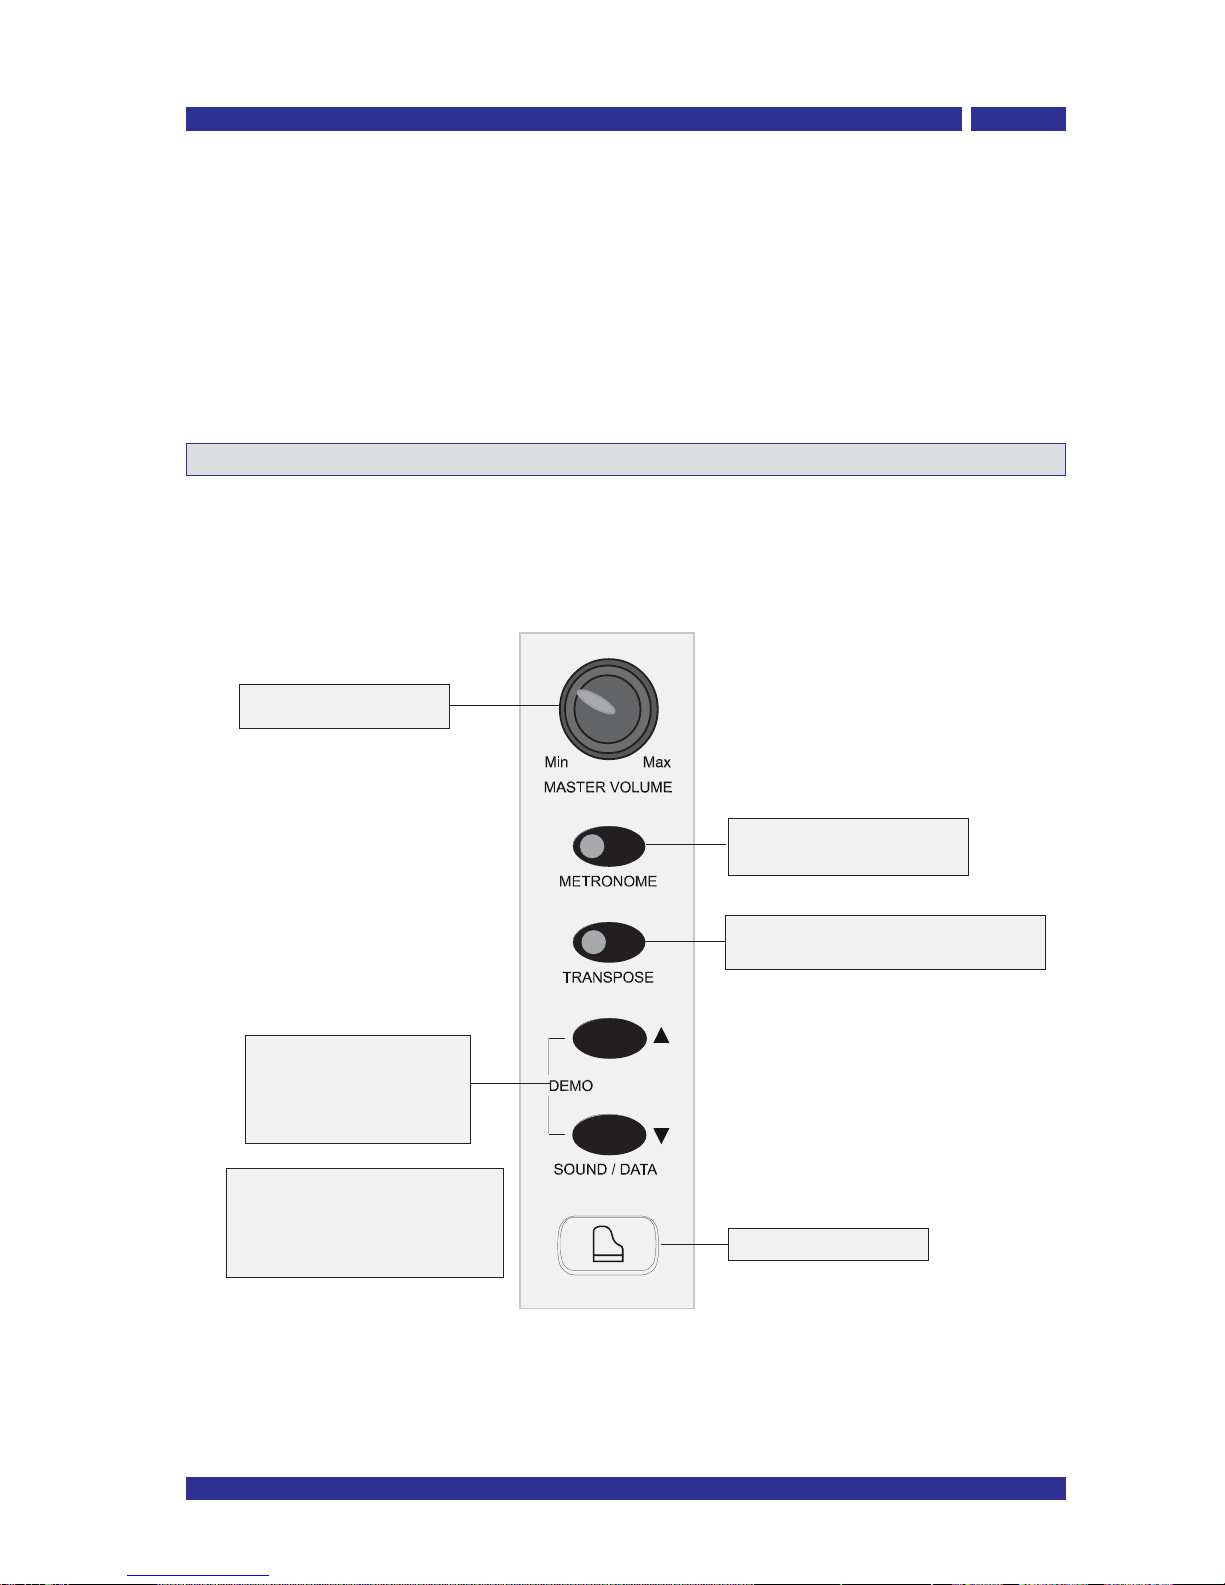
Functions menu
Being an extremely user-friendly instrument, the VP110’s functions are easily activated.
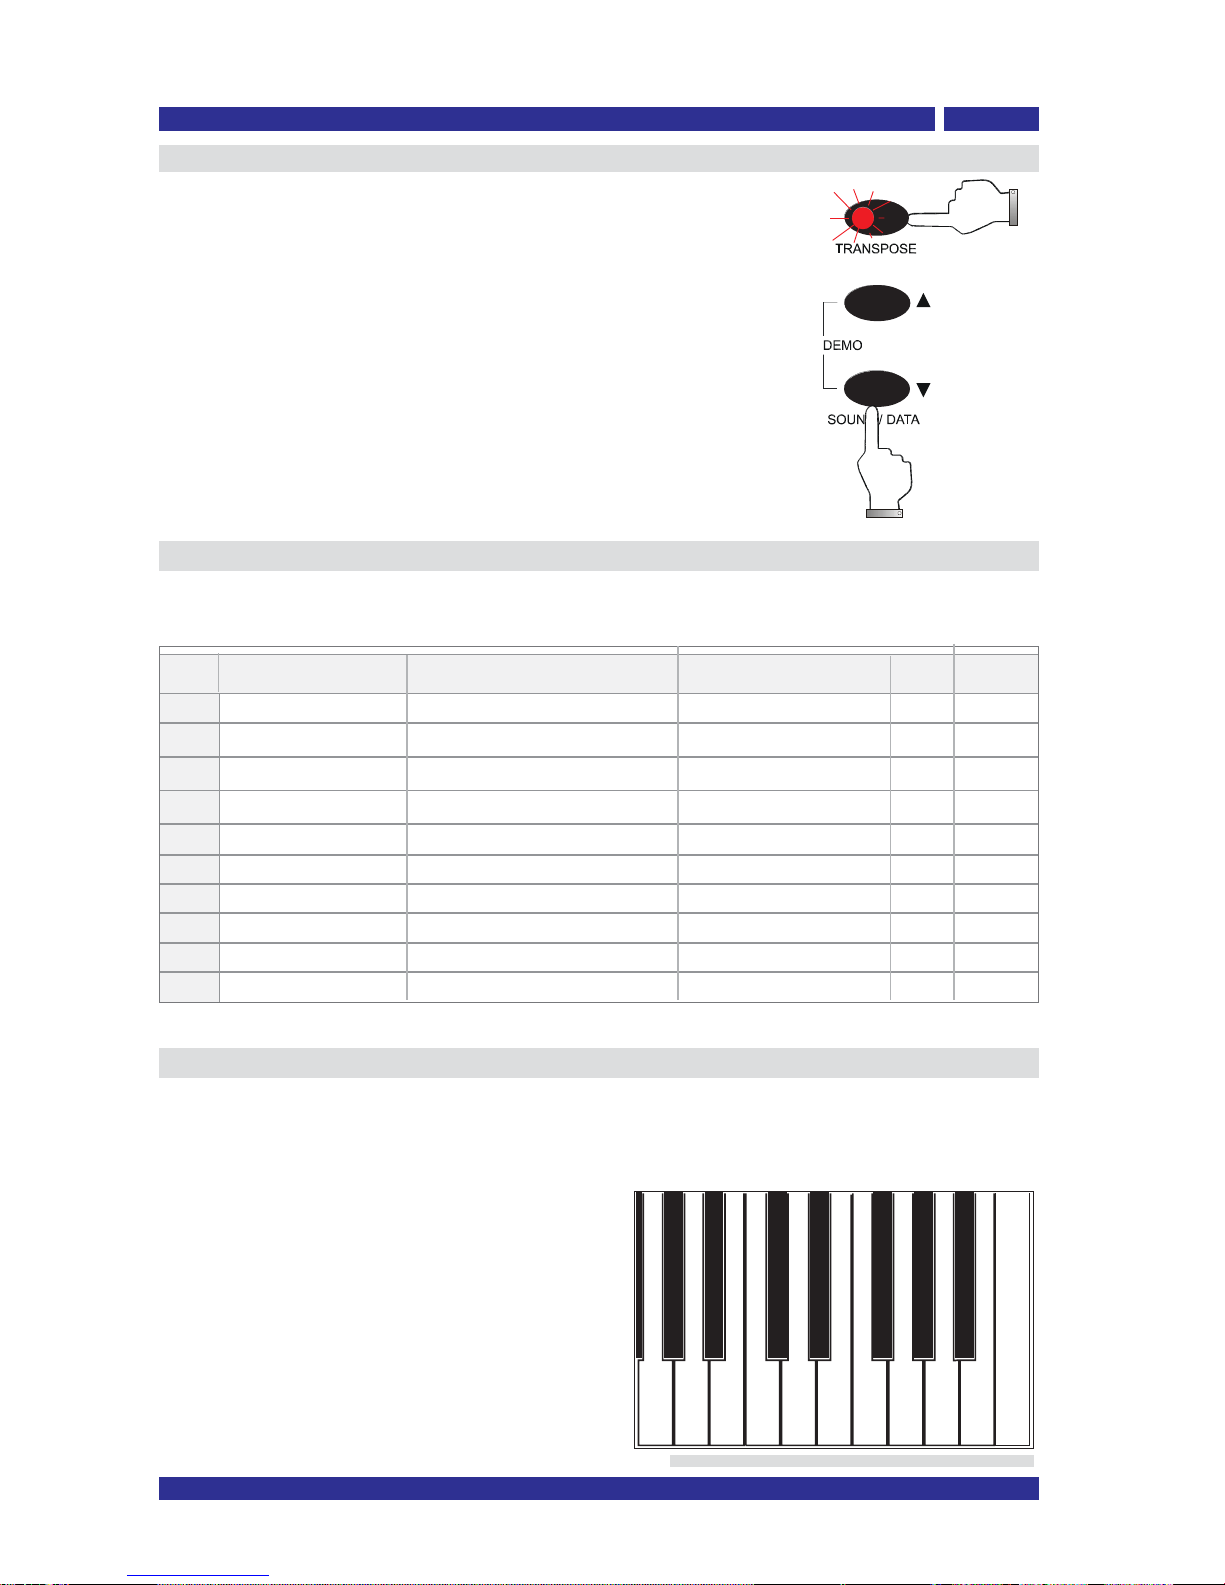
Each function is associated with one of the last two octave og keys on your piano keyboard.
The name of each function is printed under the corresponding key for your reference.
Each programming function can be enabled by
pressing the associated keyboard key. While
holding the selected key, the related function
value can be changed by pressing DATA UP/DOWN
buttons. For easy navigation and editing, your
piano is equipped with a voice-help system which
describes most of the functions and the
parameters that have been recalled. When you
release the keys associated to a function, the
keyboard returns to normal mode.
Functions Extension
1
3
4
5
6
7
8
9
10
Tune
Temperament
Time signature
Effects
MAF
Equalizer
Voice
Equal, Meantone, Kirnberger
ON/OFF
2
1/4 .... 9/8
Touch Soft - Normal - Hard
MIDI
Back-up
01....16
ON/OFF
ON/OFF
ON/OFF
default
A7
B7
C8
D8
E8
F8
G8
A8
B8
C9
ON/OFF
Normal
427,5 – 440 – 452,5 Hz 440
Equal
4/4
ON
ON
ON
ON
01
OFF
Message
Vocal Guide
Vocal Guide
Vocal Guide
Vocal Guide
Vocal Guide
Vocal Guide
Vocal Guide
Vocal Guide
Reference Sine Signal
Note
Audio Reference Signal
Touch Tune Temper. T.sign. Effects MAF Equ. MIDI Back-up Voice