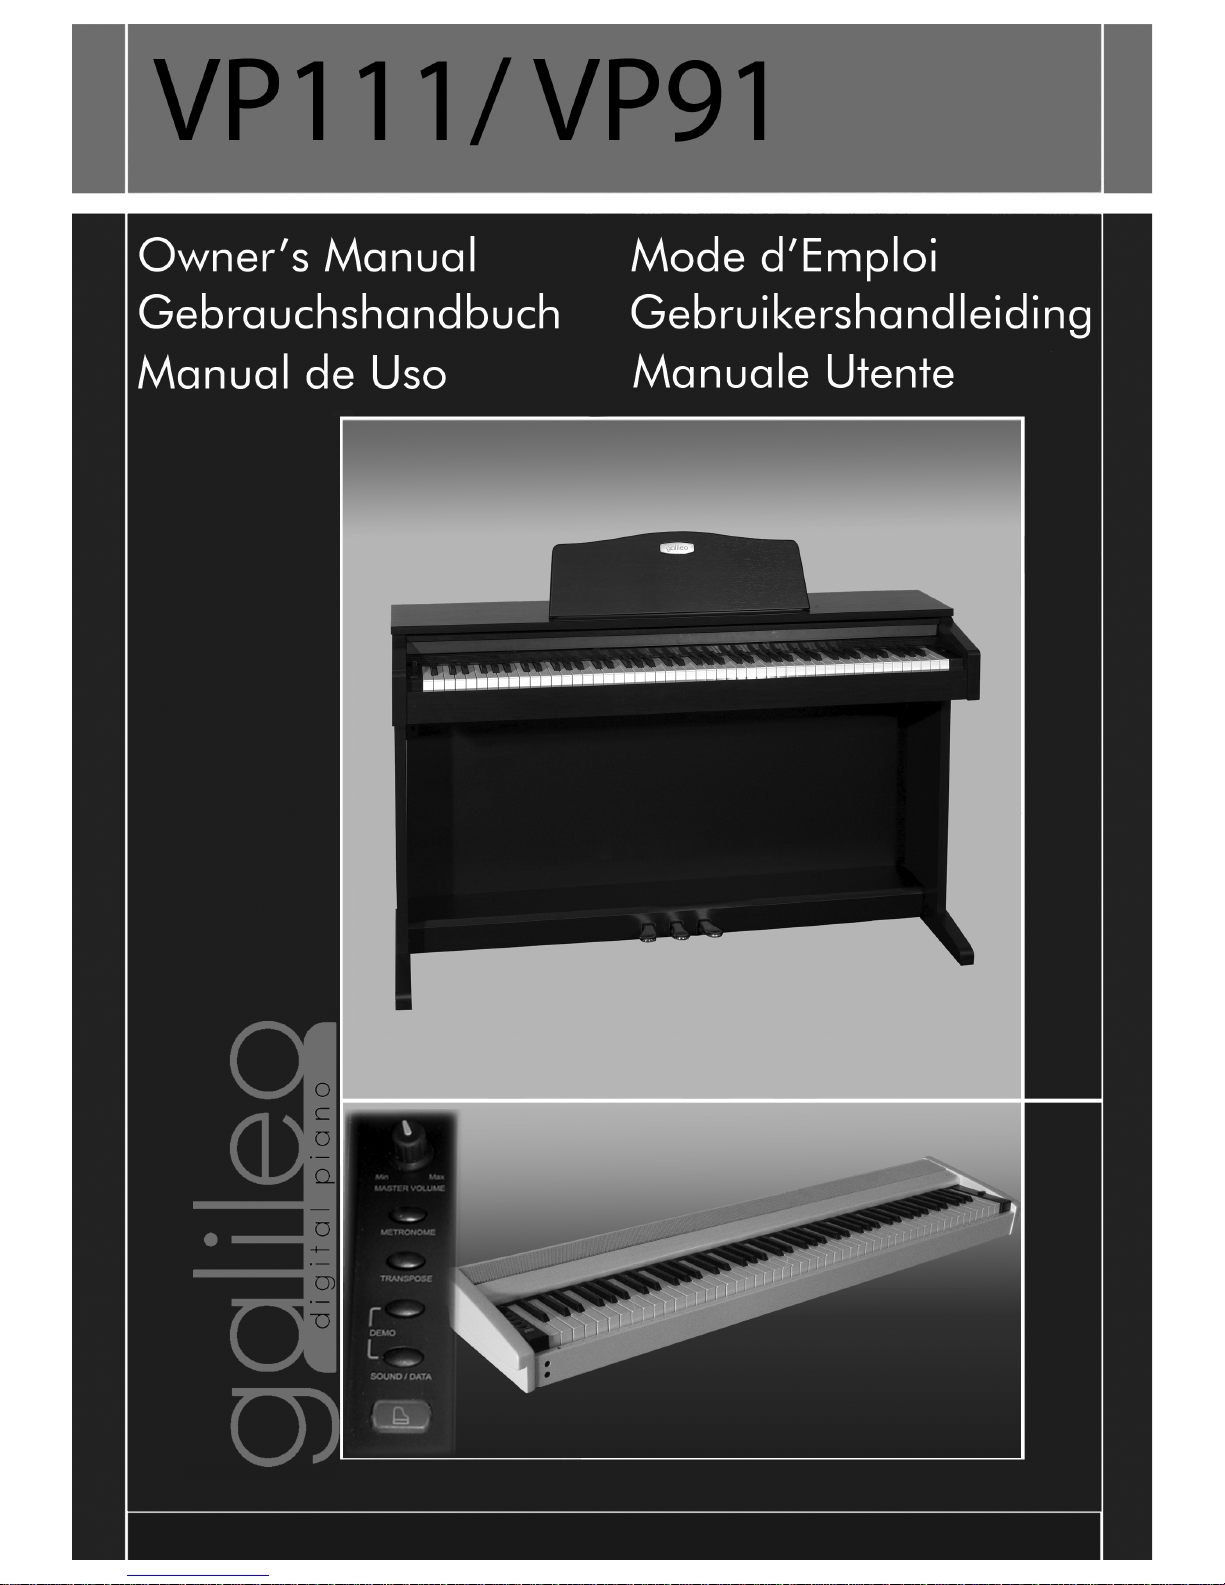
Galileo VP111 User manual


owner’s manual


1) Make sure you have the following parts, which are supplied in the package:
A) Piano cabinet
B) Right Leg
C) Left Leg
D) Rear Panel
E) Bottom crossbar with three pedals group
F) Pedal clog
G) Headphone hang
and the fixing accessories to be found into a nylon bag:
H) M6x20 TC screw (2x)
I) M6x20 TC screw (8x)
L) WL 4x20 TC screw (4x)
M) WL 4x12 TC screw (2x)
N) Adhesive clamp (5x)
O) Phillips screwdriver
2) Remove the nylon protection and white foam on the wooden parts, free the pedals cable
under the crossbar as shown in Fig. 3
3) Fix on pedals group the pedal clog (F) as shown in Fig.1.
4) Fix the right leg (B) to crossbar (E) with screws (I).
5) Fix the left leg (C) to crossbar (E) with screws (I).
6) Fix the rear panel (D) to the crossbar (E) with screws (L) and to the legs (B) and (C) with
screws (H) as shown in Fig.1.
7) Place the piano cabinet (A) on stand, fix it with screws (I) as shown in Fig.1
by paying particular attention to the position of the hook, as shown in Fig.2.
8) Fix the headphone hang (G) whit screws (M) as Fig. 1
9) Attach the adhesive clamps (N) as shown in Fig.4
10) Insert the MINI DIN pedals cable plug into the proper socket of I/O group under the
pianocabinet (A) and fix the cable on the adhesive clamp (N) of Fig. 4.
11) Place the piano in its final location and adjust on floor the clog (F) of pedals group.
Assembly instruction VP111

Assembly Instruction VP91
*STAND OPTIONAL
Make sure you have the following parts, which are supplied in the package:
1) Damper Pedal
2) Music Rest
3) Power Chord

Table of Contents
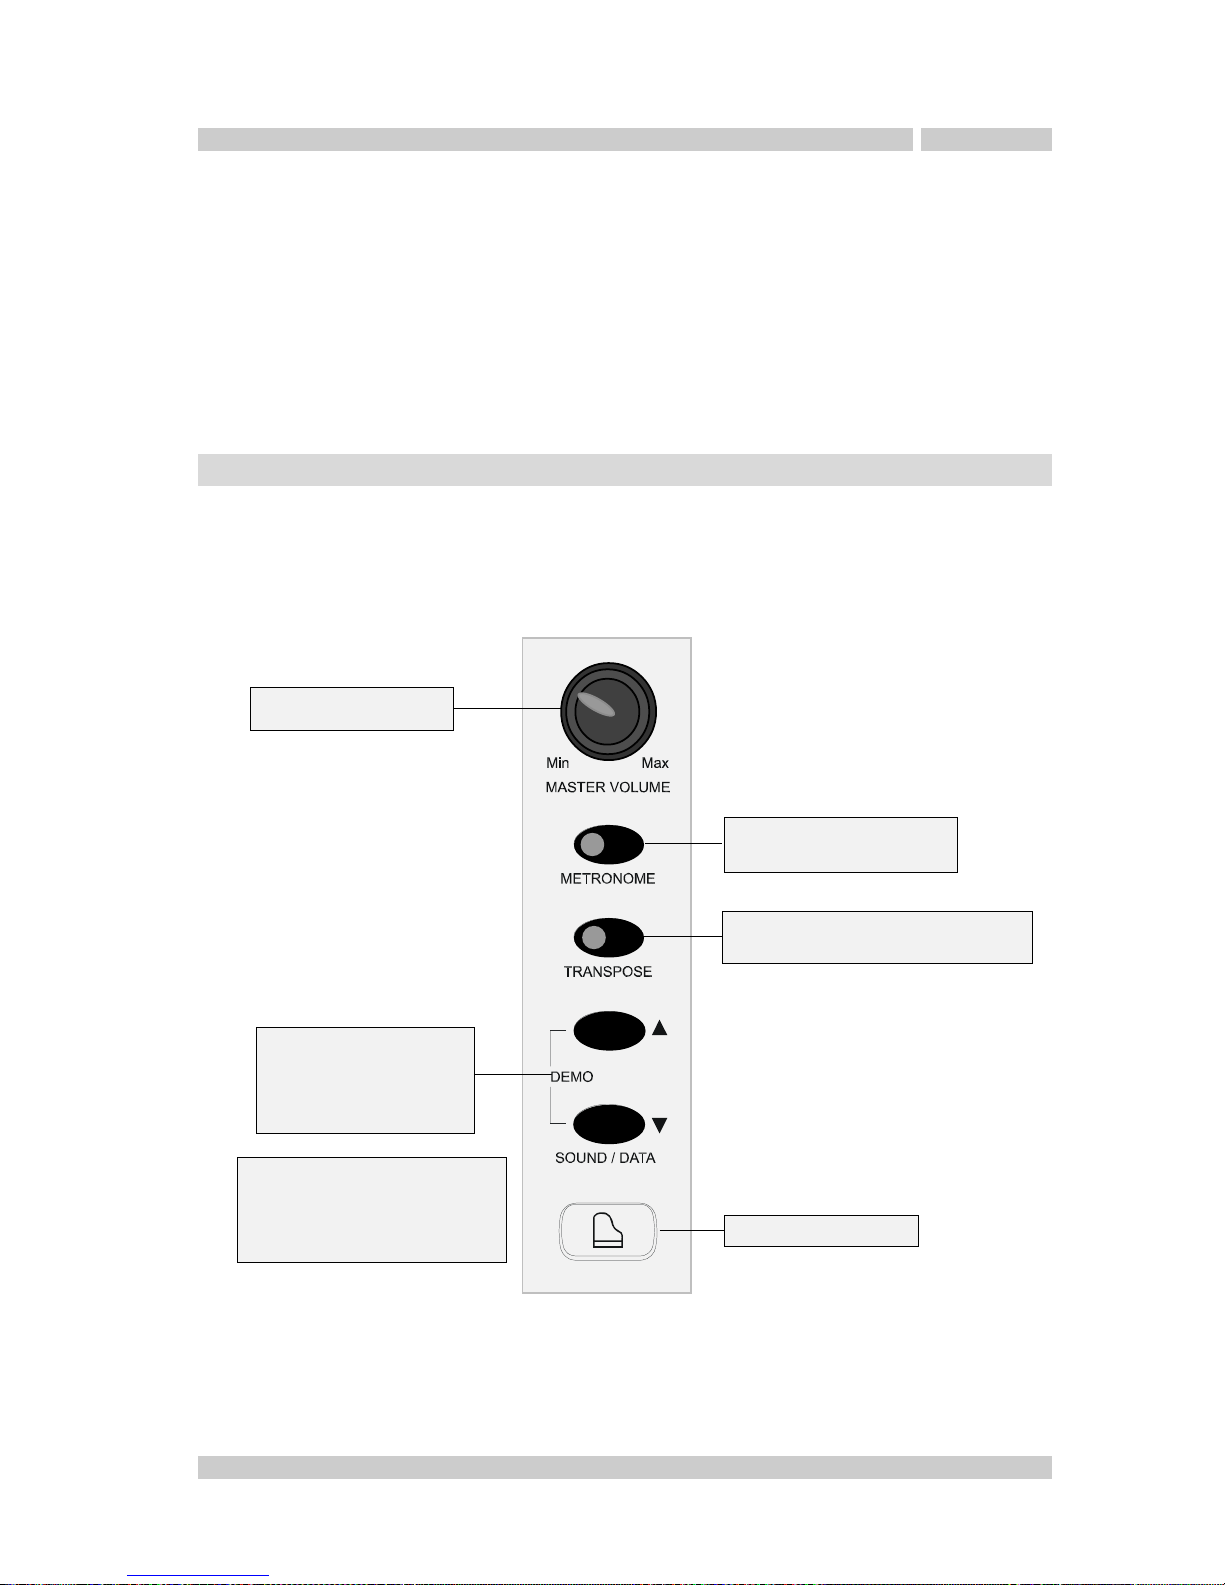
CONTROL PANEL ................................................................................. 1
Turn the power on ............................................................................... 2
Master volume set up .......................................................................... 2
Connecting headphones ....................................................................... 2
Demo listening .................................................................................... 2
Presets selection ................................................................................. 3
METRONOME: playing with a metronome guide ....................................... 3
Preset List .......................................................................................... 3
TRANSPOSE: to change the instruments tranposition ............................... 4
Function and controls........................................................................... 4
Functions menu .................................................................................. 4
Function edit menu .............................................................................. 5
Dynamic curve selection: TOUCH .................................................... 5
Tune edit: TUNE ........................................................................... 5
Tempe rame nts s ele ctio n: TE MPE RAM ENT S ... ... ... .... ... ... ... ... ... .... ... ... . 6
T. S i g n a t u r e . . . . . . . . . . . . . . . . . . . . . . . . . . . . . . . . . . . . . . . . . . . . . . . . . . . . . . . . . . . . . . . . . . . . . . . . . . . . . . . . . 6
Effects on/off: EFFECT ................................................................... 7
MAF on/off: Mechanical Acoustic Feel .............................................. 7
Equalizer on/off: EQUALIZER .......................................................... 7
MIDI ........................................................................................... 8
Back-Up on/off: Back Up................................................................ 8
Vocal guide on/off: VOICE .............................................................. 9
VP111 connections: REAR PANNEL......................................................... 9
Technical Specifications ...................................................................... 10
MIDI implementation chart ................................................................. 11
The illustrations and the screens of this manual are for instructional purposes only and may
appear different from those on your instrument.

En - 1
VP111/VP91
Owner’s manual
CONTROL PANEL
Gran Piano button
METRONOME: Switches
the metronome ON/OFF.
Function keys *
• Preset selection
• Data insert
• Demo listening
All the functions of your digital piano can be found on the control panel which is located on the
left side of the piano keyboard.
Main Volume knob
* We’ll call these keys
conventionally in this manual:
• DATA UP
• DATA DOWN
TRANSPOSE: Allows you to
transpose the piano global pitch.
Congratulations! We thank you for selecting the all-new VP111/VP91 digital piano!
Whether you are a student, teacher or professional, your piano will impress you with its musical
quality and stylish design providing years of enjoyment. In addition, your digital piano is
equipped with a high performance Hammer Action keyboard, for a realistic touch that allows
you to express yourself in endless varieties of shade and color.
For these and many other reasons, you will discover your VP111/VP91 is an absolute pleasure
to play!
To get the a bsolu te most out of your ne w piano, we r ecommend t hat you rea d this manual
carefully so that you can take full advantage of all the advanced and convenient functions. We
also recommend that you keep this manual in a safe and handy place for quick and easy
reference in the future.
If you’re enjoying your piano, please tell a friend!

En - 2
VP111/VP91
Owner’s manual
Demo listening
Connecting headphones
Master volume set up
In addition to the internal amplification system, You can connect
two sets of standard stereo headphones.
The headphone inputs are located under the left-hand side of the
keyboard.
•The headphone connection disables the internal speaker system
•The Main volume knob adjusts the headphone volume.
Turn the v olume k nob on the con trol pa nel to set your pi ano volum e.
Turning the knob to the left will decrease the volume and turning it to the
right will increase the volume.
Warning! Excessive volume (especially with headphones connected) can
be harmful to your hearing.
Your VP111/VP91 features some built-in demo songs, that you can play by
following this procedure:
Start the demo sequence by pressing the two DATA UP/DOWN
buttons AT THE SAME TIME.
Press the two DATA UP/DOWN buttons again to STOP the demo
sequence.
Press DATA UP to select next demo song.
Turn the power on
Connect your piano to an appropriate AC outlet and switch it on using
the power button located on the right hand side of the keyboard.
ON
OFF
POWER
Wait a couple of seconds while your piano powers up.
The Grand Piano button will illuminate indicating the
default sound.

En - 3
VP111/VP91
Owner’s manual
Sound selection
The sound presets are the internal sounds of your VP111/VP91. These sounds are optimized
with associated effects and control parameters.
First, power on the instrument (GRANDPIANO is automatically selected).
Press the DATA UP button to change the instrument presets.
Each time the button is pressed, the next preset is recalled (there are 16 available presets
- 11 single + 5 combination).
Using both the DATA UP/DOWN buttons you can quickly select any preset in the menu.
Pressing the Grand Piano button on the control panel will return your piano to the GRANDPIANO
sound.
Preset List
default preset XX
XX
X
Pressing the Grand Piano
button on the control panel
the preset n.1 GRANDPIANO
is recalled.
Recall previous preset
Recall next preset
Using both DATA UP/DOWN buttons you can quickly select any preset in the menu.
METRONOME: playing with a metronome guide
Press the METRONOME button on the panel to enable your metronome. The button LED-light
will start flashing. The default metronome tempo is 120 BPM (beats per minute) and has a
range from 30 to 250 BPM.
Use the TEMPO/DATA
button to change the
current beat value.
By pressing the METRONOME button for
more than 2 seconds, the piano will enter
the metronome tempo settings.
Set the metronome tempo by pressing
the corresponding key in the keyboard
in a range from 30 to 250 BPM.
Press the METRONOME button to exit
the metronome settings.
The numbers (1...0) are associated with the
keys in the first octave of your pianokeyboard.
Press the METRONOME button again
to switch off the metronome click. 1 2 3 4 5 6 7 8 9 0
prg Preset
1
2
3
4
5
6
7
8
9
10
11
12
13
14
15
16
Grand Piano (MAF)
El. Vintage Piano
FM Piano
Harpsichord
Clavi
Vibraphone
Nylon Guitar
Jazz Guitar
Slow Strings Ensamble
Choir
Warm Pad
Grand Piano dual Strings
Piano split Ac.Bass&Ride
Nylon Guitar dual Warm Pad
El. Vintage split El.Bass
Harpsichord dual Choir

En - 4
VP111/VP91
Owner’s manual
Function and controls
Your VP111/VP91 has functions and controls that allow you to adapt your piano to different
operative needs and situations.
TRANSPOSE: to change the instruments tranposition
You can transpose your piano by +/-12 semitones. Keep the
TRANSPOSE button on the control panel pressed for more than 2
seconds (the corresponding button indicator blinks):
Press the SOUND/DATA buttons to change the current value.
Press the TRANSPOSE button to exit the transpose edit status. The
button indicator stops flashing but remains ON, to show the current
transposed status of the piano.
Press the TRANSPOSE button again, to exit transpose, restoring the
piano to normal status.
Functions menu
Being an extremely user-friendly instrument, the VP111/VP91’s functions are easily activated.
Each function is associated with one of the last two octave og keys on your piano keyboard.
The name of each function is printed under the corresponding key for your reference.
Each programming function can be enabled by
pressing the associated keyboard key. While
holding the selected key, the related function
value can be changed by pressing DATA UP/DOWN
buttons. For easy navigation and editing, your
piano is equipped with a voice-help system which
describes most of the functions and the
parameters that have been recalled. When you
release the keys associated to a function, the
keyboard returns to normal mode.
Functions Extension
1
3
4
5
6
7
8
9
10
Tune
Temperam ent
Time signature
Effects
MAF
Equalizer
Voice
Equal, Meantone, Kirnberger
ON/OFF
2
1/4 .... 9/8
Touch Soft - Normal - Hard
MIDI
Back-up
01....16
ON/OFF
ON/OFF
ON/OFF
default
A7
B7
C8
D8
E8
F8
G8
A8
B8
C9
ON/OFF
Normal
427,5 – 440 – 452,5 Hz 440
Equal
4/4
ON
ON
ON
ON
01
OFF
Message
Vocal Guide
Vocal Guide
Vocal Guide
Vocal Guide
Vocal Guide
Vocal Guide
Vocal Guide
Vocal Guide
Reference Sine Signal
Note
Audio Reference Signal
Touch Tune Temper. T.sign. Effects MAF Equ. MIDI Back-up Voice

En - 5
VP111/VP91
Owner’s manual
Dynamic curve selection: TOUCH
By pressing the DATA buttons
repeatedly, you can select one
of the available touch values
(SOFT, NORMAL, HARD)
Press and hold the TOUCH (A7) function on the
keyboard, and press the DATA UP button on the
control panel.
Pressing the DATA button once, the vocal guide
signals the current active touch value.
To selec t the def ault NORMA L curve , press
the two DATA UP/DOWN buttons at the same
time, while keeping the TOUCH function key
(A7) on the piano keyboard pressed.
Tune edit: TUNE
This function allows you to modify the default standard tuning of your instrument (A=440 Hz).
This is a very useful function when you play along with other musicians or singers, as it adjusts
the instrument’s tuning to their needs.
Press and hold the TUNE key on the piano
keyboard (B7), and press the DATA UP button on
the control panel.
The piano produces a sine (sinusoidal) reference
signal at A=440 Hz. Each time you press the
DATA UP button, this frequency will increase in
steps of 1 cent, from A=440 Hz to A=452 Hz.
On the contrary, pressing the DATA DOWN button,
the frequency will decrease in steps of 1 cent,
in a range from A=440 Hz to A=427 Hz.
From any selection, the standard tune A=440
Hz can be recalled by simply pressing the
two DATA UP/DOWN buttons at the same time,
while pressing the function key TUNE (B7) on
the piano keyboard.
Function edit menu
Touch Tune Temper. T.sign. Effects MAF Equ. MIDI Back-up Voice

En - 6
VP111/VP91
Owner’s manual
Temperaments selection: TEMPERAMENTS
This function allows you to modify the current piano temperament (or ‘tuning’). The default
setting is EQUAL temperament, but other temperaments can easily be recalled.
Press the TEMPERAMENTS (C8) function key on
the piano keyboard and the DATA button on the
control panel. The vocal guide will tell you the
current temperament selection, Pressing the DATA
button again, it will be possible to recall the other
temperaments.
1. Equal (default)
2. Meantone
3. Kirnberger
It is possible to restore the EQUAL temperament from
any selection, by simply pressing the two DATA UP/
DOWN buttons on the control panel at the same time,
while pressing the function key TEMPERAMENTS (C8)
on the piano keyboard.
T. Signature
This function allows you to modify the meter setting
on your metronome. The default value corresponds
to 4/4.
Press the T.sign. (D8) function key on the piano
keyboard and the DATA button on the control panel.
The metronome will properly signal the current
subdivision, and the metronome led will start
flashing.
Press the DATA UP/DOWN button to change the
metrical subdivision ((1/4 - 2/4 – 3/4 - 4/4 – 5/4
– 6/4 – 7/8 – 3/8 – 6/8 – 7/8 – 9/8 – 12/8) ) .
It’s possible to restore 4/4 meter from any selection,
by simply pressing the two DATA UP/DOWN buttons
on the control panel at the same time, and keeping
the function key T.sign (D8) pressed on the piano
keyboard.
Touch Tune Temper. T.sign. Effects MAF Equ. MIDI Back-up Voice

En - 7
VP111/VP91
Owner’s manual
Effects on/off: EFFECT
This menu allows you to disable or enable the
effects. Keep the EFFECT (E8) function key on
the keyboard pressed and press the DATA button
on the panel. The vocal guide tells you the active
effect status.
Each of the sound presets on your VP111/VP91 are enriched with digital effects which are
generated by the internal piano Sound Engine:
Equalizer on/off: EQUALIZER
To chang e the eff ect status , ke ep the
EFFECT (E8) function key on the
keyboard pressed and press the DATA
button on the panel. The vocal guide
will tell you the status (EFFECTS ON or
EFFECTS OFF). By default the function
status is: EFFECTS ON (enabled).
To change the MAF status, keep the
MAF (F8) function key on the keyboard
pressed and press the DATA button on
the panel. The vocal guide will tell you
the status (MAF ON or MAF OFF).
By default the function status is: MAF
ON (enabled)
MAF on/off: Mechanical Acoustic Feel
This function allows you to enable or disable the
MAF (Mechanical Acoustic Feel) effect.
Keep the MAF (F8) function key on the keyboard
pressed and press the DATA button on the panel.
The vocal guide will tell you the MAF status.
This function allows you to enable or disable the
internal equalizer.
Keep the EQUALIZER (G8) function key on the
keyboard pressed and press the DATA button on
the panel. The vocal guide tells you the EQUALIZER
status.
To chang e the equ alizer statu s, keep
the EQUALIZER (G8) function key on
the keyboard pressed and press the
DATA button on the panel. The vocal
guide tells you the EQUALIZER status
(EQUALIZER ON or OFF).
By default the function status is:
EQUALIZER ON (enabled)
Touch Tune Temper. T.sign. Effects MAF Equ. MIDI Back-up Voice

En - 8
VP111/VP91
Owner’s manual
MIDI select MIDI channel: MIDI
With this function you can decide if the piano default
start set up will be factory set or user set.
Back-Up on/off: Back Up
Keep the Back-Up (B8) function key on the
keyboard pressed and press the DATA button
on the panel. The vocal guide signals the
active Back-Up status.
To change the Back-Up status, keep
the Back-Up (B8) function key on the
keyboard pressed and press the DATA
buttons on the panel. The vocal guide
signals Back-Up status (Back-Up ON or
OFF). The default instrument set up is:
Back-Up ON (enabled).
With this function you can set the trasmit and
recive MIDI channel.
Keep the MIDI (A8) function key on the
keyboard pressed and press the DATA buttons
on the panel. The vocal guide signals MIDI.
Set the MIDI channel by pressing the
corresponding key in the keyboard in a range
from 01 to 16.
The default instrument MIDI channel set up is:
01 UPPER 1 (Main sound)
02 UPPER 2 (Dual sound)
03 LEFT (Bass or Lower sound)
The MIDI channels of the thre sections (UPPER1, UPPER2, LEFT) are
sequentially linked, by meaning that if you set MIDI channel N for UPPER1,
you automatically set N+1 for UPPER2 and N+2 for LEFT.
For example if you set MIDI channel UPPER1 =5,
you have the following configuration:
05 UPPER 1 (Main sound)
06 UPPER 2 (Dual sound)
07 LEFT (Bass or Lower sound)
The internal VP111/VP91 vocal guide system can
be enabled or disabled, according to the personal
likings of the player. The piano default set up is
VOICE ON (enabled). Press the VOICE (C9) key
on the keyboard and the DATA button on the
control panel to disable the function.
Press the VOICE (C9) key on the
keyboard and the DATA button on the
control panel to reactivate the
function.
Touch Tune Temper. T.sign. Effects MAF Equ. MIDI L. MIDI F. Back-up Voice
Vocal guide on/off: VOICE
Touch Tune Temper. T.sign. Effects MAF Equ. MIDI Back-up Voice

En - 9
VP111/VP91
Owner’s manual
REAR PANNEL
MAIN OUT
Right e Left/Mono Connect the instrument to an external speaker system.
(1)
(2)
(3)
(4) INPUT
Right e Left/Mono
Connect an instrument to the internal speaker system (CD, MIDI
player, etc.)
MIDI
In-Thru-Out
Socket to connect the pedals (Damper, Soft, Sostenuto)
PEDAL
Standard MIDI connection
(1) (2) (3) (4)
Warning: the sound level of the external connected device it is not controlled
by the master volume of your digital piano.

En - 10
VP111/VP91
Owner’s manual
Technical Specifications
keyboard 88 keys with hammer action
poliphony 64 note max
volume, demo, metronome, sound/data, transpose, preset and variation
selection.
Functions menu: Touch, global tune, temperament (3 types), Effects on/
off, MAF on/off, equalizer on/off, midi menu (receive/transmit channel
progr.), back up mode, Help.
Whole, Layer, Dual
11 presets + 5 combi
ISS2 piano technology
MAF technology (Mechanical Acoustic Feel).
sounds
operating mode
controls
technology
digital effects 4 reverber and 4 modulation ,associated to the presets
sequencer metronome, demo songs.
connections stereo in/out L (mono)/R, MIDI (In/thru/out), Headphone X 2, AC In
pedals damper, soft, sostenuto
cabinet
amplification
dimensions(WxDxH)
weight
VP111: (25W + 25W) / VP91: (10W + 10W)
Rosewood (with a sliding keyboard cover)
VP111: (53,72” x 16,68” x 39,5”) / VP91: (53,58’’ x 12,56’’ x 5’’)
VP 111: 114,64 pounds / VP91: 41,89 pounds
graded
hammer
feeling
Speaking Help
MAF technology
(Mechanical
Acoustic Feel).
ISS2 piano technology Easy to use

En - 11
VP111/VP91
Owner’s manual
MIDI IMPLEMENTATION CHART
VP111/VP91
Digiltal Piano
FUNCTION TRASMITTED RECOGNIZED REMARKS
BASIC
CHANNEL
1-16
1-16 1-16
1-16
MODE Default
Messages
Altered
Mode 3
X
*********
Mode 3
Mode 3
NOTE
NUMBER
0-127
21-108
0-127
21-108
VELOCITY O
X
O
X
AFTER
TOUCH
Key’s
Ch’s
X
X
X
X
CONTROL
CHANGE
0
7
11
64
66
67
91
93
120
123
O
O
O
O
O
O
O
O
O
O
Bank Select MSB
Main Volume
Expression Contr.
Damper Pedal
Sustain Pedal
Soft Pedal
Reverb
Chorus
All Sound Off
All Note Off
(*)
PROGRAM
CHANGE
0-127
0-15
0-15
0-15
SYSTEM EXCLUSIVE OO
SYSTEM
REAL TIME
O
O
O
X
AUX
MESSAGES
Local On-Off
All Note Off
ActiveSense
Reset
X
O
O
X
X
O
O
X
NOTES: (*)
Version:1.00
Default
Changed
Mode 1: Omni On, Poly Mode 2: Omni On, Mono O = YES
Mode 3: Omni Off, Poly Mode 4: Omni Off, Mono X = NO
Note ON
Note OFF
Clock
Commands
Tru e #
Message can be filtered
O
O
O
O
O
O
O
O
O
O
Up to 3 channels at the
same time in preset mode
True Voice
(*)
MIDI implementation chart
Technical specifications are subject to change

NOTE: This equipment has been tested and found to comply with the limits for a Class B
digital Device, persuant to Part 15 if the FCC Rules. These limits are designed to provide
reasonable protection against harmful interference in a residential installation. This equipment
generates, uses and can radiate radio frequency energy and, if not installed and used in
accordance with the instruction, may cause harmful interference to radio comunications.
However, there is no guarantee that the interference will not occur in a particular installation. If
this equipment does cause harmful interference to radio or television reception, which can be
determinated by turning the equipment off and on, the user is encuraged to try to correct the
interference by one or more of the following measures:
-Reorientorrelocatethereceivingantenna.
-Increasetheseparationbetweentheequipmentandreceiver.
-Connecttheequipmentintoanoutletonacircuitdifferentfromthattowhichthereceiver
is connected.
-ConsultthedealeroranexperiencedRadio/Tvtechnicianforhelp.
The user is cautioned that any changes or modification not expressly approved by the party
responsable for compliance could void the user’s authority opearate the equipment.
This manual suits for next models
1
Table of contents
Other Galileo Musical Instrument manuals

Galileo
Galileo YP200 User manual

Galileo
Galileo Milano 3G User manual

Galileo
Galileo VP121 User manual

Galileo
Galileo Maestro II User manual

Galileo
Galileo Milano II User manual

Galileo
Galileo Milano 3G User manual

Galileo
Galileo YP300 User manual

Galileo
Galileo VP110 User manual

Galileo
Galileo Concerto User manual

Galileo
Galileo Organ User manual