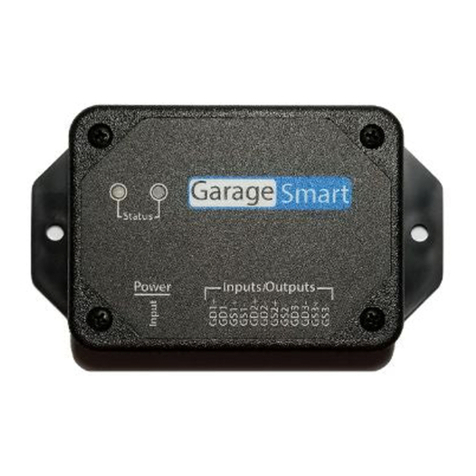
Garage Smart GS100-CR User manual

GarageSmartTM User’s Manual
1
User’s Manual
English (US)
Version 0.17a
For use with models:
GS100-CRS100N

2
GarageSmartTM User’s Manual
The information contained herein may be changed at any time without prior notification. This
manual nor any parts thereof may not be reproduced for any purpose whatsoever without the
express written consent of GarageSmart. All technical specifications, drawings, etc., are subject
to copyright law.
© 2022, GarageSmart
All rights reserved.

GarageSmartTM User’s Manual
3
Table of Contents
Introduction .......................................................................................................5
About this User Guide ....................................................................................................................5
List of nomenclature...................................................................................................................5
List of definitions ........................................................................................................................5
List of icons................................................................................................................................5
Precautionary and Safety Information ............................................................................................6
Legal notices ..................................................................................................................................7
Liability.......................................................................................................................................7
Trademarks................................................................................................................................7
Customer Service...........................................................................................................................8
E-mail.........................................................................................................................................8
Welcome.............................................................................................................9
Introducing Your GarageSmart™ Device...................................................................................9
Getting Started.................................................................................................10
What’s Included........................................................................................................................10
Optional Parts and Accessories...............................................................................................10
Pre-Installation.................................................................................................11
Creating a GarageSmart™ Account (Online Control Panel).........................................................11
Router Security Configuration.......................................................................................................12
Installation .......................................................................................................15
Installation and wiring...................................................................................................................15
Alternate Mounting .......................................................................................................................22
Wi-Fi Setup.......................................................................................................24
Configure the GarageSmart™ Device to a secure Wi-Fi network.................................................24
Controlling the GarageSmart™ Device ..........................................................28
The GarageSmart™ App..............................................................................................................28
App Installation.........................................................................................................................28
Adding Users, Remote Keys, and Scheduling..........................................................................28
App Setup ................................................................................................................................29
Controlling Garage Doors using the GarageSmart™ App........................................................31
Verify Garage Door Status using the GarageSmart™ App ......................................................35
Troubleshooting & Help..................................................................................36
Finding your default gateway address..........................................................................................36
Status Codes................................................................................................................................37
Reboot..........................................................................................................................................38
Factory Reset...............................................................................................................................38
Most Common Problems..............................................................................................................39
Frequently Asked Questions ..........................................................................40

GarageSmartTM User’s Manual
5
Introduction
About this User Guide
List of nomenclature
PC Personal Computer
RF Radio Frequency
ISP Internet Service Provider
List of definitions
FCC An independent U.S. government regulatory agency responsible
for overseeing all interstate and international communications.
Port Forwarding Port forwarding is a feature that forwards inbound traffic from the
Internet on a specific port, to reach a single device on your local
network.
Static IP A fixed IP Address that a specific device on your network uses
when connected to your router.
IP Address A unique string of characters that identifies each computer using
the Internet Protocol to communicate over a network.
Gateway Address An IP address that traffic gets sent to when it's bound for a
destination outside the current network. This is the router's
private IP address.
Mac Address A unique identifier that is assigned by the manufacturer to a
piece of network hardware (in this case, the GarageSmart™
device).
List of icons
Some sections within the manual contain Notes (located at the end of
each section), which provides further information pertaining to an item
or step within the section. This is shown by one or more numbers at
the end of a sentence or paragraph, Example: (1) (2)

6
GarageSmartTM User’s Manual
Precautionary and Safety Information
CAUTION:
Internal circuit card components are extremely sensitive to
electrostatic discharge. Be careful not to touch internal circuitry
prior to discharging any static buildup on yourself. To discharge
yourself, touch a grounded metal object such as conductor an earth-
grounded metal enclosure.
CAUTION:
Do not get the GarageSmart™device wet or expose to extreme
moisture with the cover off or loose, as this may damage the unit
and void its warranty.
CAUTION:
Do not remove the cover or touch inside the GarageSmart™device
with power applied as shock may occur.

GarageSmartTM User’s Manual
7
Legal notices
Liability
The software, websites, apps and the manual are subject to change without notice.
GarageSmart™is not liable for the accuracy of the information contained in this manual,
on its websites, in its apps or for damages resulting from the use of the GarageSmart™
device, this manual, websites or apps.
Trademarks
GarageSmart™is a trademark of GarageSmart™
is a trademark of GarageSmart™
All other trademarks mentioned herein are property of their respective companies.

8
GarageSmartTM User’s Manual
Customer Service
Visit the GarageSmart™website, www.garagesmart.net/support.html to view our support
page.
On this page you can:
• Reset your account password.
• Find warranty information.
•Send an e-mail to GarageSmart™ customer service.
• Faqs on the most asked questions and answers.
E-mail
To ensure a timely response, use e-mail at www.garagesmart.net/contact.html
Customers will receive a response within a short period of time.

GarageSmartTM User’s Manual
9
Welcome
Introducing Your GarageSmart™ Device
Welcome to the exciting world of monitoring, opening, closing, and stopping your garage
doors.
The GarageSmart™GS100-CR device is an IP66 weather resistant device that is durable
for commercial or industry applications for indoor environments. The device allows you to
reliably monitor, open, close or stop one commercial door from anywhere in the world.
The GarageSmart™device allows you to grant remote access with the use of a Master
Key to as many users (staff members, employees, etc.) as needed. Customized
individual schedules are also available by providing unique Remote Keys that expire
when you need them to. The GarageSmart™device also keeps an accurate log so that
you'll always know exactly when and who is opening and closing your garage doors.
The GarageSmart™device also contains built in Auto Shut features. Set your garage
doors to close automatically from 10 minutes up to 2 hours after being left open, or have
them close at a pre-determined time of your choosing (for example; every night at
10:00PM for security).

10
GarageSmartTM User’s Manual
Getting Started
What’s Included
Your GarageSmart™device comes with the following:
• Welcome Letter
Optional Parts and Accessories
The following parts and accessories are available and can be purchased by contacting
GarageSmart™or through the GarageSmart™web store:
•Garage Door Sensors

GarageSmartTM User’s Manual
11
Pre-Installation
Creating a GarageSmart™ Account
(Online Control Panel)
Creating a GarageSmart™ account is required as this provides you with access to an Online
Control Panel for setting up individual remote keys, custom schedules, and other configuration
settings for controlling your GarageSmart™ device.
1. Visit https://www.garagesmart.net/account_setup.html
2. Enter in all required information on the Account Setup page, including the
Mac Address and Device ID from the back of the GarageSmart™ device (1).
3. Once a GarageSmart™ account has been created, you will then be able to log into your
Online Control Panel located at https://www.garagesmart.net, by clicking on MY ACCOUNT
at the top of the page (2).
1. Only one GarageSmart™ Account is required, using a valid Mac Address and Device ID.
2. Multiple GarageSmart™ devices can be added or removed from your account at any time, using the Online
Control Panel.

12
GarageSmartTM User’s Manual
Router Security Configuration
For the GarageSmart™ device to receive inbound commands (red arrows below) from the
Internet and the GarageSmart™ Network, Port Forwarding must be setup properly within the
router.
1. Login into your router as this is usually accomplished by typing the Gateway Address
into your web browser.(1) (2)
If you don’t know the default Gateway Address of your router, see Finding your
default gateway address in the Troubleshooting & Help section of this manual.
2. Under your routers Port Forwarding settings, add the following information:(3)
a. IP Address: Select an available IP Address.
b. Start Port: Select 31301 as the Start Port.
Each GarageSmart™ device requires a different Port when used on the
same network. Example: 31301 for the first device, 31302 for the second
device, 31303 for the third device, etc.
c. End Port: This is the same as Start Port above. (4)
d. External IP Address: If your router has this setting, set this to 0.0.0.0
e. Protocol: TCP
f. Description, Application Name, or Device Name: GarageSmart (5)
Public
Private Network
Router or Access Point
Example

GarageSmartTM User’s Manual
13
3. Fill out Table 1 below (or download from the Internet) with the information that was
entered from the previous steps, as this information will be needed in the Configure
the GarageSmart™ Device to a secure Wi-Fi network section below and for future
reference. (6) (7)
Device Name: From Step 2.f above.
GarageSmart Mac Address: This can be found on the back of the
GarageSmart™ device.
Port: From Step 2.b above.
IP Address: From Step 2.a above.
Gateway Address: From Step 1 above.
GarageSmart
Device
Device Name
GarageSmart
Mac Address
Port
IP Address
Gateway
Address
1
2
3
4
5
6
7
8
9
10
Table 1
4. Repeat Steps 2 and 3 above for each GarageSmart™ device that needs to be added
to the network.
5. Save changes to the router.
1. Every routers login and Port Forwarding process is different from one another. If you do NOT have
access or know how to login into your router, or add port forwarding to your router, then refer to your
routers manual or contact your Internet Service Provider (ISP) as they will be able to assist you on
making the required changes to your router easily.
2. For more information on port forwarding or a list of the most common type’s routers, visit
www.portforward.com/router.htm or www.setuprouter.com
3. Regardless of what brand the router is or what software is on the router, the same type of information
will be entered, where you can type in the name of the application or service, which incoming Port the
router should watch for, the IP Address, and which Protocol to use.
4. Set the Port Forward range (or Start and End Ports) the same.
Example: If the GarageSmart device has been configured to use Port 31301, then set the Start Port

14
GarageSmartTM User’s Manual
and End Port to 31301.
5. The “Description, Application Name, or Device Name” can be named anything that you choose, such
as; GarageSmart, GarageSmart2, Door-5, etc.
6. Shown below is an example of a location that has 5 GarageSmart Devices connected to a single
network.
GarageSmart
Device
Device Name
GarageSmart
Mac Address
Port
IP Address
Gateway
Address
1
Bay F1
843dd5e9ca30
31301
192.168.0.201
192.168.0.1
2
Bay F2
843dd5e9c874
31302
192.168.0.202
192.168.0.1
3
Front
843dd5e9c6d2
31303
192.168.0.203
192.168.0.1
4
Back
843dd5e9c58d
31304
192.168.0.204
192.168.0.1
5
Shipping
843dd5e9ce01
31305
192.168.0.205
192.168.0.1
Example
7. Table 1 can also be downloaded from the following:
Excel:www.garagesmart.net/tools/static-table.xlsx
Word:www.garagesmart.net/tools/static-table.docx

GarageSmartTM User’s Manual
15
Installation
Installation and wiring
Installation of a GarageSmart GS100-CR is for controlling and monitoring commercial garage
doors (typically found in businesses or factories), that have a 3-button wall mounted pushbutton
(in which each pushbutton individually opens, closes and stops the garage door).
In existing installations, the GS100-CR will replace your existing 3-button mechanical controller
but it can also be added as a second door controller.
For cabling, regular Cat 5 Ethernet wire (or equivalent) is recommended to use, as this wire is low
cost, readily available and already contains 4 twisted pairs of wire (for OPEN, CLOSE, STOP,
COM, and 24VAC/DC power connections), making installation from the garage door motors
control box to the GarageSmart™ device faster and easier.
Depending on the application, additional parts may be required for proper installation.
Existing Garage Door Opener Control Board
(Example only)
Com. Wire
Stop Wire
Open Wire
Close Wire
Isolated
16-24VAC or 16-24VDC
power supply

16
GarageSmartTM User’s Manual
The wiring diagram above shows how to wire a GarageSmart GS100-CR Device to the Open,
Close, Stop and Com screw terminals of a garage door motor control board.
1. Remove the existing mechanical 3-button wall switch from the wall.
2. Remove the cover of the GarageSmart™device and using screws (not included),
secure the GarageSmart™ GS100-CR to the wall using the mounting holes as shown
below.
3. Choose the best and most practical location to install the GarageSmart Sensor.
The sensors must also be mounted in which they are no more than 0.5” apart from each
other (or close enough in which the sensor closes) when the garage door is closed.
Sensors may vary and is for show only
Mounting Hole
Mounting Hole
Note:
Alternate Mounting is available for
installations requiring bottom ended
connections.

GarageSmartTM User’s Manual
17
4. Feed the sensor wires through the opening of the GarageSmart™ device and then
connect to the SENSOR + and SENSOR - pins of the 10-Pin terminal block (polarity
doesn’t matter), using a screw driver.
5. Feed the OPEN, CLOSE, STOP and COM wires through the opening of the
GarageSmart™ device and then connect to the 10-Pin terminal block using a screw
driver, as shown below.
Sensor Wires
Wires connect to the OPEN, CLOSE,
STOP and COM terminals of the garage
door motor control board.
See the wiring diagram at the beginning of
this section for further information on how
to connect these connections.
24V +
24V –
SENSOR +
SENSOR –
OPEN
CLOSE
STOP
COM
AUX NO
AUX COM
AUX NC
Note:
Using ¾” Conduit and a Lock Washer
(shown above) is a typical application
in securing and sealing the wires
entering the GarageSmart device.
24V +
24V –
SENSOR +
SENSOR –
OPEN
CLOSE
STOP
COM
AUX NO
AUX COM
AUX NC

18
GarageSmartTM User’s Manual
6. Connect power from the garage motor control board to the 24V+ and 24V- pins
(polarity doesn’t matter) of the GarageSmart™ device as shown below.
7. Optional AUX output switches (1-NO and 1-NC) is available for connecting and
driving external buzzers, lights, electronic door locks, etc. from the GarageSmart™
device by connecting to the AUX NO, AUX NC and AUX COM pins.
Wires connect to the garage motor
control board power terminals.
See the wiring diagram at the
beginning of this section for further
information on how to connect these
connections.
24V +
24V –
SENSOR +
SENSOR –
OPEN
CLOSE
STOP
COM
AUX NO
AUX COM
AUX NC
24V +
24V –
SENSOR +
SENSOR –
OPEN
CLOSE
STOP
COM
AUX NO
AUX COM
AUX NC
The NO/NC AUX. switch can be
controlled by the App based on
the Control Panel settings and
triggered during every OPEN,
CLOSE, OPEN/CLOSE or
STOP command.

GarageSmartTM User’s Manual
19
8. Confirm that the GarageSmart™ device has power, by verifying that the Green
Power LED of the GarageSmart™ device illuminates when the power is on.
Power LED
(Green)
The NO/NC AUX switch can
also be triggered Locally by
pressing and holding the
STOP Button for 5 seconds.
After 5 seconds has passed,
the NO/NC AUX switch will
then be energized and
change state, with the Buzzer
sounding simultaneously for
as long as the STOP button
is pressed.
To enable this function, the
installer must put a Jumper
across the J10 terminal,
located on the top board as
this this option is deactivated
by default and should only be
activated if needed and
communicated to the User.
J10

20
GarageSmartTM User’s Manual
9. Confirm that the sensor is working properly by verifying that the Red Sensor LED of
the GarageSmart™ device illuminates when the door is Closed, and is off when the
door is Open.
10. Carefully plug the 11-pin connector from top PCB into the J2 connector of the bottom
PCB.
11- Pin Connector
Sensor LED
(Red)
Pin 1 of J2
Pin 1
Note the orientation of
the connector by
verifying the wire
colors.
Pin 11
Table of contents
Other Garage Smart Garage Door Opener manuals
Popular Garage Door Opener manuals by other brands

SWS
SWS SeceuroGlide Classic installation instructions

CAME
CAME PRATICO SYSTEM BX Series installation manual

Record
Record DFA 127 operating instructions

Roger
Roger BG30 Series INSTRUCTIONS AND RECOMMENDATIONS FOR THE INSTALLER

Chamberlain
Chamberlain Security+ 4620 owner's manual

Chamberlain
Chamberlain MotorLift ML500 instruction manual