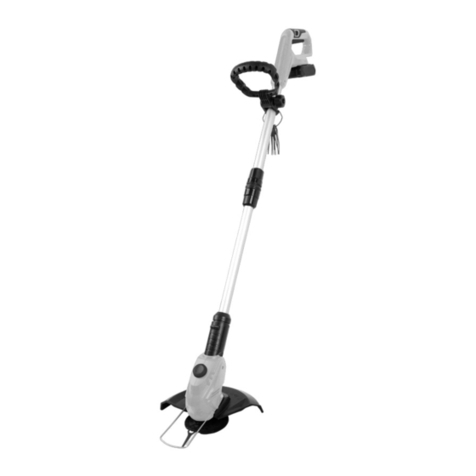
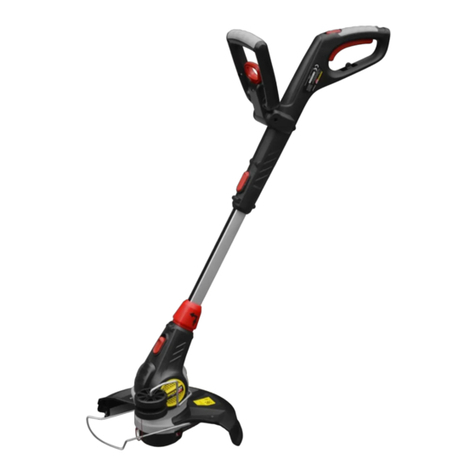
Gardeo GCBE5530T User manual

1
GCBE5530T
FR COUPE BORDURES
TRADUCTION DES INSTRUCTIONS D’ORIGINE
NL GRASTRIMMER
VERTALING VAN DE ORIGINELE INSTRUCTIES
GB LAWN TRIMMER
ORIGINAL INSTRUCTIONS
S46 M11 Y2016
Sous réserve de modifications / Technische wijzigingen voorbehouden / Subject to technical modification

2
Descriptions
1. Poignée supérieure
2. Interrupteur Marche/Arrêt
3. Poignée auxiliaire
4. Dispositif d‘arrêt pour réglage
en hauteur et rotation de la
tête moteur
5. Manche télescopique
6. Carter moteur
7. Etrier d‘écartement
8. Rouleau d’espacement
9. Câble d’alimentation secteur
10. Décharge de traction
11. Bobine de fil de rechange
12. Pédale d’ajustage de l’angle
d’inclinaison
13. Coupe-fils (caché)
14. Carter de protection
Beschrijving
1. bovenste handgreep
2. aan-/uitschakelaar
3. hulphandgreep
4. Vergrendeling voor de
lengteverstelling en de hoek
van de motorkop
5. teleskoopbuis
6. motorbehuizing
7. Afstandsbeugel
8. randgeleidingswiel
9. stroomkabel
10. trekontlasting kabel
11. Extra snijdraadspoel
12. voethendel om de
hellingshoek te veranderen
13. draadafsnijder
14. maaikap
descriptions
1. upper handle
2. On / Off switch
3. auxiliary handle
4. Blocking device for height adjustment
and rotation of the motor head
5. telescopic handle
6. crankcase
7. Spacer bracket
8. Roller spacing
9. Power cord
10. Strain relief
11. Spare reel of wire
12. Pedal adjustment of the angle of
inclination
13. Cup-son (hidden)
14. Guard
Beschreibungen
1. oberer Griff
2. Ein / Aus Schalter
3. Zusatzhandgriff
4. Sperrvorrichtung für die
Höhenverstellung und die Drehung des
Motors Kopf
5. Teleskopgriff
6. Kurbelgehäuse
7. Spacer Bügel
8. Rollenabstand
9. Netzkabel
10. Zugentlastung
11. Ersatz-Spule aus Draht
12. Pedal Einstellung des
Neigungswinkels
13. Cup-Sohn (versteckt)
14. Wache
Descrizioni
1. maniglia superiore
2. On / Off
3. impugnatura supplementare
4. Blocco dispositivo per la regolazione
dell'altezza e la rotazione della testa
motore
5. manico telescopico
6. carter
7. Distanziale staffa
8. Roller distanza
9. Cavo di alimentazione
10. Scolare sollievo
11. Bobina di filo di ricambio
12. Pedale la regolazione dell'angolo di
inclinazione
13. Cup-figlio (nascosto)
14. Guardia

3
FR COUPE BORDURES
Utilisation
Votre coupe-bordures GARDEO est conçu pour la
coupe et la finition des bordures de pelouse ainsi
que pour couper l’herbe dans les espaces
restreints. Cet outil est destiné à une utilisation
exclusivement domestique.
Consignes de sécurité
Attention ! De simples précautions sont à prendre
pour l’utilisation d’appareil branché à l’alimentation
principale. Les conseils suivants doivent toujours
être appliqués, ceci afin de réduire le risque
d’incendie, les chocs électriques, les blessures et
les dommages matériels.
Attention ! Les consignes de sécurité doivent être
respectées pendant l’utilisation. Pour votre propre
sécurité et pour celle des personnes autour, lisez
ces instructions avant d'utiliser l'outil. Veuillez
conserver les instructions pour un usage ultérieur.
u Lisez attentivement et entièrement le manuel
avant d’utiliser l’appareil.
u Ce manuel décrit la manière d’utiliser cet outil.
L’utilisation d’un accessoire ou d’une fixation, ou
bien l’utilisation de cet appareil à d’autres fins
que celles recommandées dans ce manuel
d’instruction peut présenter un risque de
blessures.
u Gardez ce manuel pour référence ultérieure.
Utilisation de votre appareil
Prenez toutes les précautions nécessaires pour
l’utiliser.
u Portez toujours des lunettes de sécurité ou de
protection.
u Ne laissez jamais les enfants ou toute autre
personne ne connaissant pas ces instructions,
utiliser l’appareil.
u Ne laissez pas les enfants ou les animaux
s’approcher de la zone de travail ou toucher
l’appareil ou le fil électrique.
u Les enfants doivent être surveillés avec attention
s’ils se trouvent près de l'appareil pendant
l’utilisation.
u Cet appareil n'est pas destiné à être utilisé par
des personnes jeunes ou déficientes sans
surveillance.
u Cet appareil ne doit pas être utilisé comme jouet.
u Utilisez cet appareil uniquement dans la journée
ou avec un éclairage artificiel approprié.
u Il doit toujours être utilisé dans des endroits secs
et en aucun cas être mouillé.
u Ne plongez pas l’appareil dans l’eau.
u N’ouvrez pas le boîtier. Les pièces à l’intérieur ne
sont pas réparables par l’utilisateur.
u N'utilisez pas l’appareil dans un environnement
présentant des risques d'explosion, ni en
présence de liquides, gaz ou poussières
inflammables.
u Pour limiter le risque d’endommagement des
prises ou des fils électriques, ne débranchez
jamais l’appareil en tirant sur le câble.
Risques résiduels.
L'utilisation d'un outil non mentionné dans les
consignes de sécurité données peut entraîner des
risques résiduels supplémentaires. Ces risques
peuvent survenir si l'outil est mal utilisé, si
l'utilisation est prolongée, etc.
Malgré l'application des normes de sécurité
correspondantes et la présence de dispositifs de
sécurité, les risques résiduels suivants ne peuvent
être évités. Ceci comprend :
u Les blessures dues au contact avec une pièce
mobile/en rotation.
u Les blessures causées en changeant des
pièces, lames ou accessoires.
u Les blessures dues à l'utilisation prolongée
d'un outil. Une utilisation prolongée de l'outil
nécessite des pauses régulières.
u Déficience auditive.
Après l’utilisation
u Quand il n’est pas utilisé, l’appareil doit être
rangé dans un endroit suffisamment aéré, sec et
hors de portée des enfants.
u Les enfants ne doivent pas avoir accès aux
appareils rangés.
u Quand l’appareil est rangé ou transporté dans un
véhicule, il doit être installé dans le coffre ou
correctement calé pour éviter les mouvements
dus aux changements de direction ou de vitesse.
Vérification et réparations
u Avant l’utilisation, vérifiez si l'appareil est en bon
état ou si aucune pièce ne manque. Recherchez
des pièces cassées et d'autres anomalies
susceptibles de nuire au bon fonctionnement de
l’appareil.
u N’utilisez pas l’appareil si une pièce est
endommagée ou défectueuse.
u Faites réparer ou remplacer les pièces
défectueuses ou endommagées par un
réparateur agréé.
u Ne tentez jamais de retirer ou de remplacer des
pièces autres que celles citées dans ce manuel.
uSi le câble d'alimentation est endommagé, il
doit être remplacé par le fabricant, son service
après vente ou des personnes de qualification
similaire afin d'éviter un danger.
Utilisation d’une rallonge
La rallonge utilisée doit être conforme aux normes
et doit s'adapter exactement à la prise de cet
appareil (voir les caractéristiques techniques). La
rallonge doit être adaptée à une utilisation à
l’extérieur et signalée comme tel. Une rallonge
allant jusqu’à 30 m peut être utilisée sans que les

4
performances de l’appareil ne soient limitées. Avant
d'utiliser la rallonge, assurez-vous qu'elle est en bon
état et récente. Remplacez la rallonge si elle est en
mauvais état. Si vous utilisez un dévidoir, le câble
doit être complètement déroulé.
Attention ! Lire attentivement les instructions
suivantes. Se familiariser avec les éléments de
commande et l’utilisation appropriée du
coupebordure.
Conserver les instructions d’utilisation
dans un endroit sûr pour son utilisation
ultérieure.
Explication des symboles se trouvant sur le
coupe-bordure
Risque de lésion corporelle
ou de dégâts matériels.
Les symboles :
Prenez des mesures de
protection oculaire
Portez toujours des protections
auditives appropriées pour utiliser
cet appareil.
Éloignez les mains et les pieds
des pièces coupantes.
Faites attention à ce que les
personnes se trouvant à proximité
ne soient pas blessées par des
projections provenant de la
machine Garder une distance de
sécurité entre l’utilisateur de la
machine en marche et des
personnes se trouvant
à proximité.
Faites attention à ce que les
personnes se trouvant à proximité
ne soient pas blessées par des
projections provenant de la
machine.
Gardez une distance de sécurité
entre l’outil de jardin et les
personnes se trouvant à proximité.
Avant d’effectuer des réglages sur
le coupebordure ou de le nettoyer,
lorsque le câble
se trouve coincé ou que le coupe-
bordure est laissé sans
surveillance même pour une
courte durée, arrêter l’appareil et
retirer la fiche de la prise de
courant. Tenir le câble
électrique à l’écart du fil de coupe.
CE Conformément aux normes
Européennes d’application en
matière de sécurité
Lire attentivement les instructions
et familiarisez-vous avec les
éléments de commande et
l'utilisation appropriée de
l'équipement.
Cet appareil est doublement isolé.
Par conséquent, aucun câble de
mise à la terre n'est nécessaire.
Vérifiez si l’alimentation
mentionnée sur la plaque
signalétique de l'outil correspond
bien à la tension présente sur le
lieu.
Consignes de sécurité
supplémentaires pour le coupe-
bordures
Attention ! Les éléments de coupe continuent de
tourner juste après la mise hors tension du moteur.
u Familiarisez-vous avec les commandes et la
manière appropriée d’utiliser l’appareil.
u Avant l’utilisation, vérifiez l’état du fil électrique et
de la rallonge (dommages, usures et
vieillissement). Si un câble est endommagé
pendant l’utilisation, débranchez immédiatement
l’appareil. NE TOUCHEZ SURTOUT PAS LE
CÂBLE AVANT DE L’AVOIR DÉBRANCHÉ.
u N’utilisez pas l’appareil si les câbles sont
endommagés ou défectueux.
u Portez des chaussures épaisses pour protéger
vos pieds.
u Portez un pantalon pour protéger vos jambes.
u Avant de commencer, retirez les bâtons, cailloux,
câbles et autres corps étrangers de la zone à
couper.
u N’utilisez l’appareil que verticalement avec le fil
de coupe au niveau du sol. Ne démarrez jamais
l’appareil dans une autre position.
u Déplacez-vous lentement pendant l’utilisation de
l’appareil. N'oubliez pas que l'herbe fraîchement
coupée est glissante.
u Ne travaillez pas sur des pentes trop raides. Ne
travaillez jamais de haut en bas.
u Ne traversez jamais des passages recouvert de
gravier quand l’appareil fonctionne.
u Ne touchez jamais le fil de coupe quand l’appareil
fonctionne.

5
u Ne posez pas l’appareil avant l’arrêt complet du
fil de coupe.
u N’utilisez que le type de fil de coupe approprié.
N’utilisez jamais un fil de coupe en métal ou un fil
de pêche.
u Prenez les précautions nécessaires pour que le
câble secteur soit éloigné du fil de coupe. Vérifiez
toujours la position du câble.
u Gardez toujours les pieds et les mains éloignés
du fil de coupe particulièrement au démarrage du
moteur.
u Avant d’utiliser l’appareil et après un choc,
recherchez des signes d’usure ou de dommages
et réparez, le cas échéant.
u Ne faites jamais fonctionner l’appareil avec des
protections endommagées ou sans protection.
u Prenez les précautions nécessaires pour éviter
de vous blesser avec les dispositifs de réglage
du fil. Une fois le nouveau fil de coupe tiré, avant
de remettre l’appareil en marche, replacez-le en
position normale de fonctionnement.
u Aucun débris ne doit se trouver sur les aérations.
u N’utilisez pas le taille-bordures si les câbles sont
endommagés ou défectueux.
u Éloignez les rallonges des zones de coupe.
Attention! Arrêter le coupe
bordure et retirer la fiche
de la prise de courant avant
de régler la machine
ou de la nettoyer ou si le
câble est coupé, endommagé
ou emmêlé.
Lorsqu’on arrête le coupe-
bordure, le fil continue
à tourner encore pendant
quelques secondes.
Attention – ne pas toucher le
fil de coupe en rotation.
AVERTISSEMENT
Les matériaux d’emballage ne
sont pas des jouets ! Les enfants
ne doivent pas jouer avec des
sacs en plastique !
Il existe un risque de suffocation!
SÉCURITÉ ÉLECTRIQUE
Vérifiez si le voltage
mentionné sur la plaque
signalétique de la machine
correspond bien à la tension
de secteur présente sur lieu.
Sécurité relative au système électrique
Pour des raisons de sécurité, la machine est
équipée d’une double isolation et ne nécessite pas
de prise de terre. La tension de fonctionnement est
de 230 V CA, 50 Hz (pour les pays hors de l’Union
européenne 220 V, 240 V suivant la version).
N’utilisez qu’une rallonge électrique homologuée.
Pour plus de sécurité, il est recommandé d’utiliser
un disjoncteur différentiel avec un courant de défaut
de 30 mA maximum. Avant chaque utilisation de la
appareil, contrôler ce disjoncteur différentiel.
Montage
Ne pas brancher l’appareil
sur la prise de courant avant
qu’il ne soit monté
complètement.
MONTAGE DU CARTER DE PROTECTION
_ Posez le carter sur l’appareil comme
indiqué sur la figure.
_ Fixez le carter de protection et serrez les vis.
MONTAGE DU GUIDE-BORDURES
_ Posez le guide-bordures et serrez les vis .
REMPLACEMENT DE BOBINE DE FIL DE COUPE
_ Maintenez les boutons de dégagement enfoncés
et retirez le couvercle du logement .
_ Retirez la bobine du logement.
_ Nettoyez le logement.
_ Déroulez environ 15 cm de fil de coupe aux deux
extrémités sur la nouvelle bobine .
_ Passez les bouts du fil de coupe dans les
filets du logement.
Placez la bobine dans le logement.
_ Replacez le couvercle sur l’appareil.
_ Vous devez entre un déclic provenant des
boutons de dégagement.
ATTENTION ! N'enroulez en aucunes circonstances
du fil supplémentaire sur la bobine vide, mais
remplacez la bobine par une neuve, identique à
celle d'origine. L'utilisation de fil ayant des
caractéristiques différentes de celles du fil original
peut endommager de manière permanente le
coupe-bordure et annuler les termes de la garantie.

6
SELECTION DE LA FONCTION
Avant de l’utiliser, réglez l’appareil sur la
fonction désirée (coupe ou bordure).
_ Pour la coupe, enfoncez le bouton de
déblocage et tournez la poignée
dans le sens contraire des aiguilles d’une
montre jusqu’à ce qu’elle s’enclenche.
_ Pour les bordures, enfoncez le bouton de
déblocage et tournez la poignée dans le
sens des aiguilles d’une montre jusqu’à ce
qu’elle s’enclenche.
REGLAGE DE LA HAUTEUR
Le tube télescopique possède plusieurs
hauteurs réglables de sorte à obtenir la
hauteur de travail la plus confortable.
_ Appuyez sur le bouton de déverrouillage et
maintenez-le enfoncé.
_ Réglez à la hauteur voulue.
_ Relâchez le bouton.
_ Vérifiez si le tube est bien bloqué.
REGLAGE DE LA POIGNEE DE GUIDAGE
La poignée de guidage est réglable pour
l’obtention d’un bon équilibre.
_ Desserrez le bouton de réglage.
_ Placez la poignée sur la position voulue.
_ Resserrez bien le bouton de réglage.
INSTRUCTIONS D’EMPLOI
Eliminer pierres, bâtons et
autres objets de la surface à
travailler.
Lorsqu’on arrête le coupe-bordure, le fil de
coupe continue à tourner encore pendant
quelques secondes. Attendre l’arrêt total du
moteur/du fil de coupe avant de remettre
l’appareil en fonctionnement.
Ne pas arrêter l’appareil et le remettre en
fonctionnement à de très courts intervalles.
_ Branchez l’appareil à une rallonge adaptée.
_ Accrochez la rallonge derrière la cosse.
_ Maintenez l’appareil à deux mains.
_ Déplacez lentement l’appareil dans un
mouvement de va-et-vient.
_ Pour couper de l’herbe haute, procédez
par couches.
_ N’approchez pas l’appareil d’objets durs
ni des plantes.
_ N’utilisez l’appareil que sur de l’herbe sèche.
_ Quand vous faites des bordures, guidez
l’appareil au-dessus du guide-bordures le long du
bord de l’herbe.
_ L’appareil est automatiquement alimenté
en fil de coupe pendant l’utilisation.
MISE EN MARCHE ET ARRET
_ Pour mettre l’appareil en marche, appuyez
sur l’interrupteur marche/arrêt.
_ Pour arrêter l’appareil, relâchez l’interrupteur
marche/arrêt.
Avant la première utilisation du coupe-bordure,
contrôlez que le fil de nylon touche ou passe sur
lame de coupe. Le fil de nylon sera coupé
automatiquement lorsqu'on tourne l'interrupteur à la
longueur maximale. S'il n'atteint pas la longueur
nécessaire, poussez la tête de la bobine avec vos
doigts tout en tirant sur le fil
Pour couper l'herbe longue, faites plusieurs coupes.
Ne coupez jamais d'herbe mouillée ou très humide.
Le fil doit être protégé d'une usure prématurée
causée par des obstacles durs ; à cet effet,
maintenez le coupe-bordure à l'écart des surfaces
dures avec le bord de la protection. Un fil trop court
ou usé réduit la capacité de coupe. Aussi, afin de
restaurer la longueur optimale de fil, poussez
l'appareil sur le sol pendant son fonctionnement ; de
cette manière, le fil sera automatiquement à la
longueur correcte
ATTENTION ! Un fil trop court ou usé réduit
l'efficacité de coupe, aussi, pour améliorer le
fonctionnement, débranchez l'alimentation
électrique et répétez l'opération décrite au début du
chapitre. Ceci assurera que tout fonctionne
correctement et vous familiarisera avec le coupe-
bordure.
ATTENTION ! Après la mise hors service, le fil de
nylon continue de tourner pendant quelques
secondes.
INSTRUCTIONS D'UTILISATION
Après avoir lu attentivement les consignes de
sécurité, suivez scrupuleusement les instructions ci-
dessous afin d'obtenir le maximum de votre coupe-
bordure.
Démarrez lentement, lorsque vous aurez acquis de
l'expérience, vous serez en mesure d'utiliser le
potentiel complet du coupe-bordure.
Démarrez le coupe-bordure avant d'arriver près
de l'herbe à couper.
Coupez l'herbe en déplaçant le coupe-bordure
de droite à gauche et procédez lentement en
maintenant le coupe-bordure incliné d'environ
15°.
L'herbe haute doit être coupée par couches,
toujours en commençant par le haut. Les
coupes doivent être courtes .
Ne coupez pas d'herbe humide ou mouillée.
L'herbe sèche donne d'excellents résultats.
Laissez toujours le fil en nylon tourner à la
vitesse maximale ; ne travaillez pas de façon à
surcharger le coupe-bordure.
Attention! N'utilisez pas le coupe-bordure sans
la protection.
Ne faites jamais passer le coupe-bordure sur le
câble prolongateur pendant que le coupe-
bordure est en fonctionnement ; veillez à ce que
le câble soit toujours en sécurité derrière votre
dos.
Avant de commencer le travail, vérifiez que la
zone à couper est libre de pierres, débris, fils et
tous autres objets.
7
MAINTENANCE
Avant tous travaux sur
l’appareil, retirer la
fiche de la prise de courant.
Un nettoyage et un entretien réguliers de votre
coupe-bordure préserveront son efficacité et
prolongeront la vie de votre appareil.
Après chaque opération de coupe,
désassemblez et éliminez l'herbe et la terre des
éléments suivants : la bobine et sa fente,
l'ensemble du coupe-bordure et en particulier la
protection.
Durant le fonctionnement, maintenez les fentes
de ventilation libres et exemptes d'herbes.
Utilisez uniquement un chiffon imbibé d'eau
chaude et une brosse douce pour nettoyer le
coupe-bordure.
Ne pulvérisez pas d'eau sur l'appareil et ne le
mouillez pas.
N'utilisez pas de détergents ni de solvants,
ceux-ci pouvant détruire le coupe-bordure. Les
parties en matière plastique peuvent facilement
être endommagées par des produits chimiques.
Si la lame de découpe du fil ne coupe plus ou
casse, faites-la remplacer par un centre de
service après-vente autorisé.
Pour les réparations qui n'ont pas été
expliquées dans ces instructions, prenez
contact avec un centre de service après-vente
autorisé.
Après l'utilisation, débranchez l'appareil de
l'alimentation électrique et contrôlez-le pour
dommages éventuels.
Lorsqu'il n'est pas utilisé, rangez l'appareil hors
de portée des enfants.
Inspectez et entretenez régulièrement le
coupe-bordure. Les coupe-bordure
fonctionnant sur le secteur doivent uniquement
être réparés par un réparateur autorisé.
L'utilisateur peut effectuer la maintenance et
les réglages. Veuillez consulter le chapitre de
REMPLACEMENT DE LA BOBINE DE FIL
NYLON.
Utilisez uniquement des pièces de rechange et
accessoires recommandés par le fabricant.
(Fil : Ø 1,2)
DEPANNAGE
Avant tous travaux sur
l’appareil, retirer la
fiche de la prise de courant.
Si le coupe-bordure vibre : retirez la bobine et
nettoyez sa fente soigneusement en enlevant
l'herbe et autres saletés. Si la vibration persiste
après le remontage, remplacez la bobine par
une neuve. Si le problème ne disparaît pas,
faites contrôler le coupe-bordure dans un centre
de service après-vente autorisé.
Si le coupe-bordure ne démarre pas : contrôlez
toutes les connexions électriques ; vérifiez que
le coupe-circuit n'a pas déclenché ; contrôlez
qu'aucun fusible de votre système électrique n'a
sauté. Si le coupe-bordure ne démarre toujours
pas après les contrôles ci-dessus, faites-le
contrôler dans un centre de service après-vente
autorisé.
STOCKAGE
Suivez ces recommandations pour le stockage du
coupe-bordure :
Faites un nettoyage d'ensemble du coupe-
bordure et de ses éléments auxiliaires (voir
paragraphe de maintenance), afin d'empêcher
la formation de moisissures.
Rangez-le hors de portée des enfants, au sec
dans un endroit stable et sûr, où la
température n'est ni trop chaude ni trop froide.
Rangez le coupe-bordure à l'écart de
l'exposition solaire directe, si possible dans un
endroit sombre ou peu éclairé.
Ne le rangez pas dans un sac en nylon, ceci
favorisant la formation de taches d'humidité.
Ne rangez pas le coupe-bordure en le laissant
reposer sur le sol. Suspendez-le plutôt par la
poignée supérieure, de façon à ce que la
protection ne touche rien. Si la protection
repose sur une surface, cela pourrait altérer sa
forme et dès lors ses dimensions et les
caractéristiques de sécurité seraient modifiées.
SPÉCIFICATIONS TECHNIQUES
Tension du réseau V 230
Fréquence du réseau Hz 50
Puissance W 550
Vitesse à vide min
-1
n
0
:9600
Diamètre max. de coupe cm 30
Poids kg 2.74
Indice de Protection IP20
Valeurs des émissions sonores mesurées selon la
norme applicable :
Pression acoustique L
PA
86 dB(A) K = 3 dB(A)
Puissance acoustique L
WA
93 dB(A) K = 2 dB(A)
Niveau de puissance acoustique garanti
L
WA
96 dB(A)
ATTENTION! Lorsque la pression
acoustique dépasse la valeur de
85 dB(A), il est nécessaire de
porter des dispositifs individuels
de protection de l’ouïe.
Niveau de vibration main/bras selon la norme
2.4 m/s² K= 1.5 m/²

8
La valeur totale de vibrations déclarée
a été mesurée conformément à une méthode
d'essai normalisée et peut être utilisée pour
comparer un outil à un autre; l'indication du fait
que la valeur totale de vibrations déclarée peut
également être utilisée pour une évaluation
préliminaire de l'exposition.
L’émission de vibration au cours de
l'utilisation réelle de l'outil électrique peut
différer de la valeur totale déclarée, selon les
méthodes d'utilisation de l'outil; et signifiant la
nécessité d’identifier les mesures de sécurité
visant à protéger l'opérateur, qui sont basées
sur une estimation de l'exposition dans les
conditions d'utilisation réelles (compte tenu de
toutes les parties constituantes du cycle de
fonctionnement, telles que les temps d'arrêt de
l'outil et de fonctionnement au repos, en plus du
temps de déclenchement).
SERVICE APRÈS-VENTE
_ Un commutateur endommagé doit être remplacé
dans nos ateliers du service après-vente.
_ Si le remplacement du câble d’alimentation est
nécessaire, cela doit être réalisé par le fabricant
ou son agent pour éviter un danger.
Service Après-Vente et Assistance
Notre Service Après-Vente répond à vos questions
concernant la réparation et l’entretien de votre
produit et les pièces de rechange. Vous trouverez
des vues éclatées ainsi que des informations
concernant les pièces de rechange également sous
: www.eco-repa.com
Les conseillers techniques et assistants GARDEO
à votre disposition pour répondre à vos questions
concernant nos produits et leurs accessoires :
ENTREPOSAGE
_ Nettoyez soigneusement toute la machine et ses
accessoires.
_ Entreposez-la hors de la portée des enfants, dans
une position stable et sûre, dans un lieu sec et
tempéré, évitez les températures trop hautes ou
trop basses.
_ Protégez-la du rayonnement direct du soleil.
Tenez-la, si possible, dans le noir.
_ Ne l’enfermez pas dans des sacs en plastique car
de l’humidité pourrait s'y former.
GARANTIE
Pour les clauses de garantie, reportez-vous
aux conditions de garantie ci-jointes.
ENVIRONNEMENT
Si, après un certain temps,
vous décidez de
remplacer votre machine, ne
vous en débarrassez pas
avec les ordures ménagères
mais destinez-la à un
traitement respectueux de
l’environnement.
Pour en savoir plus :
www.quefairedemesdechets.fr
Vous pouvez faire la demande du manuel
d’instruction sous format PDF par mail :
Fabriqué en Chine 2016

9
NL GRASTRIMMER
Beoogd gebruik
Uw GARDEO trimmer is ontworpen voor het
trimmen en afwerken van gazonranden en om gras
te maaien in beperkte ruimte. Dit apparaat is
uitsluitend bestemd voor consumentengebruik.
Veiligheidsvoorschriften
Waarschuwing! Bij apparaten voor gebruik op de
netspanning moeten bepaalde elementaire
voorzorgsmaatregelen, waaronder de navolgende,
in acht worden genomen om het gevaar voor brand,
elektrische schokken, persoonlijk letsel en materiële
schade tot een minimum te beperken.
Waarschuwing! De veiligheidsregels moeten
worden opgevolgd wanneer u het apparaat gebruikt.
Lees voor uw eigen veiligheid en de veiligheid van
omstanders deze instructies voordat u het apparaat
gebruikt. Bewaar de instructies voor later gebruik.
u Lees deze handleiding zorgvuldig door voordat u
het apparaat in gebruik neemt.
u In deze handleiding wordt ingegaan op het
beoogde gebruik. Het gebruik van andere
accessoires of hulpstukken dan wel de uitvoering
van andere handelingen dan in deze
gebruikershandleiding worden aanbevolen, kan
tot persoonlijk letsel leiden.
u Bewaar deze handleiding zorgvuldig zodat u
deze altijd nog eens kunt raadplegen.
Gebruik van het apparaat
Ga bij gebruik van het apparaat altijd voorzichtig te
werk.
u Gebruik altijd een veiligheidsbril of
oogbescherming.
u Laat het apparaat nooit gebruiken door kinderen
of door personen die onbekend zijn met de
instructies voor het apparaat.
u Laat kinderen of dieren niet in de buurt van de
werkomgeving komen, en evenmin het apparaat
of netsnoer aanraken.
u Let extra goed op wanneer u het apparaat in de
buurt van kinderen gebruikt.
u Dit apparaat mag niet zonder supervisie door
jonge of lichamelijk zwakke mensen worden
gebruikt.
u Dit apparaat mag niet als speelgoed worden
gebruikt.
u Gebruik het apparaat alleen bij daglicht of goed
kunstlicht.
u Gebruik het apparaat alleen in een droge locatie.
Het apparaat mag niet nat worden.
u Dompel het apparaat niet onder in water.
u Open de behuizing niet. Het apparaat bevat geen
onderdelen die door de gebruiker kunnen worden
gerepareerd.
u Gebruik het apparaat niet in een omgeving met
explosiegevaar, zoals in de nabijheid van
brandbare vloeistoffen, gassen of stof.
u Haal de stekker nooit uit het stopcontact door aan
de kabel te trekken. Zo voorkomt u beschadiging
aan de stekker of de kabel.
Overige risico's
Er kunnen zich tijdens het gebruik van het
gereedschap ook andere risico's voordoen, die
misschien niet in de bijgevoegde
veiligheidswaarschuwingen worden vermeld. Deze
risico's kunnen zich voordoen als gevolg van
onoordeelkundig gebruik, langdurig gebruik, enz.
Zelfs als de veiligheidsvoorschriften in acht worden
genomen en de veiligheidsvoorzieningen worden
geïmplementeerd, kunnen bepaalde risico's niet
worden vermeden. Deze omvatten:
u Verwondingen die worden veroorzaakt door
het aanraken van draaiende of bewegende
onderdelen.
u Verwondingen die worden veroorzaakt bij het
vervangen van onderdelen, bladen of
accessoires.
u Verwondingen die worden veroorzaakt door
langdurig gebruik van het gereedschap. Als u
langere periodes met het gereedschap werkt,
is het raadzaam om regelmatig een pauze in
te lassen.
u Gehoorbeschadiging.
Na gebruik
u Bewaar het apparaat na gebruik op een droge,
goed geventileerde plaats, buiten het bereik van
kinderen.
u Zorg dat het bewaarde apparaat niet toegankelijk
is voor kinderen.
u Wanneer het apparaat in de auto ligt, moet u het
apparaat in de kofferruimte plaatsen of goed
vastzetten, zodat het apparaat niet kan
wegschieten bij plotselinge veranderingen in
snelheid of richting.
Inspectie en reparaties
u Controleer het apparaat vóór gebruik op
beschadigingen en defecten. Controleer het
vooral op gebroken onderdelen en andere
omstandigheden die de werking ervan kunnen
beïnvloeden.
u Gebruik het apparaat niet in geval van een of
meer beschadigde of defecte onderdelen.
u Laat beschadigde of defecte onderdelen door
een van onze servicecentra repareren of
vervangen.
u Probeer nooit andere onderdelen te verwijderen
of vervangen dan in deze handleiding zijn
vermeld.
u Als het netsnoer is beschadigd, moet het worden
vervangen door de fabrikant zelf, zijn dealer of
vergelijkbare bekwame personen om een brand
te voorkomen
Een verlengsnoer gebruiken
Gebruik altijd een goedgekeurd verlengsnoer dat
geschikt is voor het ingangsvermogen van dit
apparaat (zie de technische gegevens). Het

10
verlengsnoer moet geschikt zijn voor gebruik
buitenshuis en dient als zodanig te zijn gemarkeerd.
Er kan een van maximaal 30 m lang worden
gebruikt zonder dat de prestaties van het apparaat
afnemen. Controleer het verlengsnoer vóór gebruik
op tekenen van beschadiging, slijtage of
veroudering. Vervang het verlengsnoer indien het
beschadigd of defect is. Als u een haspel gebruikt,
rolt u het snoer altijd helemaal af.
Let op! Lees de volgende voorschriften
zorgvuldig.
Maak uzelf vertrouwd met de
bedieningselementen en het juiste gebruik van
de gazontrimmer.
Bewaar de gebruiksaanwijzing goed voor
later gebruik.
Verklaring van de symbolen op de gazontrimmer
Gevaar voor lichamelijk letsel
of materiële schade.
waarschuwingssymbolen:
Draag een veiligheidsbril of een
stofbril als u dit apparaat gebruikt.
Gebruik het apparaat niet bij
neerslag of in een vochtige
omgeving.
Houd handen en voeten uit de
buurt van scherpe delen.
Voorkom dat personen in de buurt
gewond raken door
weggeslingerde voorwerpen.
Houd personen in de buurt op een
veilige afstand tot de machine.
Voorkom dat personen in de buurt
gewond raken door
weggeslingerde voorwerpen.
Houd in de buurt staande
personen op een veilige afstand
tot het tuingereedschap.
Schakel de gazontrimmer uit en
trek de stekker uit het stopcontact
voordat u de trimmer
instelt of schoonmaakt, wanneer
de kabel vast komt te zitten of
wanneer u de trimmer
(ook voor korte tijd) onbeheerd
laat.
Houd de stroomkabel uit de buurt
van de messen.
CE Conform de Europese
toepasselijke standaarden op het
gebied van veiligheid.
Lees de instructies
zorgtvuldig en maak uzelf vertrouwd
met de bedieningselementen en het
correcte gebruik van de trimmer.
De machine is dubbel geïsoleerd
overeenkomstig EN50144; een
aardedraad is daarom niet nodig.
Aanvullende veiligheidsinstructies
voor grastrimmers
Waarschuwing! Nadat u de motor hebt
uitgeschakeld, blijven de maai-elementen draaien.
u Zorg ervoor dat u vertrouwd bent met de knoppen
en met het juiste gebruik van het apparaat.
u Controleer het netsnoer en het verlengsnoer vóór
gebruik op tekenen van beschadiging,
veroudering en slijtage. Als het netsnoer tijdens
het gebruik wordt beschadigd, moet u
onmiddellijk de stekker uit het stopcontact halen.
RAAK HET NETSNOER IN DAT GEVAL PAS
AAN WANNEER DE STEKKER UIT HET
STOPCONTACT IS.
u Gebruik het apparaat niet wanneer het netsnoer
beschadigd of versleten is.
u Draag stevige schoenen of laarzen om uw voeten
te beschermen.
u Draag een lange broek om uw benen te
beschermen.
u Voordat u het apparaat gaat gebruiken,
controleert u of het terrein dat u gaat maaien vrij
van stokken, stenen, draad en andere obstakels
is.
u Gebruik het apparaat alleen rechtop, met de
snijdraad vlak bij de grond. Schakel het apparaat
nooit in een andere stand in.
u Beweeg langzaam wanneer u het apparaat
gebruikt. Let op: vers gemaaid gras is vochtig en
glad.
u Werk niet op steile hellingen. Werk dwars over
het vlak van een helling, niet omhoog en omlaag.
u Steek nooit grindpaden of wegen over wanneer
het apparaat is ingeschakeld.
u Zorg ervoor dat u nooit de snijdraad aanraakt
terwijl het apparaat in werking is.
u Leg het apparaat niet weg voordat de snijdraad
helemaal tot stilstand is gekomen.

11
u Gebruik alleen het juiste type snijdraad. Gebruik
nooit metalen snijdraad of visdraad.
u Zorg ervoor dat het netsnoer uit de buurt van het
snijdraad blijft. Zorg ervoor dat u altijd weet waar
het snoer zich bevindt.
u Zorg ervoor dat u altijd uw handen en voeten uit
de buurt van het snijdraad houdt, vooral wanneer
u de motor inschakelt.
u Controleer het apparaat op tekenen van slijtage
of schade en repareer deze indien nodig, voordat
u het apparaat gebruikt en nadat het apparaat
ergens tegenaan is gestoten.
u Gebruik het apparaat nooit met beschadigde
beschermkappen of zonder beschermkappen.
u Zorg ervoor dat u geen verwondingen oploopt
door apparaten die worden gebruikt om de snijlijn
op lengte te snijden. Nadat u een nieuwe snijlijn
hebt uitgetrokken, moet u het apparaat
terugbrengen naar de normale gebruikspositie
voordat u het apparaat inschakelt.
u Zorg er altijd voor dat de ventilatiesleuven niet
verstopt raken.
u Gebruik de gazontrimmer (randtrimmer) niet
wanneer de snoeren beschadigd of versleten
zijn.
u Houd verlengsnoeren uit de buurt van maai-
elementen.
Let op! Schakel de
machine
uit en trek de stekker
uit het stopcontact voordat u
de machine instelt of reinigt
en wanneer de kabel
doorgesneden of beschadigd
is of in de war is geraakt.
Na het uitschakelen van de
gazontrimmer draait de
snijdraad nog enkele
seconden verder.
Voorzichtig! Raak de
ronddraaiende snijdraad
niet aan.
WAARSCHUWING!
Verpakkingsmateriaal is geen
speelgoed! Kinderen mogen
niet spelen met plastic
zakken! Gevaar voor
verstikking!
ELEKTRISCHE VEILIGHEID
Controleer of de op het
typeplaatje van de machine
vermelde spanning
overeenkomt met de ter
plaatse beschikbare
netspanning.
Elektrische veiligheid
Uw machine is voor extra veiligheid geïsoleerd en
heeft geen aarding nodig. De bedrijfsspanning
bedraagt 230 V AC, 50 Hz (voor niet-EU-landen 220
V of 240 V, afhankelijk van de uitvoering). Gebruik
alleen goedgekeurde verlengkabels.
Voor nog meer veiligheid wordt het gebruik van een
foutstroomschakelaar (reststroomapparaat) met
een afslagstroom van maximaal 30 mA
geadviseerd.
De foutstroomschakelaar moet voor elk gebruik
worden gecontroleerd.
MONTEREN
Sluit het gereedschap nooit
aan op het stopcontact
voordat het volledig
gemonteerd is.
MONTEREN VAN DE BESCHERMKAP
_ Plaats de beschermkap op het
apparaat zoals afgebeeld.
_ Bevestig de beschermkap met behulp van
de schroeven.
MONTEREN VAN DE KANTENGELEIDER
_ Bevestig de kantengeleider met behulp
van de schroeven.
VERWISSELEN VAN EEN SPOEL SNIJDRAAD
_ Houd de ontgrendelingsknoppen
ingedrukt en verwijder het deksel van
de behuizing.
_ Neem de spoel uit de behuizing.
_ Maak de behuizing schoon.
_ Rol de snijdraad op de nieuwe spoel
aan beide uiteinden ca. 15 cm af.
_ Voer de uiteinden van de snijdraad door
de ogen van de behuizing.
_ Plaats de spoel in de behuizing.
_ Breng het deksel aan op de behuizing.
_ Zorg ervoor dat de ontgrendelingsknoppen
op hun plaats klikken.

12
OPGEPAST ! In geen geval mag u extra draad op
de lege spoel wikkelen, in plaats daarvan moet u de
spoel vervangen door een nieuw exemplaar dat
overeenkomt met het origineel. Het gebruik van
trimdraad met andere kenmerken dan deze van het
origineel kan permanente schade aan de
grastrimmer veroorzaken alsook de voorwaarden
van de waarborg opheffen.
SELECTEREN VAN DE FUNCTIE
Het apparaat dient voor gebruik op de
gewenste functie (trimmen of kantsnijden)
te worden ingesteld.
_ Voor trimmen drukt u de ontgrendelingsknop in en
draait de handgreep linksom
totdat de handgreep op zijn plaats klikt.
_ Voor kantsnijden drukt u de
ontgrendelingsknop in en draait de
handgreep rechtsom totdat de handgreep
op zijn plaats klikt.
INSTELLEN VAN DE HOOGTE
De telescoopsteel kan in trappen op de
gewenste lengte worden ingesteld om een
comfortabele bedieningshoogte te verkrijgen.
_ Houd de ontgrendelingsknop ingedrukt.
_ Stel de gewenste hoogte in.
_ Laat de ontgrendelingsknop los.
_ Controleer of de steel is vergrendeld.
INSTELLEN VAN DE EXTRA HANDGREEP
De extra handgreep kan worden
ingesteld om een goede balans te verkrijgen.
_ Draai de instelknop los.
_ Stel de handgreep in de gewenste stand in.
_ Draai de instelknop zorgvuldig vast.
AANWIJZINGEN VOOR GEBRUIK
Verwijder stenen, losse
stukken hout en
andere voorwerpen van het te
knippen oppervlak.
Na het uitschakelen van de gazontrimmer draait
de snijdraad nog enkele seconden verder.
Wacht tot de motor en de snijdraad stilstaan
voordat u het gereedschap opnieuw inschakelt.
Schakel het gereedschap niet kort achtereen uit
en weer in.
_ Sluit het apparaat aan op een geschikt
verlengsnoer.
_ Haak het verlengsnoer achter de klem.
_ Houd het apparaat met beide handen vast.
_ Beweeg het apparaat langzaam heen en weer.
_ Ga bij het bewerken van lang gras laag voor laag
te werk.
_ Houd het apparaat uit de buurt van harde
voorwerpen en beplanting.
_ Gebruik het apparaat uitsluitend voor het
bewerken van droog gras.
_ Bij het afwerken van graskanten voert u
het apparaat over de kantengeleider langs
de graskant.
_ Tijdens gebruik zorgt het apparaat er
automatisch voor dat de snijdraad wordt
doorgevoerd.
IN- EN UITSCHAKELEN
_ Om het apparaat in te schakelen, drukt u
de aan/uit-schakelaar in.
_ Om het apparaat uit te schakelen, laat u de
aan/uit-schakelaar los.
Als de trimmer voor het eerst moet worden gebruikt,
controleer dan of de nylon draad het snijmes
aanraakt of er overheen gaat. De nylon draad wordt
automatisch afgesneden bij aanzetten van de
schakelaar tot de maximale lengte. Als de draad
niet de benodigde lengte bereikt, duw dan tegen de
kop van de spoel met uw vinger terwijl u aan de
draden trekt.
trimvermogen verminderen. Breng de snijdraad dus
terug op zijn optimale lengte, duw de trimmer tegen
de grond terwijl hij in werking is; op deze manier
wordt de draad automatisch op de correcte lengte
afgesneden.
OPGEPAST ! Een korte of versleten trimdraad
snijdt minder efficiënt en bijgevolg moet u om zijn
werking te verbeteren de voedingskabel uittrekken
en de handeling herhalen die aan het begin van het
hoofdstuk wordt beschreven. Deze handeling zorgt
ervoor dat alles behoorlijk werkt en maakt u
vertrouwd met de grastrimmer.
OPGEPAST ! Na het uitschakelen zal de nylon
draad blijven draaien gedurende enkele seconden.
GEBRUIKSINSTRUCTIES
Na zorgvuldige lezing van de veiligheidsregels de
onderstaande instructies aandachtig opvolgen om
het beste uit uw grastrimmer te halen.
Start heel graag en als u ervaring hebt opgedaan
kunt u het volle potentieel van de grastrimmer
benutten.
Start de grastrimmer vooraleer u zich naar het
te maaien grasveld begeeft.
Maai het gras door de grastrimmer van rechts
naar links te bewegen en vorder geleidelijk door
de trimmer schuin onder een hoek van
ongeveer 15°te houden .
Hoog gras moet in lagen worden gemaaid,
steeds te beginnen vanaf het bovengedeelte.
De maaibeurten moeten kort zijn.
Maai geen vochtig of nat gras. Droog gras
levert uitstekende resultaten op.
Laat de nylon draad steeds met topsnelheid
draaien; werk niet zodanig dat de trimmer wordt
overbelast.
Opgepast! Gebruik de grastrimmer niet zonder
de beschermkap.
Ga nooit met de grastrimmer over de
verlengkabel terwijl de trimmer in bedrijf is; zorg
dat deze steeds in een veilige positie is achter
uw rug.
Vooraleer u begint te werken moet u zorgen dat
de maaizone vrij is van stenen, afval, draden en
andere hinderlijke voorwerpen.

13
ONDERHOUD
Vooraleer u enige onderhoudsverrichtingen uitvoert
moet u de elektrische voeding uitschakelen door de
stekker uit de verlengkabel te trekken.
Regelmatige reiniging en onderhoud van uw
grastrimmer waarborgt de nodige efficiëntie en
verlengt de levensduur van uw machine.
Na elke trimbewerking de trimmer uit elkaar
halen en het gras en de grond verwijderen van
de spoel en de sleuf, de volledige trimmer en
het bijzonder de beschermkap reinigen.
Tijdens het gebruik van de trimmer de
luchtsleuven schoon en vrij van gras houden.
Gebruik alleen een in heet water gedrenkte
doek en een zachte borstel om de grastrimmer
te reinigen.
Sproei of giet geen water over de trimmer.
Gebruik geen detergenten of oplosmiddelen
aangezien die de trimmer kunnen vernielen. De
plastic onderdelen kunnen gemakkelijk
beschadigd raken door chemische agentia.
Als het trimdraadsnijmes niet langer snijdt of
breekt, laat het dan vervangen door contact op
te nemen met een erkende hersteldienst.
Voor herstellingen die niet werden uitgelegd
in deze instructies moet u contact opnemen
met een erkende hersteldienst.
Koppel de machine na gebruik los van de
voeding en controleer ze op schade;
Wanneer niet gebruikt de machine buiten
bereik van kinderen bewaren;
Inspecteer en onderhoud de trimmer
regelmatig. Trimmers met elektrische
stroomvoorziening mogen alleen worden
hersteld door een erkende hersteldienst;
De gebruiker mag onderhoud en
aanpassingen uitvoeren. Raadpleeg het
hoofdstuk VERVANGING VAN DE SPOEL
MET NYLON TRIMDRAAD.
Gebruik uitsluitend door de fabrikant
aanbevolen vervangstukken en accessoires.
(Draad:φ1,2)
PROBLEEMVERHELPINGSGIDS
Neem voordat u onderhoud
aan de machine verricht altijd
eerst de stekker uit het
stopcontact.
OPGEPAST ! Voor elke handeling de elektrische
voedingskabel loskoppelen.
Als de grastrimmer trilt: de spoel verwijderen en
zijn sleuf zorgvuldig reinigen met verwijdering
van eventueel gras en andere resten. Als de
trilling aanhoudt na hermontage, vervang de
spoel dan door een nieuw exemplaar. Als het
probleem niet verdwijnt, laat de trimmer dan
controleren door een erkende hersteldienst.
Als de grastrimmer niet wil starten: controleer
dan alle elektrische aansluitingen; vergewis u
ervan dat de veiligheidsstroomonderbreker niet
werd gedeactiveerd; controleer of geen
zekering is gesprongen in uw elektrisch
systeem. Als na bovenstaande controles de
grastrimmer nog altijd niet start, laat deze dan
controleren bij een erkende hersteldienst.
OPSLAG
Voor deze aanbevelingen voor de opslag van de
grastrimmer:
Algemene reiniging van de grastrimmer en van
zijn bijbehorende onderdelen uitvoeren (zie
onderhoudsparagraaf), dit voorkomt
schimmelvorming.
Bewaar deze buiten bereik van kinderen, in
een stabiele en veilige positie en op een droge
plaats waar de temperatuur niet te heet of te
koud is.
Bewaar de trimmer beschermd tegen
rechtstreeks zonlicht, indien mogelijk op een
donkere of schaars verlichte plaats.
Bewaar niet in een nylon zak aangezien de
vorming van vochtvlekken hierdoor kan
worden bevorderd.
Bewaar de grastrimmer niet terwijl deze op de
vloer rust. Hang deze liever aan de bovenste
handgreep, zodat de beschermkap nergens
tegen botst. Het laten rusten van de
beschermkap op een oppervlak kan haar vorm
en daardoor ook haar afmetingen veranderen
en de veiligheidskenmerken wijzigen.
TECHNISCHE GEGEVENS
Netspanning V 230
Netfrequentie Hz 50
Vermogen W 550
Toerental (onbelast) min
-1
n
0
:9600
Max. snijcirkel mm 300
Gewicht kg 2.7
bescherming Index IP20
Geluidsniveauwaarden gemeten volgens de van
toepassing zijnde standaard :
L
PA
(Geluidsdrukniveau)
L
PA
86 dB(A) K = 3 dB(A)
L
WA
(Geluidsprestatieniveau
L
WA
93 dB(A) K = 2 dB(A)
Gegarandeerd geluidsvermogen LwA 96 dB(A)
AANDACHT! Draag
gehoorbeschermers wanneer het
geluidsniveau 85dB(A)
overschrijdt.
Gewogen kwadratische gemiddelde waarde de van
toepassing zijnde standaard :
2.4 m/s² K= 1.5 m/²

14
De aanduiding van het feit dat de
aangegeven totale trillingenwaarde werd
gemeten conform een genormaliseerde
proefmethode en kan worden gebruikt om een
instrument met een ander instrument te
vergelijken; de aanduiding van het feit dat de
aangegeven totale trillingenwaarde ook kan
worden gebruikt voor een voorafgaande
evaluatie van de blootstelling.
Een waarschuwing die stipuleert dat
de emissie van trilling in de loop van het
werkelijke gebruik van het elektrische
instrument kan verschillen van de aangegeven
totale waarde, volgens de gebruiksmethodes
van het instrument; door de noodzaak aan te
geven de veiligheidsmaatregelen te identificeren
met de bedoeling de operator te beschermen,
welke gebaseerd zijn op een raming van de
blootstelling in de werkelijke
gebruiksomstandigheden (rekening houdend
met alle bestanddelen van de werkingscyclus,
zoals de stoptijden van het instrument en de
werkingstijden in rust, naast de uitschakeltijd)
SERVICEDIENST
_ Beschadigde schakelaars moeten in de
werkplaats van onze klantendienst hersteld
worden.
_ Als de vervanging van de voedingskabel
noodzakelijk is, moet dit plaatsvinden door de
fabrikant of zijn agent om een gevaar te
voorkomen.
Klantenservice en gebruiksadviezen
Onze klantenservice beantwoordt uw vragen over
reparatie en onderhoud van uw product en over
vervangingsonderdelen. Explosietekeningen en
informatie over vervangingsonderdelen vindt u ook
op :www.eco-repa.com
Het GARDEO-team voor gebruiksadviezen helpt u
graag bij vragen over onze producten en
toebehoren : sav@eco-repa.com
OPSLAG
Reinig zorgvuldig de gehele machine en het
toebehoren.
Berg de machine op buiten het bereik van
kinderen, in een stabiele en veilige positie en op
een droge plaats met een gematigde temperatuur.
Vermijd te hoge en te lage temperaturen.
Bescherm de machine tegen direct invallend licht.
Bewaar ze, indien mogelijk, op een donkere plaats.
Bewaar de machine niet in plastic of Nylon zakken
om te vermijden dat er zich vocht ophoopt.
GARANTIE
Voor de garantiebepalingen wordt verwezen naar
de bijgevoegde garantievoorwaarden.
MILIEU
Als uw machine na verloop
van tijd aan vervanging toe
is, geef hem dan niet met het
huisvuil mee, maar zorg voor
een milieuvriendelijke
verwerking.
U kunt de handleiding in PDF-formaat opvragen
Vervaardigd in China 2016

15
GB LAWN TRIMMER
Intended use
Your GARDEO trimmer has been designed for
trimming and finishing lawn edges and to cut grass
in confined spaces. This appliance is intended for
consumer use only.
Safety instructions
Warning! When using mains-powered appliances,
basic safety precautions, including the following,
should always be followed to reduce the risk of fire,
electric shock, personal injury and material damage.
Warning! When using the machine the safety rules
must be followed. For your own safety and
bystanders please read these instructions before
operating the machine. Please keep the instructions
safe for later use.
u Read all of this manual carefully before operating
the appliance.
u The intended use is described in this manual.
The use of any accessory or attachment or the
performance of any operation with this appliance
other than those recommended in this instruction
manual may present a risk of personal injury.
u Retain this manual for future reference.
Using your appliance
Always take care when using the appliance.
u Always use safety glasses or goggles.
u Never allow children or people unfamiliar with the
instructions to use the appliance.
u Do not allow children or animals to come near the
work area or to touch the appliance or power
supply cord.
u Close supervision is necessary when the
appliance is used near children.
u This appliance is not intended for use by young
or infirm persons without supervision.
u This appliance is not to be used as a toy.
u Only use the appliance in daylight or good
artificial light.
u Use in a dry location only. Do not allow the
appliance to become wet.
u Do not immerse the appliance in water.
u Do not open the body casing. There are not user-
serviceable parts inside.
u Do not operate the appliance in explosive
atmospheres, such as in the presence of
flammable liquids, gases or dust.
u To reduce the risk of damage to plugs or cords,
never pull the cable to remove the plug from a
socket.
Residual risks.
Additional residual risks may arise when using the
tool which may not be included in the enclosed
safety warnings. These risks can arise from misuse,
prolonged use etc.
Even with the application of the relevant safety
regulations and the implementation of safety
devices, certain residual risks can not be avoided.
These include:
u Injuries caused by touching any
rotating/moving parts.
u Injuries caused when changing any parts,
blades or accessories.
u Injuries caused by prolonged use of a tool.
When using any tool for prolonged periods
ensure you take regular breaks.
u Impairment of hearing.
After use
u When not in use, the appliance should be stored
in a dry, well ventilated place out of reach of
children.
u Children should not have access to stored
appliances.
u When the appliance is stored or transported in a
vehicle it should be placed in the boot or
restrained to prevent movement following sudden
changes in speed or direction.
Inspection and repairs
u Before use, check the appliance for damaged or
defective parts. Check for breakage of parts and
any other conditions that may affect its operation.
u Do not use the appliance if any part is damaged
or defective.
u Have any damaged or defective parts repaired or
replaced by an authorised repair agent.
u Never attempt to remove or replace any parts
other than those specified in this manual.
u If the power cable is damaged it must be
replaced by the manufacturer, its service agent or
similarly qualified persons in order to avoid a
hazard.
Using an extension cable
Always use an approved extension cable suitable
for the power input of this appliance (see technical
data). The extension cable must be suitable for
outdoor use and marked accordingly. Up to 30 m of
extension cable can be used without loss of product
performance. Before use, inspect the extension
cable for signs of damage, wear and ageing.
Replace the extension cable if damaged or
defective. When using a cable reel, always unwind
the cable completely.
Warning! Read these instructions carefully, be
familiar with the controls and the proper use of
the line trimmer.

16
Please keep the instructions
safe for later use.
Explanation of symbols on the line trimmer
Denotes risk of personal
injury or damage to the tool.
warning symbols :
Wear safety glasses or goggles
when operating this appliance.
Do not work in the rain or leave
the trimmer outdoors whilst it is
raining.
Keep your hands and feet away
from sharp parts.
Beware of thrown or flying objects
to bystanders.
Keep bystanders a safe distance
away from the machine.
Pay attention that bystanders are
not injured through foreign
objects thrown from the machine.
Keep bystanders a safe distance
away from the machine.
Switch off and remove plug from
mains before adjusting, cleaning
or if the cable is entangled
and before leaving the trimmer
unattended for any period. Keep
the supply flexible cord away from
the cutting line.
In accordance with essential
applicable safety standards of
European directives
Read the instructions
carefully and be familiar with the
controls and proper use of the
equipment.
This
appliance is double insulated;
therefore no earth wire is required.
Always check that the power
supply corresponds to the voltage
on the rating plate.
Additional safety instructions for
grass trimmers
Warning! Cutting elements continue to rotate after
the motor is switched off.
u Be familiar with the controls and the proper use of
the appliance.
u Before use, check the power supply cord and
extension cord for signs of damage, ageing and
wear. If a cord becomes damaged during use,
disconnect the cord from the mains supply
immediately. DO NOT TOUCH THE CORD
BEFORE DISCONNECTING THE SUPPLY.
u Do not use the appliance if the cords are
damaged or worn.
u Wear stout shoes or boots to protect your feet.
u Wear long trousers to protect your legs.
u Before using the appliance, check that your
cutting path is free from sticks, stones, wire and
any other obstacles.
u Only use the appliance in the upright position,
with the cutting line near the ground. Never
switch the appliance on in any other position.
u Move slowly when using the appliance. Be aware
that freshly cut grass is damp and slippery.
u Do not work on steep slopes. Work across the
face of slopes, not up and down.
u Never cross gravel paths or roads while the
appliance is running.
u Never touch the cutting line while the appliance is
running.
u Do not put the appliance down until the cutting
line has come to a complete standstill.
u Use only the appropriate type of cutting line.
Never use metal cutting line or fishing line.
u Take care to keep the mains cable away from the
cutting line. Always be aware of the position of
the cable.
u Keep hands and feet away from the cutting line at
all times, especially when switching on the motor.
u Before using the appliance and after any impact,
check for signs of wear or damage and repair as
necessary.
u Never operate the appliance with damaged
guards or without guards in place.
u Take care against injury from any device fitted for
trimming the filament line length. After extending

17
new cutter line always return the machine to its
normal operating position before switching on.
u Always ensure that the ventilation slots are kept
clear of debris.
u Do not use the lawn trimmer (edge trimmer), if
the cords are damaged or worn.
u Keep extension cords away from cutting
elements.
Warning! Switch off, remov
e
plug from mains before
adjusting, cleaning or if cable
is cut, damaged or entangled.
The cutting line continues to
rotate for a few seconds after
the trimmer is switched off.
Caution – do not touch
rotating cutting line.
WARNING: Packaging
materials are not toys!
Children must not play with
plastic bags! Danger of
suffocation!
ELECTRICAL SAFETY
Always check that the power
supply corresponds to the
voltage on the rating plate.
Electrical Safety
Your machine is double insulated for safety and
requires no earth connection. The operating voltage
is 230 V AC, 50 Hz (for non-EU countries 220 V,
240 V as applicable). Only use approved extension
cables.
It is recommended for increased electrical safety to
use a Residual Current Device (RCD) with a tripping
current of not more than 30 mA. Always check your
RCD every time you use it.
MOUNTING
Do not connect the machine
to the mains socket before it
is completely assembled.
MOUNTING THE GUARD
_ Place the guard on the appliance as
shown.
_ Fit the guard using the screws .
MOUNTING THE EDGE GUIDE
_ Fit the edge guide using the screws .
REPLACING A SPOOL OF CUTTING LINE
_ Keep the release buttons depressed
and remove the lid from the housing.
_ Remove the spool from the housing.
_ Clean the housing.
_ Unwind the cutting line on the new
spool approx. 15 cm at both ends.
_ Feed the ends of the cutting line through
the eyelets of the housing.
_ Place the spool in the housing.
_ Place the lid onto the machine.
_ Make sure that the release buttons click
into place.
CAUTION! Under no circumstances wind extra line
on the empty spool but instead replace it with a new
one, the same as the original. The use of line with
different characteristics to those of the original can
permanently damage the grass trimmer as well as
annulling the terms of the guarantee.
SELECTING THE FUNCTION
Select the required operating mode before
use (trimming or edging).
_ For trimming, press the lock-off button
and turn the handle counterclockwise
until the handle clicks into place.
_ For edging, press the lock-off button and
turn the handle clockwise until the handle
clicks into place.
ADJUSTING THE HEIGHT
The telescopic tube can be adjusted in
stages to the desired length to achieve a
comfortable operating height.
_ Keep the lock-off knob depressed.
_ Set the required height.
_ Release the knob.
_ Check that the tube is locked.
ADJUSTING THE GUIDE HANDLE
The guide handle can be adjusted to achieve a
good balance.
_ Loosen the adjustment knob.
_ Set the handle to the desired position.
_ Carefully tighten the adjustment knob.
INSTRUCTIONS FOR USE
Remove stones, loose pieces
of wood and other objects
from the cutting area.
The cutting line continues to rotate for a few
seconds after the trimmer is switched off. Allow
the motor/cutting line to stop rotating before
switching “on” again.
Do not rapidly switch off and on.
_ Connect the appliance to a suitable extension
cord.
_ Hook the extension cord behind the clamp.
_ Hold the appliance with both hands.
_ Slowly move the appliance back and forth.
_ When working long grass proceed layer
for layer.
_ Keep the appliance away from hard
objects and plants.
_ Only use the appliance for working dry

18
grass.
_ When edging, guide the appliance over
the edge guide along the grass edge.
_ The appliance will automatically feed the
cutting line during use.
SWITCHING ON AND OFF
_ To switch the appliance on, press the
on/off switch.
_ To switch the appliance off, release the
on/off switch.
If the trimmer is to be used for the first time, check
that the nylon line touches or passes over the
cutting blade. The nylon line will be cut
automatically when turn on the switch to the
maximum length. If it does not reach the necessary
length, push the head of spool with your finger while
pulling the lines .
To cut long grass, take several small cuts. Never cut
wet or very damp grass. The line has to be
protected against premature wear caused by hard
obstacles; for this purpose, keep the trimmer away
from hard surfaces using the guard's edge as a
protection. A short or worn line will reduce cutting
capacity. So, to restore the line to its optimum
length, push the implement to the ground while it is
running; this way, the line will automatically be the
correct length .
CAUTION! The short or worn line cuts less
efficiently therefore, to improve its operations,
unplug the electrical supply and repeat the
operation described in the beginning of the chapter.
These make sure that everything is functioning
properly and to familiarize yourself with the grass
trimmer.
CAUTION! After switching off, the nylon line will
continue to rotate for a few more seconds.
MAINTENANCE
Before performing
maintenance to the machine,
always unplug the machine.
Regular cleaning and maintenance of you grass
trimmer will ensure efficiency and prolong the
life of your machine.
After each cutting operation, take apart and
clean out the grass and soil from; the spool and
its slot, the whole trimmer and in particular the
guard.
During operation, keep the air slots clean and
free of grass.
Only use a cloth soaked with hot water and a
soft brush to clean the grass trimmer.
Do not spray or wet the appliance with water.
Do not use detergents or solvents as these
could ruin the trimmer. The parts in plastic can
easily be damaged by chemical agents.
If the line cutting blade no longer cuts or breaks,
have this replaced by contacting an authorized
service centre.
For repairs which have not been explained in
these instructions, contact an authorized
service centre.
After use, disconnect the machine from the
mains and check for damage;
When not in use store the machine out of the
reach of children;
Inspect and maintain the trimmer regularly.
Mains powered trimmers should only be
repaired by an authorized repairer ;
User may carry out maintenance and
adjustments. Please refer to the part of
REPLACEMENT OF THE SPOOL OF NYLON
WIRE.
Use only manufacturers recommended
replacement parts and accessories. (Line:φ
1.2 )
TROUBLE-SHOOTING
Before performing
maintenance to the machine,
always unplug the machine.
If the grass trimmer vibrates: remove the spool
and clean its slot carefully removing any grass
and so forth. If vibration persists after
reassembly, replace the spool with a new one.
In the event of the problem not disappearing,
have the trimmer checked at an authorized
service center.
If the grass trimmer does not start: check all the
electrical connections; make sure the safety
circuit-breaker has not been activated; check
that no fuse has blown in your electrical system.
If after the above checks, the grass trimmer still
dose not start, have it checked at an authorized
service center.
STORAGE
Follow these recommendations for storing the grass
trimmer:
Carry out general cleaning of the grass
trimmer and its ancillary parts (see
maintenance paragraph), the prevents mould
from forming.
Store it out of the reach of children, in a stable
and safe position and in a dry place where the
temperature is not too hot or too cold.
Store the trimmer away from direct sunlight, if
possible in a dark or barely lit place.
Do not store in a nylon bag as this could
encourage the formation of damp patches.
Do not store the grass trimmer resting on the
floor. Hang it by the upper handgrip instead, so
that the guard does not touch anything. The
resting of the guard on a surface could alter its
shape and therefore its dimensions and safety
characteristics would be modified.

19
TECHNICAL DATA
Mains voltage V 230
Mains frequency Hz 50
Power input W 550
No load speed min
-1
n
0
:9600
Max. cutting circle mm 300
Weight kg 2.7
IP Protection IP20
Values of noise emissions measured by the
standard:
Acoustic pressure level L
PA
86 dB(A) K = 3 dB(A)
Acoustic power level L
WA
93 dB(A) K = 2 dB(A)
Guaranteed sound power L
WA
96 dB(A)
ATTENTION !
The sound power pressure may
exceed 85 dB(A), in this case
individual hearing protection
must be worn.
Weighted root mean square acceleration according
to relevant standard. : 2.4 m/s² K= 1.5 m/²
The declared vibration total value has
been measured in accordance with a standard
test method and may be used for comparing one
tool with another that the declared vibration total
value may also be used in a preliminary
assessment of exposure.
A warning that the vibration emission
during actual use of the power tool can differ
from the declared total value depending on the
ways in which the tool is used and of the need to
identify safety measures to protect the operator
that are based on an estimation of exposure in
the actual conditions of use (taking account of
all parts of the operating cycle such as the times
when the tool is switched off and when it is
running idle in addition to the trigger time).
SERVICE DEPARTMENT
_ Damaged switches must be replaced by our after-
sales service department.
_ If replacing the power cord is necessary, it
should be done by the manufacturer or his agent
to avoid a hazard.
After-sales Service and Application Service
Our after-sales service responds to your questions
concerning maintenance and repair of your product
as well as spare parts. Exploded views and
information on spare parts can also be found
under:www.eco-repa.com
GARDEO application service team will gladly
answer questions concerning our products and their
STORAGE
_ Thoroughly clean the whole machine and its
accessories.
_ Store it out of the reach of children, in a stable and
secure position, in a cool and dry place, avoid too
high and too low temperatures.
_ Protect it from exposure to direct sunlight. Keep it
in the dark, if possible.
_ Don’t keep it in plastic bags to avoid humidity
build-up.
GUARANTEE
Refer to the enclosed guarantee conditions
for the terms and conditions of guarantee.
ENVIRONMENT
Should your machine need
replacement after
extended use, do not put it in
the domestic waste but
dispose of it in an
environmentally safe way.
You can request the instruction manual in PDF
Made in China 2016

20
Table of contents
Languages:
Other Gardeo Trimmer manuals

Gardeo
Gardeo GCBE18VCR-LI10L User manual

Gardeo
Gardeo GTHE510SP User manual

Gardeo
Gardeo GSEBRTHE18VLI User manual

Gardeo
Gardeo GCBE18VCR-LI User manual

Gardeo
Gardeo GTHT26RH-AVW User manual

Gardeo
Gardeo GTHT2575LC User manual

Gardeo
Gardeo PRO GPTHT2560 User manual

Gardeo
Gardeo GCBE18VCR-LI20L User manual

Gardeo
Gardeo GTHE6224RH User manual

Gardeo
Gardeo GPCBE6032T User manual