gc GRADIA PLUS User manual

EN MODULAR COMPOSITE SYSTEM FOR INDIRECT RESTORATIONS
DE MODULARES KOMPOSITSYSTEM FÜR INDIREKTE RESTAURATIONEN
FR SYSTEME COMPOSITE MODULAIRE POUR RESTAURATIONS INDIRECTES
IT SISTEMA MODULARE DI COMPOSITO PER RESTAURI INDIRETTI
ES SISTEMA DE COMPOSITE MODULAR PARA RESTAURACIONES INDIRECTAS
NL MODULAIR COMPOSIETSYSTEEM VOOR INDIRECTE RESTAURATIES
DA MODULOPBYGGET KOMPOSITSYSTEM TIL INDIREKTE RESTAURERINGER
SV MODULUPPBYGGT KOMPOSITSYSTEM FÖR INDIREKTA RESTAURERINGAR
PT SISTEMA DE COMPÓSITO MODULAR PARA RESTAURAÇÕES INDIRETAS
EL ΣΥΣΤΗΜΑ ΣΥΝΘΕΤΗΣ ΡΗΤΙΝΗΣ ΓΙΑ ΕΜΜΕΣΕΣ ΑΠΟΚΑΤΑΣΤΑΣΕΙΣ
NO MODULÆRT KOMPOSITTSYSTEM FOR INDIREKTE RESTAURERINGER
FI MODULAARINEN YHDISTELMÄMUOVIJÄRJESTELMÄ EPÄSUORIA TÖITÄ VARTEN
GRADIA®PLUS
BG МОДУЛНА КОМПОЗИТНА СИСТЕМА ЗА ИНДИРЕКТНИ ВЪЗСТАНОВЯВАНИЯ
CS MODULÁRNÍ KOMPOZITNÍ SYSTÉM PRO NEPŘÍMÉ DOSTAVBY
HR MODULARNI KOMPOZITNI SUSTAV ZA INDIREKTNE RADOVE
HU MODULÁRIS KOMPOZIT RENDSZER AZ INDIREKT HELYREÁLLÍTÁSOKHOZ
PL MODUŁOWY SYSTEM KOMPOZYTOWY DO POŚREDNICH UZUPEŁNIEŃ PROTETYCZNYCH
RO SISTEM COMPOZIT MODULAR PENTRU RESTAURĂRI INDIRECTE
RU МОДУЛЬНАЯ КОМПОЗИТНАЯ СИСТЕМА ДЛЯ НЕПРЯМЫХ РЕСТАВРАЦИЙ
SK MODULÁRNY KOMPOZITNÝ SYSTÉM PRE NEPRIAME NÁHRADY
SL MODULARNI KOMPOZITNI SISTEM ZA INDIREKTNE OBNOVE
SR MODULARNI KOMPOZITNI SISTEM ZA INDIREKTNE RADOVE
UK МОДУЛЬНА КОМПОЗИТНА СИСТЕМА ДЛЯ НЕПРЯМИХ РЕСТАВРАЦІЙ
TR İNDİREK RESTORASYONLAR İÇİN MODÜLER KOMPOZİT SİSTEMİ
LV MODULĀRA KOMPOZĪTA SISTĒMA NETIEŠĀM RESTAURĀCIJĀM
LT KOMPOZITINĖ SISTEMA NETIESIOGINIŲ RESTAURACIJŲ GAMYBAI
ET MODULAARNE KOMPOSIIDI SÜSTEEM INDIREKTSETELE RESTAURATSIOONIDELE
MANUFACTURED by
GC DENTAL PRODUCTS CORP.
2-285 Torrimatsu-cho, Kasugai, Aichi 486-0844, Japan
RESPONSIBLE MANUFACTURER IN CANANDA:
GC AMERICA INC.
3737 West 127th Street, Alsip, IL 60803 U.S.A.
DISTRIBUTED by:
GC CORPORATION
76-1 Hasunuma-cho, Itabashi-ku, Tokyo 174-8585, Japan
EU: GC EUROPE N.V.
Researchpark Haasrode-Leuven 1240, Interleuvenlaan 33,
B-3001 Leuven, Belgium TEL: +32 16 74 10 00
GC AMERICA INC.
3737 West 127th Street, Alsip, IL 60803 U.S.A.
TEL: +1-708-597-0900
www.gcamerica.com
GC SOUTH AMERICA
RUA HELIODORA, 399,
SANTANA - 02022-051
SÃO PAULO, SP - BRASIL
TEL: +55-11-2925.0965
CNPJ: 08.279.999/0001-61
RESPONSÁVEL TÉCNICA
MAYARA DE SANTIS RIBEIRO
CRO/SP: 105.982
GC ASIA DENTAL PTE. LTD.
11, Tampines Concourse, #03-05 Singapore 528729
TEL: +65 6546 7588
GC AUSTRALASIA DENTAL PTY. LTD.
1753 Botany Rd, Banksmeadow, NSW 2019, Australia
TEL: +61 2 9301 8200
PRINTED IN BELGIUM 951941
X7504

Prior to use, carefully read the instructions.
GRADIA®PLUS
MODULAR COMPOSITE SYSTEM FOR INDIRECT RESTORATIONS
For use only by a dental professional in the recommended indications.
INDICATIONS
1. Crown and Bridgework (with metal backing)
2. Metal free restorations: Jacket Crowns, Inlays, Onlays and Laminated Veneers
3. Implant superstructures
4. Reproduction of gum tissue for crown restorations
CONTRAINDICATIONS
Avoid use of this product in patients with known allergies to methacrylate monomer, methacrylate polymer
or alcohol.
DIRECTIONS FOR USE
I. BUILDING UP PROCEDURE
A.Anterior / Posterior Veneer Crown (with metal backing)
1. Production of Metal Framework
a) Waxing-up and Casting
Wax-up framework conventionally, occlusal surface should have a minimum of 1 mm thickness. Apply retention
beads to the facing surface. Cast in the usual manner and remove retainers in 0.5 mm width around the marginal
veneer surface.
b) Sandblasting
Sandblast the metal frame with 50 micron aluminum oxide. Clean and dry with air gun.
c) Priming
Immediately apply METAL PRIMER II / METAL PRIMER Z to retention areas. Allow to dry.
2. Build up Veneer
a) Apply and Light cure the Opaque:
Immediately apply a layer of OPAQUE over retention area and light cure for 1 minute. Repeat this process until the
metal color is masked out.
Note: For irradiation time by the GC’s visible light curing unit, refer to the chart given below.
b) Forming Dentin:
Apply Dentin shades*, building up to the desired thickness. Pre-cure. (In some cases, adjust the shade by Lustre
Paint and light cure for 1 minute.)
*A processing aid like MODELING LIQUID can be used. Use a few drops, a brush or adequate instrument to adapt the pastes.
c) Cervical application:
Progressively thinly apply Lustre Paint (A) in 2-3 mm width around the cervical area as required and light cure for
1 minute.
d) Forming Enamel:
Apply Enamel shades progressively from the incisal edge. Light cure for 3 minutes.
e) Adjust and Characterize.
Adjust contour and characterize surface with diamond and carbide burs. (At this time, scrape off all air inhibition
layers on the surface.)
EN

3. Glazing (Coating and Polishing)
3-1 Coating method
a) Roughening the surface:
Roughen the resin surface using a carbide bur or sandblast (1.5 kg/cm2) for obtaining the mechanical adhesion.
Dry and clean with air gun.
b) Priming:
Immediately apply a silane coupling agent (e.g. CERAMIC PRIMER II) to the resin surface and dry.
c) Coloring, Coating and Final light curing:
Apply a thin layer (<0.1mm) of Lustre Paint over the resin surface and final-cure.
To prevent contamination, wash the brush with Lustre Paint Diluting Liquid every time.
3-2 Polishing method
Use proper instruments and burs to polish and finish the prosthesis, and to confirm, remove any agent or paste for
polish and finish in proper way and see the surface has proper shine.
B. Anterior or Posterior Jacket Crown (metal free)
1. Preparation of the working model
a) Prepare the die stone in usual manner.
b) Apply DIE-HARDNER to the die stone surface.
c) Block out undercuts with wax.
d) Apply a layer of paraffin wax as die spacer as required.
e) Apply a thin layer of a resin composite separator.
2. Special pre-cure treatment
a) In case of a metal core, apply first a thin layer of OPAQUE. Light cure for 1 minute.
b) In case of a vital abutment tooth, apply first a thin layer of (LB-) Base OD and Pre-cure.
3. Build up of Crown
For following build up on the surface, see instructions BUILDING UP PROCEDURE A. (Section 2. b-e) above.
4. Glazing
See instructions BUILDING UP PROCEDURE A. (Section 3.) above.
5. Cleaning, treating restoration for bonding
Roughen the inner surface of Jacket crown using alumina sandblast (1.5 kg/cm2) for obtaining the mechanical adhesion.
And then clean with air gun.
6. Cementation (Chair side)
a) Priming
Apply a thin layer of a silane coupling agent (e.g. CERAMIC PRIMER II) to bonding surface.
b) Cementation
Use a dental adhesive resin cement (e.g. G-CEM LinkForce).
C. Posterior Inlay
1. Preparation of the working model
Follow the instructions Preparation of the working model (B. Section 1. a-e) above.
2. Build up of Inlay
a) Build up (LB-) Inlay TD as a dentin color in order to retain the natural tooth color. Pre-cure.
Note: In the case of a stained tooth, it is recommended to first apply OPAQUE to the cavity floor. Light cure for
1 minute.
b) Build up (LB-) Inlay E , shape and contour. Final-cure.
c) Continue BUILDING UP PROCEDURE A. (Section 2. e) above.
3. Glazing
See instructions BUILDING UP PROCEDURE A. (Section 3.) above.
II. ADDITIONAL APPLICATION AND REPAIR
A. LABSIDE
1. Roughen the resin surface using a carbide bur or sandblast (1.5 kg/cm2).
2. Immediately apply a silane coupling agent (e.g. CERAMIC PRIMER II) to the resin surface and dry.
3. Apply Enamel shades, etc. as required.
B. CHAIRSIDE
MASKING OF EXPOSED METAL SURFACES WHEN REPAIRING INDIRECT RESTORATIONS INTRAORALLY
1. As for PREPARATION of RESTORATION, refer to G-Premio BOND IFU-II.1.
Note: Use a rubber dam for isolation.
2. Apply GRADIA PLUS OPAQUE to the prepared metal surface only. The layer applied should have a thickness of
maximum 0.2 mm. Light-cure GRADIA PLUS OPAQUE for 20 seconds.
3. If the surface is still not sufficiently masked, apply a second layer of OPAQUE and light-cure.
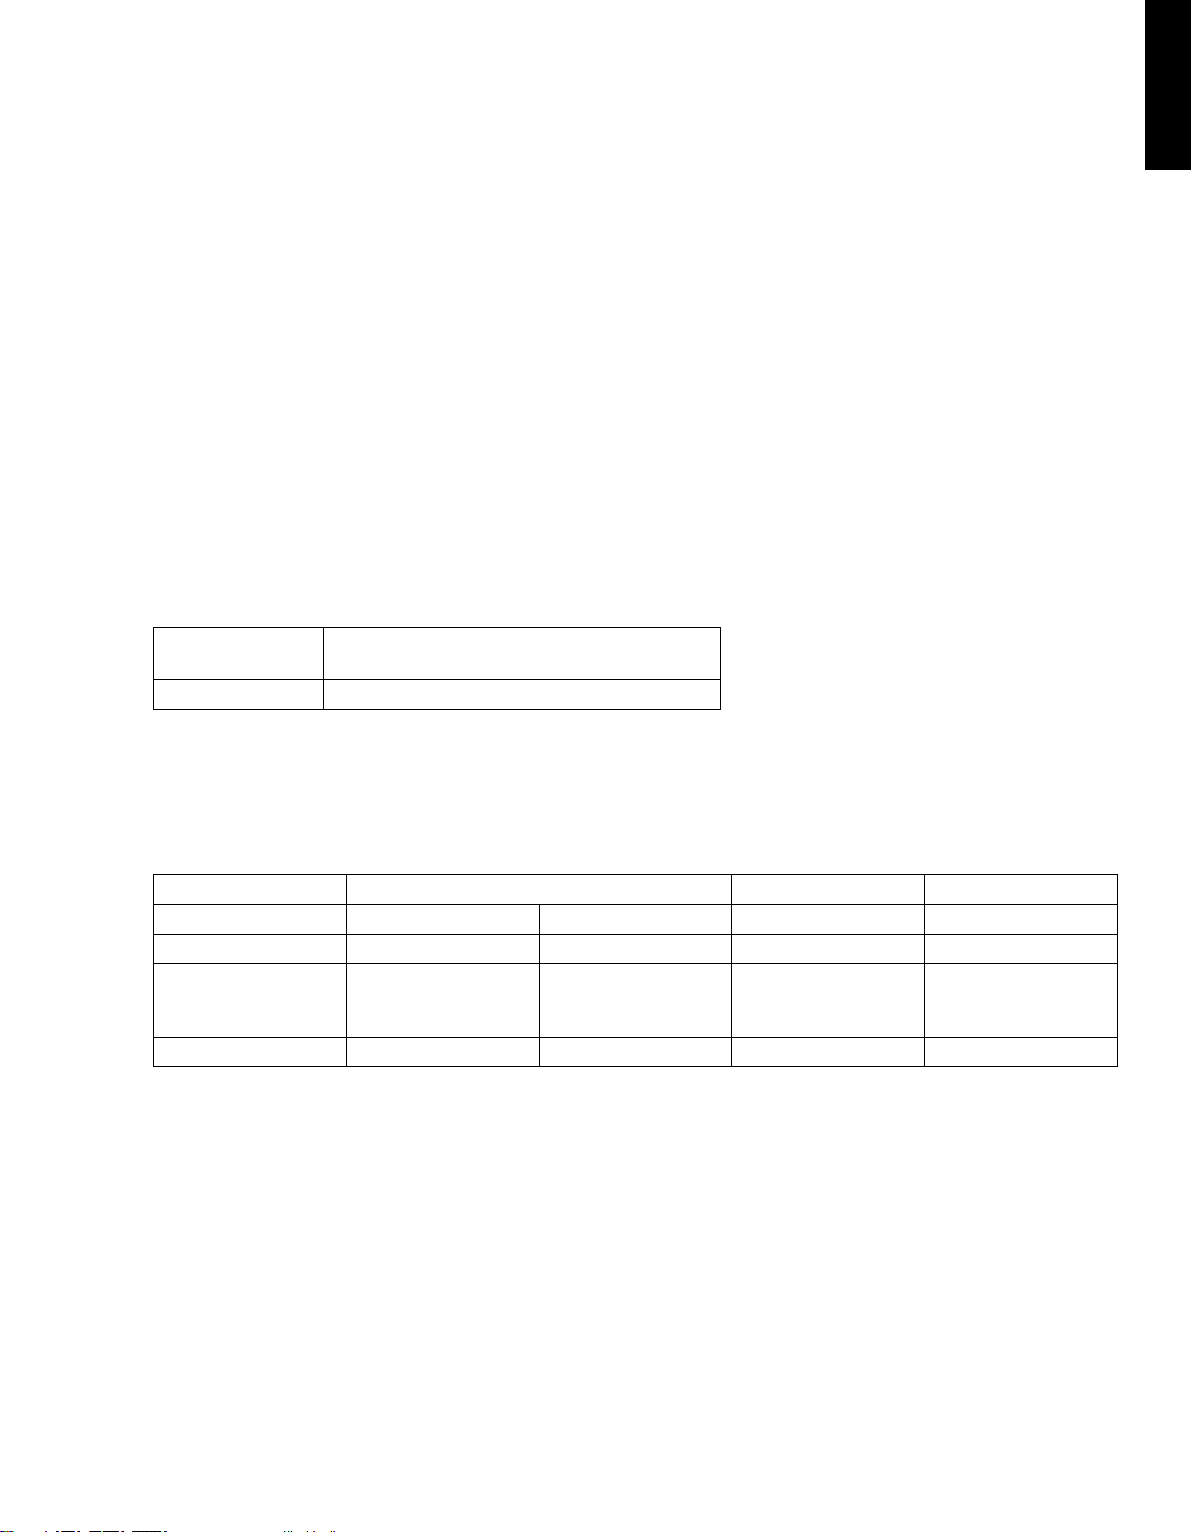
Irradiation time
Curing unit Halogen / LED (700 mW/cm²) & High power
LED (more than 1200 mW/cm²)
OPAQUE 20 seconds
4. Repair the restoration by applying a chairside composite material (e.g. G-ænial & Essentia) in layers. Light-cure each
layer according to the manufacturer’s instructions of the respective product
5. Finish and polish using standard techniques.
Irradiation time and curing unit
Curing unit LABOLIGHT DUO STEPLIGHT SL-I LABOLIGHT LV-III,II
Step-mode** Full-mode Pre-Cure** Final cure
OPAQUE - 1 min. - 1 min.
PASTE HB, PASTE LB,
GUM SHADES LB,
GUM SHADES HB
10 sec.* 3 min. 10 sec.* 3 min.
LUSTRE PAINT *** 10 sec.* 90 sec. 10 sec.* 5 min.
* For one surface of a single crown.
** Distance from light source : 3cm.
*** Thickness: 0.1mm or less.
EN
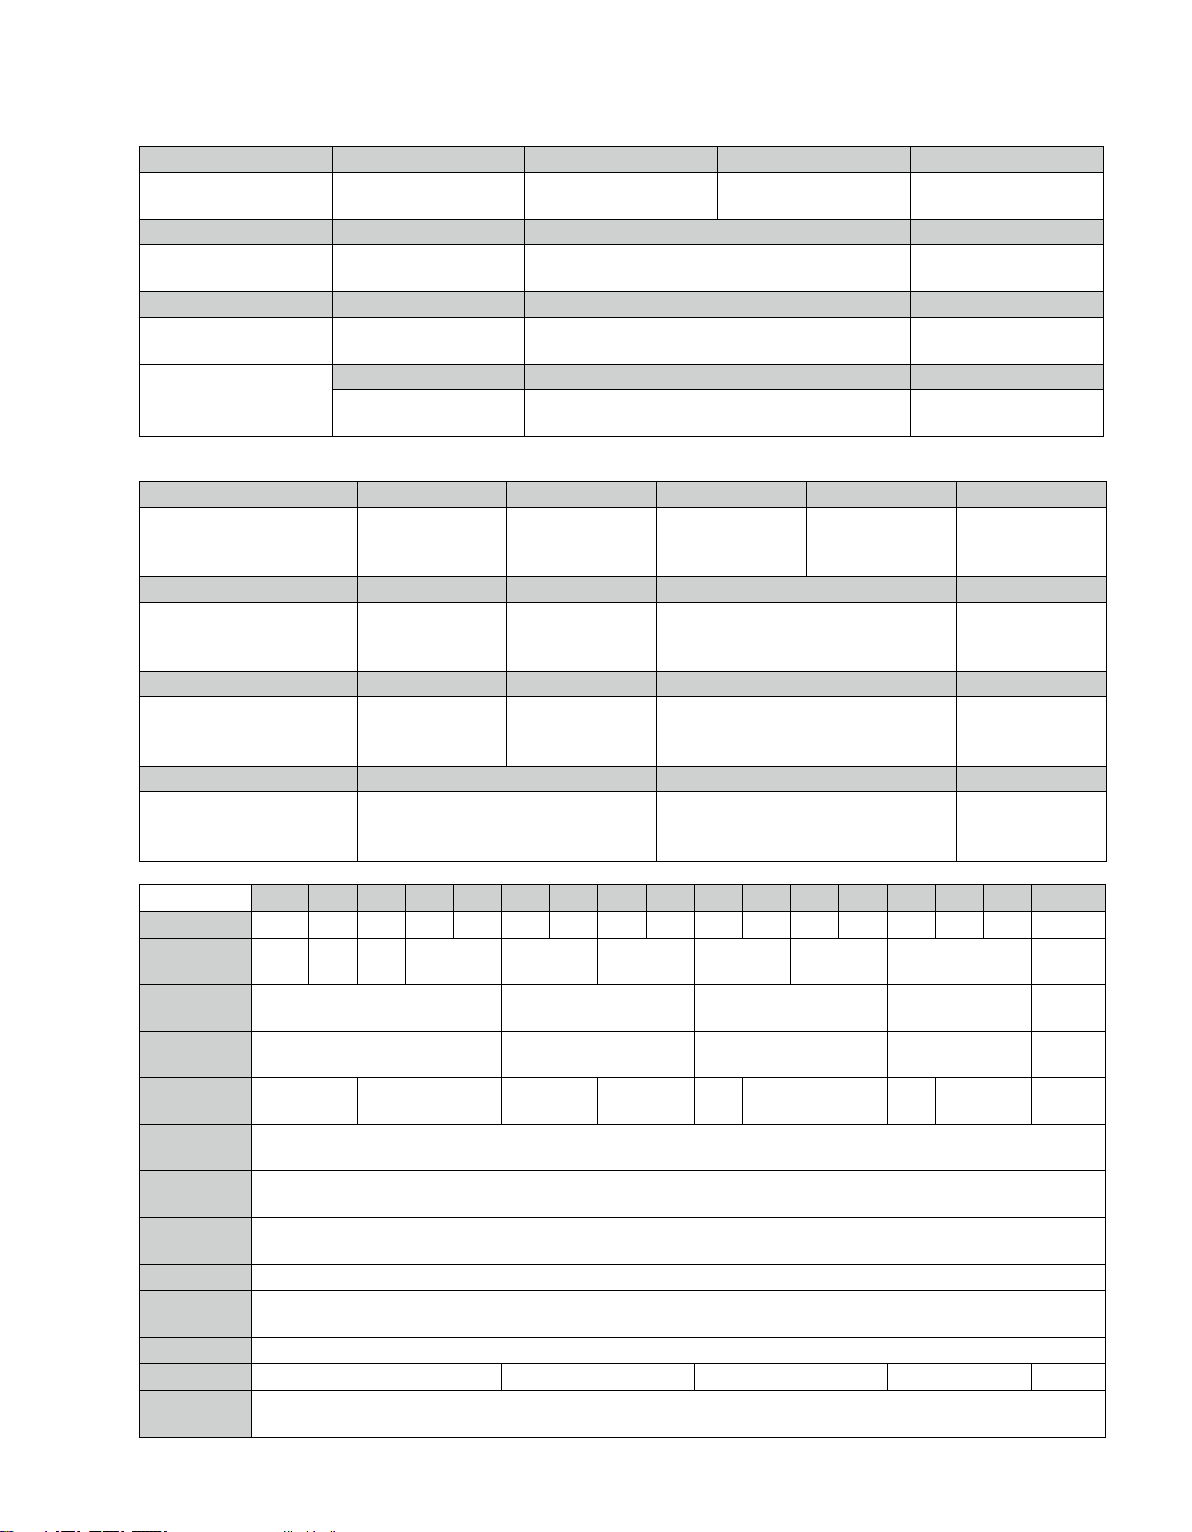
Configuration table: Opaque mixing ratio
OA1 OA2 OA3 OA3.5 OA4
O-Base:OA
3 : 1
O-BASE:OA
1 : 1
O-BASE:OA
1 : 2
O-BASE:OA
1 : 3 OA
OB1 OB2 OB3 OB4
O-BASE:OB
3 : 1
O-BASE:OB
1 : 1
O-BASE:OB
1 : 3 OB
OC1 OC2 OC3 OC4
O-BASE:OC
3 : 1
O-BASE:OC
1 : 1
O-BASE:OC
1 : 3 OC
OD2 OD3 OD4
O-BASE:OD
1 : 1
OA:OD
1 : 2 OD
Corresponding table (Enamel, Dentin and Lustre Paint)
Shade A1 A2 A3 A3.5 A4
Enamel (Paste HB)
Dentin (Paste HB)
Cervical (Lustre Paint)
EL
DA1
LP-CLF
EL
DA2
LP-CLF
ED
DA3
LP-CLF
ED
DA3.5
LP-CLF
ED
DA3.5
LP-A
Shade B1 B2 B3 B4
Enamel (Paste HB)
Dentin (Paste HB)
Cervical (Lustre Paint)
EL
DB1
LP-CLF
EL
DB1
LP-B
ED
DB3
LP-CLF
ED
DB3
LP-B
Shade C1 C2 C3 C4
Enamel (Paste HB)
Dentin (Paste HB)
Cervical (Lustre Paint)
EL
DB1
LP-C
ED
DB1
LP-C
ED
DC3
LP-CLF
ED
DC3
LP-C
Shade D2 D3 D4
Enamel (Paste HB)
Dentin (Paste HB)
Cervical (Lustre Paint)
EL
DD2
LP-CLF
ED
DD2
LP-A
ED
DD2
LP-D
A1 A2 A3 A3.5 A4 B1 B2 B3 B4 C1 C2 C3 C4 D2 D3 D4 BW
Opaque* OA1 OA2 OA3
OA3.5
OA4 OB1 OB2 OB3 OB4 OC1 OC2 OC3 OC4 OD2 OD3 OD4 O-BASE
Dentin (HB-)
DA1
(HB-)
DA2
(HB-)
DA3 (HB-)DA3.5 (HB-)DB1 (HB-)DB3 (HB-) DB1 (HB-)DC3 (HB-)DD2 (HB-)DW
Opacious
Dentin (HB-)ODA (HB-)ODB (HB-)ODC (HB-)ODD (HB-)
ODW
Cervical
(Lustre Paint) (LP-)CLF, (LP-)A (LP-)CLF, (LP-)B (LP-)CLF, (LP-)C (LP-)CLF, (LP-)D (LP-)CLF,
(LP-)A
Enamel (HB-)EL (HB-)ED (HB-)EL (HB-)ED (HB-)
EL (HB-)ED (HB-)
EL (HB-)ED (HB-)EL
Effect 1
(Dentin shade) (LB-)Base D, (LB-)Base OD, (LB-)DW, (LB-)ODW
Effect 2
(Enamel shade)
(HB-)PE, (LB-)Base E, (LB-)Inlay E
Effect 3
(Characterize) (LB-)Base Opal, (LB-)Orange, (LB-)Red, (LB-)Yellow, (LB-)Blue, (LB-)Grey, (LB-)Milky
Translucent (HB-)CLF, (LB-)Base CLF,
Cervical
Translucent (LB-)Inlay TD
Gum shade GO-1, GO-2, GLB-1, GLB-2, GLB-3, GLB-CL
One body (LB-)A (LB-)B (LB-)C (LB-)D (LB-)W
Effect 4
(Lustre Paint) (LP-)Blue, (LP-)Cream, (LP-)Grey, (LP-)Lavender, (LP-)CL, (GLP-)Bright red, (GLP-)Violet
*cf. Configuration table: Opaque mixing ratio

PACKAGES
1. Set Packages
• LAYER SET (19 shades)
HB-DA1, HB-DA2, HB-DA3, HB-DA3.5, HB-DB1, HB-DB3, HB-DC3, HB-DD2, HB-EL, HB-ED, HB-CLF, HB-PE, HB-ODA, HB-ODB,
O-Base, OA, OB, OC, OD, Dispensing Tip Needle Type & Light Protective Cover, Mixing Pad No. 22, Plastic Spatula No. 2 Blue
• LAYER PRO SET (19 shades)
HB-ODC, HB-ODD, HB-ODW, HB-DW, LB-Base E, LB-Base CLF, LB-Base D, LB-Base OD, LB-Base Opal, LB-DW, LB-ODW,
LB-Orange, LB-Yellow, LB-Red, LB-Grey, LB-Blue, LB-Milky, LB-Inlay E, LB-Inlay TD, Mixotip, Dispensing Tip Plastic Type
Wide & Light Protective Cover, Mixing Pad No. 22, Plastic Spatula No. 2 Blue
• PAINT SET (10 shades)
LP-A, LP-B, LP-C, LP-D, LP-CLF, LP-CL, LP-Blue, LP-Grey, LP-Cream, LP-Lavender, Lustre Paint Diluting Liquid, Dispensing
Tip Needle Type Small & Light Protective Cover, Brush Round No. 1, Brush Flat No. 1, Brush Holder (ivory & white handle),
Disposable Palette, Mixing Pad No. 14B
• GUM SHADES SET (11 shades)
O-Base, GO-1, GO-2, LP-CL, GLP-Bright Red, GLP-Violet, GLB-1, GLB-2, GLB-3, GLB-CL, GHB-2, Lustre Paint Diluting
Liquid, Mixotip, Dispensing Tip Plastic Type Wide & Light Protective Cover, Dispensing Tip Needle Type Small & Light
Protective Cover, Dispensing Tip Needle Type & Light Protective Cover, Brush Round No. 1, Brush Flat No. 1,
Brush Holder (ivory & white handle), Disposable Palette, Mixing Pad No. 14B, Plastic Spatula No. 22 Blue
• ONE BODY SET (11 shades)
O-Base, OA, OB, OC, OD, LB-Base OD, LB-A, LB-B, LB-C, LB-D, LB-W, Dispensing Tip Plastic Type Wide & Light
Protective Cover, Dispensing Tip Needle Type & Light Protective Cover, Mixing Pad No. 22, Plastic Spatula No. 2 Blue
• ACCESSORY KIT
AIR BARRIER, SEPARATOR, DIE-HARDNER, CERAMIC PRIMER II, METAL PRIMER Z, Acrylic Primer, DIAPOLISHER PASTE,
MODELLING LIQUID, Brush Round No. 1, Brush Flat No. 1, Brush Holder (ivory & white handle), Brush No. 7, Shade Guide Kit,
Mixing Pad No. 22
2. Refill Packages
• OPAQUE, 2.0mL syringe (in 13 shades)
O-Base, OA, OB, OC, OD, OA1, OA2, OA3, OA3.5, OB1, OB3, OC3, OD2, Dispensing Tip Needle Type,
Light Protective Cover
• PASTE HB, 3.3mL syringe (in 18 shades)
HB-DA1, HB-DA2, HB-DA3, HB-DA3.5, HB-DB1, HB-DB3, HB-DC3, HB-DD2, HB-DW, HB-ODA, HB-ODB, HB-ODC,
HB-ODD, HB-ODW, HB-EL, HB-ED, HB-CLF, HB-PE
• PASTE LB, 2.0mL syringe (in 15 shades)
LB-Base D, LB-Base E, LB-Base CLF, LB-Base OD, LB-Base Opal, LB-DW, LB-ODW, LB-Orange, LB-Red, LB-Yellow,
LB-Blue, LB-Grey, LB-Milky, LB-Inlay E, LB-Inlay TD, Dispensing Tip Plastic Type Wide, Light Protective Cover
• ONE BODY, 2.0mL syringe (in 5 shades)
LB-A, LB-B, LB-C, LB-D, LB-W, Dispensing Tip Plastic Type Wide, Light Protective Cover
• GUM Shades Opaque, 2.0mL syringe (in 2 shades)
GO-1, GO-2, Dispensing Tip Needle Type, Light Protective Cover
• GUM Shades HB, 3.3mL syringe (in 4 shades)
GHB-1, GHB-2, GHB-3, GHB-CL
• GUM Shades LB, 2.0mL syringe (in 4 shades)
GLB-1, GLB-2, GLB-3, GLB-CL, Dispensing Tip Plastic Type Wide, Light Protective Cover
• GUM Shades Lustre Paint, 0.8mL syringe (in 2 shades)
GLP-Bright Red, GLP-Violet, Dispensing Tip Needle Type Small, Light Protective Cover
• LUSTRE PAINT, 0.8mL syringe (in 10 shades)
LP-A, LP-B, LP-C, LP-D, LP-CLF, LP-Blue, LP-Cream, LP-Grey, LP-Lavender, LP-CL, Dispensing Tip Needle Type Small,
Light Protective Cover
3. Accessories
• MODELING LIQUID 3mL
• Lustre Paint DILUTING LIQUID 3mL
• AIR BARRIER 10mL
• SEPARATOR 5mL
• METAL PRIMER II 5mL / METAL PRIMER Z 5mL
• CERAMIC PRIMER II 3mL
• DIE-HARDNER 5mL
• DIAPOLISHER PASTE 2g
EN

NOTES
• Please review this Instruction for Use carefully before using the product. After reviewing the Instructions for Use, keep them
in a convenient place for quick reference if necessary. If this Instruction for use is lost, contact the distributor or supplier
shown on the package.
• This product must only be used by dentists or dental technicians.
• To prevent troubles with operating or storing, the product should be used according to the instructions specified in this
Instruction for Use. Do not use this product for contraindications given in this Instruction for Use.
• Assure that the crown or inlay is sufficiently thick, using the methods for preparing abutments and cavities described in this
manual.
• Wear gloves or take other appropriate measures when using the product.
• After dispensing, use immediately and replace caps on syringe or bottle.
• Avoid separation of the coating (Lustre Paint) from the orthoprosthesis. Sandblast the surface of orthoprosthesis with
alumina particles, 50 μm diameter before applying the connector.
• Avoid desorption of the orthoprosthesis. Use a dental adhesive resin cement to lute jacket crowns, veneers, inlays or onlays.
Sandblast the inner surface of the jacket crowns, veneers, inlays or onlays using low pressure (1.5 kg/cm2).
• The oxygen inhibited layer of the resin surface to be coated should be removed before applying Lustre Paint as it may hinder
the proper curing of Lustre Paint.
• For curing Lustre Paint, violet LED (effective wave length: 390-430nm) is required.
• Place the light source as close as possible to the resin surface. Set a 2cm platform in the curing device and place the
prosthesis on it with the coated surface facing the light. Reverse the prosthesis and repeat the light curing to fully cure the
undercut or area in shadow.
CAUTION
1. In rare cases, this product may cause sensitivity in some people. If such reactions are experienced, discontinue the use of the
product and consult a physician.
2. Wear eye protection and plastic or rubber gloves during operation in particular to avoid direct contact with paste and air
inhibited resin layers in order to prevent possible sensitivity.
3. LUSTRE PAINT DILUTING LIQUID, SEPARATOR, DIE HARDNER, GC METAL PRIMER II / GC METAL PRIMER Z and
GC CERAMIC PRIMER II are highly flammable liquid and vapour. Do not use near naked flame. Keep away from sources of
ignition. Keep away from direct sunlight.
4. When adjusting or polishing the veneer surface, use a dust collector and wear a dust mask to avoid inhaling dust.
5. In case of contact with oral tissues or skin, immediately remove with cotton. Flush with water.
6. In case of contact with eyes, immediately wash the eye with copious amounts of water and seek medical attention.
7. This product should not be used for malocclusion, clenching or bruxism.
8. At the time of cementation, sandblast the inner surface of metal free restorations, and then be sure to treat the inner surface
with a silane coupling agent (e.g. CERAMIC PRIMER II).
9. Dispose all waste according to local regulation.
10.To prevent cross contamination between patients, do not reuse the dispensing tip.
11.The dispensing tip cannot be sterilized in an autoclave or chemiclave.
12.Wear protective eye glasses during light curing.
13.Lower light intensity may cause insufficient curing.
STORAGE
Recommended for optimal performance, store in a cool place (4-25°C / 39.2-77.0 °F) away from high temperatures or direct sunlight.
Shelf life: 3 years from the date of manufacture.
Some products referenced in the present IFU may be classified as hazardous according to GHS.
Always familiarize yourself with the safety data sheets available at:
http://www.gceurope.com
They can also be obtained from your supplier.
Last Revised: 09/2017

Vor dem Gebrauch Gebrauchsanweisung sorgfältig lesen.
GRADIA®PLUS
MODULARES COMPOSITESYSTEM FÜR INDIREKTE RESTAURATIONEN
Darf nur von zahnärztlichem/zahntechnischem Fachpersonal bei den angegebenen Indikationen verwendet
werden.
INDIKATIONEN
1. Kronen und Brücken (mit Rückenschutz)
2. Metallfreie Restaurationen: Jacket-Kronen, Inlays, Onlays und geschichtete Verblendungen
3. Implantat-Aufbauten
4. Reproduktion des Zahnfleischs an einer Kronenrestaurationen
GEGENANZEIGEN
Vermeiden Sie die Verwendung dieses Produkts bei Patienten mit bekannten Allergien gegen Methacrylat-Monomer,
Methacrylat-Polymer oder Alkohol.
GEBRAUCHSANLEITUNG
I. SCHICHTVERFAHREN
A. Verblendete Krone (mit Rückenschutz) Frontzahn/Seitenzahnbereich
1. Herstellung des Metallgerüstes
a) Wachsmodellation (Wax-up) und Guss
Konventionelle Wachsmodellation. Die okklusale Fläche sollte mindestens 1 mm dick sein. Bitte tragen
Sie Retentionsperlen im vestibulären Bereich auf. Wie gewohnt gießen, entfernen Sie anschließend die
Retentionsperlen im Bereich von 0,5mm entlang des marginalen Saums der Verblendung.
b) Sandstrahlen
Das Metallgerüst mit 50 µm Aluminiumoxid sandstrahlen. Mit Druckluft reinigen und trocknen.
c) Primern
Tragen Sie im Retentionsbereich sofort METAL PRIMER II / METAL PRIMER Z auf. Trocknen lassen.
2. Aufbau der Verblendung
a) Tragen Sie OPAQUE auf und härten Sie ihn mit Licht aus.
Tragen Sie sofort eine dünne Schicht des Opakers im Retentionsbereichs auf und lichthärten diesen für 1 Minute.
Wiederholen Sie diesen Vorgang bis das Metallgerüst vollständig abgedeckt ist.
Hinweis: Für die exakte Aushärtungszeit schauen Sie bitte in die Lichthärtetabelle unten.
b) Dentin auftragen:
Dentin-Massen in der gewünschten Schichtstärke auftragen und Vorhärten. ( Sie können den Farbton, falls nötig, mit
den Lustre Paint anpassen und für 1 Minute lichthärten.)
*Eine Bearbeitungshilfe, wie z. B. MODELLIERFLÜSSIGKEIT, kann verwendet werden. Wenige Tropfen anwenden und die Pasten mit einem Pinsel
oder einem geeigneten Instrument in Form bringen.
c) Zervikale Anwendung:
Tragen Sie in dünnen Schichten Lustre Paint (A) über 2-3mm Breite im zervikalen Bereich auf und lichthärten Sie ihn
für 1 Minute.
d) Schmelz auftragen:
Schmelz-Massen im Inzisalbereich schichtweise auftragen. Für 3 Minuten lichthärten.
e ) Ausarbeiten und charakterisieren.
Kontur anpassen und Oberfläche mit Diamant- oder Hartmetall-Fräser charakterisieren . (An dieser Stelle die
Sauerstoffinhibitionsschichten auf der Oberfläche abschleifen.)
DE

3. Ausarbeitung (Versiegelung und Politur)
3-1 Versiegelungsmethode
a) Aufrauen der Oberfläche:
Composite-Oberfläche mit Hartmetall-Fräser aufrauen oder mit 50µm Aluminiumoxid sandstrahlen (1,5 bar), um
eine mechanische Retention zu erhalten. Mit Druckluft reinigen und trocknen.
b) Primern:
Sofort einen Silanhaftvermittler (z. B. CERAMIC PRIMER II) auf die Composite-Oberfläche auftragen und
trocknen lassen.
c) Charakterisierung, Versiegelung und Endhärtung:
Eine dünne Schicht (< 0,1 mm) Lustre Paint auf der Composite-Oberfläche auftragen und endhärten.
Zur Vermeidung von Kontaminationen den Pinsel jedes Mal mit Lustre Paint Verdünnungsflüssigkeit
auswaschen.
3-2 Poliermethode
Geeignete Instrumente und Bürsten verwenden, um die Restauration zu polieren und zu veredeln. Zur
Überprüfung alle Polier- und Veredelungsmittel und -pasten entfernen und prüfen, ob die Oberfläche glänzt.
B. Jacket-Krone (metallfrei) Frontzahn/Seitenzahnbereich
1. Vorbereitung des Arbeitsmodells
a) Bereiten Sie den Gipsstumpf wie gewohnt vor.
b) DIE-HARDNER auf den Gipsstumpf auftragen.
c) Unterschnitte mit Wachs ausblocken.
d) Bei Bedarf bitte eine Schicht Wachs als Distanzschicht auftragen.
e) Tragen Sie eine dünne Schicht Isoliermittel für Composite auf.
2. Spezielle Vorhärtung
a) Bei einem Metallaufbau zuerst eine dünne Schicht OPAQUE auftragen. 1 Minute lang lichthärten.
b) Bei einem vitalen Zahnstumpf zuerst eine dünne Schicht (LB-) Base OD auftragen und vorhärten.
3. Kronenaufbau
Informationen zum folgenden Aufbau auf der Oberfläche finden Sie in der Anleitung Schichtverfahren A. (Abschnitt 2.
b-e) oben.
4. Ausarbeitung
Siehe Anleitung Schichtverfahren A. (Abschnitt 3.) oben.
5. Reinigung und Behandlung der Restauration für die Befestigung
Innenfläche der Jacket-Krone mit Aluminiumoxid sandstrahlen 1,5 bar aufrauen, um die mechanische Adhäsion zu
erhalten. Anschließend mit Druckluft reinigen.
6. Zementierung (Chair side)
a) Primern
Eine dünne Schicht eines Silanhaftvermittlers (z. B. CERAMIC PRIMER II) auf die Haftoberfläche auftragen.
b) Zementierung
adhäsiven Composite-Zement verwenden (z. B. G-CEM LinkForce).
C. Inlay Seitenzahnbereich
1. Vorbereitung des Arbeitsmodells
Folgen Sie der Anleitung: Vorbereitung des Arbeitsmodells (B. Abschnitt 1.a-e) oben.
2. Aufbau des Inlays
a) (LB-) Inlay TD als Dentinfarbe aufbauen, um die natürliche Zahnfarbe zu erhalten. Vorhärten.
Hinweis: Wenn der Zahn verfärbt ist, wird empfohlen, zuerst OPAQUE auf dem Kavitätenboden aufzutragen.
1 Minute lang lichthärten.
b) (LB-) Inlay E aufbauen, formen und konturieren. Endhärten.
c) Weiter mit Schichtverfahren A. (Abschnitt 2.e) oben.
3. Ausarbeitung
Siehe Anleitung Schichtverfahren A. (Abschnitt 3.) oben.
II. ZUSÄTZLICHE ANWENDUNG UND REPARATUR
A. IM LABOR
1. Composite-Oberfläche mit einem Karbidfräser aufrauen oder mit Aluminiumoxid sandstrahlen (1,5 bar).
2. Sofort einen Silanhaftvermittler (z. B. CERAMIC PRIMER II) auf die Composite-Oberfläche auftragen und trocknen
lassen.
3. Schmelz-Farbtöne usw. nach Bedarf anwenden.
B. IN DER ZAHNARZTPRAXIS
ABDECKEN VON FREILIEGENDEN METALLOBERFLÄCHEN BEI INDIREKTEN INTRAORALEN
RESTAURATIONEN
1. Für die Präparation der Restauration, beachten Sie bitte die G-Premio BOND IFU-II.1.
Hinweis: Benutzen Sie Kofferdam zur Isolation.
2. Tragen Sie GRADIA PLUS OPAQUE nur auf die vorbereitete Metalloberfläche auf. Die aufgetragene Schicht sollte die
Stärke von maximal 0.2 mm nicht übersteigen. Lichthärten Sie GRADIA PLUS OPAQUE für
20 Sekunden.
3. Wenn die Oberfläche nicht vollständig abgedeckt ist, tragen Sie eine zweite Schicht Opaker auf und härten diese mit
Licht aus.
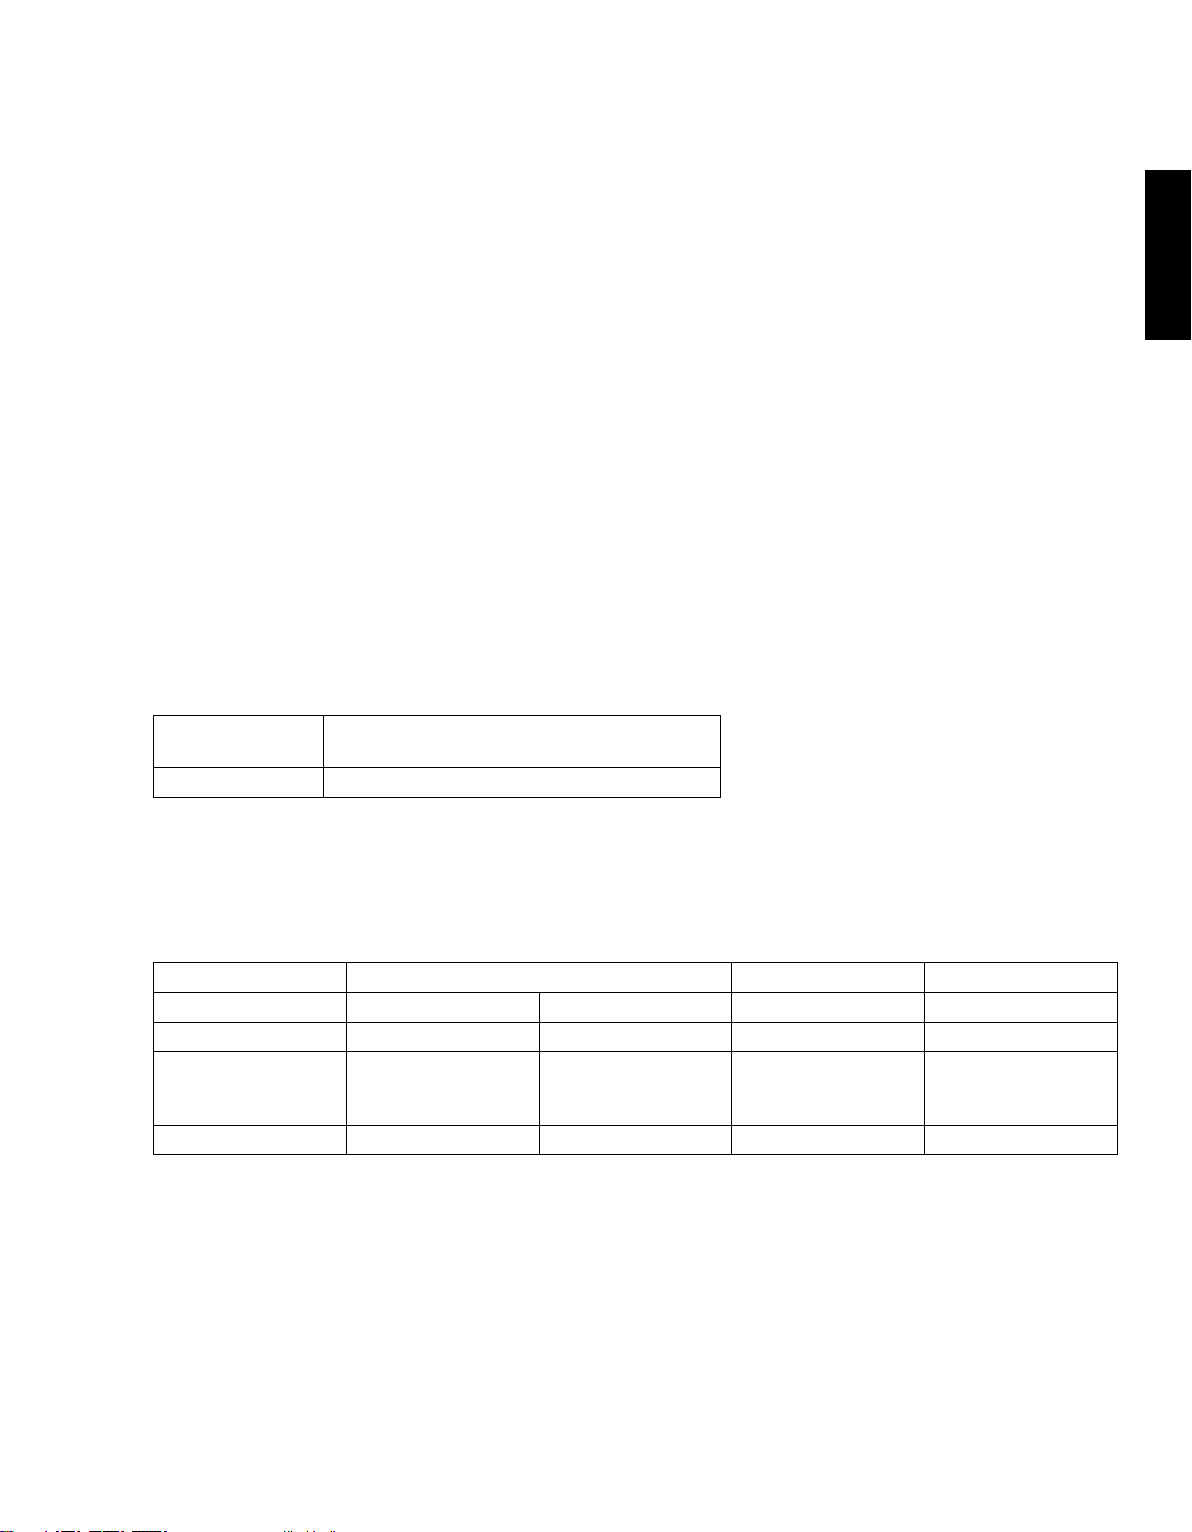
Belichtungszeit
Lichthärtegrät Halogen / LED (700 mW/cm²) & High power
LED (mehr wie 1200 mW/cm²)
OPAQUE 20 Sekunden
4. Reparieren Sie die Restauration in dem Sie zahnärztliches Composite Material (z.B. G-ænial & Essentia) Schichtweise
auftragen. Lichthärten Sie jede Schicht nach Herstellerangaben des jeweiligen Produkts.
5. Bearbeiten und polieren Sie die Oberfläche wie gewohnt.
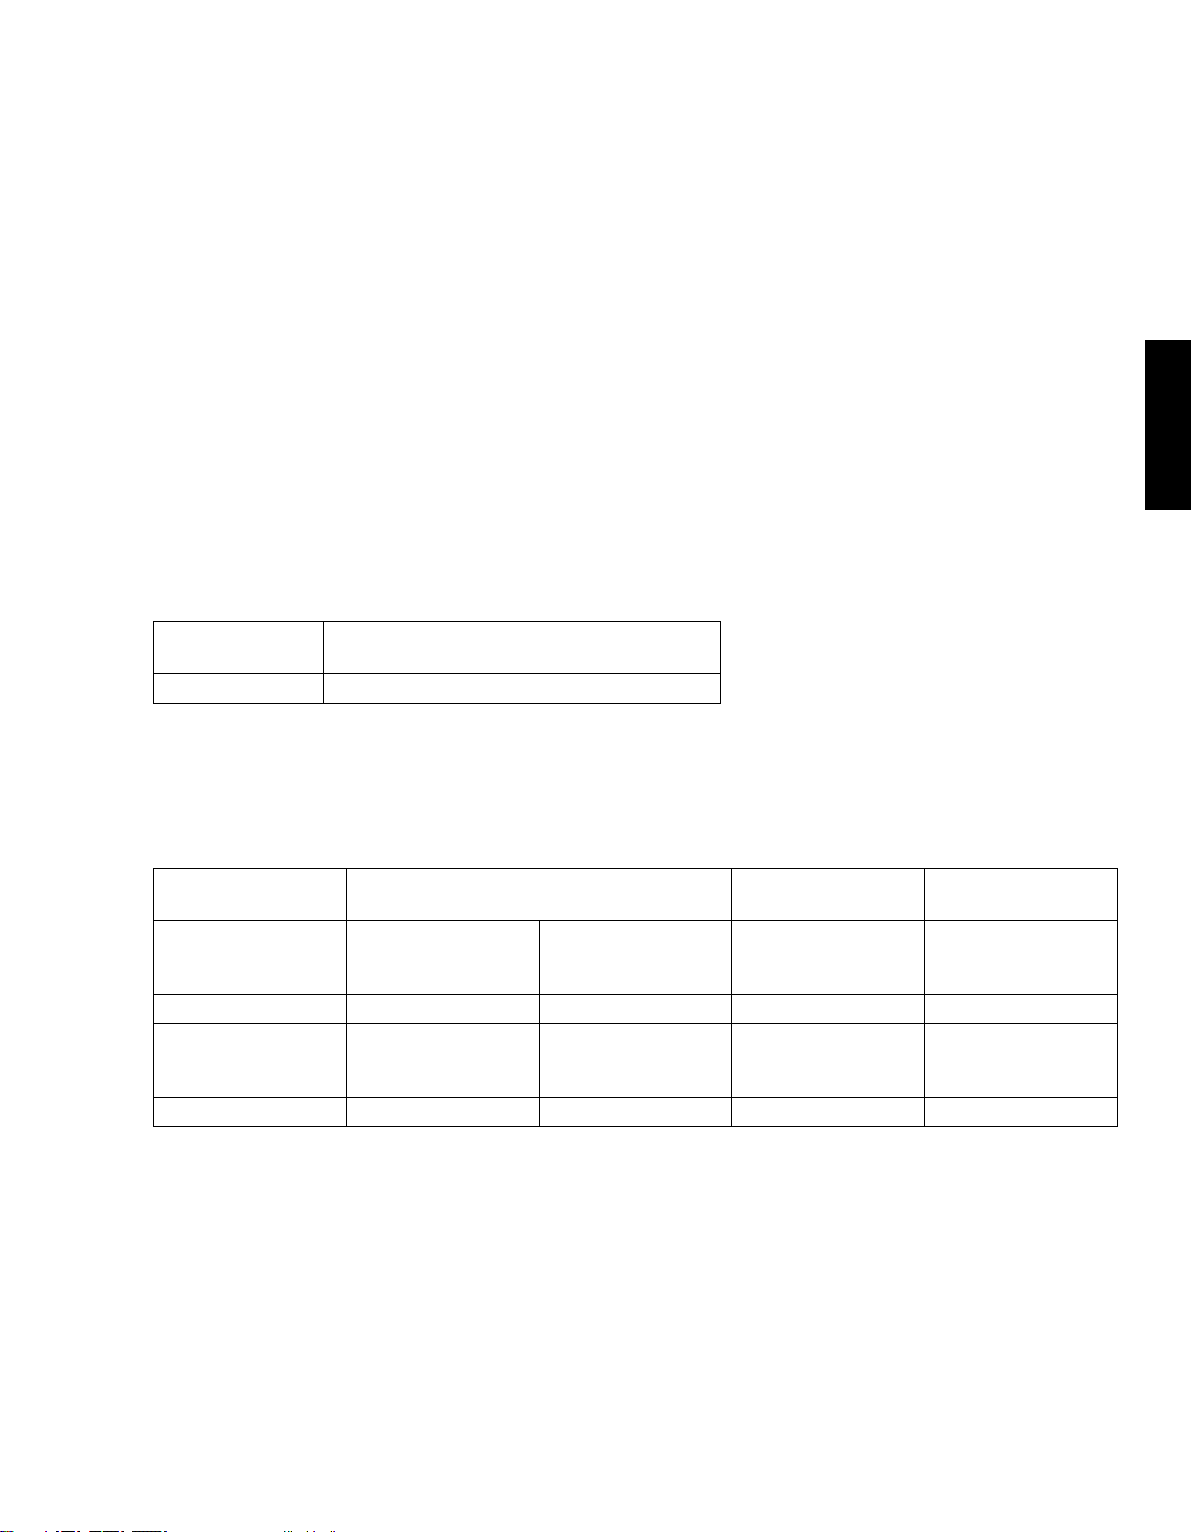
Belichtungszeit und Polimerisationsgerät
Polymerisationsgerät LABOLIGHT DUO STEPLIGHT SL-I LABOLIGHT LV-III,II
Intervallmodus** Vollmodus Vorhärten** Endhärten
OPAQUE - 1 min. - 1 min.
PASTE HB, PASTE LB,
GUM SHADES LB,
GUM SHADES HB
10 sec.* 3 min. 10 sec.* 3 min.
LUSTRE PAINT *** 10 sec.* 90 sec. 10 sec.* 5 min.
* Für eine Oberfläche einer einzelnen Krone
** Abstand von der Lichtquelle: 3 cm.
*** Dicke: 0,1 mm oder weniger.
DE

Zuordnungstabelle: OPAQUER-Mischverhältnis
OA1 OA2 OA3 OA3.5 OA4
O-Base:OA
3 : 1
O-BASE:OA
1 : 1
O-BASE:OA
1 : 2
O-BASE:OA
1 : 3 OA
OB1 OB2 OB3 OB4
O-BASE:OB
3 : 1
O-BASE:OB
1 : 1
O-BASE:OB
1 : 3 OB
OC1 OC2 OC3 OC4
O-BASE:OC
3 : 1
O-BASE:OC
1 : 1
O-BASE:OC
1 : 3 OC
OD2 OD3 OD4
O-BASE:OD
1 : 1
OA:OD
1 : 2 OD
Zuordnungstabelle (Schmelz, Dentin und Lustre Paint)
Farbe A1 A2 A3 A3.5 A4
Schmelz (Paste HB)
Dentin (Paste HB)
Zervikal (Lustre Paint)
EL
DA1
LP-CLF
EL
DA2
LP-CLF
ED
DA3
LP-CLF
ED
DA3.5
LP-CLF
ED
DA3.5
LP-A
Farbe B1 B2 B3 B4
Schmelz (Paste HB)
Dentin (Paste HB)
Zervikal (Lustre Paint)
EL
DB1
LP-CLF
EL
DB1
LP-B
ED
DB3
LP-CLF
ED
DB3
LP-B
Farbe C1 C2 C3 C4
Schmelz (Paste HB)
Dentin (Paste HB)
Zervikal (Lustre Paint)
EL
DB1
LP-C
ED
DB1
LP-C
ED
DC3
LP-CLF
ED
DC3
LP-C
Farbe D2 D3 D4
Schmelz (Paste HB)
Dentin (Paste HB)
Zervikal (Lustre Paint)
EL
DD2
LP-CLF
ED
DD2
LP-A
ED
DD2
LP-D
A1 A2 A3 A3.5 A4 B1 B2 B3 B4 C1 C2 C3 C4 D2 D3 D4 BW
Opaque* OA1 OA2 OA3
OA3.5
OA4 OB1 OB2 OB3 OB4 OC1 OC2 OC3 OC4 OD2 OD3 OD4 O-BASE
Dentin (HB-)
DA1
(HB-)
DA2
(HB-)
DA3 (HB-)DA3.5 (HB-)DB1 (HB-)DB3 (HB-) DB1 (HB-)DC3 (HB-)DD2 (HB-)DW
Opakes Dentin (HB-)ODA (HB-)ODB (HB-)ODC (HB-)ODD (HB-)
ODW
Zervikal LUSTRE
PAINT ***
(LP-)CLF, (LP-)A (LP-)CLF, (LP-)B (LP-)CLF, (LP-)C (LP-)CLF, (LP-)D (LP-)CLF,
(LP-)A
Schmelz (HB-)EL (HB-)ED (HB-)EL (HB-)ED (HB-)
EL (HB-)ED (HB-)
EL (HB-)ED (HB-)EL
Effekt 1
(Dentin-Farbton)
(LB-)Base D, (LB-)Base OD, (LB-)DW, (LB-)ODW
Effekt 2
(Schmelz-Farbton)
(HB-)PE, (LB-)Base E, (LB-)Inlay E, (LB-)Base Opal, (LB-)Orange, (LB-)Rot, (LB-)Gelb, (LB-)Blau, (LB-)Grau, (LB-)Milky
Effekt 3
(Charakterisieren)
(LB-)Base Opal, (LB-)Orange, (LB-)Rot, (LB-)Gelb, (LB-)Blau, (LB-)Grau, (LB-)Milky
Transluzent (HB-)CLF, (LB-)Base CLF,
Zervikal
Transluzent (LB-)Inlay TD
Gingiva-Farbton
GO-1, GO-2, GLB-1, GLB-2, GLB-3, GLB-CL
Einteilig (LB-)A (LB-)B (LB-)C (LB-)D (LB-)W
Effekt 4
(Lustre Paint) (LP-)Blau, (LP-)Creme, (LP-)Grau, (LP-)Lavendel, (LP-)CL, (GLP-)Hellrot, (GLP-)Lila
*vgl. Zuordnungstabelle: OPAQUE-Mischverhältnis

VERPACKUNGSGRÖSSEN
1. Sets
• LAYER SET (19 Farbtöne)
HB-DA1, HB-DA2, HB-DA3, HB-DA3.5, HB-DB1, HB-DB3, HB-DC3, HB-DD2, HB-EL, HB-ED, HB-CLF, HB-PE, HB-ODA,
HB-ODB, O-Base, OA, OB, OC, OD, Dispensing Tip Needle Type & Light Protective Cover, Mixing Pad No. 22,
Plastic Spatula No. 2 Blue
• LAYER PRO SET (19 Farbtöne)
HB-ODC, HB-ODD, HB-ODW, HB-DW, LB-Base E, LB-Base CLF, LB-Base D, LB-Base OD, LB-Base Opal, LB-DW, LB-ODW,
LB-Orange, LB-Gelb, LB-Rot, LB-Grau, LB-Blau, LB-Milky, LB-Inlay E, LB-Inlay TD, Mixotip, Dispensing Tip Plastic Type
Wide & Light Protective Cover, Mixing Pad No. 22, Plastic Spatula No. 2 Blue
• PAINT SET (10 Farbtöne)
LP-A, LP-B, LP-C, LP-D, LP-CLF, LP-CL, LP-Blau, LP-Grau, LP-Creme, LP-Lavendel, Lustre Paint Verdunnungsflussigkeit,
Dispensing Tip Needle Type Small & Light Protective Cover, Brush Round No. 1, Brush Flat No. 1, Brush Holder (ivory &
white handle), Disposable Palette, Mixing Pad No. 14B
• GUM SHADES SET (11 Farbtöne)
O-Base, GO-1, GO-2, LP-CL, GLP-Hellrot, GLP-Lila, GLB-1, GLB-2, GLB-3, GLB-CL, GHB-2, Lustre Paint Diluting Liquid,
Mixotip, Dispensing Tip Plastic Type Wide & Light Protective Cover, Dispensing Tip Needle Type Small & Light Protective
Cover, Dispensing Tip Needle Type & Light Protective Cover, Brush Round No. 1, Brush Flat No. 1, Brush Holder (ivory &
white handle), Disposable Palette, Mixing Pad No. 14B, Plastic Spatula No. 22 Blue
• ONE BODY SET (11 Farbtöne)
O-Base, OA, OB, OC, OD, LB-Base OD, LB-A, LB-B, LB-C, LB-D, LB-W, Dispensing Tip Plastic Type Wide & Light
Protective Cover, Dispensing Tip Needle Type & Light Protective Cover, Mixing Pad No. 22, Plastic Spatula No. 2 Blue
• ACCESSORY KIT (Zubehör Set)
AIR BARRIER, SEPARATOR, DIE-HARDNER, CERAMIC PRIMER II, METAL PRIMER Z, Acrylic Primer, DIAPOLISHER PASTE,
MODELLING LIQUID, Brush Round No. 1, Brush Flat No. 1, Brush Holder (ivory & white handle), Brush No. 7, Shade Guide
Kit, Mixing Pad No. 22
2. Nachfüllpackungen
• OPAQUE, 2,0-ml-Spritze (in 13 Farbtönen)
O-Base, OA, OB, OC, OD, OA1, OA2, OA3, OA3.5, OB1, OB3, OC3, OD2, Dispensing Tip Needle Type,
Light Protective Cover
• PASTE HB, 3,3-ml-Spritze (in 18 Farbtönen)
HB-DA1, HB-DA2, HB-DA3, HB-DA3.5, HB-DB1, HB-DB3, HB-DC3, HB-DD2, HB-DW, HB-ODA, HB-ODB, HB-ODC,
HB-ODD, HB-ODW, HB-EL, HB-ED, HB-CLF, HB-PE
• PASTE LB, 2,0-ml-Spritze (in 15 Farbtönen)
LB-Base D, LB-Base E, LB-Base CLF, LB-Base OD, LB-Base Opal, LB-DW, LB-ODW, LB-Orange, LB-Rot, LB-Gelb, LB-Blau,
LB-Grau, LB-Milky, LB-Inlay E, LB-Inlay TD, Dispensing Tip Plastic Type Wide, Light Protective Cover
• ONE BODY, 2,0-ml-Spritze (in 5 Farbtönen)
LB-A, LB-B, LB-C, LB-D, LB-W, Dispensing Tip Plastic Type Wide, Light Protective Cover
• GUM Shades Opaque, 2,0-ml-Spritze (in 2 Farbtönen)
GO-1, GO-2, Dispensing Tip Needle Type, Light Protective Cover
• GUM Shades HB, 3,3-ml-Spritze (in 4 Farbtönen)
GHB-1, GHB-2, GHB-3, GHB-CL
• GUM Shades LB, 2,0-ml-Spritze (in 4 Farbtönen)
GLB-1, GLB-2, GLB-3, GLB-CL, Dispensing Tip Plastic Type Wide, Light Protective Cover
• GUM Shades Lustre Paint, 0,8-ml-Spritze (in 2 Farbtönen)
GLP-Bright Red, GLP-Violet, Dispensing Tip Needle Type Small, Light Protective Cover
• LUSTRE PAINT, 0,8-ml-Spritze (in 10 Farbtönen)
LP-A, LP-B, LP-C, LP-D, LP-CLF, LP-Blau, LP-Creme, LP-Grau, LP-Lavendel, LP-CL, Dispensing Tip Needle Type Small,
Light Protective Cover
3. Zubehör
• MODELLIERFLÜSSIGKEIT 3 ml
• Lustre Paint VERDÜNNUNGSFLÜSSIGKEIT 3 ml
• AIR BARRIER 10 ml
• ISOLIERUNG 5 ml
• DIE-HARDNER 5 ml
• METAL PRIMER Z 3 ml
• CERAMIC PRIMER II 3 ml
• DIAPOLISHER PASTE 2 g
DE

HINWEISE
• Bitte lesen Sie diese Gebrauchsanweisung vor der Verwendung des Produkts sorgfältig durch. Nach dem Lesen der
Gebrauchsanweisung bewahren Sie diese an einem gut zugänglichen Ort auf, um sie bei Bedarf erneut zu konsultieren. Wenn
Sie diese Gebrauchsanweisung verlieren, kontaktieren Sie den auf der Verpackung angegebenen Händler oder Lieferanten.
• Dieses Produkt darf nur von zahnärztlichem/zahntechnischem Fachpersonal verwendet werden.
• Um Probleme bei der Anwendung oder Lagerung zu vermeiden, muss das Produkt gemäß den in dieser
Gebrauchsanweisung gegebenen Anweisungen verwendet werden. Verwenden Sie dieses Produkt nicht, wenn die in dieser
Gebrauchsanweisung genannten Gegenanzeigen vorliegen.
• Vergewissern Sie sich, dass die Krone oder das Inlay ausreichend dick ist, indem Sie die Methoden für die Vorbereitung von
Aufbauten und Kavitäten, die in dieser Gebrauchsanweisung beschrieben werden, befolgen.
• Tragen Sie Schutzhandschuhe oder ergreifen Sie andere geeignete Maßnahmen, wenn Sie das Produkt verwenden.
• Nach der Dosierung versehen Sie die Spritzen oder Flasche sofort mit den Aufsätzen.
• Vermeiden Sie es, dass sich die Charakterisierung (Lustre Paint) von der Restauration trennt.
- Sandstrahlen Sie die Oberfläche der Restauration mit Aluminiumoxid mit einem Durchmesser von 50 μm, bevor Sie den
Haftvermittler auftragen.
• Vermeiden sie die Dezementierung der Restauration.
- Verwenden Sie einen adhäsiven Composite-Zement, um Jacket-Kronen, Veneers, Inlays oder Onlays zu befestigen.
- Sandstrahlen Sie die Innenfläche der Jacket-Kronen, Veneers, Inlays oder Onlays mit niedrigem Druck (1,5 bar).
• Die Sauerstoffinhibitionsschicht der zu beschichtenden Composite-Oberfläche muss vor der Anwendung von Lustre
Paint entfernt werden, da sie die richtige Aushärtung von Lustre Paint verhindern könnte.
• Für die Aushärtung von Lustre Paint, ist eine violette LED (effektive Wellenlänge: 390-430 nm) erforderlich.
• Stellen Sie die Lichtquelle so nah wie möglich an die Composite-Oberfläche. Setzen Sie die 2 cm große Plattform in das
Polymerisationsgerät und legen Sie die Restauration darauf, so dass die beschichtete Oberfläche zum Licht zeigt. Drehen
Sie die Restauration um und wiederholen Sie die Lichthärtung, um Unterschnitte oder den Bereich im Schatten vollständig
zu härten.
VORSICHT
1. In seltenen Fällen reagieren Patienten empfindlich auf das Produkt. Wenn dies der Fall ist, brechen Sie die Behandlung ab
und überweisen Sie den Patienten an einen Arzt.
2. Beim Eingriff sind ein Augenschutz und Plastik- oder Gummihandschuhe zu tragen, vor allem um den direkten Kontakt mit
klebrigen Compositeschichten zu vermeiden, um eventuellen Unverträglichkeitsreaktionen vorzubeugen.
3. LUSTRE PAINT DILUTING LIQUID (verdünnungsflüssigkeit), SEPARATOR, DIE-HARDNER, METAL PRIMER II / METAL PRIMER
Z und CERAMIC PRIMER II sind hochentzündliche Flüssigkeiten und Dämpfe. Von Hitze, heißen Oberflächen, Funken,
offenen Flammen und anderen Entzündungsquellen fernhalten. Vor direkter Sonneneinstrahlung schützen. Behälter fest
verschlossen halten. An einem gut belüfteten Ort lagern. Kühl lagern.
4. Beim Ausarbeiten oder Polieren immer unter einer Absauganlage arbeiten und einen Mundschutz tragen, um das Einatmen
von Staub zu vermeiden.
5. Falls das Material mit der Mundschleimhaut oder Haut in Kontakt kommt, sofort mit Watte entfernen. Mit Wasser spülen.
6. Kommt das Material in Kontakt mit den Augen, müssen diese sofort mit viel Wasser ausgespült werden und der Patient muss
sich in ärztliche Behandlung begeben.
7. Dieses Produkt darf nicht bei Okklusionsstörungen, Knirschern oder Bruxismus verwendet werden.
8. Bei der Zementierung muss die Innenfläche der metallfreien Restaurationen sandgestrahlt und anschließend die Innenfläche
mit einem Silanhaftvermittler behandelt werden (z. B. CERAMIC PRIMER II).
9. Entsorgen Sie Reste nach den örtlichen Abfallbestimmungen.
10. Um Kreuzkontaminationen zwischen Patienten zu vermeiden bitte die Mischkanülen nicht wieder verwenden
11. Die Mischkanülen können nicht im Autoklaven sterilisiert werden.
12. Tragen Sie eine Schutzbrille während der Lichthärtung.
13. Geringere Lichtintensität kann zu unzureichender Aushärtung führen.
LAGERUNG
Um ein optimales Ergebnis zu gewährleisten, an einem kühlen Ort (4-25°C / 39.2-77.0 °F) geschützt vor hohen Temperaturen der
direkten Sonneneinstrahlung aufbewahren.
Haltbarkeit: 3 Jahre ab dem Herstellungsdatum.
Einige Produkte, auf die in der vorliegenden Gebrauchsanleitung Bezug genommen wird, können gemäß dem GHS als
gefährlich eingestuft sein.
Machen Sie sich immer mit den Sicherheitsdatenblättern vertraut, die unter folgendem Link erhältlich sind:
http://www.gceurope.com
Die Sicherheitsdatenblätter können Sie außerdem bei Ihrem Zulieferer anfordern.
Zuletzt aktualisiert: 09/2017

FR
Avant toute utilisation, lire attentivement la notice.
GRADIA®PLUS
SYSTEME COMPOSITE MODULAIRE POUR RESTAURATIONS INDIRECTES
Ne doit être utilisé que par un professionnel de l’Art Dentaire, selon les indications mentionnées.
INDICATIONS
1. Couronnes et Bridges (sur métal)
2. Restaurations sans métal : Couronnes jackets, Inlays, Onlays, Facettes
3. Suprastructures sur implants
4. Reproduction de la gencive pour restauration (couronnes)
CONTRE INDICATIONS
Évitez l’utilisation de ce produit chez des patients souffrant d’allergies connues au monomère méthacrylate, au
polymère méthacrylate ou à l’alcool.
MODE D’EMPLOI
I. PROCEDURES DE MONTAGE
A.Couronne sur chape métallique antérieure / postérieure
1. Réalisation de l’armature métallique
a) Wax-up et coulée
Effectuer le wax-up de manière conventionnelle, une surface occlusale devant avoir une épaisseur minimale d’1mm.
Appliquer les perles de rétention sur la surface. Coulée de façon classique et retirer les rétentions sur 0.5mm de
largeur autour de la surface marginale de la facette.
b) Sablage
Sabler l’armature métallique avec de l’oxyde d’alumine (50 microns). Nettoyer et sécher avec un pistolet à air.
c) Primer
Appliquer immédiatement le METAL PRIMER II / METAL PRIMER Z sur les zones de rétention. Laissez sécher.
2. Montage
a) Appliquer et photopolymériser l’OPAQUE :
Appliquer aussitôt une couche d’OPAQUE sur la zone de rétention et photopolymériser 1min. Répéter la procédure
jusqu’à ce que le métal soit masqué.
Note : pour le temps d’irradiation dans une unité lumineuse à lumière visible GC, se référer au tableau proposé plus
bas.
b) Réalisation de la dentine :
Appliquer les teintes* Dentine, et adapter l’épaisseur comme souhaitée. Pré-polymériser. (dans certains cas, ajuster
la teinte avec une Lustre Paint et photopolymériser pendant 1 minute)
*aidez-vous si besoin du MODELING LIQUID (liquide de modelage). Utiliser quelques gouttes, un pinceau ou un instrument adéquat pour adapter
la teinte.
c) Application au niveau cervical :
Progressivement, appliquer finement en couche de 2-3 mm de large la Lustre Paint (A) autour de la zone cervicale et
photopolymériser pendant 1 minute.
d) Formation de l’émail
Appliquer progressivement les teintes à partir du bord incisal. Photopolymériser 3 minutes.
e) Ajustage et caractérisation
Ajuster le contour et caractériser la surface avec des fraises au carbure de tungstène diamantées. Retirer la couche
d’inhibition sur l’ensemble de la dent.

3. Glaçage (vernis et polissage)
3-1 Méthode
a) Rendre rugueuse la surface :
Rendre rugueuse la surface résineuse avec une fraise au carbure de tungstène ou sabler (1.5 kg/cm2) pour
obtenir une adhésion mécanique. Nettoyer et sécher avec un pistolet à air.
b) Primer
Appliquer immédiatement un silane (ex : CERAMIC PRIMER II) à la surface de la résine et sécher.
c) Coloration, vernis et photopolymérisation finale :
Appliquer une fine couche de Lustre Paint (<0.1mm) sur la surface résineuse et procéder à la
photopolymérisation finale.
Pour prévenir la contamination, laver le pinceau à chaque fois avec le Lustre Paint Diluting Liquid.
3-2 Méthode de polissage
Utiliser les instruments et les fraises adaptées pour polir et finir la prothèse. Retirer toute trace d’agent ou pâte de
polissage et finir de façon classique puis vérifier la brillance de la surface.
B. Couronne jacket Antérieure ou Postérieure (sans métal)
1. Préparation du maître modèle en plâtre
a) Préparer les dies en plâtre de manière traditionnelle.
b) Appliquer le durcisseur GRADIA DIE-HARDNER sur toute la surface du die en plâtre.
c) Eliminer les contre-dépouilles avec de la cire.
d) Appliquer une couche de cire comme espaceur selon les besoins.
e) Appliquer une fine couche de GRADIA SEPARATOR.
2. Traitement spécial de pré-polymérisation
a) Dans le cas de faux moignon métallique, appliquer au préalable une couche fine d’OPAQUE. Photopolymériser
pendant 1 minute.
b)
Dans le cas d’un moignon de dent vivante, appliquer d’abord une fine couche de (LB-) Base OD et photopolymériser.
3. Montage de la couronne
Puis poursuivre en suivant les instructions de la partie A (section 2. B-e) PROCEDURE DE MONTAGE ci-dessus.
4. Glaçage
Voir partie A. PROCEDURE DE MONTAGE (Section 3) ci-dessus.
5. Nettoyage, traitement de la restauration pour le collage
Rendre rugueuse la partie interne de la couronne par sablage (alumine 1.5 kg/cm2) pour obtenir une adhésion
mécanique. Nettoyer et sécher avec un pistolet à air.
6. Scellement (au fauteuil)
a) Primer
Appliquer une fine couche de silane (ex : CERAMIC PRIMER II) sur la surface à coller.
b) Scellement
Utiliser un ciment résine (ex : G-CEM LinkForce).
C.Inlays postérieurs
1. Préparation du maitre modèle en plâtre.
Suivre les instructions du chapitre B (Section 1. a-e) ci-dessus.
2. Montage de l’Inlay
Réaliser l’inlay TD (LB-) comme une couleur dentine de manière à reproduire la teinte naturelle de la dent. Pré-
polymériser
Note : dans le cas de dents présentant une coloration disgracieuse, il est recommandé d’appliquer d’abord l’OPAQUE
au fond de la cavité. Photopolymériser pendant 1 minute.
b) Monter (LB-) l’Inlay E, former et contourer. Polymérisation finale.
c) Poursuivre en suivant les instructions de la partie A. PROCEDURE DE MONTAGE ci-dessus
3. Glaçage
Voir partie A. PROCEDURE DE MONTAGE (Section 3) ci-dessus.
II. RAJOUTS OU REPARATIONS
A. AU LABORATOIRE
1. Dépolir la surface de la résine avec une fraise au carbure de tungstène ou sabler (1.5 kg/cm2).
2. Appliquer aussitôt un silane (ex. CERAMIC PRIMER II) sur la surface de la résine et sécher.
3. Appliquer les teintes, etc. comme nécessaire
B. AU FAUTEUIL
MASQUER LES SURFACES METALLIQUES EXPOSEES LORS DE REPARATIONS INDIRECTES EN BOUCHE
1. Pour la préparation de la restauration, se référer à la partie II.1. du mode d’emploi G-Premio Bond.
Note : utiliser une digue en caoutchouc pour l’isolation.
2. Appliquer GRADIA PLUS OPAQUE uniquement sur la surface métallique préparée. La couche appliquée doit avoir une
épaisseur maximum de 0.2mm. Photopolymériser GRADIA PLUS OPAQUE pendant 20 secondes.
3. Si la surface n’est pas suffisamment masquée, appliquer une seconde couche d’OPAQUE et photopolymériser.
Temps d’irradiation
Unité lumineuse Halogène / LED (700 mW/cm²) & LED
puissance élevée (plus de 1200 mW/cm²)
OPAQUE 20 secondes
4. Réparer la restauration en appliquant en couches un matériau composite de cabinet (ex : G-ænial & Essentia).
Photopolymériser chaque couche selon les instructions du fabricant.
5. Finir et polir de façon habituelle.
Temps d’irradiation et unité lumineuse
Unité de
polymérisation
LABOLIGHT DUO STEPLIGHT SL-I LABOLIGHT LV-III,II
Mode Steplight** Mode
Photopolymérisation
finale
Pré-
Photopolymérisation**
Photopolymérisation
finale
OPAQUE - 1 min. - 1 min.
PASTE HB, PASTE LB,
GUM SHADES LB,
GUM SHADES HB
10 sec.* 3 min. 10 sec.* 3 min.
LUSTRE PAINT *** 10 sec.* 90 sec. 10 sec.* 5 min.
* Une surface, couronne unitaire.
** Distance de la source lumineuse : 3cm.
*** Epaisseur: 0.1mm ou moins
FR

Configuration : Ratio mélange opaque
OA1 OA2 OA3 OA3.5 OA4
O-Base:OA
3 : 1
O-BASE:OA
1 : 1
O-BASE:OA
1 : 2
O-BASE:OA
1 : 3 OA
OB1 OB2 OB3 OB4
O-BASE:OB
3 : 1
O-BASE:OB
1 : 1
O-BASE:OB
1 : 3 OB
OC1 OC2 OC3 OC4
O-BASE:OC
3 : 1
O-BASE:OC
1 : 1
O-BASE:OC
1 : 3 OC
OD2 OD3 OD4
O-BASE:OD
1 : 1
OA:OD
1 : 2 OD
Tableau de correspondance (Enamel, Dentin et Lustre Paint)
Teinte A1 A2 A3 A3.5 A4
Enamel (Paste HB)
Dentin (Paste HB)
Cervical (Lustre Paint)
EL
DA1
LP-CLF
EL
DA2
LP-CLF
ED
DA3
LP-CLF
ED
DA3.5
LP-CLF
ED
DA3.5
LP-A
Teinte B1 B2 B3 B4
Enamel (Paste HB)
Dentin (Paste HB)
Cervical (Lustre Paint)
EL
DB1
LP-CLF
EL
DB1
LP-B
ED
DB3
LP-CLF
ED
DB3
LP-B
Teinte C1 C2 C3 C4
Enamel (Paste HB)
Dentin (Paste HB)
Cervical (Lustre Paint)
EL
DB1
LP-C
ED
DB1
LP-C
ED
DC3
LP-CLF
ED
DC3
LP-C
Teinte D2 D3 D4
Enamel (Paste HB)
Dentin (Paste HB)
Cervical (Lustre Paint)
EL
DD2
LP-CLF
ED
DD2
LP-A
ED
DD2
LP-D
A1 A2 A3 A3.5 A4 B1 B2 B3 B4 C1 C2 C3 C4 D2 D3 D4 BW
Opaque* OA1 OA2 OA3
OA3.5
OA4 OB1 OB2 OB3 OB4 OC1 OC2 OC3 OC4 OD2 OD3 OD4 O-BASE
Dentin (HB-)
DA1
(HB-)
DA2
(HB-)
DA3 (HB-)DA3.5 (HB-)DB1 (HB-)DB3 (HB-) DB1 (HB-)DC3 (HB-)DD2 (HB-)DW
Opacious
Dentin (HB-)ODA (HB-)ODB (HB-)ODC (HB-)ODD (HB-)
ODW
Cervical
(Lustre Paint) (LP-)CLF, (LP-)A (LP-)CLF, (LP-)B (LP-)CLF, (LP-)C (LP-)CLF, (LP-)D (LP-)CLF,
(LP-)A
Enamel (HB-)EL (HB-)ED (HB-)EL (HB-)ED (HB-)
EL (HB-)ED (HB-)
EL (HB-)ED (HB-)EL
Effet 1
(Dentin shade) (LB-)Base D, (LB-)Base OD, (LB-)DW, (LB-)ODW
Effet 2
(Enamel shade)
(HB-)PE, (LB-)Base E, (LB-)Inlay E, (LB-)Base Opal, (LB-)Orange, (LB-)Red, (LB-)Yellow, (LB-)Blue, (LB-)Grey, (LB-)Milky
Effet 3
(caractérisation) (LB-)Base Opal, (LB-)Orange, (LB-)Red, (LB-)Yellow, (LB-)Blue, (LB-)Grey, (LB-)Milky
Translucent (HB-)CLF, (LB-)Base CLF,
Cervical
Translucent (LB-)Inlay TD
Gum shade GO-1, GO-2, GLB-1, GLB-2, GLB-3, GLB-CL
One body (LB-)A (LB-)B (LB-)C (LB-)D (LB-)W
Effect 4
(Lustre Paint) (LP-)Blue, (LP-)Cream, (LP-)Grey, (LP-)Lavender, (LP-)CL, (GLP-)Bright red, (GLP-)Violet
*cf. Table de configuration: Opaque, ratio de mélange

CONDITIONNEMENT
1. Coffrets
• LAYER SET (19 teintes)
HB-DA1, HB-DA2, HB-DA3, HB-DA3.5, HB-DB1, HB-DB3, HB-DC3, HB-DD2, HB-EL, HB-ED, HB-CLF, HB-PE, HB-ODA,
HB-ODB, O-Base, OA, OB, OC, OD, embout distributeur type aiguille & étui de protection contre la lumière, bloc de
mélange n°22, spatule en plastique n°2 bleue
• LAYER PRO SET (19 teintes)
HB-ODC, HB-ODD, HB-ODW, HB-DW, LB-Base E, LB-Base CLF, LB-Base D, LB-Base OD, LB-Base Opal, LB-DW, LB-
ODW, LB-Orange, LB-Yellow, LB-Red, LB-Grey, LB-Blue, LB-Milky, LB-Inlay E, LB-Inlay TD, embout mélangeur, embout
distributeur plastique large & étui de protection contre la lumière, bloc de mélange n°22, spatule en plastique n°2 bleue
• PAINT SET (10 teintes)
LP-A, LP-B, LP-C, LP-D, LP-CLF, LP-CL, LP-Blue, LP-Grey, LP-Cream, LP-Lavender, Lustre Paint Diluting Liquid,
embout distributeur type aiguille étroit & étui de protection contre la lumière, pinceau rond n°1, pinceau plat n°1, manche
de pinceau (ivoire et blanc), plateau jetable, bloc de mélange n°14B
• GUM SHADES SET (11 teintes)
O-Base, GO-1, GO-2, LP-CL, GLP-Bright Red, GLP-Violet, GLB-1, GLB-2, GLB-3, GLB-CL, GHB-2, Lustre Paint Diluting
Liquid, embout mélangeur, embout distributeur plastique large & étui de protection contre la lumière, embout
distributeur type aiguille étroit & étui de protection contre la lumière, embout distributeur type aiguille & étui de
protection contre la lumière, pinceau rond n°1, pinceau plat n°1, manche de pinceau (ivoire et blanc), plateau jetable, bloc
de mélange n°14B, spatule en plastique n°2 bleue
• ONE BODY SET (11 teintes)
O-Base, OA, OB, OC, OD, LB-Base OD, LB-A, LB-B, LB-C, LB-D, LB-W, embout distributeur large en plastique & étui de
protection contre la lumière, embout distributeur type aiguille & étui de protection contre la lumière, bloc de mélange
n°22, spatule en plastique n°2 bleue
• ACCESSOIRES KIT
AIR BARRIER, SEPARATOR, DIE-HARDNER, CERAMIC PRIMER II, METAL PRIMER Z, Acrylic Primer, DIAPOLISHER PASTE,
MODELLING LIQUID, pinceau rond n°1, pinceau plat n°1, manche de pinceau (ivoire & blanc), pinceau n°1, guide des teintes,
embout de mélange n°22
2. Recharge
• OPAQUE, 2.0mL seringue (13 teintes)
O-Base, OA, OB, OC, OD, OA1, OA2, OA3, OA3.5, OB1, OB3, OC3, OD2, embout distributeur type aiguille, étui de
protection contre la lumière
• PASTE HB, 3.3mL seringue (18 teintes)
HB-DA1, HB-DA2, HB-DA3, HB-DA3.5, HB-DB1, HB-DB3, HB-DC3, HB-DD2, HB-DW, HB-ODA, HB-ODB, HB-ODC,
HB-ODD, HB-ODW, HB-EL, HB-ED, HB-CLF, HB-PE
• PASTE LB, 2.0mL seringue (15 teintes)
LB-Base D, LB-Base E, LB-Base CLF, LB-Base OD, LB-Base Opal, LB-DW, LB-ODW, LB-Orange, LB-Red, LB-Yellow,
LB-Blue, LB-Grey, LB-Milky, LB-Inlay E, LB-Inlay TD, embout distributeur large en plastique, étui de protection contre la lumière
• ONE BODY, 2.0mL seringue (5 teintes)
LB-A, LB-B, LB-C, LB-D, LB-W, embout distributeur large en plastique, étui de protection contre la lumière
• GUM Shades Opaque, 2.0mL seringue (2 teintes)
GO-1, GO-2, embout distributeur type aiguille, étui de protection contre la lumière
• GUM Shades HB, 3.3mL seringue (4 teintes)
GHB-1, GHB-2, GHB-3, GHB-CL
• GUM Shades LB, 2.0mL seringue (4 teintes)
GLB-1, GLB-2, GLB-3, GLB-CL, embout distributeur large en plastique, étui de protection contre la lumière
• GUM Shades Lustre Paint, 0.8mL seringue (2 teintes)
GLP-Bright Red, GLP-Violet, embout distributeur étroit type aiguille, étui de protection contre la lumière
• LUSTRE PAINT, 0.8mL seringue (10 teintes)
LP-A, LP-B, LP-C, LP-D, LP-CLF, LP-Blue, LP-Cream, LP-Grey, LP-Lavender, LP-CL, embout distributeur étroit type aiguille,
étui de protection contre la lumière
3. Accessoires
• MODELING LIQUID 3mL
•Lustre Paint DILUTING LIQUID 3mL
• AIR BARRIER 10mL
• SEPARATOR 5mL
• DIE-HARDNER 5mL
• METAL PRIMER II 3mL
• CERAMIC PRIMER II 3mL
• DIAPOLISHER PASTE 2g
FR

NOTES
• Merci de lire attentivement ce mode d’emploi avant d’utiliser le produit. Après avoir examiné le mode d’emploi, conservez-
les dans un endroit pratique pour le retrouver rapidement, si nécessaire. Si ce mode d’emploi est perdu, contacter le
distributeur ou le fournisseur figurant sur l’emballage.
• Ce produit ne doit être utilisé que par des chirurgiens-dentistes ou des prothésistes dentaires
• Pour éviter des problèmes lors de l’utilisation ou pendant le stockage, le produit doit être utilisé selon les instructions
spécifiées dans ce mode d’emploi. Ne pas utiliser ce produit pour les contre-indications signalées dans ce mode d’emploi
• S’assurer que la couronne ou l’inlay est suffisamment épaise, en utilisant les méthodes de préparation des piliers et des
cavités décrites dans ce manuel.
• Porter des gants et prendre les mesures appropriées lorsque vous utilisez le produit
• Après ouverture, utiliser immédiatement et replacer les capuchons sur la seringue ou le flacon.
- Sabler la surface de la prothèse avec des particules d’alumine, diamètre de 50 um avant d’appliquer le connecteur.
Éviter la torsion de la prothèse.
- Utiliser un ciment résine pour coller couronnes, facettes, inlays ou onlays.
- Sabler l’intrados des couronnes, facettes, inlays ou onlays à faible pression (1,5 kg /cm2).
• La couche d’oxygène inhibée de la surface de la résine doit être retirée avant l’application du Lustre Paint lequel pourrait le
polymériser.
• Pour polymériser le Lustre Paint, une LED violette (longueur d’onde efficace : de 390 à 430 nm) est nécessaire.
• Placer la source lumineuse le plus près possible de la surface de la résine. Placer une plate-forme de 2 cm dans le dispositif
de polymérisation, y placer la prothèse avec la surface enduite face à la lumière. Retourner la prothèse et répéter la
photopolymérisation pour durcir complètement la contre-dépouille ou la zone dans l’ombre.
ATTENTION
1. Dans de rares cas ce produit peut entraîner des réactions chez certaines personnes. Si tel est le cas, ne plus utiliser ce
produit et consulter un médecin.
2. Porter des lunettes de protection et des gants en plastique ou en caoutchouc au cours de l’opération en particulier pour
éviter tout contact direct avec la pate et les couches de résine inhibées d’air afin d’éviter une possible sensibilité.
3. LUSTRE PAINT DILUTING LIQUID, SEPARATOR, DIE-HARDNER, METAL PRIMER II / METAL PRIMER Z et
CERAMIC PRIMER II sont des liquides hautement inflammables émettant des vapeurs. Tenir à l’écart de la chaleur, des
surfaces chaudes, étincelles, flammes nues et autres sources de chaleur. Tenir à l’écart des rayons directs du soleil.
Conserver le récipient bien fermé. Stocker dans un endroit bien ventilé. Garder au frais.
4. Lors de l’ajustage ou le polissage de la surface, utiliser un collecteur de poussière et porter un masque pour éviter d’inhaler
la poussière.
5. En cas de contact avec la muqueuse buccale ou de la peau, enlever immédiatement avec du coton. Rincer à l’eau
6. En cas de contact avec les yeux, laver l’œil immédiatement et abondamment avec de l’eau et consulter un médecin
7. Ce produit ne doit pas être utilisé en cas de mauvaise occlusion, bruxisme ou dents serrées.
8. Au moment du collage, sabler la surface intérieure des restaurations sans métal, puis assurez-vous de traiter la surface
intérieure avec un couplage silane (ex : CERAMIC PRIMER II).
9. Eliminer tous les déchets conformément à la réglementation locale.
10.Pour éviter tout risque de contamination croisée entre patient, ne pas réutiliser les embouts de mélange
11. L’embout de mélange ne peut pas être stérilisé… ni dans un autoclave ni dans un bain chimique.
12. Porter des lunettes de protection pendant la photopolymérisation.
13. Une intensité lumineuse trop faible peut entrainer une polymérisation insuffisante.
CONSERVATION
Pour des performances optimales, il est recommandé de conserver le matériau dans un endroit frais. (4-25°C / 39.2-77.0 °F), loin
des températures élevées et des rayons du soleil
Péremption : 3 ans à partir de la date de fabrication
Certains produits mentionnés dans ce mode d’emploi peuvent être considérés comme dangereux selon le GHS. Consulter les
fiches de sécurité disponibles sur
http://www.gceurope.com
Vous pouvez également les obtenir auprès de votre distributeur.
Dernière mise à jour: 09/2017

IT
Prima dell’ uso leggere attentamente le istruzioni.
GRADIA®PLUS
SISTEMA MODULARE DI COMPOSITO PER RESTAURI INDIRETTI
Prodotto dentale per uso esclusivamente professionale nelle indicazioni raccomandate.
INDICAZIONI
1. Corone e ponti (con supporto metallico)
2. Ricostruzioni senza metallo: corone a giacca, inlay, onlay, veneer
3. Sovrastrutture su impianti
4. Riproduzione del tessuto gengivale per restauri su corone
CONTROINDICAZIONI
Evitare l’uso di questo prodotto su pazienti con allergie note a monomeri metacrilici, a polimeri metacrilici o
all’alcool.
ISTRUZIONI PER L’USO
I. PROCEDURA DI STRATIFICAZIONE
A. Corone veneer anteriori e posteriori (con supporto metallico)
1. Produzione di strutture in metallo
a) Ceratura diagnostica e fusione
Eseguire la ceratura della struttura nella maniera consueta. La superficie occlusale deve avere uno spessore minimo
di 1 mm. Applicare le sferette di ritenzione sulla superficie esterna. Eseguire la fusione nel modo consueto ed
eliminare le ritenzioni per una larghezza di 0,5 mm intorno alla superficie marginale del veneer.
b) Sabbiatura
Sabbiare la struttura in metallo con ossido di alluminio a 50 micron. Pulire e asciugare con getto d’aria.
c) Priming
Applicare immediatamente METAL PRIMER II / METAL PRIMER Z sulle aree di ritenzione. Lasciar asciugare.
2. Stratificazione delle faccette
a) Applicazione e fotopolimerizzazione dell’Opaco:
Applicare immediatamente uno strato di OPACO sull’area di ritenzione e fotopolimerizzare per un minuto. Ripetere
questo processo fino a coprire completamente il colore del metallo.
Nota: Per i tempi di irraggiamento con lampada a luce visibile di GC, consultare lo schema riportato
successivamente.
b) Stratificazione della Dentina:
Applicare le masse* Dentina in strati incrementali fino ad ottenere lo spessore desiderato. Procedere con la pre-
polimerizzazione. (In alcuni casi, adattare il colore con Lustre Paint e fotopolimerizzare per 1 minuto).
*Come supporto nella lavorazione, si può usare ad esempio il MODELING LIQUID (liquido di modellazione). Usare alcune gocce di prodotto, un
pennello o uno strumento adeguato per adattare le paste.
c) Applicazione cervicale:
Applicare progressivamente degli strati sottili di Lustre Paint (A) su una larghezza di 2-3 mm intorno all’area cervicale
secondo quanto richiesto e quindi fotopolimerizzare per 1 minuto.
d) Applicazione dello Smalto:
Applicare progressivamente i colori Smalto partendo dal bordo incisale. Fotopolimerizzare per 3 minuti.
e ) Adattamento e caratterizzazione.
Adattare il contorno e caratterizzare la superficie con frese diamantate e al carburo. (In questa fase devono essere
eliminati tutti gli strati di inibizione all’aria presenti sulla superficie)
Table of contents
Languages:
Other gc Dental Equipment manuals


Popular Dental Equipment manuals by other brands

Biosonic
Biosonic Suvi Premier owner's guide

Aseptico
Aseptico AEU-6000-70V Operation and maintenance instruction manual

Carestream DENTAL
Carestream DENTAL CS 3800 User and installation guide

Candulor
Candulor CA 3.0 Instructions for use

RAM
RAM Microlab 350/450 instruction manual

EMS
EMS AIRFLOW Prophylaxis Master quick guide

EKOM
EKOM DO 2.1 Installation, operation and maintanance manual

Dentsply Sirona
Dentsply Sirona CEREC AF Connect operating instructions

NSK
NSK TiMax nano15LS Operation manual

BRYANT DENTAL
BRYANT DENTAL IGNIS manual

BG Light
BG Light BLUEDENT SMART cordless Operating instructions manual

HAGER WERKEN
HAGER WERKEN PRAXIPOL PS II Instructions for use


