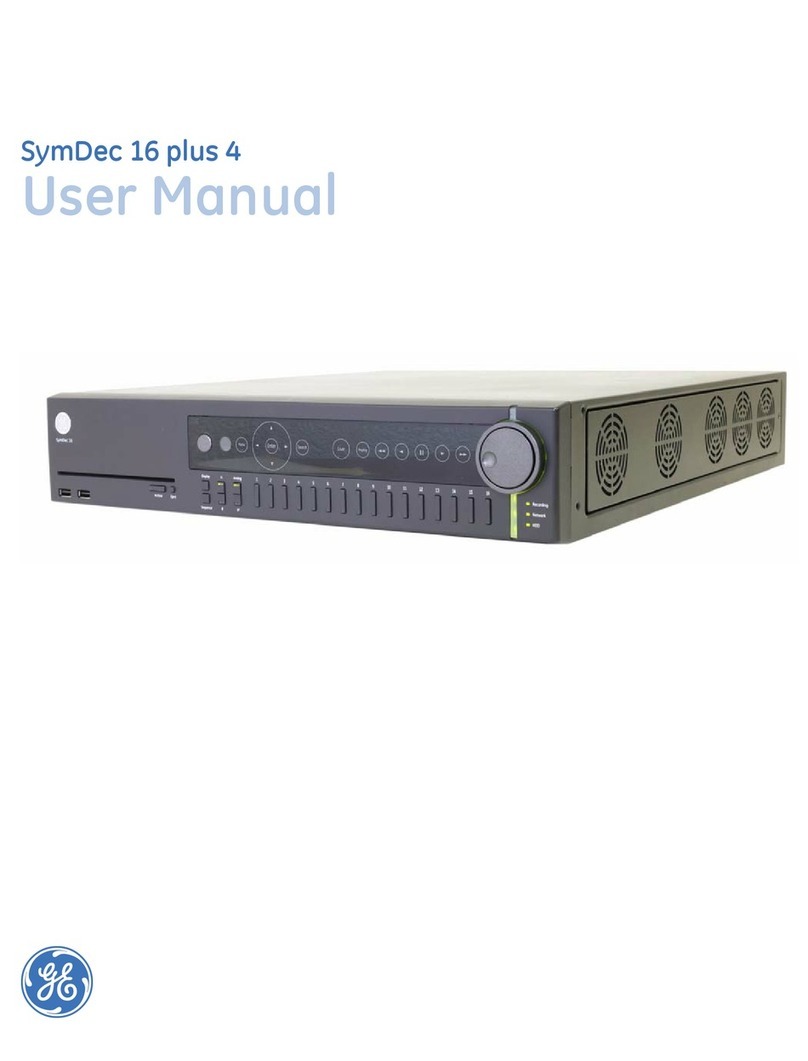
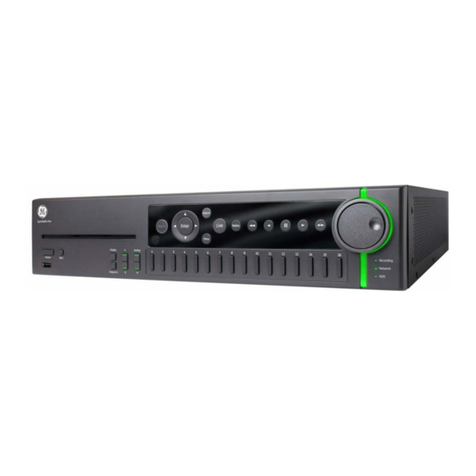
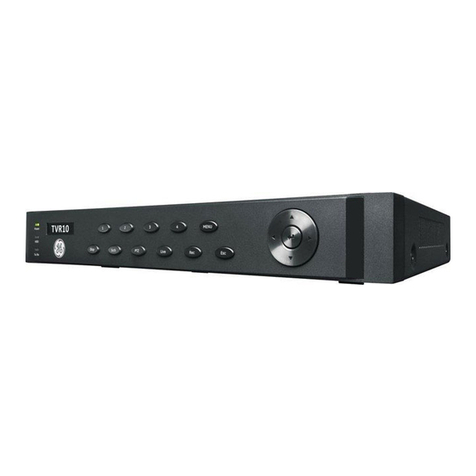
GE Security VSR-300 User manual

GE
Security
VSR
User Manual

Copyright Copyright © 2005, GE Security Inc. All rights reserved.
This document may not be copied in whole or in part, or otherwise reproduced except as
specifically permitted under US copyright law, without the prior written consent from GE.
Document number/revision: 0150-0285C.
Disclaimer The information in this document is subject to change without notice. GE, in keeping pace with
technological advances, is a company of product innovation. Therefore, it is difficult to ensure
that all information provided is entirely accurate and up-to-date. GE accepts no responsibility
for inaccuracies or omissions and specifically disclaims any liabilities, losses, or risks, personal
or otherwise, incurred as a consequence, directly or indirectly, of the use or application of any
of the contents of this document.
This publication may contain examples of screen captures and reports used in daily operations.
Examples may include fictitious names of individuals and companies. Any similarity to names
and addresses of actual businesses or persons is entirely coincidental.
Trademarks and patents GE and the GE monogram are registered trademarks of General Electric.
The VSR product and logo are registered trademarks of GE Security.
Other trade names used in this document may be trademarks or registered trademarks of the
manufacturers or vendors of the respective products.
Software license agreement GE software supplied with GE products is proprietary and furnished under license and can be
used or copied only in accordance with the license terms.
THE ENCLOSED PROGRAM IS FURNISHED SUBJECT TO THE TERMS AND CONDITIONS OF THIS
AGREEMENT. RETENTION OF THE PROGRAM FOR MORE THAN 30 DAYS, OPENING OF THE
SEALED WRAPPER, IF ANY, SURROUNDING THE PROGRAM, OR USE OF THE PROGRAM IN ANY
MANNER WILL BE CONSIDERED ACCEPTANCE OF THE AGREEMENT TERMS. IF THESE TERMS ARE
NOT ACCEPTABLE, RETURN THE UNUSED PROGRAM AND ANY ACCOMPANYING DOCUMENTATION
TO GE FOR A FULL REFUND OF THE LICENSE FEE PAID. (FOR INFORMATION REGARDING THE
RETURN OF PROGRAMS ENCODED OR INCORPORATED WITHIN EQUIPMENT, CONTACT THE
NEAREST GE SALES OFFICE.)
Intended use Use this product only for the purpose for which it was designed; refer to the data sheet and user
documentation. For the latest product information, contact your GE sales representative or visit
us online at www.gesecurity.com.
FCC compliance This equipment has been tested and found to comply with the limits for a Class A digital device,
pursuant to part 15 of the FCC Rules. These limits are designed to provide reasonable
protection against harmful interference when the equipment is operated in a commercial
environment. This equipment generates, uses, and can radiate radio frequency energy and, if
not installed and used in accordance with the instruction manual, may cause harmful
interference to radio communications.
You are cautioned that any changes or modifications not expressly approved by the party
responsible for compliance could void the user's authority to operate the equipment.
Contact Direct all inquiries about GE’s legal policies with regard to this product to:
Director of Legal Services
GE Security
12345 SW Leveton Drive
Tualatin, OR 97062-9938 USA

i
Contents
Introduction . . . . . . . . . . . . . . . . . . . . . . . . . . . . . . . . . . . . . . . . . . . . . . . . . . . . . . . . . . . . . . . . . . . . . . . . . . . . . . . . . . . . 1
Conventions used in this document. . . . . . . . . . . . . . . . . . . . . . . . . . . . . . . . . . . . . . . . . . . . . . . . . . . . . . . . . . . . . . . . .1
Safety terms and symbols . . . . . . . . . . . . . . . . . . . . . . . . . . . . . . . . . . . . . . . . . . . . . . . . . . . . . . . . . . . . . . . . . . . . . . . . .1
Overview . . . . . . . . . . . . . . . . . . . . . . . . . . . . . . . . . . . . . . . . . . . . . . . . . . . . . . . . . . . . . . . . . . . . . . . . . . . . . . . . . . . . . . . 2
Product Description. . . . . . . . . . . . . . . . . . . . . . . . . . . . . . . . . . . . . . . . . . . . . . . . . . . . . . . . . . . . . . . . . . . . . . . . . . . . . . . .2
Features . . . . . . . . . . . . . . . . . . . . . . . . . . . . . . . . . . . . . . . . . . . . . . . . . . . . . . . . . . . . . . . . . . . . . . . . . . . . . . . . . . . . . . . . . .3
Product Contents . . . . . . . . . . . . . . . . . . . . . . . . . . . . . . . . . . . . . . . . . . . . . . . . . . . . . . . . . . . . . . . . . . . . . . . . . . . . . . . . . .3
Installation Environment . . . . . . . . . . . . . . . . . . . . . . . . . . . . . . . . . . . . . . . . . . . . . . . . . . . . . . . . . . . . . . . . . . . . . . . . . . .4
Associated Equipment . . . . . . . . . . . . . . . . . . . . . . . . . . . . . . . . . . . . . . . . . . . . . . . . . . . . . . . . . . . . . . . . . . . . . . . . . . . . .4
Passwords . . . . . . . . . . . . . . . . . . . . . . . . . . . . . . . . . . . . . . . . . . . . . . . . . . . . . . . . . . . . . . . . . . . . . . . . . . . . . . . . . . . . . . . .5
Default IP Addresses . . . . . . . . . . . . . . . . . . . . . . . . . . . . . . . . . . . . . . . . . . . . . . . . . . . . . . . . . . . . . . . . . . . . . . . . . . . . . . .5
VSR Connectors and Indicators . . . . . . . . . . . . . . . . . . . . . . . . . . . . . . . . . . . . . . . . . . . . . . . . . . . . . . . . . . . . . . . . . . . 6
Front Panel Controls and Features. . . . . . . . . . . . . . . . . . . . . . . . . . . . . . . . . . . . . . . . . . . . . . . . . . . . . . . . . . . . . . . . . .6
Back Panel Connections . . . . . . . . . . . . . . . . . . . . . . . . . . . . . . . . . . . . . . . . . . . . . . . . . . . . . . . . . . . . . . . . . . . . . . . . . . .7
Audio Input and Output . . . . . . . . . . . . . . . . . . . . . . . . . . . . . . . . . . . . . . . . . . . . . . . . . . . . . . . . . . . . . . . . . . . . . . . . . . . .7
Camera Input and Output . . . . . . . . . . . . . . . . . . . . . . . . . . . . . . . . . . . . . . . . . . . . . . . . . . . . . . . . . . . . . . . . . . . . . . . . . .7
RS232 Port . . . . . . . . . . . . . . . . . . . . . . . . . . . . . . . . . . . . . . . . . . . . . . . . . . . . . . . . . . . . . . . . . . . . . . . . . . . . . . . . . . . . . . . .8
I/O port . . . . . . . . . . . . . . . . . . . . . . . . . . . . . . . . . . . . . . . . . . . . . . . . . . . . . . . . . . . . . . . . . . . . . . . . . . . . . . . . . . . . . . . . . . .8
Power Connector . . . . . . . . . . . . . . . . . . . . . . . . . . . . . . . . . . . . . . . . . . . . . . . . . . . . . . . . . . . . . . . . . . . . . . . . . . . . . . . . 10
Ethernet Port . . . . . . . . . . . . . . . . . . . . . . . . . . . . . . . . . . . . . . . . . . . . . . . . . . . . . . . . . . . . . . . . . . . . . . . . . . . . . . . . . . . . 10
Connection Diagrams. . . . . . . . . . . . . . . . . . . . . . . . . . . . . . . . . . . . . . . . . . . . . . . . . . . . . . . . . . . . . . . . . . . . . . . . . . . 12
Installing and Configuring the VSR . . . . . . . . . . . . . . . . . . . . . . . . . . . . . . . . . . . . . . . . . . . . . . . . . . . . . . . . . . . . . . . 14
Minimum System Requirements. . . . . . . . . . . . . . . . . . . . . . . . . . . . . . . . . . . . . . . . . . . . . . . . . . . . . . . . . . . . . . . . . . 14
Installing Video Navigator from CD-ROM. . . . . . . . . . . . . . . . . . . . . . . . . . . . . . . . . . . . . . . . . . . . . . . . . . . . . . . . . . 14
Starting Video Navigator . . . . . . . . . . . . . . . . . . . . . . . . . . . . . . . . . . . . . . . . . . . . . . . . . . . . . . . . . . . . . . . . . . . . . . . . . 14
Making a Serial Connection . . . . . . . . . . . . . . . . . . . . . . . . . . . . . . . . . . . . . . . . . . . . . . . . . . . . . . . . . . . . . . . . . . . . . . 15
Making an Ethernet Connection . . . . . . . . . . . . . . . . . . . . . . . . . . . . . . . . . . . . . . . . . . . . . . . . . . . . . . . . . . . . . . . . . . 15
User Operations . . . . . . . . . . . . . . . . . . . . . . . . . . . . . . . . . . . . . . . . . . . . . . . . . . . . . . . . . . . . . . . . . . . . . . . . . . . . . . . . 16
Recording (R) . . . . . . . . . . . . . . . . . . . . . . . . . . . . . . . . . . . . . . . . . . . . . . . . . . . . . . . . . . . . . . . . . . . . . . . . . . . . . . . . . . . . 16
Playback . . . . . . . . . . . . . . . . . . . . . . . . . . . . . . . . . . . . . . . . . . . . . . . . . . . . . . . . . . . . . . . . . . . . . . . . . . . . . . . . . . . . . . . . 17
The Search Interface (F) . . . . . . . . . . . . . . . . . . . . . . . . . . . . . . . . . . . . . . . . . . . . . . . . . . . . . . . . . . . . . . . . . . . . . . . . . . 18
Specifying Search Parameters . . . . . . . . . . . . . . . . . . . . . . . . . . . . . . . . . . . . . . . . . . . . . . . . . . . . . . . . . . . . . . . . . . . 19
The Menu System . . . . . . . . . . . . . . . . . . . . . . . . . . . . . . . . . . . . . . . . . . . . . . . . . . . . . . . . . . . . . . . . . . . . . . . . . . . . . . 21
How to use the Menu system . . . . . . . . . . . . . . . . . . . . . . . . . . . . . . . . . . . . . . . . . . . . . . . . . . . . . . . . . . . . . . . . . . . . 21
Main Menu Setup . . . . . . . . . . . . . . . . . . . . . . . . . . . . . . . . . . . . . . . . . . . . . . . . . . . . . . . . . . . . . . . . . . . . . . . . . . . . . . .23
Main Menu / Time/Date . . . . . . . . . . . . . . . . . . . . . . . . . . . . . . . . . . . . . . . . . . . . . . . . . . . . . . . . . . . . . . . . . . . . . . . . . . 23
Main Menu / Sequencing. . . . . . . . . . . . . . . . . . . . . . . . . . . . . . . . . . . . . . . . . . . . . . . . . . . . . . . . . . . . . . . . . . . . . . . . . 26
Main Menu / Alarms . . . . . . . . . . . . . . . . . . . . . . . . . . . . . . . . . . . . . . . . . . . . . . . . . . . . . . . . . . . . . . . . . . . . . . . . . . . . . 27
Main Menu / Record Timer . . . . . . . . . . . . . . . . . . . . . . . . . . . . . . . . . . . . . . . . . . . . . . . . . . . . . . . . . . . . . . . . . . . . . . . 32
Main Menu / Record Settings . . . . . . . . . . . . . . . . . . . . . . . . . . . . . . . . . . . . . . . . . . . . . . . . . . . . . . . . . . . . . . . . . . . . . 34

VSR
User Manual
ii
Main Menu / Camera Title . . . . . . . . . . . . . . . . . . . . . . . . . . . . . . . . . . . . . . . . . . . . . . . . . . . . . . . . . . . . . . . . . . . . . . . . 35
Main Menu / Display Settings . . . . . . . . . . . . . . . . . . . . . . . . . . . . . . . . . . . . . . . . . . . . . . . . . . . . . . . . . . . . . . . . . . . . . 36
Main Menu / Advanced Menu. . . . . . . . . . . . . . . . . . . . . . . . . . . . . . . . . . . . . . . . . . . . . . . . . . . . . . . . . . . . . . . . . . . . . 38
Main Menu / About. . . . . . . . . . . . . . . . . . . . . . . . . . . . . . . . . . . . . . . . . . . . . . . . . . . . . . . . . . . . . . . . . . . . . . . . . . . . . . . 38
Advanced Menu Setup . . . . . . . . . . . . . . . . . . . . . . . . . . . . . . . . . . . . . . . . . . . . . . . . . . . . . . . . . . . . . . . . . . . . . . . . . . 39
Advanced Menu / Disk Overwrite Mode . . . . . . . . . . . . . . . . . . . . . . . . . . . . . . . . . . . . . . . . . . . . . . . . . . . . . . . . . . . 39
Advanced Menu / Disk Maintenance . . . . . . . . . . . . . . . . . . . . . . . . . . . . . . . . . . . . . . . . . . . . . . . . . . . . . . . . . . . . . . 41
Advanced Menu / Auto Delete Mode . . . . . . . . . . . . . . . . . . . . . . . . . . . . . . . . . . . . . . . . . . . . . . . . . . . . . . . . . . . . . . 44
Advanced Menu / Communications . . . . . . . . . . . . . . . . . . . . . . . . . . . . . . . . . . . . . . . . . . . . . . . . . . . . . . . . . . . . . . . 45
Advanced Menu / Adjust Picture . . . . . . . . . . . . . . . . . . . . . . . . . . . . . . . . . . . . . . . . . . . . . . . . . . . . . . . . . . . . . . . . . . 50
Advanced Menu / Front Panel Lock . . . . . . . . . . . . . . . . . . . . . . . . . . . . . . . . . . . . . . . . . . . . . . . . . . . . . . . . . . . . . . . 51
Advanced Menu / Factory Settings. . . . . . . . . . . . . . . . . . . . . . . . . . . . . . . . . . . . . . . . . . . . . . . . . . . . . . . . . . . . . . . . 51
Advanced Menu / Change Password . . . . . . . . . . . . . . . . . . . . . . . . . . . . . . . . . . . . . . . . . . . . . . . . . . . . . . . . . . . . . . 51
Using VSR Keyboard . . . . . . . . . . . . . . . . . . . . . . . . . . . . . . . . . . . . . . . . . . . . . . . . . . . . . . . . . . . . . . . . . . . . . . . . . . . . 54
The VSR Keyboard Menu Bar . . . . . . . . . . . . . . . . . . . . . . . . . . . . . . . . . . . . . . . . . . . . . . . . . . . . . . . . . . . . . . . . . . . . . 55
Keyboard shortcuts . . . . . . . . . . . . . . . . . . . . . . . . . . . . . . . . . . . . . . . . . . . . . . . . . . . . . . . . . . . . . . . . . . . . . . . . . . . . . . 56
WebServer . . . . . . . . . . . . . . . . . . . . . . . . . . . . . . . . . . . . . . . . . . . . . . . . . . . . . . . . . . . . . . . . . . . . . . . . . . . . . . . . . . . . 57
To access the web interface: . . . . . . . . . . . . . . . . . . . . . . . . . . . . . . . . . . . . . . . . . . . . . . . . . . . . . . . . . . . . . . . . . . . . . 57
Network Settings. . . . . . . . . . . . . . . . . . . . . . . . . . . . . . . . . . . . . . . . . . . . . . . . . . . . . . . . . . . . . . . . . . . . . . . . . . . . . . . . . 58
Streaming Settings. . . . . . . . . . . . . . . . . . . . . . . . . . . . . . . . . . . . . . . . . . . . . . . . . . . . . . . . . . . . . . . . . . . . . . . . . . . . . . . 59
Streaming Video Overview . . . . . . . . . . . . . . . . . . . . . . . . . . . . . . . . . . . . . . . . . . . . . . . . . . . . . . . . . . . . . . . . . . . . . . . 59
Streaming settings for UDP unicast or TCP . . . . . . . . . . . . . . . . . . . . . . . . . . . . . . . . . . . . . . . . . . . . . . . . . . . . . . . . 61
Streaming Settings for UDP multicast . . . . . . . . . . . . . . . . . . . . . . . . . . . . . . . . . . . . . . . . . . . . . . . . . . . . . . . . . . . . . 62
MPEG Settings . . . . . . . . . . . . . . . . . . . . . . . . . . . . . . . . . . . . . . . . . . . . . . . . . . . . . . . . . . . . . . . . . . . . . . . . . . . . . . . . . . . 64
Display Options . . . . . . . . . . . . . . . . . . . . . . . . . . . . . . . . . . . . . . . . . . . . . . . . . . . . . . . . . . . . . . . . . . . . . . . . . . . . . . . . . . 64
Password Settings . . . . . . . . . . . . . . . . . . . . . . . . . . . . . . . . . . . . . . . . . . . . . . . . . . . . . . . . . . . . . . . . . . . . . . . . . . . . . . . 65
Email Configuration . . . . . . . . . . . . . . . . . . . . . . . . . . . . . . . . . . . . . . . . . . . . . . . . . . . . . . . . . . . . . . . . . . . . . . . . . . . . . . 65
Upgrading the VSR . . . . . . . . . . . . . . . . . . . . . . . . . . . . . . . . . . . . . . . . . . . . . . . . . . . . . . . . . . . . . . . . . . . . . . . . . . . . . 66
Follow the steps below to Upgrade the VSR: . . . . . . . . . . . . . . . . . . . . . . . . . . . . . . . . . . . . . . . . . . . . . . . . . . . . . . . 66
Factory Defaults . . . . . . . . . . . . . . . . . . . . . . . . . . . . . . . . . . . . . . . . . . . . . . . . . . . . . . . . . . . . . . . . . . . . . . . . . . . . . . . 67
Menu defaults . . . . . . . . . . . . . . . . . . . . . . . . . . . . . . . . . . . . . . . . . . . . . . . . . . . . . . . . . . . . . . . . . . . . . . . . . . . . . . . . . . . 67
IP addresses . . . . . . . . . . . . . . . . . . . . . . . . . . . . . . . . . . . . . . . . . . . . . . . . . . . . . . . . . . . . . . . . . . . . . . . . . . . . . . . . . . . . . 67
Streaming defaults. . . . . . . . . . . . . . . . . . . . . . . . . . . . . . . . . . . . . . . . . . . . . . . . . . . . . . . . . . . . . . . . . . . . . . . . . . . . . . . 68
Technical Specifications . . . . . . . . . . . . . . . . . . . . . . . . . . . . . . . . . . . . . . . . . . . . . . . . . . . . . . . . . . . . . . . . . . . . . . . . 69
General. . . . . . . . . . . . . . . . . . . . . . . . . . . . . . . . . . . . . . . . . . . . . . . . . . . . . . . . . . . . . . . . . . . . . . . . . . . . . . . . . . . . . . . . . . 69
Connections . . . . . . . . . . . . . . . . . . . . . . . . . . . . . . . . . . . . . . . . . . . . . . . . . . . . . . . . . . . . . . . . . . . . . . . . . . . . . . . . . . . . . 69
Video. . . . . . . . . . . . . . . . . . . . . . . . . . . . . . . . . . . . . . . . . . . . . . . . . . . . . . . . . . . . . . . . . . . . . . . . . . . . . . . . . . . . . . . . . . . . 69
Audio. . . . . . . . . . . . . . . . . . . . . . . . . . . . . . . . . . . . . . . . . . . . . . . . . . . . . . . . . . . . . . . . . . . . . . . . . . . . . . . . . . . . . . . . . . . . 70
On-screen Video Indicators. . . . . . . . . . . . . . . . . . . . . . . . . . . . . . . . . . . . . . . . . . . . . . . . . . . . . . . . . . . . . . . . . . . . . . . 70
Part Numbers. . . . . . . . . . . . . . . . . . . . . . . . . . . . . . . . . . . . . . . . . . . . . . . . . . . . . . . . . . . . . . . . . . . . . . . . . . . . . . . . . . . . 70
Warranty and Service . . . . . . . . . . . . . . . . . . . . . . . . . . . . . . . . . . . . . . . . . . . . . . . . . . . . . . . . . . . . . . . . . . . . . . . . . . 71
Factory Service . . . . . . . . . . . . . . . . . . . . . . . . . . . . . . . . . . . . . . . . . . . . . . . . . . . . . . . . . . . . . . . . . . . . . . . . . . . . . . . . . . 71
Warranty and Return Information . . . . . . . . . . . . . . . . . . . . . . . . . . . . . . . . . . . . . . . . . . . . . . . . . . . . . . . . . . . . . . . . 71
Contacting technical support. . . . . . . . . . . . . . . . . . . . . . . . . . . . . . . . . . . . . . . . . . . . . . . . . . . . . . . . . . . . . . . . . . . . 73

Online publication library. . . . . . . . . . . . . . . . . . . . . . . . . . . . . . . . . . . . . . . . . . . . . . . . . . . . . . . . . . . . . . . . . . . . . . . . . 73

1
Introduction
This is the GE VSR User Manual for model VSR-300. This document includes an overview of the product and
detailed instructions explaining:
• how to install and configure; and
• how to connect to other GE IP devices.
There is also information describing how to contact technical support if you have questions or concerns.
To use this document effectively, you should have the following minimum qualifications:
• a basic knowledge of CCTV systems and components; and
• a basic knowledge of electrical wiring and low-voltage electrical connections.
Read these instructions and all ancillary documentation entirely before installing or operating this product.
The most current versions of this and related documentation may be found on our website. Refer to Online
publication library on page 73 for instructions on accessing our online publication library.
Note: A qualified service person, complying with all applicable codes, should perform all required hardware installation.
Conventions used in this document
The following conventions are used in this document:
Safety terms and symbols
These terms may appear in this manual:
Bold Menu items and buttons.
Italic Emphasis of an instruction or point; special terms.
File names, path names, windows, panes, tabs, fields, variables, and other GUI elements.
Titles of books and various documents.
Monospace Text that displays on the computer screen.
Programming or coding sequences.
Blue italic Hyperlinks to cross-references, related topics, and URL addresses.
CAUTION
CAUTION Cautions identify conditions or practices that may result in damage to the equipment or other property.
WARNING Warnings identify conditions or practices that could result in equipment damage or serious personal injury.

VSR
User Manual
2
Overview
Product Description
The VSR is a single channel Video Streaming Recorder that introduces “hybrid” recording that works with a
single conventional analog camera and the new family of GE digital cameras (1). This unique platform
provides a graceful migration path to digital recording – the future of video recording.
The VSR allows users to record full-size images at full speed on both channels. Using MPEG-4 compression,
the VSR records at 60, 30, 20, 15, 10, and 5 pictures per second and has virtual triplex functionality for
simultaneous viewing, playback, and recording of video.
In addition, the VSR can be easily networked and recorded video viewed remotely over a TCP/IP network.
Figure 1. VSR-300
CAUTION
CAUTION Caution! Please note that the VSR was not designed for, nor is intended to work with multiplexers.

3
Features
• View live and recorded video from multiple VSR’s using Video Navigator software.
• Advanced MPEG4 video compression.
• Single channel Composite Video Input/Output connection.
• Over 1 week nonstop recording with outstanding picture quality and audio (Base model).
• 3 video quality settings.
• Virtual triplex functionality.
• Records up to 60 pictures per second (NTSC) of real time video or up to 30 frames per second of
interlaced video.
• Multi-level password protection.
• Continuous Recording in Disk Overwrite mode.
• A simple on-screen menu system.
• Remote configuration over TCP/IP or RS232 using VSR Keyboard software.
• Clock synchronization with Network Server.
• Timed recording.
• Dynamic IP addressing (DHCP).
• Support for Dynamic Domain Name Server (DDNS).
• Local search on time, date, and hardwired alarms.
• Alarm Handling with History Log.
• Alarm notification through email notification.
• Programmable Auto Delete Mode.
• Hard Disk monitoring and testing features.
• Video streaming with UDP (User Datagram Protocol) and TCP (Transmission Control Protocol)
support.
Product Contents
The VSR system consists of the following:
• The VSR unit.
• Power supply and (2) power cords (US and EU).
• The VSR user manual.
• The Video Navigator Software CD.
• The VSR quick reference guide.
• The accessory I/O PCB.
Check the package and contents for visible damage. If any components are missing or damaged, contact the
supplier immediately. Do not attempt to use the unit. If, for any reason they must be returned, the contents
must be shipped in the original packaging.

VSR
User Manual
4
Installation Environment
Power: Ensure that the site's AC power is stable and within the rated voltage of the external power
supply. If the site's AC power is likely to have spikes or power dips, use power line conditioning
or an Uninterruptable Power Supply (UPS).
Ventilation: Install the unit in a well-ventilated area. Take note of the locations of the cooling vents
in the unit's enclosure, and ensure that they are not obstructed.
Temperature: Observe the unit's ambient temperature specifications when choosing a location space.
Extremes of heat or cold beyond the specified operating temperature limits may cause the unit to
fail. Do not install the unit on top of other hot equipment.
Moisture: Do not expose the unit to rain or moisture. Moisture can damage the internal components.
Do not install this unit near sources of water.
Handling Hard Disks: This unit has a built-in hard disk (HD). Be sure to observe the following
points carefully when operating, setting up, and servicing the unit.
• Do not subject the unit to shocks or vibration. Shocks and vibration may damage the HD or cause
corruption of the data stored on the unit.
• Do not move the unit while the power is turned on.
• Do not move the unit for 30 seconds after tuning off the power.
• When transporting the unit, pack it securely using the original packing materials.
Associated Equipment
Associated equipment you might need:
• Analog camera.
•IPCamera.
• Analog monitor to view video.
• Alarm input devices: Pressure sensors, motion detectors, etc.
• Alarm output devices: Buzzers, Sirens, Flashing Lights, etc.
• A PC connected via ethernet cable.
• An RJ45 to DB9-F null modem cable.
• A microphone with amplification.
• Speakers to hear audio.
• Symnet encoder/decoder to receive or send video.
For instructions regarding the connection of the associated security equipment in your system, please consult
the instruction manual of the associated equipment.

5
Passwords
Passwords are provided to limit access to the VSR, WebServer, and the Video Navigator software. It is
recommended that the default passwords be changed after installation is complete. As a security measure,
store the password in the administrator's secured files or in a limited access area.
Default IP Addresses
These settings provide access and control of the VSR over an IP network.
Note: These IP addresses should be changed before you connect to your IP network. Contact your network administrator to
obtain your network specific addresses.
Table 1. Default software passwords
Password name Program Changeable by user Default password
Admin Password WebServer Yes, through the webserver admin
Log In Password Video Navigator Yes, through the Security
menu
12345
Table 2. Default hardware passwords
Password name Function Changeable by user Default password
Advanced Menu
Password
Provides access to the
Advances menu for the
installer
See page 51 0 0 0 0
Factory Password Restores the unit to the
factory defaults No 8 1 1 1
Ethernet Password Limits access over Ethernet See page 51 No default password
Ethernet Access Reset
Password
Resets the Ethernet
password No 1 1 1 1
DDNS Password Provides access to the
Domain Name Server See page 51 2 2 2 2
Table 3. Default IP addresses
Address name Changeable by user Default user
IP Address Yes 3.112.55.10
Subnet Mask Yes 255.255.254.0
Gateway Address Yes 3.112.54.1

VSR
User Manual
6
VSR Connectors and Indicators
This section deals with the various physical features, connectors, and indicators of the VSR.
Front Panel Controls and Features
Figure 2. Front Panel: VSR-300
1. Record button: Press this button to begin recording.
2. Reverse play button: Press this button to playback video in reverse at the normal record speed.
3. Stop button: Press this button to stop Recording or Playback.
4. Play Forward button: Press this button to playback video at the normal record speed.
5. Pause button: Press this button to pause playback.
6. Search button: Press this button to enter the Search Filters menu.
7. Increase and Decrease Record Speed buttons: Press these buttons to increase or decrease the Record
Speed.
8. Power On Indicator: Indicates power is on when LED is lit.
9. Alarm Indicator: Indicates an alarm condition when the LED is lit.
10. Menu Button: Provides access to on-screen menus.
11. Arrow Buttons: Controls Playback speed and menu selections.
12. Enter Button: Confirms selection in menus.

7
Back Panel Connections
Figure 3. Back Panel
1. Audio In/Out: Line -level audio input and output with RCA style connector.
2. Video In/Out: Composite video input and output with BNC style connector.
3. RS-232 Serial Port: Used for serial debugging.
4. RS-485 Port: Not used at this time.
5. S-Link: Not used at this time
6. I/O Port: For connecting peripheral devices such as alarm devices or alarm relays.
7. Power Connector: For connecting to the 12 Volt DC external power supply.
8. Ethernet Port: For connecting to a LAN or WAN. Used for upgrading the software via the Internet.
Audio Input and Output
The unit is equipped with 1 audio input and 1 audio output. Both the audio output and the audio input are line-
level.
Note: Line-level audio requires amplification.
Camera Input and Output
The VSR is equipped with a composite input and output. The video input is auto-terminating. When
connecting directly from the VSR to the monitor, select the 75-Ohm impedance setting on the monitor.
Audio in RCA jack, 315 mV, 40k Ohms. Unbalanced
Audio out RCA jack, 315mV, 600 Ohms. Unbalanced

VSR
User Manual
8
If an additional device is connected to the monitor’s looping output, set the termination of the additional device
as 75-Ohm, and set the termination of the monitor as Hi-Z (High Impedance).
RS232 Port
The RS232 port is provided for external control of the VSR from a PC via the PC’s serial port. This requires
the use of a RJ45 to DB9-F null modem cable (or DB25-F depending on the type of RS232 port on the PC).
I/O port
The back panel of the VSR is equipped with an accessories I/O port (DB9-M style connector). Connect the
accessories PCB, supplied with the unit, to the I/O port. Wire all accessories to the accessories PCB.
Note: Do not attempt to wire accessories directly to the I/O connector.
If the accessories PCB is lost or missing, contact GE Security technical support at 888-437-3287 for a
replacement part (P/N 0900-0127).
Note: This port is not used for serial communications.
Cable 75-Ohm coaxial
Connectors BNC
Auto terminating Yes
Passive looping Yes
Table 4. RJ45 RS232 connector pinouts
Pin Use
1Ground
2 Reserved
3Notconnected
4RxD
5TxD
6Notconnected
7Ground
8 Reserved

9
Figure 4. Accessory PCB
Alarm In
An alarm condition can be activated by an Active Low TTL input or by relay contact devices such as pressure
pads, passive infrared, door switches, or other similar devices.
Alarm Out
The Alarm output is activated while the Alarm Input is active. The Alarm output is only active for the duration
of the alarm event.
Record Start In
Record Start In will place the unit in Record mode when activated. Compatible with the Disk End Out signal
from a second unit.
Table 5. Accessory PCB pinouts
Pin Use
1AlarmIn
2AlarmOut
3RecordStartIn
4 Alarm Record Reset
5Notused
6ErrorOut
7Ground
8 Video Loss Out
9DiskEndOut
10 Ground

VSR
User Manual
10
Alarm Record Reset
This feature is for future development, and has not yet been implemented.
Error Out
The Error Out signal is activated when the unit experiences any operational or internal error.
Video Loss Out
The Videoloss Out signal is activated when the unit experiences videoloss on the video input (Composite). In
the event of videoloss, VIDEOLOSS will be indicated near the upper left hand corner of the primary monitor.
Videoloss is defined as the inability to successfully lock on either horizontal or vertical sync frequencies at the
video inputs.
Disk End Out
The Disk End Out is activated when there is less than 1% of recording space left on the hard disk. The VSR
must be in Record mode and not set to Continuous Overwrite.
Power Connector
Plug the power cord into the power cord connector and then into a properly rated wall socket. Once power is
applied to the unit, it will begin its power-up procedure. The unit will begin by displaying the software version
on Monitor-A, then the unit will begin recording automatically.
Ethernet Port
The cable connection configuration for the ethernet port depends on your network configuration:
• For a VSR that connects directly to a hub, use a straight through connection.
• For a VSR that connects directly to a PC, use a cross-over connection.
Table 6. Power supply rating
Power supply
Voltage Input 100-240 VAC 50-60 Hz, auto-ranging
Amps 1.65-0.85 A
Voltage Output 12 VDC
Connector 2.1 mm barrel, center positive

11
Consult with your network administrator or IS professional for the specific type of configuration. See
Advanced Menu / Communications on page 45 for information about configuring the Ethernet settings in the
menu system.
Ethernet 10/100Base-T, auto sensing
Wire type Cat 5
Connector type RJ-45
Max cable length 300 meters
Minimum cable length 6 feet/1.8 meters
Hub wiring configuration Straight through
PC wiring configuration Cross over
Table 7. Ethernet RJ45 pinouts
Pin Use
1TX+
2TX-
3RX+
4Notconnected
5Notconnected
6RX-
7Notconnected
8Notconnected

VSR
User Manual
12
Connection Diagrams
Use the figures on the following pages a guide to connect the various peripherals to the VSR.
Figure 5. Connection diagram
1. Microphone with amp.
2. Analog camera.
3. TCP/IP network.
4. Speakers with amp.
5. CCTV Monitor.
6. Event or alarm connections
7. Power Supply

13
Figure 6. Typical network setup

VSR
User Manual
14
Installing and Configuring the VSR
Minimum System Requirements
The following minimum system requirements must be met before software installation.
Windows® 2000/XP and Direct X are registered trademarks of Microsoft Corporation.
Installing Video Navigator from CD-ROM
To install Software on your hard disk from a CD:
1. Place the Video Navigator CD in the CD-ROM drive of a PC that meets the minimum system
requirements.
2. Follow the instructions for installation as they appear.
3. Both Video Navigator and the VSR Keyboard should be installed when the installation is completed.
Note: If Autorun is not enabled on your PC, choose Run from the Start Menu, then type d:\setup.exe (where “d” is the drive
letter of your CD-ROM) and press OK. Follow the instructions as they appear on your screen.
Starting Video Navigator
To start the Video Navigator, double-click on the Video Navigator desktop icon or choose Programs
from the Start menu and then select Video Navigator. The Main window of the Video Navigator program will
appear. For operating details, please see the Video Navigator manual.
Making a Serial Connection
An option to connect by RS232 is provided for debug purposes and local (not by LAN) menu configuration.
Follow the steps below to make an RS232 connection.
Table 8. Minimum system requirements
Hardware Specification
CPU Pentium 2.8 GHz or faster
RAM 512 MB
Hard disk drive 50 MB free hard drive space
Monitor SVGA, 1024 X 768, 24 bit color
Video AGP or PCI Express, 128 MB DDR Memory
Direct X Version 9 or higher
Operating system Windows® 2000 SP4, XP SP2

15
1. Check that the COM port setting on the PC is 9600 baud, 8 data bits, No parity, 1 stop bit, and no flow
control.
2. Turn the power off to the VSR and the PC.
3. Connect the VSR and the PC with a RJ45 to DB9-F (or DB25-F) null modem cable. This cable should
be plugged in the RS232 port on the VSR and one of the COM ports on the PC. A monitor should also
be connected to the VSR on monitor A out.
Figure 7.
4. Power up the VSR and the PC. Wait for the boot processes of both units to complete.
5. Launch the VSR Keyboard application.
6. Select RS232 from the Type drop down menu.
7. Select COM1 or COM2 from the Address drop down menu.
8. Click the Connect button.
Making an Ethernet Connection
To configure the VSR over Ethernet, follow the steps below.
1. Plug one end Ethernet cable into the Ethernet connection on the rear of the DSR. Plug the other end of
the cable into an active Ethernet port. This could be in a router or directly to the Ethernet port on your
computer.
2. Launch the VSR Keyboard application.
3. Select Ethernet from the Type drop down menu.
4. Select IP Address from the Address drop down menu.
5. Click the Connect button.

VSR
User Manual
16
User Operations
The following user operations are implemented through the front panel of the VSR or the VSR Keyboard
utility.
Recording (R)
To begin recording, press the record button on the front panel or press the Rkey on your keyboard. RECORD
will be indicated for three seconds, near the upper left hand corner of the output monitor. The unit always
starts recording at the end of the previously recorded data.
Recording will continue until:
• The Stop button is pressed.
• The disk is full (In No Overwrite and Overwrite Once modes). See Advanced Menu / Disk Overwrite
Mode on page 39, for details regarding Disk Overwrite modes.
Normal Recording
The normal record speed is indicated on the output monitor, and can be altered using the Up/Down Record
Speed buttons, or page up/page down keys on your keyboard.
For information about altering the normal record speed from the menu system, see Main Menu / Record
Settings / Record Speed on page 34 of the Operator Programming section of this manual.
The normal record speed can be altered while the unit is recording. The unit will continue recording while the
menu system is active.
Alarm Recording
An alarm condition is indicated in several ways:
• With the word ALARM, displayed on the output monitor, near the upper left hand corner of the screen.
• With the LED Alarm Indicators on the front panel of the unit.
• With the internal buzzer (if activated in the menu system). For information about activating the
internal buzzer during alarms, see Main Menu /Alarms on page 27 of the Operator programming
section of this manual.
• By an external device, connected to the alarm output of the unit (if the unit is installed that way).
Disk Nearly Full Notification
A Disk Full. Recording has stopped message will appear on the output monitor to indicate that the unit has
stopped recording, because the disk is full and No Overwrite Mode is selected.
No Overwrite mode: The user must acknowledge the on-screen message by pressing the Enter button.
In this mode the VSR will not record over previously recorded data. To continue recording, the data must be
erased (or deleted) in the Advanced /Disk Maintenance menu.
Overwrite Once mode: The user must acknowledge the on-screen message by pressing the Enter button.
The unit will continue recording again when the user presses the Record button.
Table of contents
Other GE Security DVR manuals

GE Security
GE Security Digia User manual

GE Security
GE Security TruVision DVR 60 User manual

GE Security
GE Security DVMRe Matrix User manual

GE Security
GE Security DVMRe Simplex User manual

GE Security
GE Security TruVision DVR 10 User manual

GE Security
GE Security StoreSafe User manual

GE Security
GE Security SymSafe User manual

GE Security
GE Security SymDec 16 plus 4 User manual

GE Security
GE Security VSR-4 User manual

GE Security
GE Security DIGIA II - User manual