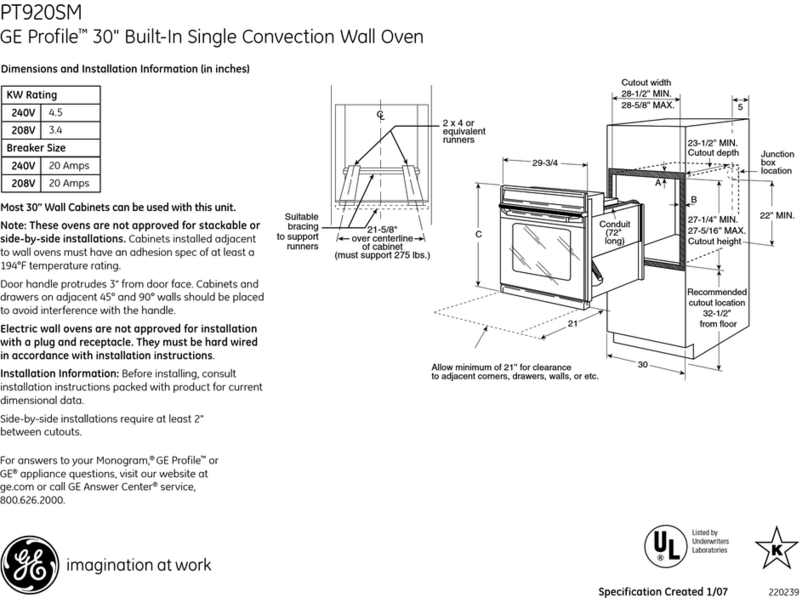
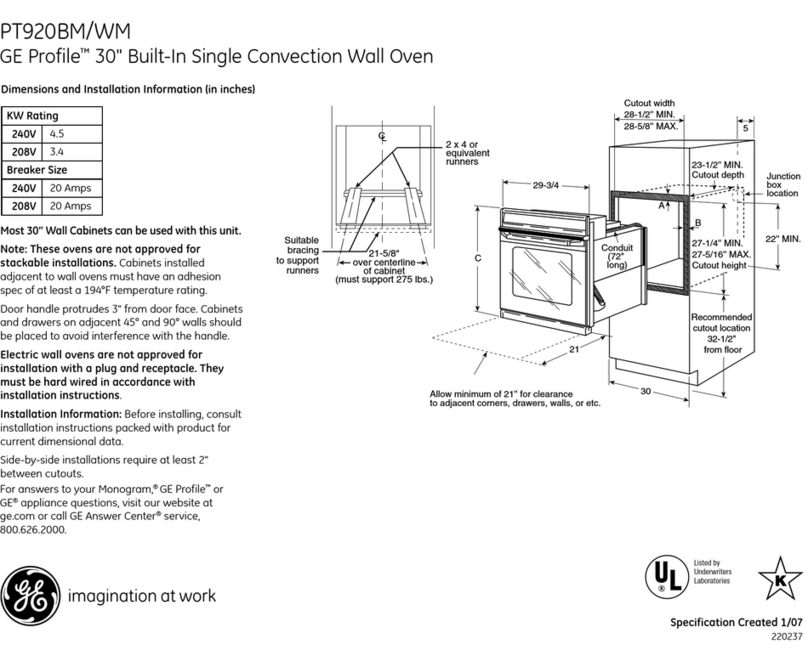
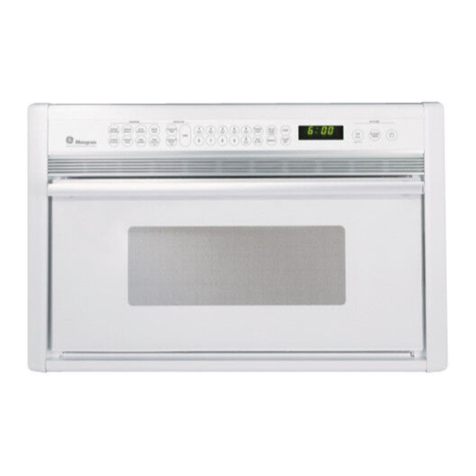
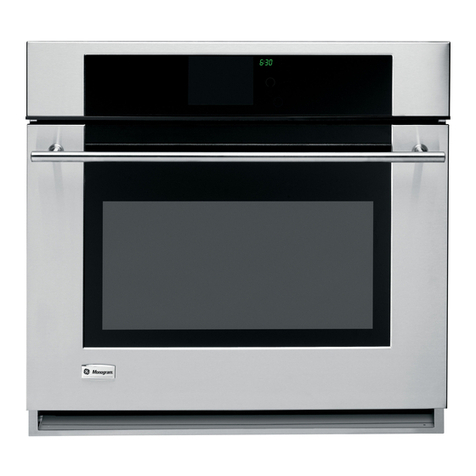
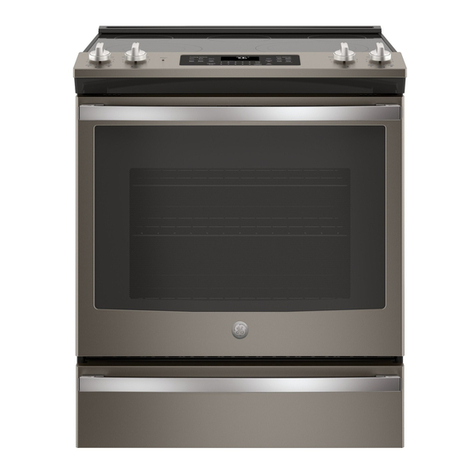
GE Profile J2S968 SERIES User manual

www.GEAppliances.cem
©
?.
.=.
Safety Instructions .......... 2-7
Operating Instrudions
Baking or Roasting ........... 11
Broiling, Broiling Guide ....... t2
Clock a_d Timer . ............ 13
Control I,ockout ............. 13
Convection ............... t6-20
Cookware .................... 9
Oven ................... 10-28
Pro be ...................... t 5
Proofi ng ................... 21
Sabbad_ Feature .............. 28
Self:Clea_ing ............. 23, 24
Special Features ........... 25-27
Sur}i_ce Bmners ............ 8, 9
Thermostat ................. 22
Timed Baki_g & Roasting ...... t4
Care and Cleaning
groileI Pan and (,Hd ......... :,1
Burner Assembly . ........... 29
Burner Grates a_d
o
Center Grate ................ aO
(;o_tI ol Panel ....
............... O,)
oOD
(,lass Cooktop ............ a4, ° r_
Headng Elements ............ oo
99
K_ol)s ..................... 2{}
Lift-Off Door . .............. :,2
Light Bulbs ................. 30
Oxen Floo_ ..................... O,)
Packaging Tape .............. 29
Racks ...................... 31
Storage Drawer . ............. 31
oc
Smf_ces .a2, oo................ O,)
Me l _t o o
Troubleshooting Tips ..... 36-40
Accessories . .................. 45
Consumer Support
():mstH_]er Support .... Back Co_er
Produ(t Registration ....... 41, 42
_Aarrai_tv fbr Customers
ii_ Canada .................. 47
_Aarrantv fbr Customers
ii_ the U.S.A ................. 46
www.geappfiances.ca
Write the model and serial
numbers here:
Model #
Serial #
You can find them on a label
behind the open oven door
on the lower left corner of
the range ti'ame. ....ii
164D4290P324 49-80168 04-03 JR

IMPORTANTSAFETYINFORMATION.
READALLINSTRUCTIONSBEFOREUSING.
AWARNING!
ANTI-TIPDEVICE
,ALLRANGESCAN TIP
INJURY TOPERSONS
COULDRESULT
INSTALLAN_ tiP
DEVICESPACKEDWITH
RANGE
SEEINSTALLATION
INSTRUCtiONS
AWARNING:If the information
in this manual is not followed exactly,
a fire or explosion may result causing
property damage, personal injury
or death.
-- Do not store or use gasoline or other
flammable vapors and liquids in the
vicinity of this or any other appliance.
-WHATTODOIF YOU
SMELLGAS
Do not try to light any appliance.
Do not touch any electrical switch;
do not use any phone in your building.
Immediately call your gas supplier
from aneighbor's phone. Follow the
gas supplier's instructions.
If you cannot reach your gas supplier,
call the fire department.
-- Installation and service must be
performed by aqualified installer,
service agency or the gas supplier.
2

www.GEAppliances.com
WARNING!
Foryour safe_, the information in this manual must be followed to minimize the risk of fire or
explosion, electric shock, or to prevent property damage, personal injury, or loss of life.
ANti-TIPDEVICE
All rangescan tip and injury could result.
Toprevent accidental tipping of the range, attach it to the wall or floor by installing the Anti--tip device
supplied.
If the Anti--tip device supplied with the range does not fit this application, use the universal Anti--tip
device WB2X7909.
Tocheck if the device is installed and engaged properly, remove the storage drawer and inspect the
rear leveling leg. Make sure #fits securely into the slot.
It'VOtl p/til tile range Otlt from tile wall for ally' reason, make sure tile device is properly
engv_ged when you push tile rang_ back agvdnst tile wall. lt'it is not, there is a possible iisk of
tile rang> tipping oxer and causing il_juW if you or a child stand, sit or lean on all open door
Please refer to tile Anti-Tip device information ill this manual. Failure to take tills piecaufion
could result ill tipping of tile rang> and il)jury.
IMPORTANTSAFETYNOtiCE
The California Safe Drinking Water and ToxicEnforcement Act requires the Governor of California to
publish a list of substances known to the state to cause birth defects or other reproductive harm, and
requires businesses to warn customers of potential exposure to such substances.
Gasappliances can cause minor exposure to four of these substances, namely benzene, carbon
monoxide, formaldehyde and soot, caused primarily by the incomplete combustion of natural gas or
LP fuels. Properly adjusted burners, indicated by a bluish rather than a yellow flame, will minimize
incomplete combustion. Exposure to these substances can be minimized by venting with an open
window or using a ventilation fan or hood.
The fiberglass insulation in self-clean ovensgives off a very small amount of carbon monoxide during
the cleaning cycle. Exposure can be minimized by venting with an open window or using a ventilation
fan or hood.
3

IMPORTANTSAFETYINFORMATION.
READALLINSTRUCTIONSBEFOREUSING.
WARNING!
SAFETYPRECAUTIONS
When using electrical appfiances, basic safety precautions should be foflowed, including the
following:
Use this appliance only for its intended
purpose as descrihed m tins _x_nei s
Manual.
Be sure your appliance is properly installed
and grounded hy a qualified technician in
accordance with tile pioxqded installation
instructions.
iiiiiiiiiiii_iii
Be sure all packaging materials are
removed flom the rang_ before operating
it to prevent file or smoke damag_ should
tile i)ackaging material ignite.
Do not leaxe children alone or unattended
where a range is hot or in operation. They
could he selqouslv burned.
Before perfom/ing any service, disconnect
the range power supply at the household
disuibufion panel by removing the fllse or
switching off tile circuit breaken
Hme the installer show yon the location of
the circuit hreaker or fl_se. Mark it for easy
reference.
Do not leme children alone--<hildren
should not he left alone or unattended in
an area where an appliance is in use. They
should nexer he allowed to sit or stand on
any part of tile appliance.
Haxe the installer show you tile location
of the range gas shut_offxahe and how to
shut it off if necessa U.
Ha_e your rang_ installed and properly
grounded hy a qualified installel; in
accordance with the Installation
Instructions. Any adjusm_ent and service
should be perfoi_ned only hy qualified gas
range installers or seiwice mchnicians.
Locate the range out of kitchen traffic path
and out of drafty locations to piexent poor
air circulation.
Do not attempt to repair or replace any
part of your range unless it is specifically
recommended in this manual. All other
service should he refelTed to a qualified
technician.
Be sure your range is con_ecfly adjusmd
hy a qualified seiMce mchnician or installer
for the type of gas (natural or LP) that is
to be used. Your range can he comermd
for use with either type of gas. See tile
Installation Instructions packed with
the rang_.
,& WARNING:>eseadjustments
must be made by a qualified service
technbbn in accordance with the
manufacturer's instructions and aft codes
and requirements of the authority having
jurisdiction. Failure to follow these
instructions could result in serious injury or
property damage. The qualified agency
performing this work assumes
responsibility for the conversion.
4

vvww.GEAppl_nce_com
Kee I) fl_e hood and gTease filmrs clean to
maintain g_od x>ndng and to a_oid gTease
fires.
Teach children not to play with fl_e
controls 05 any other part of the rang_.
Always kee I) dish towels, dish cloths, pot
holders and other linens a safe distance
from your rang>.
Always kee I) wooden and plastic umnsils
and canned food a safe distance flom your
rang_.
Always kee I) combustible wall coxerings,
curtains 05 drapes a safe distance flom
your rang_.
Do not clean the range with flammable or
x_latile cleaning fluids.
Mter prolonged use of a range, high floor
temperatures may result and ma W floor
cox_rings will not withstand this kind of
use. Nex_r install the rang_ over vinyl file
or linoleum that cannot withstand such
type of use. Nexer install it directly ox_r
interior kitchen carpeting.
Avoid scratching tile glass cooktop with
shas]) instruments, 05 with tings and other
jeweh>
Do not allow anyone to climb, stand 05
hang on the oven doos, storag_ drawer 05
cooktop. They could damag> tile rang>
and even tip it o_>l, causing severe
personal i_lju_>
CAUTION:Itemsinteresttochildren
shou/dnotbe storedin cabinetsabovea rangeor
on ttTebacksplashofa range--children climbing
on therangetoreachitemscouldbe seriously
injured.
For your safety, nmer use your appliance
for warming or heating tile room.
Larg_ scratches 05 impacts to glass doors
can lead to broken or shattered glass.
Do not clean file rang_ when tile appliance
is in use.
Never wear loose-fitting 05 hanging
g:_5_nents while using tile appliance.
Be careflfl when reaching for imms stored
in cabinets o_>r tim rang_. Flammable
mamrial could be ig_ited if brought in
contact with flame 05 hot oxen surfaces
and m W cause sex>re bums.
Do not store flammable materials in an
ox>n, a rang> storag> drawer or near a
cooktop.
Do not store or use combustible mamrials,
gasoline or other flammable vapors and
liquids in the vicinity of this or any other
appliance.
Do not let cooking grease 05 other
flammable mamrials accumulate in or
near the rang_.
Do not use wamr on grease fires. Ne_er
pick up a flaming pan. Turn fl_e conuols
off: Smother a flaming pan on a surfi_ce
burner by covering the pan completely
with a well-fitting lid, cookie sheet or fiat
tray. Use a mulfi-pml)ose dt T chemical or
foam-type fire extinguisher
Flaming grease outside a pan can be put
out by covering it Mth baking soda 05,
if available, by using a mulfi-pml)ose dU
chemical or foam-type fire exfinguishen
Flame in die oven can be smothered
completely by closing tile oven door and
tui_ing the control to off 05 by using a
multi-purpose dUchemical 05 foam-[vpe
fire extinguisher.
Let tile burner grates and other surfaces
cool before touching them or leaving
them where children can reach them.
Ne_er block the vents (air opening:s) of
tile range. They provide file air inlet and
outlet flint are necessasw for file rang_ to
operam properly with correct combusuon.
Air opening:s are located at the 5ear of the
cooktop, at the top and bottom of the
oven door, and at the bouom of tile rang>
under the storag> drawer or kick panel.
Do not lift the cooktop. Lifting the
cooktop can lead to damag_ and improper
operation of the rang>.
5
READALLINSTRUCTIONSBEFOREUSING
WARNING!
SURFACEBURNERS
Useproperpan size--avoid pansthat are unstableor easilytipped.Selectcookvvarehavingflat bottoms/arge
enoughto coverburnergrates.Toavoidspi/Iovers,makesurecookvvareis iarge enoughto containthefood
proper/_ Thiswillbot,_save cleaningtimeandprevent hazardousaccumulationsoffood,sinceheavyspattering
or spil!oversleft onrangecan ignite.Usepanswith hand/esthat canbe easfiygraspedand remaincool
Always use d_e LITEposition when igniting
the top 1)urners and make sure the 1)urners
hme ig_ited.
Never lem,e the surface 1)urners unattended
at high flame settings. Boiloxers cause
smoking and greasy spilloxers that may
catch on fire.
Adjust the top 1)urner flame size so it does
not exmnd 1)eyond the edge of the cookware.
Excessive flame is hazardous.
Use only dry pot holders--moist or damp pot
holders on hot surf_ces m W resuh in 1)urns
flom smam. Do not let pot holders come
near open flames when lifting cookware. Do
not use a towel or other 1)ulky cloth in place
of a pot holder:
X_hen using glass cookware, make sure it
is desig_ed for top<_f-r,mge cooking.
To minimize dm possibili_, of 1)urns, ignition
of flammable materials and spillage, mm
cookware handles toward the side or back of
the range without extending over adjacent
l)tlI'IleI's.
Careflflly watch foods 1)eing flied at a high
flame setting.
Ahvays heat fat slowly and watch as it heats.
ff a coml)ination of oils or fhts will be used
in flTing, stir together 1)efore heating or
as f_ltsmeh slowh,
Use a deep f_lt thermometer whenever
possible to prevent oxerheating f_u 1)eyond
the smoking point.
Do not operate the 1)umer wifl_out all 1)urner
parts in place.
17se the least possible amount of _lt for
eft>cdx e shallow or deep-lht fl3,ing. Filling the
pan too fifll of f_t can cause spillovers when
food is added.
Do not use a wok on dm cooking sur£1ce
if the wok has a round metal ring that is
placed o\'er the burner g_'am m support the
wok. This ring acts as a heat u'ap, which mW
damage the 1)urner gi"am and N_rner head.
Also, it m W cm_se the 1)urner m work
improperly. This may came a cad)on
monoxide le\_l abo\_ that allowed 1)ycurient
standards, resulting in a heahh hazard.
Foods for flying should be as dry as possible.
Frost on flozen foods or moisture on flesh
foods can cause hot Pat to 1)ul)l)le up and over
the sides of the pan.
Nexer u}, to move a pan of hot Pat especially
a deep lht flTer. $4hit unol the lht is cool.
Do not leme plastic items on tim cooktop---
they may meh if left too close to the vent.
J J
Kee I) all plastics mvay flom the surPace
l)llI'Ile I'S.
To moid the possibility of a 1)urn ahvavs be
certain that the conuols for all 1)urners are
at the OFFposition and all g_'ates are cool
1)efore attempdng to remove them.
If _ange is located near a window, do not
hang long curtains that could blow over the
surface 1)urners and create a fire hazard.
If you smell gas, turn off the g_s to the range
and call a qualified service technician. Nmer
use an open flame to locate a leak.
Ahvays turn the stuJ_ce burner conuols off
1)efore removing cookware.
Do not leave any imms on tim cooktop. The
hot air flom the \ent may ignim flammable
items and will increase pressure in closed
containers, which may cm_se them to burst.
X_qmn preparing flaming foods under dm
hood, turn the f_m on.
c

vvww.GEAppliances.com
COOKMEATANDPOULTRYTHOROUGHLY...
Cookmeat andpoultry thoreughly--meat toat least an INTERNALtemperatureof 160°Fandpoultry
to at leastan INTERNALtemperatureof 180°ECookingto thesetemperaturesusuallyprotectsagainst
foodboroeillness.
WARNING!
OVEN
Stand awayfrom the range when opening the oven door. Hot air or steam which escapes can cause
bums to hands, face and/or eyes.
Do not heat unopened food containers.
Pressure could build up and tile container
could burst, causing an inju U.
Kee I) the oxen xent unobstructed.
_4Kee I) tile oxen flee from grease buildup.
Place the oxen rack in the desired position
while the oxen is cool. If racks must be
handled when hot, do not let pot holder
contact the heating elements.
V_]mn using cooking or roasting bags
ira the oxen, tbllow the nmnuthctmer's
directions.
Pulling out the rack to the stop-lock is a
convenience in lifting heax T foods. It is also
a precaution against bnYlls fron] touching
hot stirfaces of the door or oxen walls.
Do not use the oven to d_T newspapers.
If oxerheated, they can catch on fire.
Do not use the oxen for a storage area.
Items stored ira an oxen can ig_fite.
Do not leme paper products, cooking
utensils or food ira the oxen when not
ira rise.
Do not use aluminum foil to line oxen
bottoms, except as suggested in this
manual, hnproper installation of
alunainnm foil may restflt ira a risk
of electric shock or fire.
Make sure the broiler pan is ira place
correcdv to reduce the possibiliw of
grease fires.
ffvou should hme a gTease fire ira the
broiler pan, press the CLEAR/OFFpadand
kee I) the oxen door closed to contain fire
until it bums ont.
SELF-CLEANINGOVEN
Do not use oven cleaners. No commercial oven cleaner or oven liner protective coating of any kind
should be used in or around any part of the oven. Residue from oven cleaners will damage the inside
of the oven when the self-clean cycle is used.
iiiiiiiiiiii_iii
Do not clean flae door gasket. The door
g_asket is essential for a good seal. Care
should be token not to rub, damag_ or
mow the gasket.
Be%re self-cleaning the oven, remoxe
the racks, broiler pan, grid and other
cookwa re.
If the self-cleaning mode malflmctions,
turn the oxen off and disconnect the
power supply. Hme it serviced by a
qualified technician.
Clean only parts listed ira this ()wner's
Manual.
Be sure to wipe up excess spillage be%re
starting the seltMeaning operation.
READANDFOLLOWTHISSAFETY/NFORMATIONCAREFULLY.
SAVETHESEINSTRUCTIONS 7

Usingthegas surfaceburners.
Throughout this manual, features and appearance may vary from your model.
\
Push the control knob in and turn it
to the LITEposifion.
How to Light a Gas Surface Burner
Push the control knob in and turn it to
tile LITE l)osition.
You will hear a little clicking noise---
tile sound of tile electric soark i,mifin,_
the burnel:
Mter the flame lights, mrn the knob to
ac!iust the flmne size, If the knob stays at
£1TE, it will continue to click,
When one burner is turned to LITE,all
the burne_ spark. Do not attempt to
disassemble or clean around any burner
while another burner is on. An electric
shock may result, which could cause you
to knock ()vet" hot cookware.
Sealed Gas Burners
The smaller burner (right rear position)
will give the best simmer results fl)r
delicate fi)ods, Stlch as satlces or fi)ods
which need to cook over low heat tot a
long time. It can be turned down to a ve_'
low setting.
The largest burners are higher powered
than the othe_ and will bring liquids to
a boil quicke_:
How to Select Flame Size
For safe handling of cookware, never let the flames
extend up the sides of the cookware.
_'m'h the flame, not the knob, as you
reduce heat. The flame size on a gas
burner should match the cookware
VOII aI'e rising.
An) flame larger than the bottom of the
cookware is wasted and (mix serx es to heat
the handle.
In Case of Power Failure
In case ot a power tifilure, you can light
the gas surli_ce burne_ on your range
with a match. Hold a lit match to the
burner, then push in and turn the control
knob to the LifEposition. Use extreme
caution when lighting burnexs this way.
Surfi_ce burners in use when an electrical
power fifilure occm_ will confint/e to
operate noHnallv.,
Before Lighting a Gas Burner
Make sure all grates on the range are in
place heft)re using any burner
After Lighting a Gas Burner
Do not operate the burner for an
extended period of time without
cookware on the grate. The finish on
the grate may chip without cookware
to absorb the heat.
Be sure the 1)urnet5 and grates are
cool heft)re you place your hand,
a pot holder; cleaning cloths or
other materials on them.

www.GEAppliances.com
Top-of-Range Cookware
Aluminum: Medium-weight cookware is
recommended because it heats quickly
and evenly: Most fi)ods brown evenly in
an ahmlinum skillet. Use saucepans with
tight-fitting lids when cooking with
IllinillltlI// alllO/ints ot watei;
Cast-Iron: If heated slowly, most skillets
will give satisti_ctmy results.
Enamelware: Under some conditions,
tile enalllel Of SOllle (ookware Ill}IV
Illelt. Follow cookware Ill_lnDIilCttlI'eI"S
recommendations fl)r cooking methods.
Glass'. There are two t)pes of glass
cookware--those tot oven use only
and those fin" tel>el:range cooking
(saucepans, coffee and teapots).
Glass conducts heat very slowly.
Heatproof Glass Ceramic: Can be used
for either sui_hce or oven cooking. It
con(hlctS heat very sh)wlv and cools velw
slowl> Check cooi_wai'e inanufilcturer's
directions to be sure it can be used on gas
ranges.
Stainless Steel: This metal alone has
poor heating prope_*ies and is usually
combined with coppe_; ahmfinum
or other metals fin" improved heat
distribution. Combination metal skillets
usually work safisfi_ctofilv if they are used
with medium heat as the manufi_ctm'er
i'ecOlillilends,
Stove TopGrills
Do not use stove top grills on your sealed
gas burnex_. If' you use tile stove top grill
on tile sealed gas burnex; it will cause
incomplete combustion and can result
in eN)osure to carbon monoxide levels
above allowable cmTent standards.
Thiscanbehazardoustoyourhealth.
Use afiat-bottomed wok.
t
t
Wok This Way
Werecommendthat you usea 14-inchorsmaller
flat-bottomed wok.Make surethe wok bottom
sits flat on thegrate. Theyareavailableat your
localretail store.
OnE a fiat-bottomed wok should be used.
Do not use a fiat-bottomed wok on a
support ring. Placing tile i'iilg over tile
burner or grate may cause tile burner
to work improperl> resulting in carbon
monoxide levels above allowable
standards. This could be dangerous to
veto" health.

Usingtheovencontrols.
(Throughout this manual, features and appearance may vary from your model.)
Features and appearance may var_A
--0
10
OvenControl Clockand TimerFeaturesandSettings
BAKEPad
Touch to select the bake fimction. 0VENLIGHTON/OFFPad
Touch to turn tile men light on or off.
BROILHI/LOPad
Touch to select tile broil fimcdon. Touch once for 0
high broil and twice for low broil.
CONVECTIONBAKEPad
Touch to select baking with tile con_ection O
flmction. Touch once ior multi-rack com'ection
baking and twice for 1-rack comection baking.
CONVECTIONROASTPad
Touch to select roasting _ith tile (omection
fimction.
PROOFPad
Totlch to select a "w;:|J_l/en'_,ironn/ent t|selill tot
rising.,yeast-leavened,..... [)roducts..
STARTPad
Mtlst be touched to start any cooking or
cleaning fimction.
Display
Sho_:_ tile time of da}, o_en temperature,
\_hether the o_en is ill the bake, broil or
selfkleaning mode and the times set for the
timer or automatic o_en operations.
ff "F-andanumberorletter"flashinthedisplayandthe
ovencontrolsignals,thisindicatesa functionerrorcode.
TouchtheCLEAR/OFFpad.AIIowtheoventocoolforonehour
Puttheovenbackintooperation.Ifthefunctionerrorcoderepeats,
disconnectthepowertotheovenandcallforservice.
Ifyourovenwassetforatimedovenoperationanda
poweroutageoccurred,theclockandallprogrammed
functionsmustbereset.
Thetimeofdaywill flashin thedisplaywhen therehas
beenapoweroutage.
SELFCLEANLO/STDPad
Touch to select selfcleaning fimction. See tile
Usingthe self-cleaningoven section.
0
0
@
DELAYSTARTPad
Use along with COOKTIMEor SELFCLEAN
LO/STOpads to set tile ()\'ell to start and stop
automaticallt at a time you set.
COOKTIMEPad
Touch and then touch the ntmflx_r pads to set
the _ll//OIlI/t of time YOU wail[ vot/r food to cook.
The o',en will shut offwhen the cooking time
has YtlIl out.
CLEAR/OFFPad
Touch to cancel ALL()\'ell operations except tile
clock, timer and control lockout.
CLOCKPad
Touch befbl_ setting the clock.
Number Pads
Else to set any thn(fion reqtfiring ntm-lbel_
such as tile time of(lay on tile clock, die fimel;
tile oven tempemtm'e, the internal food
tempemtm'e, the start time and length of
operation ibr timed baking and self cleaning.
KITCHENTIMERON/OFFPad
Touch to select the timer teatul_.
PROBEPad
Touch \_hen using tile probe to cook ti)o(t.
WARMPad
Touch to kee I) cooked tbods _mn. See tile
Howto Set the OvenforWarmingsection.
CONTROLLOCKOUT
Tile control lockout is 9and O.Touch and hold
tile gand 0pads at tile same time tor 24seconds.

Usingthe oven. vvww.GEAppliances.com
Toavoid possible bums, place the racks in the desired position before you turn the oven on.
Theoven has 7rack positions.
Before you begin...
Tile racks have stops, so that when placed
correcflv Oil tile supports, they will stop
befi)re conling coinpletely ()/it, and will
not tilt.
_A]/en placing and reinoving cookware,
pull tile rack ()/It until it stops.
On sonle n/odels, tile bake heating
eleillent is tinder tile oven flooi: Do not
place fi)ods on tile ()veil bottoil/ fi)i"
cooking.
Toremove a rack, pull it toward you,
tilt tile ti'ont end up and pull it ()/It.
Toreplace, place tile end of tile rack
(stop-loci<s) on tile support, tilt up tile
fl'ont and push the rack in.
CAUTION:Whenyouareusingthe
rackin the lowest position(,4),youw#l needto
usecautionwhen pulling the rackout We
recommendthat youpuffthe rackout several
inchesandthen,using two pot holders,puff the
rackout byho/ding the sidesof it Therackis low
andyou couldbe burnedif youplace yourhand in
the middleof therackand pu//a// the way out Be
verycarefulnot to burnyourhandon the door
when using therack in the/owestposition (A).
How to Set the Oven for Baking or Roasting
[] Touch tile BAKE pad.
[] Touch tile nun/her pads to set
tile desired ten/perature.
[] Touch tile STARTpad.
[] Check filed fin" doneness at
n/ininluin tilne on recipe. Cook
longer if necessai 7.
[] Touch tile CLEAR/OFFpad when
cooking, is conll)lete.
TypeofFood Rack Position
Frozenpies(oncookiesheet) CorD
Angelfoodcake A
Bundtorpoundcakes BorC
Biscuits,muffins,brownies, CorD
cookies,cupcakes,
layercakes,pies
Casseroles CorD
Turkey A
NOTE:A coolingfanwill automaticallyturnon
andoff tocoolinternalparts.Thisisnormal,and
thefanmaycontinuetorunevenaftertheoven
inturnedoK
If baking fi)ur cake layers at file same time,
place t_) layeI_ on Iack B and two layers Oil
Iack D, Stagger i/mlS on the iack so one is
not direct]} aboxe the othei:
Donotplacefoodsdirectlyon the
ovenfleet
Preheating and Pan Placement
Preheat tile oven if tile recipe calls fi)r it.
Preheating is necessai y fi)r good results
when baking cakes, cookies, pasti y and
breads.
Topreheat,set theovenat the correcttemperature.
Thecontrol wi// beepwhen the oven/s preheated
and the display w#/show yourset temperature.
Thiswi// take approximately15-20 minutes.
Baking results Mll be better if baking
pans are centered in tile oven as nmch as
possible. If baking with inore than one
pan, place tile pans so each has at least 1"
to 1½" of air space around it.
Cut slits in the foil just like the grid.
Aluminum Foil
'_i)l* Gm I*se a]umhmm %Jl to ]h_e the
broiler [xm amid broiler grid. H(me_ e_;
you midst todd the Iti)i] tightly to the grid
am_(] clot slits h_ it,jl_st like the grid.
_'_thol_t the slits, the ti)i] will pre_ el_t ti_t
mM mea@dces from (h:dMm_g hm) the
broiler [:xm. Thejldces could become
hot e_ol_gh to catch (m fire. If v(}u
do m_()t cut the slits, yol_ are esse_tia]Iy
fl')_m_g, m_otbroi]im_g.
Donot usealuminumre#on thebottom of
the oven.
Never el_th'elv cover a _v_c];_rHt])
ah*mhmm fi)iL T]lis _d]] distm'b the heat
circ_dati(m a_(] res_dt h_ poor baki_g
A smaller sheet o{ fbi] may be _se(] to
catc]l a spill()', er by p]a d _g it (m a1()_ er
rack severM h_ches be]o_ t]_e %od. //

Usingtheoven.
If yourrangeisconnectedto
208 volts,rare steaksmay be
broiled bypreheating the broiler
and positionl)_gthe oven rackone
positionhigher
How to Set the Oven for Broiling
Leavethedooropento thebroil stopposition.
Thedoorstaysopenbyitself, yet theproper
temperature is maintained in the oven.
IMPORTANT'. Toavolcl possib/e burns, place the
shelves in the desired position before you turn the
oven oR.
NOTE:Foodcanbe broiledwith thedoor
dosed, but it may not brown as well because
the oven heating element wifl cycle on and off.
[] Place the meat or fish on the broiler
grid in the broiler pan.
[] Follow suggested rack positions in
the Broiling Guide.
[] Touch the BROILHI/LO pad once for
HI Broil
To change to LO Broil, touch the
BROILHI/LO pad again.
Use LOBroil to cook foods such as
poultry or thick cuts of meat thoroughly
without ove_q)rowning them.
[] Touch the START pad.
[] XAq_enbroiling is finished, touch the
CLEAR/OFFpad.
NOTE:Broil wi// not work if the temperature
probeis pluggedin.
Broiling Guide
The size, weight, thickness,
starting temperature Food
and yotlr preference GroundBeef
of doneness will altect Well Done
broiling times. This guide
is based on meats at Beef Steaks
Raret
reli'igera tot temperature. Medium
Well Done
4TIw {S. l)@a_lm_l o/
D@_llat; &*l )oz* *ho*zldk_ow lh_zl
:_M6_gil lo o_d3140<12mem**
ma), su:'_:iv(,." (.So_:_:(,:S(_(, l'_,_>d
Boot:. };n_ Kih:he_ Gttide. (iSI}_
l'eza ]m_e 19?,'5.)
Rarer
Medium
Well Done
Chicken
LobsterTails
Fish Fillets
Ham Slices
{precooked}
Pork Chops
Well Done
LambChops
Medium
Well Done
Medium
Well Done
SalmonSteaks
/2
Quantityand/
orThickness
1 lb.(4 patties}
1/2to 3/4" thick
1" thick
1to 11/LIbs.
17/' thick
2to 27zIbs.
1whole cut up
2to 27_Ibs.,
split lengthwise
2Breasts
2-4
10to 12oz.each
1/4to I/2" thick
1/2" thick
2(1/2" thick}
2(1" thick)about 1 lb.
2{1" thick)about 10
to 12oz.
1
2(1_" thick) about 1lb.
2(1" thick)
4(1" thick)about 1 lb.
Rack
Position
F
E
E
D
D
D
C
E
E
E
E
D
D
FirstSide
Time(min,)
9
11
7
9
11
14
18
22
25
25
18 20
10
15
8
10
14
17
10
12
Second Side
Time (rain.)
6
10
5
67
89
11
1_16
20
10
10 15
Do not
turll
oveE
10
15
78
9 10
12
12 14
78
10
Comments
Space evenly. Up to 8
patties take about the
same time.
Steakslessthan1"
thickcookthrough
beforebrowning.Pan
fryingisrecommended.
Slashfat.
Broilskin-side-down
first.
Cutthroughbackof
shell.Spreadopen.
Brushwith melted
butterbeforebroiling
andafter half of
broilingtime.
Handleandturnvery
carefully.Brushwith
lemonbutterbefore
andduring cooking,
if desired.
Increasetime 5to 10
minutespersidefor
11//'thick or home-
curedham.
Slashfat.
Slashfat.
Grease pan. Brush
steaks witl_ melted
butter.

Usingthe clock, timerandcontrollockout, vvvvw.GEAppliances.com
Make sure the clock is set to the
correct time of da,A
ToSet the Clock
The clock must be set to tile correct time
of dm fin" tile automatic o',en tinting
flmctions to work properl). Tile time of
da) cannot be changed dining a timed
baking or self=cleaning cycle,
[] Touch tile CLOCK pad.
[] Touch tile number pads.
[] Touch the START pad.
[]
Thetimer is a mflTutetimer onl_
Thetimer does not control oven
operations. The maximum setting on
the timer is 9hours and 59mhTutes.
ToSet the Timer
[]
Touch tile KITCHEN TIMER
ON/OFF pad.
Touch tile nmnber pads tmfil tile
aiilOtlnt of time yell want shows
in tile displa): For example, to set
2 hom_ and 45 minutes, much 2, 4
and 5in that order: If you make a
mistake touch tile KITCHEN TIMER
ON/OFF pad and begin again.
Touch tile STARTpad.
After touching the STARTpad, SET disappears,
this tells you the tl_neis counting down,although
the displaydoesnot changeuntil one minute has
passed Secondswi// not be shown in the display
until the/astmlnute iscounting down.
[] _hen tile timer reaches :00, tile
control will beep 3 times followed
by one beep eve_T 6 seconds tmtil
tile KITCHENTIMERON/OFFpad
is touched.
The&second tonecanbe cance/edby fo//owlbg
the stepsin the Special featuresof youroven
controlsection under Tonesat the Endofa
TimedCycle.
To Reset the Timer
If tile display is st.ill shoMng tile time
remaining, you may change it by
touching tile KITCHEN TIMER ON/OFF pad,
then touch tile number pads tmtil tile
time w_u want appea_ in tile displa>
If tile remaining time is not in tile display
(clock, delay start or cooking time are in
tile display), recall tile remaining time by
touching tile KITCHEN TIMER ON/OFF pad
and then touching tile ntllllber pads to
enter tile new tillle vi)[i iV_lllt,
ToCancel the Timer
Touch tile KITCHEN TIMER ON/OFF
pad twice.
LOCK/UNLOCK HOLD 3 SECONDS
Control Lockout
Yourcontrol will allow you tolock out the touch
padsso theycannot beactivated when pressed
To lock/ mflock tile controls:
[] Touch the 9and 0pads at tile same
time fin 3 seconds, tmtil tile displa)
sho_vs LOCON.
[] To unlock tile control, touch tile 9
and 0pads at tile same time fin" 3
seconds, until tile display shows
LOCOFF.
When this teatm'e is on and tile touch
pads are touched, tile control will beep
and tile display will show LOC ON.
Thecontrol/ockoutmode affectsa// touch
pads.No touch padswi// work when this
featureis activated
Theadjustment will be retained in memory
after apower fai/ure.
13

Usingthetimedbakingand mastingfeatures.
NOTE."Foods that sped easily--such as milk, eggs, fish, stuffings, poultry and pork--should not be allowed to sit for
more than 1hour before or after cooking. Room temperature promotes the growth of harmful bacteria. Be sure that
the oven light is off because heat from the bulb will speed harmful bacteria growth.
How to Set an Immediate Start and Automatic Stop
The oven wi// turn on immed&te/y and cook for The displa) will show the changing
aselectedlengthof time.At theendofthe
cookingtimetheovenwill turnoff automatically
[] Touch the BAKE pad.
[] Using the munber pads, enter the
desired temperature.
[] Touch the COOKTIMEpad.
NOTE:If yourreciperequkespreheatingyou
mayneedtoaddadditionaltimetothelengthof
thecookingrime.
[] Using the munl)er pads, enter the
desired baking time. Tile oxen
temi)erature and the cooking time
that wm entered will be displayed.
temperature (starting at 100°F) and the
cooking time. The display starts changing
once the temperature reaches 100°E
The oven will continue to cook fi)r the
progrannned amount of time, then shut
offautonmfically, unless the WARM or
tile Cook and Hold teattlI'e was set.
Depending {m your model, see the How
to Set the Oven for Warmingsection or the
Spec&/ features of your oven control section.
Tou{'h the CLEAR/OFFpad to {'lear the
display:
[] Touch the START pad.
°kp2/
How to Set a Delayed Start and Automatic Stop
Youcanset the ovencontrol to de&y-start the
oven,cookfor a specihclength of time andthen
turnoff automatically
Make sure the clock shows the correct
time of day:
If you would like to check tile times you
have set, touch the DELAYSTARTpad to
check the start time you have set or touch
the COOK TIME pad to check the length
of cooking time you have set.
[] Touch the BAKEpad.
[] Using the nmnber pads, enter the
desired temperature.
[] Touch the COOKTIMEpad.
X'_hen the oven turns on at the time of
da) you haxe set, the displa)will show the
changim,, _ temi)erature (startim,. _ at 100°F)
and the cooking iUne. The displa)starts
changing once the temI)eramre reaches
IO0°F,
NOTE:If yourreciperequkespreheatingyou
mayneedtoaddadditionaltimetothelengthof
thecookingrime.
[] Using the munber pads, enter the
desired baking time.
[] Touch the DELAYSTART pad.
[] Using tile munber pads, enter the
time of {la))ou want the oxen to
ttlI'n on and start co(}king,
The oven will continue to cook fi)r the
progrannned amount of fin]e, then shut
off autonmtically, unless the _,_;M_M or
tile Cook and Hold teattue was set.
Depending on your model, see the How to
Set the Ovenfor Warmingsection or tile
Special featuresof yourovencontro/secdon.
Tou{'h the CLEAR/OFFpad to {'lear the
display:
[] Touch the STARTpad.
NOTE:An attention tonewi// soundif youare
using tlYnedbakingand do not touchthe START
pad after entering the bakingtemperature.
/4

Using the probe. (onsome models) www.GEAppliances.com
For many foods, especially roasts and poultry, internal food temperature is the best test for doneness. The
temperature probe takes the guesswork out of roasting by cooking foods to the exact aloneness you want.
Thetemperature probe has a
skewer-like probe at one end and a
plug at the other end that goes into
the outlet h7the oven.
Use of probes other than the one
proxided with this product ma) result in
dalila(re_ to tile probe or oxen control.
Use the handles of the probe and plug
when inserting and remoxim, them fl'om
the toed and outlet.
Toavoiddamag/bgyourprobe,donotuse
tongstopuffonthecamewhenremov/bgit
Toavoidbreakingtheprobe,makesurefood
iscompletelydefrostedbeforeinserting.
:_Topreventpossibleburns,donotunplugthe
probefromtheoutletunt/7theovenhas
cooler_
C b!e
P,0,
Neverleave yourprobe/bside the ovenduring
a self-clean!bycycle.
Donot store the probe inthe oven.
_Mter preparing the meat and placing it
on a trivet or on the broiler pan grid,
tOllow these directions for proper probe
placement,
Insert the probe completely into the
]neat. It should not touch bone, fat or
gristle.
For roasts Mth no bone, insert the probe
into the meatiest part of the roast. For
bone-in ham or lamb, insert the probe
into the center of the l_m'est large muscle.
Inse_t the probe into the center of dishes
Stlch _lS IIleat loaf c,r casseroles.
Insert the probe into the meatiest part of
the im]er thigh fl'om below and parallel
to the leg era whole tin'key.
@@CX)@C
C@@@@
@
How to Set the Oven For Roasting When Using the Probe (onsomemodels)
[]
[] h_sert the probe im_t{_the fbc,d.
Ph*g die probe h_to d_e ol*tlet ]m_d_e
ove_. Make slate it's Ix_shed all the
way im Close the ove_ doox: Make
sure the probe cable is m_ottol*chh_g
the broil eleme]_t,
[] Touch the PROBEpad.
[] Touch the mm]l]er pads to set the
desired i_]te]'m_] food or meat
tempe]_ture. The maxil))um
im_term_] temperature [or the food
that xou cm_ set is 200"K
[] Touch the BAKEpad.
] Touch d_e mm_ber pads u> set d_e
desired o','e_) tempe]:ma'e.
[] Touch d_e STARTpad.
Thedisplaywi//f/ashif Neprobeis/?sorted
bto theoutbt andyouhavenotsetaprobe
temperatureandtouchedbe STARTpad
,Mter t]]e i_ten]al tern peramre <>fthe
food reaches _00°F the cham_im_
i_term_] tempe]wtm'e wi]] be S]_(}_r]_ H_
[] X'Vhe]) d)e i_)term_] temperature of
t]]e {k >od tea c]]es t]? e _?_lm be1" _ol l
])ave se[_ the [)robe a_)d {lie o\ el)
[_11"_) (>f} a_)d [lie ove]] CO])[I'(>I
signals, To stop the signal to_mh the
CLEAR/OFFpad. [_se ho_ pads to
rem_>_e the probe {_'om the {ood,
Do _ot _se to_]gs to [:m]] o_ it--they
might damage it,
To chm_ge the ove_ tempe_vm*re dmJ_*g
die Roast c}v]e, tollch die 8AKEpad a_d
the_] the _Hmber [>ads to set the _e*,_
tempel=ffm'e.
?: If theprobe isremovedfrom the foodbefore
the fba/ temperatureisreached,a tonewi//
soundand the displaywill flash until theprobe
isremoved from the oven.
Youcan use the timer even though you
cannot use timed oven operations while
using the probe. 15

Usingtheconvectionoven.
ConvectionFan
In a convection oven,a fan circulates hot air
over, under andaround the food
This circulating hot ak is evenly distributed
throughout the oven cavit_ As a result, foods
are evenly cooked and browned--often in less
time with convection heat
NOTE:The convection tim will cycle on
and off while cooking to best distribute
hot air in the oven.
Tile convection oven lilil shtlts off when
tile oven door is opened. 00 NOTleave
tile door open for long periods of time
while using convection cooking or you
may sho_Len tile life of tile convection
heating element.
1-Rack Convection Baking
Tile convection tim drculates tile heated
air evenly over and arotmd tile food
using tile bake and broil elements.
WhenconvectionbakingwithonlyI rack,
useCONVECTIONBAKE1RACKor
CONVECTIONBAKE(dependingonmodel)and
forbestresultsplacetherackonshelfCorDat
thecenteroftheoven.Cooktimesmaydecrease,
sofoodshouldbecheckedear/larthanpackage
directionstomakesurethatit doesnotovercook.
Idealforevenlybrownedbakedfoodscooked
on I rackandforlargefoods.Additionally,
sometimesavingsmaybenoticed
Goodresultswithcookies,biscuits,muffins,
brownies,cupcakes,creampuffs,sweetrolls,
angelfoodcakeandbreacL
Multi-rack position.
Multi-Rack Convection Baking
Because heated air is circulated evenly
throughout tile oven, fi)ods can be
baked with excellent results using
multiple racks.
Tile amount of tinle required fi)r
multi-rock baking may increase slightly
for some tOo(_% but overall time is saved
beGluse two to three tilnes as illtlch fi)od
is cooked at once. Cookies, inttflins,
biscuits, and other quick breads give
good results with multi-rock baking.
To cook fi,od on i/loi'e than one rack in
convection bake, use CONVECT/0N BAKE
MULTI or CONVECTION BAKE(depending
on model).
\,_l/ell baking on 3 racks, place one
rock in the second (B) position, one
in the flmrth (D) position and one in
the sixth (F) position. If pans will not
fit, use rack positions B, D and F
Adapting Recipes...
You can use yore" fi_\'o_ite recipes in tile
convection ()veil.
\'\lien convection baking, tile Auto
Recipe" Conversion featm'e automatically
reduces tile set regular baking
temperature by the recommended 25°E
See Auto Recipe ''_Conversion in tile
Special Features section.
Usepan size recommended
Somepackageinstructionsfor frozen
casserolesor main disheshave been
developedusing commercialconvection ovens.
Forbest results in this oven,preheat the oven
andusethe temperatureon thepackage.
16

vvww.GEAppliances.com
Boastingrack
Grid
Broilerpan
Convection Roast
Goodfor large tendercutsof meat, uncovered
The convection tim circulates tim heated
air evenly over and around tim food.
Meat and poultI T are browned on all
sides as if tile)' were cooked on a
rotisserie. Lrsing the roasting rack
provided, heated air will be drculated
ovei; under and ar(iund the filed being
roasted. The heated air seals in juices
quickly for a moist and milder product
while, at the sanle tiine, creating a rich
golden brown exteiioi:
_,_l_ei1w)u are convection roasting it is
inil)ortant that you rise the broiler pan
and grid and the spedal roasting rack fl)I"
best convection roasting results. The pan
is used to catch grease spills and the grid
is used to i)revent grease spattei_, while
the rack alh)ws the heated air m circulate
under the nleat and increase browning
Oil the undei_ide of the nleat or poultry:
Place the oven rack in the position
that centei_ the food between the top
and bottoill ()t the ()veil.
Place tim grid (In the broiler I)an
and put the roasting rack over thenl,
nlaking sure the posts Oil the roasting
rack fit into tim boles in broiler pan.
Place the nieat on the roasting rack.
When baking cookies, you will
get the best results ff you use a
flat cookie sheet instead of a
pan with low side&
Cookware for Convection Cooking
gefi)re using your convection oven,
check to see if your cookware leaves
rooin fi)r air d_'culafion in tim ()veil.
If you are baking with several pans, leave
silence between tbenl. Mso, be sure the
pans do not touch each other or the
walls ot the ()veil.
Paper and Plastic
Heat-resistant paper and plastic
containei_ that are reconlInended for
use in regular baking can also be used
for convection baking, but should not
be used at teinl)eratuies higher than
the teinl)erature reconlnlended by the
cookware ii/antt[ilCtui'ei: Plastic cookware
that is beat-resistant to teInl)eratures oI
400°F can also be used.
Metal and Glass
Any type of cookwai'e will work in your
convection oven, Howevei; Illetal liens
heat the fi_stest and are reconinlended
for convection baking.
Darkenedor matte-finishedpans will bake
faster thanshinypans.
Glassor ceramlcpanscookmore s/ow/jz
For recipes like ovenq)aked chicken,
use a pan with h)w sides. Hot air cannot
dIvulate well around food in a pan with
high sides.
CONVECTION
taepen_g 0tl n0aen
How mSet the Oven for Convection Baking or Roasting
[] Touch the CONVECTION BAKE
MULTI/1 RACK pad once
(CONVECTION BAKEMULTI mode)
ti)r nI ulti-rack convection baking.
This nIode is used fi)r cooking flied
iteIns on inoi'e than one rack (i.e., 2,
3 or nlore racks) at the same time in
convection bake. See Multi-Rack
Baking section for inore
inti)ii/lation.
T()uch tile CONVECTIONBAKEMULTI/
I RACK pad twice (CONVECTIONBAKE
I RACKinode) fi)i" one rack
COilVeCtk)nbaking. This Inode is used
fi)I"cooking fbod iteIns on (>Ill) one
rack in convection bake.
NOTE: On seine Inodels, there is ()Ill)'
a CONVECTION BAKEpad which
_)i'ks fbr both one-rock and nmlti-
rack convection baking.
Touch the CONVECTIONROAST pad
fi)r convection roasting.
[] Touch the nuinl)er pads to set the
desired oxen tenil)erature.
[] Touch the STARTpad.
To change tim oven teini)erature, touch
tile CONVECTION BAKEMULTI/1 RACK,
CONVECTION BAKE (depending on
nlodel) or CONVECTION ROASTpad and
then tile nunlber pads to set the new
teinl)erature.
\A]_eI1 the oven starts to beat, the
changing tenii)erature, starting at 100°g
will be displayed. When oven reaches the
tenil)erature you set, 3 beeps will sound.
[] Touch CLEAR/OFFpad when
finished.
Youwillheara fanwh/iecookingwith
convection.Thefanwillstopwhenthedoor if
opened,buttheheatwillnotturnoK
Youmayheartheovencrickingdunbg
baking.Thisisnormal 17

Usingthe timedfeaturesforconvectioncooking.
Youwill hear a fan while cooking with these features. The fan will stop when the door& opened, butthe heat
will not turn off.
NOTE:Foods that spoil easily--such as milk, eggs, fish, stuffings, poultry and pork--should not be aflowed to
s# for more than 1hour before or after cooking. Room temperature promotes the growth of harmful bacteria.
Be sure that the oven light is off because heat from the bulb will speed harmful bacteria growth.
CONVECTIOI_
laepending0[7moaeu
How to Set an Immediate Start and Automatic Stop
Theovenwilf turnon immediate/)/andcookfor a
selectedlengthof time.At theendof thecooking
time,theovenwill turnoffautomatically
Make sure tile clock sho_,_:stile correct time
of day.
[] Touch the CONVECTIONBAKE
MULTI/1 RACK pad once
(CONVECTION BAKEMULTI mode)
for m ulti-rack convection baking.
Tiffs mode is used for cooking ti)od
items (m more than (me rack (i.e., 2,
3 or more racLs) at the same dine ill
convection bake. See Multi-Rack
Baking section for more inlbmlation.
Touch the CONVECTIONBAKEMULTI/
I RACKpad twice (CONVECTIONBAKE
I RACKmode) li>r one rack
c()m'ection baking. This mode is used
ti)r cooking ti)od items on onl) one
lack ill convection bake.
NOTE:On some models, there is onl)
a CONVECTION BAKEpad which
works for both one-rack and m ulti-
rack convection baking.
Touch the CONVECTION ROAST pad
tor convection roasting.
[] Touch the number pads to set the
desired oxen temperatm'e.
[] Touch tile COOKTIME pad.
NOTE:ffyourreciperequirespreheating,youmay
needtoaddaflfltiona/timeto thelengthof the
cookingtime.
[] Touch the number pads to set tile
desired length of cooking time. The
mininmna cooking dine you call set
is 1 minute. Tile oven tempeIatm'e
that you set and the cooking time that
?<m enmred will be ill the display.
[] Touch tile STARTpad.
The displa} will show the changing
mmperature (starting at 100°F) and the
cooking dine. The displa} starts changing
once the temperature reaches 100°E
The oxen will continue to cook ti)r the
progTammed amount of time, then shut
offautomatically, unless the WARM or
the Cook and Hold feature was set.
Depending on your model, see the How to
Set the Ovenfor Warmingsection or the
Spec&lfeaturesof yourovencontrolsection.
[] Touch tile CLEAR/OFFpadto clear
the displa) if necessaD'. Remo_e
the ti)od fl'onl tile ()_en, RemembeI;
even thotlgh the oven ttlrns Off
autonaafically, ti)od left ill tile oven
will continue cooking after the oxen
turns ale

vvww.GEAppliances.com
CONVECTION
(dependingonmooeu
How to Set a Delayed Start and Automatic Stop
Youcansettheovencontroltodelay-sta_theoven,
cookfora specificlengthof timeandthenturnoff
automatically
Make sure die clock sho_v:sfile correct thne
of day,
[] Touch tile CONVECTIONBAKE
MULTI/I RACK pad once
(CONVECTION BAKEMULTI mode)
for multi-rack convection baking.
This mode is used tk)i"cooking food
items on more than one rack (i.e., 2,
3 or more racks) at tile same time in
convection bake. See Multi-Rack
Baking section for more infimnafion.
Touch tile CONVECTIONBAKEMULTI/
I RACKpad t_dce (CONVECTIONBAKE
I RACKmode) )i)r one rack
COIl\rect]oI1 baking. This mode is used
fi)r cooking fi)od items on on])one
rack in convection bake,
NOTE:(In some models, there is on b
aCONVECTION BAKEpad which
wor]_ for both one-rack and m ulti-
rack convection baking.
Touch tile CONVECT/ON ROAST pad
Jor ('on;'e('tion roasting.
] Touch tile number pads to set tile
desired oxen temperature,
[] Touch tile COOKTIME pad.
NOTE"Ifyourreciperequirespreheatingyoumay
needtoadd addifionaltime tothe lengthof the
cookingtime.
[] Touch tile number pads to set tile
desired cooking time,
[] Touch tile DELAYSTARTpad,
[] Touch tile number pads to set tile
time of da} }ou want tile oxen to turn
on and start cooking,
ffj/ouwouldliketo&eckthetimesyouhaveset,
touchtheDELAYSTARTpadtocheckthestarttime
youhaveset,ortouchtheCOOKTIMEpaflto
checkthelengthofcookingtimeyouhaveset.
[] Touch tile STARTpad,
NOTE"An attentiontonewill soundif youare
usingtimedbakingorroastingand donot touch
the STARTpaflafter enteringthebakingor
roastingtemperature.
_]len tile ()veil ttlI'ns on at file fiIlle
of da)you have set, tile displa)will
show tile changing temperature
(starting at 100°F) and tile cooking time,
Tile displa) starts changing once tile
temperature reaches lO0°E
Tile oven will confintle to cook ti)r the
programmed amount of time, then shut
off automaficall}, unless tile WARM or tile
Cook and Hold teature was set.
Depending on your model, see tile How to
Set the OvenforWarmingsection or tile
Special featuresof your ovencontro/secdon.
[] Touch tile CLEAR/OFFpad to clear
tile displa} if necessar); Remoxe
tile food fi'om tile oven. Remember;
e\_n t]lOtlg]l tile ()veil shuts off
automaticalb; food left in tile oven
will confintle cooking after tile ()veil
t tlI'ns ott_
18

Usingtheconvectionoven.
For best results when roasting large
turkeys and roasts, we recommend
using the probe flTcluded t7 the
cm?vectiol? oveR.
CONVECTION
®
®
Tochange the oven temperature
during the Convection Roast cycle,
touch the CONVECTIONROASTpad
and then touch the number pads to
set the new desired temperature.
How to Set the Oven for Convection Roasting when Using the Probe
The display will flash PROBE and the
oven control will signal if the probe is
inserted into the outlet, and you have not
set a probe temperature and pressed the
STARTpad.
[]
[]
Place the oxen rack in the position
that cente_ the fi)od between the
top and bottom of the oxen, Insert
the probe into the meat.
Plug the probe into the outlet in the
oxen. Make sm'e it is pushed all the
wa_ in. Close the o;en (loo_:
[] Touch the CONVECTIONROASTpad.
[] Touch the number pads to set the
desired oven tel//pel';ittll'e,
[] Touch the PROBEpad.
[] T(>uch the number pads to set the
desired interlml meat teluperature.
[] Touch the START pad.
\4"hen the oven starts to heat, the word
tO will be in the display.
_Mier the internal temperature of the lneat
reaches l()()°K the changing internal
temperature will be shown in the display.
[] X._q_en the internal temperatm'e of
the meat reaches the nmnber xou
have set, the probe and the oven
ttlI'n oil and the oven control
signals. To stop the signal, touch the
CLEAR/OFFpad. Use hot pads to
remove the probe fl'om the too(l.
Do not use tongs to pull on it--they
might damage it.
CAUTION:Topreventposs, leburns,
donotunplugtheprobefromtheovenoutletuntil
the oven has coolecL Do not store the probe lb
the oven.
NOTE:
If theprobe isremoved from the food before
the f/hal temperaturetsreached,a tonewill
soundand the display will flash until the probe
is removedfrom the oven.
Youwi// hear a fan while cookingwith this
feature. Thefan will stop.,when the dooris
opened,but the heat will not turnoK
Youcanuse thekitchen tlknereven thoughyou
cannotuse timedoven operations.
Convection Roasting Guide
20
Meats Minutes/Lb. Oven Temp. Internal Temp.
Beef Rib,BonelessRib, Rare 20 24 325°F 140°Ft
TopSirloin Medium 2&28 325°F 160°F
(3to RIbs.) Well 28 32 325°F 170%
BeefTenderloin Rare 10 14 32R°F 140°Ft
Medium 1&18 32R°F 160%
Perk Bonedn,Boneless(3to 5Ibs.) 23 27 32R°F 170%
Chops(1/2to 1" thick) 2 chops 30_5 total 32R°F 170°F
4 chops 35-40 total 32R°F 170°F
6 chops 40-45 total 325°F 170%
Ham Canned,Butt, Shank(3to 5 Ibs.fully cooked} 1_18 325°F 140%
Lamb Bonedn,Boneless(3to 5Ibs.) Medium 17 20 325°F 160°F
Well 20 24 325°F 170°F
Seafood Fish,Whole(3 to 5Ihs.) 30-40 total 400°F
LobsterTails(0 to 8oz.each) 20_5 total 350°F
Poultry WholeChicken(2_4to31/zIhs.} 2_26 350°F 180° 185°F
CornishHens,Unstuffed(1to 11/LIhs.) 50 55total 350°F 180° 185°F
Stuffed(1 to 11/LIhs.) 5R 60total 350°F 180° 185°F
Duckling(4to 5 Ibs.) 2_26 325°F 180° 185°F
Turkey,Whole*
Unstuffed(lOto 16Ihs.) 8 11 32R°F 180° 185°F
Unstuffed(18to 24 Ibs.) 7 10 32R°F 180° 185°F
TurkeyBreast(4to 6 Ibs.) 16 19 32R°F 170%
Slu//ed bsds gv_em/{) _,qui_v 3t)-45 miracles addilim*al *l)asli_ lime. Shidd h'y:sa_ d b*_,asl ,vilh /vil 1opn,'_,e_l
i)'leH)lownin,< and d_yi_*,go/ slli_*.
4Th* {X i)(Jm_lmenl o/Ag_'ic*zllun, s(zys "l'a*l, two/L*po/m/a*; but you should h_zoa_1hal (:o&i_g il to m_{y I40<I2memos
some /ood t_oiso_ i_ly,ol:e,_z_gsms m<0 su_'_i-i,_,."(%_m_,: ,Sa/elbod Book. }bu_ Kilche_ Guide. [SI)A lCe_. flz_*e 19,'_'5.)
Other manuals for Profile J2S968 SERIES
9
Table of contents
Other GE Convection Oven manuals

GE
GE Profile PK916BM Manual

GE
GE GE MONOGRAMTM ZET837DBSB User instructions

GE
GE Monogram ZET1R User manual

GE
GE Monogram ZET1R User manual

GE
GE Appliances JVM1920 User manual

GE
GE Monogram ZET1058 User manual

GE
GE JTP70BM Manual

GE
GE Profile PT970SM User manual

GE
GE PEB1590SMSS - Countertop Microwave Oven Manual

GE
GE JKP18 Series User manual
Popular Convection Oven manuals by other brands

Fisher Scientific
Fisher Scientific Isotemp 3511FSQ Installation and operation manual

AEG
AEG BE3013021 user manual

turbofan
turbofan 30D Series Installation and operation manual

Diamond
Diamond CFG202/N installation manual

KitchenAid
KitchenAid KDRS463VBU installation instructions

NuWave
NuWave Pro Plus user manual