Installation Preparation
Stainless Steel Gas ( ooktop
locations
Gas supply:
These cooktops are shipped fl'om tile tactorv
set ti)r either natural gas or I,P gas. Check to
be s/IYe VO/l have tile COITeCt cooktop fl)r tile
type of gas being used.
• Tile pressure regulator must be connected
in series with tile manifold of tile cooktop
and must remain in series with tile supply
line regardless of type of gas being used.
• The natural gas model is designed to
operate at 5" water cohmm pressure.
A regulator is required at tile natural gas
som'ce to provide a maximmn of 7" water
pressure to the cooktop regulator.
• Tile liquid propane model is designed to
operate at l 0" water cohmm pressure.
A regulator is required at the I,P som'ce
to provide a maximmn of 14" water pressm'e
to tile cooktop regulator.
For ease of installation, and if local codes
permit, tile gas supply line into tile cooktop
should be l/2" or 3/4" ]D flexible metal
appliance connectoi; three to five feet long.
NOTE: Purchase new flexible line. DO NOT
USE OLD, PREVIOUSLY USED FLEXIBLE
LINE.
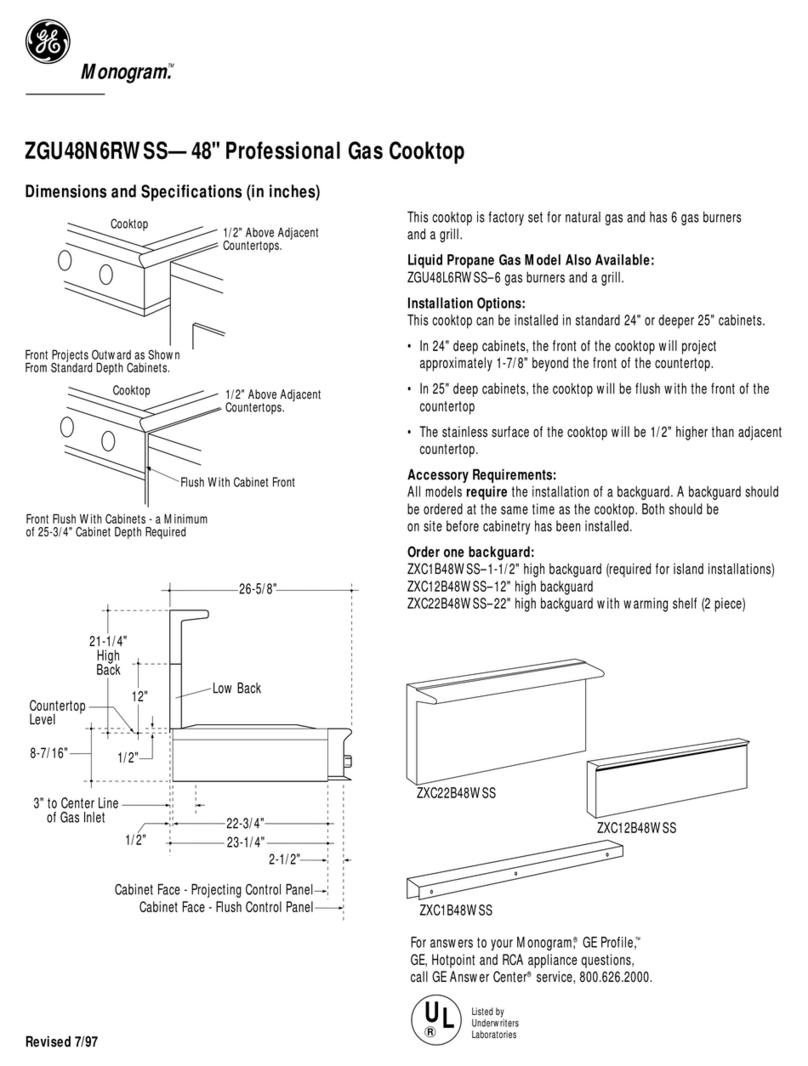
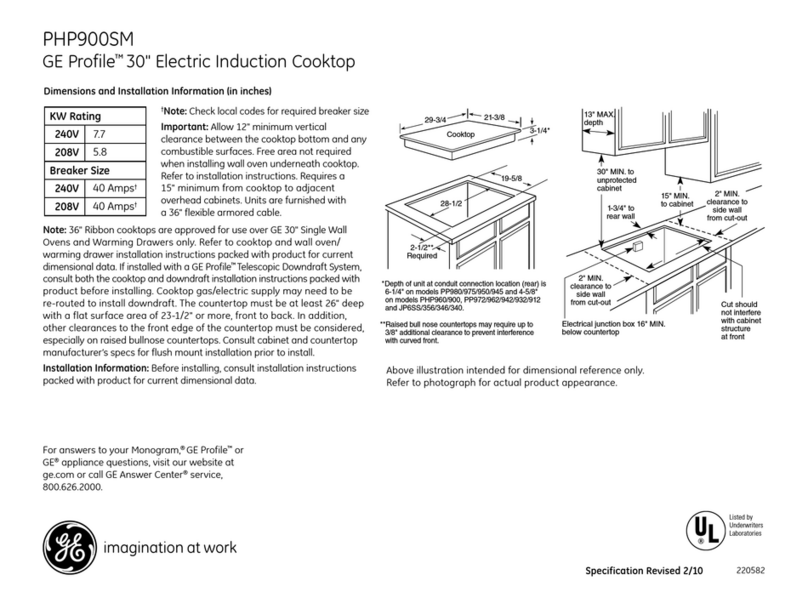
• Make gas connection through rear wall, or
on cabinet floor at rear, as illustrated.
Electrical supply:
This cooktop features pilotless electric
ignition for energy savings and reliability.
It operates on a 120 volt, 60 Hz power supply.
A separate circuit, protected by a 15 amp time
delay filse or circuit breaker, is required.
Optional Combination Installations
This cooktop may be installed in combina-
tion with a ZVB36 Monogram Downdrafl
Vent, a ZET1038 Single Oven or a ZTD910
_mning Drawer.
• The gas and electrical supply must be
located where it will not interfere with
vent housing, the oven or the warming
drawer. See pages 9 through 11 fin.
alternate installation requirements.
NOTE:Locate gas and electrical
supplywithin shaded area. Locations
shown for a 42" cabinet base, adjust
when using other cabinet size.
• A properly-grom_ded 3-prong receptacle
should be located within reach of cooktop's
t0/n" foot power cord.
IMPORTANT: (Please read carefully). FOR
PERSONAL SAFETY, THIS APPLIANCE
MUST BE PROPERLY GROUNDED.
• Tile power cord of this appliance is
equipped with a three-prong (grotmding)
plug which mates with a standard three-
prong grounding wall receptacle to mini-
mize tile possibility of electric shock hazard
from this appliance.
• The customer should have the wall recep-
tacle and circuit checked by a qualified
electrician to make sure the receptacle is
properly grotmded and has correct polarity.
• Where a standard two-prong wall receptacle
is encotmtered, it is tile personal responsibil-
it)' and obligation of tile customer to have it
replaced with a properly grotmded three-
prong wall receptacle.
Do Not, Under Any Circumstances, Cut Or
Remove The Third (groined) Prong From The
Power Cord.
Do not rise _111 extension cord.
IMPORTANT: hnproper grounding and
improper polarity of tile house wiring can
cause continuous sparking of tile ignition
svsteln. Be stlre to check ti)r correct
grotmding and polarity.
