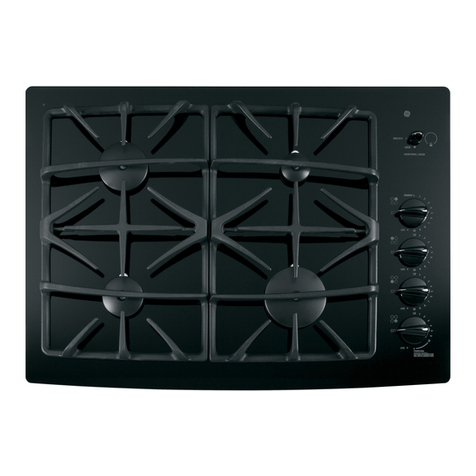
GE PGP989DN2BB Original instructions

GEAppliances.corn
E3
-(3
C
0
Safety Instructions .... 2-7
Operating Instructions
Downdraft Vent System ... 10
Features ................... 8
Gas Surface Burners ....... 9
Using Your Cooktop ...... 10
Care and Cleaning
Burner Assemblies ....... 11
Burner Caps, Heads
and Electrodes ........... ii
Burner Grates,
Vent Grille and Gasket .... 12
Control Knobs ............ 13
Glass Surface ......... 13, 14
Vent Filter ................ 12
Installation Instructions
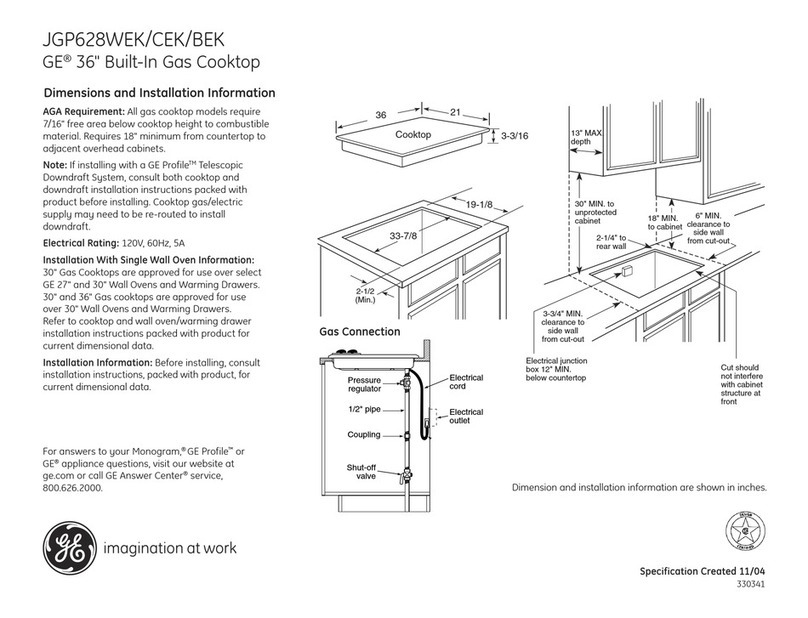
Ductwork ......... 19-22, 27
Electrical
Connections ...... 23, 28, 29
Exhaust Blower Ratings .... 21
Final Assembly ........ 30, 31
Installing
the Cooktop ........... 25-28
Installing the Gasket ...... 24
Power Supply ............ 23
Preparation ........... 17-19
Safety Precautions ....... 15
Unpacking
the Cooktop ........... 16, 24
Write the model end seriol
numbers here:
Model #
Seriol #
Find these numbers on a label
under the cooktop, on the side
of the vent chamber.
Troubleshooting
Tips .................. 32,33
Consumer Support
Consumer Support ....... 36
Warranty ................ 35 PGP989
49-80516-2 12-12 GE

IMPORTANT SAFETY INFORMATION.
READ ALL INSTRUCTIONS BEFORE USING.
WARNING!
Foryour safety, the information in this manual must be followed to minimize the risk of fire or explosion, electric shock, or
to prevent property damage, personal injury or loss of life.
,_ WARNING: if the information in this
manual is not followed exactly, a fire or explosion
may result, causing property damage, personal
injury or death.
Do not store or use gasoline or other flammable
vapors and liquids in the vicinity of this or any
other appliance.
WHAT TO DO IF YOU SNELL GAS
Do not try to light any appliance.
Do not touch any electrical switch; do not use
any phone in your building.
Immediately call your gas supplier from a
neighbor's phone. Follow the gas supplier's
instructions.
If you cannot reach your gas supplier, call the
fire department.
-- Installation and service must be performed by
a qualified installer, service agency or the gas
supplier.
GAS-FIRED
LISTED
2SAVE THESE INSTRUCTIONS

IMPORTANT SAFETY INFORMATION.
READ ALL INSTRUCTIONS BEFORE USING. GEApp,oncescom
IMPORTANT SAFETYNOTICE
The California Safe Drinking Water and Toxic Enforcement Act requires the Governor of California to publish
a list of substances known to the state to cause cancer, birth defects or other reproductive harm, and
requires businesses to warn customers of potential exposure to such substances.
Gas appliances can cause minor exposure to four of these substances, namely benzene, carbon monoxide,
formaldehyde and soot, caused primarily by the incomplete combustion of natural gas or LP fuels. Properly
adjusted burners, indicated by abluish rather than ayellow flame, will minimize incomplete combustion.
Exposure to these substances can be minimized by venting with an open window or using aventilation fan
or hood.
SAFETYPRECAUTIONS
Have the installer show you the location of the cooktop gas shuboff valve and how to shut it off
if necessary.
Have your cooktop installed and properly
grounded by a qualified installer, in accordance
with the Installation Instructions. Any adjustment
and service should be performed only by
qualified gas cooktop installers or service
technicians.
Be sure your cooktop is correctly adjusted by
a qualified service technician or installer for
the type of gas (natural or LP)which isto be
used. Your cooktop can be converted for use
with either type of gas. See the Installation
Instructions in the LPConversion Kit.
iiiiiiiiiiii_i;i
iiiiiiiiiiii_i;i
iiiiiiiiiiii_i;i
iiiiiiiiiiii_i;i
Do not attempt to repair or replace any
part of your cooktop unless it isspecifically
recommended in this manual. All other service
should be referred to a qualified technician.
Locate the cooktop out of kitchen traffic path
and out of drafty locations to prevent poor
burner performance.
Plug your cooktop into a 120-volt grounded
outlet only. Do not remove the round grounding
prong from the plug.
If in doubt about the grounding of the home
electrical system, it is your personal responsibility
and obligation to have an ungrounded outlet
replaced with a properly grounded, three-prong
outlet in accordance with the National Electrical
Code. Do not use an extension cord with this
appliance.
Let the burner grates and other surfaces cool
before touching them or leaving them where
children can reach them.
Be sure all packaging materials are removed
from the cooktop before operating it to prevent
fire or smoke damage should the packaging
material ignite.
,tk WARNING: Theseadjustments
must be made by a qualified service technician
in accordance with the manufacturer's
instructions and all codes and requirements
of the authority having jurisdiction. Failure to
follow these instructions could result in serious
injury or property damage. The qualified agency
performing this work assumes responsibility for
the conversion.
Do not leave children alone or unattended where
a cooktop is hot or in operation. They could be
seriously burned.
Do not allow anyone to climb, stand or hang on
the cooktop.
Do not operate or clean your cooktop if the glass
is broken or cracked. Cleaning solutions and
spillovers could penetrate the broken cooktop
and create a risk of electric shock. Call for service
immediately if the cooktop glass breaks or
cracks.
SAVE THESE INSTRUCTIONS s

IMPORTANT SAFETY INFORMATION.
READ ALL INSTRUCTIONS BEFORE USING.
SAFETYPRECAUTIONS
iiiiiiiiiiii_i;i
iiiiiiiiiiii_i;i
iiiiiiiiiiii_i;i
ACAUTION: Items of interest to
children should not be stored in cabinets above
a cooktop-children climbing on the cooktop to
reach items could be seriously injured.
Always keep wooden and plastic utensils and
canned food a safe distance away from your
cooktop.
Always keep combustible wall coverings, curtains
or drapes a safe distance from your cooktop.
Do not obstruct the flow of combustion and
ventilation air.
Leak testing of the appliance shall be conducted
according to the manufacturer's instructions
Never wear loose-fitting or hanging garments
while using the appliance.
Be careful when reaching for items stored in
cabinets over the cooktop. Flammable material
could be ignited if brought in contact with flame
or hot surfaces and may cause severe burns.
Teach children not to play with the controls
or any other part of the cooktop.
AWARNING: .EVERusethis appliance
as a space heater to heat or warm the room.
Doing so may result in carbon monoxide
poisoning and overheating of the oven.
Always keep dish towels, dishcloths, pot holders
and other linens a safe distance from your
cooktop.
Do not store flammable materials near a
cooktop.
Do not store or use combustible materials,
gasoline or other flammable vapors and liquids
in the vicinity of this or any other appliance.
Do not let cooking grease or other flammable
materials accumulate on or near the cooktop.
Do not operate the burner without all burner
parts in place.
Do not place hot cookware on the glass cooktop.
This could cause glass to break.
Do not clean the cooktop with flammable
or volatile cleaning fluids.
Do not clean the cooktop when the appliance is
in use.
iiiiiiiiiiii_i;i
iiiiiiiiiiii_i;i
iiiiiiiiiiii_i;i
Avoid scratching the cooktop with sharp
instruments, or with rings and other jewelry.
Never use the cooktop as a cutting board.
Do not use water on grease fires. Never pick up
a flaming pan. Turn the controls off. Smother
a flaming pan on a surface burner by covering
the pan completely with a well-fitting lid, cookie
sheet or flat tray. Use a multi-purpose dry
chemical or foam-type fire extinguisher.
Flaming grease outside a pan can be put out by
covering it with baking soda or, if available, by
using a multi-purpose dry chemical or foam-type
fire extinguisher.
WARNING: To reduce the risk of fire,
electrical shock or injury to persons, observe the
following:
A. Use this unit only in the manner intended by the
manufacturer. If you have questions, contact the
manufacturer.
B. Before servicing or cleaning the unit, switch
power off at service panel.
C. When cutting or drilling into wall or ceiling, do
not damage electrical wiring and other hidden
utilities.
D. Ducted fans must always be vented to the
outdoors.
E. To reduce the risk of fire, use only metal
ductwork.
F. Do not flame foods on the cooktop. If you do
flame foods under the hood, turn the fan on.
WAR Ni NG: roreducetherisl<ora
cool<top grease fire:
A. Keep fan, filters and grease-laden surfaces
clean.
B. Always turn vent ON when cooking at high heat.
C. Use high settings on cooktop only when
necessary. Heat oil slowly on low to medium
setting.
D. Don't leave the cooktop unattended when
cooking.
E. Always use cookware and utensils appropriate
for the type and amount of food being prepared.
,tkCAUTION: Forgeneralventilating use
only. Do not use to exhaust hazardous or explosive
materials and vapors.
4SAVE THESE INSTRUCTIONS

IMPORTANT SAFETY INFORMATION.
READ ALL INSTRUCTIONS BEFORE USING. GEAppliances.com
GLASSCOOKTOP SURFACE(onsomemode/s)
Use care when touching the glass cooktop surface. The glass surface of the cooktop will retain heat after
the controls have been turned off.
Avoid scratching the glass cooktop surface. The
glass surface can be scratched with items such
as sharp instruments, rings or other jewelry and
rivets on clothing.
iiiiiiiiiiii_i;i
iiiiiiiiiiii_i;i
iiiiiiiiiiii_i;i
iiiiiiiiiiii_i;i
iiiiiiiiiiii_i;i
Large scratches or impacts to glass cooktops
can lead to broken or shattered glass.
Do not operate the cooktop if the glass is
broken. Spillovers or cleaning solution may
penetrate a broken cooktop and create a risk of
electrical shock. Contact a qualified technician
immediately should your glass cooktop surface
become broken.
Never use the glass cooktop surface as a cutting
board.
Do not place or store items that can melt or
catch fire on the glass cooktop surface, even
when it is not being used.
Be careful when placing spoons or other stirring
utensils on glass cooktop surface when it is in
use. They may become hot and could cause
burns.
iiiiiiiiiiii_i;i
iiiiiiiiiiii_i;i
iiiiiiiiiiii_i;i
Clean the cooktop surface with caution. If a wet
sponge or cloth is used to wipe spills on a hot
surface, be careful to avoid steam burns. Some
cleaners can produce noxious fumes if applied to
a hot surface.
NOTE: We recommend that you avoid wiping
any surface unit areas until they have cooled and
the indicator light has gone off. Sugar spills are
the e×ception to this. Please see Cleaning the
Glass Cooktop in the Care and Cleaning section.
When the cooktop is cool, use only CERAMA
BRYTE®Ceramic Cooktop Cleaner and the
CERAP1ABRYTE®Cleaning Pad to clean the
cooktop.
To avoid possible damage to the cooking
surface, do not apply cleaning cream to the
glass surface when it is hot.
After cleaning, use a dry cloth or paper towel to
remove all cleaning cream residue.
Read and follow all instructions and warnings on
the cleaning cream labels.
SAVE THESE INSTRUCTIONS s
IMPORTANT SAFETY INFORMATION.
READ ALL INSTRUCTIONS BEFORE USING.
AWARNING!
SURFACEBURNERS
Use proper pan size-avoid pans that are unstable or easily tipped. Select cool<ware having flat bottoms
large enough to cover bumer grates. To avoid spillovers, make sure cool<ware islarge enough to contain
the food properly. This will both save cleaning time and prevent hazardous accumulations of food, since
heavy spattering or spillovers left on cool<top can ignite. Use pans with handles that can be easily grasped
and remain cool
Always use the LITE position when igniting the
top burners and make sure the burners have
ignited.
Never leave the surface burners unattended at
high flame settings. Boilovers cause smoking and
greasy spillovers that may catch on fire.
Use only dry pot holders-moist or damp pot
holders on hot surfaces may result in burns from
steam. Do not let pot holders come near open
flames when lifting cookware. Do not use a towel
or other bulky cloth in place of a pot holder. Such
cloths can catch fire on a hot burner.
When using glass cookware, make sure it is
designed for cooktop cooking.
To minimize the possibility of burns, ignition of
flammable materials and spillage, turn cookware
handles toward the side or center of the cooktop
without extending over adjacent burners.
Always turn the surface burner controls off
before removing cookware.
Carefully watch foods being fried at a high flame
setting.
Always heat fat slowly and watch as it heats.
Do not leave any items on the cooktop. The hot
air from the vent may ignite flammable items
and will increase pressure in closed containers,
which may cause them to burst.
If a combination of oils or fats will be used in
frying, stir together before heating or as fats melt
slowly.
Do not use a wok on the cooking surface
if the wok has a round metal ring that is placed
over the burner grate to support the wok. This
ring acts as a heat trap, which may damage the
burner grate and burner head. Also, it may cause
the burner to work improperly. This may cause
a carbon monoxide level above that allowed by
current standards, resulting in a health hazard.
Foods for frying should be as dry as possible.
Frost on frozen foods or moisture on fresh foods
can cause hot fat to bubble up and over the
sides of the pan.
Use the least possible amount of fat for effective
shallow or deep-fat frying. Filling the pan too full
of fat can cause spillovers when food is added.
Use a deep fat thermometer whenever possible
to prevent overheating fat beyond the smoking
point.
Never try to move a pan of hot fat, especially a
deep fat fryer. Wait until the fat is cool.
Do not flame foods on the cooktop. If you do
flame foods under the hood, turn the fan on.
6SAVE THESE INSTRUCTIONS
IMPORTANT SAFETY INFORMATION.
READ ALL INSTRUCTIONS BEFORE USING. GEAppliances.com
SURFACE BURNERS
Adjust the burner flame size so it does not extend beyond the edge of the cool<ware. Excessive flame is
hazardous.
Do not leave plastic items on the cooktop- they
may melt if left too close to the vent.
Keep all plastics away from the surface burners.
Ifyou smell gas, turn off the gas to the cooktop
and call a qualified service technician. Never use
an open flame to locate a leak.
To avoid the possibility of a burn, always be
certain that the controls for all burners are at
the off position and all grates are cool before
attempting to remove them.
Never clean the cooktop surface when it is hot.
Some cleaners produce noxious fumes and wet
cloths could cause steam burns if used on a hot
surface.
iiiiiiiiiiii_i;i
Never leavejars or cans of fat drippings on or
near your cooktop.
Do not use aluminum foil under burner grates.
Hisuse could result in a fire hazard or damage
to the cooktop.
Do not cover or block the area around the
cooktop knobs. This area must be kept clear for
proper ventilation and burner performance.
Clean only parts listed in this Owner's Manual.
COOK MEAT AND POULTRY THOROUGHLY...
Cool<meat and poultry thoroughly-meat to at least an INTERNALtemperature of 260°F and poultry
to at least an INTERNALtemperature of 280°E Cooking to these temperatures usually protects against
foodbome illness.
CONVERTING TO LP GAS (orconvertingbackto natural gas from LP)
This cool<top leaves the factory set for use with natural gas.
If you want to convert to LPgas, the conversion must be performed by a qualified LPgas installer.
The conversion instructions, conversion sticker and LPorifices can be found attached to the pressure
regulator.
There is a second set of instructions included in the envelope containing the product wiring diagrams
on the side of the cooktop. Keep these instructions and the orifices in case you want to convert back to
natural gas.
READAND FOLLOWTHISSAFETYINFORMATIONCAREFULLY.
SAVETHESEINSTRUCTIONS

Features of your cooktop.
Throughout this manual, features and appearance may vary from your model.
0
@
Explained
Feature Index on page
Vent Grille 12
Vent Filter (located under the vent grille) 12
Simmer Spillproof Burner 9, 11
Spillproof Burners 9, 11
High Power Spillproof Burner 9, 11
Vent Control 10
Surface Burner Controls 9
Glass Cooktop Surface 13, 14
Cast-Iron Burner Grates 12
__ Vent Grille Gasket 12, 13, 14

Using the gas surface burners. GEAppliances.com
Throughout this manual, features and appearance may vary from your model.
Push the control knob down and
turn it to the LITEposition.
How to Light a Gas Surface Burner
Push the control knob down and turn itto the
LITE position.
Youwill hear a littleclicking noise-the sound
of the electric spark igniting the burner.
Turn the knob to adjust the flame size. Ifthe
knob stays at LITE, itwill continue to click.
When one burner is turned to LITE,all the
burners spark. Do not attempt to disassemble
or clean around any burner while another
burner is on. An electric shock may result, which
could cause you to knock over hot cookware.
If the burner hasnot been used recently,the
flames may make an excessivenoise.Thisis
normal, and itshould dissipate after/4 to 5
minutes.
Sealed Gas Burners
Thesmaller burner (right rear position) will
givethe best simmer results.It offers precise
cooking performance for delicate foods,such
assauces or foods which need to cook over
low heat for a long time. It can be turned down
to a very low simmer setting.
Theother burnersare higher powered and will
bring liquidsto a boil quicker, especiallywith
the use of a lid.
How to Select Name Size
Forsafe handling of cookware, never let the
flames extend up the sides of the cookware.
Watch the flame, not the knob, asyou reduce
heat. Theflame sizeon a gas burner should
match the cookware you are using.
Anyflame larger than the bottom of the
cookware iswasted and only servesto heat the
handle.
In Case of Power Failure
Incase of a power failure,you can light the gas
surface burnerson your cooktop with a match.
Holda lit match to the burner,then push in and
turn the control knob to the LITEposition.Use
extreme caution when lighting burnersthis way.
Surface burners in usewhen an electrical
power failure occurswill continue to operate
normally.
IN CASE OF A POWER FAILURE, THE
VENTILATION SYSTEM WILL NOT OPERATE.
Before Lighting a Gas Burner
Hake sure all burner heads,burner caps
and grates are intheir proper locations (see
Burner Caps,Heads and Electrodesinthe
Careand cleaning of the cooktop section).
After Lighting a Gas Burner
Donot operate the burner for an extended
period of time without cookware on the
grate. Thefinish on the grate may chip
without cookware to absorb the heat.
Besurethe burners and grates are cool
beforeyou placeyour hand, a pot holder,
cleaning cloths or other materials on them.

Usingyour cooktop.
Use a flat-bottomed wok,.
Wok This Way
Werecommend that you usea flat-bo_omed
wok, availableatyour local retailstore.
Onlya flat-bottomed wok should be used. Do
not usea flat-bottomed wok with a wok holder.
Donot usea flat-bottomed wok on a support
ring.Placingthe ring over the burner or grate
may cause the burner to work improperly,
resulting in carbon monoxide levelsabove
allowable current standards. This could be
dangerous to your health.
Cookware
Aluminum: Medium-weight cookware is
recommended because it heats quickly
and evenly.Mostfoods brown evenly in an
aluminum skillet.Usesaucepans with tight
fitting lidswhen cooking with minimum
amounts of water.
Enomelwore: Undersome conditions, the
enamel of some cookware may melt. Follow
cookware manufacturer's recommendations
for cooking methods.
Gloss:Thereare two types of glass cookware:
those for oven useonly and those for cooktop
cooking (saucepans,coffee and tea pots).Glass
conducts heat very slowly.
Cost Iron: If heated slowly, most skilletswill
give satisfactory results.
HeotproofGIoss-Ceromic: Canbe usedfor
either surface or oven cooking. It conducts
heat very slowly and cools very slowly. Check
cookware manufacturer's directions to be sure
it can be used on a gas cooktop.
Stoinless Steel'. Thismetal alone has poor
heating properties and isusually combined
with copper, aluminum or other metals for
improved heat distribution. Combination metal
skillets usually work satisfactorily ifthey are
usedwith medium heat asthe manufacturer
recommends.
Stove Top Grills
Do not use stove top grills on your sealed
gas burners. If you use the stove top grill on
the sealed gas burner it will cause incomplete
combustion and can
result in exposure to carbon monoxide levels
above allowable current standards. This can
be hazardous to your health.
Using the downdruft vent system.
10
How to Operate the Downdraft Vent System
The built-in vent system helps remove
cooking vapors, odors and smoke from
foods prepared on the cooktop.
Turn the vent fan speed control knob to HI,
NED or LO,as needed.
Continuous use of the vent system while
cooking helps keep the kitchen comfortable
and less humid, reducing cooking odors
and soiling moisture that normally creates a
frequent need for cleaning.
The appearance of the burner flames
may be affected when the vent fan is
operating. At the high fan speed setting, it
is normal for the nearby burner flames to
be drawn toward the vent grille. If cooking
performance is affected, use a lower fan
speed setting.
IN CASE OF A POWER FAILURE, THE
VENTILATION SYSTEM WILL NOT OPERATE.

Care and cleaning of the cooktop. GEAppliances.com
Be sure electrical power is off and all surfaces are coo/before cleaning any part of the cooktop.
How to Remove Protective Shipping Film
Carefullygrasp a corner of the protective
shipping film with your fingers and slowly peel
it from the appliance surface. Do not use any
sharp items to remove the film. Removeall of
the film before using the appliance for the first
time.
and Packaging Tape
Toassurenodamageisdonetothefinishofthe
product,thesafestwayto removetheadhesive
from packagingtapeon newappliancesisan
applicationofa householdliquiddishwashing
detergentApplywithasoftclothandallowtosoak
NOTE:The adhesive must be removed from all
parts. Itcannot be removed ifitis baked on.
Grate_
_eap
/O Burner head
/Electrode _ 3urner aase
/
Sealed Burner Assemblies
Turn all controls OFF before removing the
burner parts.
The burner grates, caps and burner headscan
be lifted off, making them easy to clean.
ACAUTION: Do not operate the burner
without all burner parts in place.
_ Electrode
S
Whenone burneristurnedto LITE,allthe
burnersspark.Donotattempt to disassemble
or cleanaroundany burnerwhileanother
burner ison.Anelectricshockmay result,
which couldcauseyouto knockoverhot
cookware.
After cleaning, make sure the
notch in the burner head
ispositioned toward the
electrode. Rotate the burner
head around the burner base
until it is level and securely
seated.
NOTE:Beforeremoving the
burner capsand heads,
remember their sizeand location.
Replacethem in the same
location after cleaning.
Theburner heads and burner
basesare labeledA,B and Cto
aid reassembly.
Burner Caps, Heads and Electrodes
Burner Caps
Liftoffwhen cool. Toclean the burner caps, wash
in hot,soapywaterand rinsewith cleanwater.You
mayscourwith a plasticscouringpadto remove
burned-onfoodparticles.
Burner Heads
Theslitsintheburnerheadsofyour cooktopmust
bekeptcleanat atttimesforan even,unhampered
flame.
Youshouldcleanthe surfaceburnersroutinely,
especiallyafter bad spillovers,which couldclog
these openings.Liftoff when cool.
Toclean the burner heads,wash in hot,soapy
water and rinsewith cleanwater.
Toremoveburned-on food,soakthe burner
headsina solutionof mildliquiddetergent and
hotwater for20-]0 minutes.Formorestubborn
stains,usea toothbrush. Usea smallsewing
needleor paperclipto removeanyclogs inthe
slits.
Electrodes
Thissmallmetalrodproducesthesparkandmust
bekeptcleananddryto properlyignitethe gas.
Toclean theelectrodes,use a dry paper towel or
scrub pad.
After Cleaning
Beforeputtingtheburnercapsand headsback,
shakeout excesswater andthendrythem
thoroughlybysettingina warm ovenfor30
minutes.Checkto makesuretheelectrodesremain
seateddown inburnerhead.
Replacement
Theburnerheadsand burnerbasesare labeledA,
Band Cto aid reassembly.
Replacetheburnerheadsonthe basesmatching
the letters.Replacethe capsontheheads.Make
surethat the capsandheadsare replacedinthe
correctlocation.Thereisone small(A),two medium
(B)and onelarge(C)headand cap.Ifthecapsor
headsare notreplacedinthecorrectlocations,
burnersmay not igniteor perform properly.
Medium Head Small Head
ap and
OB Ae
@B AQ
OE_ CQ _)
QFront of Cooktop C _
B
I I
Medium Head Large Head
and Cap and Cap
11

Care and cleaning of the cooktop.
Burner Grates, Vent Grille and Gasket
IIIIIIII/I should be washed regularly and, of course,
after spillovers.
Todean, wash them in hot, soapy water and
rinsewith clean water.
Appearancemay vary.
The grate legs have four rubber
feet. To order replacement rubber
grate feet,please call our toll-fiee
number:
National
Parts Center ...... 800.626.2002
Rubber Grate Feet #WBO2T10101
Discoloration on the grates may also be
removed by usingthe provided cooktop
cleaning cream.Apply a drop or two on a damp
cloth and rub across the discolored area. Rinse
and dry. After cleaning, replacethe burner
grates and make surethey are positioned
securelyover the burners.
To remove burned-on food, usea soap-filled
scouring pad.
Although they are durable, the grates will
gradually losetheir shine,regardless of the
best care you can give them. Thisisdue to their
continual exposure to high temperatures. You
will notice this soonerwith lighter color grates.
Donot operate a burner for an extended
period of time without cookware on the burner
grate.Thefinish on the grate may chip without
cookware to absorb the heat.
Replacement
Before replacingthe vent grille,make sure
the grille gasket is properly installed around
the downdraft vent opening,with the word
"FRONT"toward the knobs.Replacethe vent
grille carefully over the gasket.
When replacing the grates,make surethe
curved sides of the grates are toward the
center.
:,:, Vent Grille
b Gasket
:itter
Curved'.
of Grate
NOTE:Do not cleanthe grates,grille or grille
gasket in a self-cleaningoven.
Thegrates,grille and grille gasket may be
cleanedin a dishwasher.
To order replacement filters, please
call our toll-flee number:
National
Parts Center ...... 800.626.2002
Filter ............ #WBO2X10651
12
Vent Filter end Chamber
Remove the vent grille and vent grille gasket.
The filter isheld in place at an angle with a
hold bump. Lift the filter up and out of the
vent opening diagonally.
To clean the filter, swish it in hot, soapy
water. Rinsewell with clean water and dry
thoroughly.
w
Remove and replace the filter diagonally through
the vent opening.
Do not operate the vent without the filter
in place.
k Z ¸
U: ::: : iil¸
iiii _ iii
iiii
When replacing the filter: make sure it rests, at an
angle, on the supports in the vent opening.
Toclean the vent chamber, use hot, soapy
water. Rinsewith clean water and dry
thoroughly. Donot useabrasive cleaners;they
will damage the finish.
Replacement
Replacethe filter after it iscleaned and dry.
Replacethe vent grille gasket by forming it
around the vent opening and make surethe
word "FRONT"istoward the knobs.Replacethe
grille.

GEAppliances.com
Mokledflot aieu Control Knobs
Thecontrol knobs may be removed for easier
cleaning.
Make surethe knobs are in the OFFpositions
and pull them straight off the stems for
cleaning.
Thecontrol knobs may be removed
for easiercleaning.
To clean the knobs, place them in u dishwasher
or wash with soup and water. Rinse with clean
water. Hake sure the insides of the knobs are
dry before replacing.
Replace the knobs in the OFF position to ensure
proper placement.
Stainless Steel Surfaces (on some models)
Do not use u steel wool pad; it will scratch the
surface.
To clean the stainless steel surface,
use warm sudsy water or a stainless steel
cleaner or polish. Always wipe the surface in
the direction of the grain. Followthe cleaner
instructions for cleaning the stainless steel
surface.
Toinquire about purchasing stainlesssteel
appliance cleaner or polish, or to find the
locution of u dealer nearest you, pleasecull our
toll-free number:
National Parts Center 1.800.626.2002
GEAppliances.com
Cleaning the glass cooktop.
Clean your cooktop
after each spill. Use
®
CERAMABRYTE Ceramic
Cooktop Cleaner.
Normal Doily Use Cleaning
ONLYuseCERAMABRYTE®CeramicCooktop
Cleaneron the glasscooktop. Other creams
may not be useffective.
To maintain and protect the surface ofyour
glasscooktop, follow these steps:
7] Beforeusing the cooktop for the
first time, clean itwith CERAMABRYTE®
Ceramic Cooktop Cleaner.This helps
protect the top and makes clean-up
easier.
r2]Daily useof CERAMABRYTE®Ceramic
Cooktop Cleanerwill help keepthe
cooktop lookingnew.
I-_ Removethe burner grates,vent grille and
vent grille gasket.
%
@
@
Shakethe cleaning cream well. Applya
few drops of CERAMABRYTE®Ceramic
CooktopCleanerdirectly to the cooktop.
Usea paper towel or CERAMABRYTE®
CleaningPadfor CeramicCooktops to
cleanthe entire cooktop surface.
Use a dry cloth or paper towel
to remove all cleaning residue.
No need to rinse.
NOTE." It is very important that you DO NOT
heat the cooktop until it has been cleaned
thoroughly.
Use a CERAMABRYTE®Cleaning
Pad for Ceramic Cooktops or a
Scotch-Brite ®Multi-Purpose No
Scratch blue scrub pad.
Burned-On Residue
WARNING:DAMAGEtoyour glass surface
may occur if you use scrub pads other than
the pad included with your cooktop.
[Z] Allow the cooktop to cool.
[] Remove the burner grates, vent grille
and vent grille gasket. Spread a few
drops of CERAMABRYTE®Ceramic
Cooktop Cleanerto the entire burned
residuearea.
@
%
@
Using the included CERAIVlABRYTE®
Cleaning Pad for Ceramic Cooktops, rub
the residue area, applying pressure as
needed.
If any residue remains, repeat the steps
listed above as needed.
For additional protection, after all
residue has been removed, polish the
entire surface with CERAMABRYTE®
Ceramic Cooktop Cleaner and a paper
towel. 13

Cleaning the glass cooktop.
/
/
The CERAMABRYTE®Ceramic
Cool<top Scraper and all
recommended supplies are
available through our Parts Centen
See instructions under "To Order
Parts" section below.
NOTE: Do not use a dull or nicked
blade.
Heavy, Burned-On Residue
J-_ Allow the cooktop to cool.
[] Remove the burner grates, vent grille
and vent grille gasket.
@Use a single-edge razor blade scraper
at approximately a 45° angle against
the glass surface and scrape the soil. It
will be necessary to apply pressure to
the razor scraper in order to remove
the residue.
%
@
After scraping with the razor scraper,
spread a few drops of CERAIVlABRYTE®
CeramicCooktop Cleanerto the entire
burned residuearea. Usethe
CERAMABRYTE®Cleaning Pad to
remove any remaining residue.
For additional protection, after all
residue has been removed, polish the
entire surface with CERAMABRYTE®
Ceramic Cooktop Cleaner and a paper
towel.
Metal Marks and Scratches
Be careful not to slide pots and pans across
your cooktop. It will leave metal markings on
the cooktop surface.
These marks are removable using
the CERAMABRYTE®Ceramic Cooktop
Cleaner with the CERAMABRYTE®Cleaning
Pad for Ceramic Cooktops.
WARNING: Carefully check the bottom
of pans for roughness that would scratch
the cooktop.
Glass surface--potential for permanent damage.
Our testing shows that
if you are cooking high
sugar mixtures such as
jelly or fudge and have
a spillover, it can cause
permanent damage to the
glass surface unless the
spillover is immediately
removed.
Damage from Sugary Spills and Melted Plastic
J-f] Turn off all surface burners and, with an
oven mitt, remove hot pans and grates.
Wearing an oven mitt:
a. Use a single-edge razor blade
scraper (CERAMABRYTE®Ceramic
Cooktop Scraper) to move the spill to
a cool area on the cooktop.
b. Remove the spill with
paper towels.
[] Any remaining spillover should be left
until the surface of the cooktop has
cooled.
[] Don't use the surface units again until
all of the residue has been completely
removed.
NOTE:If pitting or indentation in the glass
surface has already occurred, the cooktop
glass will have to be replaced.
In this case,service will be necessary.
14
To Order Parts
To order CERAMABRYTE®Ceramic Cooktop
Cleaner and the cooktop scraper, pleasecall
our toll-free number:
National Parts Center 800.626.2002
CERAMA BRYTE®
Ceramic Cooktop Cleaner.. # WX10X300
CERAMA BRYTE®
Ceramic Cooktop Scraper # WX10X0302
Kit ....................... # WB64X5027
(Kit includes cream and razor scraper)
CERAMA BRYTE®Cleaning Pads for
Ceramic Cooktops ......... #W×!0×350

Installation
i structi GasDowndroft
Cooktop
_ If you have questions, call 800.GE.CARES (800.432.2737} or visit our Website at: GEAppliances.com
IN THECOHHONWEALTH OF MASSACHUSETTS:
• This product must be installed by a licensed plumber
or gas fitter.
•When using ball-type gas shut-off valves, they shall be
the T-handle type.
•A flexible gas connector, when used, must not exceed
3 feet.
BEFORE YOU BEGIN
Read these instructions completely and carefully.
•IMPORTANT - savetheseinstructionsforlocal
inspector's use.
•IMPORTANT - Observeallgoverning codes
and ordinances.
° Note to Installer - Be sure to leave these instructions
with the Consumer.
• Note to Consumer - Keep these instructions for future
reference.
° Unless very knowledgeable in the installation of this
product, engage a professional installer.
• Proper installation isthe responsibility of the installer.
• Product failure due to improper installation isnot
covered under the Warranty.
FOR YOUR SAFETY
If You SmellGas:
1.Open windows.
2.Don't touch any electrical switches.
3.Extinguish any open flame.
4.Immediately call your gas supplier.
Do not store or usegasoline or other flammable vapors
and liquids in the vicinity of this or any other appliance.
WARNING - Beforebeginning the installation,
switch power off at the servicepanel and lockthe service
disconnecting means to prevent power from being
switched on accidentally.When the servicedisconnecting
means cannot be locked,securelyfasten a prominent
warning device,such as a tag, to the servicepanel.
IMPORTANT SAFETY INSTRUCTIONS
ThecooktophasbeendesigncertifiedbyUnderwriters
Laboratories(UL).Aswith anyapplianceusinggasand
generatingheat,therearecertainsafetyprecautionsyou
shouldfollow.You'llfindtheseprecautionsinthe Important
SafetyInformationsectioninthefront ofthisOwner'sManual.
Readthemcarefully.
, Besureyourcooktopisinstalledproperlybyaqualified
installeror servicetechnician.
• Thecooktop must be electrically grounded in accordance
with localcodes,or intheir absence,with the National
ElectricalCodeANSI/NFPANo.70 - Latest Edition.
• Installation of this cooktop must conform with local codes,
or in the absence of local codes,with the National FuelGas
CodeANSIZ223.1/NFPA54 - Latest Edition.
• Improper installation,adjustment, alteration, serviceor
maintenance can cause injuryor property damage. Refer
to this manual. Forassistanceor additional information,
consult a qualified installer,serviceagency, manufacturer
(dealer)or the gas supplier.
• Disconnectelectricalsupply before servicing.
• Never reuseold flexibleconnectors.The useof old flexible
connectors can cause gas leaksand personal injury.Always
useNEWflexibleconnectors when installinga gasappliance.
° Makesure the wall coveringsaround the cooktop can
withstand heat generated bythe cooktop up to 200°F.
• Avoid placing cabinets abovethe cooktop.
• If cabinets are placed abovethe cooktop, allow a minimum
clearance of SO"between the cooking surface and the
bottom of unprotected cabinets.
• If cabinets are placed abovethe cooktop, usecabinets no
more than _tS"deep.
° If a 30" clearance between cooking surface and overhead
combustible material or metal cabinets cannot be
maintained, protect the undersideof the cabinets above
the cooktop with not lessthan 1/4" insulating millboard or
gypsum board at least 3/16" thick covered with 28 gauge
sheet steelor 0.020"thick copper.
° Clearancebetween the cooking surface and protected
cabinets HUSTNEVERBELESSTHAN24" Thevertical
distancefrom the plane of the cooking surfaceto the
bottom of adjacent overhead cabinets extending closer
than 1"to the plane of the cooktop sidesmust not be less
than 18".
15

Installation Instructions
UNPACKING YOUR COOKTOP
PARTS INCLUDED (PACKED BELOW THE COOKTOPI
, Blower assembly , Vent grille gasket , Burner cops
, Blower plenum , Cleaning cream (1 small, 2 medium, 1 large)
, (4) Nuts (10-32 keps- nuts with , Scrub sponge or scraper , Gas pressure regulator &
lock washers attached) (on some models) LP Conversion Instructions
, (9) Sheet metal screws , Burner grates , Attached 120-volt grounded
(8-18 x 3/8") , Burner heads plug cord
, Foam gasket tope (9-ft. roll) (1 small (A),2 medium (B), , Reflective tape
, Vent grille 1 large (C))
, Vent filter
Check to be sure that all packing materials
and tape have been removed. This will include
tape on control knobs (if applicable), adhesive
tape, wire ties, cardboard and protective
plastic. Failure to remove these materials could
result in damage to the appliance once the
appliance has been turned on and surfaces
have heated. Reflective Tope Cleaning Cream Sheet Metal Screws (9)
(8-18 x 3/8"1
Burner Grate (2)
A CAUTION:
GLASS IS FRAGILE
DO NOT BUMP EDGE
OF GLASS DURING
INSTALLATION
Scrub Sponge /_" __
Regulator Vent Grille /DoCNAUTTILIFNT
Burner Caps and Burner Heads ,_ fRqM "/E KL
m_/ ",_ _ /© BUMP GLASS
..rnerHead
Burner Cap and Burner Head
Blower Assembly and (4)
Mounting Nuts (10-32 keps - nuts
with lock washers attached) Foam Gasket Tape Vent Grille Gasket
16 Blower Plenum Vent Filter

Installation Instructions
PREPARATION
TOOLSAND MATERIALS
YOUWILL NEED
• Saw
° Ducttape
° Measuring tape or scale
° Carpenter'ssquare
° Adjustablewrench or socket set (7/16" socket and
ratchet)
° Drilland drill bit
• 1/4" nutdriver
° Sheetmetalscrews
° Pipewrench
• Manual gas line shut-offvalve
° Pipejoint sealant that resistsaction of LPgas
• Ductwork to suit the installation
For rigid connection:
• Shut-off valve
•Union
• Pipefittings asrequired
For fle×ible connection where local codes permit:
° Flexiblemetal tubing (same3/4"or 1/2" I.D.as gassupply
line)
HIGH ALTITUDE ORIFICE CONVERSION KIT
Usefor cooktop operation at elevationsabove 5000 ft.
(1500m).
Specifykit for Natural Gasor LPGaswhen ordering:
Natural GasHighAltitude
OrificeConversionKit ......................... WB28X10114
LPHighAltitude Orifice ConversionKit........ WB28X10115
Toorder,pleasecall our toll-free number:
National Parts Center ............ 800.626,2002
30" COOKTOP (DIMENSIONS FOR REFERENCE ONLY)
Unit shown fully assembled,
22_d'
_(22gAd 'SS)_,'-
_20½" _i
29_"
-,t (30" SS) _1I
l'
Unit must be vented to the outside!
17

Installation Instructions
CABINET PREPARATION
[] PREPARING FOR INSTALLATION
Positioning the cooktop
Thecooktop isdesignedto look best when centered ina
cabinet at least 30"wide.
Theexhaust vent beneath the cooktop must be located
between wall studs or floor joists sothat the ductwork may
be installed properly.
13"max:--__1]- ]_11
depth of "_ r II
unprotected -/[
overhead
cabinets 30" min. clearance
from countertop
to unprotected
" overhead surface
18" min. height
from countertop to
nearest cabinet on
either side of the unit
B" min. clearance
from cutout to
side walls
Thedowndraft systemwith blower, motor and ductwork
will occupy the cabinet belowthe cooktop. Drawerscannot
be installed below this cooktop.
Avoid placing cabinets abovethe cooktop unit, if possible,
in order to reducethe hazardscaused by reaching over
heated surface units.
Ifthe cabinetry is usedabovethe cooktop, allow a
minimum 30" clearance between the cooking surfaceand
the bottom of the unprotected cabinet.
Ifthe clearance between the cooktop and the cabinetry
islessthan 30",the cabinet bottom must be protected
with a flame retardant millboard at least 1/4"thick, or
gypsum board at least 3/16" thick, covered with 28 gauge
sheet steel or 0.020"thick copper. Clearance between the
cooktop and the protected cabinetry MUSTNEVERBELESS
THAN24",
EXCEPTION:Installationof a listed microwave oven or
cooking appliance overthe cooktop shallconform to the
installation instructions packed with that appliance.
Working areasadjacent to the cooktop should have an
18" minimum clearance between the countertop and the
bottom of the cabinet. Ifthe clearance islessthan 18",the
adjacent cabinets should be at least 5" from the sideedge
of the cooktop.
PREPARING THE BASE CABINET
This cooktop is designed to fit easily into a variety
of cabinets. However, the combined installation of
a downdraft vent and a cooktop require careful
consideration.
Some cabinets may require modifications.
This installation requires a 24" min. deep cabinet
base. The cabinet must be at least 30" wide.
Preparing a cabinet that is against a wall
In some cabinets, the sides may need to be
1
scooped or cut down 5¾" as shown, and the corner
braces removed in order to accommodate the unit.
In 75 cm and 90 cm frameless European cabinets,
the back panel may need to be cut down 5sA"to
accommodate the unit.
Preparing a peninsula or island-type cabinet
In a peninsula or island type cabinet, the sides may
need to be scooped or cut down, and the corner
braces removed in order to accommodate the unit.
5¾"
Approx.
5¾" Approx.
for European
cabinets
18

Installation Instructions
CABINET PREPARATIONCUTOUTS
171PREPARING THE COUNTERTOP
The countertop must have a deep flat surface
to accommodate the cooktop and the vent.
Countertops with a rolled front edge and
backsplash may not provide the flat surface
area required.
25" min. flat surface area required
Clearance between inside front of cabinet and
rear of countertop cutout must be 20%" in order to
accommodate cooktop depth.
2_" min. rain.
A 1/2" wide flat area is required around the edge
of opening for support of the unit. Thecooktop
unit must be level and sit squarely into countertop
opening.
Carefully cut countertop opening according to the
dimensions shown in the illustration. Be sure that
opening is cut squarely, with sides parallel to each
other and rear exactly perpendicular to sides.
20%"
!_" min.
For island installation, maintain 1 7/8" minimum
from cutout to front edge; 2 3/8" minimum from
cutout to back edge; and 5" minimum from cutout
to side edges of countertop.
r_ PREPARING FOR DUCTWORK
NOTE:Ductwork MUSTbe vented to outside.
DO NOTvent into a wall, ceiling, crawlspace, attic or any
concealed space.
Cut hole incabinet wall or floor asappropriate for your
installation.Make sure exhaustduct islocated between wall
studs or floorjoists.
NOTE:When cutting or drilling into wall or ceiling, do
not damage electrical wiring and other hidden utilities.
Make sure that any opening/cutout in the wall behind the
appliance and in the floor under the appliance are sealed
properly.
!8_"
RearWall Venting Downward Venting
19
[] BLOWERTO DUCTWORKALIGNMENT
Ingeneral,the useof flexible ducting isdiscouraged because
it can cause severelyrestricted airflow. However, ifthe
blower outlet and the floor or wall duct location do NOTalign
well,then flexible IVIETALducting can be usedto adapt to an
offset.Good alignment without useof flexibleducting isbest.
NOTE:
• Donot exceedthe maximum recommended offset of 6".
• Donot allow the flexible ducting to kink or collapse.
• Dostretch the flexible ducting as much aspossibleto
eliminate asmuch of the corrugation as possible.
i , _ 6"Max. _ j
centt:rline_'_d/_ ,_
Bottom Venting Back Venting
(Requires 3½" x 10")
A 3_" x !0" rectangle to 6" round transition duct isavailable
at your localbuilding supply store.
NOTE:Illustrations are for planning purposes only.

Installation Instructions
DUCTWORK CALCULATIONS
Calculate Total Equivalent Ductwork Length
Equivalent Number Equivalent
Duct Pieces Length* x Used - Length
(_ 6" round
straight 1ft. x ( )t= ft.
3VY'x 10"
straight 1ft. x ( )t= ft.
(_ 6", 90°
elbow 15ft. x ( )= ft.
6", 45°
elbow 9 ft. x ( )= ft.
24" max.
flexible
metal offset
adapter 34 ft. x ( )- ft.
3VY'x I0"
90° elbow 16ft. x ( )= ft.
(_ 3¼" x 10"
45° elbow 5 ft. x ( )= ft.
3¼" x i0"
90°flat elbow 18ft. x ( )= ft.
[_ 6" round
to 3¼" x 10"
transition 7ft. x ( )- ft.
Subtotal Column 1- ft.
*Equivalent lengths of duct pieces are based on actual
tests and reflect requirements for good venting
performance with any downdraft cooktop.
TlVleasureand list feet of straight duct used. Count and
list the quantity of all other duct pieces for the "Number
Used" of each type.
IMPORTANT:
Formaximum efficiency, use the shortest and straightest
duct run possible, with as few fittings as possible.
For satisfactory performance, the duct run should not
exceed 100 feet equivalent length.
Venting performance isimproved by using larger
diameter duct.
20
Duct Pieces
%
6" round
to 3¼" x 10"
transition
90° elbow
3¼" x 10"
to 6" round
transition
3¼" x 10"
to 6" round
transition
90° elbow
6" round
wall cap
with damper
Equivalent Number
Length* x Used =
20 ft. x ( )=
Sft. x ( 1=
12 ft. x ( 1=
Equivalent
Length
ft.
ft.
ft.
21ft. x ( 1- ft.
3½" x i0"
wall cap
with damper 27 ft. x ( )- ft.
6" round
roof cap 20 ft. x ( )- ft.
6" round
roof vent 24 ft. x ( l-
Subtotal Column 2-
Subtotal Column 1-
TOTAL DU CTWORK =
ft.
ft.
ft.
ft.
Should not exceed 100 feet.
DO NOT use flexible plastic ducting.
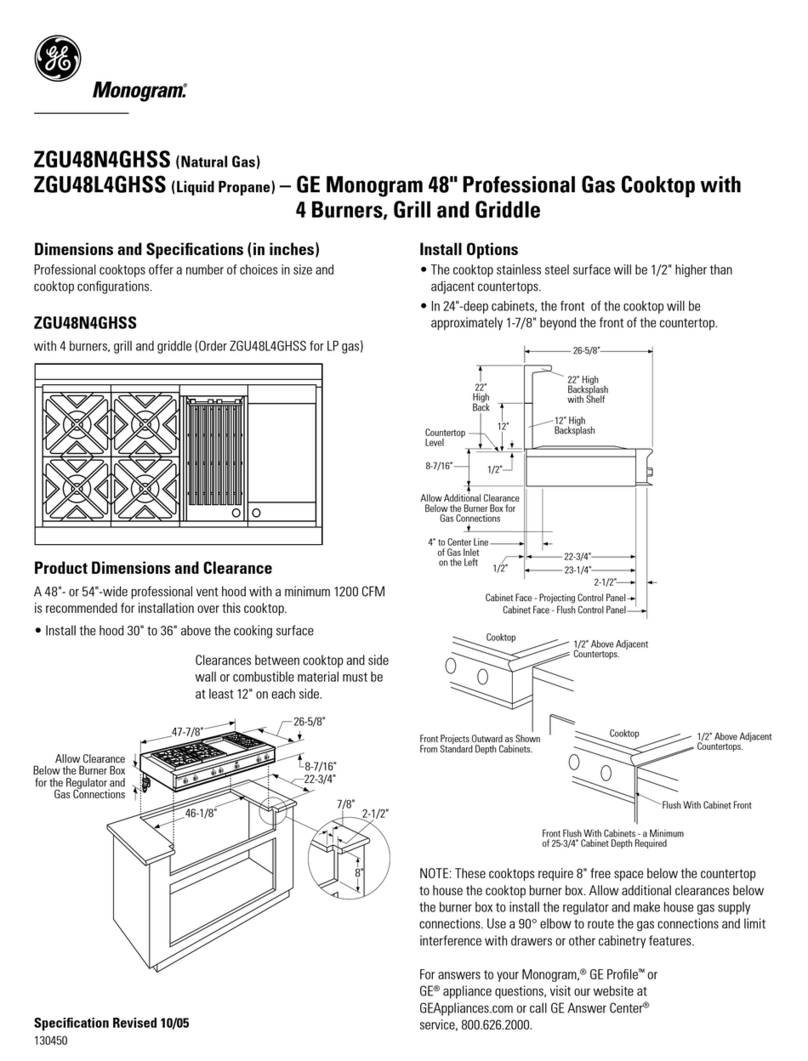
Vent installation should not exceed 100 feet
equivalent length.
This manual suits for next models
2
Table of contents
Languages:
Other GE Cooktop manuals

GE
GE JP256WM2WW Operating instructions

GE
GE JGP990 Original instructions

GE
GE Monogram ZGU384LSMSS Manual

GE
GE JGP945SEKSS - 30" Sealed Burner Gas Cooktop Manual

GE
GE JGP18 Training manual

GE
GE PGP990 Original instructions

GE
GE Monogram ZGU48N4G User manual

GE
GE PGP943SETSS Manual

GE
GE 169214 User manual

GE
GE JP256 Operating instructions

GE
GE Profile PP950 User manual

GE
GE GE Profile JP968BC User manual

GE
GE Profile JP340 User manual

GE
GE JGBP28SETSS Original instructions

GE
GE JP202 Original instructions

GE
GE JP330L User manual

GE
GE Monogram ZHU30RBM Manual

GE
GE Profile PP912 User manual

GE
GE Monogram ZEU30 User manual

GE
GE Monogram ZGU385LSMSS Manual