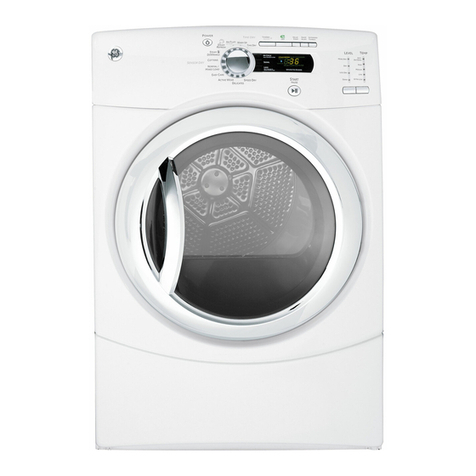
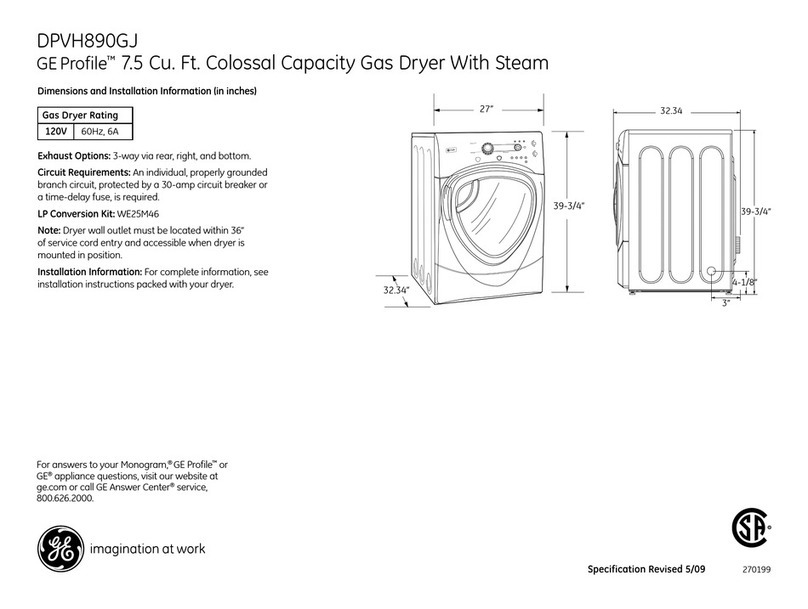
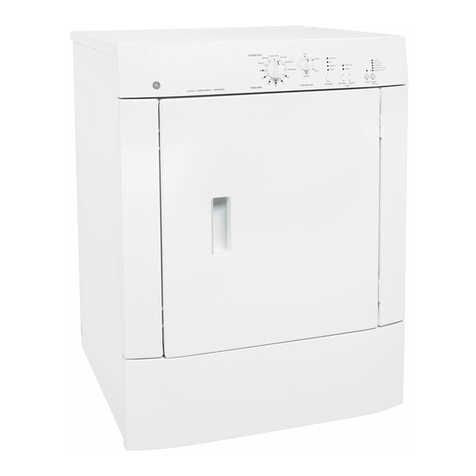
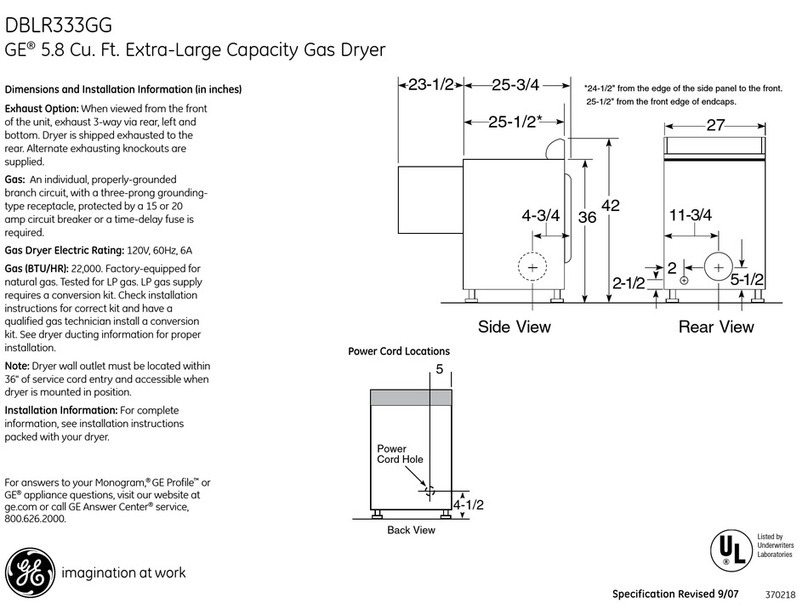
GE 475 User manual

GEAppliances
Owner'sManual
Manuel d'utilisation
Manual del propietario
Type473
Type475
English section begins on page 2
La section franqaise commence a la page 16
La seccion en espa_ol empieza en la pagina 30
Part No. 175D1807P274Pub.No.49-90007 5-99JR
500A277P022Rev.1

m
w
w
m
w
m_
w
w
,wm_
m_
W
m.
w
SafetyInformation s-5
Operating Instructions
Controls .................... 6
Features................... 7 8
ReversingTheDoor........... 9
LoadingandUsingTheDryer.. 10
VentingTheDryer........... 11
Troubleshooting tips
BeforeYouCallForService.. 72,13
Customer Service
Warranty.................. 74
ServiceTelephone
Numbers............ BackCover
Congratulations!
YouAre Now Partof theGEFamily.
Welcome to the GE fmnily. We're proud of our quality pro(tuct_s and we are committed
to providing dependable service. You'll see it in this eas?_to-use Owner's Manual and
you'll hear it in the fiiendly voices of our customer service deparunent.
Best of all, you'll experience these values each time you use your dpyer. That's
important, because your new (tuer willbe part of your fmnily for ma W years. And we
hope you will be part of ours for a long time to come.
We thankyou for buying GE. We appreciate your purchase, and hope you will continue
to rely on us whenever you need quality appliances for your home.
GE& You,A ServicePartnership.
IMPORTANT!
Staple sales slip or cancelled check here.
Proof of the original purchase date is needed to obtain service
under the wan'anty.
FORYOURRECORDS
Write the model and serial numbers here:
#
#
They are on the label on the front of the (hyer behind the (toot'.
READTHISMANUAL
Inside you _411find many helpfitl hin_s on how to use and maintain
your (tuer properly.Just a little preventive care on your part can sm_e
you a _'eat deal of time and money over the life of your (tuer.
PROPERVENTING
For the best &bqng perforntance the &b_r needs to be properly
vented. The duer xdll use more energy and mn longer if it is not
vented to tile specifications outlined in the Ventingthe Dryersection in
this manual and tim Exhaustingsection in tim Installation Instructions.
IFYOUNEEDSERVICE
You'll find ma W answers to common problems in the Before You
CallForServicesection. If you review our chart of TroubleshootingTips
first, you may not need to call for service at all.
If you do need service, you can relax knowing help is only a phone
call a_vty. A list of toll-flee customer service numbers is included in
the back section. Or, in the O.$.,you can always call the GE Answer
Center ®at 800.626.2000, 24 hours a day, 7 days a week. In Canada,
call 1-800-361-3400.
2

IMPORTANTSAFETYINFORMATION.
READALL INSTRUCTIONSBEFOREUSING.
tL WARNING!
Foryour safety, the information in this manual must be followed to minimize the risk of fire
or explosion, electric shock, or toprevent property damage, personal in.jury,or death.
[] Do net store or use gasoline or other
flammable vapors and liquids in the
vicinity of this or any other appliance.
[] Installation and service must be performed
by a qualified installer, service agency or
the gas supplier.
WHATTODOIF YOUSMELLGAS:
_Do not try to light amatch, or cigarette, or
turn on any gas or electrical appliance.
_Do not touch any electrical switch; do net
use any phone in your building.
Clear the room, building or area of all
occupants.
_lmmediately call your gas supplier from a
neighbor's phone. Follow the gas
supplier's instructions carefully.
_ff you cannot reach your gas supplier, call
the fire department.
California Safe Drinking Water and ToxicEnforcement Act
This act requires the governor of California to publish a list of substances kno_,_ to the state to cause cancer,
birth defects or other reproductive harm and requires businesses to warn customers of potential exposure
to such substances.
Gas appliances can cause minor exposure to %ur of these substances, nmnely benzene, carbon monoxide,
formaMehyde and soot, caused primarily by the incomplete combustion of natural gas or LP fuels.
Properly adjusted (hyers will minimize incomplete combusuon. Exposure to these substances can be
minimized fllrther by properly venting the (hyer to the outdoors.
PROPERINSTALLATION
This dryer must be properly installed and located in accordance with the Installation Instructions
before it is used. If you did not receive an Installation Instructions sheet, you can receive one by
calling us toll-free at the GEAnswer Cente/_, 800.626.2000.
[] Properly ground (hyer to confbrm with all
governing codes and ordinances. Follow details in
Installation Instructions.
[] Install or store where it will not be exposed to
temperatures below freezing or exposed to the
weather.
[] Connect to a properly rated, protected and sized
power supply circuit to re<lid electrical overload.
[] Remove all shmp packing items and dispose of all
shipping materials properly.
Exhaust/Ducting:
[-_ Gas (hyers MUSTbe exhausted to the outside.
[_Exhausting electric diTers to the outside is
stronglyrecommendedto prevent large amounts
of moisture and lint from being blown into the
FOO1TI.
[_Use only rind metal or flexible metal 4"
diameter (lnctwork inside the (hyer cabinet or
for exhausting m the outside. USE OFPLASTIC
OROTHERCOMBUSTIBLEDUCTWORKCAN
CAUSEA FIRE.PUNCTUREDDUCTWORKCAN
CAUSEA FIREIFIT COLLAPSESORBECOMES
OTHERWISERESTRICTEDIN USEORDURING
iNSTALLATiON.
For complete details, follow the Installation 3
Instructions.

IMPORTANTSAFETYINFORMATION.
READALL INSTRUCTIONSBEFOREUSING.
WARNING!
YOURLAUNDRYAREA
Keep the area underneath and around your
appliances fi'ee of combustible materials (lint,
paper, rags, etc.), gasoline, chemicals, and other
flamlnable vapors and liquids.
•Keep all lmmdty aids (such as detergents,
bleaches, etc.) out of the reach of children,
preferably in a locked cabinet. Obsexve all
warnings on container labels to avoid inju U.
•Keep the floor around your appliances clean and •Never climb on or stand on the (hyer top.
cityto re&me the possibility of slipping.
•Close supervision is necessa,y if this appliance is
used by or near children. Do not allow children to
play on, xdth, or inside this or any_other appliance.
WHENUSINGYOURDRYER
Never reach into die (hyer while die drum is
lnoving. Before loading, unloading or adding
clothes, wait until the dram has COlnpletely
stopped.
•The lmmchy process can reduce die flame
retardanQ_ of fabrics. To avoid such a result,
carefiflly follow the gammnt manuf_mmrer's
care instructions.
Clean the lint filter before each load to prevent
lint accumulation inside the duer or in the room.
DONOTOPERATETHEDRYERWITHOUTTHELINT
FILTERIN PLACE.
•Do not wash or cityarticles fllat have been
cleaned in, washed in, soaked in, or spotted
with combustible or explosive substances (such as
wax, oil, paint, gasoline, de_'easers, (h?:cleaning
solvent.s, kerosene, etc.) which mW ignite or
explode. Do not acid these substances to the
wash water. Do not use or place these substances
around your washer or (hyer during operation.
•Do not place items exposed to cooking oils in
your (hyer. Itelns contaminated,_4th cooking oils
inW contribute to a chelnical reaction that could
cruise a clothes load to catch fire.
•AW article on which you have used a cleaning
solvent or that contains flamlnable materials
(such as cleaning cloths, mops, towels used in
bern W salons, restaurants, or barber shops, etc.)
lnUSt not be placed in or near the duer until
solvent.s or flammable materials have been
removed. There are ma W highly flammable
items used in homes such as acetone, denatured
alcohol, gasoline, kerosene, seine household
cleaners, some spot removers, tmpentines,
waxes, wax removers and pro&rots containing
petroleum distillates.
•Do not dpyarticles containing rubber, plastic,
foam, or similar materials such as padded bras,
tennis shoes, galoshes, bath mats, rugs, bibs, baby
pant_s,plastic bags, pillows, etc., that In W melt or
burn. Some robber materials, when heated, can
under certain circumstances pro&me fire by
spontaneous combustion.
•Do not store plastic, paper or clothing that may
bum or melt on top of the duer duting operation.
•Garments labeled DryAway fromHeater Do
Not Tumble Dry (such as life jackets containing
Kapok) lnUStnot be put in your (hyer.
•Do not cityfiberglass articles in your (hyer.
Skin irritation could result ffOln the relnaining
particles that may be picked up by clothing
chuing subsequent duer uses.
•To minimize tim possibility of electric shock,
unplug this appliance fi'oln the power supply
or disconnect tim (hTer at the household
distribution panel by removing the filse or
switching off tim circuit breaker before
attempting any maintenance or cleaning
(except tim removal and cleaning of tim lint
filter). NOTE:Turning tim Cycle Selector knob
to an OFFposition does NOTdisconnect the
appliance fi'Oln the power supply.
4

Never attempt to operate this appliance if it is
damaged, malfimctioning, partially
disassembled, or has missing or broken parks,
including a damaged cord or plug.
The interior of tim machine and the exhaust duct
connection inside the &yer shouM be cleaned at
least once a year by a qualified technician. See the
Loadingand Usingthe Dryersection.
Ifyours is a gas (hyer, it is equipped with an
automatic electric ignition and does not have a
pilot light. DONOTATTEMPTTOLIGHTWITHA
MATCH.Burns may result fi'om having your hand
in the vicinib_ of the burner when the automatic
ignition rams on.
• You may wish to soften your laundered f>lbrics
or re&me the static electrici b, in theln by using
a due>applied f>tbricsoftener or an anti-static
conditioner. We recommend you use either a
f>tbricsoftener in the wash cycle, according to
the manufacturer's instructions for those
pro(hm_s, or uy a due>added product for
which the manufacturer gives written assurance
on the package that their product can be safely
used in your duer. Sets@e or perfbmlance
problems caused by use of these pro(hints are
the responsibility of the manuf_mmrers of those
produc_s and are not covered under the wan'anty
m this appliance.
WHENNOTUSINGYOURDRYER
• Grasp file plug firefly when disconnecting this
appliance to avoid dmnage to the cord while
pulling. Place the cord away fi'om traffic areas so
it,_411not be stepped on, tripped over or
subjected to damage.
• Befbre discarding a dxyer, or relnoving it ffOln
sexvice, remove the dxyer door to prevent
chiMren fi'Oln hiding inside.
• Do not tamper,_ith controls.
Do not attempt to repair or replace any part of
this appliance or attempt aW sel_:idng unless
spedfically recommended in this Ox.mer's Manual
or in published user-repair instructions that }<)u
understand and have the skills to cany out.
ReadandfollowthisSafetyInformationcarefully
SAVETHESEINSTRUCTIONS
5

Aboutthe dryercontrolpanel
Youcan Iocate your model number on the label on the front of the dryer behind the door.
Throughout this manual, features and appearance may vary from your model.
START FABRICCARE
START COTTONS EASYCARE OFF SET
O Q
DELICATES NOHEAT
LOWHEAT
EXTRACARE SIGNAL
MEDIUM
OFF LOUD
Q
iSensorDry
I
El ',
!
Optional Feature,
on some models
COTTONS EASYCARE
AUTOMATIC AUTOMATIC
!PERMPRESS/DELICATES
• MOREDRY _
EXTRA__CARE_ LESSDRY
LESSDRY 5COOLDOWN
MOREDR"IIII II" TIMEDDRY
•ulJ.oo,°
DEWRINKLE 2_0 70
DAMP DRY 30 40 S0
Control Settings
IMPORT/INK" Clean the lint filter each time you use the dryer.
I'm Fabric Care
COTTONSForregulartoheavycottons.
REG.HEAT
EASYCAREForsynthetics,blends,delicatesanditemslabeledpermanentpress.
MED.HEAT
FLUFFForfluffingitemswithoutheat.UsetheTIMEDDRgcycle,
NOHEAT
EASYCAREFordelicates,syntheticsanditemslabeledtumbledrylow.
DELICATES
LOWHEAT
El Drying Cycles-Automatic cycles automatically determine fabric duness. Select MOREDRgfbr hemmer
f:abrics, LESS DRgfbr lighter f:abfics. Timed q:cles mn fbr the selected ume.
COTTONS Forcottonsandmostlinens.FormostloadsselectthePreferredRegularSettingmarkedwithan :_.
AUTOMATIC
EASYCARE Forsyntheticblendsanddelicates.
AUTOMATIC
PERMPRESS/
DEUCATES
TIMEDDRY SettheCycleSelectoratthedesireddryingtime.
DAMPDRY Forleavingitemspartiallydry.
DEWRINRLEForremovingwrinklesfromitemsthatarecleananddryorthatareverylightlydamp.
lrl Start- (;lose the duet door. Select START Opening tl_edoor during operauon will stop tl_e duet. To
restart the (hTer, close the door and select sraRrto complete the QTcle.
6
NOTE:
Drying times will vary according to the type of heat used (Electric, Natural or LP gas), size of
load, types of fabrics, wetness of clothes and condition of exhaust ducts.

About your dryerfeatures.
Color Logic
Select the correct FABRICCAREsetting.
Match the particular color below the words
with the same color on the Cycle Dial.
Example:Dryinga load of clothinglabeled
permanentpress.
[-_ Choose the FABRICCAREsetfing--for
this load it would be the EASYCAREMED.
HEAT(which isa particular color).
Turn the CycleDial to the area that has
the samecolor asthe FABRICCARE
setting you have chosen-for this load it
would be the EASYCAREAUTOMATIC.
SensorDry
SensorDry (on some models)
This feature is only activated in the
automatic cycles. As the clothes ramble they touch a large
sensor. The SensorDryfeamre will stop
the heating cycle as soon as the clothes
have reached the selected duness.
Extra Care
EXTRACARE.............. Use this option to minimize the wrinkles
in clod_es. It provides approximately 15
minutes of no-heat rambling after dm
clothes are dU.
This option can only be used wid_ tt_e
Automatic cycles.
If you are using the ENDOFCYCLESIGNAL
and you select the EXTRACAREopOon, a
signal xdll sound at the end of the (h)dng
time and several umes during the EXTRA
CARE(.Tcle.This will remind you tidal it is
time to remove tt_e clodms.
7

Aboutyour dryerfeatures.
SIGNAL
MEDIUM
OFF LOUD
End of Cycle Signal (on some models)
This signal _ill sound just befbre dm end of
the cycle to remind you to remove the clothes.
The signal sound level can be adjusted.
If you selected the EXTRACAREoption the
signal will sound at the end of the (hying
time and will sound several times during
the EXTRACAREcycle. This will remind you
that it is time to remove the clothes.
NOTE:
•Removegarmentspromptlyat thesound
ofthesignal Placeclothesonhangers
so wrinkles won't set in.
•Use the END OF CYCLE SIGNAL especially
when drying fabrics like polyester knits
and permanent press. These fabrics should
be removed so wrinkles won't set in.
Drum Lamp
Before replacing the light bulb, be sure to
unplug the &yer power cord or disconnect
the (hyer at the household distribution panel
by removing the filse or switching off the
circuit breaker. Reach above duer opening
from inside the dram. Remove the bulb and
replace with the same size bulb.
Drying Rack
A handy (hying rack may be used fbr (lp)_ng
articles such as stuffed tWs, pillows or
washable sweaters.
Hook the rack over the lint filter so the rack
extends into the (hyer drum.
NOTE:
•The (hying rack must be used with the
TIMEDCYCLE.
•Do not use this (hying rack when there are
other clothes in the (hyer.
8

About reversing the door.
[] Need/e-nosed
priers
[--_Open the door and remove tt_e filler plugs opposite the hinges. With d_e door
completely open, remove the bottom screw from each hinge on the (h)Terf:ace. Insert
these screws about halfway into the TOPholes, for each hinge, on the opposite side
(where you removed the filler plugs). Apply firm pressure to get the screw started in
untapped holes.
[_Loosen top screw from each hinge on d_e (hTer f:acehalfway. Witt_ one hand holding
the top of the door and the other hand holding the bottom, remove the door from the
(h)Ter1)77lifting it UPand OUT.
[_Romte the door 180% Insert it on tt_e opposite side oldie opening by moving tt_e door
I/Vand DOWN until the top hinge and the bottom hinge are resting on the top screws
inserted in step 1.
; ¸2¸¸)¸¸¸¸¸¸
_iii_i_!!iii__i_!i_ i!iiii_!iili!i_i!iii_i!iii_i__
[_Remove d_e remaining screws from the side of tt_e opening from which tt_edoor was
removed. Witt_ tt_ese screws secure each hinge at d_e bottom. Tighten d_e t_,,'otop
screws of each hinge. Reinsert the plastic plugs on tt_eside from which the door was
removed.
9

Loadingandusingthe dryer.
Always foflow the fabric manufacturer's care label when laundering.
SortingandLoadingHints
As a general rule, if clothes are sorted properly fbr the washer, they are sorted properly fbr the (hyer.
Donotaddfabricsoftenersheetsoncetheloadhasbecomewarm.Theymaycausefabricsoftenerstains.
Bounce._'FabricConditionerDryerSheetshavebeenapprovedforuseinaftGEDryerswhenusedinaccordancewiththe
manufacturer_instructions.
Donotoverload. Thiswastesenergyandcauseswrinkling.
Donotdotthefollowing items:fiberglassitems,woolens,rubber-coateditems,plastics,itemswithplastictrimand
foam-filleditems.
CareandCleaningof theDryer
TheExterior:Wipe or dust any spills or washing
compounds with a damp cloth. Duer control
panel and finishes may be damaged by soule
laund Upretreatment soil and stain relnover
products. Apply these products awW fl'Oln the
duer. The fabric in W then be washed and dried
normally. Damage to your duer caused by these
products is not covered by your warranty.
The Lint Filter: Clean tim lint filter before each
use. Moisten your fingers and reach into the filter
opening. Run your fingers across the filter, Have a
qualified technician vacumn the lint fi'om the dpyer
once a year.
The Exhaust DucL"Inspect and clean tim exhaust
ducting at least once ayear to prevent clogging. A
partially clogged exhaust can lengthen tim dp)ing
time.
Follow these steps.
F-_ Turn offelectrical supply by disconnecting the
plug fi'om the wall socket.
[_Disconnect the duct fi'om tim dryer.
E_Vacuum the duct _4th the hose attachment and
reconnect the duct.
TheExhaustHood:Check xdfll a milTor that tim inside
flaps of the hood move freely when operating. Make
sure that there isnot xdldlife (birds, insects, etc.)
nesting inside the duct or hood.
FabricCareLabels
Below are ri0)tic care label "s)lnbols" fllat affect file clothing you _ill be laundering.
WASH LABELS
wash __ __
cycle Normal Pelmanent Press/ Genteel/ an was Do not wash Do not wri_g
wHnk_e resistant delicate h
Water • • • • •
temperature Hot w_m
(50°C/120°F) (40°C/105°F) Cold/cool
(30°C/85°F)
BLEACH LABELS
Bleach A//}X
symbols i_'J._gdl O,,,y,,_oh_or_,_<,_e_,ohDono_b,e_,oh
(when needed)
DRYLABELS
wrinkle resistant delicate do not wash)
.eat ® ® @
setting High Medium Low No heat/ak
Une dry/ Drip dry Dry fiat In the shade
hang to ary
/O

Ventingthedryer.
For the best (hTing per%rmance the &Tar needs to be properly vented. The dryer will use more energy
andrunlongerif it isnot vented tothebelow specifications. Carefullyfollow thedetailson Exhaustingin the
Installationinstructions.
[] Use only rigid metal or flexible metal 4" diameter
ductwork inside the duer cabinet or for exhausung
to the outside.
[] Do not use plastic or other combustible ductwork.
[] Use the shortest length possible.
[] Do not crush or collapse.
[] Avoid resting the duct on sharp objects.
[] Ventingmustconform tolocalbuildingcodes.
Correct
Venting
Incorrect
Venting
i
11

Beforeyou call forservice...
Troub/eshooting Tips
Save time and money! Review the charts on the fo//owing
pages first and you may not need to ca//for service.
Dryerdoesn'tstart
Possible Causes What ToDo
Dryer is unplugged •Make sure the (hyer plug is pushed COlnpletely into
tim outlet.
Fuse is blown/circuit breaker is •Check the house filse/circuit breaker box and
tripped replace filse or reset breaker. NOTE."Most electric
(hyers use two rises/breakers.
Dryer doesn't heat Fuse is blown/circuit breaker is •Check the house rise/circuit breaker box and
tripped, the dryer may ramble replace filse or reset breaker.
but not heat
Gas service is off •Make sure gas shutoffat (hyer and main shutoffare
filly open.
Dryer shakes or makes Some shaking/noise is normal. •Move (hyer to an even floor space, or a(ljust
noise Dryer may be sitting unevenly leveling legs as necessaly until even.
Greasyspots on clothes Improper use of fabric softener •Follow directions on fhbric softener package.
Drying dirty items with clean ones •Use your (hyer to (hy only clean items. Dirty items can
stain clean items and the (hyer.
Clothes were not completely clean •Sometimes stains which cannot be seen when the
clothes are wet appear after (hying. Use proper
washing proce(hlres before (hying.
Lint onclothes Lint filter is full •Clean lint screen before each load.
Improper sorting •Sort lint pro(hmers (like chenille) fi'Oln lint collectors
(like cor(hlroy).
Static electricity can attract lint •See suggestions in this section under STATIC.
Overloading •Separate large loads into slnaller ones.
Paper, tissue, etc., left in pockets •Elnpvy all pocke_s befbre laundering clothes.
Static occurs No fabric softener was used •Try a filbric softener.
Bounce ®Fabric Conditioner Dryer Shee_s have
been approved fbr use in all GE D_yers when used in
accordance with the manufacturer's instructions.
Overdrying •Try a filbric softener.
• Adjust controls far less (hying.
Synthetics, permanent press and •Try a filbric softener.
blends can cause static
Inconsistent drying times Type of heat • Automatic (hying times will vaxyaccording to the type
of heat used (electric, natural or LP gas), size of load,
types of f_lbrics,wemess of clothes and condition of
exhaust (hlcts.
12

Clothes take too long
todq
Possible Causes What ToDo
Improper sorting
Large loads of heavy fabrics (fike
beach towels)
Controls improperly set
Lint filter is full
Improper or obstructed ducting
•Separate hemT items fi'om lightweight items (generally,
a well-sorted washer load is a well-sorted &yer load).
•Large, heax,yfabrics contain more lnoismre and take
longer to dpy. Separate large, hem T fabrics into smaller
loads to speed (h)_ng time.
• Match control settings m the loadyou are dp)5ng.
• Clean lint filter before every load.
• Check installation instructions fiorproper
&rating/venting.
• Make sure ducting is clean, flee of kinks and
unobstructed.
• Check to see if outside wall damper operates easily.
• Check the Installation Instructions to make sure the (hyer
venting is correct.
Blown fuses or tripped circuit •Replace filses or reset circuit breakers. Since most
breaker dpyers use 2 fllses/breakers, make sure both are
operating.
Overloading/combining loads •Do not put more than one washer load in the dryer at
a time.
Underloading • If you are (hying only one or two items, add a few items to
ensure proper mlnbling.
Clothes are wrinkled Overdrying •Select a shorter (hying time.
• Remove items while they still hold a slight amount of
lnoisture.
Letting items sit in dryer after • Remove items when <Tcle ends and fold or hang
cycle ends imlnediately.
Clothes shrink Some fabrics will naturally shrink •To avoid shrinkage, fiollow gammnt care labels exactly.
when washed. Others can be • Some items may be pressed back into shape after dp)5ng.
safelywashed, but will shrink
in the dryer • If you are concerned about shrinkage in a particular item,
do not machine wash or mlnble (hy it.
13

GEDryer Warranty(Forcustomers in the United States)
Aft warranty service provided by our Factory This warranty is valid only in the United States.
Service Centers, or an authorized Customer Card _Warranty may vary in Canada. See your approved
technician. For service, call 800-GE-CARES. Profile dealer for details.
GE Will Replace:
Anypartofthe (hyer which f_lilsdue to a defe(:t in materials or worklnanship. During this full
From the date ofthe one-year warranty,GE will also provide, free of charge, all labor and in-heine sewice to replace the
originalpumhase defective part.
Any extra large or super capacity dryer drumwhich f_tilsdue m a deDct in materials or
From the date of the worklnanship. During this five-year limited warranty,you will be responsible for aW labor or
originalpurchaso in-home sewice costs.
• Service trips to your home to teach you how to use the
product.
•Improper installation.
•Failure of the product if it is abused, misused, or used for
other than the intended purpose or used commercially.
•Replacement of house fuses or resetting of circuit
breakers.
•Damage to the product caused by accident, fire, floods or
acts of God.
•Incidental or consequential damage to personal property
caused by possible defects with this appliance.
This warranty is extended to the original purchaser and any succeeding owner for products purchased for home
use within the USA. In Alaska, the warranty excludes the cost of shipping or service calls to your home.
Some states do not allow the exclusion or limitation of incidental or consequential damages. This warranty gives
you specific legal rights, and you may also have other rights which vary from state to state. Toknow what your
legal rights are, consult your local or state consumer affairs office or your state's Attorney General.
Warrantor: General Electric Company. Louisville, KY 40225
14

Notes
_m
A
w
w
m
w
15

m
w
m
m
,raa
m
Mesures de securite ,.77- 79
Directives de
fonctionnement
Tableauxdecommande .... 20
Autrescaracteristiques ,21, 22
Inversionde Ibuverture
de laporte ............. 23
Utilisationde la
secheuse .............. 24
Evacuationde la secheuse . 25
Conseils de de.pannage
Avant d'appeter
unreparateur .......... 26.27
Service a la clientele
Oarantie .............. 28
Numerosde
service.................. 29
16
Felicitations!
Desormais vous faitespattie de la famille GE.
Bienvenue dans la fmnille GE. Nous sommes tiers de la qualitd de nos produits
et de la tiabilit(_ de notre seivice apr&s-vente. Vous le constaterez dans le present
manuel, f:acile 5utiliser, et dans lavoix mnicale de notre personnel du sewice 5 la
clientele.
Mais, surtout, vous le constaterez chaque lois que vous ferez votre lessive. C'est
important, car votre nouvelle lm,euse Dra partie de votre fmnille pendant des anndes.
Et nous esp(_rons que vous Drez partie tie la n6tre pendant longtemps aussi.
Nous vous remercions de votre achat GE, et espdrons qu'a l'm,enir vous penserez fi
nous chaque fffisque vous aurez besoin d'un dlectromdnager de qualitd.
Unpartenariat de service.
IMPORTANT!
Agrafez ici votre facture ou une copie de votrecheque.
Pour bdndticier de rdparations sousgarantie, il flint fbumir une
preuve de la date d'achat d'odgine.
A CONSERVERSOIGNEUSEMENT
Transcrivezlesnumeros de modele et de serie icL
N°
N°
Vous les trouverez detr'i_re le tableau de commande.
LISEZVOTREMANUEL
Vous y trouverez de nombreux conseils pour l'utilisation et
l'entretien de votre sdcheuse. Ces quelques mesures prdventives vous
permem'ont d'dconomiser du temps et de l'argent, et, ainsi, de
prolonger lavie de votre sdcheuse.
EVACUATIONCORRECTE
Pour un meilleur rendement, la sdcheuse doit atre correctement
avacu6e. La sacheuse usera plus d'anergie et fonctionnera pendant
plus longtemps si elle n'est pas &acu6e suNant les consi_ms donndes
dans la section Evacuationdela secheuseet dans la section Evacuation
dans les Directives d'installation.
Sl VOUSAVEZBESOINDESERVICE
Vous trouverez des solutions aux probliemes courant_s que vous
pourdez rencontrer dans la section Avant d'appeler un reparateur.
Et, en consultant d'abord nos Consoils do dopannago, vous potur'ez
peut-etre dviter de faire appel fiun rdparateur.
Sivous avez besoin de sets_ice,vous savez que vous n'avez qu'fi
nous tdldphoner. Vous trouverez fi la tin (hi prdsent manuel les
numdros sans ffais (hi service fila clientble. Aux Etats-Unis,vous
pouvez appeler 24 heures parjour, 7jours par semaine au GE
Answer Center ®,800.626.2000. Au Canada,appelez le 1-800-361-3400.

MESURESDESECURITEIMPORTANTES.
LISEZD'ABORDTOUTESLESDIRECTIVES.
MISE ENGARDE!
Pour votre securite, suivez les directives fournies dans le present manuel afin de minimiser les risques
d'incendie, d'expIosion et de chocs electriques et prevenir des deg_ts materiels et des blessures graves
or mortelles.
•N'entreposez pas ou n'utilisez pas d'essence
ou autres vapeurs ou liquides inflammables
proximit# de cet appareil ou de tout autre
electrom#nager.
•L'installation et les reparations doivent Otre
effectuees par un installateur qualifie, une
entreprise de reparation ou votre fournisseur
de gaz.
SI VOUSREMARQUEZUNEODEURDEGAZ:
Ne faites fonctionner aucun appareil
electrique.
_N'actionnez aucun interrupteur; n'utilisez
aucun t#lephone dans votre edifice.
_Evacuez la piece, I'edifice ou les environs.
_Appelez immediatement votre fournisseur
de gaz en utilisant le tP,IP,phone d'un voisin.
Suivez les directives qu'il vous donnera.
_Si vous ne pouvezjoindre votre fournisseur
de gaz, appelez les pompiers.
Loi sur les produits toxiques et I'eau potable de la Califomie
En vertu de cette loi, le Gouverneur de la Califomie est tenu de publier une liste des substances reconnues par
l'F'7_tatcomme pouvant causer le cancer, des malformations congenitales ou autres problemes (Illgenre et d'obliger
les entreprises "am_ertir leurs client.s de route exposition potentielle "ade telles substances.
Les electromenagers "agaz peuvent entrainer une exposition mineure "aquatre de ces substances, en l'occurrence
le benzene, le monoxyde de carbone, le fbrmaldehyde ou la suie, attribuables pIincipalement _ala combustion
incomplete du gaz namrel ou du gaz de petrole liquefie.
Une secheuse bien reglee re(hilt au minimum les risques de combustion incomplete. Pour re&fire au minimum
l'exposition "acessubstances, f_dtesevacuer Fair de la secheuse "al'exteIieur.
UNEINSTALLATIONADEQUATE
Avant d'utiliser votre secheuse, assurez-vous qu'elle a eto adoquatement installee, conformement
aux Directives d'installation. Si vous n'avez pas requ de Directives d'installation avec votre secheuse,
appelez sans frais aux Etats-Unis au Centre de reponse GEau 800-626-2000.Au Canada appelez sans
frais au 1-800-361-3400.
•Mettez l'appareil ala telr'e confbnnement a tous
les codes et reglements en vigueur. Suivez les
Directives d'installation.
•Installez ou entreposez l'appareil dans une piece
o_ la temperature est supefieure "a0 °C. et o_ elle
sera _al'abIi des intempefies.
•Branchez l'appareil sur un circuit protege et de
capacita appropriae afin d'aviter route surcharge
electrique.
•Retirez tousles articles tranchants d'emballage et
jetez tousles matOriaux de transport.
Conduit d_vacuafion "
[--_L'air des sOcheuses "a DOITetreOvacuO"a
gaz
l'exteIieur.
[_I1 est fortement recommanded'&_acuer l'air
des secheuses electriques a 1exterieur _din
d'eviter l'accumulation d'une grande quantite
d'humidite et de charpie dans la piece. Suivez
les consignes donnees pour l'&Tacuation dans
les Directives d'installation.
[_N'utilisez qu'un conduit mOtallique figide ou
souple de 4 po de diametre _al'intOrieur de la
caIr'osserie de la secheuse ou pour l'&,acuation
vers l'exterieur. L'UTILISATIOND'UNCONDUIT
DEPLASTIQUEOUFABRIQURAVECTOUTAUTRE
MAT£RIAUCOMBUSTIBLEPEUTCAUSERUN
INCENDIE.LORSQU'UNCONDUITESTPERFOR£
OUDEVIENTOBSTRURAUCOURSDE
L'UTILISATIONOUDEL'INSTALLATION,ILPEUT
CAUSERUN INCENDIE.
Pour plus de details, suivez les Directives
d'installation. 17

MESURESDESECURITEIMPORTANTES.
LISEZD'ABORDTOUTESLESDIRECTIVES.
AMISE EN GARDE!
AUTOURDEVOTRESECHEUSE
Ne laissez pas s'accumuler autour et au-dessous
de vos dlectromdnagers des lnatdfiatLx
combustibles, comme de la charpie, du papier,
des chiffons, des pro&tit_s chimiques, etc.
Gardez le sol propre et sec "aproximitd de vos
dlectroIndnagers afin de ne pas glisser.
•Gardez tousles pro&fit.s pour la lessive (coInIne
les ddtersifs, laJavel, etc.) en dehors de la portde
des enfmlts, de prdf_3rence clans une armoire
fennde "acld. Suivez toutes les raises en garde stir
les dtiquettes pour &_iterdes blessures.
• Ne montezjamais stir le dessus de la sdcheuse.
I1fruit exercer une etroite smsTeillance lorsque
vous faites fbnctionner cet appareil en presence
d'enfants. Ne les laissez pasjouer avec l'appareil
ni inonter dessus, ou s'introduire "al'interieur
d'un vieil appareil qui ne sert plus.
18
LORSQUEVOUSUT/LISEZLASECHEUSES
• Ne vous penchezjamais clans la secheuse pendant
que le tambour toume. Avant de charger ou
dechaNer la secheuse ou d'y ajouter des
vetements, attendez que le tambour se stir
coInpl&teInent an'etC.
• Avant chaque sechage, nettoyez le fihre "achmpie
afin de prevenir l'accumulation de chmpie "a
l'interieur de la secheuse ou dans la pigece.NE
FAITESPASFONCTIONNERLAS£CHEUSESANSLE
FILTREA CHARPIE.
• I1ne fruit pas mem'e dans la secheuse, ou "a
proximite de celle-ci, tout article ayant ete utilise
avec un solvant degraissant ou contenant une
substance itfflammable (comme des chiffons de
nettoyage, des vadrouilles, des sexviettes utilisees
dans les salons de coiffilre, etc.), _amoins qu'ils ait
ere deban'asse de route trace et route vapeur de
substance flfflamInable. On utilise "ala maison de
nombreux produit_s inflammable :acetone, alcool
denatnre, essence, kerosene, nettoyants
mdnagers, detachants, terebenthine, cire,
decapants, contenant (hi distillat de petrole.
• Ne rangez pas clans votre secheuse des articles qui
ont ete en contact avec des huiles de cuisson;
ceux-ci peuvent provoquer une reaction
chimique susceptible de faire s'enflamIner vos
veteInents.
• Ne lavez pas oune faites pas secher des articles
qui ont ere laves avec des produits combustibles
ou explosifs, ou qui ont ere trempes dans ces
produits ou qui en sont tachds (cire, peinulre,
huile, essence, de_'aissant_s, solvants pour le
nettoyage "asec, kerosene, etc.) car ils fisquent de
s'enflannner ou d'exploser. Ne versez pasces
substances dans l'eau de la laveuse. N'utilisez pas
ces substances "aproximite de votre laveuse ou de
votre secheuse pendant qu'elles fbnctionnent.
La lessive peut attenuer les proprietes
ignifllgeantes des tissus. Pour eviter cette
siulation, suivez "ala lem'e les directives donnees
par le fabricant (hi veteInent.
Ne faites pas secher des articles contenant (hi
caoutchouc, du plastique, de la mousse ou autres
matefiaux similaires (coInme des soutiensgorge
prefbnnds, des chaussures de tennis, des
caoutchoucs, des tapis de bain, des carpettes, des
bavoirs, des culottes de bebe, des sacs de
plastique, des oreillers, etc.) car ces matefiaux
peuvent fondre ou br61er. De plus, clans certaines
circonstances, certains matefimlx de caoutchouc
peuvent causer tin incendie par combustion
spontanee lorsqu'ils sont chmlffk3s.
Ne rangez pas des articles qui peuvent fondre ou
brOler, comIne du plastique, papier, ou des
vetements stir le dessus de la secheuse pendant
qu'elle fbnctionne.
Les vetement_s portant la mention <<Fairesecher
loin de la chaleur,, ou <<Nefaites pas secher par
culbutage,, (comme les gilet_sde sauvetage
contenant du kapok) no doivent pas Otresechos
clans votre secheuse.
Ne faites pas secher d'articles en fibre de verre
clans votre secheuse. Les particules qui restent
dans la secheuse et qui pourraient etre recueillies
par les vetements lors d'un sechage subsequent
risquent de cruiser des irritations cutanees.
Pour reduire les risques de chocs electriques,
debranchez mujours l'appareil ou debranchez la
secheuse au panneau de distribution en enlevant
le fllsible ou declenchant le disjoncteur avant de
le reparer ou de le nettoyer (saufpour enlever et
nettoyer le fihre _ charpie). REMARQUE:Lefair de
placer le selecteur de pro_'amme a une position
d'ARR[-Tnecoupe PASl'alimentation electrique
de l'appareil.

•Ne filites pas fonctionner l'appareil s'il est
endolnlnagO, dOfecmeux, partiellelnent
damontO, ou si des pieces sont manquantes ou
&3fecmeuses, ou si le cordon d'alimentation ou la
fiche sont endommag4s.
• L'intdrieur de l'appareil et le raccord du conduit
d'&_acuation Al'int_3fieur de la s_3cheuse doivent
etre nettwds une lois par an par une personne
qualifiae. Vwez la section Utillsoret chargerla
socheuse.
• Si votre sacheuse fbnctionne "agaz, elle est
pouxsale d'un systeme d'allumage alectrique
aumInatique et ne possede pas de veilleuse.
N'ESSAYEZPASDEL'ALLUMERAVECUNE
ALLUMETTE.Vous risquez de vous bx_ler sivous
approchez votre main du bx_leur et que le
dispositif d'allumage mltoInatique s'allume.
• II est possible que vous dasiriez assouplir votre
lessive ou r_3duire le colleInent _31ectrostatique en
utilisant un assouplissant textile dans votre
s_3cheuse ou tin produit antistatique. Nous vous
recommandons d'utiliser un assouplissant liquide
au cours du pro wamme de lavage, conformOment
aux directives du tZabficant de ce _pe de produit,
ou de faire l'essai d'un assouplissant textile pour la
secheuse, pour lequel le fabficant certifie sur
l'emballage que son produit peut etre utilise en
toute secufitO dans la secheuse. La responsabilitO
des problemes de rendement ou de
fonctionnement qui ne sont pas couverts pax"la
garantie de cet appareil et sont attribuables ft
l'utilisation de ces produits releve du fabficant de
ces produits.
LORSOUELASECHEUSESN'ESTPASUT/LISEE
• Lorsque vous &3branchez l'appareil, tirez stir la
fiche et non pas stir le cordon afin d'&_iter
d'endoInInager le cordon d'alimentation.
Installez le cordon de sorte que personne ne
inarche ni tr_3buche dessus ou qu'il ne soit pas
exposa "ades doInInages ou des contraintes
• Avant dejeter ou d'entreposer une sacheuse,
enlevez toujours la porte afin d'empecher les
ex6_mts de se cacher "al'int_3rieur.
• Ne trafiquez pas les coInInandes de l'appareil.
• Ne raparez oune reInplacez mmune piece de cet
appareil, AInoins que cela ne stir sp_3cifiquement
recommand_3 dans le pr&ent manuel ou dans des
directives de raparation que vous coInprenez et
que vous etes en Inesure de suix_'e.
VeuillezfireetsuivreottentivementcesmesuresdesOcuritO.
CONSERVEZCESDIRECTIVES
19

Lescommandesde votresecheuse.
Voustrouverez votre numero de modele sur I_tiquette a I'avant de la secheuse derriere la porte.
Les caracteristiques et I'aspect de votre modele peuvent varier de ceux presentes a travers ce manuel.
START FABRICCARE EXTRACARE SIGNAL
START
QMEDIUM
COTTONS EASYCARE OFF SET OFF LOUD
COTTONS
AUTOMATIC
Llrl
EXTRA CARE
LESS_R_
'
e SensorDry DAMP DRY30 40 50
_r_ Caracteristiqu_,acuitative, _El
sur certains modeles
EASYCARE
AUTOMATIC
PERM PRESSIDELICATES
• MOREDRY _
LESSDRY
COOLDOWN
XTRA CARE
80MINTIMEDDRY
60
20
Reglage des commandes
IMPORTANT: Nettoyez le filtre a charpie chaque lois que veus utilisez la secheuse.
Fabric Care (entretien des tissus)
COTTONSREG.HEAT Pourloscotonsordinairesou Iourds.
(cotonstemp.reguliere)
EASYCARE IVIED.HEAT Pourlestissussynthetiques,losmelangeset losarticlesportantla mention
(entretienfacile temp.moyenne),,Sansrepassage>>.
FLUFFNOHEAT Pourfaire,,aOrer,>losarticlessanschaleur.Reglezun SECHAGEMINUTE.
(Duvetage/Sanschaleur)
D
EASY CARE DELICATES Pourlostissusdelicats,synthetiqueset losarticles portant la mention ,,Secherpar
LOW HEAT(entretien facile culbutage a basse temperature>>.
delicatsbassotemp.)
Programmes de sechage-Les pro_'ammes mltomadques (t_mrminent la s_3cheresse des ussus
mlmmadquement. Choisissez More Dry (plus sec) pour les ussus plus
lourds, et tess Dry (moins sec) pour les ussus plus l_gers. Les
programmes de s_3chage minuu3 fbncfionnem pour la dur_e choisie.
COTTONS Pourlescotonset laplupartdestoiles.Pourla plupartdesbrassees,choisissezle
AUTOMATIC Reglageregulierprdere marqueavecun _.
(Cotonsautomatique)
EASYCARE AUTOMATIC PERM Pourlesmelangessynthetiquesetdelicats.
PRESSIDELICATES(entretien
facile sansrepassageldeJicats)
TIMED DRY Reglezle selecteurdeprogrammea ladureedesechagedesir0e.
(Sechageminute)
DAMP DRY Pourquelosarticlessoientlegorementhumides,reglezleselecteurde programme.
(Sechagepartied
El DEWRINKLEPourfairedisparaYtrelesfauxplis d'articlespropresetseesou legorementhumides,
(Defroissage) reglezleselecteurde programme.
MJse eB marche-Fm'mez la porte de la s&cheuse. Acdonnez le bomon START (raise en marche).
Lorsque vous ouvrez la porte pendam qu'elle fbncdonne, la secheuse s'arrete.
Pour la remeure en marche, fermez la porte et acuonnez START (mise en marche)
pour terminer le programme.
REMARQUE : Les durees de sechage varient selon le type d'energie utilise (electricite, gaz naturel ou gaz de petrole
liquefie), la grosseur de la brassee, le type de tissu, I'humidite des v_tements et I'etat des conduits d'evacuation.
This manual suits for next models
1
Table of contents
Languages:
Other GE Dryer manuals

GE
GE DBL333 Operating instructions

GE
GE Profile DPVH890EJ How to use

GE
GE GTDS855ED0MC User manual

GE
GE DBVH520EJ User manual

GE
GE GFDS350ELWW User manual

GE
GE DDC4400T User manual

GE
GE Profile DPSE810 User manual

GE
GE DSKS433EB0WW User manual

GE
GE DDC4500SMMWH Assembly instructions

GE
GE Spacemaker DDP1400S User manual
Popular Dryer manuals by other brands

Fricosmos
Fricosmos 460206 Installation and use

AEG
AEG LAVATHERM 57760 electronic operating instructions

Samung
Samung DVE50R5400W/A3 user manual

Bobrick
Bobrick CompacDryer installation instructions

Beko
Beko DRYPOINT RS 1300-6000 HP45 Instructions for installation and operation

Frigidaire
Frigidaire GLER341CES0 operating instructions