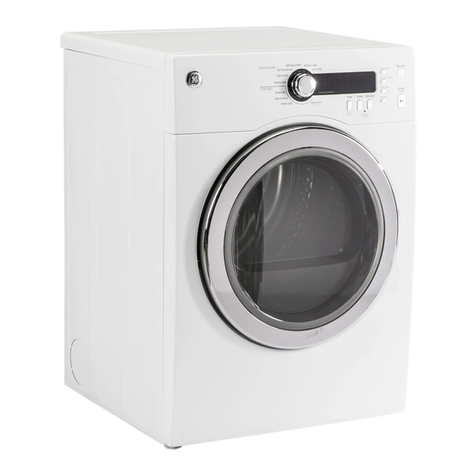
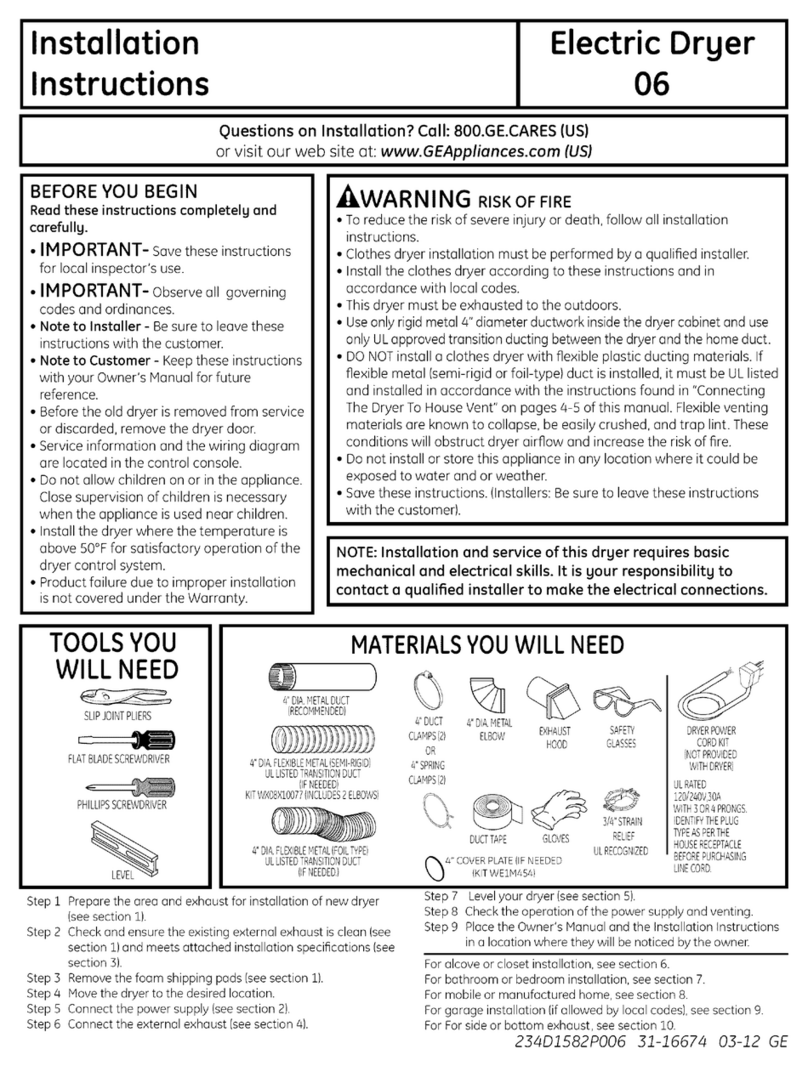
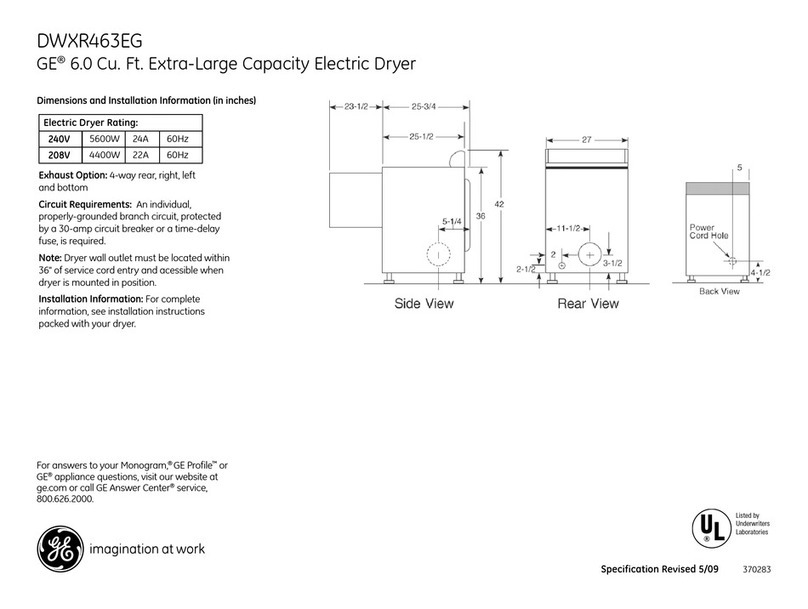
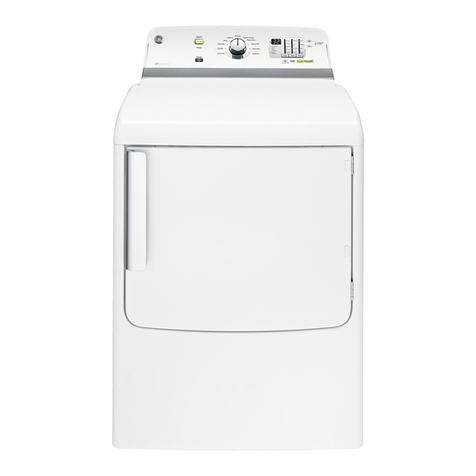
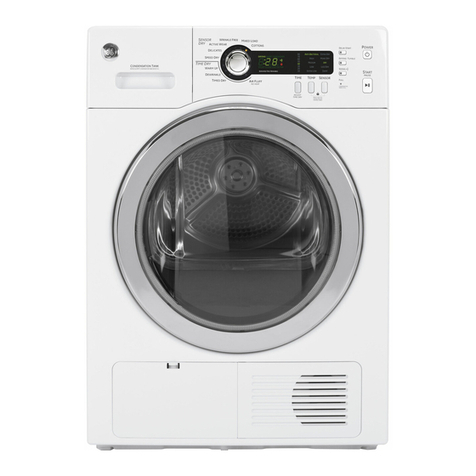
GE HTDP120ED0WW User manual

GEAppliances.com
Safety Instructions ........ 2-4
Operating Instructions
Control Panels ................. 5-7
Dryer Features ................... 8
Loading and Using the Dryer ..... 10
Reversing the Door ............... 9
Venting the Dryer ............... 11
Troubleshooting Tips... 12,13
Consumer Support
Consumer Support .............. 16
Warranty ....................... 15
Write the model and serial
number here:
Model #
Serial #
You can find them on c]label
on the front of the dryer
behind the door.
PrintedinCanada 234D1581PO01 49-90452 04-12 GE

IMPORTANT SAFETY INFOR/V/AT/ON.
READ ALL INSTRUCTIONS BEFORE USING.
Ai,WARNING!
For sour safety, the information in this manual must be followed to minimize the
risk of fire or explosion, electric shock, or to prevent property damage, persona/
injury, or death.
•Do not store or use gasoline or other
flammable vapors and liquids in the
vicinity of this or ang other appliance.
• Installation and service must be
performed bg a qualified installer,
service agencg or the gas supplier.
WHAT TO DO IF YOUSMELL GAS:
[_ Do not try to light a match, or cigarette,
or turn on ang gas or electrical
appliance.
F_ Do not touch ang electrical switch; do
not useang phone in gout building.
r_ Clear the room, building or urea of
oil occupants.
F_ Immediately call sour gas supplier from
a neighbor's phone. Follow the gas
supplier's instructions carefullg.
r-_ If gou cannot reach gour gas supplier,
call the fire department.
%
2
California Safe Drinking Water and Toxic Enforcement Act
Thisact requiresthe governor of Californiato publisha list of substancesknown to the state to causecancer,
birth defects or other reproductive harm and requires businessesto warn customers of potential exposure to
such substances.
Gasappliances can causeminor exposureto four of thesesubstances,namely benzene,carbon monoxide,
formaldehyde and soot, caused primarily by the incomplete combustion of natural gas or LPfuels.
Properlyadjusted dryers will minimize incomplete combustion. Exposureto these substances can be minimized
further by properly venting the dryer to the outdoors.
PROPERINSTALLATION
This drger must be properlg installed and located in accordance with the Installation Instructions
before it is used. If Sou did not receive on Installation Instructions sheet, Sou con receive one bg
visiting GEAppliunces.com or bg coiling 800.GE.CARES (800.432.2737).
•Properlyground dryer to conform with all
governing codes and ordinances. Followdetails
in Installation Instructions.
•Installor store where it will not be exposed to
temperatures below freezing or exposed to
the weather.
•Connectto a properly rated, protected and sized
power supply circuit to avoid electrical overload.
•Removeall sharp packing items and dispose of
all shipping materials properly.
•Removethe colored protective tape from the
control panel.
Exhoust/Ducting:
r-1-1Alldryers MUSTbe exhausted to the outside to
prevent large amounts of moisture and lint from
being blown into the room.
D Useonly rigid metal/4" diameter ductwork inside
the dryer cabinet and use only rigid metal/4"
diameter or ULapproved transition ducting
between the dryer and the home duct. USEOF
PLASTICOROTHERCOMBUSTIBLEDUCTWORK
CANCAUSEA FIRE.PUNCTUREDDUCTWORK
CANCAUSEA FIREIF ITCOLLAPSESOR
BECOMESOTHERWISERESTRICTEDIN USEOR
DURINGINSTALLATION.
Forcomplete details,follow the Installation
Instructions.

IMPORTANT SAFETY INFORMATION.
READ ALL INSTRUCTIONS BEFORE USING. GEAppliances.com
YOURLAUNDRY AREA
• Keepthe area underneath and around your •
appliances free of combustible materials (lint,
paper, rags,etc.),gasoline, chemicals and other
flammable vapors and liquids.
Keepthe floor around your appliances clean and
dry to reducethe possibility of slipping.
Closesupervisionis necessaryif this appliance is
used near children. Donot allow children to play
on,with or insidethis or anyother appliance.
AWARNING!
Keepall laundry aids(such asdetergents, bleaches,
etc.)out of the reach of children, preferably in a
locked cabinet. Observe all warnings on container
labelsto avoid injury.
• Neverclimb on or stand on the dryer top.
• Keepthe area around the exhaust opening
and adjacent surrounding areas free from the
accumulation of lint,dust, and dirt.
• Donot obstruct the flow of ventilating air. Donot
stack or place laundry or throw rugs against the
front or back of the dryer.
WHEN USING YOURDRYER
Neverreach intothe dryer while the drum is
moving. Before loading,unloading or adding
clothes,wait until the drum hascompletely
stopped.
Thelaundry processcan reduce the flame
retardancy of fabrics. Toavoid such a result,
carefully follow the garment manufacturer's
care instructions.
Cleanthe lint filter before each load to prevent
lint accumulation insidethe dryer or in the room.
DONOT OPERATETHEDRYERWITHOUT
THELINTFILTERIN PLACE.
Donot wash or dry articlesthat have been
cleaned in,washed in,soaked in or spotted
with combustible or explosivesubstances (suchas
wax, oil,paint, gasoline,degreasers,dry-cleaning
solvents,kerosene,etc.).Thesesubstances give
off vapors that may ignite or explode. Donot add
these substances to the wash water. Do not use
or placethese substancesaround your washer or
dryer during operation.
Do not place items exposed to cooking oils inyour
dryer. Items contaminated with cooking oilsmay
contribute to a chemical reaction that could cause
a clothes load to catch fire.
Any article on which you have used a cleaning
solvent or that contains flammable materials (such
as cleaning cloths, mops,towels usedin beauty
salons,restaurants or barber shops,etc.)must not
be placed in or near the dryer. Thereare many
highly flammable items usedin homes such as
acetone, denatured alcohol, gasoline,kerosene,
some household cleaners,some spot removers,
turpentines, waxes, wax removers and products
containing petroleum distillates.
Donot dry articles containing rubber, plastic,
foam or similar materials such as padded bras,
tennis shoes,galoshes,bath mats, rugs, bibs,baby
pants, plastic bags, pillows,etc.,that may melt
or burn.Some rubber materials, when heated,
can under certain circumstances produce fire by
spontaneous combustion.
Donot store plastic,paper or clothing that may
burn or melt on top of the dryerduring operation.
Garments labeled DryAwag from Heat or Do Not
Tumble Dry (suchas lifejackets containing Kapok)
must not be put inyour dryer.
Donot dry fiberglass articles in your dryer.
Skinirritation could result from the remaining
particles that may be picked up by clothing during
subsequent dryer uses.
Tominimize the possibilityof electric shock, unplug
this appliance from the power supply or disconnect
the dryer at the household distribution panel by
removing the fuse or switching off the circuit
breaker before attempting any maintenance or
cleaning (exceptthe removal and cleaning of the
lint filter).NOTE'.Turning the CycleSelector knob
to an off position,or pressing PAUSEdoes NOT
disconnect the appliance from the power supply.

IMPORTANT SAFETY INFORMATION.
READ ALL INSTRUCTIONS BEFORE USING.
AWARNING!
WHEN USING YOURDRYER(cont.)
Neverattempt to operate this appliance
if it isdamaged, malfunctioning, partially
disassembled,or hasmissing or broken parts,
including a damaged cord or plug.
Theinterior of the machine and the exhaust duct
connection insidethe dryer should be cleaned at
least once a year by a qualified technician. Seethe
Loading and Usingthe Dryer section.
Ifyours isa gasdryer, itis equippedwith an
automatic electric ignition and does not have a
pilot light. DONOTATTEMPTTOLIGHTWITH A
MATCH.Burnsmay result from having your hand
in the vicinity of the burner when the automatic
ignition turns on.
You may wish to softenyour laundered fabrics
or reduce the static electricity in them by using
a dryer-applied fabric softener or an anti-static
conditioner. We recommend you useeither a
fabric softener inthe wash cycle,according to the
manufacturer's instructions for those products,
or try a dryer-added product for which the
manufacturer gives written assurance on the
package that their product can be safelyused
inyour dryer. Serviceor performance problems
caused by use ofthese products are the
responsibility of the manufacturers of those
products and are not covered under the warranty
to this appliance.
Ifyou seewater on the floor around the dryer, call
for service.
Donot spray any type of aerosol into, on,or near
dryer at any time. Donot useany type of spray
cleanerwhen cleaning dryer interior. Hazardous
fumes or electrical shock could occur.
Never attempt to usethe Steam Dewrinkleor
Steam Refreshcycles without clothes in the drum.
It is highly recommended to selectthe appropriate
load sizefor best results.Selecting large load cycles
for small loads may result in clothes being wet,
and selectingsmall load cycles for large loads may
result in poor dewrinkling performance.
WHEN NOT USING YOURDRYER
Graspthe plug firmly when disconnecting this
appliance to avoid damage to the cord while
pulling. Placethe cord away from traffic areas
so itwill not be stepped on,tripped over or
subjected to damage.
•Beforediscarding a dryer, or removing itfrom
service,remove the dryer door to prevent children
from hiding inside.
•Donot tamper with controls.
Donot attempt to repair or replaceany part of
this appliance or attempt any servicingunless
specificallyrecommended in this Owner'sManual
or in publisheduser-repair instructionsthat you
understand and havethe skillsto carry out.
READAND FOLLOWTHISSAFETYINFORMATIONCAREFULLY.
SAVETHESEINSTRUCTIONS
4

About the control panel GEAppliances.com
• Clean lint filter
2
• Add clothes
• Shut door • Select drging cgcle
Step 4
• Push Start
AWARNING!
To reduce the risk of fire, electric shock, or injurg to persons, read the IMPORTANTSAFETYINSTRUCTIONSbefore operating
this appliance.
Throughout this manual, features and appearance mag varg from gour model.
Perm. Press Mixed Loads
Delicates Cottons
Towels/Sheets _ _
Antibacterial
mc_l_lad
Speed Dry
Steam Refresh _
Extra Dry
More Dry
Dry
Less Dry Start
• _mp O On Pause
Quick Fluff Dewrinkle _ _ _ _1
reSa_C_mC_e
Power
Controls
Drging Cgcles-Sensor cycles automatically determine fabric dryness.
Timed cycles run for the selected time.
Cottons Forcottons and most linens.
Perm.Press Forwrinkle-flee, permanent press, delicate items and knits.
Delicates Fordelicate items, special-care fabrics and knits.
Mixed Loads Forloadsconsisting ofcottons and poly-blends.
Timed Dry Setthe CycleSelectorat the desired drying time.
Dewrinkle Forremoving wrinklesfrom items that are clean and dry or that are very lightly damp.
Quick Fluff Forfreshening or fluffing up already dry clothing,fabric, linensand pillows.Usewith NoHeat.
Provides10 minutes of no-heat tumbling.
Anti-Bacterial
Sanitization Performance of
Residential Clothes Dryers
Thisoption reduces certain types of bacteria by99.9%, including: Staphylococcus aureus, Pseudomonas
aeruginosa and Klebsiellapneumoniae*. Theanti-bacterial processoccurs when high heat isused
during a portion of the drying cycle.
NOTE:Donot usethis cycleon delicate fabrics.
*The Anti-Bacterial CycleisCertified by NSFInternational (formerly National Sanitation
Foundation)to NSFProtocol P154Sanitization Performance of ResidentialClothesDryers.

About the control panel
Towels/Sheets Formost towels and linens.
Speed Dry
Energy Saver
Steam Refresh
(onsome models)
Steam Dewrinkle
(on some models)
Forsmallloadsthat are neededina hurry,suchas sport or schooluniforms.Canalsobe usedifthe previous
cycleleft some itemsdamp, such ascollarsor waistbands.NOTE:Onsome models,thetime remainingin
the cyclewillshow counting down in thedisplay.
Forcottons and most linens.Thecycleoffersa reduction inenergyusewhen comparedto the Cottons
cycle.Thedryer automaticallysetsthe mostenergyefficientsettings and onlychangesto the Dryness Level
are allowedbythe user.
Forslightly wrinkled dry garments. Significantly reduces wrinkles.After the Steam Refresh cycle,
the unit will beep (ifSignal isselected)and display "00."
Steam Refresh is recommended for 1-2 garments
NOTE:Steam cycles are not intendedfor usewith towels.
NOTE:A singleextremely light fabric item may need to havean additional item included in
the Steam Refresh cycleto achieve optimum results.
Important -the temperature setting must be set to HIGH and water must be turned on
before running the Steam Refresh cycle.
Forusewith larger loadsthan Steam Refresh. Idealfor loads left in the dryerfor an extended time.
Steam Dewrinkle is recommended for 8-13 garments
NOTE:Steam cycles are not intended for use with towels.
Important - the temperature setting must be set to HIGH and water must be turned on
before running the Steam Refresh cycle.
Options
Dewrinkle Tumble
Usethis option to minimize the wrinkles in clothes. It provides 30 minutes ofno-heat tumbling after the clothes are dry. Ifyou
are usingthe cycle Signal and you selectthe Dewrinkle Tumble option, a signalwill sound at the end of the drying time and
severaltimes during the Dewrinkle Tumble cycle.Thiswill remind you that it istime to remove the clothes.
Extended Tumble
Usethis option to minimize the wrinkles in clothes. It provides i hour of no-heat tumbling after the clothes are dry. Ifyou
are usingthe cycle Signal and you selectthe Extended Tumble option, a signal will sound at the end ofthe drying time and
severaltimes during the Emended Tumble cycle.Thiswill remindyou that it istime to remove the clothes.
Damp Alert
Thisoption causesthe dryer to beep when clothes have dried to a damp level.Removeitems that you wish to hang dry. The
Damp Alert will only beepwhen this option isselected(butthe dry cyclewill keeprunning).Removingclothes and hanging
them when they are damp, can reduce the need to iron some items.The light besidethe pad will be litwhen Damp Alert is
on.
Delay Dry
Onmodels with a TimeRemainingdisplay,as the Delay Dry pad is repeatedly pressed,the delay time setsto 30 minutes, 1_
hour,2 hours, 4 hours,8 hours,and back to clear (0 minutes).After selectingthe delay time, pressStart and the delay time will
count down the time remaining until the cyclestarts.
On modelswithout a Time Remainingdisplag,as the Delay Dry pad is repeatedly pressed,the delay time setsto 2 hours, 4
hours, 8 hours, and back to clear (0hours).
Forall models,if the Delay Dry pad ispressed for 3 seconds,it clears (regardlessofthe delay time).
Signal
Usethe Signal pad to change the volume of the end of cyclesignal. Pressthe pad untilyou reach the desiredvolume or off.
Theclothes should be removed when the beeper goes offsowrinkles do not set in.
NOTE:
• Removegarments promptly at the sound of signal. Placeclothes on hangers sowrinkles will not set in.
• Usethe Signal especiallywhen drying fabrics likepolyester,knitsand permanent press.Thesefabrics should be removed so
wrinkleswill not set in.
6

About the control panel GEAppliances.com
QSettings
Individual settings for dryness level (Level),temperature (Temp),and Timed Dry cycle minutes (Time)can be set from
the minimum (lowest in column) to maximum (highest in column). In general, the higher up the column, the more
energy will be used.
Dryness Level-Selection only used for Sensor cycles. Timed cycles run for the selected time.
Extra Dry Usefor heavy-dutyfabricsor itemsthat should bevery dry,such astowels.
More Dry Usefor heavy-duty or mixed type fabrics.
Dry Usefor a normal dryness levelsuitable for most loads.This isthe preferred cycle for energy savings.
Less Dry Usefor lighter fabrics.
Damp Forleaving items partially damp.
Temperature
High Forregular to heavy cottons.
NOTE:Steam Dewrinkle and Steam Refresh require the Hightemperature setting.
Medium Forsynthetics, blends,delicatesand items labeled permanent press.
Low Fordelicates, synthetics and items labeled tumble drg low.
Extra Low Fordelicates, synthetics and items labeled tumble drg low.
No Heat Forfluffing items without heat. Foruseonly with the Timed Dry cycles.
@
®
@
0
My Settings (onsome models)
Asthe cycleselector knob isturned, the Level (DrynessLevel),Tamp (Temperature)and Time (TimedDry)settings change to
automatic pre-set default settings. Ifyou desirea different setting, press the appropriate pad(s).Thenpress and hold the My
Settings pad for 3 seconds and the dryer will "remember" these settings for that Knob Selection.Inthe future, when you turn
the selector knob to that cycle,your settings will be automatically recalled.NOTE;Signalvolume cannot be set for My Settings.
Power
Press to "wake up" the display. If the display is active, press to put the dryer into idle mode.
NOTE:Pressing Power does not disconnect the appliance from the power supply.
Start
PressStart to begin the cycle. NOTE:Thedoor must be closedfor the dryer to start the cycle. PressingStart again will Pause
the cycle and the cgcleIndicator Lightwill blink.
Tocontinue the cycle, pressStart again. Tostop the cycle,hold the pad for 3 seconds.
eDrg (onsome models)
When the eDry pad ispressed,cycle settings change to reduce the total energy consumption of the selected sensorcycle.
NOTE:Cgcletimes will changewhen eDry isselected.
Display Ionsomemodels)
Thedisplay showsthe approximate time remaining until the end of the cycle.
In addition, this displag will, "scroll" the drger status:
•PAUSE Themessage"PAUSE"will scrollacross the display when the dryer's cycle ispaused.Thecycle may be
re-started by pressingthe Start pad.
• door Themessage"door" will be displayed when the door isopened during the dryer's cycle.
TheeMonitor lights display the relative energy useofyour selected cycleand options.They are provided as an energy guide
and range from Good (1light)to Better (5lights).Cycle(time),dryness level,temperature, and additional tumble options can
increase or decrease your energy efficiency. Somespecial cycles will not provide a display.
Indicator lights
Five LEDlights indicate the current dryer status moving from left to right as the cycle progresses.
DSM Demand Side Management (onsome models) - When connected to your power company's rate monitoring system, the
dryer will automatically delay starting if the rates are high/critical. An "ES"will be displayed and the selected cycle will
start after/4 hours or when the rates drop to low/medium, whichever comes first. If the rates are not high/critical, the
selected cycle will start immediately.
7

About the dryer features.
Sensor Dry
Sensor Dry (on some models)
This feature is only activated in the Cottons,
Easy Care and Oelicates cycles.
The Sensor Dry provides greater
drying accuracy than standard machines,
resulting in shorter dry times and better
clothes care. Asthe clothes tumble, they
touch a moisture sensor. The sensor will
stop the heating cycle as soon as the
clothes have reached the selected dryness.
drying time of the sensor dry cycles as it
"learns" its installation and usage profile.
Pleaseallow several weeks for the dryer to
customize itself to "you".
This dryer will adjust the initial estimated
Drum Lamp
Before replacing the light bulb, be sure to
unplug the dryer power cord or disconnect
the dryer at the household distribution panel
by removing the fuse or switching off the
circuit breaker. Reach above dryer opening
from inside the drum. Removethe bulb and
replace with the same size bulb.
Drying Rack Ionsomemodels)
A handy drying rack may be used for drying
delicate items such as washable sweaters.
Hook the rack over the lint filter so
the rack extends into the dryer drum.
NOTE:
• The drying rack must be used with the
Timed Cgcle.
• Do not use this drying rack when there
are other clothes in the dryer.
Stainless Steel Drum (onsomemodels)
Thestainlesssteel usedto make the
dryer drum provides the highest reliability
available in a GEdryer. Ifthe dryer drum
should be scratched or dented during normal
use,the drum will not rust or corrode. These
surface blemisheswill not affect the function
or durability of the drum.
8

About reversing the door. GEApplionces.com
Reversing the Door
Tools needed:
•Standard #2
Phillips screwdriver • Tape-tipped
puttg knife
rl1 open the door and remove the filler plugs opposite the hinges. With the door
completely open, remove the bottom screw from each hinge on the dryer face.
Insert these screws about half way into the TOPholes, for each hinge, on the
opposite side (where you removed the filler plugs). Apply firm pressure to get
the screw started in new holes.
[] Loosen top screw from each hinge on the dryer face half way. With one hand
holding the top of the door and the other hand holding the bottom, remove
the door from the dryer by lifting it UPand OUT.
r-_lRotate the door 180°Insert it on the opposite side of the opening by moving
the door IN and DOWNuntil the top hinge and the bottom hinge are resting
on the top screws inserted in step 1.
Ir41 Remove the remaining screws from the side of the opening from which the door
was removed. With these screws, secure each hinge at the bottom. Tighten the
two top screws of each hinge. Reinsert the plastic plugs on the side from which
the door was removed.

About loading and using the drger.
Alwags follow the fabric manufacturer's care label when laundering.
Sorting and Loading Hints
As a general rule, if clothes are sorted properly for
the washer, they are sorted properly for the dryer. Do not overload. This wastes energy and causes
wrinkling.
Do not add fabric softener sheets once the load
has become warm. They may cause fabric
softener stains. Bounce®Fabric Conditioner
Dryer Sheets have been approved for use in all
GEDryers when used in accordance with the
manufacturer's instructions.
Do not drg the following items: fiberglass items,
woolens, rubber-coated items, plastics, items with
plastic trim and foam-filled items.
FabricCareLabels
Below are fabric care label "symbols" that affect the clothing you will be laundering.
WASH LABELS DRY LABELS
wash i I
cycle l_orr_al PermanentPress/ GeNder/ an was Donotwash Donotwr_ng
wrinkle resistant de[ic ate h
Water 000 O0 •
temperature Hot Waml gold/cool
(50C/120F} (40C/I05F} (30C/85F}
BLEACH LABELS
symbols [vA_leynbneea__d) ..... roo_eChIrOer_r_leb)...................
Tumble r_
dry Dry bqbqbq _
No_mal Permanent P_ess/ 6enfle/ Do not tumNe dW {used with
wrinkle _esistant delicate do not wasl
.eat _ ®
setting
High Medium
Special
instructions
Line dry/
hang to dry
®•
Low No heat/air
D Pq
Drip dry Dry liar Inthe shade
10
Care and Cleaning of the Drger
The Exterior'. Wipe or dust any spills or washing
compounds with a damp cloth. Dryer control
panel and finishes may be damaged by some
laundry pretreatment soil and stain remover
products. Apply these products away from the
dryer. The fabric may then be washed and dried
normally. Damage to your dryer caused by these
products is not covered by your warranty.
The Lint Filter: Clean the lint filter before each
use. Moisten your fingers and reach into the filter
opening. Runyour fingers acrossthe filter. Have a
qualified technician vacuum the lint from the dryer
once a year.
/
Stainless Steel: To clean stainless steel surfaces,
use a damp cloth with a mild, non-abrasive cleaner
suitable for stainless steel surfaces. Remove the
cleaner residue, and then dry with a clean cloth.
The Exhaust Duct: Inspect and clean the exhaust
ducting at least once a year to prevent clogging.
A partially clogged exhaust can lengthen the
drying time.
Follow these steps:
I-_ Turn off electrical supply by disconnecting
the plug from the wall socket.
I--_ Disconnect the duct from the dryer.
I--_ Vacuum the duct with the hose attachment
and reconnect the duct.
The Exhaust Hood: Checkfrom the outside that
the flaps of the hood move freely when operating.
Make sure that there is not wildlife (birds, insects,
etc.)nesting inside the duct or hood.

About venting the dryer. GEAppliunces.com
Forthe best drying performance, the dryer needs to be properly vented. The drger
will use more energg end run longer if it is not vented to the below specificutions.
Curefully follow the detuils on E×huusting in the Instullution Instructions.
• Use only rigid metal 4" diameter ductwork inside the dryer cabinet. Use only rigid metal or
ULlisted flexible metal 4" diameter ductwork for exhausting to the outside.
• Do not use plastic or other combustible ductwork.
• Use the shortest length possible.
• Do not crush or collapse.
• Avoid resting the duct on sharp objects.
•Venting must conform to Iocul building codes.
Correct
Venting
Incorrect
Venting |
11

Before you call for service...
Troubleshooting Tips
Save time and moneg! Review the charts on the following pages,
or visit GEAppliances.com. You may not need to call for service.
Problem Possible Causes What To Do
Dryer doesn't start Dryer is unplugged • Makesure the dryer plug is pushedcompletely into
the outlet.
Fuseis blown/circuit breaker • Checkthe housefuse/circuit breaker box and replace
is tripped fuse or reset breaker. NOTE:Mostelectric dryers use
two fuses/breakers.
Drger doesn't heat Fuseis blown/circuit breaker is • Checkthe housefuse/circuit breaker box and replace
tripped; the dryer may tumble both fusesor reset both breakers.Your dryer may tumble
but not heat ifonly one fuse isblown or one breaker istripped.
Gasserviceis off • Makesure gas shutoff at dryer and main shutoff ore
fully open.
Noheat temperature • Select another heat setting.
selected
Dryer shakes or Someshaking/noiseis normal. • Movedryer to on evenfloor space,or adjust leveling legs
makes noise Dryer may be sitting unevenly as necessary until even.
Greasy spots on clothes Improper use of fabric softener • Followdirections on fabric softener package.
Drying dirty items • Useyour dryer to dry only cleon items. Dirty items con
with clean ones stain cleon items and the dryer.
Clothes were not • Sometimesstains which cannot be seenwhen the clothes
completely clean ore wet appear offer drying. Useproper washing procedures
beforedrying.
Lint on clothes Lint filter isfull • Clean lintscreen before each load.
Improper sorting • Sort lint producers (likechenille)from lint collectors
(likecorduroy).
Static electricity can attract lint • Seesuggestions inthis section under Static.
Overloading • Separate large loadsinto smaller ones.
Paper, tissue, etc., left in pockets • Emptyoil pockets before laundering clothes.
Static occurs Nofabric softenerwas used • Try o fabric softener.
Bounce®FabricConditioner Dryer Sheetshove been
approved for usein oil GEDryerswhen usedin accordance
with the manufacturer's instructions.
Over-drging
Synthetics, permanent press
and blends can cause static
• Try o fabric softener.
• Adjust setting to Less Dry or Damp Dry.
• Try o fabric softener.
Inconsistent
drying times
TheDry drgness level
was chosen but load is
still damp
Type of heat
Load consistsof a mixture
of heavy and light fabrics
Automatic drying times will vary according to the type
of heat used(electric,natural or LPgas),sizeof load,
types of fabrics, wetness of clothes and condition of
exhaust ducts.
• When combining heavy and light fabrics in o load,
choose More Drg ifyou ore using o sensor cycle.
Exhaust system is blocked • Inspect and cleon exhaust system.
12

Before you call for service... GEAppliancescom
Problem Possible Causes What To Do
Clothes take too long Improper sorting • Separate heavy itemsfrom lightweight items (generally,
to dry o well-sorted washer load iso well-sorted dryer load).
Large loads ofheovg fabrics • Large,heavyfabrics contain more moisture and take
(like beach towels) longer to dry.Separate large,heavy fabrics into smaller
loadsto speed drying time.
Controls improperlg set • Hatch control settingsto the loadyou ore drying.
Lint filter isfull • Clean lintfilter before every load.
Improper or obstructed • Check installation instructions for proper
ducting ducting/venting.
Hake sureducting iscleon,free of kinksand
unobstructed.
•Checkto seeif outside wall damper operates easily.
• Checkthe Installation Instructions to make sure the
dryer venting iscorrect.
Blown fuses or tripped • Replacefuses or resetcircuit breakers.Sincemost dryers
circuit breaker use2 fuses/breakers, make sure both ore operating.
Overloading/combining loads • Donot put more than one washer load in the dryer at
o time.
Under-loading • Ifyou ore drying only one or two items, odd o few items
to ensure proper tumbling.
Clothes are wrinkled Over-drging •Select oshorter drying time.
• Removeitemswhile they still hold a slight amount of
moisture. Selecto Less Dry or Damp Dry setting.
Letting items sit in dryer • Removeitemswhen cycle ends and fold or hang
offer cgcle ends immediately.
Overloading • Separate large loads into smaller ones.
Clothes shrink Somefabrics will naturallg shrink • Toovoid shrinkage,follow garment core labelsexactly.
when washed. Others con be • Some items may be pressed buck into shape after drying.
sofelg washed, but will shrink
in the dryer • Ifyou ore concerned about shrinkage in u particular
item,do not machine wash or tumble dry it
• This isnormal.Water seen on inside of
door and top of lint filter
when opening door after
steam cycle
Small areas on clothes are
damp after steam cgcle
Steam condenses onthese
surfaces
Steam condenseson innerdrum •If usingthe Steam Dewrinkle cycle,manually reduce
the cycletime. If using the Steam Refreshcycle, odd
more garments to the load.
Collars and waistbands
still wet at end of cgcle Thedrgness monitor senses
that the bodg ofthe clothes
is drg
• ChooseSpeed Dry or Timed Dry to dry damp collars
and waistbands. Inthe future, when drying o load with
collars and waistbands, choose More Dry.
Slight variation
in metallic color This is normal • Dueto the metallic properties of point usedfor this unique
product, slight variations of color may occur due to
viewing angles and lighting conditions.
13

Before you call for service...
Problem Possible Causes What To Do
Small amount of water Inadequate load size for steam • Ifusing the Steam Oewrinkle cycle, manually reduce
on floor in front of dryer cgcle selected, excess steam time. Ifusing the Steam Refresh cycle, add more
condenses inside cabinet end garments to the load.
leaks out
Water on floor in back Loose water hose connection to • Tighten connection.
of dryer valve
Hose missing rubber washer at • Install rubber washer provided with hose.
connection with valve
Water drips from door Steam condenses on inner door • This is normal.
when opened after
a Steam Cycle
Cannot see steam at Steam released at different • This is normal.
beginning of cycle time in cgcle
Cannot see steam at any The steam nozzle might be • Call 800.GECARES to order nozzle replacement kit
time during the cycle clogged with debris from gour WE2SM71 or to request a service technician to replace this
water supplg for you.
Garments still wrinkled Too mong garments • Loadfewer garments; manually increasetime.
offer steam cycle
Dryer continues to Extended/Dewrinkle Tumble • Ensure Extended/Oewrinkle Tumble option is not selected.
tumble after display was selected Forthe Steam Refresh cycle, Extended/Oewrinkle Tumble
says complete willautomatically be turned on and cannot be turned off.
Garments are wet offer Lint filter not clean • Clean lintfilter
Steam cycle Load ischildren/infant garments • Usethe Steam Refreshcycle.
No numbers displayed Drger is continuouslg • This is normal. When the dryer senses a low level of
during cycle, only lights monitoring the amount of moisture in the load, the dryer willdisplay the dry time
moisture in the clothes remaining.
Time Remaining The estimated time mog change • This is normal.
jumped to a when o smaller load than usual
lower number is drging
Dryer is running but The Extended/Dewrinkle • This is normal. During Extended/Oewrinkle Tumble, the
O0is displayed in Tumble option was chosen time remaining is not displayed. The extended tumbling
Time Remaining option lasts approximately 60 minutes; dewrinkle 30 minutes.
Clothes are still wet The door was opened mid-cgcle. • Adry cycle must be re-selected each time a new load
and dryer shuts off The load was then removed from is put in.
after a short time the drger and o new load put in
without selecting o new cgcle
Smallload •When drying 3 items or less,choose Speed Dry or
Timed Dry.
Load was olreodg drg except • ChooseSpeed Dry or Timed Dry to dry damp collars
for collarsand waistbands and waistbands. Inthe future, when drying a load with
collars and waistbands, choose More Dry.
Drger isnot level • Movedryer to an evenfloor space or adjust leveling legs
as necessary until even.
14

GE Dryer Warranty.
All warranty support provided by our Factory Service Centers,
or an authorized Customer Care®technician. To schedule service,
on-line, 24 hours a day, visit us at GEApplionces.com or call 800.
GE.CARES1800.432.2737). Please have serial number and model
number available when calling for service.
Staple gour receipt here.
Proof of the original purchase
date is needed to obtain
support under the warranty.
For The Period Of: GE Will Replace:
One Year
From the date of the
original purchase
Any part of the dryer which fails due to a defect in materials or workmanship. Duringthis
limited one-year warranty, GEwill also provide,free of charge, all labor and related servicecosts
to replacethe defective part.
Second Year
From the date of the
original purchase
Any part ofthe dryer which fails due to a defect in materials or workmanship. Duringthis
additional one-year limited warranty, you will be responsiblefor any labor or related servicecosts.
Second through
Fifth Year
From the date of the
original purchase
The extra large or super capacity dryer drum and main electronic control board, ifany of these
parts should fail due to a defect in materials or workmanship. During this additional four-year
limited warranty, you willbe responsible for any labor or related service costs.
What GE Will Not Cover'.
• Service trips to gour home to teach gou how
to use the product.
• Improper installation, deliverg or maintenance.
• Failure of the product ifit is abused, misused, or
used for other than the intended purpose or used
commerciollg.
• Replacement of the light bulb.
• Replacement of house fuses or resetting
of circuit breakers.
• Damage to the product caused bg accident, fire, floods
or acts of God.
• Incidental or consequential damage caused bg possible
defects with this appliance.
• Damage caused after deliverg.
• Product not accessible to provide required service.
• Defects or damage due to operation in freezing
temperatures.
• Products which are not defective or broken, or which are
working as described in the Owner's Manual.
EXCLUSION OF IMPLIED WARRANTIES--Your sole and exclusive remedy is product repair as provided in this Limited
Warranty. Any implied warranties, including the implied warranties of merchantability or fitness for a particular
purpose, are limited to one year or the shortest period allowed by law.
Thisworrontg isextended to the original purchaser and ong succeedingowner for products purchased for home usewithin the
USA.If the product islocated in on area whereservicebg o GEAuthorized Servicerisnot available,gou mog beresponsiblefor o
trip charge or gou mog berequired to bring the product to on Authorized GEServicelocation for service.InAlaska,theworrontg
excludesthe cost ofshipping or servicecoilsto gout home.
Some states do not allow the exclusion or limitation of incidental or consequential damages. This warrantg gives gou specific legal
rights, and gou max also hove other rights which vorg from state to state. To know what gout legal rights ore, consult gout local
or state consumer affairs office or gout state's Attorneg General.
Warranton General Electric Company. Louisville, KY 40225
15

ConsumerSupport.
GEAppliances Website GEAppliances.com
Have a question or need assistancewith your appliance? Trythe GEAppliancesWebsite 24 hours a day,
any day of the year! Forgreater convenience and faster service,you can now download Owner's Manuals,
order parts or even schedule serviceon-line.
Schedule Service GEAppliances.com
Expert GErepair serviceis only one step away from your door.Get on-line and schedule your serviceat your
convenience 24 hoursany day of the year! Orcall 800.GE.CARES(800.432.2737)during normal businesshours.
RealLifeDesignStudio GEApplicmces.com
GEsupports the Universal Designconcept-products, servicesand environments that can be used by
people of all ages,sizesand capabilities. We recognizethe need to designfor a wide range of physicaland
mental abilities and impairments. Fordetails of GE'sUniversalDesignapplications, including kitchen design
ideasfor people with disabilities,check out our Website today. Forthe hearing impaired, pleasecall 800.TDD.
GEAC(800.833.4322).
ExtendedWarranties GEAppliances.com
Purchase a GEextended warranty and learn about special discounts that are available while your warranty
isstill in effect. You can purchase it on-line anytime, or call 800.626.2224during normal businesshours.
GEConsumer Home Serviceswill still be there after your warranty expires.
Partsand Accessories GEAppliances.com
Individuals qualified to servicetheir own appliances can have parts or accessoriessent directly to their homes
(VISA,MasterCard and Discovercards are accepted).Order on-line today, 24 hours every day or by phone
at 800.626.2002 during normal businesshours.
Instructions contained in this manual cover procedures to be performed byany user.Other servicinggenerally
should be referredto qualified servicepersonnel. Caution must be exercised,since improper servicing may
cause unsafe operation.
Contact Us GEAppliances.com
If you are not satisfied with the serviceyou receivefrom GE,contact uson our Website with all the details
including your phone number, or write to: General IVlanager,Customer Relations
GEAppliances,Appliance Park
Louisville,KY40225
RegisterYourAppliance GEAppliunces.com
Register gour new appliance on-line--at gour convenience! Timely product registration will allow for enhanced
communication and prompt service under the terms ofyour warranty, should the need arise.
You may also mail inthe pre-printed registration card included in the packing material.
16

0GEAppliances.com
Instrucciones
de seguridad ............... 2-4
Instrucciones de operaci6n
C6mo cambiar el sentido
de apertura de la puerta ......... 9
C6mo cargar y usar la secadora. 10
Funciones de la secadora ........ 8
Paneles de control ............. 5-7
Ventilaci6n de la secadora ....... 11
Consejos para la soluci6n
de problemas ............ is, 14
Soporte al consumidor
Garantia .....................15
Soporte al consumidor .......... 16
Escriba el n6mero de modelo
yde serie aqui:
No. de modelo
No. de serie
Estos nOmeros se encuentmn
en una etiqueta en la porte
delantem de la secadom, detr6s
de la puerto.
ImpresoenCanadd 234DI581PO0149-9045204-12GE

INFORPIACION DE SEGURIDAD IMPORTANTE.
LEA TODAS LAS INSTRUCCIONES ANTES DE USAR.
iADVERTENCIA!
Par su seguridad, debe seguir las indicaciones de este manual para minimizar el
riesgo de incendio o e×plosi6n, descarga el_ctrica, o para evitar da_os a la propiedad,
lesiones personales, o muerte.
No almacene ni use gasolina uotros
vapores g liquidos inflamables en las
pro×imidades de este ocualquier otro
electrodom_stico.
• La instalaci6n g el servicio Io deben
Ilevar a cabo un instalador calificado,
la agencia de servicio o el proveedor
de gas.
QUa"HACERSI USTEDHUELE GAS:
F_ No intente encender un f6sforo,
oun cigarrillo, o encender cualquier
electrodom_stico el_ctrico ode gas.
_] No toque ning_n interruptor el_ctrico;
no use ning_n tel_fono en el edificio.
F_ Desocupe el habitaci6n, edificio o 6rea
afectada.
_] Llame inmediatamente asu proveedor
de gas usando el tel_fono de alg_n
vecino. Siga las instrucciones del
proveedor de gas cuidadosamente.
F_ si usted no puede ponerse en contacto
con su proveedor de gas, Ilame al
departamento de bomberos.
2
%
Oecreto para hacer cumplir los leges sabre t6xicos g agua potable de California
Estedecretorequiere que el Gobemador de Californiapublique una lista de lassustanciasque el estado sabeque
causan co}ricer,defectosde nacimiento g otros dahosreproductivos g requiereque los comerciantesle adviertan
a sus consumidoressabre elpotencial de exposicibna talessustancias.
Loselectmdomdsticosde gas pueden causar la exposicibna cuatro de estassustancias,concretamente
benceno,monbxido de carbono,formaldehfdo g hollfn,principalmente causadospar la combustibn incompleta
del gas natural o de combustiblesLP.
Cuandolossecadoms estdn ajustadas apropiadamente, seminimiza la combustion incompleta. Lo exposici6na
estassustanciaspuede minimizarse aOnmds ventilando apropiadamente la secadom hacia el exterior.
INSTALACION APROPIADA
Antes de usarse, la secadora se debe instalar apropiadamente de acuerdo con los Instrucciones
de instalaci6n. 5i no recibi6 una Hoja de instrucciones de instalaci6n, puede obtener una
visitando GEAppliances.com o Ilamando a1800.GE.CARES (800.432.2737).
•Conecte la secadora a tierra de manera apropiada
que cumpla con todos losc6digos y ordenanzas
reguladoras.Siga con cuidado las Instrucciones
de instalaci6n.
•Inst61elao almac6nela donde no est6 expuesta
a temperaturas por debajo del punto de
congelaci6n o expuesta a la intemperie.
•Conectea un tomacorriente deltamaflo y delcalibre
apropiados para evitar una sobrecarga el6ctrica.
•Remuevatodos losobjetos de empaquetado
ydesh6gase apropiadamente de todos los
materiales de env[o.
•Quitela cinta colorada de protecci6n del panel de
control.
-lcape/Ouctos:
Lassecadoras DEBENcontar con escape al
exterior para impedir que grandes volOmenesde
humedad ypelusa ingresena la habitaci6n.
121Utilice0nicamenteductode metalrfgidode4" de
didmetroenelinteriordelgabinetedelasecadoray
utilice0nicamenteductodemetalrfgidode/-4"de
didmetro,o conaprobaci6ndeULen elductode
transici6nentrela secadorayelductodelhogar.EL
USODEDUCTOSPLASTICOSUOTROSDUCTOSDE
MATERIALESCOMBUSTIBLESPODR[ACAUSARUN
INCENDIO.LOSDUCTOSPERFORADOSPODRIAN
CAUSARUNINCENDIOSICOLAPSAN0 SIOCURRE
ALGUNAOBSTRUCCIONDURANTEELUSO0
DURANTELAINSTALACION.
Paralosdetallescompletos,sigalasInstruccionesde
instalaci6n.

INFORMACION DE SEGURIDAD IMPORTANTE.
LEA TODAS LAS INSTRUCCIONES ANTES DE USAR. GEAppliances.com
SUAREA DE SECADO
• Mantenga el 6rea debajo y alrededor de sus •
electrodom6sticos libre de materiales combustibles
(pelusas,papel,trapos, etc.),gasolina, productos
qu[micos y otros I[quidosy vapores inflamables.
Mantengael pisoalrededor de sus
electrodom6sticoslimpios y secospara reducir la
posibilidad de
un accidente.
Supervisea losniflos en caso de que ellosusen
la secadora ojueguen cerca de ella durante su
operaci6n. Nopermita que los niflosjueguen con
la secadora, en su interior, sobre ella o ningOn
otro electrodom6stico.
-&iADVERTENCIA!
Mantengatodos los articulos de limpieza (tales
como detergentes y blanqueadores)fuera del
alcance de los niBos,preferiblemente encerrados
en un gabinete. Pongaatenci6n alas advertencias
en lasetiquetas de losenvasespara evitar
accidentes.
Nunca trepe ni seponga de pie sobrela parte
superior de la secadora.
Mantenga el6rea alrededor de la saliday las6reas
cercanas libresde acumulaci6n de pelusas,polvillo
y suciedad.
No obstruya el flujo del aire ventilado. No apile,
no coloque ropa, no eche alfombras al frente o al
respaldo de la secadora.
CUANDO USESU SECADORA
Nunca introduzca sus manos en el interior de
la secadora mientras el tambor giratorio est6
movi6ndose. Antes de agregar y sacar ropa,
espere hasta que eltambor giratorio sehaya
detenido.
Limpieelfiltro de pelusaantes de cada carga
para evitar la acumulaci6n de pelusa en el interior
de la secadora o en la habitaci6n. NOOPEREM,
SECADORASINELFILTRODEPELUSAENSULUGAR.
Nolave ni sequearticulos que se hayan limpiado,
lavado, remojado o salpicado con sustancias
combustibles o explosivas(talescomo cera,aceite,
pintura, gasolina, desengrasadores,solventes de
tintoreria, kerosene).Estassustancias producen
vapores que podrian incendiarse o explotar. No
agregue estassustancias al agua de lavado. No
use ni coloque estas sustanciasalrededor de la
lavadora o secadora durante su uso.
Nocoloque articulos expuestos a aceite de cocinar
en la secadora. Losart[culos contaminados con
aceites de cocinar podrian contribuir a formar una
reacci6n qu[mica que podr[acausar que una carga
de ropasse incendie.
Cualquierarticulo sobreel cual usted us6 un
solvente de limpieza o que contenga materiales
inflamables (talescomo paBosde limpieza,
trapeadores, toallas usadas en salones de belleza,
restaurantes o barber[as)no se deben colocar en
el interior o en las proximidades de la secadora.
Existenmuchos articulos inflamables en el hogar
tales como la acetona, el alcohol, la gasolina,
el kerosene,algunos limpiadores,algunos
quitamanchas, aguarr6s, trementina, ceras,
removedores de ceray productos que contengan
derivados del petr61eo.
Elproceso de lavado puede reducir la habilidad
de retardar la flamabilidad de algunas telas.
Paraevitar tal resultado, siga lasinstrucciones
del fabricante de lastelas con mucho cuidado.
Nosequearticulos que contengan goma,
pl6stico, espuma o materiales similarestales
como sostenes (brasieres)con relleno,zapatos
deportivos, ganchos de goma, alfombras de
baBo,baberos de niBo,pantalones de niBo,bolsas
pl6sticas y almohadas que se puedan derretir o
quemar. Algunos materiales gomosos, cuando
secalientan, bajo ciertas circunstancias podrian
incendiarse por combusti6n espont6nea.
Durante su operaci6n, no almacene encima
de la secadora pl6sticos,papel o ropa que se
puedan quemar o derretir.
Lasprendas de vestir etiquetadas "Dry away from
heat" (Secaralejadas del calor)o "Do not tumble
dry" (Nosecar por giro)--tales como chaquetas
salvavidas que contienen capoc-no se deben
colocar en su secadora.
Nosequearticulos defibra devidrio en susecadora.
Estopodria ocasionar irritaci6n en la piel debido a
las particulas restantes que se podrian adherir a la
ropa durante usos subsecuentesde la secadora.
Paraminimizar la posibilidad de una descarga
el6ctrica, desconecte 6ste electrodom6stico de su
tomacorriente o desconecte la secadora del panel
de distribuci6n el6ctrica del edificio removiendo el
fusible o desconectando el circuito antes de dar
cualquier tipo de mantenimiento o limpieza (con
la excepci6n de remover y limpiar el filtro de la
pelusa).NOTA:Girar la perilla selectora de ciclos
a la posici6n OFF(apagado)o presionar PAUSENO
desconectael electrodom6sticodeltomacorriente.

INFORMACION DE SEGURIDAD IMPORTANTE.
LEA TODAS LAS INSTRUCCIONES ANTES DE USAR.
Zi,iAD VERTENCIA!
CUANDO USESUSECADORA(cont.)
Nunca intente operar 6ste electrodom6stico
siest6 daflado,sinofunciona bien,siest6
parcialmentedesarmado,o silefaltan parteso 6stas
est6nrotas,incluyendodaflos alcableel6ctrico.
Elinteriorde la m6quinayla conexi6ndeltubo
de escapeen elinteriorde lasecadorasedeben
limpiarpor Iomenosuna vezal a_o por partede un
t6cnicocalificado.Verla secci6nC6mocargar
yusarla secadora.
productoen elqueelfabricanteleproporcione
unagarant[aescritaen elpaqueteespecificandoque
esseguropara usarenlassecadoras.Losproblemas
de servicioo de rendimientocausadospor estos
productossonresponsabilidadde
losfabricantesde estosproductosy noest6n
cubiertosporla garantiade6steelectrodom6stico.
Sive aguasobreelpisoalrededorde la secadora,
Ilameal serviciot6cnico.
Sisusecadoraesde gas,6staest6equipadacon un •
encendidoel6ctricoautom6tico yno necesitauna luz
piloto.NOINTENTEENCENDERLACONUNFOSFORO.
Podr[anresultarquemaduras portenersumano en
lascercan[asdelquemadorcuandoelencendido
el6ctricoautom6tico comience.
Esposibleque usteddeseesuavizarsuropa
o reducirla electricidadest6ticaenellausando
una toallasuavizantepara secadorao un
acondicionadorantiest6tico.Recomendamos
que usteduseun suavizantede telasenel ciclo
de lavado,deacuerdoconlasinstrucciones
delfabricanteparaestosproductos,o trate un
Nuncapulvericecualquiertipode aerosolen,sobreo
cerca dela secadora.Nouseninguntipo de limpiador
aerosolal limpiarel interiorde lasecadora.Humos
peligrososochoqueel6ctricopuedenocurrir.
Nuncatrate deutilizarlosciclosde estirarporvapor
o renovaci6nporvaporsinprendasen eltambor.
Adem6s,serecomiendaenf6ticamenteseleccionarel
tamaflo decargaapropiado paramejoresresultados.
Seleccionarciclosde cargasgrandespara cargas
pequeflaspuedemojar lasropas y seleccionar ciclos
de cargas pequeflas para cargas grandes puede
generar un desempeflo pobre de estiramiento.
CUANDO NO SEENCUENTREUSANDO SU SECADORA
Cuando desconecte 6ste electrodom6stico, agarre
el enchufe firmemente para evitar daBosal
cable el6ctrico mientras Iohale.Coloqueel cable
el6ctrico en un lugar alejado de las6reas de tr6fico
para que nadie Io pise,tropiece o Iopueda da_ar.
Nointente hacer reparaciones o reemplazar
ninguna parte de 6ste electrodom6stico ni intente
Ilevar a cabo ning0n tipo de servicio a no serque
Iorecomiende el Manual del propietario o
instrucciones publicadas que usted entienda
ytenga la habilidad de Ilevar a cabo.
• Antesde desecharuna secadora ode removerla
para darle servicio,remueva la puerta de la
secadora para evitar que alg0n ni_o seesconda
en su interior.
• No intente alterar los controles.
LEAYSIGAESTAINFORMAClON
DESEGURIDADCUIDADOSAMENTE.
CONSERVE ESTASINSTRUCCIONES
4
This manual suits for next models
4
Table of contents
Languages:
Other GE Dryer manuals

GE
GE GTDP490GD4WS User manual

GE
GE Easy Breeze SE1200 User manual

GE
GE DDE9200V User manual

GE
GE Profile PTDN850GM0WW Operating instructions

GE
GE DDE5100R User manual

GE
GE DISR473CG5WW User manual

GE
GE ddg7680r User manual

GE
GE 31-16023 User manual

GE
GE DWSR473EVAA Manual

GE
GE Spacemaker DSKS333EC User manual
Popular Dryer manuals by other brands

Starmix
Starmix St2400 Series Mounting Instructions and Directions for Use

Grundig
Grundig GTN 38110 G user manual

Miele
Miele T 1526 VENT ED DRYER - OPERATING Operation manual

Whirlpool
Whirlpool Gold GEX9868JQ1 Use & care guide

LG
LG STEAM DRYER DLGX5966W User's guide & installation instructions

Maytag
Maytag MGDE201YW2 installation instructions