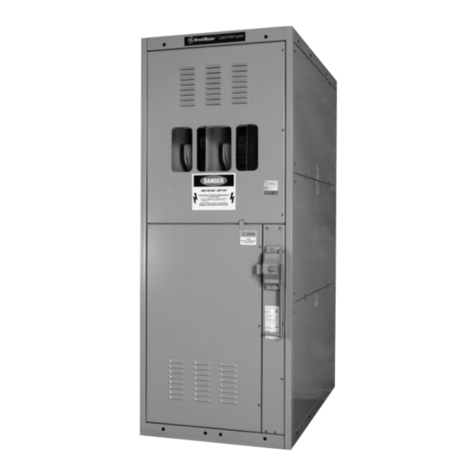
manuals.online logo
Brands
  1. Home
  2. •
  3. Brands
  4. •
  5. GE
  6. •
  7. Switch
  8. •
  9. GE SE-100E User manual

GE SE-100E User manual

INSTRUCTIONS
GEI
-
88767
F
Supersedes
GEI
-
88767
E
SE
-
IOOE
SE
-
I
00
M
SE
-
IOOS
GENERALS
ELECTRIC
Courtesy of NationalSwitchgear.com
GEI
-
88767
CONTENTS
Page
3
Introduction
4
Ratings
4
Receiving
,
Handling
and
Storage
Receiving
and
Handling
. .
.
Storage
4
4
4
Installation
.
. .
Mounting
.
.
.
Connections
. .
Switch
Alignment
4
4
5
5
Description
of
Operation
(
SE
-
100
E
and
SE
-
100
S
)
Closing
Operation
Opening
Operation
.
Adjustments
(
SE
-
100
E
and
SE
-
100
S
)
...
5
6
9
13
Description
of
Operation
(
SE
-
100
M
)
Closing
Operation
Opening
Operation
.
Adjustments
(
SE
-
100
M
)
.
.
.
13
13
13
General
Maintenance
.
Periodic
Inspection
Insulation
System
.
Interrupters
.
.
,
Contacts
.
,
. .
Switch
Alignment
.
Mechanism
.
.
.
Lubrication
.
..
14
14
15
15
15
15
15
16
Final
Inspection
.
Insulation
Test
17
17
Renewal
Parts
Ordering
Instructions
Parts
Recommended
for
Normal
Maintenance
18
19
19
2
Courtesy of NationalSwitchgear.com
GEI
-
88767
LOAD
BREAK
SWITCH
TYPE
SE
-
100
INTRODUCTION
The
SE
-
100
S
switch
has
a
manually
charged
,
spring
stored
energy
operating
mechanism
capable
of
closing
the
switch
against
maximum
rated
short
circuited
current
.
Rotation
of
the
operating
handle
through
an
arc
of
180
degrees
provides
a
positive
action
closing
and
opening
operation
by
means
of
the
stored
energy
springs
.
The
type
SE
-
100
load
break
switch
is
a
manually
or
elec
-
trically
operated
,
triple
pole
disconnecting
switch
with
an
inte
-
gral
interrupter
that
has
capability
of
interrupting
transformer
magnetizing
and
load
currents
within
its
rating
.
The
switch
is
normally
furnished
with
outside
and
inter
-
phase
insulating
barriers
in
a
metal
-
enclosed
housing
.
It
can
be
connected
either
directly
to
the
incoming
side
of
a
power
transformer
,
the
primary
bus
,
or
to
cables
by
the
use
of
pot
-
heads
.
When
applied
with
power
fuses
,
the
combination
serves
as
a
successful
switching
and
fault
protection
device
.
The
SE
-
100
E
switch
is
similar
to
the
SE
-
100
S
except
that
it
has
an
electrically
charged
,
spring
stored
energy
operating
mechanism
having
the
same
closing
capabilities
.
The
switch
is
normally
operated
by
energizing
the
integral
electric
motor
that
charges
the
springs
for
positive
closing
and
opening
opera
-
tions
.
The
switch
can
be
quickly
converted
from
electrical
to
manual
operation
,
permitting
operations
with
an
operating
handle
for
maintenance
or
emergency
use
.
On
normal
feeder
or
single
circuit
applications
the
sta
-
tionary
contacts
of
the
load
break
switch
should
be
connected
to
the
source
of
power
and
the
moving
contact
blades
de
-
energized
when
the
switch
is
in
the
open
position
.
When
the
switch
is
used
in
more
complex
circuit
configurations
,
such
as
“
main
-
tie
-
main
”
or
“
double
feed
”
circuits
,
a
back
feed
can
ccur
which
results
in
the
moving
contact
blades
being
ener
-
gized
during
the
opening
operation
.
For
these
conditions
on
the
13.8
kV
switch
a
special
barrier
is
required
to
prevent
flashover
between
the
switch
blades
and
the
metal
front
of
the
enclosure
.
Special
barriers
are
not
required
on
the
4.8
kV
load
interrupter
switch
.
*
The
SE
-
100
M
switch
is
a
manually
closed
and
opened
switch
with
only
load
break
capability
as
indicated
on
the
nameplate
.
The
operating
handle
must
be
rotated
180
degrees
with
a
full
positive
motion
to
assure
proper
closing
and
open
-
ing
with
the
direct
drive
mechanism
.
The
operating
handle
is
often
interlocked
with
other
devices
such
as
secondary
circuit
breakers
in
order
to
assure
sequential
operation
.
SE
-
100
SWITCH
RATINGS
Load
Break
Current
Amps
Close
&
Latch
Current
Amps
Nominal
Voltage
Max
.
Design
Voltage
BIL
Continuous
Current
Amps
Momentary
Current
KV
KA
KV
KV
600
40
,
000
61
,
000
40
,
000
61
,
000
40
4.8
5.5
60
600
UJ
on
8 8
1200
1200
61
4.8
5.5
60
95
600
600
40
13.8
15.5
ua
M
tn
cn
95
600
61
13.8
15.5
1200
2
o
5.5
60
600
400
400
40
4.8
*
o
100
40
13.8
15.5
95
600
100
i
ua
in
*
Discontinued
in
1973
Those
instructions
do
not
purport
to
cover
*
11
do
toils
or
variations
in
equipment
nor
to
provide
for
every
possible
contingency
to
be
met
in
connection
with
inst
*
ll
*
tion
,
operation
or
maintenance
.
further
information
be
desired
or
should
particular
problems
arise
which
are
not
covered
au
/
/
iciently
for
the
purchaser
'
s
purposes
,
the
matter
should
be
referred
to
the
General
Electric
Company
.
To
the
extent
required
the
products
described
herein
meet
applicable
ANSI
,
IEEE
and
HE
HA
standards
;
but
no
such
assurance
is
given
with
respect
to
local
codes
and
ordinances
because
they
vary
yreatly
.
Shouid
3
Courtesy of NationalSwitchgear.com
GEI
-
88767
RATINGS
the
use
of
an
arc
chute
type
interrupter
working
in
conjunc
-
tion
with
an
auxiliary
blade
.
As
the
switch
is
opened
the
auxiliary
blade
contacts
are
the
last
to
separate
and
will
ini
-
tiate
an
arc
within
the
interrupter
.
The
hot
arc
causes
gases
to
be
released
from
the
plastic
arc
chute
sides
in
such
volume
that
the
arc
is
blown
away
from
the
rapidly
moving
auxiliary
blade
and
is
cooled
by
contact
with
the
large
area
of
arc
chute
sides
.
After
the
arc
has
been
extinguished
,
the
blades
continue
to
open
,
providing
a
sufficient
air
gap
to
isolate
the
terminals
.
Refer
to
the
nameplate
for
complete
ratings
of
any
particu
-
lar
switch
.
Do
not
apply
the
switch
for
any
duty
where
voltage
or
current
levels
are
greater
than
those
given
on
the
nameplate
.
The
chart
on
the
previous
page
gives
the
ratings
for
the
basic
switches
.
The
interrupting
ability
of
the
switch
is
accomplished
by
RECEIVING
,
HANDLING
AND
STORAGE
RECEIVING
AND
HANDLING
the
following
precautions
should
be
taken
to
insure
proper
storage
conditions
:
Immediately
upon
receipt
of
the
switch
,
an
examination
should
be
made
for
loss
or
damage
sustained
in
transit
.
If
in
-
jury
or
rough
handling
is
evident
,
a
damage
claim
should
be
filed
immediately
with
the
transportation
company
and
the
nearest
General
Electric
Apparatus
Sales
Office
should
be
noti
-
fied
.
1
.
The
switch
should
be
stored
in
a
warm
dry
location
to
protect
the
insulation
parts
from
condensation
.
2
.
The
switch
should
be
stored
in
a
clean
location
free
from
corrosive
gases
or
fumes
.
Particular
care
should
be
taken
to
protect
the
equipment
from
moisture
and
cement
dust
,
as
this
combination
has
a
very
corrosive
effect
on
many
parts
.
Although
damage
due
to
handling
is
minimized
because
of
the
metal
enclosure
,
it
is
expected
that
due
care
will
be
exer
-
cised
in
the
unpacking
and
installation
of
the
switch
unit
so
that
no
damage
will
occur
from
careless
or
rough
handling
,
or
from
exposure
to
moisture
or
dirt
.
Care
should
be
exercised
>
prevent
tools
from
striking
any
part
of
the
housing
or
switch
itself
.
3
.
Machined
parts
of
the
operating
mechanism
should
be
coated
with
a
heavy
oil
or
grease
to
prevent
rusting
.
Loose
parts
associated
with
the
switch
are
always
included
in
the
same
crate
.
Check
all
parts
against
the
packing
list
to
be
sure
that
no
parts
have
been
overlooked
.
If
the
switch
is
stored
for
long
periods
of
time
,
periodic
in
-
spections
should
be
made
to
insure
that
corrosion
of
metallic
parts
or
deterioration
of
insulation
parts
has
not
begun
.
Should
the
switch
be
stored
under
unfavorable
conditions
,
steps
should
be
taken
to
dry
out
or
replace
insulation
parts
be
-
fore
placing
in
service
.
STORAGE
It
is
recommended
that
the
switch
be
placed
into
service
immediately
in
its
permanent
location
.
If
this
is
not
possible
,
INSTALLATION
Each
switch
has
been
tested
and
inspected
before
shipment
from
the
factory
;
however
,
before
placing
the
switch
in
service
the
following
items
should
be
checked
to
assure
that
no
change
has
occurred
during
shipment
and
storage
.
twisting
may
cause
misalignment
of
the
contacts
.
If
necessary
,
shims
should
be
used
to
prevent
twisting
.
CONNECTIONS
The
connections
on
the
600
ampere
switch
may
be
made
from
above
or
below
the
insulator
support
.
The
1200
ampere
switch
must
have
the
upper
connections
above
the
upper
insu
-
lator
support
and
the
lower
connection
below
the
hinge
sup
-
port
insulator
.
Connection
of
bus
bars
to
this
terminal
can
MOUNTING
The
switch
must
be
mounted
in
the
housing
by
supporting
both
the
front
and
rear
.
Care
should
be
taken
not
to
distort
:
frame
by
mounting
on
unflat
or
out
-
of
-
square
surfaces
as
4
Courtesy of NationalSwitchgear.com
GEI
-
88767
3
.
The
primary
insulators
and
other
insulation
parts
should
be
wiped
clean
during
installation
as
well
as
during
each
maintenance
inspection
.
easily
be
made
using
the
provided
terminal
bolts
.
After
con
-
nections
to
the
switch
have
been
made
,
the
switch
alignment
should
be
checked
as
listed
below
.
When
furnished
as
a
complete
housing
,
the
connections
directly
to
the
switch
h
?
ve
been
made
at
the
factory
.
On
these
units
,
connections
are
made
using
the
provided
potheads
,
cable
terminal
connectors
,
etc
.
4
.
To
assure
that
the
electrical
connections
have
remained
tight
on
the
SE
-
10
3
and
all
switches
ha
'
ing
auxiliary
'
switches
,
they
should
be
checked
during
installation
and
during
each
maintenance
inspection
.
SWITCH
ALIGNMENT
5
.
After
the
switch
has
been
operated
several
times
with
the
maintenance
operating
handle
and
the
contact
ad
-
justments
have
been
checked
,
the
operating
springs
should
be
unblocked
and
the
switch
operated
several
times
with
the
normal
operating
handle
to
assure
proper
closing
and
opening
with
the
springs
.
Prior
to
placing
the
switch
in
service
the
following
adjust
-
ments
and
alignment
checks
should
be
made
to
insure
proper
operation
.
1
.
Before
operating
the
SE
-
100
E
or
SE
-
100
S
switch
with
the
normal
spring
load
,
a
slow
closing
of
the
blades
should
be
made
to
check
alignment
.
The
power
springs
should
be
blocked
as
described
under
SPRING
BLOCK
-
ING
and
the
three
poles
of
the
switch
operated
slowly
by
the
maintenance
handle
to
assure
freedom
of
motion
and
to
check
alignment
.
A
slow
closing
operation
can
be
made
on
the
SE
-
100
M
switch
with
the
norma
*
operating
handle
.
6
.
On
the
SE
-
100
E
switch
check
the
control
voltage
at
the
motor
terminals
.
Refer
to
CONTROL
POWER
CHECK
.
7
.
If
the
switch
has
been
stored
for
a
long
period
of
time
,
it
is
recommended
that
the
insulation
be
checked
with
a
standard
60
hertz
high
potential
test
.
Refer
to
INSULA
-
TION
TEST
.
2
.
Check
the
following
items
listed
under
ADJUSTMENTS
before
the
switch
is
put
in
operation
and
during
each
period
of
maintenance
.
NOTE
:
If
the
switch
secondary
wiring
is
to
be
given
a
high
potential
test
at
1500
volts
,
remove
all
the
motor
leads
on
the
SE
-
100
E
from
the
terminal
connection
.
Fail
-
ure
to
disconnect
the
motor
from
the
circuit
may
cause
damage
to
the
winding
insulation
.
(
a
)
Primary
contact
alignment
.
Arc
chute
alignment
.
Auxiliary
blade
release
.
Primary
contact
wipe
.
Primary
contact
gap
.
Upper
(
closed
)
mechanism
stops
.
(
b
)
(
c
)
(
d
)
8
.
A
final
inspection
before
energizing
should
be
made
in
accordance
with
FINAL
INSPECTION
.
(
e
)
(
0
DESCRIPTION
OF
OPERATION
(
SE
-
100
E
and
SE
-
100
S
)
CLOSING
OPERATION
On
the
SE
-
100
E
and
SE
-
100
S
switches
both
the
closing
and
opening
operation
is
accomplished
by
the
spring
-
charged
mechanism
(
6
)
,
Fig
.
1
,
located
on
the
front
of
the
switch
assembly
.
The
operating
springs
are
manually
or
electrically
charged
but
are
completely
disengaged
from
the
operating
han
-
dle
as
they
begin
to
operate
the
switch
.
In
this
way
the
actual
operation
of
the
switch
is
independent
of
the
operator
.
Closing
the
SE
-
100
S
switch
,
and
the
SE
-
100
E
switch
set
for
manual
operation
,
is
accomplished
by
inserting
the
operating
handle
(
1
)
,
Fig
.
2
,
into
the
handle
socket
provided
in
the
operating
hub
(
7
)
,
Fig
.
1
,
in
the
enclosure
and
rotating
in
a
counterclockwise
direction
as
far
as
possible
(
approximately
180
degrees
)
.
When
operating
either
switch
manually
,
the
handle
should
be
rotated
with
a
positive
motion
throughout
its
entire
stroke
.
After
a
few
degrees
of
handle
rotation
,
the
mechanism
will
engage
the
primary
spring
(
4
)
,
Fig
.
1
,
located
on
the
right
side
5
Courtesy of NationalSwitchgear.com
GEI
-
88767
and
compress
it
fully
.
Continued
rotation
of
the
handle
will
2
push
the
spring
over
the
toggle
position
and
it
will
start
to
dis
-
charge
.
A
driving
lug
(
5
)
,
Fig
.
3
,
will
engage
the
drive
crank
(
3
)
,
which
is
directly
connected
to
the
main
crank
shaft
(
11
)
3
just
as
the
primary
spring
leaves
the
toggle
position
.
When
the
main
crank
shaft
has
rotated
a
few
degrees
,
the
fully
charged
booster
spring
(
5
)
,
Fig
.
1
,
located
on
the
left
side
,
will
pass
its
toggle
position
and
the
full
energy
of
both
springs
will
close
the
switch
with
sufficient
force
to
close
and
latch
against
the
fault
closing
current
rating
on
the
nameplate
.
i
\
v
!
*
1
!
v
*
m
i
;
\
4
WfmM
|
x
V
"
l
During
the
closing
operation
the
auxiliary
blade
will
be
held
out
of
the
chute
until
just
before
the
arcing
contacts
(
6
)
,
Fig
.
4
,
are
engaged
,
then
it
is
released
to
enter
the
chute
and
latch
into
the
arc
chute
contacts
(
2
)
,
Fig
.
5
.
This
sequence
of
operations
will
prevent
prestrike
in
the
interrupting
area
of
the
arc
chute
.
K
I
M
-
c
Vi
At
any
time
during
the
operation
,
until
the
primary
spring
reaches
its
toggle
position
,
the
handle
can
be
returned
to
its
starting
position
and
removed
.
The
mechanism
will
complete
-
ly
reset
to
the
starting
position
.
V
t
r
The
SE
-
100
E
switch
is
normally
electrically
operated
by
energizing
a
motor
(
2
)
,
Fig
.
6
.
An
internal
gear
driving
mecha
-
nism
will
charge
the
springs
and
operate
the
switch
in
the
same
manner
as
the
mechanical
handle
drive
.
5
.
Booster
Spring
Operating
Mechanism
Operating
Hub
1
.
Primary
Blade
Stop
2
.
Primary
Contact
Fingers
6
.
3
.
Primary
Contact
Blade
Primary
Spring
7
.
When
the
closing
switch
contacts
are
made
the
start
-
stop
relay
(
3
)
,
Fig
.
6
,
will
close
contacts
and
energize
the
motor
in
the
proper
direction
.
At
the
same
time
a
closing
seal
-
in
relay
(
4
)
assures
a
complete
operation
without
hesitation
and
makes
the
closing
of
the
SE
-
100
E
switch
independent
of
the
opera
-
tor
.
During
the
closing
operation
an
auxiliary
switch
(
1
)
will
open
the
motor
circuit
and
arrange
a
series
of
contacts
for
an
opening
operation
.
It
will
also
de
-
energize
the
start
-
stop
relay
that
will
close
a
set
of
contacts
in
the
motor
circuit
,
shunting
the
field
coils
around
the
armature
,
thereby
effecting
a
dyna
-
mic
brake
.
Refer
to
wiring
diagram
Fig
.
12
.
Fig
.
1
(
8035016
)
SE
-
100
S
Switch
Partially
Open
OPENING
OPERATION
To
open
the
SE
-
100
S
switch
,
and
the
SE
-
100
E
switch
set
for
manual
operation
,
the
operating
handle
is
inserted
into
the
handle
socket
and
rotated
in
a
clockwise
direction
as
far
as
possible
(
approximately
180
degrees
)
.
After
a
few
degrees
of
handle
rotation
,
the
mechanism
will
engage
the
primary
spring
(
4
)
,
Fig
.
1
,
and
compress
it
fully
.
Continued
handle
rotation
will
push
the
spring
over
the
toggle
position
and
it
will
start
to
discharge
.
A
driving
lug
(
5
)
,
Fig
.
3
,
will
engage
the
drive
crank
(
3
)
at
the
toggle
position
of
the
pri
-
mary
spring
and
will
turn
the
main
crank
shaft
(
11
)
.
When
the
1
.
Operating
Handle
2
.
Maintenance
Handle
3
.
Spring
Blocking
Pin
Fig
.
2
(
8035232
)
Operating
and
Maintenance
Handles
6
Courtesy of NationalSwitchgear.com
GEI
-
88767
8
la
1
.
Spring
Stop
Bolt
1
A
.
Spring
Stop
Bolt
2
.
Spring
Stop
3
.
Driving
Crank
4
.
Hole
for
Spring
Blocking
Pin
5
.
Driving
Lug
6
.
Buffer
Rubber
7
.
Buffer
Stop
8
.
Operating
Rod
9
.
Operating
Rod
Crank
10
.
Operating
Hub
11
.
Main
Crank
Shaft
12
.
Maintenance
Handle
0
^
k
l
2
/
1
4
/
i
M
m
ft
3
V
I
I
;
6
,
7
5
-
I
o
~
1
_
L
—
u
m
10
12
Fig
.
3
(
8037271
)
Spring
Drive
Mechanism
1
.
Interrupter
Assembly
2
.
Interrupter
Mounting
Bolts
3
.
Shims
4
.
Contact
Bolt
5
.
Primary
Contact
Fingers
6
.
Arcing
Contact
Fingers
7
.
Auxiliary
Blade
8
.
Buffer
Stop
9
.
Guide
Block
10
.
Interrupter
Mounting
Bolts
11
.
Primary
Contact
Blade
12
.
Auxiliary
Contact
Blade
13
.
Pivot
Pin
for
Auxiliary
Blade
14
.
Auxiliary
Blade
Release
Hook
15
.
Operating
Rod
Clevis
Pin
16
.
Hinge
Pin
l
2
3
5
6
8
9
10
11
12
13
14
15
16
7
Courtesy of NationalSwitchgear.com
GEI
-
88767
2
3
4
1
.
Blade
Stop
Block
2
.
Arc
Chute
Contacts
3
.
Auxiliary
Blade
4
.
Spacer
5
.
Arc
Chute
Side
6
.
Primary
Contact
Blade
7
.
Auxiliary
Blade
Spring
8
.
Camming
Screw
9
.
Lock
Nut
10
.
Auxiliary
Blade
Release
Hook
11
.
Operating
Rod
5
6
i
/
/
o
!
*
<
7
/
tr
/
-
/
8
9
10
X
'
.
•
\
II
\
r
\
\
\
\
V
A
\
Fig
.
5
(
8035037
)
Unit
Pole
Opening
fcm
m
MI
i
m
i
11
\
IW
HH
.
JN
!
I
)
3
4
O
;
1
O
l
•
v
*
1
5
a
~
i
-
-
i
•
»
!
<
4
l
1
f r
\
r
-
.
5
•
i
\
£
3
*
•
2
O
I
o
.
%
c
w
4
.
Close
Relay
5
.
Open
Relay
1
.
Auxiliary
Switch
2
.
Motor
3
.
Start
-
Stop
Relay
Fig
.
6
(
8037272
)
Electrical
Operator
8
Courtesy of NationalSwitchgear.com
GEI
-
88767
front
bolts
of
the
right
-
hand
barrier
to
have
access
to
the
bolts
.
main
crank
shaft
has
rotated
a
few
degrees
past
the
primary
spring
toggle
position
,
the
spring
will
discharge
,
opening
the
witch
,
and
charging
the
booster
spring
(
5
)
,
Fig
.
1
,
for
the
next
closing
operation
.
3
.
Rotate
the
stop
until
it
is
vertical
,
replace
the
bolt
that
had
been
removed
in
the
lower
location
(
1
)
and
tighten
.
The
primary
blade
(
11
)
,
Fig
.
4
,
travel
will
cause
the
primary
contacts
(
5
)
to
part
first
and
the
arcing
contacts
(
6
)
a
few
de
-
grees
later
.
The
spring
loaded
auxiliary
blade
(
3
)
,
Fig
.
5
,
will
remain
latched
to
the
contacts
(
2
)
inside
the
arc
chute
.
At
a
predetermined
position
of
the
primary
blades
,
the
auxiliary
blade
will
be
released
and
will
snap
open
at
a
high
velocity
.
4
.
The
SE
-
100
E
mechanism
must
be
put
into
the
manual
operation
condition
before
operating
with
the
manual
handle
.
Disengage
the
electrical
operator
by
sliding
the
yellow
pawl
block
toward
the
center
hub
using
a
screw
driver
or
other
small
tool
.
See
Fig
.
6
.
When
the
switch
is
open
the
pawl
will
appear
in
the
right
hole
,
if
the
switch
is
closed
the
pawl
will
appear
in
the
left
hole
.
As
the
arc
chute
contacts
part
,
an
arc
is
established
between
the
auxiliary
blade
tip
(
3
)
,
Fig
.
5
,
and
the
finger
contacts
(
2
)
.
The
hot
arc
releases
gases
from
the
plastic
arc
chute
material
dispersing
the
arc
over
a
large
area
of
the
chute
sides
.
The
rapidly
cooled
arc
is
extinguished
in
the
chute
and
the
aux
-
iliary
blade
will
continue
to
travel
until
a
sufficient
air
gap
is
achieved
to
withstand
BIL
voltages
.
5
.
Using
the
normal
operating
handle
rotate
in
a
counter
-
clockwise
direction
(
direction
of
close
)
until
the
spring
yoke
on
the
right
contacts
the
stop
.
6
.
Remove
operating
handle
and
insert
maintenance
handle
(
2
)
,
Fig
.
2
,
on
main
square
shaft
and
screw
the
blocking
pins
(
3
)
in
the
left
and
right
spring
guide
at
(
4
)
,
Fig
.
3
.
The
springs
are
now
safely
blocked
and
the
maintenance
handle
will
open
and
close
the
switch
for
adjusting
pur
-
poses
.
The
SE
-
100
E
switch
when
opened
electrically
by
the
motor
drive
will
have
the
same
sequence
of
operations
as
when
the
manual
handle
is
used
.
The
electrical
sequence
is
the
same
as
described
in
the
closing
operation
except
seal
-
in
relay
(
5
)
,
Fig
.
6
,
is
used
.
UPPER
(
CLOSED
)
MECHANISM
STOP
ADJUSTMENTS
The
upper
buffer
stops
(
3
)
,
Fig
.
7
,
located
on
either
side
of
the
mechanism
at
the
ends
of
the
main
crank
shaft
,
must
be
adjusted
to
position
the
operating
rod
cranks
when
the
switch
is
closed
.
Operate
the
switch
to
the
fully
closed
position
.
(
SE
-
100
E
and
SE
-
100
S
)
All
adjustments
should
be
checked
during
periodic
inspec
-
tions
and
whenever
it
becomes
necessary
to
repair
or
replace
parts
that
have
become
worn
or
defective
while
in
service
.
The
operating
rod
must
go
over
toggle
approximately
VA
inch
at
the
crank
connection
when
the
switch
is
closed
.
A
simple
means
of
measuring
the
correct
toggle
angle
is
to
place
a
straight
edge
along
the
upper
side
of
the
operating
rod
and
extend
it
until
it
is
over
the
square
main
shaft
(
10
)
,
Fig
.
8
.
The
dimension
from
the
straight
edge
to
the
closest
comer
of
the
square
shaft
should
be
1
/
4
inch
to
3
/
8
inch
.
NOTE
:
BEFORE
ATTEMPTING
TO
WORK
ON
EITHER
THE
SWITCH
OR
MECHANISM
MAKE
CERTAIN
THAT
THE
SWITCH
HAS
BEEN
DISCONNECTED
FROM
ALL
PRIMARY
VOLTAGE
POWER
SOURCES
.
ALSO
THE
OPERATING
SPRINGS
SHOULD
BE
BLOCKED
TO
PRE
-
VENT
ACCIDENTAL
CLOSING
OR
OPENING
.
If
adjustment
of
the
stop
is
necessary
,
remove
the
cotter
pin
holding
the
stop
(
3
)
,
Fig
.
7
,
and
move
washers
and
metal
shims
from
the
front
to
the
rear
(
or
the
reverse
)
until
the
pro
-
per
toggle
angle
is
obtained
.
Adjust
the
stops
at
both
ends
of
the
main
shaft
the
same
amount
to
keep
them
balanced
.
SPRING
BLOCKING
For
most
of
the
adjustments
it
will
be
necessary
to
operate
the
switch
slowly
with
the
maintenance
handle
.
To
do
this
the
power
springs
must
be
blocked
using
the
following
procedure
.
Refer
to
Fig
.
3
.
PRIMARY
WIPE
The
operating
rod
must
fully
close
the
switch
primary
blades
to
obtain
the
correct
primary
finger
wipe
.
1
.
Make
certain
that
the
switch
is
in
the
open
position
.
With
the
switch
in
the
closed
position
,
pull
the
top
of
the
primary
blades
to
the
front
with
your
hands
to
remove
all
linkage
pin
allowance
.
There
should
be
1
/
64
inch
to
1
/
32
2
.
Remove
the
rear
bolt
from
position
(
1
A
)
of
the
spring
stop
(
2
)
located
on
the
upper
right
angle
frame
.
On
1200
ampere
.
switches
it
may
be
necessary
to
loosen
the
9
Courtesy of NationalSwitchgear.com
GEI
-
88767
1
.
Collar
2
.
Buffer
Rubber
3
.
Upper
Buffer
Stop
4
.
Booster
Crank
5
.
Buffer
Rubber
6
.
Lower
Buffer
Stop
6
.
Adjusting
Nut
1
.
Auxiliary
Blade
Spring
2
.
Auxiliary
Blade
Release
Hook
7
.
Release
Hook
Spring
8
.
Operating
Rod
9
.
Operating
Rod
Crank
10
.
Main
Crank
Shaft
3
.
Spring
Stop
4
.
Camming
Screw
5
.
Lock
Nut
Fig
.
7
(
8035014
)
Buffer
Assembly
Fig
.
8
(
8035015
)
Switch
Blade
Adjustments
inch
clearance
between
the
buffer
(
8
)
,
Fig
.
4
,
and
the
pri
-
mary
blade
buffer
stop
(
1
)
,
Fig
.
1
.
There
should
also
be
3
/
16
inch
to
1
/
4
inch
between
the
edge
of
the
primary
blade
and
the
front
of
the
primary
contact
support
.
dimension
is
not
correct
,
the
lower
buffer
stop
(
6
)
,
Fig
.
7
,
should
be
adjusted
in
a
similar
manner
to
the
adjustment
on
the
upper
stop
.
Move
shims
and
washers
from
the
top
to
the
bottom
of
the
stop
(
or
the
reverse
)
as
required
.
Adjust
the
stops
at
both
ends
of
the
main
shaft
the
same
amount
to
keep
them
balanced
.
Adjust
the
length
of
the
rod
by
use
of
the
adjusting
nuts
(
6
)
,
Fig
.
8
,
to
obtain
the
3
/
16
inch
to
1
/
4
inch
gap
then
adjust
the
buffer
(
8
)
,
Fig
.
4
,
by
adding
or
removing
shims
to
get
the
1
/
64
inch
to
1
/
32
inch
clearance
.
PRIMARY
AND
ARCING
CONTACT
ALIGNMENT
Close
the
primary
blades
(
12
)
,
Fig
.
10
,
slowly
by
the
use
of
the
maintenance
handle
and
note
the
engagement
of
the
pri
-
mary
contacts
(
4
)
,
arcing
contacts
(
6
and
8
)
,
and
guide
block
(
10
)
.
The
blades
should
center
around
the
guide
block
with
some
clearance
on
either
side
.
They
should
also
be
centered
in
the
primary
and
arcing
contact
fingers
.
PRIMARY
GAP
The
primary
gap
should
be
measured
with
the
primary
blades
in
the
normal
position
.
A
measurement
should
be
made
from
the
buffer
stop
or
spacer
(
3
)
,
Fig
.
9
,
to
the
primary
finger
(
2
)
.
The
same
primary
finger
,
the
bottom
finger
,
should
be
used
on
both
600
ampere
and
1200
ampere
switches
.
The
mension
should
be
11
inches
plus
or
minus
3
/
8
inch
.
If
this
If
the
blades
press
hard
against
the
sides
of
the
guide
block
,
loosen
the
two
bolts
(
11
)
,
Fig
.
10
,
holding
the
Mock
.
Again
10
Courtesy of NationalSwitchgear.com
GEI
-
88767
i
•
2
3
t
I
1
.
Interrupter
Assembly
2
.
Stationary
Primary
Contact
3
.
Primary
Blade
Stop
4
.
Primary
Blade
Fig
.
9
(
8035032
)
Unit
Pole
Fully
Open
check
the
contact
alignment
.
If
the
contacts
are
properly
aligned
,
reposition
the
guide
block
and
bolt
securely
.
1
.
Interrupter
Mounting
Bolts
2
.
Upper
Terminal
3
.
Shims
4
.
Primary
Contacts
5
.
Contact
Bolts
6
.
Arcing
Contact
Fingers
7
.
Contact
Bolt
8
.
Movable
Arcing
Contact
9
.
Tube
Spacer
10
.
Guide
Block
11
.
Buffer
Block
Bolts
12
.
Primary
Contact
Blades
If
the
contacts
are
not
in
alignment
,
loosen
the
bolts
hold
-
ing
the
top
insulator
and
position
the
insulator
to
center
the
contacts
.
After
securing
the
insulators
,
reposition
the
guide
blocks
and
tighten
the
bolts
.
Be
certain
the
insulator
is
moved
only
in
a
horizontal
direc
-
tion
.
Vertical
displacement
may
cause
misalignment
of
the
auxiliary
blade
contacts
.
ARC
CHUTE
ALIGNMENT
The
arc
chute
must
be
positioned
to
allow
the
auxiliary
blade
to
enter
and
latch
on
a
closing
operation
,
and
to
release
\
e
auxiliary
blade
at
the
proper
time
on
an
opening
opera
-
tion
.
Fig
.
10
(
8035033
)
Contact
Arrangement
11
Courtesy of NationalSwitchgear.com
GEI
-
88767
With
the
operating
springs
blocked
,
turn
the
contact
arm
(
12
)
,
Fig
.
4
,
slowly
closed
and
check
the
entry
of
the
auxiliary
lade
(
7
)
into
the
arc
chute
(
1
)
.
The
blade
should
enter
smoothly
and
be
in
the
center
of
the
opening
.
If
the
blade
scrapes
heavily
on
the
sides
of
the
chute
,
loosen
the
two
bolts
(
2
)
at
the
top
and
the
two
bolts
(
10
)
at
the
bottom
of
the
chute
.
Position
the
chute
so
that
the
blade
will
travel
the
full
length
without
binding
or
heavy
scraping
,
and
tighten
the
bolts
.
PRIMARY
CONTACT
PRESSURE
The
primary
finger
pressure
has
been
adjusted
at
the
fac
-
tory
to
be
12
pounds
per
contact
on
the
600
ampere
switch
and
24
pounds
per
contact
on
the
1200
ampere
switch
for
nor
-
mal
standard
momentary
ratings
.
For
special
switches
with
80
kA
momentary
ratings
the
contact
pressure
should
be
32
pounds
per
contact
.
This
can
be
measured
with
a
pull
scale
exerting
a
pressure
against
the
contact
surface
.
The
contact
pressure
of
each
finger
(
5
)
,
Fig
.
4
,
should
be
measured
indi
-
vidually
.
Increase
or
decrease
the
contact
pressure
by
loosen
-
ing
or
tightening
the
contact
bolts
(
4
)
.
Refer
to
Fig
.
4
.
A
dimension
of
1
-
1
/
6
inches
should
be
maintained
from
the
rear
edge
of
the
arc
chute
to
the
front
edge
of
the
primary
finger
contact
support
at
all
times
when
moving
or
re
-
aligning
the
chute
.
The
arc
chute
contacts
(
2
)
,
Fig
.
5
,
inside
the
chute
should
be
properly
positioned
to
latch
the
auxiliary
blade
when
this
dimension
is
maintained
.
ARCING
FINGER
CONTACT
PRESSURE
The
arcing
finger
contact
pressure
should
be
12
pounds
on
all
600
ampere
and
16
pounds
on
all
1200
ampere
switches
for
normal
standard
momentary
.
For
special
switches
with
80
kA
momentary
rating
the
contact
pressure
should
be
24
pounds
per
contact
.
This
pressure
can
again
be
measured
with
a
spring
scale
against
the
contact
surface
.
Loosen
or
tighten
the
con
-
tact
bolts
(
7
)
,
Fig
.
10
,
as
necessary
.
The
auxiliary
blade
must
be
released
by
the
contacts
when
the
primary
blade
has
been
opened
to
a
predetermined
gap
.
With
the
operating
springs
blocked
,
open
the
primary
contacts
and
slowly
move
the
primary
blade
until
the
auxiliary
blade
is
released
.
At
the
point
of
release
the
gap
from
the
lower
edge
of
the
primary
finger
(
the
bottom
finger
(
2
)
,
Fig
.
9
,
to
the
buf
-
fer
stop
or
spacer
(
3
)
should
be
4
-
7
/
8
inches
to
5
*
3
/
8
inches
on
the
4.8
kV
and
7
-
1
/
8
inches
to
7
-
3
/
4
inches
on
the
13.2
kV
switch
.
If
the
gap
is
not
correct
the
vertical
location
of
the
chute
must
be
changed
.
For
gaps
greater
than
the
above
nge
,
the
chute
must
be
raised
,
for
gaps
that
are
less
the
chute
,
iust
be
lowered
.
To
adjust
the
chute
,
remove
the
upper
and
iower
mounting
bolts
(
2
and
10
)
,
Fig
.
4
.
Move
shims
(
3
)
from
the
bottom
to
the
top
of
the
support
to
decrease
the
gap
.
To
increase
the
gap
,
move
some
of
the
top
shims
to
the
bottom
support
.
PRIMARY
BLADE
HINGE
PRESSURE
The
correct
hinge
pressure
is
essential
for
proper
operation
of
the
switch
.
The
hinge
pressure
is
properly
set
at
the
factory
and
normally
will
not
require
checking
unless
the
blade
assem
-
bly
has
been
disassembled
for
maintenance
or
replacement
of
parts
.
The
hinge
pressure
is
difficult
to
measure
;
however
,
the
torque
required
to
move
the
primary
blades
can
be
easily
mea
-
sured
and
can
be
substituted
for
a
pressure
measurement
.
The
break
-
away
torque
of
the
hinge
(
the
torque
required
to
start
the
blades
moving
)
should
be
between
60
and
90
pounds
-
inches
on
the
600
ampere
contact
blades
and
between
85
and
110
pounds
-
inches
on
the
1200
ampere
contact
blades
.
When
the
release
gap
is
properly
set
,
check
again
the
dimen
-
sion
from
the
back
edge
of
the
chute
to
the
primary
contact
finger
support
and
the
alignment
of
the
auxiliary
blade
in
the
chute
opening
.
To
obtain
the
starting
torque
at
the
blade
hinge
,
the
operat
-
ing
rod
(
8
)
,
Fig
.
8
,
must
be
disconnected
from
the
operating
rod
crank
(
9
)
.
The
primary
contacts
,
arcing
contacts
,
and
auxiliary
blade
contacts
must
be
disengaged
.
With
a
spring
scale
pull
at
the
buffer
stop
or
spacer
(
1
)
,
Fig
.
1
,
until
the
blade
starts
to
move
.
The
scale
reading
should
be
between
SVi
and
8
Y
*
pounds
on
the
600
ampere
blade
and
between
8
and
10
pounds
on
the
1200
ampere
blade
.
If
adjustment
is
necessary
,
remove
a
cotter
pin
from
either
end
of
tire
hinge
pin
(
16
)
,
Fig
.
4
,
and
tighten
or
loosen
the
nut
as
required
.
Move
the
nut
in
increments
of
one
sixth
of
a
turn
to
assure
line
-
up
of
cotter
pin
hole
and
slot
in
the
nut
.
AUXILIARY
BLADE
RELEASE
The
auxiliary
blade
release
hook
(
14
)
,
Fig
.
4
,
should
be
ad
-
justed
to
hold
the
blade
out
of
the
arc
chute
until
a
prede
-
termined
position
in
the
closing
operation
.
Close
the
switch
slowly
with
the
maintenance
handle
and
note
the
position
of
the
primary
blades
when
the
auxiliary
blade
is
released
by
the
hook
.
The
hook
should
be
adjusted
by
setting
the
camming
screw
(
8
)
,
Fig
.
5
,
to
release
the
aux
-
iliary
blade
within
the
range
of
1
/
2
inch
before
the
primary
contacts
touch
.
After
adjustment
is
made
the
lock
nut
(
9
)
>
u
\
d
be
tightened
.
CONTROL
POWER
CHECK
-
SE
-
100
E
After
the
switch
has
been
opened
and
closed
several
times
with
the
maintenance
closing
handle
and
all
adjustments
have
been
checked
as
described
,
the
operating
voltage
should
be
12
Courtesy of NationalSwitchgear.com
GEI
-
88767
and
switch
.
When
two
or
more
switches
operating
from
the
same
power
source
are
required
to
operate
simultaneously
,
the
close
circuit
voltage
at
the
motor
of
each
switch
must
fall
within
the
specified
limits
.
"
hecked
at
the
motor
terminal
board
.
Control
power
for
elec
-
ical
operation
may
be
from
either
an
alternating
or
direct
current
source
.
The
operating
ranges
for
the
motor
voltages
are
as
follows
:
ACCEPTABLE
RANGE
(
CLOSED
CIRCUIT
VOLTAGE
)
AUXILIARY
SWITCH
NOMINAL
VOLTAGE
The
auxiliary
switch
(
1
)
,
Fig
.
6
,
is
mounted
in
the
mecha
-
nism
area
and
is
operated
by
several
links
from
the
main
shaft
.
The
switch
consists
of
“
a
”
contacts
that
are
open
when
the
SE
-
100
E
switch
is
open
and
“
b
”
contacts
that
are
open
when
the
SE
-
100
E
switch
is
closed
.
The
contacts
are
used
for
relay
operation
and
setting
up
the
motor
circuits
for
close
and
open
operations
.
Several
“
a
”
and
“
b
”
contacts
are
available
for
special
applications
by
the
customer
.
An
auxiliary
switch
can
be
added
to
the
SE
-
100
S
when
required
for
special
customer
applications
.
90
-
130
VDC
180
-
260
VDC
95
-
125
V
60
Hz
190
-
250
V
60
Hz
125
VDC
250
VDC
115
V
60
Hz
230
V
60
Hz
If
the
closed
circuit
voltage
at
the
terminals
of
the
motor
does
not
fall
in
the
specified
range
,
check
the
voltage
at
the
source
of
power
and
the
line
drop
between
the
power
source
DESCRIPTION
OF
OPERATION
(
SE
-
100
M
)
*
The
SE
-
100
M
switch
has
a
direct
mechanical
drive
and
the
closing
and
opening
energy
is
supplied
by
the
operator
.
When
the
primary
blade
gap
is
sufficient
,
the
auxiliary
blade
(
3
)
,
Fig
.
5
,
will
be
released
and
will
snap
open
at
high
velocity
.
Again
it
must
be
emphasized
that
the
mechanism
has
a
direct
gear
drive
to
the
main
shaft
of
the
switch
and
depends
entirely
on
the
operator
to
produce
a
smooth
and
positive
mo
-
tion
to
satisfactorily
open
the
switch
.
When
operating
the
switch
,
the
handle
must
be
rotated
with
positive
motion
throughout
its
entire
stroke
.
CLOSING
OPERATION
Unlike
the
SE
-
100
S
,
on
the
SE
-
100
M
an
operation
must
be
completed
once
it
is
initiated
.
Do
not
initiate
an
operation
and
then
return
to
original
position
.
Closing
the
switch
is
accomplished
by
inserting
the
operat
-
ing
handle
(
1
)
,
Fig
.
2
,
into
the
handle
socket
provided
in
the
operating
hub
(
7
)
,
Fig
.
1
,
in
the
enclosure
and
rotating
in
a
counterclockwise
direction
as
far
as
possible
(
approximately
180
degrees
)
.
ADJUSTMENTS
During
the
closing
cycle
the
auxiliary
blade
(
7
)
,
Fig
.
4
,
will
be
held
out
of
the
arc
chute
until
the
primary
blades
(
11
)
are
almost
closed
.
Just
before
the
primary
contacts
(
5
)
touch
,
the
auxiliary
blade
is
released
and
will
be
the
first
part
to
close
.
(
SE
-
100
M
)
All
adjustments
should
be
checked
during
periodic
inspec
-
tion
and
whenever
it
becomes
necessary
to
repair
or
replace
parts
that
have
become
worn
or
defective
while
in
service
.
The
mechanism
has
a
direct
gear
drive
to
the
main
shaft
of
the
switch
and
depends
entirely
on
the
operator
to
produce
a
smooth
and
positive
motion
to
satisfactorily
close
the
switch
.
NOTE
:
BEFORE
ATTEMPTING
TO
WORK
ON
EITHER
THE
SWITCH
OR
MECHANISM
MAKE
CERTAIN
THAT
THE
SWITCH
HAS
BEEN
DISCONNECTED
FROM
ALL
PRIMARY
VOLTAGE
POWER
SOURCES
.
OPENING
OPERATION
Many
of
the
adjustments
are
the
same
as
those
on
the
SE
-
100
E
and
SE
-
100
S
.
Reference
will
be
made
to
the
appro
-
priate
descriptions
.
Slow
operation
of
the
SE
-
100
M
switch
can
be
accomplished
using
the
normal
operating
handle
since
the
mechanism
is
direct
drive
.
To
open
the
switch
insert
the
operating
handle
into
the
handle
socket
and
rotate
in
a
clockwise
direction
as
far
as
possible
(
approximately
180
degrees
)
.
The
primary
contacts
(
5
and
11
)
,
Fig
.
4
,
will
part
first
.
Discontinued
1973
13
Courtesy of NationalSwitchgear.com
GEI
-
88767
PRIMARY
CONTACT
ALIGNMENT
UPPER
(
CLOSED
)
MECHANISM
STOP
Refer
to
ADJUSTMENTS
.
Refer
to
ADJUSTMENTS
.
ARC
CHUTE
ALIGNMENT
PRIMARY
WIPE
Refer
to
ADJUSTMENTS
.
AUXILIARY
BLADE
RELEASE
When
the
switch
is
in
the
dosed
position
,
there
should
be
no
clearance
between
the
primary
blades
and
the
primary
fin
-
ger
support
.
The
length
of
the
operating
rod
should
be
ad
-
justed
so
that
there
is
noticeable
force
involved
when
the
operating
rod
goes
overcenter
near
the
end
of
the
closing
stroke
.
When
the
switch
is
fully
closed
it
should
require
be
-
tween
30
and
40
pounds
force
to
break
the
toggle
.
This
force
is
applied
at
the
bolt
in
the
mechanism
end
of
the
operating
rod
and
is
applied
downward
perpendicular
to
the
long
axis
of
the
operating
rod
.
This
force
may
be
increased
by
lengthening
the
rod
and
decreased
by
shortening
the
rod
.
The
SE
-
100
M
hook
release
should
be
adjusted
to
release
the
auxiliary
blade
when
the
primary
contacts
and
blade
are
1
/
2
inch
to
1
inch
apart
.
Be
certain
the
auxiliary
blade
latches
into
the
arcing
contacts
in
the
chute
on
each
operation
.
The
aux
-
iliary
blade
is
released
before
the
primary
contacts
are
closed
so
that
it
will
close
first
and
give
a
positive
closing
action
even
when
the
switch
is
inadvertently
operated
slowly
.
PRIMARY
CONTACT
PRESSURE
Refer
to
ADJUSTMENTS
.
PRIMARY
GAP
PRIMARY
BLADE
HINGE
PRESSURE
Refer
to
ADJUSTMENTS
.
Refer
to
ADJUSTMENTS
.
GENERAL
MAINTENANCE
Dependable
service
and
safe
operation
of
the
equipment
is
contingent
upon
reliable
operation
of
the
switch
and
mecha
-
nism
assembly
.
To
maintain
such
service
,
it
is
recommended
that
a
definite
inspection
and
maintenance
schedule
be
set
up
and
followed
.
Load
break
switches
may
not
always
be
readily
available
for
servicing
at
frequent
intervals
;
however
,
this
does
not
relieve
the
user
of
the
responsibility
for
care
and
inspec
-
tion
.
The
switches
should
be
periodicallv
inspected
to
make
certain
that
they
are
in
satisfactory
se
*
.
*
ceable
condition
.
Serious
shutdowns
can
often
be
avoided
by
locating
potential
sources
of
trouble
in
a
early
stage
.
experience
gained
by
each
operating
company
over
a
period
time
will
be
of
great
help
in
determining
this
schedule
.
Facto
*
,
which
should
be
considered
are
:
Importance
of
the
switch
to
overall
plant
or
system
operation
;
frequency
of
operation
and
the
magnitude
of
the
currents
switched
;
fault
current
exposure
and
the
atmospheric
conditions
in
which
the
switch
normally
operates
.
Extreme
conditions
of
dust
,
moisture
,
corrosive
gas
,
etc
.
can
indicate
that
inspection
and
maintenance
will
be
re
-
quired
more
frequently
.
Very
clean
,
dry
operating
conditions
with
low
current
switching
duty
can
justify
a
longer
period
of
time
between
inspections
.
It
is
recommended
that
an
initial
inspection
be
made
on
new
switches
at
the
time
of
installation
and
also
after
being
in
service
for
six
months
.
Thereafter
,
the
switch
should
be
inspected
and
serviced
annually
unless
the
application
conditions
indicate
the
necessity
for
shorter
peri
-
ods
of
time
between
inspections
.
The
following
instructions
give
the
items
that
should
be
included
in
an
inspection
and
general
recommendations
on
the
maintenance
of
load
break
switches
.
Refer
to
section
on
ADJUSTMENTS
for
dimensions
and
procedure
.
BEFORE
ANY
MAINTENANCE
WORK
IS
PERFORMED
,
MAKE
CERTAIN
THAT
THE
SWITCH
IS
DISCONNECTED
FROM
ALL
PRIMARY
VOLTAGE
POWER
SOURCES
AND
GROUND
LEADS
OR
EQUIVALENT
HAVE
BEEN
AT
-
TACHED
TO
BOTH
SIDES
OF
THE
SWITCH
.
MAKE
CERTAIN
THAT
THE
SECONDARY
CONTROL
CIRCUITS
HAVE
BEEN
DE
-
ENERGIZED
ON
THE
ELEC
-
TRICALLY
OPERATED
SWITCHES
,
SE
-
100
E
.
PERIODIC
INSPECTION
DO
NOT
WORK
ON
THE
SWITCH
OR
MECHANISM
UN
-
LESS
THE
OPERATING
SPRINGS
HAVE
BEEN
PRO
-
PERLY
BLOCKED
WITH
THE
MAINTENANCE
BLOCK
ING
PINS
.
The
frequency
of
the
inspection
and
maintenance
schedule
is
dependent
upon
the
individual
application
and
operating
conditions
and
will
differ
on
various
installations
.
Operating
14
Courtesy of NationalSwitchgear.com
GEI
-
88767
INSULATION
SYSTEM
With
the
interrupter
disassembled
,
the
contact
fingers
(
2
)
,
Fig
.
5
,
should
be
inspected
for
excess
wear
or
burning
.
Any
protrusions
caused
by
arc
burning
should
be
removed
by
filing
.
The
flat
area
between
the
fingers
functions
to
restrain
the
auxiliary
blade
during
the
opening
operation
.
If
this
area
is
badly
burned
the
contacts
should
be
replaced
.
The
surface
of
insulation
parts
should
be
kept
clean
,
dry
,
and
unmarred
to
prevent
deterioration
and
moisture
absorp
-
tion
.
This
is
particularly
critical
where
abnormal
conditions
,
such
as
salt
deposits
,
cement
dust
,
or
acid
fumes
prevail
and
is
necessary
to
avoid
flashover
as
a
result
of
accumulation
of
foreign
substances
on
the
insulation
surfaces
.
Inspect
porce
-
lain
insulators
for
breaks
,
cracks
,
or
burns
and
replace
when
deterioration
is
evident
.
If
organic
insulation
surfaces
should
become
damaged
,
they
should
be
lightly
sanded
,
cleaned
,
and
refinished
with
either
clear
varnish
or
clear
resin
.
Allow
to
dry
smooth
and
hard
.
If
damage
or
burning
is
extensive
,
the
part
should
be
replaced
.
Smoke
or
dust
collected
between
inspec
-
tion
periods
should
be
wiped
off
,
and
if
dampness
is
apparent
,
heaters
should
be
installed
in
the
switchgear
compartment
to
insure
dryness
.
Reassemble
the
interrupter
and
check
that
all
spacers
and
shims
have
been
properly
positioned
.
Reassemble
the
inter
-
rupter
on
the
switch
and
check
that
the
proper
number
of
shims
are
replaced
above
and
below
the
support
.
Realign
with
the
auxiliary
blade
per
instructions
in
the
section
ADJUST
-
MENTS
-
PRIMARY
AND
ARCING
CONTACT
ALIGN
-
MENT
.
CONTACTS
With
the
switch
in
the
open
position
the
arcing
fingers
and
arcing
blades
should
be
examined
carefully
for
smoothness
.
If
roughness
is
present
due
to
arcing
,
it
can
be
smoothed
off
by
the
use
of
a
fine
file
and
crocus
cloth
.
(
Note
:
Do
not
re
-
move
more
metal
from
the
blade
than
is
necessary
.
)
INTERRUPTERS
Since
there
are
no
moving
parts
,
the
interrupters
will
nor
-
mally
require
little
or
no
inspection
unless
there
is
evidence
of
damage
to
the
arc
chute
sides
or
heavy
contamination
on
the
inner
surfaces
.
During
interruption
,
some
of
the
residual
pro
-
ducts
of
the
gaseous
ablation
will
re
deposit
on
the
inside
walls
of
the
arc
chute
sides
.
This
build
-
up
of
residue
will
gradually
jduce
the
resistance
of
the
internal
surfaces
of
the
arc
chutes
and
could
result
in
longer
interrupting
times
.
The
magnitude
of
the
currents
and
the
frequency
of
operation
will
determine
how
rapidly
this
deposit
will
affect
the
performance
of
the
interrupter
.
A
simple
megger
test
will
normally
indicate
the
resistance
of
the
arc
chutes
.
Connect
one
lead
of
the
megger
to
the
steel
interrupter
support
.
The
other
lead
should
be
con
-
nected
to
a
metallic
probe
tightly
inserted
1
/
2
inch
into
the
arc
chute
side
at
a
point
midway
across
the
diagonal
edge
.
A
resistance
below
0.2
megohm
(
500
V
megger
minimum
)
,
indi
-
cates
necessity
for
cleaning
the
arc
chute
surfaces
.
Also
,
examine
the
primary
fingers
and
blades
for
burns
or
pits
.
If
excessive
burns
are
present
the
contacts
should
be
re
-
placed
and
the
operation
of
the
auxiliary
blade
checked
.
Dur
-
ing
major
maintenance
,
the
contact
pressure
of
the
primary
and
arcing
contact
fingers
and
at
the
primary
blade
hinge
should
be
checked
.
Examine
the
auxiliary
blades
for
evidence
of
excessive
arc
erosion
or
damage
to
the
arcing
tips
.
The
auxiliary
blade
must
be
replaced
if
the
opening
release
position
cannot
be
obtained
.
After
completing
inspection
of
the
contacts
,
check
all
con
-
tact
and
blade
adjustments
and
clearances
as
listed
under
ADJUSTMENTS
.
SWITCH
ALIGNMENT
To
disassemble
the
interrupter
from
the
switch
,
remove
the
four
bolts
(
2
and
10
)
,
Fig
.
4
,
noting
the
position
of
the
shims
at
the
top
and
bottom
of
the
support
.
Disassemble
the
inter
-
rupter
by
removing
the
bolts
thru
the
arc
chute
sides
.
Make
note
of
the
position
of
any
shims
and
spacers
.
Using
the
maintenance
operating
handle
,
operate
the
switch
through
a
closing
and
opening
cycle
.
Check
the
alignment
of
the
primary
and
arcing
contact
blades
relative
to
the
stationary
contacts
.
Also
,
check
for
proper
entry
of
the
auxiliary
blade
into
the
interrupter
,
including
the
release
positions
for
both
closing
and
opening
operations
.
Check
for
reasonably
simul
-
taneous
closing
of
all
contacts
and
for
proper
contacting
in
the
close
position
.
Inspect
for
evidence
of
corrosion
or
mechanical
malfunctions
.
Clean
and
lubricate
the
switch
parts
as
des
-
cribed
under
LUBRICATION
.
Remove
the
contamination
from
the
inner
surfaces
of
the
arc
chute
sides
by
using
a
good
grade
of
plastic
polish
.
These
surfaces
should
then
be
washed
with
clear
water
to
eliminate
residue
from
the
polish
.
This
method
of
cleaning
will
usually
restore
the
resistance
across
the
assembled
arc
chutes
to
a
value
in
excess
of
50
megohms
.
Severe
erosion
of
the
arc
hute
surfaces
indicates
the
need
to
replace
the
interrupter
assembly
.
MECHANISM
A
careful
inspection
should
be
made
to
check
for
loose
nuts
,
bolts
,
and
loose
or
damaged
set
screws
or
other
locking
devices
.
All
worm
and
miter
gears
and
bearings
should
be
ex
-
15
Courtesy of NationalSwitchgear.com
GEI
-
88767
amined
for
evidence
of
damage
or
excessive
wear
.
Lubricate
the
mechanism
as
outlined
under
LUBRICATION
.
General
Electric
Lubricants
D
50
H
15
and
D
50
H
47
are
available
in
one
-
quarter
pound
collapsible
tubes
.
It
is
so
pack
-
aged
to
insure
cleanliness
and
to
prevent
oxidation
.
Unblock
the
operating
springs
;
open
and
close
the
switch
several
times
with
the
operating
handle
to
make
certain
that
the
mechanism
operates
freely
throughout
its
entire
stroke
.
Check
the
mechanism
upper
(
closed
)
stop
as
described
under
ADJUSTMENTS
.
METHOD
OF
CLEANING
BEARINGS
Sleeve
Bearings
.
Sleeve
bearings
located
in
the
driving
element
and
mecha
-
nism
should
be
cleaned
and
relubricated
with
GE
D
50
H
15
lubricant
at
general
overhaul
periods
.
Bearings
that
are
pressed
into
the
frame
or
other
mechanism
members
should
not
be
removed
.
The
main
shaft
bearings
should
be
removed
,
cleaned
,
and
relubricated
with
GE
D
50
H
15
lubricant
at
general
overhaul
periods
.
The
hinge
of
the
primary
contact
blade
(
16
)
,
Fig
.
4
,
should
be
disassembled
,
cleaned
,
and
lubricated
with
GE
D
50
H
47
lubricant
at
general
overhaul
periods
.
A
thin
film
of
GE
D
50
H
47
should
also
be
applied
to
the
silvered
area
of
the
primary
contact
blade
where
it
enters
the
primary
finger
(
5
)
,
Fig
.
4
.
All
other
rolling
or
rubbing
surfaces
should
have
the
dried
,
dirty
grease
removed
and
a
thin
film
of
fresh
D
50
H
15
lubricant
applied
.
On
the
SE
-
100
S
with
an
auxiliary
switch
and
the
SE
-
100
E
,
check
the
secondary
wiring
for
tightness
of
terminal
connec
-
tions
and
condition
of
insulation
on
the
wires
.
In
addition
,
examine
the
contacts
and
coils
on
the
control
relay
to
assure
that
they
are
in
satisfactory
condition
.
The
SE
-
100
E
should
be
opened
and
closed
several
times
electrically
to
check
for
proper
operation
.
LUBRICATION
GENERAL
In
order
to
maintain
reliable
open
*
t
;
on
,
it
is
important
that
all
parts
of
the
switch
assembly
be
p
.
operly
lubricated
at
all
times
.
All
bearings
and
other
parts
of
the
mechanism
sub
-
jected
to
wear
have
been
properly
lubricated
,
during
assembly
it
the
factory
,
using
the
finest
grades
of
lubricants
available
.
However
,
even
the
finest
oils
and
greases
have
a
tendency
to
oxidize
with
age
,
as
evidenced
by
hardening
and
darkening
in
color
.
Elimination
of
the
hardened
lubricant
is
essential
for
the
proper
operation
of
the
switch
.
Also
frequent
operation
of
the
device
causes
the
lubricant
to
be
forced
out
from
between
the
bearing
surfaces
.
A
simple
lubrication
will
often
clear
up
minor
disturbances
which
might
be
mistaken
for
more
serious
trouble
.
DO
NOT
GREASE
THE
CONTACT
END
OF
THE
AUXILIARY
BLADE
.
Roller
or
Needle
Bearings
Roller
and
needle
bearings
should
be
disassembled
from
the
mechanism
and
the
inner
race
removed
.
They
should
then
be
placed
in
a
container
of
clean
petroleum
solvent
or
similar
cleaner
.
DO
NOT
USE
CARBON
TETROCHLORIDE
.
If
the
grease
in
the
bearings
has
become
badly
oxidized
,
it
may
be
necessary
to
use
alcohol
(
type
used
for
thinning
shellac
)
to
re
-
move
it
.
Ordinarily
,
by
agitating
the
bearings
in
the
cleaning
solution
,
and
using
a
stiff
brush
to
remove
the
solid
particles
,
the
bearings
can
be
satisfactorily
cleaned
.
Do
not
handle
the
bearings
with
bare
hands
as
deposits
from
the
skin
onto
the
bearings
are
conducive
to
corrosion
.
If
the
bearings
are
touched
,
the
contamination
can
be
removed
by
washing
in
alcohol
.
After
the
bearings
have
been
thoroughly
cleaned
,
spin
them
in
clean
new
light
machine
oil
until
the
cleaner
or
solvent
is
entirely
removed
.
Allow
this
oil
to
drain
off
and
then
repack
them
immediately
with
G
-
E
lubricant
D
50
H
15
being
sure
all
metal
parts
are
greased
.
The
inner
races
should
then
be
assembled
.
A
definite
lubrication
schedule
should
be
set
up
taking
into
consideration
the
frequency
of
operation
of
the
switch
and
local
conditions
.
Until
such
a
schedule
is
worked
out
,
the
switch
should
be
lubricated
at
each
periodic
inspection
and
also
whenever
it
is
overhauled
or
replacement
of
parts
becomes
necessary
.
It
is
also
recommended
that
the
device
be
operated
at
regular
intervals
to
insure
the
user
that
the
equipment
is
operating
freely
.
The
lubrication
chart
.
Fig
.
11
,
is
divided
into
two
methods
of
lubrication
.
The
first
method
outlines
the
maintenance
lubrication
which
should
be
performed
at
the
time
of
periodic
maintenance
,
and
requires
no
disassembly
.
The
second
method
outlines
a
lubrication
procedure
similar
to
that
per
-
formed
on
the
device
at
the
factory
,
and
should
be
used
when
'
general
overhaul
or
partial
disassembly
of
the
switch
is
<
ecessary
.
NOTE
:
If
it
becomes
necessary
to
clean
the
bearings
in
alcohol
(
shellac
thinner
)
,
be
sure
the
alcohol
is
perfectly
clean
,
and
do
not
allow
the
bearings
to
remain
in
the
alcohol
more
than
a
few
hours
.
If
it
is
desirable
to
leave
the
bearings
in
the
alcohol
for
a
longer
time
,
an
inhibited
alcohol
such
as
is
used
for
anti
-
freeze
should
be
used
.
Even
then
the
bearings
should
16
Courtesy of NationalSwitchgear.com
GEI
-
88767
ALTERNATE
LUBRICATION
REQUIRE
DISASSEMBLY
LUBRICATION
AT
NORMAL
MAINTENANCE
PERIOD
PART
Light
application
of
SAE
20
-
30
oil
.
Clean
bearings
then
apply
D
50
H
15
grease
.
Sleeve
Bearings
(
Operating
rod
ends
,
auxiliary
blade
hinge
,
release
hook
,
etc
.
)
Clean
bearings
then
apply
D
50
H
15
grease
.
Light
application
of
SAE
20
-
30
oiL
Roller
and
Needle
Bearings
Apply
D
50
H
15
grease
.
Wipe
clean
and
apply
D
50
H
15
grease
.
Worm
and
Wheel
Miter
Gears
Light
application
of
SAE
20
-
30
oil
at
rear
oil
hole
only
.
Light
application
of
SAE
20
-
30
oil
at
rear
oil
hole
only
.
Motor
Wipe
clean
and
apply
thin
film
of
D
50
H
47
.
Contact
Blade
Hinge
Assembly
No
lubrication
required
.
Wipe
clean
and
apply
thin
film
of
D
50
H
47
.
Wipe
clean
and
apply
thin
film
of
D
50
H
47
.
Silver
plated
Contacts
External
Arcing
Contacts
Do
not
lubricate
.
Auxiliary
Blade
Tip
Do
not
lubricate
.
Fig
.
11
Lubrication
Chart
Bearings
that
are
pressed
into
the
frame
or
other
members
such
as
the
motor
support
should
not
be
removed
.
After
re
-
moving
the
shaft
and
inner
race
the
bearing
can
be
cleaned
satisfactorily
with
petroleum
solvent
or
a
similar
cleaner
and
a
stiff
brush
.
Follow
the
procedure
outlined
above
using
a
light
machine
oil
and
G
-
E
lubricant
D
50
H
15
before
reassembling
the
inner
race
and
shaft
.
be
removed
from
the
alcohol
within
twenty
-
four
hours
.
Pre
-
cautions
against
the
toxic
effects
of
the
alcohol
must
be
exer
-
cised
by
wearing
rubber
gloves
and
by
using
the
alcohol
in
a
well
ventilated
room
;
excessive
exposure
to
the
fumes
is
some
-
times
unpleasant
to
personnel
.
Washing
the
bearings
in
the
light
oil
,
draining
and
repacking
with
lubricant
D
50
H
15
should
follow
immediately
.
FINAL
INSPECTION
INSULATION
TEST
A
high
potential
test
is
recommended
for
switches
when
-
ever
insulation
parts
have
been
repaired
or
replaced
,
or
when
the
switch
has
been
stored
over
an
extended
period
of
time
or
operated
under
unfavorable
atmospheric
conditions
.
A
standard
one
(
1
)
minute
,
60
Hz
high
potential
test
at
14000
volts
rms
for
the
4.8
kV
switch
and
27000
volts
rms
for
the
13.8
kV
switch
will
normally
indicate
whether
the
device
is
satisfactory
for
service
.
With
the
switch
contacts
in
the
fully
open
position
,
apply
the
high
potential
to
each
terminal
indi
-
vidually
with
all
other
terminals
and
the
frame
grounded
.
After
high
potential
tests
are
made
on
organic
insulating
ma
-
terial
,
these
materials
should
be
inspected
for
visible
leakage
current
paths
,
and
necessary
action
must
be
taken
to
replace
insulation
that
may
have
been
affected
by
moisture
absorp
-
tion
.
Before
initially
placing
the
SE
-
100
load
break
switch
in
ser
-
vice
and
at
the
end
of
each
maintenance
period
,
a
final
inspec
-
tion
should
be
made
consisting
of
the
following
:
1
.
Check
all
nuts
,
bolts
,
washers
,
cotter
pins
,
terminal
con
-
nections
,
and
other
locking
devices
for
tightness
.
2
.
Check
that
all
bearing
surfaces
of
the
mechanism
have
been
lubricated
.
3
.
Make
sure
that
any
place
where
the
surface
of
the
paint
has
been
damaged
during
installation
or
maintenance
is
repainted
immediately
.
4
.
Replace
all
barriers
,
covers
,
and
any
other
parts
that
may
have
been
removed
during
installation
or
maintenance
.
17
Courtesy of NationalSwitchgear.com
GEI
-
88767
NOTE
:
BEFORE
APPLYING
A
HIGH
POTENTIAL
TEST
MAKE
CERTAIN
THAT
THE
SWITCH
HAS
BEEN
DIS
-
CONNECTED
FROM
ALL
PRIMARY
VOLTAGE
POWER
SOURCES
AND
LOAD
.
If
the
SE
-
100
E
secondary
wiring
is
to
be
given
a
high
po
-
tential
test
at
1500
volts
-
60
Hz
,
remove
all
the
motor
leads
from
the
terminal
board
.
Failure
to
disconnect
the
motor
from
the
circuit
may
cause
damage
to
the
winding
insulation
.
RENEWAL
PARTS
During
the
normal
life
of
the
switch
,
no
renewal
parts
should
be
required
.
However
,
under
certain
applications
hav
-
ing
abnormal
operating
duty
,
some
parts
may
become
worn
and
will
require
replacement
.
For
these
applications
,
it
is
recommended
that
sufficient
renewal
parts
be
carried
in
stock
to
enable
the
prompt
replacement
of
any
worn
,
broken
,
or
damaged
parts
.
A
stock
of
such
parts
minimizes
service
inter
-
ruptions
caused
by
breakdowns
and
saves
time
and
expense
.
When
continuous
operation
is
a
primary
consideration
,
more
renewal
parts
should
be
carried
,
the
amount
depending
upon
the
severity
of
the
service
and
the
time
required
to
secure
re
-
placements
.
Renewal
parts
which
are
furnished
may
not
be
identical
to
the
original
parts
since
improvements
are
made
from
time
to
time
.
The
parts
which
are
furnished
,
however
,
will
be
inter
-
changeable
.
NOTE
:
The
listed
terms
“
Right
”
and
“
Left
”
apply
when
facing
the
front
of
the
switch
.
FUSED
SOURCE
<
i
no
£
60
<
ac
^
0
K
)
L
.
v
rZ
2
Q
-
asoiiDc
OMLV
i
T
\
i
l
i
i
»
±
CAP
\
%
LLR
%
LS
4
-
CS
8
T
I
+
CS
T
T
8
±
LS
±
LR
2
'
7
\
I
AS
AS
I
1
*
to
<
"
5
V
Z
,
rzT
IT
I
RES
3500
'
Jr
AS
>
ONLY
*
slOPEN
5
i
i
H
ctsSE
6
T
i
'
*
5
f
I
BS
RSS
n
*
3600
M
m
-
,
J
3
iS
_
n
3500
220
-
ZSOVPC
*
OMIT
OH
_
2
*
0
-
250
V
DC
2
22
?
SloW
*
*
Wu
>
W
5
T
4
T
BLUE
4
-
-
AS
JJiAS
*
-
AS
J
‘
AS
eAS
77
KJT
TO
lAfTftaUXK
'
l
^
RELAY
IF
REQUIRED
3
MOT
.
rLT
jjfcLT
Z
±
LT
PCS
COIL
6
3
BROWM
4
>
14
220
-
250
-
iprT
7
T
VDC
OMLT
^
LT
I
i
J
*
FUSED
I
SOURCE
FUSE
DOOR
SW
T
WHEN
REQ
+
KIRK
LOCK
SW
WHEN
REQ
OMIT
RESISTOR
ON
ALL
VOLTAGES
EXCEPT
220
-
250
V
0
C
ONLY
*
SWITCHES
SHOWN
IN
OPEN
POSITION
.
1
V
Fig
.
12
(
0227
A
1055
)
Schematic
Wiring
Diagram
18
Courtesy of NationalSwitchgear.com
GEI
-
88767
4
.
For
prices
,
refer
to
the
nearest
office
of
the
General
Electric
Company
.
ORDERING
INSTRUCTIONS
1
.
Always
specify
the
complete
nameplate
data
of
the
load
break
switch
.
PARTS
RECOMMENDED
FOR
NORMAL
MAINTENANCE
2
.
Specify
the
quantity
,
catalog
number
(
if
listed
)
,
refer
-
ence
number
(
if
listed
)
,
and
description
of
each
part
ordered
,
and
this
bulletin
number
.
In
the
following
tabulations
are
listed
those
parts
of
the
switch
and
operating
mechanism
which
are
usually
recom
-
mended
for
stock
for
normal
maintenance
.
Other
parts
can
be
obtained
by
contacting
the
nearest
office
of
the
General
Elec
-
tric
Company
.
3
.
Standard
hardware
,
such
as
screws
,
bolts
,
nuts
,
washers
,
etc
.
,
are
not
listed
and
should
be
purchased
locally
.
RECOMMENDED
RENEWAL
PARTS
FOR
MOTOR
OPERATED
MECHANISM
USED
FOR
TYPE
SE
-
100
E
-
1
LOAD
BREAK
SWITCH
Ref
.
No
.
Fig
.
Catalog
No
.
Req
’
d
.
Description
No
.
No
.
Spring
Charging
Motor
*
125
VDC
115
V
60
Hz
250
VDC
230
V
60
Hz
6
1
2
0105
C
9393
P
005
0105
C
9393
P
005
0
I
05
C
9393
P
006
0105
C
9393
P
006
Relay
,
Start
-
Stop
*
*
,
Close
,
Open
125
VDC
250
VDC
115
V
60
Hz
230
V
60
Hz
6
3
3
4
5
0137
A
7575
P
001
0137
A
7575
P
003
0137
A
7575
P
005
0137
A
7575
P
002
0137
A
9192
G
007
Auxiliary
Switch
Type
SBM
6
1
1
*
Refer
to
motor
nameplate
or
summary
for
proper
voltage
rating
.
*
*
Refer
to
relay
nameplate
or
summary
for
proper
voltage
rating
.
19
Courtesy of NationalSwitchgear.com
GEl
-
88767
RECOMMENDED
RENEWAL
PARTS
FOR
TYPE
SE
-
100
,
LOAD
BREAK
SWITCH
Catalog
No
.
Fig
-
Ref
.
SE
-
100
S
SE
-
100
E
-
1
No
.
Ampere
Rating
No
.
SE
-
100
M
Description
No
.
P
.
eq
’
d
.
0105
C
9350
G
001
0105
C
9350
G
002
0105
C
9350
G
002
0105
C
9350
G
002
0121
A
7458
P
002
0161
A
4219
P
002
0456
A
0806
P
001
0456
A
0806
POOI
0105
C
9352
P
005
0105
C
9352
P
005
0114
C
5395
G
002
0114
C
5395
G
001
0
I
05
C
9365
P
003
0105
C
9366
P
013
0105
C
9350
G
002
600
4
1
3
Interrupter
Assembly
—
4.8
kV
Interrupter
Assembly
-
4.8
kV
Interrupter
Assembly
-
13.8
kV
Interrupter
Assembly
—
13.8
kV
Primary
Contact
Finger
Primary
Contact
Finger
Primary
Contact
Spring
Primary
Contact
Spring
Primary
Finger
Retainer
Primary
Finger
Retainer
Auxiliary
Blade
,
4.8
kV
Auxiliary
Blade
,
13.8
kV
Primary
Contact
Blade
Primary
Contact
Blade
1200
4
1
3
600
0105
C
9350
G
002
4
1
3
4
1200
1
3
5
600
0121
A
7458
P
002
4
24
5
4
1200
48
*
*
600
0456
A
0806
P
001
12
*
*
1200
48
*
600
0105
C
9352
P
005
12
i
*
1200
24
i
4
7
ALL
0114
C
5318
G
009
0114
C
5318
G
009
0105
C
9365
P
003
3
4
7
ALL
3
4
600
11
6
4
1200
11
3
5
600
0114
C
5394
G
001
0114
C
5394
G
002
11
0114
C
5394
G
001
3
Operating
Rod
Operating
Rod
5
1200
11
3
10
6
600
0105
C
9360
P
001
0105
C
9360
G
002
0151
A
5829
P
001
0105
C
9366
P
004
0105
C
9366
G
001
6
Arcing
Contact
Finger
Arcing
Contact
Finger
Arcing
Contact
Spring
Arcing
Contact
Blade
Arcing
Contact
Blade
10
6
1200
6
*
ALL
*
6
8
600
10
3
8
10
1200
3
*
Not
Illustrated
GENERAL
ELECTRIC
COMPANY
•
SWITCHGEAR
BUSINESS
DEPARTMENT
•
PHILADELPHIA
,
PA
19142
4
-
79
Courtesy of NationalSwitchgear.com

Other manuals for SE-100E

1

This manual suits for next models

2

Other GE Switch manuals

GE Power Break User manual

GE

GE Power Break User manual

GE Motion Sensing Diecast Metal Lantern None User manual

GE

GE Motion Sensing Diecast Metal Lantern None User manual

GE QS24 UR User manual

GE

GE QS24 UR User manual

GE T1000 User manual

GE

GE T1000 User manual

GE Quirky+ User manual

GE

GE Quirky+ User manual

GE Manual Service Bypass User manual

GE

GE Manual Service Bypass User manual

GE MC-4TX1FXMM-2K User manual

GE

GE MC-4TX1FXMM-2K User manual

GE 50 AMP AUTOMATIC TRANSFER SWITCH Setup guide

GE

GE 50 AMP AUTOMATIC TRANSFER SWITCH Setup guide

GE CWLSWDMBWF1 User manual

GE

GE CWLSWDMBWF1 User manual

GE GE-DSH-82 Assembly instructions

GE

GE GE-DSH-82 Assembly instructions

GE NETernity CP921RC-30X Quick user guide

GE

GE NETernity CP921RC-30X Quick user guide

GE GuardSwitch 300 Series User manual

GE

GE GuardSwitch 300 Series User manual

GE Power/Vac VM-4.16 User manual

GE

GE Power/Vac VM-4.16 User manual

GE MULTILINK ML2400 User manual

GE

GE MULTILINK ML2400 User manual

GE SE-100E User manual

GE

GE SE-100E User manual

GE ZTS Series Installation guide

GE

GE ZTS Series Installation guide

GE EntelliGuard G Technical Document

GE

GE EntelliGuard G Technical Document

GE 3-Device HDMI Switch User manual

GE

GE 3-Device HDMI Switch User manual

GE MultiLink ML810 User manual

GE

GE MultiLink ML810 User manual
GE Digital Energy STS-230-25-2-RM User manual

GE

GE Digital Energy STS-230-25-2-RM User manual

GE GEH-4763 User manual

GE

GE GEH-4763 User manual
GE MultiLink ML1200 User manual

GE

GE MultiLink ML1200 User manual

GE GuardSwitch 300 Series User manual

GE

GE GuardSwitch 300 Series User manual
GE GE-DSG-8 DSGH-5 User manual

GE

GE GE-DSG-8 DSGH-5 User manual

Popular Switch manuals by other brands

Avocent DSR 1024 Installer/user guide

Avocent

Avocent DSR 1024 Installer/user guide

Cablematic KV00200 quick start guide

Cablematic

Cablematic KV00200 quick start guide

Roland XS-1HD Reference manual

Roland

Roland XS-1HD Reference manual

H3C S12500X-AF Series Configuration Examples

H3C

H3C S12500X-AF Series Configuration Examples

Bircher ESD3 Translation of the original instructions

Bircher

Bircher ESD3 Translation of the original instructions

ATEN CL3108 user manual

ATEN

ATEN CL3108 user manual

LevelOne FGP-1072 user manual

LevelOne

LevelOne FGP-1072 user manual

TRENDnet TEG-S224 - DATA SHEETS Specifications

TRENDnet

TRENDnet TEG-S224 - DATA SHEETS Specifications

Marmitek SWM1P user manual

Marmitek

Marmitek SWM1P user manual

NETGEAR GS108PE installation guide

NETGEAR

NETGEAR GS108PE installation guide

Marshall Amplification VMV-402-SH user manual

Marshall Amplification

Marshall Amplification VMV-402-SH user manual

Thinklogical PDU 4/4 product manual

Thinklogical

Thinklogical PDU 4/4 product manual

Virtualfly SOLO GA1 user manual

Virtualfly

Virtualfly SOLO GA1 user manual

UTEPO UTP3306TS-PSB user manual

UTEPO

UTEPO UTP3306TS-PSB user manual

HK Instruments PS Series installation instructions

HK Instruments

HK Instruments PS Series installation instructions

SMC Networks 8612T - annexe 1 installation guide

SMC Networks

SMC Networks 8612T - annexe 1 installation guide

ATEN CS1644a quick start guide

ATEN

ATEN CS1644a quick start guide

socomec ATyS 12SA Installation and commissioning

socomec

socomec ATyS 12SA Installation and commissioning

manuals.online logo
manuals.online logoBrands
  • About & Mission
  • Contact us
  • Privacy Policy
  • Terms and Conditions

Copyright 2025 Manuals.Online. All Rights Reserved.