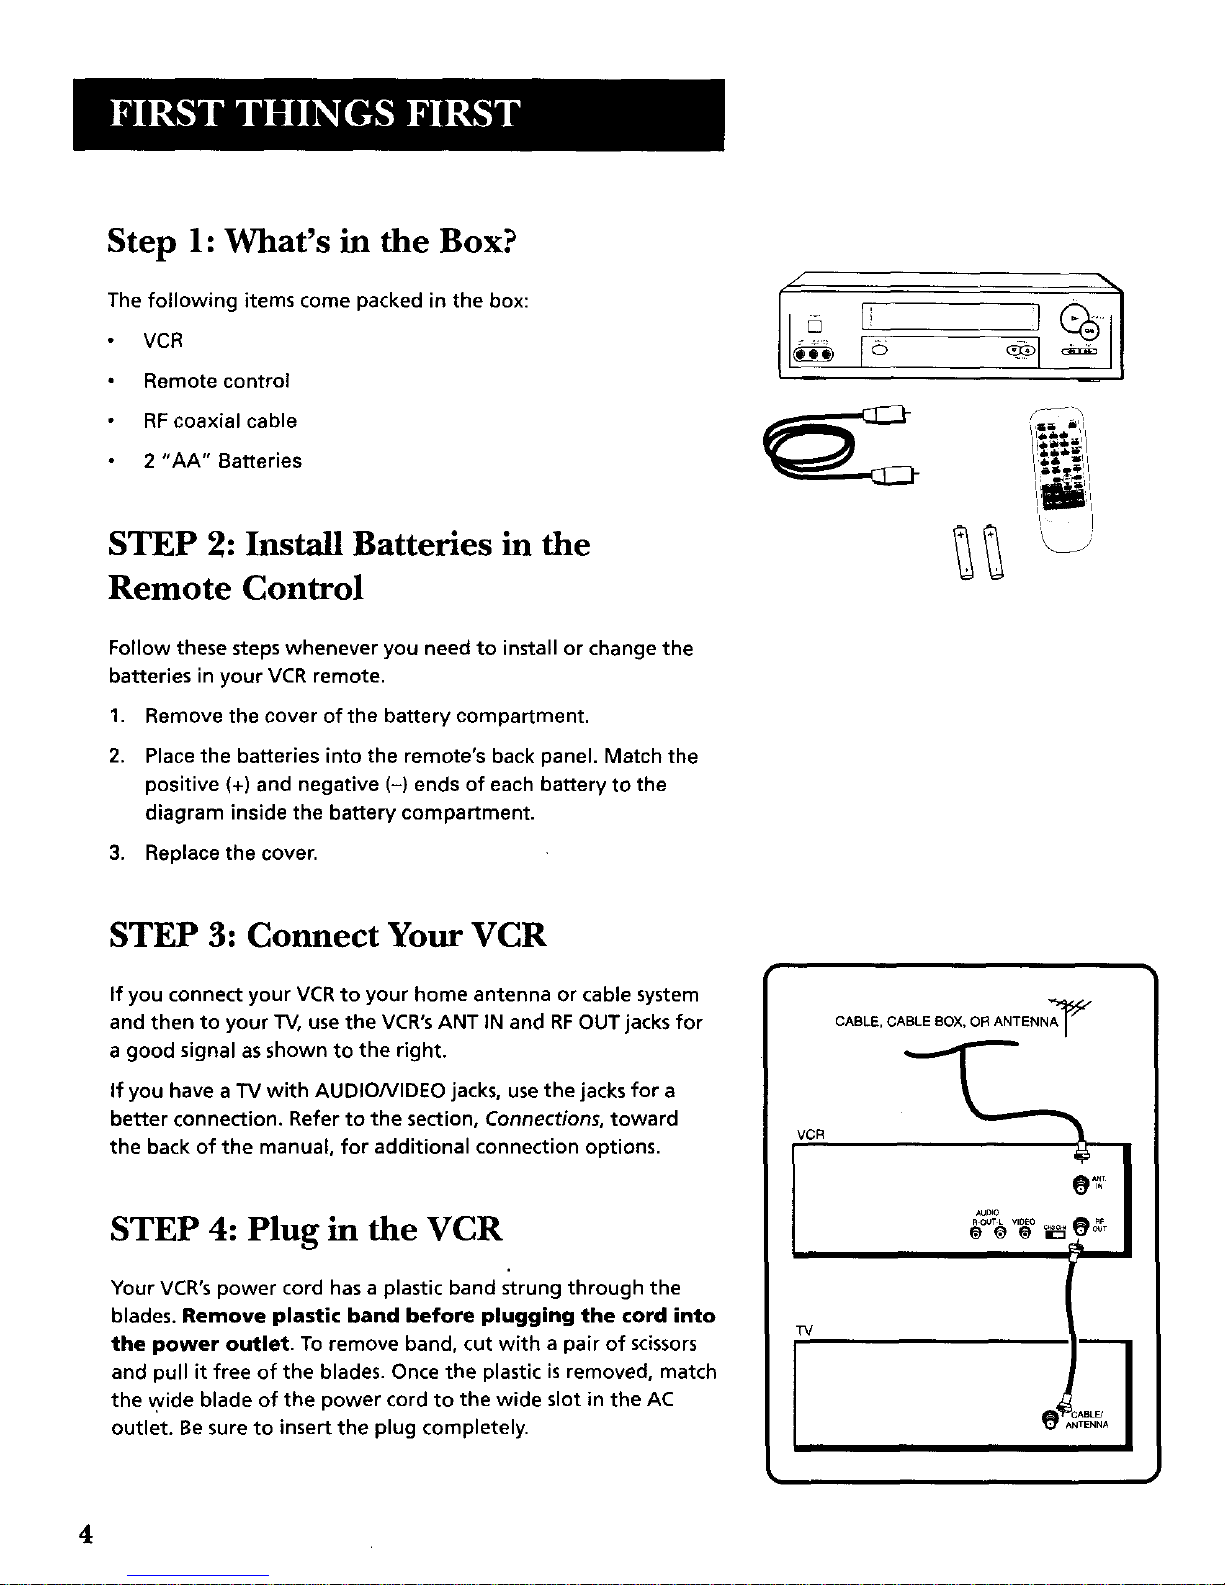
STEP 5: Tune the TV
Tune the TV to the VCR viewing channel. The VCR viewing
channel is channel 3 or 4 or the TV's video input.
If you connect your VCR using the ANTENNA connectors
with RF coaxial cable, set the 3 CH. 4switch to channel 3
or channel 4--the channel you want to use on your TV.
If you connect your VCR using the AUDIO/VIDEO jacks
with audio/video cables, select the TV's video input with
the remote control's INPUT button to see the signal. For
more information see, "How to Find Your TV's Video input
Channel," in the Reference section of this manual.
STEP 6: Turn on the VCR
Press POWER on the VCR's front panel or the POWER button
on the remote control to turn on the VCR. After connecting
your VCR to a TV correctly and tuning to the proper viewing
channel, the first time you turn the VCR on, press the MENU
button to display LANGUAGE screen. This is the start of an
initial set up which helps you set different options for your
VCR.
STEP 7: Initial Setup
Your VCR will ask you to select a language after it has been
hooked up to the TV, plugged in, and turned on. Then press
the MENU button.
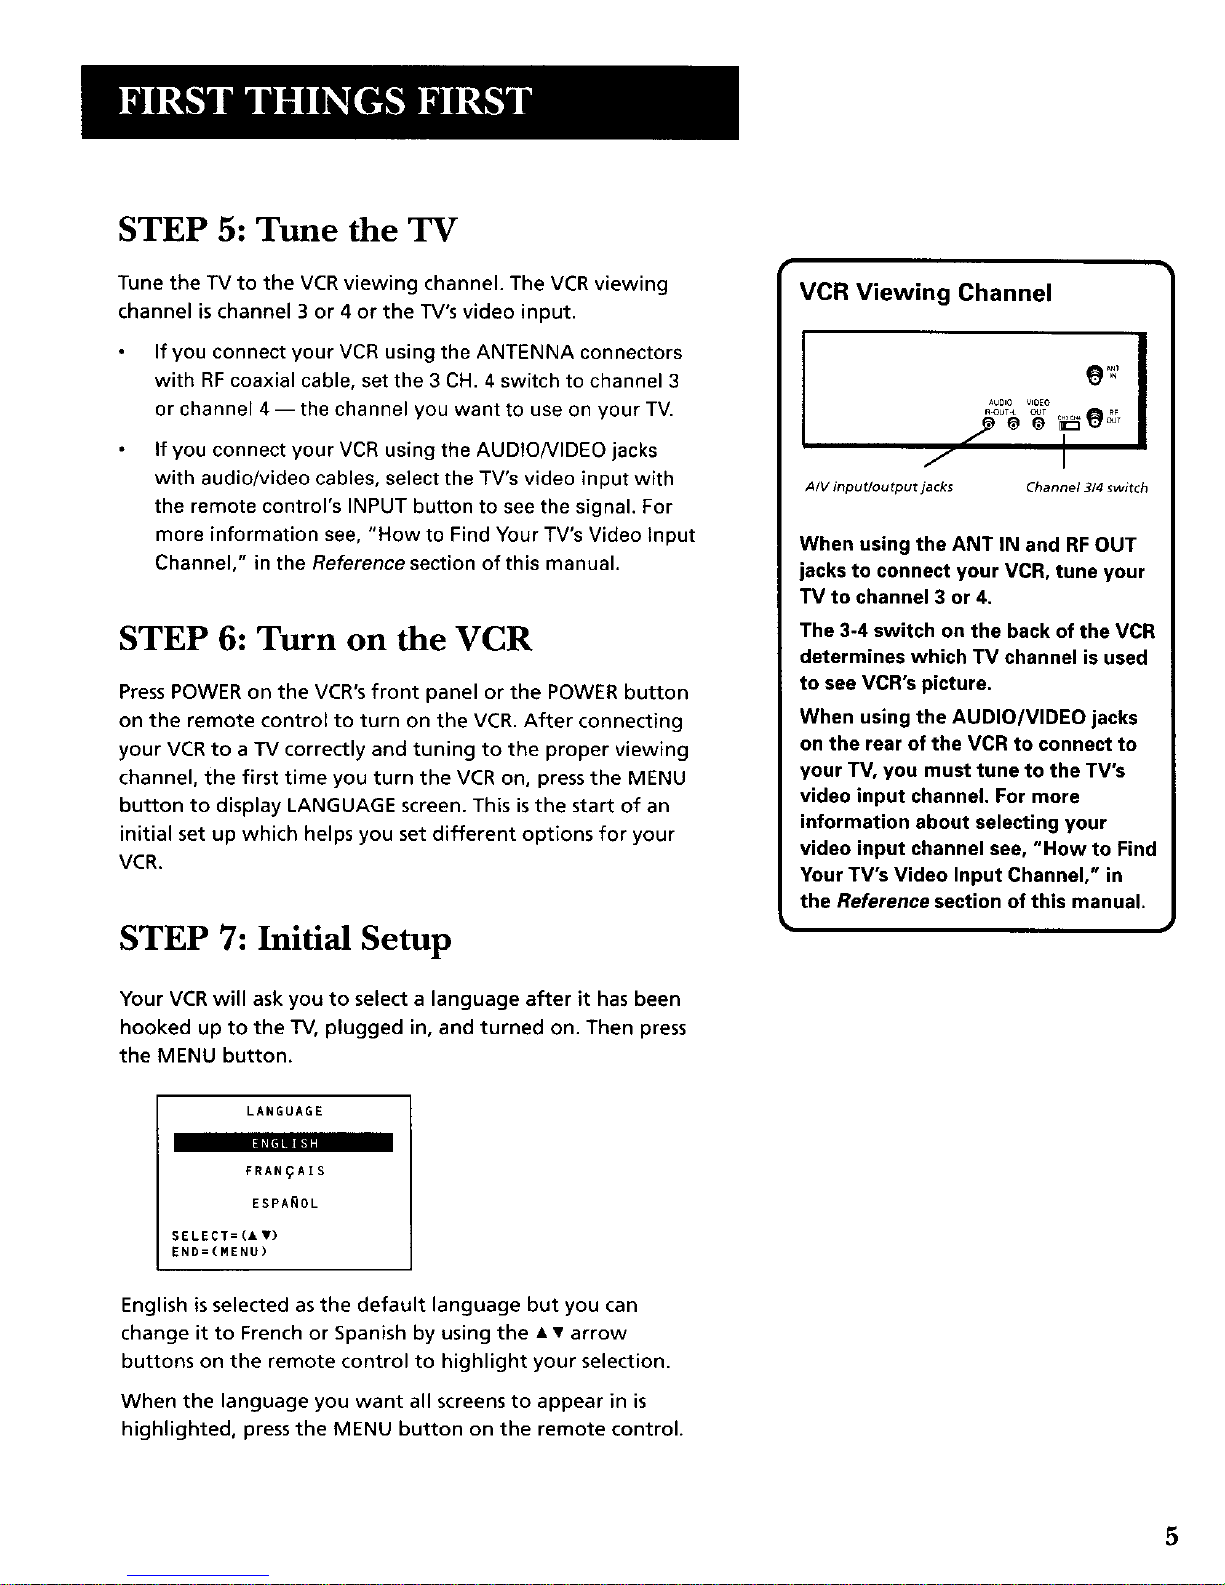
VCR Viewing Channel
/I
A/V input/output jacks Channel 314switch
When using the ANT IN and RF OUT
jacks to connect your VCR, tune your
TV to channel 3 or 4.
The 3-4 switch on the back of the VCR
determines which TV channel is used
to see VCR's picture.
When using the AUDIO/VIDEO jacks
on the rear of the VCR to connect to
your TV, you must tune to the TV's
video input channel. For more
information about selecting your
video input channel see, "How to Find
Your TV's Video Input Channel," in
the Reference section of this manual.
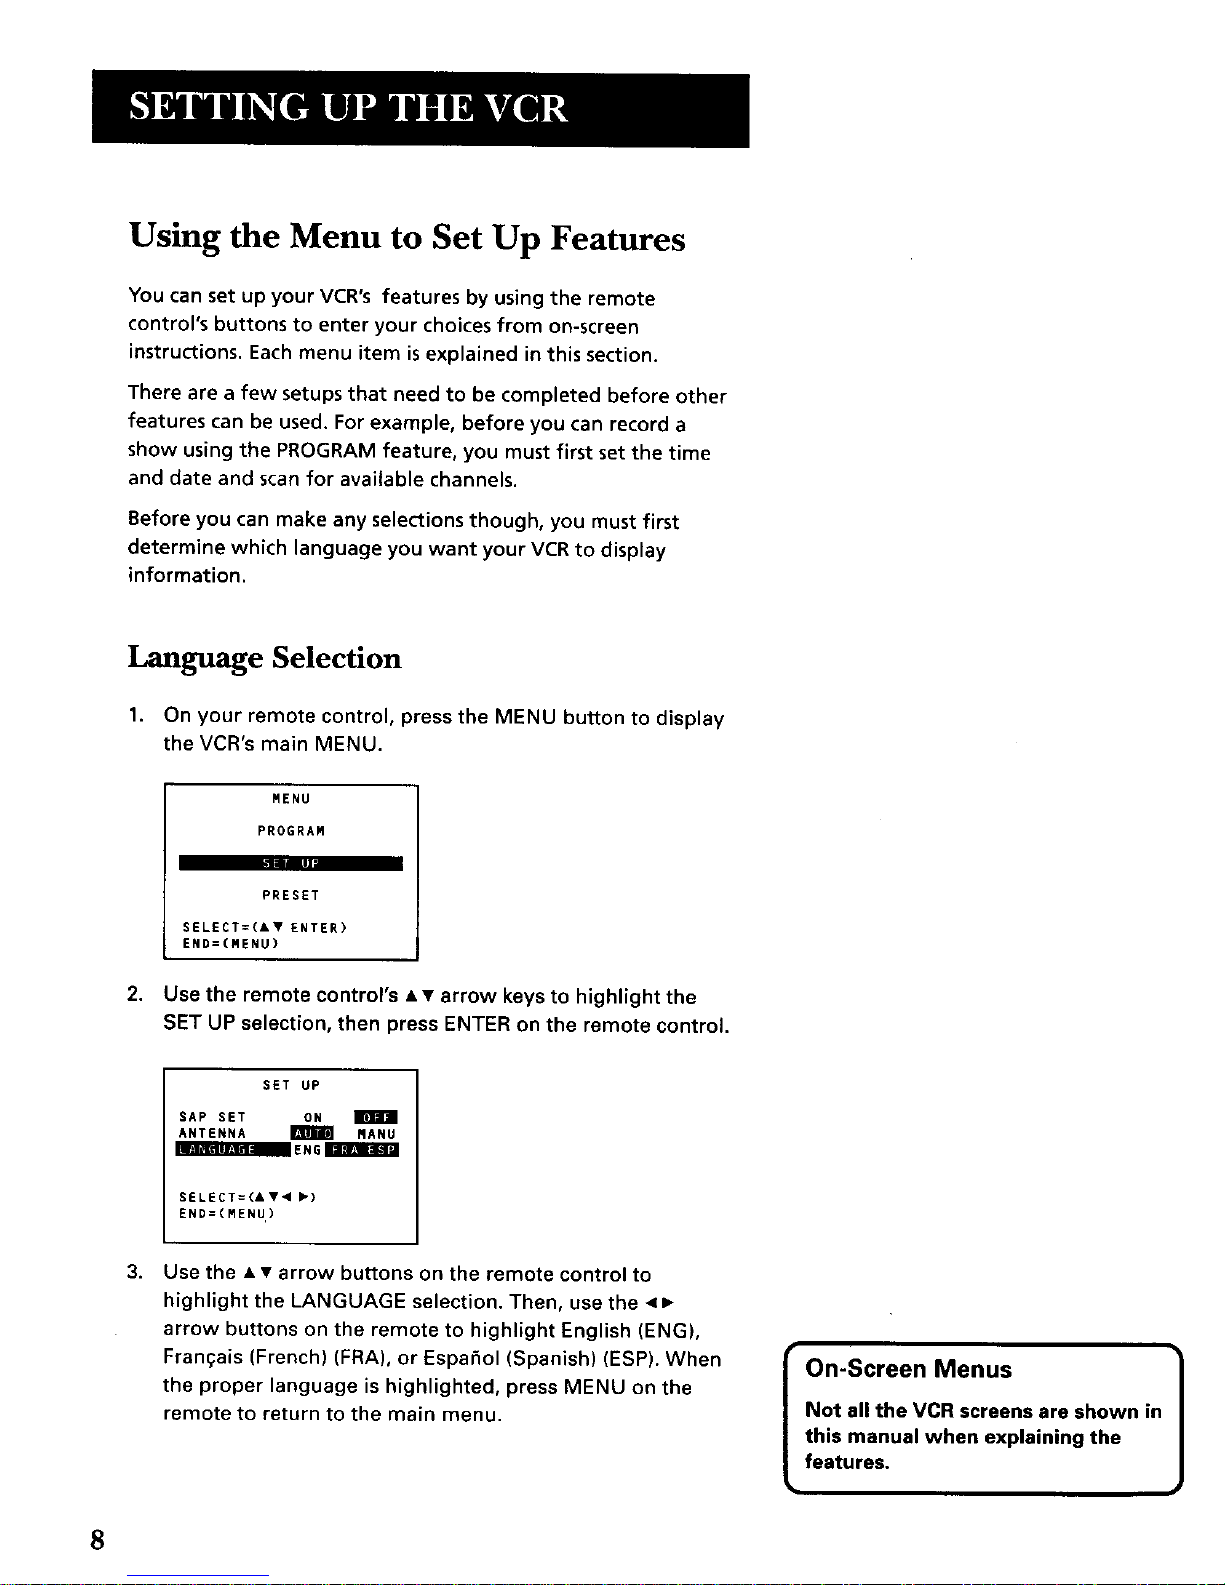
LANGUAGE
I
ERAN_AIS
ESPA_OL
SELECT=(A T)
END=tMENU)
English is selected as the default language but you can
change it to French or Spanish by using the • • arrow
buttons on the remote control to highlight your selection.
When the language you want all screens to appear in is
highlighted, press the MENU button on the remote control.
5