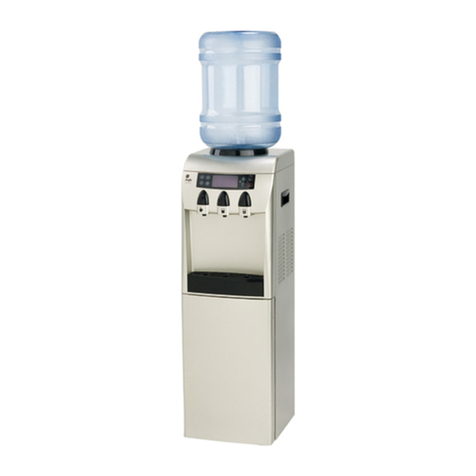
GE GXCF01P User manual

Write the model and serial
numbers here:
Model #_________________
Serial # _________________
You can find them on the rating
label on the front side of your
water heater.
GE is a trademark of the General Electric Company. Manufactured under trademark license.
OWNER’S MANUAL
WATER DISPENSER
49-6000233 Rev. 0 11-20 GEA
GXCF01P
GXCF04P
GXCF18P
SAFETY INFORMATION .........3
PARTS INCLUDED ................4
INSTALLATION
INSTRUCTIONS ...................7
USING THE DISPENSER..........8
CARE AND CLEANING ...........8
TROUBLESHOOTING TIPS......12
LIMITED WARRANTY ...........13
CONSUMER SUPPORT ..........14
ESPAÑOL
Para consultar una version en
español de este manual de
instrucciones, visite nuestro sitio de
internet GEAppliances.com.
FRANÇAIS
Pour une version français de
ce manuel d’utilisation, veuillez
visiter notre site web à l’adresse
GEAppliances.com.

249-6000223 Rev. 0
THANK YOU FOR MAKING GE APPLIANCES A PART OF YOUR HOME.
Whether you grew up with GE Appliances, or this is your first, we’re happy to have you in the family.
We take pride in the craftsmanship, innovation and design that goes into every GE Appliances
product, and we think you will too. Among other things, registration of your appliance ensures that we
can deliver important product information and warranty details when you need them.
Register your GE appliance now online. Helpful websites and phone numbers are available in the
Consumer Support section of this Owner’s Manual. You may also mail in the pre-printed registration
card included in the packing material.

49-6000233 Rev. 0 3
READ AND SAVE THESE INSTRUCTIONS
IMPORTANT SAFETY INFORMATION
READ ALL INSTRUCTIONS BEFORE USING THE APPLIANCE
SAFETY INFORMATION
WARNING Refrigerant Disposal
Your old water dispenser may have used a regulated refrigerant in its cooling system. These refrigerants are
believed to harm stratospheric ozone. If you are throwing away your old dispenser, make sure the refrigerant
is removed and recovered for proper disposal by an EPA-certified technician. If you intentionally release this
refrigerant, you can be subject to fines and imprisonment under provisions of environmental legislation.
WARNING Read all safety information before use.
• Do not allow children to climb, stand or hang on the
outside of the dispenser. They could tip the dispenser
over and damage it, as well as injure themselves.
• This dispenser is equipped with a grounded power
cord plug for your safety.
• Do not operate this (or any other appliance) with
a damaged power cord. Be sure that the plug is
fully inserted into the GFCI outlet and that no other
appliance is plugged into the same outlet.
• Do not run the power cord under carpeting or other
heat insulators, and do not cover it. Avoid laying the
cord in high traffic areas, and never submerge it in
water.
• Do not use an extension cord as it may overheat,
increasing the risk of fire.
• If the supply cord is damaged, contact GE Appliances
or a qualified electrician to replace it before plugging
it in.
• Never turn the dispenser upside down. If the
dispenser has been resting on its side for a long
period of time, place it in the upright position for
approximately 12 hours before using.
• For use with 3 to 5 gallon (12 to 19 liter) water
bottles.
• Never allow children to dispense hot water without
proper and direct supervision.
• Always use known and microbiologically-safe bottled
water.
• Keep your dispenser in a dry place away from direct
sunlight.
• Do not use this dispenser outdoors.
• Never put anything flammable close to the dispenser.
• Leave a minimum clearance of 6 in (15 cm) in
back and on both sides of the dispenser for proper
ventilation.
• Always install your dispenser on a level floor.
• Wait 5 minutes before restarting the dispenser after
turning it off.
• Always unplug the dispenser before servicing.
• Regular cleaning of your dispenser is required to
maintain your warranty.
• Please follow the cleaning instructions outlined in this
manual and clean the dispenser every 6 months.
Grounding Instructions
• To provide additional protection from the risk of
shock, this dispenser MUST be connected to a
ground fault circuit interrupter (GFCI) outlet at
all times. Use of an extension cord will void any
warranties.
• This appliance must be grounded. Improper use of
the grounding plug can result in a risk of electric
shock, causing serious injury and possibly death.
• This appliance is equipped with a power cord having
a grounding wire with a grounding plug and must be
connected into a properly-grounded, polarized outlet.
• Consult a qualified electrician if the grounding
instructions are not completely understood, or if
doubt exists as to whether the appliance is properly
grounded. If the wall outlet is a standard, 2-prong
outlet, it is your personal responsibility and obligation
to have it replaced with a properly-grounded, 3-prong
wall outlet.
• Do not under any circumstances cut or remove the
third (ground) prong from the power cord plug.
• Do not use an adapter plug with this appliance.

449-6000223 Rev. 0
Parts Included
Technical Specifications
Model: GXCF01P,
Rated Voltage: 115V - 60Hz
Heating Power: 500W
Cooling Power: 100W
Coolant: R134a
Hot Water/HR: 1.0 gal (4 L)
Cold Water/HR: 0.9 gal (3.5 L)
Hot Water Temp. Range: 165F - 190F
OPERATING INSTRUCTIONS
COLD CONTROL
POWER CORD
COLD WATER
DISPENSE BUTTON
COLD TANK
DRAIN VALVE
AND CAP
HOT TANK
DRAIN VALVE
AND CAP
CONDENSER
COILS
COOLING SYSTEM
SWITCH (GREEN)
HOT WATER SWITCH
(RED)
LED DISPLAY
PANEL
WATER DISPENSE
POINT
HOT WATER
DISPENSE BUTTON
DRIP TRAY

49-6000233 Rev. 0 5
Parts Included
Technical Specifications
Model: GXCF04P,
Rated Voltage: 115V - 60Hz
Heating Power: 500W
Cooling Power: 100W
Coolant: R134a
Hot Water/HR: 1.0 gal (4 L)
Cold Water/HR: 0.9 gal (3.5 L)
Hot Water Temp. Range: 165F - 190F
OPERATING INSTRUCTIONS
COLD WATER
DISPENSE BUTTON
LED PANEL
DISPLAY
COLD WATER
DISPENSE POINT
HOT WATER
DISPENSE BUTTON
HOT WATER
DISPENSE POINT
DRIP TRAY
COOLING SYSTEM
SWITCH
(GREEN)
HOT WATER
SWITCH
(RED)
COLD CONTROL
HOT TANK
DRAIN VALVE
AND CAP
COLD TANK
DRAIN VALVE
AND CAP
POWER CORD
CONDENSER
COILS

649-6000223 Rev. 0
Parts Included
Technical Specifications
Model: GXCF01P,
Rated Voltage: 115V - 60Hz
Heating Power: 500W
Cooling Power: 100W
Coolant: R134a
Hot Water/HR: 1.0 gal (4 L)
Cold Water/HR: 0.9 gal (3.5 L)
Hot Water Temp. Range: 165F - 190F
OPERATING INSTRUCTIONS
COLD WATER
DISPENSE BUTTON
ROOM TEMP WATER
DISPENSE BUTTON
HOT WATER
DISPENSE BUTTON
LED PANEL
DISPLAY
WATER DISPENSE
POINT
DRIP TRAY
DOOR
COOLING SYSTEM
SWITCH
(GREEN)
HOT WATER
SWITCH
(RED)
POWER CORD
HOT TANK
DRAIN VALVE
AND CAP
COLD TANK
DRAIN VALVE
AND CAP
CONDENSER
COILS

49-6000233 Rev. 0 7
Installation
1. After unpacking, wipe dispenser with soft cloth.
2. Place the dispenser on a hard, flat surface, making
certain it is level. The dispenser should not be
placed near direct sunlight or any other source of
heat.
3. It is best to place the dispenser in an area with
good air circulation. Make sure there is at least 6 in
(15cm) of clearance in back and on both sides of
the dispenser for proper ventilation.
WARNING The hot and cold tank drain plugs on
the back of the dispenser may loosen during shipping.
Securely tighten the drain plugs before starting the
dispenser. A loose drain plug may leak, causing floor
damage.
IMPORTANT: DO NOT PLUG IN THE POWER
CORD YET
4. Follow steps 1-3 in “How to Install Water Bottle”
section in the right column.
5. Place a container under the water dispense point.
Dispense hot, then cold water until both flow
freely. Once water flows freely the dispenser can
be plugged in.
CAUTION Turning on the hot water before
installing the water bottle will cause failure of the
hot water system. Failure to follow these steps may
damage the dispenser and will void all warranty.
6. Plug the dispenser into a grounded GFCI power
outlet.
7. Flip both the cooling system switch and the hot
water switch on the back of the dispenser to the
ON position. The heating and cooling indicator
lights will turn on when water is finished heating or
cooling.
8. The first time the dispenser is used, you will have to
wait at least 1 hour for cold water and 15 minutes
for hot water.
NOTE: Initial rinsing of waterways.
During shipment, dust and odors can accumulate
in the dispenser. Before use, it is recommended to
flush 0.5 gal (1.9 L) of water through the system by
actuating the hot and cold water dispense buttons.
How to Install Water Bottle – GXCF01P
and GXCF04P models
1. Clean the top of the water bottle cap and neck.
Remove the tamper seal from the plastic cap.
CAP NO CAP
NO-SPILL
TYPE CAP
SMALL HOLE
2. Invert bottle and line the center of the bottle cap
over the probe of the spill guard funnel. Carefully
push the bottle onto the spill guard funnel.
3. To remove water bottle for replacement ensure
water bottle is completely empty then lift bottle
vertically removing it from the spill guard funnel.
WARNING Make sure the water level in the top
of the dispenser is low enough to allow for proper
bottle installation. Failure to do so may cause the
dispenser to overflow.
How to Install Water Bottle – GXCF18P
1. Remove the tamper proof seal from the plastic cap.
Remove the plastic cap from the water bottle.
2. Open the door of the dispenser from the right hand
side. Pull out the metal siphon tube and insert it
into the water bottle, ensuring that the cap of the
siphon tube assembly is fully seated on the bottle.
3. Place the bottle into the dispenser and close the
door. Ensuring the hot and cold switches are in
the OFF position, plug in the water dispenser. The
pump will begin pulling water into the reservoirs.
Do not continue with installation until the pump
turns off.
WARNING Make sure the water level in the top
of the dispenser is low enough to allow for proper
bottle installation. Failure to do so may cause the
dispenser to overflow.
INSTALLATION INSTRUCTIONS
Installation Instructions

849-6000223 Rev. 0
USING THE WATER DISPENSER / CARE AND CLEANING
Using the Water Dispenser
Care and Cleaning
Operation
The water dispenser has 2 indicator lights on the front
panel.
• When the red indicator light is on, the dispenser has
finished heating water and is ready to dispense.
• When the blue indicator light is on, the dispenser has
finished chilling water in the cold tank, and is ready to
dispense.
LED Light Display
Using the Water Dispenser
• To dispense HOT water, slide the red safety slider to
the left and while holding the slider in place, press the
hot water dispense button all the way down.
• To dispense COLD water, press the cold water
dispense button all the way down.
For maximum efficiency and performance, your water dispenser requires cleaning on a regular basis (ie.
every 6 months). Regular cleaning will prevent potential growth of bacteria and will maintain a hygienic
environment.
Never use harsh chemicals or abrasive cleaners.
Cleaning the Outside of the Water
Dispenser
The outside of the dispenser may be wiped clean with
a mild cleaning solution product or mild soap and water
mixture and a soft cloth. Rinse thoroughly with clean
water and then dry surfaces.
Cleaning the Drip Tray
The drip tray should be emptied and cleaned regularly to
remove spotting and any mineral deposits.
To remove the drip tray, lift the tray upward, dislodging it
from the guides. Drain and clean with cleaning solution
or a mild soap and water mixture. For tough deposits,
add vinegar and let it soak until the deposits loosen.
Then wash, rinse and dry throughly. Place the drip tray
back into place on the dispenser.
Cleaning the Condenser Coils
Vacuum or sweep away the dust from the condenser
coils. This will improve cooling and efficiency.
Red indicator Blue indicator

49-6000233 Rev. 0 9
CARE AND CLEANING
Care and Cleaning
Spill Guard Disassembly
NOTE: Only applicable for GXCF01P and GXCF04P units.
1. Remove the empty water bottle. Bottles with water may be removed, but care must be taken not to spill. If
removing a full bottle, quickly place your hand over the opening after lifting free and turn the bottle over.
2. Rotate the spill guard funnel counterclockwise and lift to remove. (See Figure 1.)
3. After the funnel has been removed, the baffle for the cold water reservoir may be removed by pulling up on the
part. The fit may be tight. (See Figure 2.)
4. Wash the spill guard funnel and baffle with warm soapy water. Rinse well before reassembly.
5. Reverse the previous steps to reassemble.
Figure 1. Figure 2.
Funnel
Spill Guard Funnel
Water Reservoir

10 49-6000223 Rev. 0
CARE AND CLEANING
Care and Cleaning
Cleaning the Waterways
IMPORTANT: UNPLUG THE DISPENSER BEFORE PERFORMING THIS PROCEDURE AND COLLECT THE
WATER IN A CONTAINER CAPABLE OF WITHSTANDING HOT WATER, NOT THE DRIP TRAY.
1. Refer to the “Draining the Reservoirs” section on page 9 and complete steps 1-3.
2. For the GXCF01P and GXCF04P units, remove the spill guard funnel. Pull the baffle out of the cold water
reservoir. Wash the spill guard funnel and baffle with warm soapy water, rinse and dry. Set Aside. See “Spill
Guard Disassembly” section on page 7. For the GXCF18P, skip this step.
3. Using a container, drain the remaining water from the internal hot tank by removing the hot tank drain cover and
unscrewing the drain cap located at the back of the unit (see figures 1 and 2). Ensure that the drain bucket is
properly placed and remove the small silicone drain plug. Water will flow immediately after removal. Discard the
drained water and re-install the hot tank drain cap. Repeat the previous steps for the cold drain.
4. Using a clean container, mix 8 cups (2 L) of white vinegar with 8 cups (2 L) of warm water. Pour the mixture
into the water reservoir. Place a container under the water dispense point and dispense 0.5 cup (0.12 L) of the
mixture first using the hot water dispense button, then using the cold water dispense button. This will help clean
the water lines. Allow the cleaning solution to sit inside the dispenser for 20 minutes.
5 Place a container under the dispense point and dispense water using the hot, then cold water dispense buttons
until the solution stops flowing. Discard cleaning solution.
6. Using a container, drain the remaining cleaning solution from the internal hot tank by removing the hot tank drain
cover and unscrewing the drain cap, located at the back of the unit (see figures 1 and 2). Ensure that the drain
bucket is properly placed and remove the small silicone drain plug. Water will flow immediately after removal.
Discard the cleaning solution and re-install the hot tank drain cap. Repeat the previous steps for the cold drain.
Figure 1. Figure 2.
Drain Cover
Mounting Screw
Drain Cap
Hot Drain
Drain Plug
Cold Drain
7. Flush the system by pouring 16 cups (4 L) of fresh warm water (no cleaning solution) into the water reservoir.
Place a container under the dispense point. Dispense first hot then cold water until water stops flowing. Discard
water.
8. Place a container under the hot tank drain valve and remove the drain cap by following the instructions on page
8, allowing rinse water to drain. When the rinse water stops flowing, reinstall the drain cap. Repeat for cold drain.
9. Using the steps shown on page 8 with Figures 1 and 2, drain the cold reservoir (left side) and let fresh water run
through the system.
10. Reinstall the baffle and spill guard funnel. Place a new bottle on the dispenser. See the “How to Install Water
Bottle” section on page 5.
11. Dispense 4 cups (1 L) by pressing the cold dispense button. Dispense 0.5 cup (0.12 L) by pressing the hot
dispense button. The cleaning process is now complete.
12. Plug the dispenser into a grounded GFCI power outlet and make sure that the hot water and cooling system
switches are both in the ON position. If you are not going to use hot water, turn the hot water switch OFF to
conserve energy.

49-6000233 Rev. 0 11
CARE AND CLEANING
Care and Cleaning
Draining the Reservoirs
IMPORTANT: UNPLUG THE DISPENSER BEFORE PERFORMING THIS PROCEDURE.
1. Dispense hot water from the water dispense point until the temperature drops to a safe level to avoid the risk of
scalding.
Slide and hold hot safety to the left. Push dispense button down.
2. Remove the water bottle
3. Press all dispense buttons until water no longer comes out.
IMPORTANT: Collect the water in a container, not the drip tray.
4. Follow the procedures in step 3 of the “Cleaning the Waterways” section on page 8 for draining the hot and cold
water tanks.
NOTE: To conserve energy when not using the dispenser for a long period of time, unplug the dispenser and drain
the reservoirs.

12 49-6000223 Rev. 0
Troubleshooting
Problem Possible Cause Solution
Water does not dispense System has malfunctioned. Remove water bottle and unplug the dispenser.
Contact dealer.
Water is not cold Cooling system switch is OFF. Turn cooling switch ON.
Too much cold water consumed in a short period
of time.
Wait 15 minutes for the water to cool. If the unit
has just been turned on, the wait time for cold
water may be up to 1 hour.
Water in the water bottle is hot.
(Bottle is exposed to direct sunlight.)
Place the dispenser in a cool location out of
direct sunlight.
The ventilation around the dispenser is insufficient. Provide at least 6 in (15 cm) of clearance on all
sides of the dispenser.
System has malfunctioned. Remove water bottle and unplug the dispenser.
Contact dealer.
Water is not hot Hot water switch is OFF. Turn hot water switch ON.
Too much hot water has been consumed in short
period of time.
Wait 15 minutes for the water to heat.
System has malfunctioned. Remove water bottle and unplug the dispenser.
Contact dealer.
Dispenser is noisy during
operation
Dispenser is not level. Place the dispenser on a level, flat surface.
Dispenser is touching other objects. Move the dispenser away from other objects.
Water leaks from the water
dispense point
The buttons are stuck down. Check for foreign objects in the button area.
The water dispense point has been damaged. Contact GE Appliances at
1.800.
GE.CARES (1-800-432-2737)
Water is dripping out of the
dispenser and onto the floor
Water bottle has a small crack. Replace water bottle.(See Installation
Instructions)
The hot or cold tank drain cap is not fastened
properly.
Tighten the drain caps.
If the seal inside the drain cap is torn or
damaged then replace with a new one.
The hot or cold water tank is leaking. Unplug the dispenser, remove the water bottle,
and contact the dealer.
The water being dispensed has a
strange taste
New water dispenser. This is not uncommon with new water
dispensers. The taste usually goes away after
the first bottle has been used.
Dispenser requires cleaning. Clean the waterways.
(See Cleaning The Waterways)
Save time and money! Review the charts on the following pages first and you may not need to call for service.
TROUBLESHOOTING

49-6000233 Rev. 0 13
ŶService trips to your home.
ŶImproper installation, delivery or maintenance.
ŶFailure of the product if it is abused, misused, or
used for other than the intended purpose or used
commercially.
ŶReplacement of house fuses or resetting of circuit
breakers.
ŶDamage caused after delivery.
ŶReplacement of the light bulbs, if included.
ŶDamage to the product caused by accident, fire, floods
or acts of God.
ŶIncidental or consequential damage caused by
possible defects with this appliance.
ŶLabor and other charges to install and/or remove the
product
What GE Appliances Will Not Cover:
For the Period of: GE Appliances Covers
One Year
From the date of the
original purchase
If the water dispenser fails due to a defect in materials or workmanship, during the limited one-
year warranty, GE Appliances will either replace your product with a new or remanufactured
product, or refund the purchase price of the product at GE Appliances sole discretion.
Staple your receipt here. Proof of the original purchase
date is needed to obtain service under the warranty.
GEAppliances.com
Please have your serial number and your model number available when calling for service.
Call 1.800.GE.CARES (1-800-432-2737) for service questions.
LIMITED WARRANTY
GE Appliances Limited Warranty
EXCLUSION OF IMPLIED WARRANTIES
Your sole and exclusive remedies are product exchange or refund as provided in this Limited Warranty. Any
implied warranties, including the implied warranties of merchantability or fitness for a particular purpose, are
limited to one year or the shortest period allowed by law.
For sale in the 50 United States and the District of Columbia only: For US Customers: This limited warranty is
extended to the original purchaser for products purchased for home use within the USA. In Alaska and Hawaii, the limited
warranty does not include the costs of shipping units.
Some states do not allow the exclusion or limitation of incidental or consequential damages. This warranty gives you
specific legal rights, and you may also have other rights which vary from state to state. To know what your legal rights
are, consult your local or state consumer affairs office or your state’s Attorney General.
Warrantor: GE Appliances, aHaier company
Louisville, KY 40225

14 49-6000223 Rev. 0
Printed in ChinaPrinted in China
Consumer Support
CONSUMER SUPPORT
Service and Registration
Register your new appliance on-line at your convenience! Timely product registration will allow for enhanced
communication and prompt service under the terms of your warranty, should the need arise.
Register your appliance at GEAppliances.com/register.
Contact Us
If you are not satisfied with the service you receive from GE Appliances, contact us on our Website with all the
details including your phone number, or write to:
In the US: General Manager, Customer Relations | GE Appliances, Appliance Park | Louisville, KY 40225
GEAppliances.com/contact
In Canada: Director, Consumer Relations, MC Commercial Inc. | Suite 310, 1 Factory Lane | Moncton, N.B. E1C 9M3
GEAppliances.ca/en/contact-us
This manual suits for next models
2
Table of contents
Other GE Water Dispenser manuals

GE
GE FQROPF User manual

GE
GE GXSF40H Original instructions

GE
GE Profile GXCF25FBS User manual

GE
GE SmartWater GXRLQ User manual

GE
GE GNCF02H User manual

GE
GE SmartWater GNSF35Z Operating instructions

GE
GE SmartWater GXSF18G Original instructions

GE
GE MWFA User manual

GE
GE GXSF35E Original instructions

GE
GE SmartWater GXSF18G Operating instructions

GE
GE SmartWater GXCF05D User manual

GE
GE FX12M User manual

GE
GE GE SmartWater GXRTQR User manual

GE
GE GXSF27E Original instructions

GE
GE GNSM48F Original instructions

GE
GE GXSF23Z01 User manual

GE
GE PNSF35B Operating instructions

GE
GE GXSF23Z01 User manual

GE
GE Profile FQROMF Instruction Manual

GE
GE GXCF03E User manual