manuals.online logo
Brands
  1. Home
  2. •
  3. Brands
  4. •
  5. Gemini
  6. •
  7. Accessories
  8. •
  9. Gemini 7709 Guide

Gemini 7709 Guide

AC2650 Rev. 03 - 09/14
Made in Italy
UK
INSTALLATION CERTIFICATE
The undersigned,qualified installer attests to have personally fitted the here
described vehicle security device following the manufacturer instructions.
7709
GEMINI Technologies S.p.A.
Via Luigi Galvani 12 - 21020 Bodio Lomnago (VA) - Italia
Tel. +39 0332 943211 - Fax +39 0332 948080
www.gemini-alarm.com
ISO 9001 Certified Company
INSTALLATION
AND USE
MANUAL
...................................... ..............................
..............................
..................................................................................................
By :
Sold on : Type of product :
Alarm :
Vehicle :
PASSIVE INFRARED 7709
P
Infrared sensors are more sensible to movement in the transverse plane rather
than in the frontal plane.
To avoid false alarms, do not install the PIR:
Near forced air heating.
Near ventilation equipment.
On vibrating or unstable surfaces.
Where pets have access.
!
!
!
!
assive infrared (PIR) detector with 2 pyroelectric sensing elements to detect
movement within the detection range.
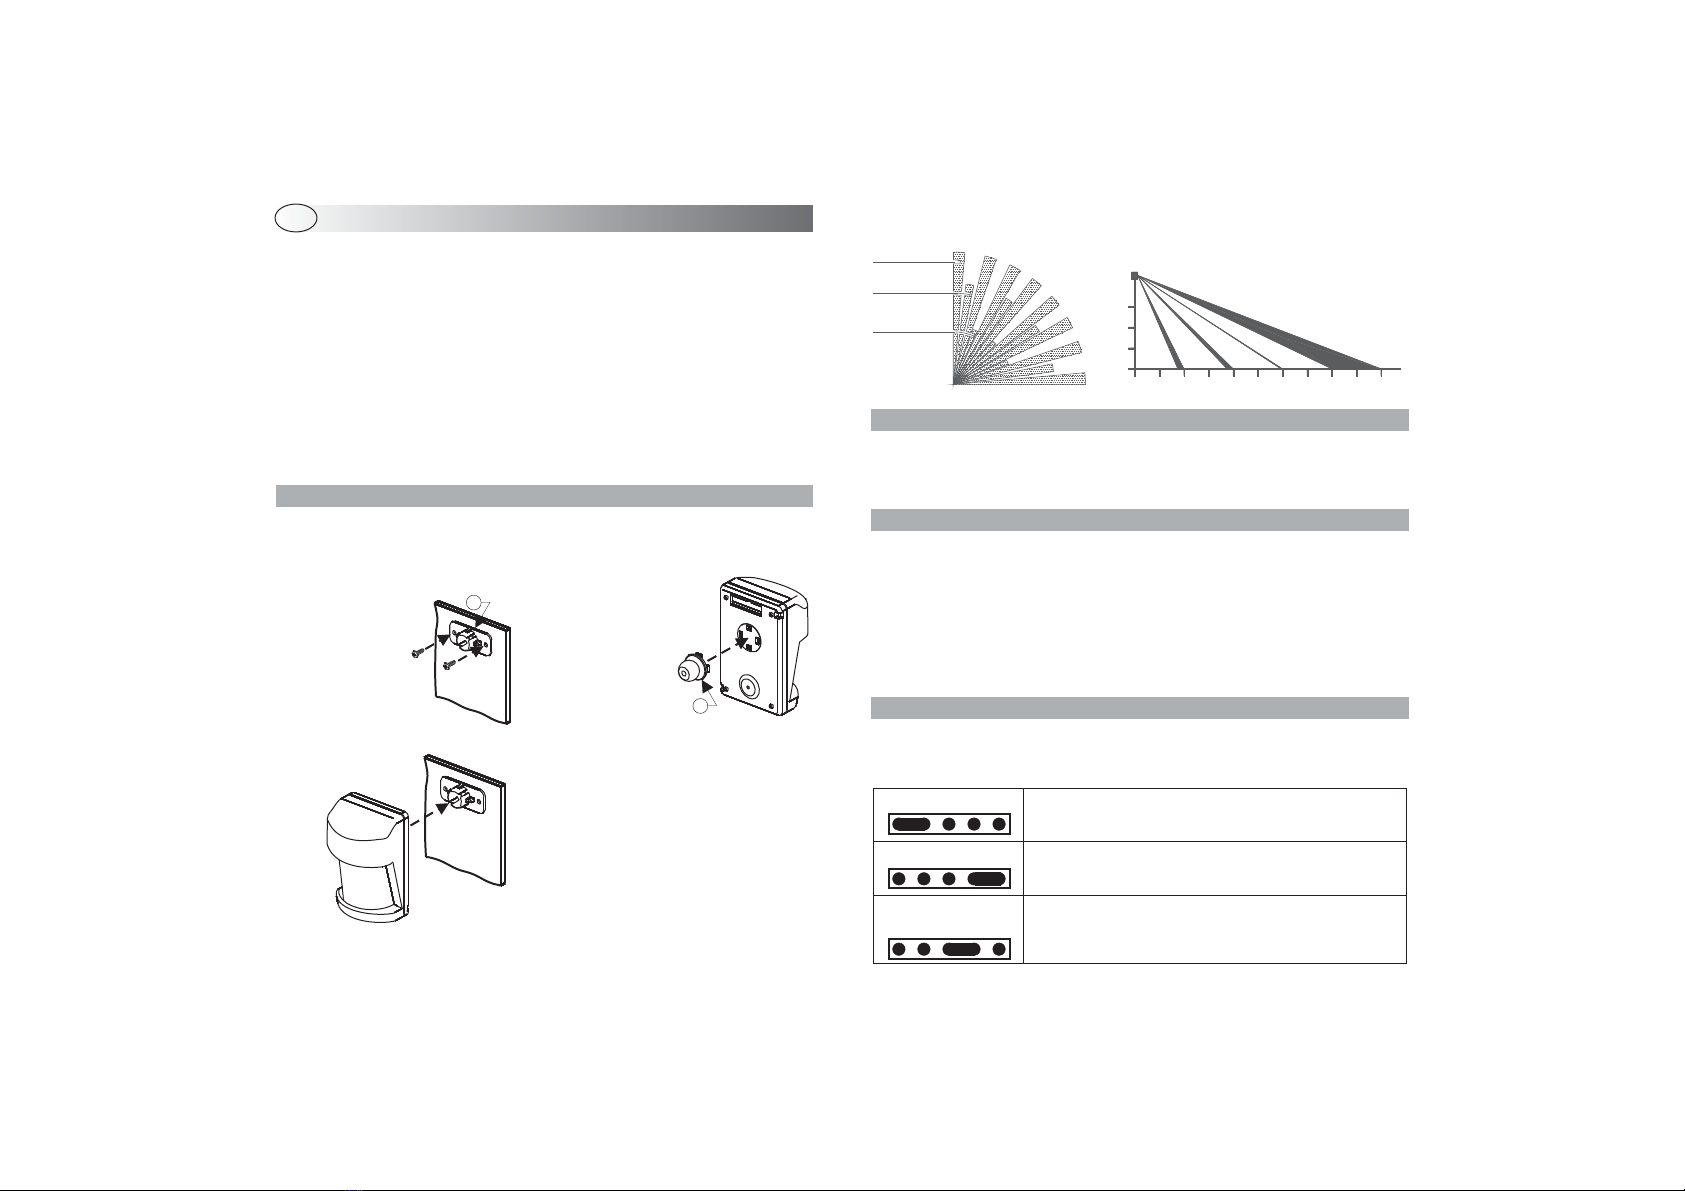
Positioned in a corner of the area to be protected, it can cover an area of 10 x
10 meters.
2m
10m
OPERATION
DETECTION TESTING
After the PIR sensor sends an alarm signal it goes into inhibit mode for 4
seconds to maximise battery life.
The sensor will return in “operating” mode when the alarm condition is over but
not before the 4 minutes have elapsed.
To couple the sensor with the alarm unit, proceed as follows
Open the sensor cover by applying pressure to the top and bottom sides.
Connect the .
Set the alarm unit in learning mode.
Insert the PIR jumper connector into the 2 “TX test” pins.
Optical/acoustic signals will confirm coupling.
Remove the PIR jumper connector inserted in the 2 ”TX test” pins.
Replace the sensor cover.
Test the sensor after completing installation and programming to make sure it
works correctly.
Depending on the test to be carried out, insert the jumper connector as follows:
PROGRAMMING
:
!
!
!
!
!
!
!
supplied 9V alkaline battery
INSTALLATON
After selecting the mounting location, install the PIR as follows:
WALK TEST
TX TEST
NORMAL
WORKING
Jumper connector into “WALK TEST” mode:
The LED will flash every time motion is detected.
No signal is transmitted to the alarm system.
Jumper connector into “TX TEST” mode:
The sensor continuously transmits a signal to the alarm
system.
Jumper connector into “NORMAL “WORKING MODE”:
The sensor will send a signal to the alarm system only when
motion is detected.
Adjust the sensor taking into considration the area to be protect and perform a
system test.
UK
Long range
Medium range
Short range
A
B
Install bracket
“A” on the wall.
Snap-connect swivel ball
“B” to bracket “A” socket
and rotate the detector
into the desired position.
Snap swivel ball (B)
into its socket on the
back of the sensor.
LOW BATTERY INDICATION AND REPLACEMENT
When the battery voltage drops below 5.5V, the indicator LED will flash and the
internal buzzer will sound for approx. 1 second to indicate the battery is too low.
To replace the battery proceed as follows
Switch the alarm system OFF.
:
!
TECHNICAL SPECIFICATIONS
9V alkaline battery
10µA
6mA
Approx. 1 year
10m
30m
433.92MHz
Power supply
Standby current
Operating current
Average alkaline battery life
Detection range
RF transmission range
Transmission frequency
WASTE ELECTRICAL AND ELECTRONIC EQUIPMENT
(WEEE) DIRECTIVE
The present device does not fall within the scope of Directive 2002/96/EC on
Waste Electrical and Electronic Equipment (WEEE) as specified in art. 2.1 of
L.D. no. 151 of 25/07/2005.
1
6LR61 9V
4
6LR619V
5
6LR61 9V
3
Remove the sensor cover
by applying pressure on
the top and bottom as
shown in Fig.1
Remove the
battery from
its housing
and
disconnect the
connector
(Fig.4).
6LR619V
2
Insert and connect a new 9V
alkaline battery.
Replace the cover.
Use only . Different type batteries can
seriously damage the PIR sensor.
Discard used batteries properly in special dedicated containers.
9V alkaline batteries
!

Other manuals for 7709

1

Other Gemini Accessories manuals

Gemini 818H Guide

Gemini

Gemini 818H Guide

Gemini 7709 Manual

Gemini

Gemini 7709 Manual

Gemini GEB12DW2 User manual

Gemini

Gemini GEB12DW2 User manual

Popular Accessories manuals by other brands

HYDRO-RAIN HRC-100-RS-HW instruction manual

HYDRO-RAIN

HYDRO-RAIN HRC-100-RS-HW instruction manual

NeuLog NUL-230 Guide

NeuLog

NeuLog NUL-230 Guide

Arizona Kool Kube AZ65MB1 Operating instructions and parts manual

Arizona

Arizona Kool Kube AZ65MB1 Operating instructions and parts manual

Afag SA-1 Series Assembly and operating instructions

Afag

Afag SA-1 Series Assembly and operating instructions

Simply Automated UPB URD manual

Simply Automated

Simply Automated UPB URD manual

Snom M900 Provisioning guide

Snom

Snom M900 Provisioning guide

Vega VEGAWAVE 61 Operating instructions manual

Vega

Vega VEGAWAVE 61 Operating instructions manual

NeuLog NUL-240 Guide

NeuLog

NeuLog NUL-240 Guide

AmTidy A325 user manual

AmTidy

AmTidy A325 user manual

Byron SX-201I quick start guide

Byron

Byron SX-201I quick start guide

EUPRY EHBS1-S user guide

EUPRY

EUPRY EHBS1-S user guide

EnOcean TRI02SYS Installation and operating manual

EnOcean

EnOcean TRI02SYS Installation and operating manual

Digiflex RF113 installation guide

Digiflex

Digiflex RF113 installation guide

Loadrite PRO Operator's manual

Loadrite

Loadrite PRO Operator's manual

Panasonic EX-Z Series user manual

Panasonic

Panasonic EX-Z Series user manual

Futek IBT100 instruction manual

Futek

Futek IBT100 instruction manual

Swisher PowerBlade PBB-7530 Assembly instructions

Swisher

Swisher PowerBlade PBB-7530 Assembly instructions

Invacare 710 Assembly, installation and operating instructions

Invacare

Invacare 710 Assembly, installation and operating instructions

manuals.online logo
manuals.online logoBrands
  • About & Mission
  • Contact us
  • Privacy Policy
  • Terms and Conditions

Copyright 2025 Manuals.Online. All Rights Reserved.