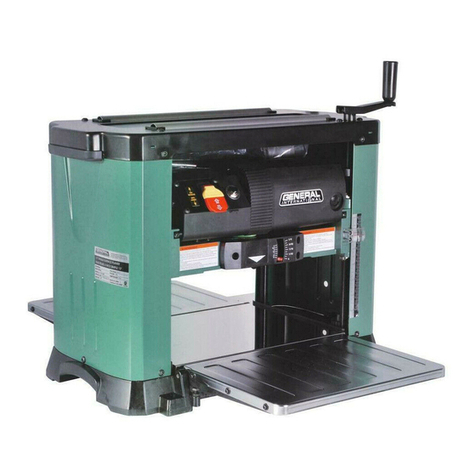
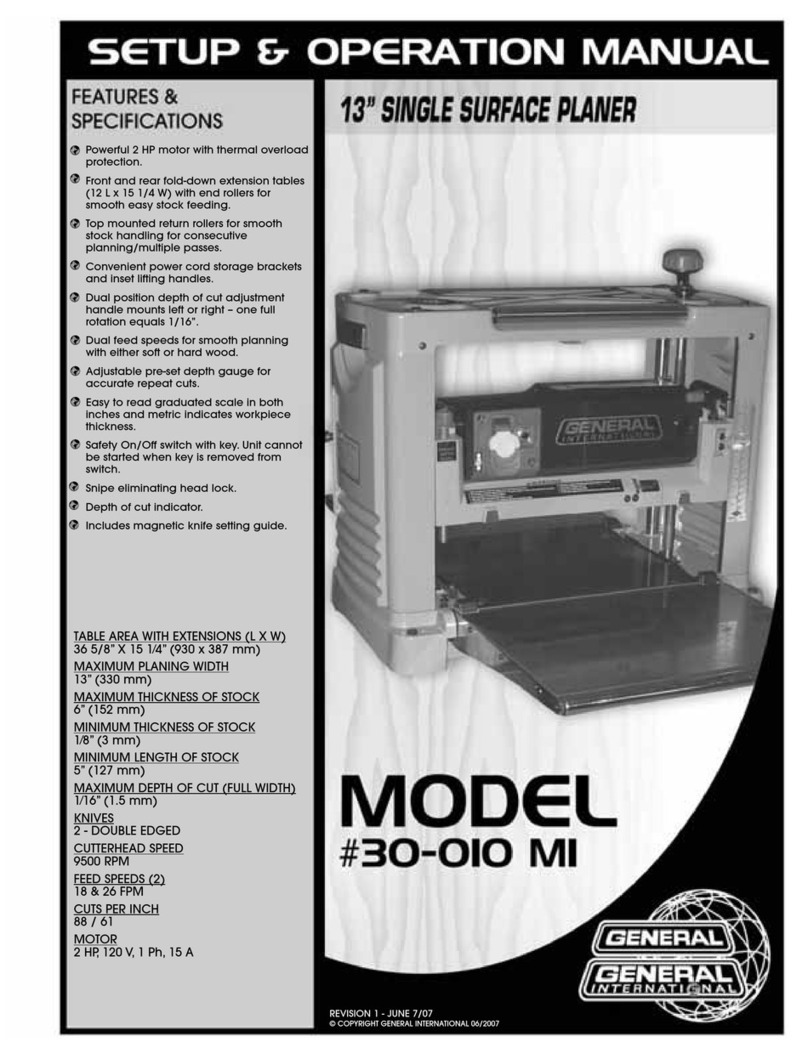
General International 30-125CE M1 User manual

(GENERA
lin
TERNATIGNA\
===
=
15”
SINGLE
SURFACE
PLANER
30-125CE
M1
Ж”
Heavy
duty
enclosed
stand
protects
motor
from
dust
and
provides
a
stable
work
station.
+
Heavy
duty
cast
Iron
frame
provides
more
precision,
Four
columns
design
provides
extra
stability
of
the
cast
iron
table
to
keep
the
parallelism
with
the
head.
An
offset
5"
(127
mm)
dust
chute
to
keep
work
area
clean.
Knife
setting
gauge
included.
Comes
with
3
driving
V-belts
for
more
power.
“
Magnetic
safety
switch
for
more
securlty.
+
Two
rollers
15"
bulit
on
the
top
of
the
machine
provide
convenient
handling
for
consecutive
cutting
operations.
*
Machine
base
has
4
lockable
wheels
to
allow
easy
movement
around
the
workshop.
*
The
head
of
the
machine
is
equipped
with
anti-kickback
fingers.
*
The
table
can
locked
by
2
lock-knobs
for
more
precision,
*
Cast
iron
large
extension
wings.
OPERATING
MAINTENANGE
[INSTRUCTIONS
TABLE
AREA
WITH
TABLE
EXTENSION
15”
x
48
1/8”
(381
x
1222
mm)
MAXIMUM
PLANING
WIDTH
15"
(381
mm)
MAXIMUM
PLANING
THICKNESS
6”
(152
mm)
MINIMUM
PLANING
THICKNESS
3/8”
(10
mm)
MINIMUM
PLANING
LENGTH
61/2"
(165
mm)
MAXIMUM
CUTTING
DEPTH
1/8"
(3
mm)
CUTTERHEAD
DIAMETER
27/8"
(73
mm)
KNIVES
3
(DOUBLE
EDGE)
CUTTERHEAD
DIAMETER
5000
RPM
FEEDING
SPEEDS
(2)
16
&
20
FPM
(4.87
&
6.1
MPM)
MOTOR
3
HR
220
V,
I
Ph
WEIGHT
539
LBS
(245
kg)

SAFETY
RULES
READ
CAREFULLY
BEFORE
OPERATING
THE
MACHINE
Learn
the
machine's
applications
and
limitations,
as
well
as
the
specific
potential
hazards
particular
to
this
machine.
Follow
available
safety
instructions
and
safety
rules
carefully.
Keep
working
area
clean
and
be
sure
adequate
lighting
is
available.
Do
not
wear
loose
clothing,
gloves,
bracelets,
necklaces,
or
ornaments.
Wear
face,
eye,
ear,
respiratory
and
body
protection
devices,
as
indicated
for
the
operation
or
environment.
Keep
hands
well
away
from
cutterhead
and
all
moving
parts.
Do
not
clear
chips
and
sawdust
away
with
hands.
Use
a
brush.
Keep
guards
in
place
and
in
working
order.
If
a
guard
must
be
removed
for
maintenance
or
cleaning
make
sure
it
is
properly
attached
before
using
the
fool
again.
Do
not
push
the
cutting
tool
to
hard.
The
cutting
tool
will
perform
better
and
be
safer
working
at
the
rate
for
which
if
was
designed.
Feed
work
into
a
blade
against
the
direction
of
rotation
of
the
blade.
Whenever
possible
use
a
dust
collector
with
shaving
hood
to
minimize
health
hazards.
Be
positive
that
hold-downs
and
anti-kickback
devices
are
positioned
properly,
and
that
the
workpiece
is
being
fed
through
the
cutting
tool
in
the
tight
direction.
9.
Never
leave
the
machine
with
the
power
on.
10.
Do
not
use
a
dull,
bent
or
cracked
cutting
tool.
11.
Never
stand
on
tool.
Serious
injury
could
occur
if
the
tool
is
tipped
or
if
the
cutting
tool
is
unintentionally
contacted.
12.
Make
sure
tool
is
properly
grounded.
If
tool
is
equipped
with
three-prong
plug,
it
should
be
plugged
into
а
three-pole
electrical
receptacle.
Never
remove
the
third
prong.
13.
Always
disconnect
tool
before
servicing
and
when
changing
accessories
such
as
blades
and
cutters.
14.
Make
sure
that
switch
is
in
"OFF"
position
before
plugging
in
cord.
15.
Be
sure
that
key
and
adjusting
wrenches
have
been
removed
before
turning
power
on.
16.
Use
only
accessories
designed
for
the
machine.
17.
Clamp
workpiece
or
guide
prevent
injury.
18.
Do
not
start
any
operation
before
checking
that
the
cutters
are
tight
to
cutterhead
also
check
if
the
cutters
are
positioned
at
the
same
level.
19.
Use
caution
when
placing
hands
near
the
cutterhead,
knives
are
extremely
sharp.
20.
Use
ONLY
recommended
accessories.
Use
of
accessories
NOT
recommended
by
General
International
may
result
in
a
risk
of
injury.
21.
Do
not
use
this
planer
for
other
than
it's
inten-
ded
use.
If
used
for
other
purposes,
General
International
disclaims
any
real or
implied
war
гапіу
and
holds
itself
harmless
for
any
injury,
which
may
result
from
that
use.
GENERAL
®
INTERNATIONAL
guarantee
All
component
parts
of
GENERAL
INTERNATIONAL
machinery
are
carefully
inspected
during
all
production
stages
and
each
machine
is
thoroughly
inspected
upon
completion
of
assembly.
Because
of
quality,
GENERAL
INTERNATIONAL
agrees
to
repair
or
replace
any
genuine
part
or
parts
which,
upon
examination,
proves
to
be
defective
in
workmanship
or
material
within
a
period
of
24
months
from
date
of
purchase.In
order
to
obtain
warrantee,
all
defective
parts
must
be
returned
pre-
paid
to
GENERAL
INTERNATIONAL
MFG.
Co
Ltd.
Repairs
made
without
our
written
authorization
voids
all
guarantees.

FRONT
EXTENSION
TABLE
DEPTH
SCALE
GEAR
BOX
TABLE
LOCK
KNOB
(NOT
SHOW
ON
PICTURE)
ELEVATING
HAND
WHEEL
MAGNETIC
SWITCH
REAR
EXTENSION
TABLE
LIFTER
BAR
CABINET
STAND
10.
CASTOR
1.
2.
3.
4.
5.
6.
7.
8.
9.
PARTS
IDENTIFICATION

15”
PLANER
30-125CE
M1
UNPACKAGE
AND
CLEANUP
ITEM
#1
3
mm
Allen
Wrench
4
mm
Allen
Wrench
5
mm
Allen
Wrench
6mm
Allen
Wrench
#
=
5
(2)
Knife
Setting
Guide
al
hal
-10
mm
Open
End
Wrench
2-14
mm
Open
End
Wrench
7-19
mm
Open
End
Wrench
GENERAL®
INTERNATIONAL
Planer
are
carefully
tested
and
inspected
before
shipment
and
if
properly
used
will
give
perfect
results.
However,
a
reasonable
amount
of
care
and
attention
is
necessary
to
ensure
perfect
performance
and
accurate
work.
It
is
imperative
that
you
take
a
few
moments
to
familiarise
yourself
with
these
instructions,
as
they
will
no
doubt
save
you
а
lot
of
time
and
trouble.
2.
Report
damage,
if
any
to
your
local
distributor.
To
prevent
rust,
apply
a
light
coating
of
paste
wax
to
surface.
ПЕМ
#
ó
(3)
Mó
Cap
Screw
#
ПЕМ
#7
(3)
Spring
Washer
ПЕМ
#8
(1)
Knife
Setting
Guide
Shaft
ПЕМ
#9
(1)
Напа
wheel
(1)
Напаіе
(1)
Direction
Label
(1)
Nut
(1)
ITEM
#
10
(2)
Extension
table
©
е
ШШ
ФФ
9900
mM
To
ensure
maximum
performance
from
your
GENERAL®
INTERNATIONAL
15"
Planer,
clean
it
properly;
and
install
it
accurately
before
use.
As
soon
as
you
receive
your
30-125CE
M1,
we
recommend
you
follow
these
procedures:
1.
Finish
removing
the
contents
of
the
shipping
wooden
case
and
compare
with
the
contents
list.
3.
Clean
all
rust
protected
surfaces
with
a
mild
solvent
or
kerosene.
Do
not
use
lacquer
thinner;
paint
thinner,
or
gasoline.
These
will
damage
painted
surfaces.
ТЕМ
#11
(1)
Dust
chute
ITEM
#12
(6)
M8
Hex.
Head
Screw
(6)
М8
Set
Screw
ITEM
#13
(2)
Knob
ITEM
#
14
(3)
Flat
Washer
ITEM
%
15
(4)
3/8"
Hex.
Head
Screw
(4)
Flat
Washer
(2)
"L"type
metallic
plate
«Ө

e
e
e
o o
e
WARNING!
ALWAYS
VERIFY
THAT
THE
MACHINE
IS
PROPERLY
GROUNDED
TO
AVOID
ELECTRIC:
SHOCK
TO
THE
WORK
OPERATOR!
ee
ooe
e
CAUTION!’
• • •
•
NEVER
ATTEMPT
TO
CONNECT
TO
AN
OUTLET
WITH
A
GREATER
POWER
SOURCE
VOLTAGE
THAN
REQUIRED!
ELECTRICAL
REQUIREMENTS
Before
connecting
the
machine
to
the
power
source
verify
that
the
voltage
supplied
corresponds
as
specified
on
the
nameplate
of
the
machine.
A
power
source
with
greater
voltage
than
needed
can
result
In
serious
injury
to
the
user
as
well
as
damage
the
machine.
If
in
doubt,
contact
a
qualified
electrician
before
connecting
to
the
power
source.
GROUNDING
Machine
must
be
properly
grounded
in
order
to
avoid
electric
shock
to
the
work
operator.
Connect
to
а
circuit
breaker
no
greater
than
voltage
supplied
on
name
plate,
to
avoid
shock
or
fire;
replace
the
power
cord
if
it
gets
worn
out,
cut
or
damaged
in
any
way
replace
immediately.
INSTALLATION
Fig.
|
*
Make
sure
location
is
a
fixed
solid
foundation.
Verify
that
the
machine
remains
steady
and
properly
balanced.
*
Choose
work
area
accordingly,
avoiding
obstacles
that
may
interfere
while
work
operations
are
being
performed.
WARNING
!
D
DISCONNECT
THE
MACHINE
BEFORE
PERFORMING
ANY
ADJUSTMENTS!
FAILURE
TO
COMPLY
CAN
CAUSE
SERIOUS
INJURIES
TO
THE
MACHINE
AND
THE
WORK
OPERATOR!
7
7
ADJUSTMENTS
MACHINE
ANCHOR
Use
two
"L"
type
metallic
plate
locating
in
front
and
back
of
the
stand
to
fix
machine
on
the
floor.
(Fig.
1)
EXTENSI
ES
(Fig.
2
*
—
Install
set
screw(B)
into
extension
table
so
that
they
are
levelled
with
the
surface
that
faces
the
machine.
+
To
attach
the
table
extension
to
machine
use
hex
head
bolts(A).
*
Find
a
straight
edge
approximately
four feet
long
to
adjust
table
extension.
+
Using
bolts(A)
and
set
screws(B),
adjust
so
that
when
the
straight
edge
Is
lying
on
the
table
extension,
there
is
no
space
between
the
straight
edge
and
the
table.
*
Tighten
screw(A).
*
Repeate
the
same
procedures
for
the
opposite
of
table
extension.
DJUSTME!
Fig.
3)
Turn
handwheel
(A)
clockwise
or
counterclockwise
to
adjust
to
the
required
height.

DEPTH
OF
CUT
ADJUSTMENT
(FIG.
4)
*
The
depth
of
cut
is
controlled
by
raising
and
lowering
the
table
as
illustrated
in
Fig.4.
The
table
raises
and
lowers
on
four
preci-
sion
steel
ground
columns.
*
To
Adjust:
Loosen
the
two
head
assembly
lock
knob
(A),
and
turn
the
elevating
handwheel
(В).
*
When
required
depth
is
obtained,
lock
the
two
head
assembly
lock
knobs
In
order
to
maintain
the
current
depth.
+
A
scale
(С)
is
located
on
the
right
front
column
for
easy
reading.
*
The
maximum
depth
of
cut
on
full
width
planing
is
1/8".
A
limiter
(D)
is
provided
to
limit
the
depth
of
cut.
If
the
workpiece
to
be
cut
is
less
than
ó”,
the
allowable
maximum
depth
of
cut
is
no
more
than
1/4”
(6
mm)
in
one
pass.
ANTI-KICKBACK
FINGERS
(FIG.
5)
Anti-kickback
fingers
(A)
are
provided
on
your
planer
to
prevent
kickback.
These
fingers
operate
by
gravity
and
it
is
necessary
to
inspect
them
occasionally.
In
order
for
the
anti-kickback
fingers
to
move
freely
and
operate
correctly,
you
must
clean
off
any
dust,
particles
or
residue
left
behind.
FEED
ROLLER
SPEED
CONTROL
(FIG.
6)
The
30-125CE
М1
Planer
is
equipped
with
a
spiral,
serrated
infeed
roller
and
rubber
outfeed
roller
When
the
feed
rollers
are
engaged,
they
turn
and
feed
the
stock.
The
feed
rollers
slow
automatically
when
the
machine
is
under
heavy
load
in
order
to
gives
great
results
under
all
planing
condi-
tions.
The
feed
roller
are
driven
by
a
chain
and
sprocket
drive,
which
takes
power
directly
from
the
cutterhead
through
the
oil
bath
gear-
box.
To
engage:
the
feed
rollers,
pull
out
the
lever
as
illustrated
іп
(Fig.6).
То
disengage:
the
feed
rollers,
push
the
lever
back
in
towards
machine.
To
change:
the
feed
speed,
push
the
lever
in
for
20
FPM,
or
pull
lever
out
for
16
FPM.
Set
the
lever
in
neutral
position
for
zero
speed.
Note:
speed
change
can
only
be
changed
when
the
machine
is
running.
WARNING
!
DISCONNECT
THE
MACHINE
BEFORE
PERFORMING
ANY
ADJUSTMENTS!
FAILURE
TO
COMPLY
CAN
CAUSE
SERIOUS
INJURIES
TO
THE
MACHINE
AND
THE
WORK
OPERATOR!
CHECKING
PULLEY
(FIG.
7)
To
verify
that
motor
pulley
(B)
is
in
line
with
the
shaft
pulley
of
(A),
using
the
edge
of
a
straight
scale
check
to
see
if
they
are
on-line
with
each
other.

ADJUSTING
MOTOR
MOUNT
(FIG.
8)
If
motor
pulley
B
and
shaft
pulley
A,
are
not
on-line
loosen
screw
(C)
as
shown
in
(Fig.8),
move
motor
to
left
and
right
until
adjusted
to
proper
position
and
tighten
the
screw
again.
ADJUSTING
BELT
TENSION
(FIG.
8)
Use
the
two
nuts
(D)
to
adjust
the
belt
tension
(Fig.8)
When
achieved
proper
position
of
adjustment
tighten
bolts
to
hold
in
place.
ADJUSTMENTS
(FIG.
9)
Planer
has
been
factory
adjusted,
and
requires
no
further
modifica-
tions;
however
considering
the
handling
and
transit
movement
from
the
warehouse
to
the
destination,
minor
adjustments
may
be
need-
ed
before
starting
work
operations.
To
adjust:
you
will
need
a
straight
edge,
a
feeler
gauge
and
a
home
made
gauge
block
made
of
hardwood.
The
gauge
block
can
be
made
by
following
the
dimension
illustrated
in
(Fig.9)
KNIVES
(FIG.
10)
TO
REPLACE:
USE THE
FOLLOWING
METHODS:
1.
Disconnect
the
machine
from
the
power
source.
2.
Remove
the
four
screws,
as
illustrated
in
(Fig.10);
remove
the
top
cover.
3.
Loosen
the
two
knobs
and
remove
pulley
cover.
TO
ADJUST:
USE THE
FOLLOWING
METHODS:
1.
Use
knife
gauge
and
verify
all
three
knives
for
proper
setting
as
illustrated
in
(Fig.11)
2.
A
properly
placed
gauge
should
slightly
touch
the
bottom
of
the
center
protrusion
of
the
gauge.
3.
If
adjustment
is
required;
slightly
loosen
the
knife
locking
bars
of
all
three
knives
by
turning
the
fifteen
knife
locking
screws
into
the
knife
locking
bars.
Screws
should
just
be
loose
enough
to
relieve
stress
in
the
cutterhead
without
disturbing
the
knives
setting.
4.
Use
the
knife
gauge
to
adjust
the
knife
that
needs
to
be
ad-
justed;
loosen
the
five
locking
screws
by
turning
them
into
the
knife
locking
bar.
5.
As
the
knife
locking
bar
becomes
loose,
the
springs
under
the
knife
will
raise
until
it
contacts
with
the
center
portion
of
the
gauge.
Close
up
the
knife
locking
bar
by
lightly
backing
out
the
five
screws
against
the
slot.
Temporarily
tighten
the
knife
into
slot
in
order
to
hold
in
position.
6.
If
additional
knives
must
be
reset
repeat
steps
4
&
5.
7.
After
all
three
knives
are
set,
tighten
the
five
screws
against
the
slot
starting
with
the
end
screw
and
then
the
center
screws.
Make
sure
knife
is
securely
tightened
to
cutterhead
before
proceeding
with
the
next
two
knives.

To
remove:
use
the
following
steps.
1.
Loosen
the
knife
locking
bar
by
turning
the
five
knife
locking
screws;
remove
the
knife
locking
bar,
springs
located
under
the
knives.
2.
Remove
the
remaining
knives
in
the
same
manner.
3.
Clean
the
knife
slots,
knife
bars,
screws
and
springs.
Replace
screws
if
threads
appear
worn
or
stripped.
4.
Inspect
the
cutting
edges
of
knives
for
nicks
or
warped
edges.
Grind
the
knives
using
a
stone
or
sharpen
if
required.
Always
maintain
a
cutting
angle
of
35
degrees
as
illustrated
in
(Fig.12).
5.
Insert
springs,
knives
and
knife
locking
bars
into
all
three
slots
on
the
cutterhead.
Back
out
the
locking
screw
just
enough
to
hold
all
three
knives
in
the
cutterhead.
6.
Place
the
knife
gauge
(A)
over
one
of
the
knives,
as
illustrated
in
(Fig.12).
7.
Hold
down
the
knife
gauge
and
loosen
all
five
locking
screws
(D)
turn
them
into
bar
(C)
until
the
cutting
edge
of
the
knife
(F)
comes
in
contact
with
the
protrusion
(B)
of
the
gauge.
Close
the
knife
locking
bar(C)
by
slightly
backing
out
the
five
screws
(D)
against
the
slot.
Note:
Slightly
tighten
Іп
order
to
hold
in
position,
in
order
to
Insert
the
remaining
knives.
8.
Replace
and
reset
the
other
two
knives
in
the
same
manner.
9.
Once
all
three
knives
are
set
up
tighten
the
five
screws
against
the
slot
starting
with
the
end
screw
and
then
the
center
screws.
Verify
that
the
knives
are
securely
held
in
the
cutterhead,
and
tighten
the
remaining
screws.
ADJUSTING
FEED
ROLLER
SPRING
TENSION
(FIG.
13-14)
The
infeed
roller
(A)
and
outfeed
roller(B)
are
the
parts
that
feed
the
stock
while
it
Is
being
planed.
The
feed
rollers
(A)
and
(В)
are
under
spring
tension
and
this
tension
must
be
sufficient
in
order
to
feed
stock
smoothly
and
evenly
through
the
planer
without
slipping.
The
tension
should
not
be
too
tight;
this
can
cause
damages
to
the
board.
Equal
tension
should
be
on
both
ends
of
each
roller.
О
ADJUST
INFEED
ROLLER
*
Turn
screw
(C)
clockwise
to
increase
tension
and
counte-
clockwise
to
decrease
tension.
Adjust
equally
at
both
ends
of
the
rollers
(Fig.
14).
TO
ADJUST
*
Turn
screw
(D)
clockwise
to
increase
tension
and
counterclock
wise
to
decrease
tension.
Adjust
equally
at
both
ends
of
the
rollers
(Fig.
14).
ADJUSTING
HEIGHT
OF
OUTFEED
ROLLER
(FIG.
15)
The
outfeed
roller
is
factory
adjusted
at
0.5
mm
below
the
cutting
circle.
Follow theses
methods
in
order
to
adjust:
1.
Disconnect
the
machine
from
the
power
source.
2.
Verify
that
the
knives
are
properly
adjusted
as
indicated
under
"Knives"
page
7.
3.
Place
the
gauge
block
on
the
table
directly
underneath
the
cutterhead.
Use
а
0.5
mm
feeler
gauge,
place
on
top
of
the
gauge
block,
raise
or
lower
the
head
until
the
knife
slightly
touches
the
feeler
gauge
when
knife
is
at
the
lowest
point.
Do
not
move
the
fable
any
further
until
the out
feed
roller
is
adjusted.
Fig.
I5
CHIP
BREAKER
OUTFEED
ROLLER
FEED
POUR:

Move
the
gauge
block
under
the
end
of
the
outfeed
roller
(Fig15).
The
bottom
of
the
outfeed
roller
should
slightly
touch
the
top
of
the
gauge
block.
If
adjustment
to
the
outfeed
roller
is
necessary,
loosen
the
locknut
апа
turn
screw
until
feed
roller
slightly
touches
the
gauge
block.
Re-tighten
locknut
in
order
to
hold
in
position.
5.
Verify
and
adjust
opposite
end
of
outfeed
roller
the
same
way.
ADJUSTING
CHIPBREAKER
(FIG.
16-17-18)
Тһе
chipbreaker
is
located
оп
top
of
the
planer
and
extends
down
around
the
front
of
the
cutterhead.
The
chipbreaker
raises
as
stock
is
fed
through
and
"breaks
or
curls"
the
chips.
The
bottom
of
the
chip-
breaker
must
be
parallel
to
the
knives
and
set 0.5
mm
below
the
cutting
circle.
To
verify
and
adjust
chipbreaker,
follow
these
procedures:
1.
Disconnect
the
machine
from
the
power
source.
2.
Verify
that
the
knives
are
adjusted
properly
as
previously
explained
under
"Knives"
page
7.
3.
Place
the
gauge
block
(A)
on
the
table
directly
underneath
the
cutterhead
as
illustrated
in
(Fig.16).
using
a
0.5
mm
feeler
gauge
(B),
place
on
top
of
the
gauge
block,
raise
or
lower
the
head
until
the
knife
(C)
slightly
touches
the
feeler
gauge
when
the
knife
is
at
its
lowest
point.
Do
not
move
the
table
any
further
until
the
chipbreaker
is
checked
and
adjusted
as
required.
4.
Move
the
gauge
block
(A)
underneath
the
chipbreaker
(D)
as
illustrated
іп
(Fig.17).
the
bottom
of
the
chip
breaker
should
slightly
touch
the
top
of
the
gauge
block.
Check
the
opposite
end
of
the
chipbreaker
the
same
way.
5.
If
any
adjustments
are
required,
loosen
nuts
(F)
as
illustrated
in
(Fig.18).
Turn
screws
(E)
until
the
bottom
of
the
chipbreaker
slightly
touches
the
gauge
block.
Re-tighten
nuts
(F)
in
order
to
hold
in
position.
ADJUSTING
TABLE
ROLLERS
(FIG.
19)
Your
planer
is
equipped
with
two
table
rollers
(A)
(Fig.19).
These
rollers
will
help
in
feeding
stock
by
reducing
friction,
and
turn
as
the
stock
is
fed
through
the
planer.
It
is
not
possible
to
give
exact
dimen-
sions
on
the
proper
height
setting
of
the
table
rollers
because
each
type
of
wood
behaves
differently.
As
a
general
rule,
when
planing
rough
stock
the
table
rollers
should
be
set
High
and
when
planing
smooth
stock
the
table
rollers
should
be
set
Low.
The
suggested
table
roller
height
is
at
least
0.15
mm
over
the
table
surface.
The
table
rollers
on
the
planer
are
set
for
average
planing
and
are
parallel
to
the
table
surface.
If
higher
or
lower
adjustments
are
required,
follow
these
procedures:
1.
Disconnect
the
machine
from
the
power
source.
2.
Place
a
straight
edge
(B)
across
both
rollers
as
illustrated
in
(Fig.19).
Loosen
set
screw
(D)
turn
the
two
eccentric
shafts
(E)
in
order
to
raise
or
lower
the
table
rollers,
tighten
set
screw
(D)
as
illustrated.
Table
rollers
must
also
be
adjusted
on
the
opposite
end
of
the
table
in
the
same
way, note
that
table
rollers
must
always
be
set
parallel
to
the
table.

ADJUSTING
CUTTERHEAD
PARALLEL
ТО
TABLE
(FIG.
20-21-22)
The
cutterhead
hos
been
pre-set
parallel
to
the
table
at
the
factory,
therefore
no
further
adjustments
are
required.
If
your
machine
is
planing
a
taper;
verify
to
see
if
knives
are
proper-
ly
set
in
the
cufterhead.
Due
to
transport
handling
verify
that
the
table
is
parallel
to
the
cutterhead.
If
adjustments
are
required
follow
these
procedures:
1.
Disconnect
the
machine
from
the
power
source.
2.
Place
the
gauge
block
on
table
directly
under
cutterhead
as
illustrated.
Rise
the
table
until
cutterhead
slightly
touches
the
gauge
block.
Move
gauge
block
to
opposite
end
of
table,
as
illustrated
in
(Fig.
20).
If
cutterhead
is
not
parallel,
tilt
planer
on
its
side
as
illustrated
іп
(Fig.21).
Remove
bolt
(C)
and
loosen
bolt
(D);
this
will
allow
you
to
move
the
idler
sprocket
assembly
far
enough
to
release
tension
on
the
chain.
Remove
chain
from
sprocket
on
the
end
that
needs
to
be
adjusted.
5.
Тит
sprocket
(Р)
by
hand
as
illustrated
in
(Fig.22),
adjust
the
first
corner
with
the
remaining
three.
Note:
This
adjustment
is
very
sensitiv
e
and
it
should
not
be
neces
-
sary
fo
turn
the
sproc
ket
more
than
one
or
two
teeth.
6.
Turning
sprocket
clockwise
will
decrease
the
distance
between
the
table
and
cutterhead.
Counter-clockwise
will
increase
the
distance.
LUBRICATION
(FIG.
23)
When
lubrication
needs
to
be
changed:
1.
Loosen
the
nut
В
on
the
out
feed
hole.
2.
Clean
out
old
fubrication
and
let
it
drain.
3.
Tighten
nut
В.
4.
Replace
clean
lubricant
by
hole
A.
PERIODIC
MAINTENANCE
1.
Close
fitting
parts,
such
as
the
lock-bars
and
the
planer
cutterhead
slots
should
be
cleaned
with
a
brush,
remove
any
particle
clinging
to
the
equipment
and
slightly
dampen
with
oil.
Remove
any
accumulation
from
the
feed
rollers
and
tables
with
a
non-flammable
solvent.
The
gear
box
oil
should
be
changed
once
a
year.
The
four
fable
raising
screws
should
be
lubricated
as
required
using
a
common
grease.

HEAD
ASSEMBLY
PART
NO.
30125-01
30125-02
30125-03
30125-05
30125-06
30125-07
30125-10
11
30125-11
12
30125-12
3
30125-13
WASHER
3/8"X20X1.5
14
30125-14
15
30125-15
16
30125-16
17
3012517
—
BEARING
-—
—
62004A)
7
—
18
30125-18
19
30125-19
20
30125-20
21
22
30125-22
ROLLER
23
30125-23
24
30125-24
25
30125-25
26
30125-26
27
30125-27
28
30125-28
29
30125-29
SHAFT
PARTS
LIST
30-125
HEAD
ASSEMBLY
DESCRIPTION
BOLT
SOC.
HEAD
SPECIFICATION
Mó
X
1.0P
X
12
IDLE
PULLEY
BRACKET
WASHER
8.2
X
22
X
3
SPRING
1.2
09
30725-09
LABEL
DIRECTION
HEX.
HEAD
SCREW
CAP
SCREW.
HEX.NUT
M5X0.8PX12
M6X1.09X12
М10Х1.25Р
HANDLE
HAND
WHEEL
RETAINING
RING
RTW-30
KEY
4X4X10
WORM
GEAR
BOLT
SOC.
HEAD
BOX
WORM
GEAR
=|]
mf
|
[co
fom)
№
M6X1.0PX20
ROLLER
BRACKET
BOLT
SOC.
HEAD
М8Х1.25РХ50
COVER
SPRING
PIN
6Х20
КЕҮ
8X8X35
BEARING
#620577
or
|
no
||
[co
[ro
|]
SET
SCREW
M6X1.0PX16

PARTS
LIST
30-125
HEAD
ASSEMBLY
CODE
PART
NO.
DESCRIPTION
SPECIFICATION
30
30125-30
SCREW
M22X1.5PX20
31
30125-31
BOLT
PAN
HEAD
M6X1.0PX12
17
32
30125-32
BRACKET
3
33
30125-33
CUTTERHEAD
1
34
30125-34
DUST
COVER
35
30125-35
COLLECTOR
HOOD.
38
30125-38
SPRING
WASHER
6.1Х10.2Х4
39
30125-39
CHIP
DEFLECTOR
PLATE
40
30125-40
PLATE
41
30125-41
BOLT
HEX.
HD
M6X1.0PX12
42
30125-42
SPRING
0.ó
43
30125-43
See
30-130
— —
E
AAA
O
AA
44
30125-44.
CUTIERHEAD
GIB
45
30125-45
BOLT
GIB
M8X1.25PX10
46
30125-46
WASHER
5/16"X23X2
47
30125-47
SET
SCREW
М10Х1.5РХ12
48
30125-48
DRIVEN
PULLEY
49
30125-49
WASHER
8X30X3
50
30125-50
BOLT
HEX.
HD
M8X1.25PX20
51
30125-51
HEX.NUT
5/16"X18NC
52
30125-52
WASHER
5/16"X16X1.5
30125-53
30125-54
PULLEY
GUARD
30125-55
STUD
30125-56
ВЕТ
М58
30125-57
PULLEY
COVER
30125-58
NUT
59
30125-59
CHAIN
406BX63
60
30125-60
BOLT
HEX.
HD
M6X1.0PX16
él
32012561
WASHER
—
62203
—
2
62
30125-62
SPROCKET
311
30125-63
64
30125-64
RETAINING
BRACKET
65
30125-65
KEY
5X5X22
30125-66
30125-67
30125-68
RIVET
30125-69
E
к
|—
[0
[us
ox
[oo
[no]
O
POTTEN
1
30125-71
SET
SCREW
72
30125-72
DEPTH
LIMITER
73
30125-73
PHILIPS
SCREW
M5X0.8PX12
74
30125-74.
SET
SCREW
M8X1.25PX12
75
30125-75
ERING
ETW-15
76
30125-76
SPACER
77
30125-77
ANTI-KICKBACK
PAWL
8
30125-78
NUT.HEX
9
30125-79
80
30125-80
SPROCKET
31t
30125-81
INFEED
ROLLER
30125-82
5НАҒТ
30125-83
СНІР
DEFLECTOR
5НАҒТ
30125-84
РЕТАІМІМС
RING
STW12
30125-85
PXI
30125-86
NUT
HEX.HD
3/16"-24NC
87
30125-87
WASHER
BW-5
___30125-98
SWITCH
BOARD
89
30125-89
SCREW
PAN
HD.
3/16"-24NCX5/8"
9
30125-90
SWITCH
(CSA)
Sess
|
91
30125-91
LABEL
92
30125-92A
STRAIN
RELIEF
93
30125-93A
РОУ/
PPLY
CORD
94
30125-94A
FLAT
WASHER
30125-HB
HARDWARE
BAG
125-НВ1
E
ASS"
95
30125-95А
PLATE

BASE
ASSEMBLY
PARTS
LIST
30-125
BASE
ASSEMBLY
CODE
PARTNO.
DESCRIPTION
SPECIFICATION
30125-92
BAR
30125-93
E-RING
ETW12
30125-94
RETAINING
RING
STW10
30125-96
INTERNAL
RING.
RTW38
30125-97
BUSHING
07
30125-98
LEAD
МІЛ
08
30125-99
КЕҮ
4X4X10
09
30125-100
CRANK
LEAD
SCREW
10
30125-101
COLUMN
11
30125-102
SCALE
12
30125-103
SCREW
PAN
HD.
M3X0.5PX6
1
30125-104
|
62027(
А.
14
30125-105
INTERNAL
RING
RTW35
15
30125-106
SPROCKET
16
30125-107
WASHER
3/8"X20X1.5
17
30125-108
NUT
HEX
M10X1.25P
18
30125-109
LEAD
SCREW
19
30125-110
CRANK
CASE
COLUMN
30125-111
WASHER
2X22X3
1.25PX25
—|—|—[—|—|—|м
GO|b|
5
ja
—|—|—
[no]
fc]
30125-113
BRACKET
TENSION
30125-114
SHAFT
30125-115
SPROCKET
30125-116
RETAINING
RING
STW15
30125-117
CHAIN
#410X134
125-118
BASE
30125-119
ЗЕТ
SCREW
M10X1.5PX12
cof
|
—

GEAR
BOX
ASSEMBLY
PARTS
LIST
30-125
GEAR
BOX
ASSEMBLY
CODE
PART
М0.
DESCRIPTION
SPECIFICATION
30125-120
BOLT
SOC.HD
M8X1.25PX50
30125-121
OIL
SEAL
1С28Х40Х8
30125-122
PLUG
МРТ
РТ1/4"-19
30125-123
СЕАЕ
ВОХ
30125-124
СА$КЕТ
0125-125
BEARING
#620477
30125-126
HELICAL
GEAR
1
GE
471
30125-128
BEARING
#6201(A;
30125-129
KEY
5X5X10
30125-130
SINGLE
GEARED
SHAFT
18t
30125-131
DOUBLE
GEARED
SHAFT
18.22
30125-132
GEAR
71
30125-133
КЕҮ
6X6X40
30125-134
GEAR
ASSEMBLY
30125-135
SPRING
20.6
30125-136
STEEL
BALL
96
30125-137
СЕАЕ
SHAFT
30125-138
OIL
SEAL
SC25X47X6
30125-139
BEARING
%62047(А;
30125-140
HANDLE
CLUTCH
30125-141
O-RING
Р12
30125-142
COVER
GEAR
BOX
30125-143
KNOB
AE32X3/8"-16NC
30125-144
HEX.
HD.
BOLT
M6X1.0PX25
30125-145
PIN
8X20
—|—|—|—|ко|—|
—|—]—|—|—|—|—|—|кю
IN]
|p]
|
30125-147
WASHER
6.2Х20Х3
30125-148
НЕХ.
НО.
BOLT
M6X1.0PX16
30125-149
CHAIN
#06BX47
30125-150
CLUTCH
30125-151
WASHER
1/4"X13X0.8
30125-152
HEX.
HD.
BOLT
M6X1.0PX12
125-1
35
30125-154
BEARING
#6201
TS

CABINET
ASSEMBLY
PARTS
LIST
30-125
CABINET
ASSEMBLY
CODE
PART
NO.
DESCRIPTION
SPECIFICATION
өтү
01
30125-155
МОТОР
LABEL
(CSA)
02
30125-156
STRAIN
RELIEF
SB8R-3
03
30125-157
SET
SCREW
M6X1.0PX12
04
30125-158
SPACER
05
30125-159
HEX.NUT
М8Х1.25Р
30125-160
WASHER
5/16"X23X2
7
30125-161
MOTOR
PLATE
30125-
HEX.
HD.
BOLT
M8X1.25PX30
30125-163
MOTOR
3HP-115V/230
(CSA)
10
30125-164
КЕҮ
5Х5Х30
11
30125-165
MOTOR
CORD
14A/3CX1.4mX1R2Y1R2T
30125-166
HEX.
NUT
M10X1.25P
1
30125-167
WASHER
1/2"X2
30125-168
TENSION
BOLT
ASSEMBLY
30125-169
TENSION
BOLT
M10X1.25PX100
0125-170
RETAINER
16.5X21.7X25
30125-171
PIVOT
BAR
30125-172
FLAT
НО.
SCREW
М6Х1.0Х12
30125-173
LOCK
WHEEL
38X5/16"-18NCX3/4
30125-174
ANGLE
SET
STIFFENING
PLATE
9
30125-175
WASHER
3/8"Х20Х15
20
30125-176
НЕХ.
НО.
BOLT
3/8"-16NCX3/8"
21
_30125-177_
НЕХ.
HD.
BOLT
"-16NCX2-1/2"
125-178
WHEEL
23
30125-179
LOCKING
NUT
3/8"-16NC
24
30125-180
DOOR
25
30125-181
HEX.
HD.
BOLT
M8X1.25PX40
26
30125-182
CABINET
PHRA
x
|

TABLE
ASSEMBLY
CODE
PART
N0.
DESCRIPTION
SPECIFICATION
ӨТҮ
01
30125-183
TABLE
1
30125-185
BEARING
4
30125-186
ECCENTRIC
ADJUSTER
4
05
30125-187
SET
SCREW
M6X1.0PX12
4
06
30125-188
NUT
LOCK
M12X1.75P
2
07
30125-189
5НАЕТ
THREADED
2
08
125-1
BUSHING
LOCK
2
09
30125-19
KNOB
M12X1.75P
2
11
30125-199
SOC.HD.
BOLT
M6X1.0PX20
8
12
30125-200
HEX.
HD.
BOLT
M8X1.25PX20
6
14
30125-202
SET
SCREW
M8X1.25PX12
Š
30125-203
16
30125-204
17
5-205
TABLE
ASSEMBLY
PARTS
LIST
30-125
TOR
RIVET
2X5
EXTENSION
TABLE
S
Table of contents
Other General International Planer manuals