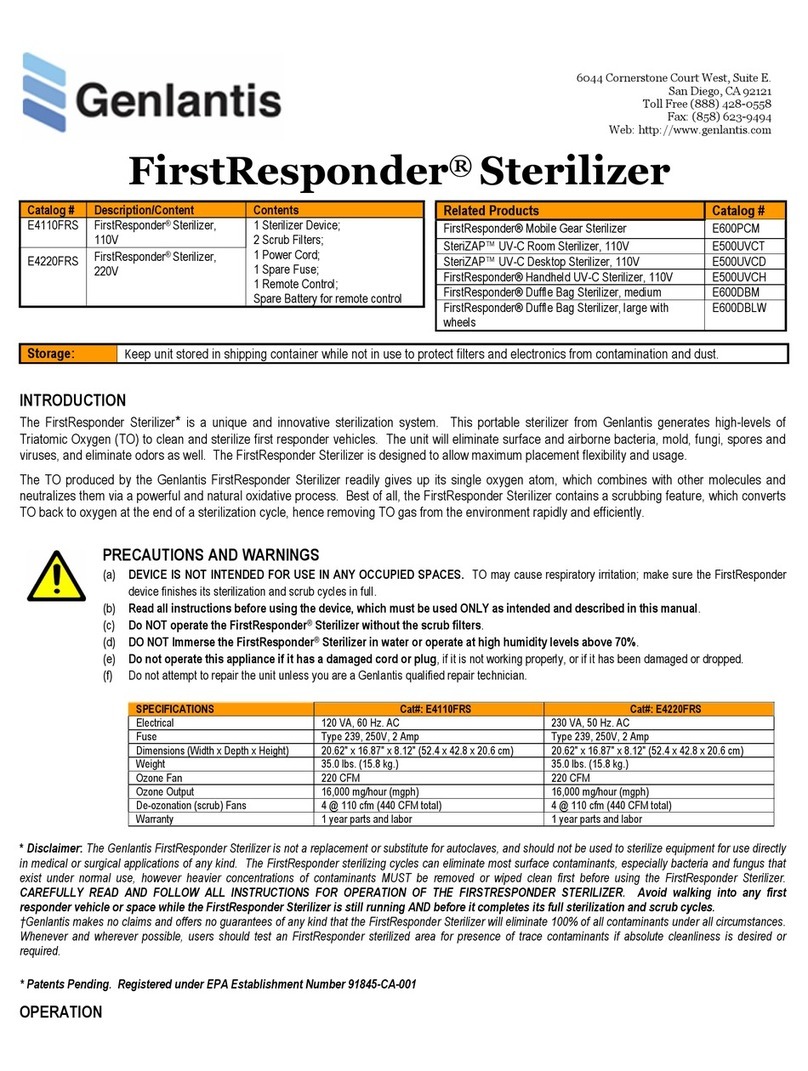
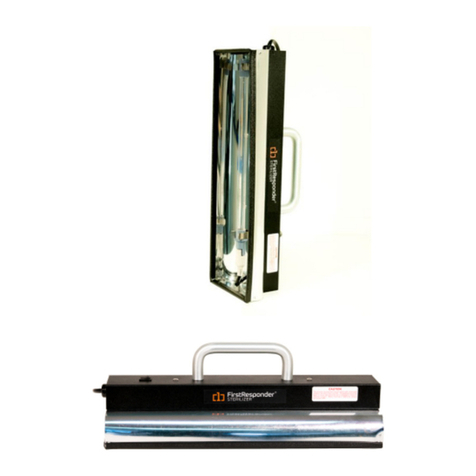
Genlantis FirstResponder E900FRUR User manual

Note and Disclaimer
*The FirstResponder® UV-C Robot is not a replacement or substitute for good cleaning practices. Areas to be sterilized must be free of excess contaminants, especially any visible
liquids or solids (for example bodily fluids, debris or dirt). The FirstResponder UV-C Robot can eliminate or reduce residual surface contaminants, especially bacterial and fungal, but
only if the UV-C light is able to directly impact the contaminated surfaces. Any surfaces or items that are covered or are behind curtains, glass panels or plastic sheeting will
not be sterilized by the unit. Genlantis makes no claims and offers no guarantees of any kind that the FirstResponder® UV-C Robot will eliminate or reduce all contaminants and
under all possible circumstances. For best results, users should closely follow the recommended instructions below.
FirstResponder® UV-C Robot
INTRODUCTION
UV-C light is electromagnetic radiation with wavelengths shorter than visible light. UV-C can be separated into various
wavelength ranges, with the short-wavelength UV-C considered to be germicidal. Furthermore, and at the specific wavelength
range of 260 to 270 nm, UV-C is found to be mutagenic to bacteria, viruses and other microorganisms. Germicidal UV-C kills or
inactivates microorganisms by destroying their nucleic acids and disrupting their DNA, leaving them unable to perform vital cellular
functions.
The FirstResponder® UV-C Robot harnesses the germicidal power of UV-C light, in particular in the 254 nm wavelength. This unit
uses shortwave UV-C lamps that emit ultraviolet light with the major peak output (~90%) band at 253.7 nm. The doped fused
quartz glass tubes of the FirstResponder lamps pass the 254 nm radiation (which produces very low ozone levels) but blocks the
185 nm wavelength (which produce higher ozone levels).
The FirstResponder® UV-C Robot is an autonomous sterilization device with great features and easy to use Apple® iPad Mini®
Tablet interface. The unit will scan and build a map of as many locations as you need, and once the maps are built, all that is
needed is to program and run the robot for efficient sterilization of air and surfaces. For extra safety, the robot will automatically
shut down if it detects any movement via its sensitive motion detectors. Once the unit is finished, it will automatically return to its
charging pile where it will recharge its internal batteries.
The FirstResponder UV-C Robot is intended for use in disinfection of air and surfaces in laboratories, hospital or clinic rooms,
schools, food-processing areas, meeting spaces, conference rooms, or any other trafficked locations like business offices and
hallways.
SAFETY NOTIFICATION:
UV-C radiation can damage the superficial tissues of the eye, and care must be taken to avoid any exposure to
the eyes. Wear eye protection at all time, such as glass or plexiglass eyewear, or face mask in case of
accidental exposure to UV-C light. Exposure of unprotected skin to UV-C for extended periods of time may
cause skin burn and possible damage to cellular or tissue DNA. In case of robot malfunction, turn the unit off
using the emergency stop button, and flip the power switch off (Section 6, Step 2)
Apple and iPad Mini are trademarks of Apple Inc., registered in the U.S. and other countries.
Specifications
UV-C Lamps 30W per lamp, 240W total (8 lamps); 253.7 nm
CPU RK3288, quad-core
Memory
2GB RAM; 8GB Flash
Battery Lithium ion; 40AH, 24V; 8 hours standby time; ≥ 3 hours working time
WiFi Supports 2.4/5G 802.11 b/g/n
Lidar Sensor
Scanning radius: 25 m (
82 feet)
Navigation Accuracy: ±5 cm (2 inches); travel speed: 0.5 meters/second (1.6 feet/second)
Charger Input voltage: 120-240 volts AC; output: 25.2V, 10A
Dimensions and Weight
Robot: 132 x 50.8 x 50.8 cm (52 x 20 x 20 inches), 35 kg (77 lbs). Charging
pile
: 35.6 x 15.3 x 31.75 cm (14 x 6 x 12.5 inches),
Warranty 1 year
Catalog #
Description/Content
Contents
E900FRUR FirstResponder® UV-C Robot, 120-
240V
Robot unit
Charging pile
Power cable
3-Pin charging cable
Apple® iPad Mini® Tablet
Related Products
Catalog #
FirstResponder® Sterilizer, 110V
E4110FRS
FirstResponder® Portable UVC Sterilizer
E600UVCP
SteriZAP® UV
-
C Room Sterilizer, 110V
E500
UV
CT

FirstResponder® UV-C Robot Manual
VKM210301 Genlantis Page 2 of 10
6044 Cornerstone Court West, Bldg. E. San Diego, CA 92121 Toll Free (888) 428-0558 U.S. & Canada (858) 457-1919 www.first-responder.com
2021 Genlantis and Gene Therapy Systems, Inc.
PRECAUTIONS AND WARNINGS
(a) Read all instructions before using the device. Use of this device is only for intended purposes as described in this manual.
(B) DO NOT BLOCK OR TAPE OVER THE MOTION DETECTORS, THIS WILL DEACTIVATE A VERY IMPORTANT SAFETY FEATURE THAT ELIMINATES
ACCIDENTAL EXPOSURE TO HARMFUL UV-C LIGHT.
(C) FOR SAFE AND PROPER OPERATIONS, DO NOT TAMPER WITH THE UNIT IN ANY WAY.
(D) DO NOT EXPOSE UNIT TO LIQUIDS OF ANY KIND. KEEP UNIT AWAY FROM OPEN LIQUID CONTAINERS OR POTENTIAL SPILL AREAS.
(e) It is normal for the unit to emit a small amount of ozone gas when operating; briefly aerate the area afterward if needed.
(f) Do not operate if the unit, charging cord, charging pile, or charging plug are damaged or not working properly.
(g) Do not attempt to repair or open the unit unless you are a qualified repair technician.
(h) To avoid injury, handle broken lamps carefully by using protective hand, face, and eye gear. Dispose of broken glass in sharps containers and obey all applicable laws.
(i) Avoid pushing the unit forcefully.
ROBOT DETAILS
Front

FirstResponder® UV-C Robot Manual
VKM210301 Genlantis Page 3 of 10
6044 Cornerstone Court West, Bldg. E. San Diego, CA 92121 Toll Free (888) 428-0558 U.S. & Canada (858) 457-1919 www.first-responder.com
2021 Genlantis and Gene Therapy Systems, Inc.
IDM
-
Robot
App Icon
Robot Power
Button
ROBOT SETUP
1. After unpacking the items, place the charging pile in a location where you would like the robot to be stationed when charging or not in use.
2. Place the charging pile against a flat wall on a level surface, with enough space around the robot (minimum 1.5 meter or 5 feet of clear
semicircular space); plug the charging pile into a power outlet using the power cable.
NOTE: charging piles cannot be shared by more than one robot.
3. Manually move the robot and park it at the charging pile while making sure that the charging contact strips on both units are touching.
4. A successful charging will show a flashing green light as indicated in the Table 1 below:
Table 1: Charging Pile Indicator Light Status
Charging pile connected to AC source and powered up Solid red
Robot connected to charging pile and charging Flashing green
Robot fully charged (3-pin charging cable or charging pile) Solid green
3-pin charging cable is attached to charging pile Solid yellow
3-pin charging cable attached to charging pile and robot Flashing yellow
Charging or connection failure Off color flashing or light off
5. In cases where the robot cannot or will not park properly at the charging pile, use the 3-pin cable to attach to both the charging pile and robot
for a temporary emergency charging procedure.
NOTE: the 3-pin cable cannot be used while the robot is parked and connected to the charging pile.
SOFTWARE LAUNCH AND CONNECTION
6. The FirstResponder® UV-C Robot kit comes with an Apple®, Inc. iPad Mini® tablet with preloaded “IDM-Robot” App for
connecting and communicating with the robot unit. Make sure that the IDM-Robot App is installed on the iPad Mini, and if
not, download and install it from Apple’s App Store® by using the search string “IDM-Robot”. IMPORTANT: Do not launch
App at this time.
Follow these steps to establish a connection between the robot and the iPad Mini:
Step 1: connect iPad Mini to your Wi-Fi network; open Settings > General, > Date & Time > turn on
the Set Automatically function. Make sure the iPad Mini time is synchronized correctly before
proceeding.
Step 2: Power the robot on by flipping the robot main power switch from left to right; the power switch
is located in the center and underside of the radar opening as shown in this image:

FirstResponder® UV-C Robot Manual
VKM210301 Genlantis Page 4 of 10
6044 Cornerstone Court West, Bldg. E. San Diego, CA 92121 Toll Free (888) 428-0558 U.S. & Canada (858) 457-1919 www.first-responder.com
2021 Genlantis and Gene Therapy Systems, Inc.
Robot Wi
-
Fi
Button
Step 3: Turn the robot communication hub on by pressing the Wi-Fi button located on the right rear of the
radar opening as shown in this image:
Step 4: Return to the iPad Mini® Settings menu, and click on WLAN. After about 30-60 seconds, select the
SLAMWAR-xxxxxx network when it appears in the Wi-Fi list.
Step 5: Click the iPad Mini home button then launch the IDM-Robot App. The following screen will appear:
Step 6: Click on the “Connect IP” button. After successful connection, screen 1 will appear.
In some cases, a connection is unsuccessful and Screen 2 will appear; if so, close the App by double clicking the iPad Mini home button and
swiping the App up to clear it; relaunch App and try Connect IP again. This step may need to be repeated twice to work properly.
Screen 1
Screen
2
NOTE: Do not use the “Scan QR Code” button with
your FirstResponder® UV-C Robot.

FirstResponder® UV-C Robot Manual
VKM210301 Genlantis Page 5 of 10
6044 Cornerstone Court West, Bldg. E. San Diego, CA 92121 Toll Free (888) 428-0558 U.S. & Canada (858) 457-1919 www.first-responder.com
2021 Genlantis and Gene Therapy Systems, Inc.
Screen
3
Screen
4
MANIPULATING AND PROGRAMMING THE ROBOT
After successful connection between the iPad Mini® and the robot, users are now ready to manipulate and program the robot. It is
recommended to follow these steps for proper setup:
Step 7: After tapping on the “New Map” button on
Screen 1, Screen 3 will appear:
Familiarize yourself with robot controls by using the
navigation circle to move robot in all directions.
Practice until you are satisfied you have good control
of robot movements before proceeding to the next
step.
NOTES: the forward and reverse buttons need
continuous pressing to keep robot moving;
conversely, the left and right rotation buttons will work
continuously once tapped, and rotation can be
stopped by tapping any of the other areas within the
navigation circle.
Step 8: It is important to return the robot to the
charging pile - by navigating manually or by tapping
the “Charging Pile” button – before going to the next
step.
Step 9: Now you are ready to create your first map. Manually move the robot to the first operating point; tap on the “Add points” button, and
name the first point on the prompt screen. The first point will now appear under the “Set marking points” list (Screen 4)
Move the robot to the next point where the robot should stop and perform a sterilization cycle. Tap the “Add points” button and name your
second point. Repeat this step as many times as necessary to cover all of the points that your robot should cover during a sterilization cycle
within a space.
Step 10: Once finished with adding map points, your
screen should look like Screen 4, where the map will
list the programmed points and show them as red
place markers on the map.
Step 11: In some instances, there will be some
special objects along the robot route, such as glass
walls, staircases, elevators, and protruding table/chair
legs to name a few examples. In such cases, it is
recommended to create a virtual wall to prevent the
robot from running into or past these obstacles. To do
so, follow these steps:
Step 11a: Tap on “Beautify map” button.

FirstResponder® UV-C Robot Manual
VKM210301 Genlantis Page 6 of 10
6044 Cornerstone Court West, Bldg. E. San Diego, CA 92121 Toll Free (888) 428-0558 U.S. & Canada (858) 457-1919 www.first-responder.com
2021 Genlantis and Gene Therapy Systems, Inc.
Screen
5
Screen
6
Step 11b: On next screen, pinch out to zoom in and
enlarge map (Screen 5). Tap on the “Create virtual
wall” button. Tap on first spot where virtual wall starts (a
green dot will appear), then tap on the second spot
where virtual wall ends (a red dot will appear) and a red
line is automatically drawn to show virtual wall location.
The virtual wall can be deleted and redone as many
times as needed by tapping on the “Reverse to delete”
button and then repeating Step 11b.
Step 12: Once satisfied with the map creation process, tap
the “Work” button on the bottom of the screen. Screen 6
will appear and will show the space map along with the
charging pile location (blue marker), the programmed
points (red markers), and any virtual wall locations.
CAUTION: in this manual operation mode,
the motion detectors safety mechanism is
turned off; users must make sure to wear
protective glasses and clothing to avoid accidental
damage to eyes and skin.
While in Screen 6, the robot can be manually navigated to
each of the set points. In the Screen 6 example, tapping on
the “Start 1” button will navigate the robot to that location;
once at the Start 1 position, a brief message that the robot
has arrived at location will flash on the screen;
If needed, tap on the “Start” button to manually turn on the UV lamps, then immediately tap the “End” button to turn the UV lamps off. When
doing this test, it is highly recommended to minimize exposure the UV-C light by standing as far away from the robot as possible.
Tap on “Charging pile” button to return the robot to the start point.
Step 13: To program sterilization tasks, tap on the “Task”
button on bottom of Screen 6, then tap on the “New Task”
button on top left of Screen 7.
Screen
7

FirstResponder® UV-C Robot Manual
VKM210301 Genlantis Page 7 of 10
6044 Cornerstone Court West, Bldg. E. San Diego, CA 92121 Toll Free (888) 428-0558 U.S. & Canada (858) 457-1919 www.first-responder.com
2021 Genlantis and Gene Therapy Systems, Inc.
Screen 9
Screen 10
Screen 8
Step 14: To program task parameters, tap on each of the fields
to modify. Start by giving the task a name, then select task
type as either Normal Task (manual operation) or Timed Task
(operation will start at a selected date and time).
If Timed Task is needed, follow the prompts to program the
time and date when the robot can begin its sterilization task.
For Disinfecting mode, tap the “FixPoDis” button for fixed point
disinfection; tap the “PathDis” button for pathway disinfection.
The difference between the two modes is that the UV lamps
will stay on during robot movement between points in the
PathDis mode, while the UV lamps will turn off between points
in the FixPoDis mode.
Last steps involve setting the amount of time the robot will stop
at each of the selected points. Tap the first point, and set the
time duration by using the up and down arrows in the time
window, or by typing the time on the screen keyboard (Screen
9)
For guidance on the amounts of times needed at each point
based on the type of suspected contaminants, consult with
Table 2 on Page 9 of this manual.
Once finished with setting the new task parameters, the screen
should look like Screen 10.

FirstResponder® UV-C Robot Manual
VKM210301 Genlantis Page 8 of 10
6044 Cornerstone Court West, Bldg. E. San Diego, CA 92121 Toll Free (888) 428-0558 U.S. & Canada (858) 457-1919 www.first-responder.com
2021 Genlantis and Gene Therapy Systems, Inc.
Screen 11
RUNNING STERILIZATION CYCLES
Once all of the tasks are programmed (for different areas and/or
time periods) the task list screen will list all of the programmed
tasks and will look like Screen 11. You can start any of the tasks
by clicking on the “Start” button (for Normal Tasks), or by leaving
the robot to start automatically (for Timed Tasks).
In either Normal or Timed Tasks, the robot will automatically
return to the charging pile where it will dock and charge its
batteries once finished with the sterilization task.
IMPORTANT NOTE ABOUT MOTION DETECTION
The FirstResponder® UV-C Robot is equipped with highly sensitive passive infrared (PIR) sensors for motion detection (see Robot Details
Section on Page 2). During normal or timed tasks, when the PIR sensors detect motion, they will deactivate the robot's UV-C lights; this is
safety function to avoid accidental human or animal exposure to UV-C rays. The Robot will resume normal function when it no longer detects
movement.
CAUTION: The PIR motion sensors will only work when running Normal or Timed tasks (Task Mode). When practicing
with the robot or while in manual (Work) mode, it is possible to turn the UV-C lamps on manually. The motion
detectors will not deactivate the UV-C lamps even in the presence of a person or animal in the room in the manual
(Work) operation mode. The robot’s motion detectors will help minimize, but not completely eliminate accidental
exposure to the UV-C rays, so users must use proper precautions while manually testing the UV-C lamps during the
setup stages, clearly mark the areas that are being disinfected by posting easy to read signs, and by notifying other
people to stay away from the vicinity of the areas being sterilized. Also, always wear protective UV-C goggles and
clothing when using the robot in all modes of operation.
EMERGENCY STOP BUTTON
At any time during the robot’s sterilization operations, and in case of emergency or unavailability of the iPad Mini tablet, the robot can be
stopped by pressing the red emergency stop button on the back side of the unit. When in the emergency stop mode, the robot can be moved
manually to any location or back to the charging pile.

FirstResponder® UV-C Robot Manual
VKM210301 Genlantis Page 9 of 10
6044 Cornerstone Court West, Bldg. E. San Diego, CA 92121 Toll Free (888) 428-0558 U.S. & Canada (858) 457-1919 www.first-responder.com
2021 Genlantis and Gene Therapy Systems, Inc.
Figure 1
Figure 3 Figure 4
Figure 2
UV-C BULB REPLACEMENT
1. IMPORTANT: mark the bulb to be replaced with a piece of tape before moving to the
next steps, then unplug the robot from power source and turn the unit off.
2. Access top of robot by removing the 8 underside screws that secure the top lid in
place (Figure 1) using a #1 Phillips screwdriver.
3. Once the top lid is off, remove the 4 screws that hold the spring-loaded white
cylinder in place (Figure 2) using a #1 Phillips screwdriver.
4. Pull the spring-loaded cylinder out (Figure 3), then slide the UV-C bulb up and out of the
robot (Figure 4).
5. Insert replacement bulb and make sure the bulb’s 4 pins align properly with the 4 holes in
the bottom of the robot (Figure 5).
6. Insert all screws back in to secure UV-C bulb and robot top lid.
7. Power the robot up and test that the new bulb is working properly;
if not, contact Genlantis customer service for troubleshooting and
service.
Figure 5

FirstResponder® UV-C Robot Manual
VKM210301 Genlantis Page 10 of 10
6044 Cornerstone Court West, Bldg. E. San Diego, CA 92121 Toll Free (888) 428-0558 U.S. & Canada (858) 457-1919 www.first-responder.com
2021 Genlantis and Gene Therapy Systems, Inc.
Table 2: UV-C dosage and FirstResponder Portable UV-C Sterilizer Kill Times
Organism
Ultraviolet radiation (dose) in µWs/cm
2
needed for kill factor:
FirstResponder UV
-
C Robot
Bacteria
90% (1 log
reduction)
99% (2 log reduction)
99% Kill Times (in seconds) @ 3 Feet
Bacillus anthracis
–
Anthrax
4,520
8,700
16
Bacillus anthracis spores
-
Anthrax spores
24,320
46,200
84
Bacillus magaterium sp. (spores)
2,730
5,200
9
Bacillus magaterium
sp. (veg.)
1,300
2,500
5
Bacillus paratyphusus
3,200
6,100
11
Bacillus subtilis spores
11,600
22,000
40
Bacillus subtilis
5,800
11,000
20
Clostridium tetani
13,000
22,000
40
Corynebacterium diphtheriae
3,370
6,510
12
Ebertelia typhosa
2,140
4,100
7
Escherichia coli
3,000
6,600
12
Leptospiracanicola
-
infectious Jaundice
3,150
6,000
11
Microccocus candidus
6,050
12,300
22
Microccocus sphaeroides
1,000
15,400
28
Mycobacterium tuberculosis
6,200
10,000
18
Neisseria catarrhalis
4,400
8,500
15
Phytomonas tumefaciens
4,400
8,000
15
Proteus vulgaris
3,000
6,600
12
Pseudomonas aeruginosa
5,500
10,500
19
Pseudomonas fluorescens
3,500
6,600
12
Salmonella enteritidis
4,000
7,600
14
Salmonela paratyphi
-
Enteric fever
3,200
6,100
11
Salmonella typhosa
-
Typhoid fever
2,150
4,100
7
Salmonella typhimurium
8,000
15,200
28
Sarcina lutea
19,700
26,400
48
Serratia marcescens
2,420
6,160
11
Shigella dyseteriae
-
Dysentery
2,200
4,200
8
Shigella flexneri
-
Dysentery
1,700
3,400
6
Shigella paradysenteriae
1,680
3,400
6
Spirillum rubrum
4,400
6,160
11
Staphylococcus albus
1,840
5,720
10
Staphylococcus aureus MRSA
2,600
6,600
12
Staphylococcus hemolyticus
2,160
5,500
10
Staphylococcus lactis
6,150
8,800
16
Streptococcus viridans
2,000
3,800
7
Vibrio comma
-
Cholera
3,375
6,500
12
Molds
90% (1 log reduction)
99% (2 log reduction)
99% Kill Times (in seconds) @ 3 Feet
Aspergillius flavus
60,000
99,000
180
Aspergillius glaucus
44,000
88,000
160
Aspergillius niger
132,000
330,000
600
Mucor racemosus A
17,000
35,200
64
Mucor racemosus B
17,000
35,200
64
Oospora lactis
5,000
11,000
20
Penicillium expansum
13,000
22,000
40
Penicillium roqueforti
13,000
26,400
48
Penicillium digitatum
44,000
88,000
160
Rhisopus nigricans
111,000
220,000
400
Protozoa
90% (1 log reduction)
99% (2 log reduction)
99% Kill Times (in seconds) @ 3 Feet
Chlorella Vulgaris
13,000
22,000
40
Nematode Eggs
45,000
92,000
167
Paramecium
11,000
20,000
36
Virus
90% (1 log reduction)
99% (2 log reduction)
99% Kill Times (in seconds) @ 3 Feet
SARS
-
CoV
16,064
24096
44
MERS
-
CoV
NA
833
2
Bacteriophage
-
E. Coli
2,600
6,600
12
Infectious Hepatitis
5,800
8,000
15
Influenza
3,400
6,600
12
Poliovirus
-
Poliomyelitis
3,150
6,600
12
Tobacco mosaic
240,000
440,000
800
Yeast
90% (1 log reduction)
99% (2 log reduction)
99% Kill Times (in seconds) @ 3 Feet
Brewers yeast
3,300
6,600
12
Common yeast cake
6,000
13,200
24
Saccharomyces cerevisiae
6,000
13,200
24
Saccharomyces ellipsoideus
6,000
13,200
24
Saccharomyces spores
8,000
17,600
32
Table of contents
Other Genlantis Laboratory Equipment manuals
Popular Laboratory Equipment manuals by other brands

Fisher Scientific
Fisher Scientific accuSpin 1 operating instructions

Horizon Fitness
Horizon Fitness FCJJ-34 Assembly guide

Keysight
Keysight 772D Operating and service manual

VWR
VWR avantor Chemi Premium instruction manual

DDS Calorimeters
DDS Calorimeters CAL3K-A installation guide

Emerson
Emerson Branson Sonifier quick start guide