AgiLight Inc. 1074 Arion Circle, Suite 116, San Antonio, TX 78216, United States of America, +1.866.482.0203 www.GENLEDBRANDS.com
Installaon Guide
© 2019 GENLED Brands™. 2019 All rights reserved.
Product Specifications subject to change without notice.
ING-01713 03-2019
IT
Istruzioni di montaggio:
la catena può essere tagliata per ottenere la
lunghezza desiderata (fig. 1 e 2).
Per ottenere un illuminazione uniforme, i moduli
dovrebbero essere montati alla stessa distanza tra di loro.
Prima di incollare i moduli, pulire accuratamente la
superfice di montaggio con un detergente idoneo, p. es.
miscela di acqua- alcohol (50-50).
il bi adesivo di montaggio dei moduli raggiunge
piena rigidità solo dopo 24 ore circa.
Smaltire a regola d’arte la confezione, secondo le leggi
locali vigenti.
PERICOLO!
Pericolo di morte dovuto da scossa elettrica
Staccare la tensione di rete prima di collegare l´alimentatore.
Montare i moduli in un ambiente asciutto.
ATTENZIONE!
Un montaggio sbagliato può ridurre l´aspettativa di vita dei
moduli o danneggiarli in maniera permanente.
Rispettare la polarità: rosso (+); bianco (-)
Per mantenere il grado di protezione IP66, utilizzare
collegamenti e morsetti idonei
Osservare le indicazioni e informazioni riportate nella
scheda tecnica del prodotto e per il cablaggio.
ES
Instrucctión de montaje:
La cadena de los módulos se puede adaptar a la
longitud necesaria (fig. 1 y 2).
Para que la iluminación sea uniforme, los módulos tienen
que montarse guardando la misma distancia entre sí.
Antes de pegar los módulos, hay que limpiar bien la
zona de montaje con un limpiador adecuado, p. ej., con
una mezcla de isopropanol/agua (50-50).
Las superficies adhesivas de los módulos tardan unas 24
horas en alcanzar su capacidad completa de adherencia.
Presione firme cada módulo para activar el adhesivo.
Hay que deshacerse de los envases de forma adecuada
de conformidad con la legislación local vigente.
¡PELIGRO!
Peligro de muerte por descarga eléctrica
Desconectar la tensión de alimentación antes de conectar
el convertidor.
Montar los módulos cuando estén secos.
¡ADVERTENCIA!
¡Un montaje efectuado de forma incorrecta puede
reducir la vida útil o provocar que los módulos fallen a
corto plazo!
Observar la polaridad: rojo (+); blanco (-)
Para mantener el modo de protección IP66 hay que usar
conexiones, manguitos de empalme y pasos de cables
de caja adecuados.
Observar los datos de la ficha técnica del producto y del
cableado.
DE
Montageanleitung:
Die Modulkette kann auf die jeweils benötigte Länge
zugeschnitten werden (Abb. 1 und 2).
Für eine gleichmäßige Ausleuchtung sollten die Module
im gleichen Abstand zueinander montiert werden.
Vor dem Aufkleben der Module Montageflächen gründ
lich mit geeignetem Reinigungsmittel, z. B. Isopropanol-
Wasser (50-50) reinigen.
Die Klebeflächen der Module erreichen ihre volle Festigkeit
kerst nach ca. 24 Stunden. Drücken Sie fest auf beiden
Modulen um das Klebstoff zu aktivieren.
Verpackung gemäß den örtlich geltenden Gesetzen
fachgerecht entsorgen.
GEFAHR!
Lebensgefahr durch Stromschlag
Vor dem Anschluss des Konverters Netzspannung
trennen.
Module im trockenen Zustand montieren.
HINWEIS!
Falsche Montage kann die Lebensdauer reduzieren
oder die Module können kurzfristig ausfallen!
Polarität beachten: rot (+); weiß (-)
Zum Erhalt der Schutzart IP66 entsprechende Verbindungen,
Endhülsen und Gehäusedurchführungen
verwenden.
Angaben im Datenblatt zum Produkt und zur Verdrahtung
beachten.
EN
Installation instruction:
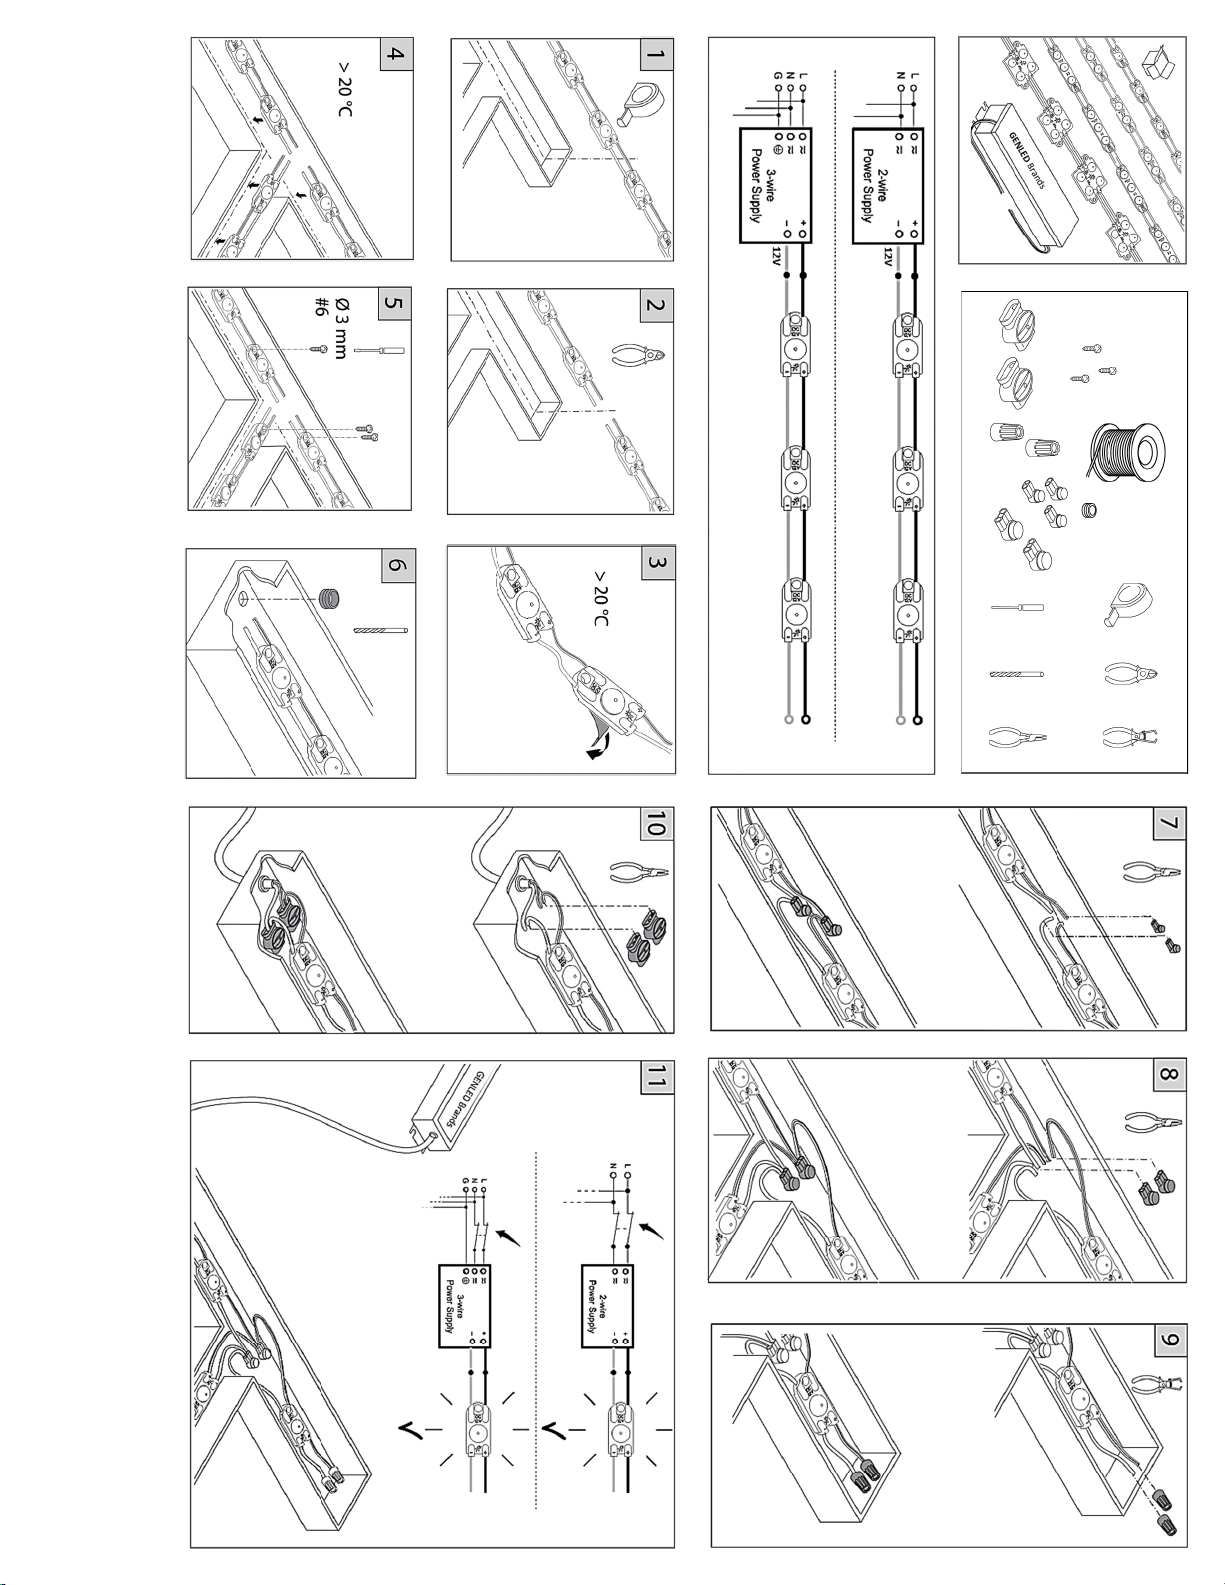
The module chain can be cut between each module to
the necessary length (fig. 1 and 2).
When mounting the modules, they should be spaced
equally to ensure uniform illumination.
Clean the mounting surfaces thoroughly before sticking
down the modules, for example, using isopropyl alcohol
diluted with water (50:50).
The tape on the modules attain their full strength
only after approx. 24 hours. Be sure to press firmly on each
module to activate the adhesive.
Disposal of packaging in compliance with the local laws.
DANGER!
Hazard of death by electrocution
Before connecting the power supply, disconnect the main
electrical lines.
Ensure that the modules are dry when mounting.
WARNING!
Improper mounting can reduce the life of the modules
or cause them to fail within a short time!
Observe polarity: red (+); white (-)
To ensure compliance with type of protection IP66, use
appropriate connectors, end ferrules and grommets on
the casing.
Observe the product and wiring specifications listed in
the data sheet.
FR
Instruction de montage :
La chaîne modulaire peut être coupée sur la longueur
désirée (fig. 1 et 2).
Pour garantir un éclairage uniforme, veiller à respecter la
même distance entre les modules lors du montage.
Avant de coller les modules, nettoyer les surfaces de
montage à fond avec des nettoyants appropriés, comme
l’isopropanol dilué dans l’eau (50-50).
Les surfaces adhésives des modules n’atteignent leur
résistance définitive qu’après 24 h environ. Veuillez vous
assurer d’appuyez fermement sur chaque module à active
l’adhésif.
Eliminer l’emballage correctement en respectant les
prescriptions locales en vigueur.
DANGER !
Danger de mort dû à l’électrocution
Avant le raccordement du convertisseur, couper la
tension d’alimentation.
Monter les modules à l’état sec.
NOTE !
Un montage incorrect risque de se traduire par une
durée de vie moindre et une défaillance des modules
à court terme !
Respecter la polarité : rouge (+); blanc (-)
Pour conserver l’indice de protection IP66, il faut utiliser
des connexions, bagues d’extrémité et passages de
boîtiers respectifs.
Respecter les indications concernant le produit et le
câblage dans la fiche technique.
Problem Possible Cause
All LED modules are OFF or some of the LED
modules are not illuminated. 1. Power supply may not be loaded properly with LED modules.
2. Wrong Power Supply. Must be constant current.
3. Bad, loose or improper connections.
Entire section does not light or lights
intermittently. 1. Bad, loose, or improper connections.
2. Power supplies are spaced too close together; overheating.
Note: Spacings between LED power supplies shall be at least 1 inch (25.4mm) from end to end, and 4 inches
(101.6mm) from side to side.
LEDs flicker or appear dim. 1. Power supply may not be properly loaded with LED modules, too many or too few modules
2. Power supply may be damaged or defective.
3. Power supply may not be wired correctly. Check AC input wiring. (Green to Ground, Black or Brown to Line, and
White or Blue to Neutral).
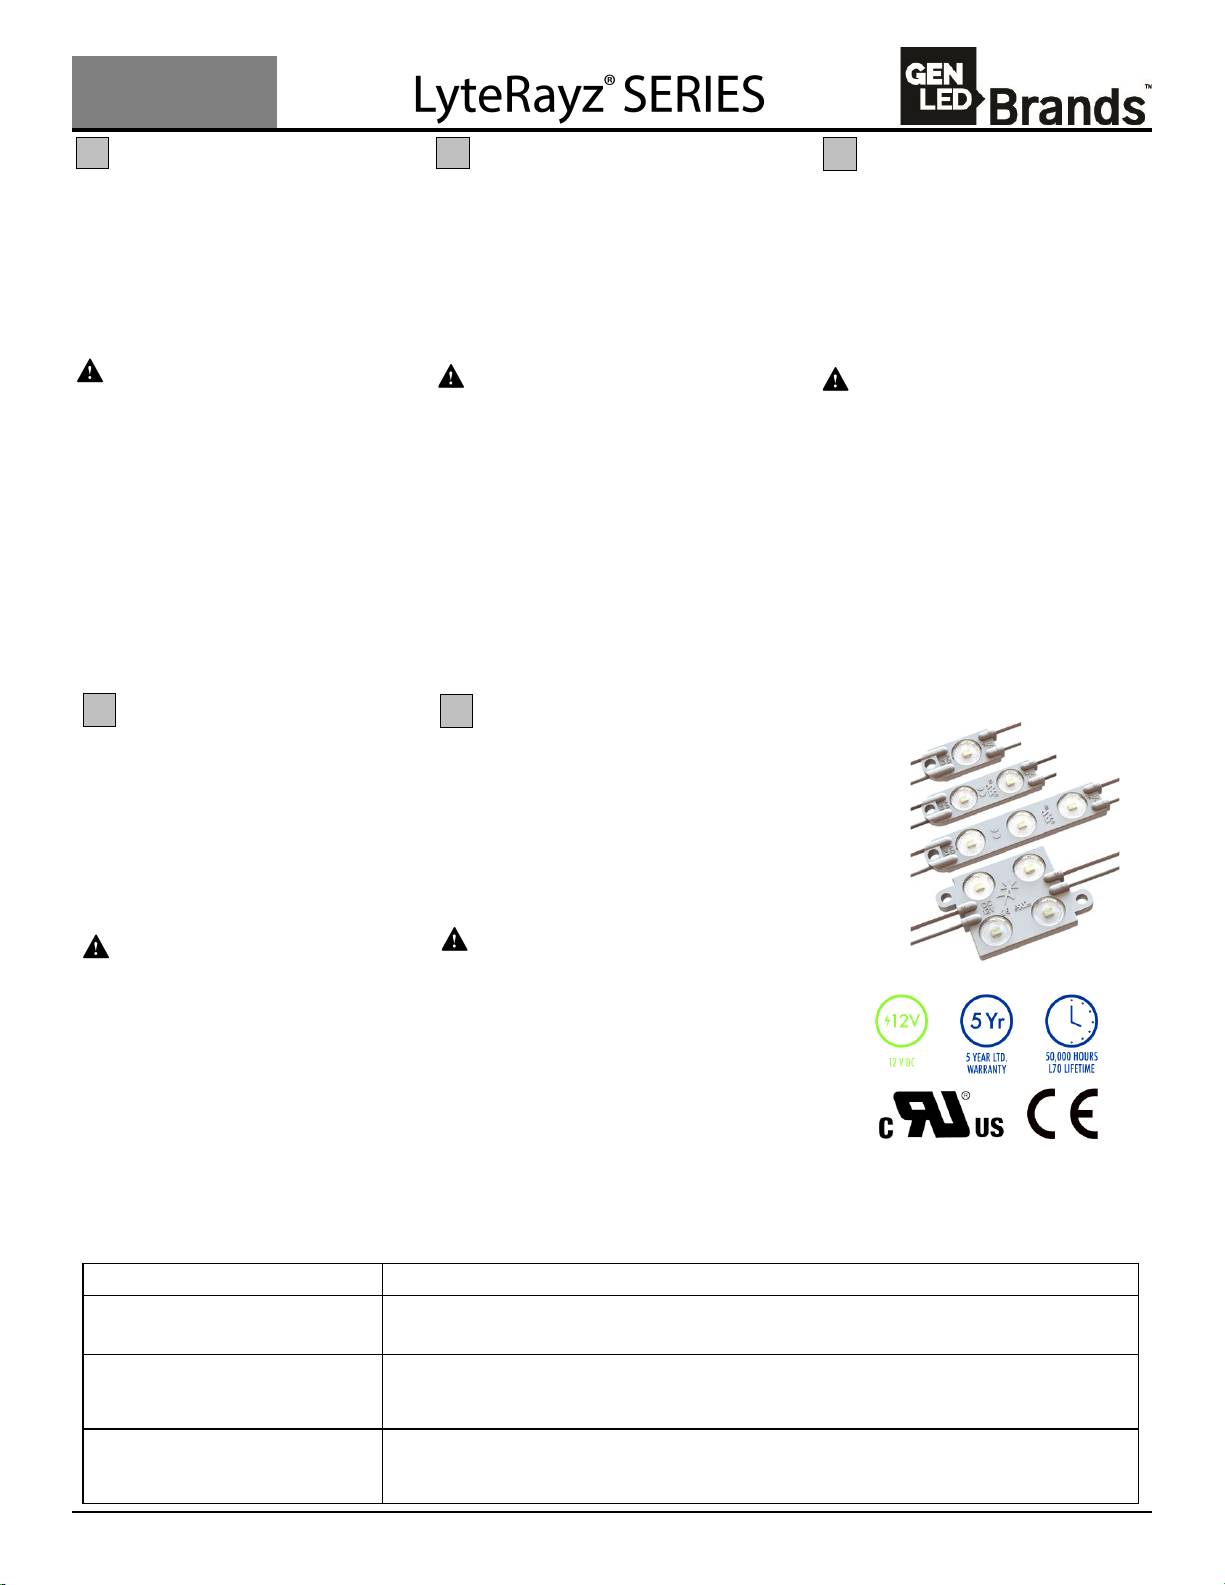
Driver requirements: Class II or Class I SELV depending on local requirements.
LRZ1
LRZ2
LRZ3
LRZ4