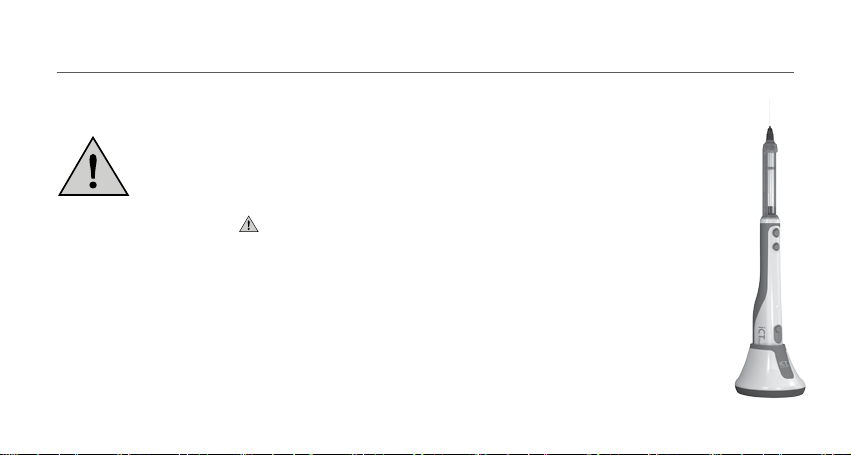
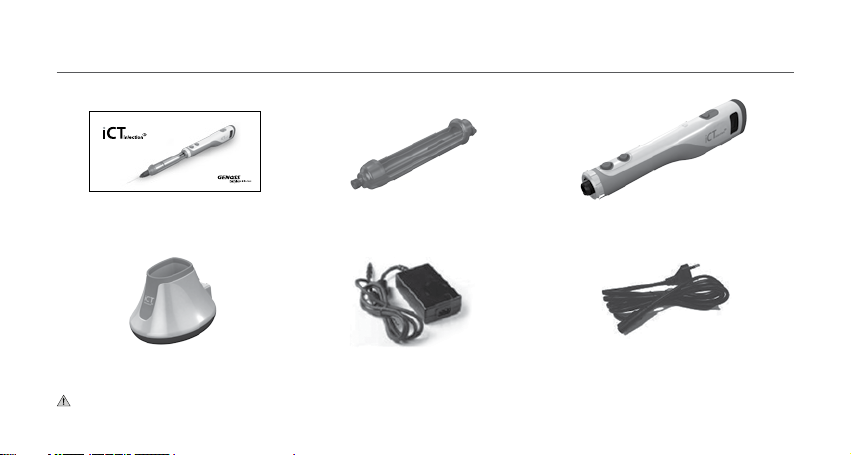
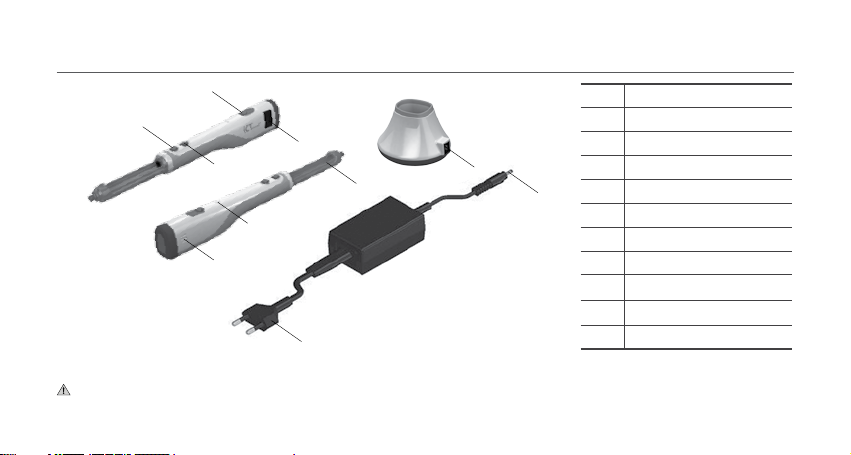
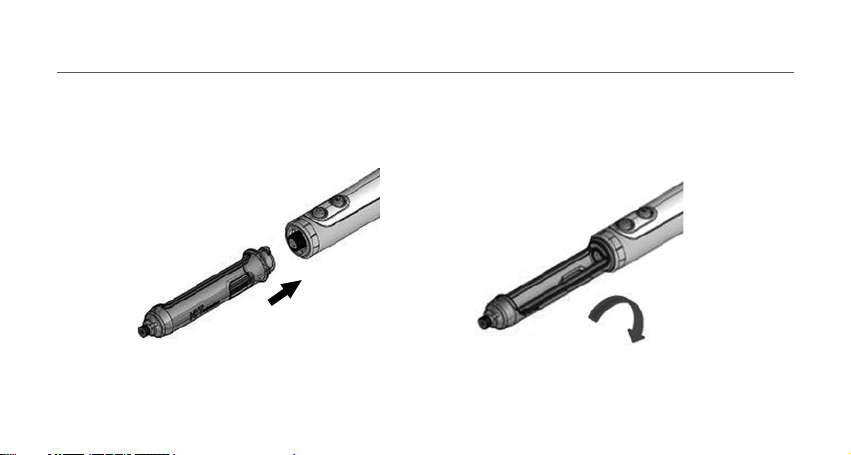
Genoss iCT injection SE User manual

www.genoss.com
www.genoss.com
User Manual
English

2
Dear Customer
Contents
iCT injectionSE by GENOSS is an anesthesia solution injecting instrument during surgical procedures. Its injecting speed can be adjusted to help a
surgery safely and accurately. Please read through this user manual before using the product to ensure safe and proper use.
If you have any enquiries, please contact your service provider.
1. Attention
2. Package Contents
3. Technical Information
4. Device Layout
5. Product Assembly and Disassembly
5.1 Charging the Product
5.2 Anesthesia cartridge holder and a Needle
5.3 Anesthesia cartridge
04
05
06
07
08
08
10
12

3
6. Function
6.1 Buttons
6.2 Announcements and Displays
6.3 Charge Display
6.4 Operation
7. Important notes
8. Cleaning and Storage
8.1 Cleaning
8.2 Storage
9. Maintenance
10. Trouble shooting
11. Label
12. Warranty
14
14
15
16
16
18
19
19
19
20
22
24
27

4
1. Attention
▶ Special attention is marked with [ Warning!] sign.
▶ iCT injectionSE is to be used only by doctors and specialists.
▶ Plaese read thorough this manual before using the device to ensure safe and proper use.
▶ Assemble/Disassemble the ampoule holder and the needle only when the device is OFF.
▶ Please note that damages occurred due to user’s deliberately forced disassembly of the device are not
covered by the warranty.
▶ The device can be damaged if it is dropped or exerted much force.
▶ If there is any abnormality with the device, please stop using the device immediately and contact your service provider.

5
2. Package Contents
www.genoss.com
www.genoss.com
User Manual
English
User Manual Anesthesia Ampoule Holder 3ea Main Body
Charger Cradle Adaptor AC Cord
Caution!
Anesthesia cartridge holder and rechargeable battery are consumable goods.

6
3. Technical Information
Main Body
Weight: 72g / Size: 150(W) x 22.4(D) x 30(H)mm / Material: ABS resin
Charger Cradle
Weight: 40g / Size: 71(W) x 62(D) x 46.5(H)mm / Material: ABS resin
Anesthesia Cartridge Holder
Weight: 7g / Size: 7(Ø) x 86.3(H)mm / Material: PEI resin (able to sterilize)
Injection Level Manual mode 3steps
Total Injection Amount 1.8ml
Electrical Power Source
Body
3.7V 470mAh Lithium Polymer (Protection circuit equipped)
Charger Cradle
Input: DC 12V/1A
Adapter
Input: AC 100~240V (50/60Hz) / Output: DC 12V/1A
Use Condition Temperature: 10~40℃/ Relative humidity: Max. 80%
Free Warranty 1 year
Product cycle 3 years
[Table-1]

7
4. Device layout
[Figure-1]
①
②
③
④
⑤
⑦
⑥
⑩
⑨
⑧
[Table-2]
No. Name
①Power Button
②Injection Button
③Stop Button
④Display Panel
⑤Anesthesia Ampoule Holder
⑥Speaker
⑦Charge Display
⑧DC jack
⑨DC Plug
⑩AC Cord
Caution!
If a product defect occurred by using for unintended purpose, randomly disassemble or modied by the user,
the repair service will not be covered by the warranty.

8
5. Product Assembly and Disassembly
5.1 charging the Product
▶ Connect the power cord to AC adapter rmly then insert them into the DC jack on the charger cradle.
▶ Full charging takes 8 hours at the rst time after purchasing this product.
[Figure-2]

9
Caution!
Use only approved chargers, batteries, and cables. Unapproved charges or cable can causethe battery explode or damage the device.
5. Product Assembly and Disassembly
▶ Main body will be inserted at the same direction as shown in the [Figure-3]. The chargedisplay will be turned on when the battery is
charging, and turned o when the main body is taken out after fully charging.
▶ Refer the [Figure-5] for the color of charge display.
[Figure-3]

10
5. Product Assembly and Disassembly
5.2 Anesthesia Cartridge holder and a needle.
▶ Assemble of Anesthesia ampoule holder: The ampoule holder should be tightly installed at the front of the main body and turned 90 degrees to
the right (clockwise) as shown in the [Figure-4]. Disassembly will be done by reverse order of installation process.
[Figure-4]

11
5. Product Assembly and Disassembly
[Figure-5]
Caution!
1. ‘Disposable needle 30G~33G’ should be used.
2. Do not remove the needle protection cap before performing a surgery.
3. Refer the user manual for usage of a disposable needle.
▶ Assemble of a disposable needle: The needle should be installed at the tip of the holder by turning to the clockwise. Disassembly will be done by
reverse order of installation process.

12
5. Product Assembly and Disassembly
5.3 Anesthesia Cartridge
[Figure-6]
[Figure-7]
▶ Insert the injection ampoule into the ampoule holder by slotting its front as shown in the [Figure-6]. Needle will penetrate the rubber cap of the
ampoule when it is inserted.
▶ Press down the back of the ampoule holder until the locking system is activated to x the ampoule holder in position as shown in the [Figure-7].

13
5. Product Assembly and Disassembly
▶ Injection ampoule can be taken out when it is pushed upwards from the bottom as shown in the [Figure-8].
[Figure-8]

14
6. Function
6.1 Buttons
[Table-3]
Function
Operation Product Condition
Power
Press the power button
(Shortly)
Repeat the turn On/O whenever press
the Power button
Remove Air Bubble
Press the injection button once
(Shortly)
Remove air bubbles trapped in the needle
Change
Injection
Velocity
1step Press the button once
(Shortly)
250sec/1.8ml (Low Speed)
2step Once more
(Shortly)
120sec/1.8ml (Middle Speed)
3step Once more
(Shortly)
50sec/1.8ml (High Speed)
Stop
Press the button once (Shortly)
Stop the injection
Initialization
Press the button once (Long)
Initializing by hand-operated
Explain Usage Press the button (Long) once at the initialized state Explain the usage in a voice
Set / Release Sound Press both button at the same time for 3 more than seconds Repeat set up/release
Control Volume Level
Press the stop button once(shortly) under injection button
is pressed for more than 0.5 seconds
Select 1~9 steps

15
6. Function
6.2 Announcement and Display
Indicator Situation Notication and voice guidance
Step 3 “Beep beep beep”
Battery
residual
value
-
Initialization “The initialization process”
“Doo~”
Injection
has
completed
“Beep~beep~“
Error “Beeeeeeep~~~“
Need to be
charged
(Notice every 10 seconds when the device is on hold.)
Strongly“Beep, Beep, Beep“
Indicator Situation Notication and voice guidance
Power ON
“Didididididing~”
“Hi, you have an automatic iCT injector powered
by electricity. Our iCT injector provides you
with painless injection when you are given an
anesthetic”
Announcement “Thank you for choosing our product. We’ll now
explain ~”
Power OFF
(If device have not used for more than 5 minutes, Power is O.)
“Thank you for using our product”
(Battery is running out)
“The battery is required to be charged“
Remove
Bubbles
“Beep”
“Air bubbles are getting removed”
“Doo”~
Step 1 “Beep”
Step 2 “Beep beep”
[Table-4]

16
Status Explain
Charging in Process
Orange The battery is over discharged.
Red The battery is charging.
Charging Complete
Green The battery has nished charging.
In Use
Colorless No luminescence
[Table-5]
6.3 Charge Display
6. Function
6.4 Operation
▶ When the power button is pressed, ‘P’ will be indicated on the panel with an announcement.
▶ When the machine is operable, it will display its battery residual value on the panel, informing that the machine is now on hold.
▶ When the stop button is pressed for a few seconds, the device will guide the user on how to use the device with announcements.
▶ When the injection and stop button are pressed at the same time for 3 seconds, the device will be muted/not muted.
▶ Volume of the device can be controlled (from level 1 to 9) by pressing the stop button (shortly) while pressing the injection button,
when the device is on hold.

17
6. Function
▶ If you press the injection button once after initialize, air bubbles in the needle will be removed. The device will then automatically be
on hold. When the injection button is pressed again, the device will be activated at low speed and the button is pressed again, the speed will be
adjusted to higher speed. (ex. low speed →middle speed →high speed →low speed)
▶ In 5 seconds after the injection is completed, the device will be initialize automatically.
▶ The operation of the device will stop when the stop button is pressed.
▶ After the device is stopped (with the stop button), injection button can be pressed again to resume the operation at low speed.
▶ After the device is stopped (with the stop button) and the stop button is pressed again (for a few seconds), the device will be reset. However, if
the button is only pressed shortly, the device will not do anything with an error sound.
Caution!
Depending on the manufacturer of the anesthesia ampoule, not all the air bubbles will be removed at once. Hence, please ensure that all air bub-
bles have been removed by pressing the injection button to operate the device at low speed.

18
▶ Please do not use in high temperature or humid environment.
▶ Please charge the device for more than 8 hours when it is being charged for the rst time.
▶ Please use a ‘Disposable needle’.
▶ When the device is connected to its charger with its power on, it will automatically shit o.
▶ If you wish to maintain the battery charged to its fullest, you need to connect it to the charger when it is not being used.
▶ The battery of the device experiences capacity fading after every use. (Approximately the battery run out after 500 cycles of charge/discharge
process). If the battery displays ‘charge’sign even after it has been fully charged, the battery has to be replaced. You can contact your service
provider to do so. However, bear in mind that you may have to pay to replace the item if its warranty has expired.
▶ Please dispose the injection ampoule holder after 100 sterilized usage.
▶ Please do not use the charger outdoors or anywhere it can be overheated.
7. Important notes

19
8.1 Cleaning
8.2 Storage
▶ Please use antibacterial solutions or ethanol solution on clean, soft wipes, to clean the device. Also, please be careful not to exert too much force
or use sharp objects when cleaning.
▶ Please be careful not to contaminate the inner side of the device
▶ The injection cartridge holder is to be sterilized before every use.
Sterilization condition:
1. 121℃, 15min.
2. Autoclave pouch should be used.
▶ This device uses its rechargeable battery as its power source. Hence please charge the battery using the charger after use.
▶ Please store the device at room temperature, without direct sunlight.
▶ When the device is not being used, please keep the injection ampoule holder separately from the device.
▶ If the device is not used for a long period of time, take out the plug of the charger and store it after cleaning in a dry place where there is
no direct sunlight.
8. Cleaning and Storage

20
▶ Check if the sheath of the adapter cable is peeled o.
▶ If problems such as unusual vibration or overheating occur, stop the
device immediately and contact your service provider.
▶ Please take note that the device accessories and batteries contain
chemicals that can be environmental hazards. Please be careful when you
dispose these items. If the items are dicult to be disposed, you can bring
it to your service providers who will safely dispose them for you.
▶ Please refer to [Figure-9] to see how to disassemble the device. ①Twist
the metal in anticlockwise direction. ② Pull out the internal housing.
③Disassemble the Lithium Polymer battery from the connector and
replace it with a new one.
9. Maintenance
[Figure-9]
①
②
③
Table of contents
Popular Dental Equipment manuals by other brands

Durr Dental
Durr Dental PTS 195 Installation and operating instructions

Carestream DENTAL
Carestream DENTAL CS 8200 3D user guide

Muss Dental
Muss Dental MA 31 Operation instructions

Denjoy
Denjoy DY400-4 user manual

Aseptico
Aseptico ADU-17X Express II Operation and maintenance instruction manual

erkodent
erkodent Erkopress 240 Instruction