Genovation MiniTermPro 909 Safety guide

GENOVATION
MiniTermPro 909
Software User Guide (Optional)
Release 8.11
Fall 2022

Genovation, Inc. 2 MiniTermPro

Genovation, Inc. 3 MiniTermPro
WARRANTY REPAIR SERVICE AND LICENSE
Genovation, Incorporated ("Genovation") warrants this product to be in good
working order and free of defects in materials and workmanship under normal
use for a period of one year from the date of purchase. Any implied warranties,
including warranties of merchantability and fitness for a particular purpose, are
limited in duration to a period of thirty (30) days from date of purchase. Any
abuse including opening the case will void the warranty. Your sole remedy and
Genovation's entire liability for this product will be repair or replacement as
provided for above, or at Genovation's option, the refund of your purchase price.
A RETURN MATERIAL AUTHORIZATION (RMA) number is absolutely
required before returning a product. Any shipment received without an
RMA will be returned unopened. Please contact Customer Service for
instructions before returning any product. Genovation makes software
available and licenses its use to you for world wide for use.
FCC CERTIFICATION
This product has been certified to comply with FCC, EC, TUV and other test
standards. See label on the product for confirmation.
FCC CERTIFICATION REQUIRED STATEMENT WARNING:
This equipment has been certified to comply with the limits for a Class B
Computing Device, pursuant to Subpart J of Part 15 of the FCC rules. Only
peripherals (computer, computer input/output devices, terminals, printers, etc.)
certified to comply with the Class B limits may be attached to this device.
Operation with non-certified peripherals is likely to result in interference to radio
and TV reception.
NOTE: This equipment generates and uses radio frequency energy and if not
installed and used properly, that is, in strict accordance with the manufacturer's
instructions, may cause interference to radio and television reception. It has been
type tested and found to comply with the limits for Class B computing devices in
accordance with the specifications in Subpart J of part 15 of the FCC Rules,
which are designed to provide reasonable protection against such interference in
a particular installation. If this equipment does cause interference to radio or
television reception, which can be determined by turning the equipment off or on,
the user is encouraged to try to correct the interference by one or more of the
following measures:
o Reorient the receiving antennas
o Relocate the computer with respect to the receiver
o Move the computer away from the receiver
o Plug the computer and receiver into different circuits

Genovation, Inc. 4 MiniTermPro
If necessary, the user should consult the dealer or an experienced
radio/television technician for additional suggestions. The user may find the
following booklet prepared by the Federal Communications Commission helpful:
“How to identify and Resolve Radio-TV Interference Problems". This booklet is
available from the U.S. Government Printing Office, Washington, DC 20402.
(Stock #004-000-00345-4).
TECHNICAL SUPPORT
If you require technical support or if you wish to make suggestions about the
product, don’t hesitate to contact us. We can be reached Monday though Friday
from 7:30 AM to 11:00 AM and from 11:30 AM to 3:30 PM Pacific Time. If the
customer support lines are busy or after hours, leave a message or send a FAX
or E-MAIL and a representative will respond typically within 24 hours.
VOICE NUMBER: (949) 833-3355 ext. 112
FAX NUMBER: (949) 833-0322
WEB: http://www.genovation.com
FORUM: http://www.genovation.com/forum

Genovation, Inc. 5 MiniTermPro
CONTENTS
1: MiniTermPro Software Installation Guide ............................................................................... 7
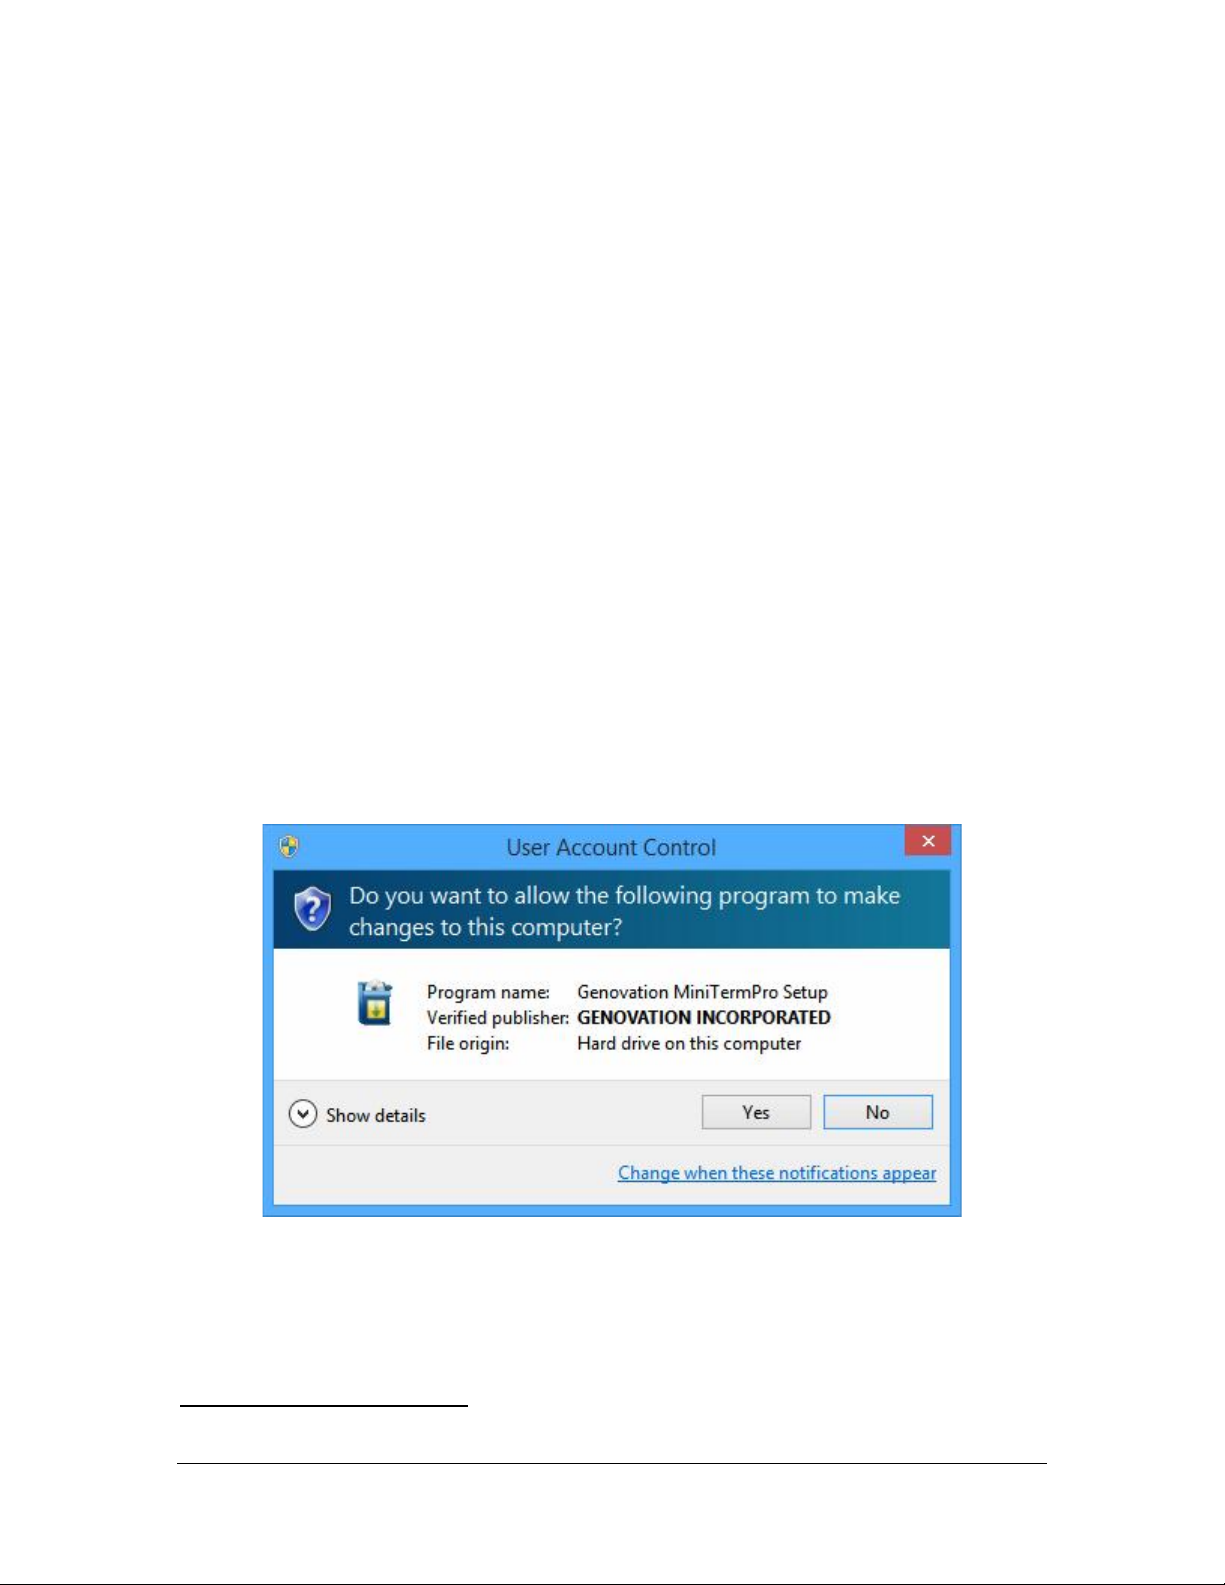
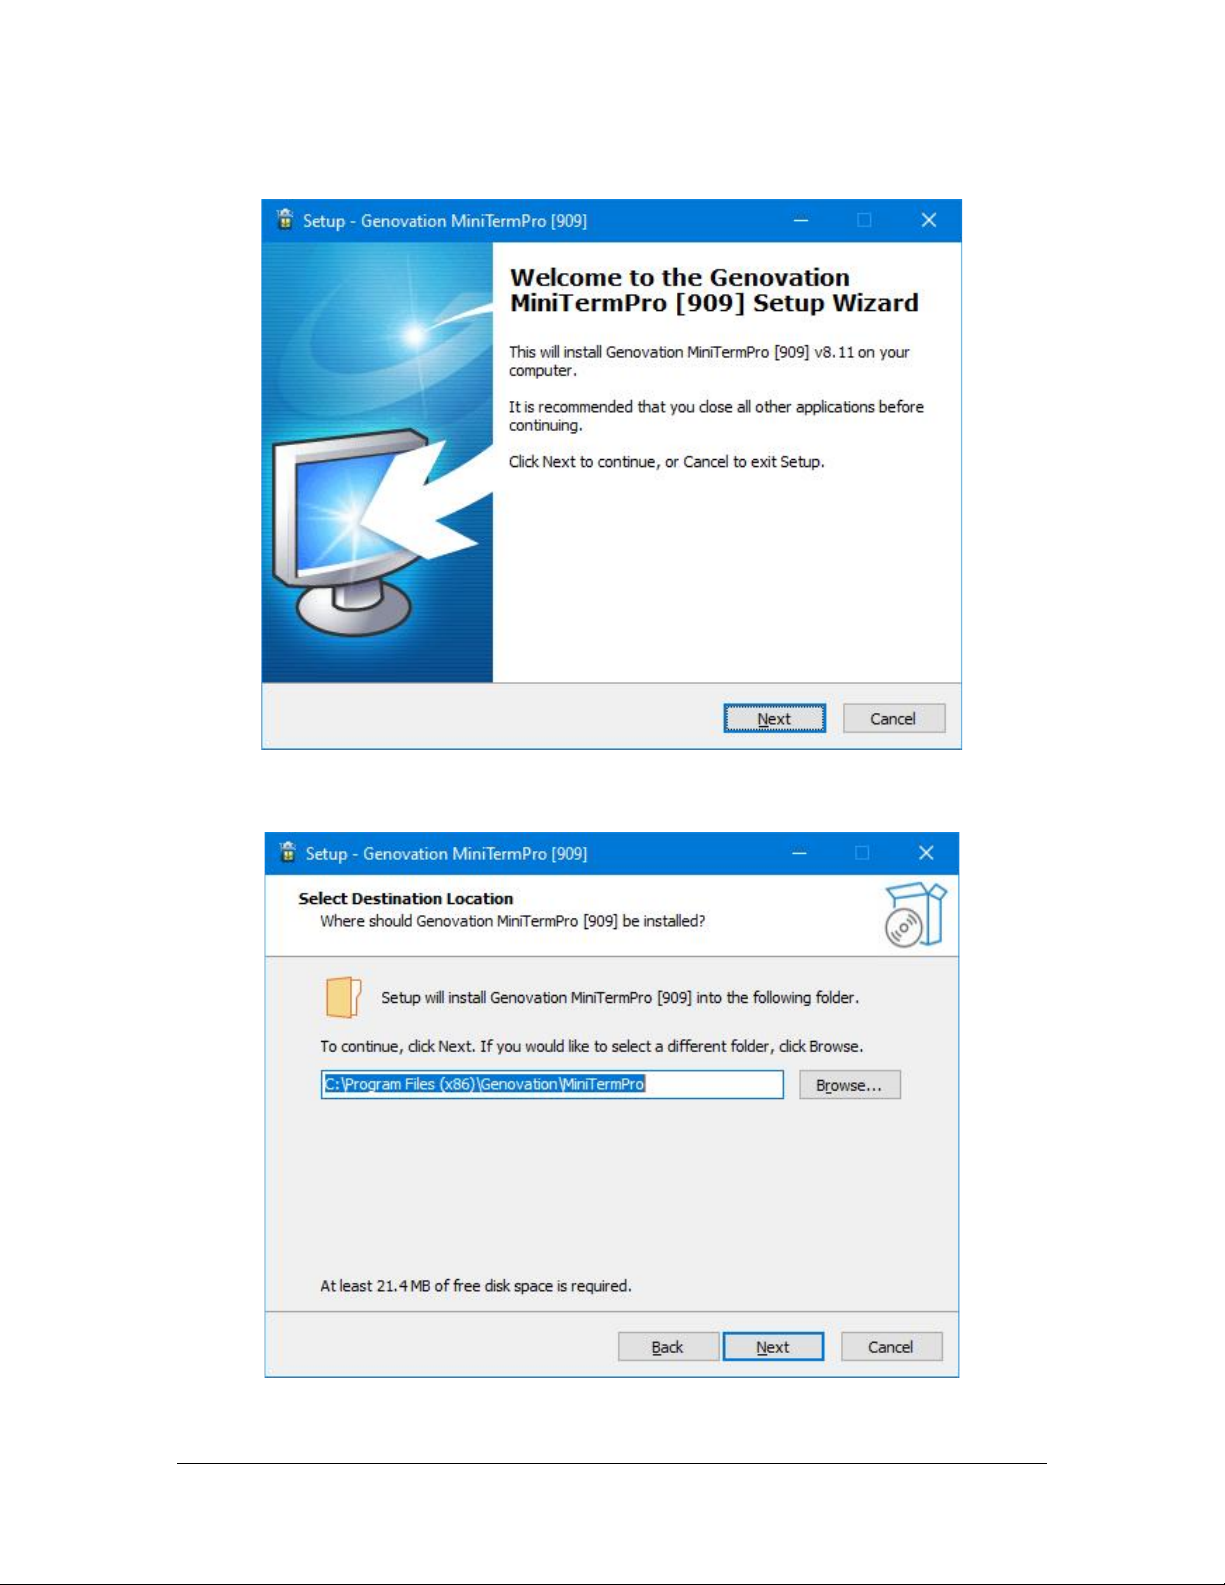
Install Software .............................................................................................. 7
Install Hardware ........................................................................................... 10
Select Virtual COM Port (Genovation USB Virtual Serial mode) .................. 10
Test Keypads ............................................................................................... 13
Where to Go from Here ............................................................................... 15
Un-Installing and Re-Installing ..................................................................... 15
2: MiniTerm 909 Boot Options .................................................................................................... 16
3: Host Command Set ................................................................................................................. 22
Command Format ........................................................................................ 22
Command Index Summary .......................................................................... 23
‘E’ – 45h – Turn Echo on/off ........................................................................ 24
‘T’ – 54h – Set Keyboard Typematic Delay/Rate ......................................... 24
‘B’ – 42h – Beep <duration> ........................................................................ 25
‘L’ – 4Ch – LED Control ............................................................................... 25
‘D’ – 43h – Set LCD Display Mode .............................................................. 26
‘S’ – 53h – Set LCD Scroll/Wrap (True Terminal mode only) ...................... 26
‘C’ – 43h – Clear LCD .................................................................................. 27
‘P’ – 50h – Set LCD Cursor Position ............................................................ 27
‘M’ – 4Dh – Mask User Input (Line Edit mode only) .................................... 27
‘K’ – 4Bh – Next User Key Press Clears LCD (Line Edit mode only) .......... 28
‘R’ – 52h – Preset LCD Rotation String (v4.10 and greater) ........................ 29
‘V’ – 56h – Rotating String Velocity (v4.10 and greater) .............................. 29
‘G’ – 47h – Graph Value (v4.10 and greater) ............................................... 30
‘U’ – 55h – Create User-Defined LCD character (v4.20 and greater) ........ 31
‘F’ – 46h – Show Firmware Version on the LCD (v4.20 and later) ............. 32
FEh – LCD Compatibility Mode Prefix (v4.20 and later) ............................ 32
‘s’ – 73h – Scanner/GPIO Mode (v6.00 and later) ...................................... 34
^D – 04h – Restart Firmware ....................................................................... 35
^E – 05h – Get Connected Port Type .......................................................... 35
^F – 06h – Get Version String ...................................................................... 36
^G – 07h – Get User Version String............................................................. 36
^H – 08h – Get Firmware Version Byte ........................................................ 37
^I – 09h – Get Platform Word ...................................................................... 37
^J – 0Ah – Get Card Reader Type ............................................................... 38
^M – 0Dh – Get and Clear Status Word ....................................................... 39
Appendix A: ASCII Character Sets ............................................................................................ 40
Appendix B: USB HID Key Codes .............................................................................................. 41

Genovation, Inc. 6 MiniTermPro
Appendix C: USB CDC Virtual COM Comparison .................................................................... 45
The CDC Driver on Windows 7/8 ................................................................. 45
Appendix D: Technical Specifications ...................................................................................... 48
MiniTerm 909 ............................................................................................... 48
Appendix E: Advanced Topics ................................................................................................... 49
MiniTermPro Background ............................................................................ 49
Additional Fault Tolerant Features ............................................................... 50
Driverless Operation .................................................................................... 50
Customization Is Standard ........................................................................... 50

Genovation, Inc. 7 MiniTermPro
1: MiniTermPro Software Installation Guide
Your MiniTerm 909 package should include the following items:
o Welcome sheet
o MiniTerm 909 LCD keypad
o Custom USB cable
The Genovation Mini Data Terminal (MiniTerm) 9xx keypad family works with:
o Any OS in HID modes.
o Any OS that supports USB CDC class virtual com ports.
o Genovation’s proprietary virtual serial mode works with Windows.
The MiniTermPro configuration software is designed to work with computers
running Microsoft Windows XP / Vista / Windows 7 / Windows 8 / Windows 10
operating systems.
Install Software
Download the software from the website mentioned on the Welcome Sheet. Run
the install software. You should see the following screen:
Click Yes to begin the installation1.
1 Network admins: You may use the /silent flag if you are automating the installation. /? for help.

Genovation, Inc. 8 MiniTermPro
Click Next:
Click Install:

Genovation, Inc. 9 MiniTermPro
You may be prompted to install the Windows CDC Driver, if so, click Next and
then when that completes, click Finish.
Finally, the setup completes.
Check the “Launch Genovation MiniTermPro” box if you want to run the
application immediately.
Click Finish to complete the installation.
The Setup procedure will create an item in the Startup folder that automatically
starts MiniTermPro every time you start your computer.
When the MiniTermPro application is running, you will see the MiniTermPro icon
in the system tray.

Genovation, Inc. 10 MiniTermPro
Install Hardware
MiniTermPro is very forgiving with regard to adding new hardware. You may
plug in new hardware at any time. If you have not already plugged in your
MiniTerm 9xx device(s), do so now. Please wait for the device to be identified
by the PC.
Select Virtual COM Port (Genovation USB Virtual Serial mode)
Right click on the icon located in the system tray and select Configure
MinTerms from the context menu.
When the Attention reminder dialog appears, click OK to dismiss it. You will
then see a screen such as shown on the next page. This is how you assign a
COM port to the MiniTerm.
IMPORTANT! In Genovation’s standard Virtual Serial mode2, the COM port you
choose will be tied to the USB jack on your PC (or USB HUB), so if you
remove your keypad, make sure to re-plug it into the same USB jack. If you use
a HUB we recommend it be of self-powered type (uses an AC adapter).
2 The USB CDC class driver host mode uses the keypad serial number to assign the COM Port.

Genovation, Inc. 11 MiniTermPro
MiniTerms shown in green are present and identified. Within this group there are
three connection types:
A USB MiniTerm (such as MiniTerm #3 above) is the most common
connection. It uses a USB cable and MiniTermPro can assign a COM Port
using the “Set Com Port” button.
A MiniTerm connected via a legacy RS-232/DB9 cable (MiniTerm #1
above) is displayed but you cannot modify its COM port. To change this
type of connection you need to physically move the cable to a different
DB9 port on the computer. This category also applies to a MiniTerm
connected via its RS232 cable along with a 3rd part USB-to-Serial adapter.
A MiniTerm connected via USB CDC (MiniTerm #2 above) uses Windows
built-in virtual COM port drivers to set the COM port number. To change
the port you need to use the Windows Device Manager.
When the “Set COM Port” button is activated, you can adjust the COM Port
number. COM1 and COM2 are reserved for DB9 connections.

Genovation, Inc. 12 MiniTermPro
For convenience, the keypad version is shown for any attached keypads and the
keypad itself will display the keypad # and port on its LCD. Once you assign a
port, it will appear in the Port Assigned column.
Click on Set Com Port to bring up a list of available options for assigning the
keypad.
COM ports that are in use or not available for assignment, for example they are
used by the motherboard COM ports or a modem, are shown in gray.
o You may select any COM port # that is not grayed out.
o Clicking on Not Assigned allows you to free a port that you have
previously committed. Alternatively, you can use the Start Over button.
Once you have made your selection, click Finished. If at any time you wish to
erase your commitments or search for new keypads, click Start Over.
NOTES:
i. HID Keyboard Miniterms (those that have been customized to function like
a PC Keyboard) are not shown. They automatically connect to the PC’s
keyboard subsystem and MiniTermPro does not manage them. The Test
USB Keyboard menu item allows you to test HID MiniTerms.
ii. RS232 (DB9) MiniTerms are shown for convenience; they are connected
to the PC’s hardware COM port subsystem. MiniTermPro does not
manage them, but you can use the other menu items with them (see next
page).

Genovation, Inc. 13 MiniTermPro
Test Keypads
Right click on the MiniTermPro icon in the system tray again, and this time select
Test Serial/Virtual Serial.
To test MiniTerms connected to RS232 or virtual serial ports, select Test
Serial/Virtual Serial. To test MiniTerms that are operating in PC Keyboard
mode, select Test USB Keyboard (HID).
In the case of Serial, then SST.exe (Simple Serial Tester) will open already
connected to your MiniTerm(s). Enter data on the MiniTerm keypad to verify
correct operation (press some number keys and then hit Enter).

Genovation, Inc. 14 MiniTermPro
You should see the data you entered on the keypad in the SST main window. If
you want to test sending data to the keypad, click on Send. You may edit the
message sent to the keypad. Close SST when you are finished with it.
Similarly, for the case of HID (PC keyboard) MiniTerms, KeyTest.exe opens:
Congratulations, your installation is complete! Your PC will connect to your
USB MiniTerm(s) automatically whenever you start your computer.

Genovation, Inc. 15 MiniTermPro
Where to Go from Here
If you plan to use your MiniTerm hardware in its current configuration you can
start to work with it right away.
If you plan to change the keypad settings,
Proceed to the MiniTerm 909 Boot Options instructions.
If you want more information about the USB CDC class host mode,
Proceed to Appendix D: USB CDC Virtual COM Host Mode.
At any time, this document can be accessed by right-clicking on the MiniTermPro
icon in the system tray and selecting PDF Manual.
Genovation also has a variety of Tips and Application Notes available that delve
deeper into the product. See the Genovation.com website for more.
Un-Installing and Re-Installing
It’s a quick and simple matter to remove, re-install or upgrade MiniTermPro.
To un-install MiniTermPro, click on:
Start >> Programs >> Genovation >> MiniTermPro >> Uninstall MiniTermPro
The un-installer will NOT remove any macro files you have created. If you are
not installing a newer version, you may delete the macro files and directories
manually. The un-installer will remove several .INI configuration files from the
Genovation MiniTermPro folder in the Public Documents area.
To re-install the software or upgrade to a newer version, it is recommended that
you un-install, reboot then perform a new installation. Your macro files will be
saved for you, but you will probably need to redo your COM port assignments.
Appendix C

Genovation, Inc. 16 MiniTermPro
2: MiniTerm 909 Boot Options
These menus are subject to change.
Entry to Boot Menu
Press and hold the CLEAR and ENTER on the bottom row and power up the
keypad (plug it in). Release the two keys. You will be presented with the
message
BOOT MENU
Choose Menu Item
Boot Menu Map
7 – Barcode Scanner
On/Off
8 – Red LED Function
9 – Green LED
Function
4 – PIN Masking
On/Off
5 – USB Connection
Type
6 – USB CDC Serial
No.
1 – Run Bootloader
2 – Key Beep Time
3 – Operating Mode
CLEAR – Cancel (Quit)
0 – Restore Defaults
ENTER –
You have 15 seconds to make your selection or the keypad will revert to
normal operation. You may also press CLEAR from this menu to exit. The
menu choices and settings are detailed on the following pages. There are seven
programmable settings that you can customize and in addition two utility items.
The 2 utility menu items are:
Launch Bootloader for firmware upgrade.
Restore all default programmable settings.
The 7 programmable settings available and the default values for them are:
Keypress Beep Time – 33ms (range is 0 to 255ms).
Operating Mode – Line Edit (choices are Line Edit or True Terminal).

Genovation, Inc. 17 MiniTermPro
PIN Masking – OFF (choices are ON or OFF).
USB Connection Type – USB Keyboard KB1.
USB CDC Serial Number – 0001 (4-decimal digits 0000 to 9999).
Barcode Scanner – ON (choices are ON or OFF).
Green LED – Power indicator.
Red LED – Host controlled.
Each configuration setting requires entering 1 or more decimal numbers
followed by the ENTER Key. The process must be repeated if multiple
changes are required. In addition to the number keys and ENTER, the CLEAR
key can be used to edit the number you are entering. If the number entry field
is blank and you press CLEAR, the Boot Menu will “escape” (abandon the
current operation).
Utility Boot Options
0 – Restore Defaults
From the Boot Menu, press the 0 key. You should see the message:
Restore DEFAULTS
?>_ 0:No, 1:Yes
Pressing CLEAR will escape out of the menu. Pressing 0 and then
ENTER will abandon the operation and escape out the menu. Press 1 and
then ENTER will erase all of the programmable settings and reboot the
keypad.
1 – Run Bootloader
This menu item will allow you to launch the Bootloader so that you can
upgrade the MiniTerm firmware using the 9xxLoad.exe Windows
application. From the Boot Menu, press the 1 key. You should see the
message:
Run Bootloader?
>_ 0:No, 1:Yes
Pressing CLEAR will escape out of the menu. Pressing 0 and then
ENTER will abandon the operation and escape out the menu. Press 1 and
then ENTER will run the Bootloader. (To exit the actual Bootloader mode,
replug the MiniTerm.)

Genovation, Inc. 18 MiniTermPro
Programmable Settings
2 – Key Beep (Default is 33ms)
This menu item allows you to configure the key “click” noise emitted when
the buttons are pressed. After Boot Menu entry, press 2. You should see
the message:
Key Beep = ###ms
Enter 0-255>_
The ### value shown above will actually indicate the current Key Beep
setting in milliseconds on the LCD. Enter a value from 1 (very short) to
255 (very long) for the keypress “click”. If you use 0 then the key beep is
turned off.
You must test your key beep value in normal operating mode (the Boot
Menu itself uses only a medium value or off).
3 – Operating Mode (Default is Line Edit)
This menu item allows you to configure whether the MiniTerm operates in
True Terminal mode or Line Edit Mode. After Boot Menu entry, press 3.
You should see the message:
OpMode=##### >_
0:Term, 1:Line
The ##### indicated above will show the current setting and this will
appear as either TTERM or LEDIT. Select 0 for True Terminal or 1 for
Line Edit.
4 – PIN Masking On/Off (Default is Off)
For Line Edit Mode (only) the user’s keypad entry will either be displayed
as numbers, or hidden (masked) by an ASCII character of your choosing.
This menu item allows you to turn the masking (hiding) on or off. See the
next menu for the Mask character setting. After Boot Menu entry, press 4.
You should see the message:
PIN Masking= ###
>_ 0:Off, 1:On
The ### indicated above will show the current setting and this will appear
as either OFF or ON. Select 0 for OFF or 1 for ON.

Genovation, Inc. 19 MiniTermPro
5 – USB Connection Type (Default is USB Keyboard KB1)
The MiniTerm 9xx family connects to a host PC over USB using one of
several possible USB device types. This menu item lets you select which
type of USB connection the MiniTerm presents to the host PC. After Boot
Menu entry, press 6. You should see the message:
USB Type=#######
Choose 1-5>_
The ####### will show which type is currently selected. Refer to the table
below to choose the appropriate USB connection type for your
environment. Be aware that as you change USB connection type, the PC
your MiniTerm is connected to may take some time to load new drivers.
DEC
Abbreviation
USB Type Description
1
VS1-LS
Low Speed MiniTermPro Virtual Serial
2
KB1-LS
Low Speed HID Keyboard
3
CDC ACM
Communication Device Class (CDC) Virtual COM Port
4
VS2-FS
Full Speed MiniTermPro Virtual Serial
5
KB2-FS
Full Speed HID Multimedia Keyboard
6 – USB CDC Serial Number (Default is 0001)
USB CDC uses a serial number to assign COM port numbers to a specific
device. This is different from how MiniTermPro works. MiniTermPro
assigns COM port numbers to the specific USB jack on the PC. To give
your CDC-connected MiniTerm a unique identity, use this menu to assign
a 4-digit serial number. After Boot Menu entry, press 7. You should see
the message:
CDC S/N = ####
4 Digits>_
The #### will show which type is currently serial number. Enter a value
from 0 to 9999 and press ENTER. Be aware that as you change CDC
serial number, the PC your MiniTerm is connected to may take some time
to reload drivers.

Genovation, Inc. 20 MiniTermPro
7 – Barcode Scanner On/Off (Default is On)
If your MiniTerm is outfitted with an optional Barcode/1D or QRcode/2D
scanner, it can be enabled or disabled using this menu item. After Boot
Menu entry, press 8. You should see the message:
Scanner = ###
>_ 0:Off, 1:On
The ### indicated above will show the current setting and this will appear
as either OFF or ON. Select 0 for scanner OFF or 1 for scanner ON.
NOTE: You can use 7 to toggle the scanner for programming purposes.
NOTE: Barcode type (manufacturer) is set by internal hardware.
8 – Red LED Function (Default is Host Controlled)
Each of the two LEDs can be configured in one of 6 modes. Two of the
modes (Off and On) are valid for any host connection type. Three of the
modes (Num, Caps, Scroll) are valid only for HID keyboard host
connections. Finally, one is for a Virtual Serial/CDC host connections and
the LED state is controlled by the PC host. After Boot Menu entry, press 8.
You should see the message:
RLED Mode = ####
Choose 0-5>_
The #### indicated above will show the current setting (see table below).
DEC
Mode
Description
0
OFF
Always extinguished
1
ON
Always illuminated
2
NUM
For HID KB1/KB2, shows the PC Num Lock LED state
3
CAPS
For HID KB1/KB2, shows the PC Caps Lock LED state
4
SCROLL
For HID KB1/KB2, shows the PC Scroll Lock LED state
5 HOST For Virtual Serial/CDC, can be controlled by the host
(off/on/flashing)
Choose one of the values (0 to 5) from the table to change the Red LED
operation.
Table of contents
Other Genovation Keypad manuals