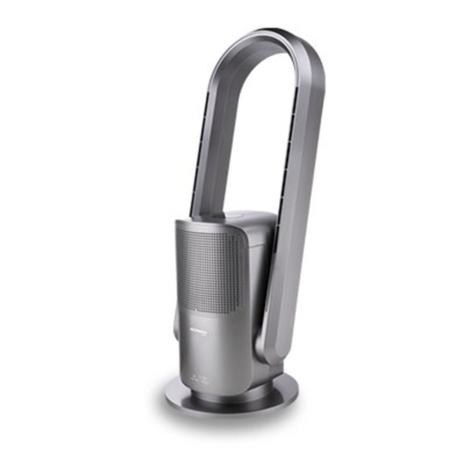
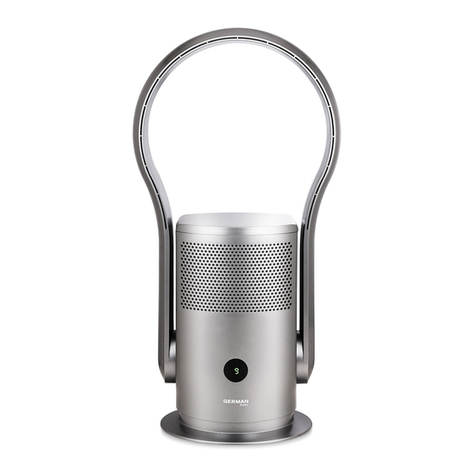
German pool BEF-353DC-SC User manual

P.1
Please read these instructions and warranty information carefully
before use and keep them handy for future reference.
USER MANUAL
Online Warranty Registration
WiFi Smart UVC Plasma Air Purifier Fan BEF-353DC-SC

P.2
Please register your warranty information now !
For Warranty Terms & Conditions,
please refer to the last page of this user manual.
請即進行保用登記!
有關保用條款細則,請看說明書最後一頁。

P.3
Tables of Contents
Warnings & Safety Instructions 4
Product Structure 6
Installation Instructions 7
Operation Instructions 10
Cleaning & Maintenance 23
Troubleshooting 24
Technical Specication 24
Warranty Terms & Conditions 47

P.4
Warnings & Safety Instructions
WARNING!
Read all instructions carefully before using this product.
• This product is for domestic indoor use only. If this product is used for any commercial, industrial,
rental or other purposes, product warranty will be VOIDED.
• This product is not intended for use by children or persons with reduced physical, sensory
or mental capabilities, or lack of experience and knowledge, unless they have been given
supervision or instruction concerning use of this product by an adult responsible for their safety.
• Mind your children and DO NOT let children play with this product.
• Cleaning and user maintenance shall not be made by children without supervision.
• Check the voltage indicated on the rating label before using this product.
• If the supply cord is damaged, it must be replaced by the manufacturer, its service agent or
similarly qualied persons in order to avoid hazards.
• Unplug this product from the power source before cleaning and maintenance.
• Contact German Pool authorized service technician for repair or maintenance of this product.
1. WARNING! To avoid re, electric shock and bodily harm, user must abide by the following
requirements; and abide by your local electrical regulations.
2. Children, the elderly and persons with reduced physical, sensory or mental capabilities, or lack of
experience and knowledge, must use this product under supervision and guidance; children must
be supervised when touching this product to ensure they DO NOT treat this product as a toy.
3. Before plugging this product in the socket outlet, check to make sure the rated voltage matches
the voltage in your home. DO NOT share socket with another appliance, and DO NOT use this
product with a universal adaptor.
4. If this product malfunctions, remove from the power source immediately and contact German Pool
Customer Service & Repair Centre.
5. DO NOT move this product with power on. When unplugging from the socket, always grasp and
pull on the plug, DO NOT pull on the power cord.
6. If the power adaptor is damaged, contact German Pool Customer Service & Repair Centre for
replacement. DO NOT replace with other adaptors.
7. DO NOT pull or stretch the power cord, and keep the cord away from hot surfaces.
8. DO NOT place the power cord underneath the carpet, or allow the cord to be covered by rugs,
other devices or similar materials. Place the cord away from trafc zones where it may cause
people walking by to be tripped over by it.
9. Make sure the product is turned off before unplugging it from the socket.
10. If this product will not be used for an extended period of time, unplug it from the socket and
bundle up the power cord to prevent people tripping over it.
11. DO NOT place any object into the air inlet or air outlet. Make sure the air vents are not blocked by
objects, and regularly clear away dust, hair or other substances which may hinder air ow.
P.5
Warnings & Safety Instructions
12. Place this product far away from heat sources and corrosive gases, in a well-ventilated and
horizontal surface with at least 150mm empty space all around this product to ensure proper air
ventilation.
13. This product is only suitable for use in a dry environment. DO NOT use outdoors or on a humid
surface.
14. To avoid danger, DO NOT immerse this product, its power cord or power plug in water or other
liquids. DO NOT use this product with any extension cord unless inspected and approved by a
professional technician.
15. DO NOT use air puriers or similar products next to this product, and DO NOT use any cleaners
or lubricants on this product. Always unplug this product from the socket before cleaning and
maintenance.
16. DO NOT wash the lter with water.
17. Do not ingest battery, Chemical Burn Hazard.
18. WARNING! This product contains a coin / button cell battery. If the coin / button cell battery is
swallowed, it can cause severe internal burns in just 2 hours and can lead to death.
19. Keep new and used batteries away from children.
20. If the battery compartment does not close securely, stop using the remote control and keep it
away from children.
21. If you think batteries might have been swallowed or placed inside any part of the body, seek
immediate medical attention.
22. The batteries contain materials which are hazardous to the environment; they must be removed
from this product before it is scrapped and that they are disposed of safely.

P.6
Product Structure
Air Duct & Air
Outlet
Remote Control
HEPA Filter
Tripod Stand
Power Port
(located at the foot
of tripod stand)
Motor & Air Inlet
Control Panel
Magnetic Holder
for Remote Control
(Side)
Power Adaptor

P.7
Before using this product, remove all packing materials and follow the installation instructions below.
Installing The Body
1. There are three holes at the base of the motor. Locate the one with power connection, and insert
the tripod leg with power port into this hole (push down the spring button on the leg to insert into
the hole). When you hear a click, it signals the leg has been properly installed.
2. Install the other two legs in a similar way.
3. Install the air duct onto the motor.
4. Insert the supplied screw (included in the box) into the screw hole at the bottom of the air duct,
and use the screwdriver end of the supplied wrench to tighten the screw in a clockwise motion.
5. Check that all parts are properly installed. Installation is complete.
Installation Instructions

P.8
Installation Instructions
Installing The Filter
This product is equipped with a HEPA lter. Install the HEPA lter into the motor before using this
product.
1. Hold the lter cover at the back of the motor, and turn it anticlockwise to remove it.
2. Remove the HEPA lter from its wrappings and insert it into the motor.
3. Place the lter cover back on, and turn it clockwise to tighten it.
HEPA lter Filter cover

P.9
Location
• Place this product on a level surface. DO NOT put it on an unstable surface (such as a slanted or
soft surface) to avoid it from falling over and getting damaged. DO NOT use this product in hot and
humid areas (such as bathroom and kitchen).
• DO NOT block the air inlet when product is in use. Keep the product far away from curtains, so
that they will not block the air Inlet and obstruct the product from working properly.
• DO NOT place objects within 1 meter of the air outlet to ensure the air ow would not be reduced.
Installing Remote Control Battery
1. To open the battery cover at the bottom of the Remote Control, press the buckle on the battery
cover inward and pull it out.
2. Identify the polarity of the battery, and insert the battery into the battery slot.
3. Reinsert the battery cover into the bottom of the Remote Control.
Installation Instructions
WARNING!
• This product contains a coin / button cell battery. If the coin / button cell battery is swallowed,
it can cause severe internal burns in just 2 hours and can lead to death. Keep new and used
batteries away from children.
• This battery is not rechargeable. DO NOT recharge the battery.
• If Remote Control will not be used for a prolonged period of time, please remove the battery.

P.10
Operation Instructions
Main Body
Connecting The Power
1. Plug the power cord into the power port located on the tripod leg.
2. Connect to the power source. Buzzer beeps once, On/Off Key lights up, and product enters
standby state.
Air Duct Angle Setting
Before adjusting the air duct angle, please make sure the product is turned off. Hold the tripod with
one hand, and set the air duct 15°forward or backward with the other hand.

P.11
Control Panel
Operation Instructions
Mode Key
Max Mode Indicator Light Sleep Mode Indicator Light
Auto Mode Indicator Light Rhythm Mode Indicator Light
PM2.5 Concentration
Air Quality Colour Display
Filter Change Indicator Light
WiFi Indicator LightUVC Indicator Light
Plasma Indicator Light
Timer Key
On/Off Key
Oscillation Key
Fan Speed
Key

P.12
Operation Instructions
Control Keys
PM2.5
Concentration
0-35µg/m³ 36-70µg/m³ 71-120µg/m³ 121-999µg/m³
Fan Speed
Level
004 006 008 010
LED Display
Color
Green Yellow Orange Red
Key Function
• In standby state, tap this key to turn on the product
• When product is turned on, tap this key to turn off product and return to
standby state
• Tap and hold this key for 5 seconds to start WiFi pairing; WiFi Indicator
Light blinks
• Tap this key to cycle among Auto Mode/Max Mode/Sleep Mode/Rhythm
Mode/Manual Mode:
• In Auto Mode, Indicator Light lights up constant, product detects
PM2.5 concentration in the air and automatically adjusts to its
corresponding fan speed level; Air Quality Colour Display will adjust
accordingly as well
• In Max Mode, Indicator Light lights up constant, fan speed level
automatically jumps to Max
• In Sleep Mode, Indicator Light lights up constant, fan speed level
automatically jumps to lowest, Display Panel goes dim
• In Rhythm Mode, Indicator Light lights up constant, fan speed level
automatically adjusts to mimic natural breeze
• In Manual Mode, tap Fan Speed Key to adjust fan speed level
• Tap this key to set 1-8 hr countdown for product to turn off; set timer to
“0” to cancel the timer
• If user manually turns off the product, timer will be automatically
cancelled
Tap this key to cycle among oscillation angle of 30°/60°/90°/120°/stop
oscillation, Display Panel shows “030/060/090/120/current fan speed”,
5 seconds later returns to showing current PM2.5 concentration
• Tap this key to cycle among fan speed level 001-010
• Tap and hold this key for 2 seconds to activate Max Mode, fan speed level
will automatically jump to Max
• After adjusting fan speed, Display Panel will show current fan speed for
5 seconds, then return to showing current PM2.5 concentration
Mode Key
Timer Key
On/Off Key
Oscillation Key
Fan Speed Key
Note:
In Auto Mode/Max Mode/Sleep Mode/Rhythm Mode, tapping Fan Speed Key will exit the respective
mode.

P.13
Remote Control
Operation Instructions
Note:
1. Point the Remote Control directly at the Control Panel to maximize remote control reception.
2. Other products may respond to this Remote Control. This is due to overlapping frequencies of the
remote controls. There is no quality problem in the product itself. To avoid interference, keep this
Remote Control away from other electrical devices during operation.
3. The On/Off button on the Remote Control does not completely disconnect the power supply to this
product. If product will be unused for a prolonged period of time, please unplug the power cord
from the socket.
Timer Button
Increase Button
UVC Button
Oscillation Button
Mode Button
Oscillation Angle Button
Mood Light ButtonEco Mode Button
Decrease ButtonPlasma Button
On/Off Button

P.14
Operation Instructions
Remote Control Buttons
Button Function
• Press this button to turn product on or off (return to standby state)
• When Filter Change Indicator Light lights up, it signals the lter needs to
be changed. After changing the lter, long-press this button for 5 seconds
to reset the cumulative time to zero, Filter Change Indicator Light goes
dark (refer to ‘‘Cleaning & Maintenance’’ section for details)
• Press this button to set the product to turn off in 1-8 hours; set timer to
“0” to cancel the timer
• When product is manually turned off, timer will automatically be cancelled
• Press Increase Button to go up one fan speed level; press Decrease
Button to go down one fan speed level
• After adjusting fan speed, Display Panel will show current fan speed for 5
seconds, then return to showing current PM2.5 concentration
Press this button to turn mood light on or off
• Press this button to cycle among Auto Mode/Max Mode/Sleep Mode/
Rhythm Mode/Manual Mode
• Refer to ‘‘Control Keys’’ section for details
Press this button to start or stop Oscillation Function, product is set to 90° by
default (oscillation angle cannot be adjusted by pressing this button)
When Oscillation Function is turned on, press this button to cycle oscillation
angle among 30°/60°/90°/120°, Display Panel shows ‘‘030/060/090/120’’
for 5 seconds, then returns to showing current PM2.5 concentration
• Press this button to turn UVC Sterilization Lamp on or off
• UVC Sterilization Lamp will automatically turn off after it’s been turned on
for 1 hour
• Press this button to turn lights of control keys and brand logo on or off
• When Eco Mode is turned on, press any key to exit Eco Mode, lights of
control keys and brand logo will light up
Press this button to turn Plasma Function on or off
Timer Button
Increase/Decrease
Button
UVC Button
Oscillation Button
Mode Button
Oscillation Angle
Button
Mood Light Button
Eco Mode Button
Plasma Button
On/Off Button
Note:
In Auto Mode/Max Mode/Sleep Mode/Rhythm Mode, pressing Increase Button/Decrease Button will
exit the respective mode.

P.15
Connecting The Product To WiFi
This product can be controlled via smartphone with German Pool Smart Control APP.
Note:
To connect the product to WiFi, please use WiFi with a frequency of 2.4 GHz, does not work with WiFi
with a frequency of 5.0 GHz.
A. How To Set Up The APP
1. Connect your phone to 2.4 GHz WiFi then scan the QR Code below, or search “German Pool Smart
Control”in App Store or Google Play to download and install the APP.
Operation Instructions
B. Change The Language
Apple IOS System
1. Search “Smart Control” in
Settings.
2. Click “Preferred Language”. 3. Select Traditional Chinese
or English in the “Suggested
Languages” column (Note:
if user select “Traditional
Chinese (Hong Kong)”, app
will display in English).
Android System
App will appear in your preset phone language. If you need to change APP language, you need to
change the system language in your phone settings.
Apple IOS System
App Store
Android System
Google Play

P.16
Operation Instructions
C. Register Your Account
2. Click “Sign Up” to register
your account.
3. Enter your email address, tick
“I agree Privacy Policy and
User Agreement”, then click
“Get Verication Code”.
4. Enter one-time verication
code from your email.
5. Set up your password then
click “Done”.
1. Open the APP,click “Agree”
on “User Agreement and
Privacy Policy”.

P.17
D. Pairing Sequence
Method 1: Auto Pairing
Operation Instructions
2. Click “+” on the upper right
corner of the APP homepage,
then click “Add Device”.
6. APP will show “Searching for
nearby devices…”.
3. Before pairing, user must
allow the App to access your
Bluetooth. Tap on “Turn on
Bluetooth” (if Bluetooth is
already on, ignore this step).
4. Tap “Go To Set” (if Bluetooth
is already on, ignore this step).
5. Turn on Bluetooth (if
Bluetooth is already on, ignore
this step).
7. APP will show “Discovering
devices…”, click “Add”.
8. Click “+” on the right of
product name.
9. it is recommended to allow
the APP to access your location.
Tap “Set Now” (if Location is
already on, ignore this step).
WiFi Smart UVC Plasma Air ...
1. Long-press the product’s
On/Off Key for 5 seconds
until WiFi Indicator Light
blinks.
ON/OFF
開關

P.18
Operation Instructions
12. APP will show ”Being
Added”, the product and APP
will automatically pair up.
13. When pairing is completed,
APP will show “Added
successfully”. Click “Done” to
return to homepage.
WiFi Smart UVC Plasma Air ...
10. Tap “Allow While Using App”
(if Location is already on, ignore
this step).
11. Select WiFi name and enter
your WiFi password, then
click “Next”.
WARNING!
If Bluetooth is turned off or App is not permitted to access Bluetooth, the product cannot be paired.
(Note: Even if Bluetooth is turned on, it does not mean the APP is allowed to access your Bluetooth.)
Note:
• The product can only be paired to one account at a time. If another user pairs their smartphone to
the product, the previous account will lose their control of the product.
• User who has already been paired can share their control rights with other users. For details, see
“E. Sharing Control”.
Note:
If APP cannot nd the product, or during Pairing Sequence, if APP shows an exclamation mark icon, it
means pairing is unsuccessful. Please use method 2 below for pairing.

P.19
Operation Instructions
Method 2: Bluetooth Pairing
1. Click “+” on the upper right
corner of the APP homepage,
then click “Add Device”.
4. Click “+” on the right of
product name.
2. In the “Add Manually “
column, nd the product
model that needs to be
paired, and click the product
to pair.
5. Select WiFi name and enter
your WiFi password, then
click “Next”.
3. Follow the instructions on the
APP to pair.
6. When pairing is completed,
APP will show “Added
successfully”. Click “Done” to
return to homepage.
WiFi Smart UVC Plasma Air ...
WARNING!
If Bluetooth is turned off or App is not permitted to access Bluetooth, the product cannot be paired.
(Note: Even if Bluetooth is turned on, it does not mean the APP is allowed to access your Bluetooth.)

P.20
1. On the product’s homepage,
click “ ” on the upper
right corner.
4. Set the number of users with
whom you wish to share
control, then click “Share with
the Account Smart Control”.
2. Click “Share Device” under
“Others”.
5. Enter that account’s
registered email address,
then click “Done” on the
upper right corner.
3. Click “Add Sharing”.
6. Repeat step 3-5 to share with
more accounts.
Note:
On the “Share Device” page, you can add or delete other accounts’ control rights.
Operation Instructions
WiFi Smart UVC Plasma Air Purier Fan has been shared with
WiFi Smart UVC Plasma Air Purier Fan
E. Sharing Control
WiFi Smart UVC Plasma Air ...
Filter Life
Display
Table of contents
Other German pool Air Cleaner manuals

German pool
German pool PUT-40 User manual

German pool
German pool EFB-PCTH User manual

German pool
German pool PUF-50 User manual

German pool
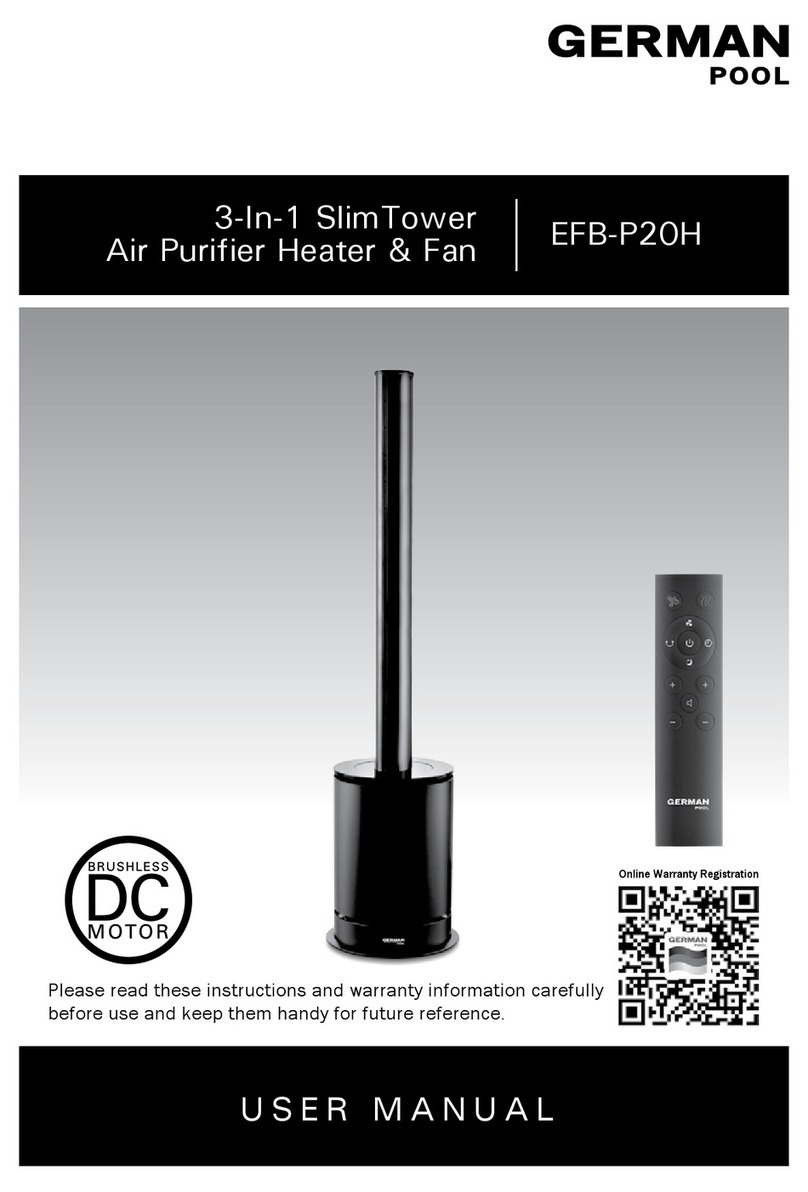
German pool SlimTower EFB-P20H User manual

German pool
German pool EFB-W526-SC User manual

German pool
German pool PUT-35 User manual

German pool
German pool PUP-100 User manual

German pool
German pool PUV-2 User manual

German pool
German pool EFB-PCT2 User manual

German pool
German pool PUF-70 User manual