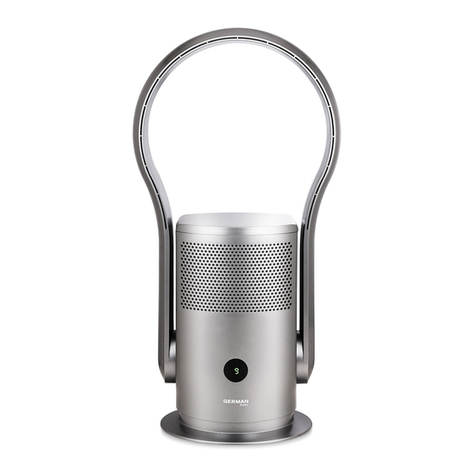
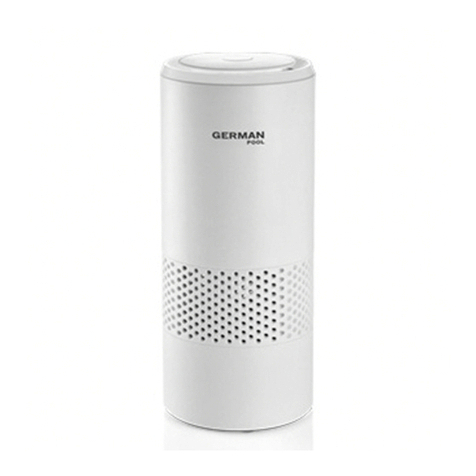
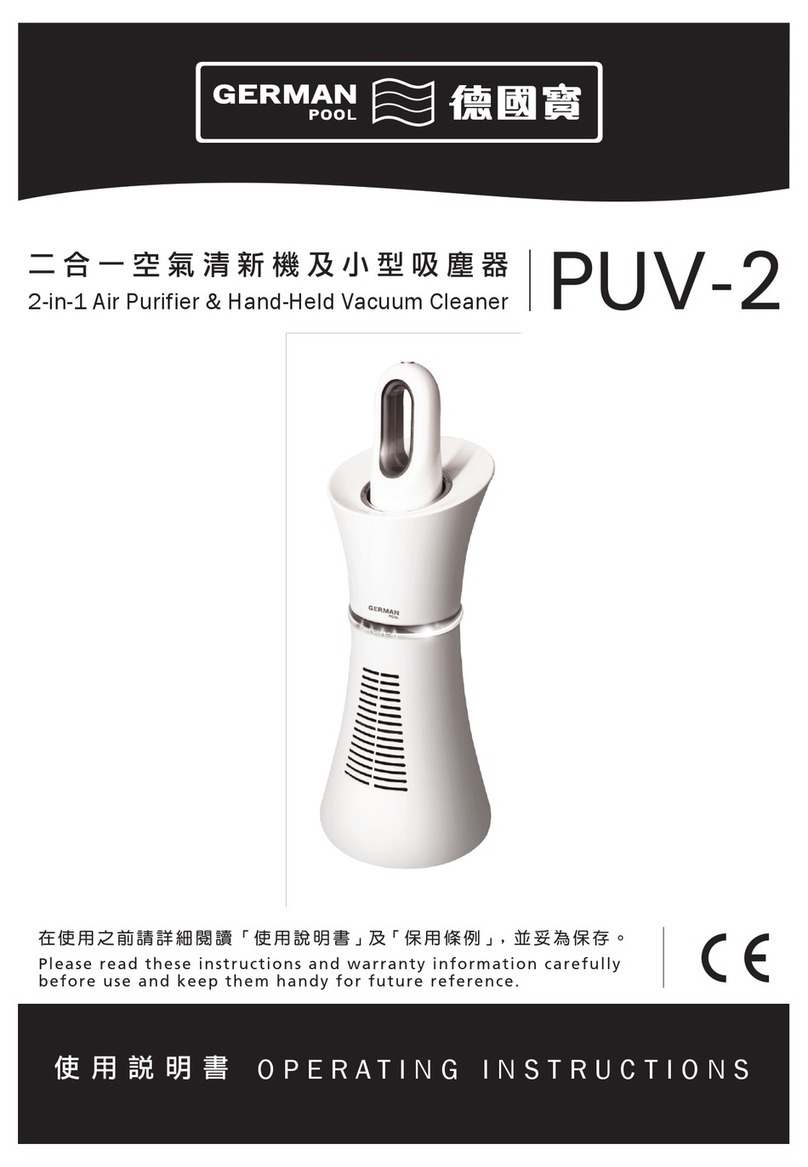
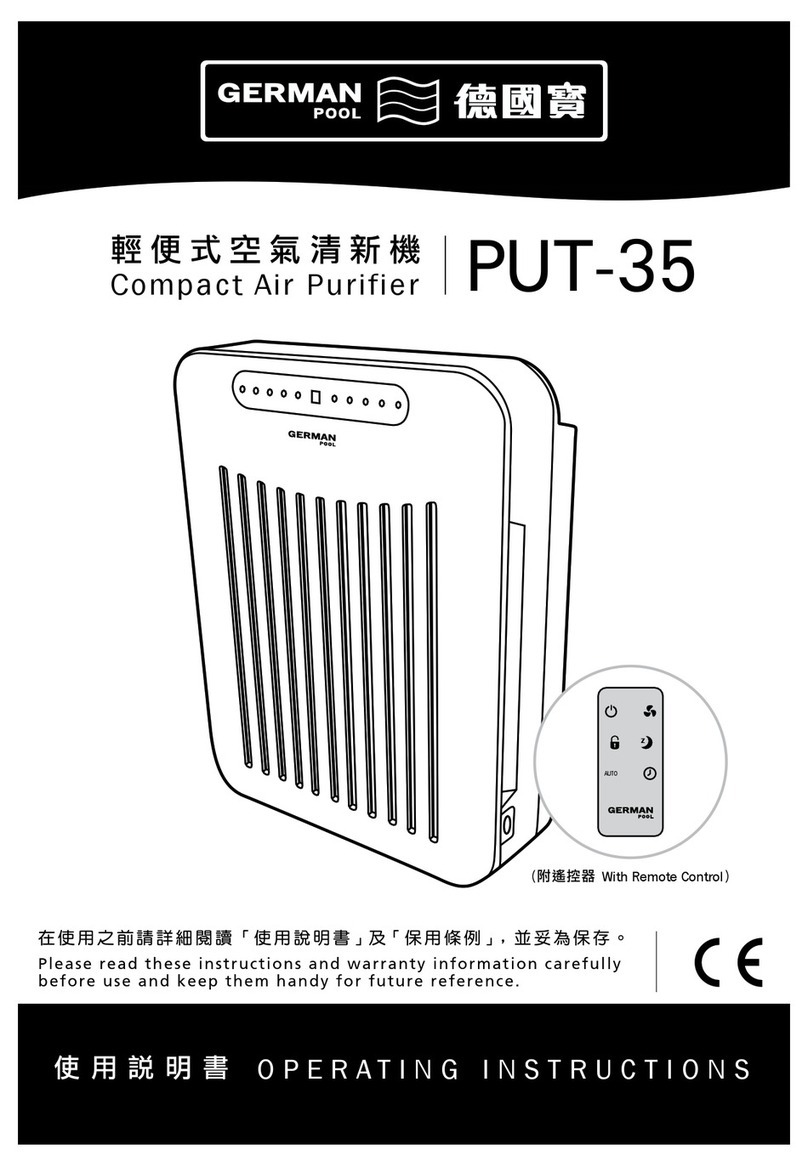
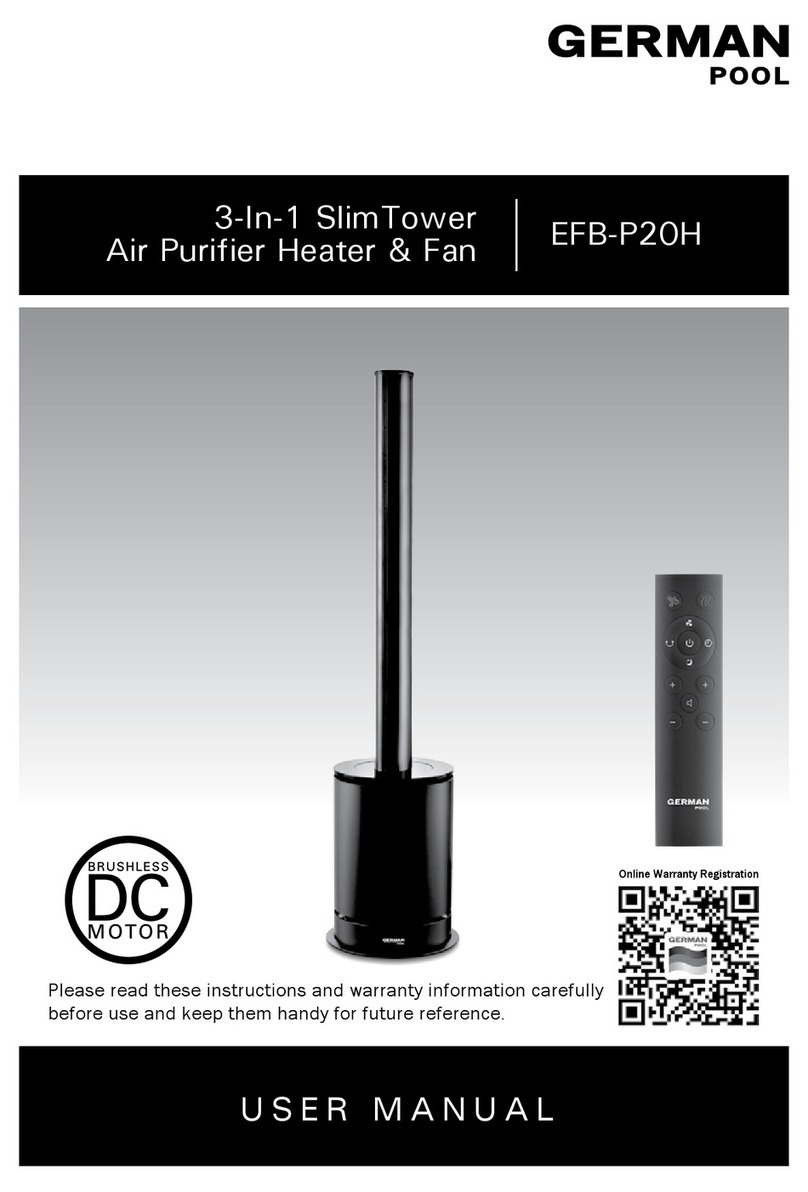
German pool EFB-PCTH User manual

Please read these instructions and warranty information carefully
before use and keep them handy for future reference.
Online Warranty Registration
UV-C Air Purifier Heater & Fan EFB-PCTH
USER MANUAL

P.2 P.3
Contents
Warnings & Safety Instructions 4
Product Structure 6
Getting Started 7
Operating Instructions 9
Cleaning & Maintenance 18
Troubleshooting 20
Technical Specication 20
Warranty Terms & Conditions 39
請即進行保用登記﹗
有關保用條款細則,請看本說明書最後一頁。
Please register your warranty information now!
For Warranty Terms & Conditions,
please refer to the last page of this user manual.

P.4 P.5
Warnings & Safety Instructions
1. This product is only suitable for indoor use and should not be used outdoors.
2. Non-professional personnel or unauthorized repair personnel may not repair or
modify this product by themselves.
3. Before plugging in the power supply, please check that the rated voltage
matches the voltage in your home.
4. Keep at least 1.5 meters away from fire source or tinder, and avoid direct
sunlight.
5. DO NOT use this product near objects that are flammable, explosive, subject to
heat, deformation, discoloration or deterioration. DO NOT use this product in
places with severe dust.
6. DO NOT use this product underneath hanging objects that may be prone to fall
down. DO NOT use this product in places that are vulnerable to shocks. DO NOT
place this product on unstable surfaces.
7. DO NOT turn the product on/off by pulling or inserting the plug. Always turn
product on/off by using the product’s ON/OFF button.
8. DO NOT use this product as heat preservation and heating equipment for
animals and plants.
9. DO NOT place any objects on the air inlet or outlet to avoid overheating the
product.
10. DO NOT insert metal wire or any other foreign objects into any crevices of this
product to avoid electric shock.
11. DO NOT use this product if it has been dropped or if it shows any sign of
damage.
12. DO NOT immerse this product in water.
13. DO NOT use this product directly facing an electrical outlet or under a power
outlet.
14. DO NOT let this product share the socket with other high-power appliances.
WARNING!
To avoid re, electric shock, and injury, you must meet the following requirements.
Otherwise, please follow the respective national and local electricity regulations.
Warnings & Safety Instructions
15. DO NOT directly pull the power cord to move the body.
16. If this product is covered or incorrectly placed, it can cause a fire hazard.
Therefore, DO NOT use a programmable automatic power-on device, timer, or
any other device with this product.
17. When this product is in use, the power cord should be placed behind the body.
Placing the power cord in front will cause it to overheat and be damaged, or
even cause an accident.
18. Children, elderly people or patients who have lost the ability to take care of
themselves, please use this appliance under the supervision of an adult to
prevent accidents.
19. If this product fails, please turn off the power and unplug the power cord
immediately. This product must only be repaired by the manufacturer's
maintenance department or a similarly qualified professional.
20. Before use, check that the power cord and the plug are in good condition.
If the power cord is damaged, in order to avoid danger, the user MUST NOT
disassemble or replace it. Replacing the power cord must only be performed
by the manufacturer's maintenance department or a similarly qualified
professional.
21. To avoid getting burnt when using this product, please DO NOT let bare skin
come into direct contact with the surface of the air outlet.
22. This product is only suitable for use in dry environment. Do not use around a
bathtub, sprinkler or swimming pool.
23. If there is a gap between the plug and the socket, or the plug has become very
hot, it may be necessary to replace the socket. Consult a qualified electrician to
replace the socket.
24. This product must be connected to a fixed (wall) socket compatible to the
specified capacity and in compliance with the current industry standards.
P.6 P.7
Body
1. Air Duct
2. Air Outlet
3. LED Display
4. Top Cover
5. Air Inlet
6. Base
7. Air Duct
8. Top Cover
9. Air Inlet
10. Body
11. Power Cord
Product Structure
Location
1. Please put this product on a level surface. Avoid putting it on an unstable surface
(such as a slanted or soft surface) to prevent it from falling over. Please do not
use it in hot and humid areas (such as bathroom and kitchen).
2. Avoid blocking the Air Inlet and Air Outlet when product is in use. Please keep the
product far away from curtains, so that they will not block the Inlet/Outlet and
obstruct the product from working properly.
3. DO NOT place objects within 1 meter in front of the Air Outlet to ensure that the
air flow would not be reduced.
Getting Started
Place away
from curtains
UV-CLED HEPA13
UV-C
UV-C LED HEPA13
UV-C
7
8
9
10
11
1
2
3
4
5
6

P.8 P.9
Getting Started Operating Instructions
Air Duct Angle Setting
Before adjusting the air duct angle, please make sure the product is turned off. Hold
product body with one hand and set the air duct 15° forward or backward.
Switch ON and OFF
1. Connect to power source, and product will enter into Standby Mode.
2. Press On/Off , the buzzer will beep once, and product will start to operate.
3. To turn off the product, long-press 2 seconds, the buzzer will beep once, and
product will stop operating.
Main Body
Battery Replacement
1. To open the battery cover at the bottom of the Remote Control, press the
buckle on the battery cover inward and pull it out.
2. Identify the polarity of the battery, and insert the battery into the battery slot.
3. Reinsert the battery cover into the bottom of the Remote Control.
Attention:
1. If Remote Control will not be used for a prolonged period of time,
please remove the battery.
2. This battery is not rechargeable. DO NOT recharge the battery.
3. The Remote Control and battery are not toys. Please keep them out of
children’s reach.
4. If accidentally swallow battery, please seek medical attention immediately.
Attention:
1. When operating in Warm Air Mode, the air duct will become hot. Shortly
after the product is turned off, it may still be hot to the touch. Please be
cautious.
2. This product has a built-in Overheat Protection Sensor, which is an
automatic fail-proof safety protection that cuts off power automatically
when the product is accidentally tipped over or overheats. If this sensor
is triggered and the product is stopped, unplug the product and let it cool
down.

P.10 P.11
Operating Instructions
Filter Replacement Alert
Indicator Light
UV-C Disinfection
Indicator Light
Wi-Fi Indicator Light
Settings &
Humidity Display
On/Off
Temperature Display
Operating Instructions
Icon Description
On/Off Button
• Press to turn product on.
• Press repeatedly to adjust air volume.
• Long-press 1 second to turn Oscillation on and off.
• Long-press 2 seconds to turn off product.
• Long-press 5 seconds to connect product to smartphone
App Control.
Filter Replacement Alert Indicator Light
After a total of 720 hours of operation, will light up, indicating
the filter needs to be replaced. After the filter has been replaced,
long-press on the Remote Control for 5 seconds, will turn
off, and product will enter a new 720 hour cycle.
UV-C Disinfection Indicator Light
When UV-C Disinfection Function is turned on via the Remote
Control, will light up. UV-C will automatically turn off after 1
hour.
Wi-Fi Indicator Light
Long-press on the LED Display for 5 seconds, will flash,
user can then control the product through smartphone App.
Long-press 5 seconds again, flashes, and product runs in
Compatibility Mode. When successfully connected to the app,
will light up. Long-press on LED Display for 5 seconds to
cancel Wi-Fi connection.
Temperature Display
In Cool Air Mode, display will light up in blue; in Warm Air Mode,
display will light up in orange.
Settings & Humidity Display
This indicates the current setting and humidity level.
LED Display LED Display Icon

P.1 2 P.13
Operating Instructions Operating Instructions
Function Button Description
On/Off
• In Standby Mode, press once to turn on product.
• When product is operating, press once and product
will turn off and return to Standby Mode.
UV-C
Sterilization
• Press once to turn on UV-C Sterilization Function.
• Press again to turn off UV-C Sterilization Function
(Otherwise, UV Sterilization Function will automatically
turn off after operating for 1 hr).
Oscillation
• Press once to turn on Oscillation Function, oscillation
angle is 80°±5°.
• Press again to turn off Oscillation Function.
Timer
Mode
• Press this button to set Countdown To Turn Off Time
(1-8 hr). When countdown completes, the product will
automatically stop operating.
• If user wishes to restart product, please press .
Sleep
Mode
• Press once to enter Sleep Mode; LED Display will show
“LL”, and airflow will decrease to the lowest level.
• Press again to exit Sleep Mode.
Warm Air
Mode
• Press once to switch to Warm Air Mode.
• In Warm Air Mode, LED Display lights up in orange.
• In Warm Air Mode, press +/- to adjust temperature
from 1-30°C.
• In Cool Air Mode, this button does not respond.
• Press + to increase airflow; press – to decrease
airflow.
• Warm Air Mode has 4 levels of airflow.
Cool Air
Mode
• Press once to switch to Cool Air Mode.
• In Cool Air Mode, LED Display lights up in blue.
• Press + to increase airflow; press – to decrease
airflow.
• Cool Air Mode has 9 levels of airflow.
Remote Control Remote Control Functions
Attention:
1. The Remote Control should be pointed directly at the Signal Receiver
on the Display Panel to maximize remote control reception.
2. This product may respond to the remote control of other devices.
3. Other products may respond to this Remote Control. This is due to
overlapping frequencies of the remote controls. There is no quality
problem in the product itself. To avoid interference, keep this Remote
Control away from other electrical devices during operation.
4. The On/Off button on the Remote Control does not completely
disconnect the power supply to this product. If product will be unused
for a prolonged period of time, please unplug the power cord from
the socket.
UV-C
Oscillation Button
On/O Button
T° Adjust Button Airow Adjust Button
Warm Air Mode Button Cool Air Mode Button
T° Adjust Button Airow Adjust Button
Sleep Mode Button
UV-C Sterilization Button
Timer Button

P.14 P.15
Operating Instructions Cleaning & Maintenance
WARNING!
• DO NOT wash HEPA lter with water or any liquid. DO NOT immerse HEPA lter in water.
• DO NOT place this product and HEPA Filter in humid area that the lter is moist and wet condition.
Thermostat Function Instruction (Warm Air Mode)
1. Press the “Warm Air Mode” button and the LED Display shows the ambient
temperature.
2. Press “+ -”button, temperature display on LED Display will flash, and user can
set A desired temperature ( 1-30°C).
3. 10 seconds after the desired temperature is set, LED Display will stop flashing,
and show ambient temperature.
• The temperature being set should be higher than the ambient temperature, so
that the heating function will be turned on.
• When the ambient temperature reaches the set temperature, the heating
function will stop, the product will continue to run for 40 seconds, then return to
Standby Mode.
• When ambient temperature drops lower than the set temperature, the heating
function will automatically be reactivated.
Attention:
• The factory default temperature is set at 25°C.
• After the Warm Air Mode has run for over 9 hours, the product will
automatically stop running. Restart by pressing the On/Off Button on the
main body or the Remote Control.
WARNING!
Unplug the power supply before
performing maintenance.
1. Lift out Top Cover.
3. Install new filter into the main body
of the product.
4. Reinstall Top Cover, the magnetic lid
will snap into place automatically.
2. Lift out the old air filter.
Filter Replacement

P.16 P.17
Cleaning & Maintenance Cleaning & Maintenance
HEPA13 HE PA13
UV-C
Plasma
UVC
Storage
• After cleaning the product, put in plastic bag and store away.
• Please avoid storing in a place with vibration (car trunk) or a place heated or
cooled by another appliance.
• Please avoid placing it in direct sunlight or in a hot and humid environment.
• Please keep this product out of reach of young children.
Product Surface
• When cleaning the product, do not wet or splash water on the product, to
avoid water entering inside and causing malfunction.
• Do not use banana oil, benzine, alcohol, bleach or metal objects to wipe
the surface of the product, which may damage the surface or cause
discoloration.
• Please use soft dry cloth to lightly wipe the surface of the product.
• If the surface is very dirty, use a soft cloth and diluted mild detergent to
clean, then wipe dry with a soft dry cloth.
Air Inlet & Air Outlet
Use a soft brush or vacuum cleaner to regularly clean off any dust accumulated
on the Air Inlet and Outlet. Do not let dust build up as too much dust will reduce
the efficiency of the product.
Remote Control
Gently wipe the surface of the Remote Control with a soft dry cloth. If the Remote
Control will not be used for a prolonged period of time, please remove the battery
inside to avoid battery consumption.
Power Plug
Use soft dry cloth to clean the power plug.

P.18 P.19
Troubleshooting Troubleshooting
WARNING!
• Before maintenance work, turn off the product and unplug product from power source.
• This product must be installed and repaired by the manufacturer’s authorized after-sales personnel
only; if consumers entrust personnel not designated by the manufacturer, or if consumers perform
reparation work on their own, there may be a risk of personal injury or property loss.
Error Code
PROBLEM POSSIBLE REASON
Has plugged in power but the
product does not work Is the plug properly inserted into the socket?
Remote Control does not work
Is the battery dead?
Is the battery inserted correctly?
Is the Remote Control aligned with the Signal Receiver?
CODE PROBLEM POSSIBLE REASON
E1 Under Voltage
Protection
• Induced by voltage too low
• 220V fan connected to 110V voltage
• Under bad AC terminal block connection during operation of
fan, voltage of the electronic board may go too low
• Pulling the plug when fan is operating at high speed. This is
because fan motor is still heated so electronic board takes
time to drop its electricity, inducing this problem. This is natural
occurrence. When plugged again, the fan will operate normally.
• Electronic board defect
E2 High Voltage Pro-
tection
• Induced by voltage too high
• 110V fan connected to 220V voltage
• Electronic board defect
E3 Blocked Rotor • Rotor installed incorrectly, fan blade blocked
• Poor connection between rotor terminal block and
electronic board
• Rotor defect or disconnection
• Rotor terminal block of the electronic board defect, poorly weld-
ed or terminal block pin missing
• Electronic board defect: circuit driver, power component (MOS-
FET) or other components damaged by outer forces, Electronic
board parameter error
E4 Hardware
Overcurrent
• Short circuit of fan rotor or inner rotor
• Electronic board defect: driver error or power component (MOS-
FET) error
• Incorrect rotor usage: using low voltage rotor on
high voltage driver
E5 Software
Overcurrent Electronic board defect: current sampling circuit error
E6 Default Phase
of Rotor
• Rotor disconnection
• Poor connection between rotor and terminal block
• Electronic board defect: driving error of driver
E7 Communication
Error
• Poor communication between display board and mother board,
poor cable connection, cable terminal block installation error
• Usage of display board with non-updated programme, matching
error with new mother board
• Poor welding of electronic board terminal block
E8 Machine Tilting • Machine placed at an angle of ≥30 degrees
against the surface
• Tipping Switch defect, electronic board defect
E9 Temperature-sensor
probe not connected
• Temperature-sensor probe plug-in failure
• Electronic board defect
• Temperature-sensor probe defect

P.20 P.21
Technical Specication
Model EFB-PCTH
Rated Voltage/Frequency 220V - 240V~ / 50Hz - 60Hz
Rated Power 45W (Fan) / 2000W (Heat)
Product Dimensions (H)700 (W)255 (D)255 mm
Net Weight Approx. 5 kg
Gross Weight Approx. 6 kg
Specications are subject to change without prior notice.
If there is any inconsistency or ambiguity between the English version and the
Chinese version, the Chinese version shall prevail.
Refer to www.germanpool.com for the most up-to-date version of the Operating
Instructions.
目錄
警告及注意事項 22
產品結構 24
使用前的準備 25
操作說明 26
清潔與保養 33
故障檢修 36
技術規格 38
保用條款 39

P.22 P.23
警告及注意事項
1. 本產品只適宜室內使用,不宜在室外使用。
2. 非專職人員或者未授權修理人員,不得自行修理或改造本機。
3. 插接電源前,請檢查本產品標明的額定電壓是否與您家中的電壓相符。
4. 機器正常使用或閒置時,離火源和火種1.5米以上,並避免陽光直射。
5. 禁止在易燃、易爆、受熱易變形、變色、變質的物體附近使用,禁止在有嚴重粉
塵的地方使用。
6. 禁止在有易落下懸掛物的地方使用,禁止在易受衝擊或擺放在不穩定的地方使用。
7. 禁止用插(拔)電源線插頭的方法代替功率開關的開機和關機。
8. 禁止把本機作為動植物的保溫、加熱設備。
9. 為避免過熱,禁止覆蓋加熱器。
10. 嚴禁用細的金屬絲或其他異物插入機內任何孔隙,以免造成觸電事故。
11. 如果本產品跌落或有明顯的損壞跡象,請勿使用。
12. 嚴禁將機器浸入水中。
13. 嚴禁將機器對著電源插座或置於電源插座下使用。
14. 嚴禁本機與其他大功率電器共用插座。
15. 嚴禁直接拉著電源線移動機體。
16. 因為機器被覆蓋或不正確的放置會引起火災危險,故不得利用帶有可自動接通
電源的程式器、定時器、或任何其他裝置來使用本產品。
17. 本產品在使用時電源線應置於機體後面,放在機體前面會使其過熱而損壞,甚
至發生安全事故。
警告!
為避免火災、電擊、人身傷害,請務必遵守以下要求;其他請遵循國家
及地區的有關電氣法規。
警告及注意事項
18. 小孩、喪失生活自理能力的老人或病人請在成人監護下使用本電器,以防發生
意外。
19. 若本產品出現故障,請立即關機並拔下電源線插頭,必須由製造商維修部或類
似部門專業人員維修。
20. 使用前需要先檢查電源線以及插頭是否破損,如果電源軟線損壞,為了避免危
險,用戶不得自行拆卸、更換電源線,必須由製造商其維修部或類似部門專業人員
更換。
21. 使用本產品時,為避免灼燒,請不要讓裸露的皮膚直接接觸出風口表面。
22. 僅適合在乾燥環境下使用。在浴缸、噴頭或游泳池的四周不得使用本產品。
23. 如果插頭與插座之間出現鬆動或插頭變得很燙,可能需要更換插座。諮詢有資
格的電工以更換插座。
24. 本產品必須配套與插頭額定工作電流一致的有認證的固定插座,嚴禁使用移動
多用插座。

P.24 P.25
產品結構
機身
1. 風圈
2. 出風口
3. LED 顯示屏
4. 濾網頂蓋
5. 進風口
6. 底座
7. 風圈
8. 濾網頂蓋
9. 進風口
10. 機身
11. 電源插頭
使用前的準備
使用位置
1 請將本產品放置在水平位置使用,請不要放置在不穩定地方(如有斜度、柔軟
的表面),以避免本產品翻倒造成損壞或故障。請不要在高溫多濕的地方使用
(如浴室、廚房)。
2 在使用過程中,需避免擋住進風口,請遠離裝有窗簾的地方使用以避免物體堵
住進風口導致本產品無法工作。
3 出風口前面1米內不要放置物體以減弱吹風效果。
遠離窗簾
UV-C LED HEPA13
UV-C
UV-C LED HEPA13
UV-C
7
8
9
10
11
1
2
3
4
5
6

P.26 P.27
安裝遙控器電池
1. 向內按住遙控器底部電池槽上的扣位,電池槽往外拉出。
2. 確認電池的極性,將電池裝進電池槽的凹槽內。
3. 將電池槽裝回遙控器的底部。
注意 :
1. 如果長時間不使用遙控器,請取出電池。
2. 此電池請勿充電。
3. 這不是玩具,請置於小孩接觸不到的地方。
4. 如誤吞電池,請立即求醫。
操作說明 操作說明
風圈角度調整
運行停止後,朝向喜歡的方向擺動;請單手按住主機,對風圈角度進行前後各15°調
節。
開關機操作
.連接電源,打開電源開關,進入待機狀態。
.按開關鍵 ,蜂鳴器提示聲響一聲,開始運行。
主機操作方法
注意 :
1. 暖風模式下風圈會發熱,使用後短時間內尚有餘熱,請注意高溫。
2. 為確保人身安全,本產品裝有自動斷電開關,可在本產品傾倒或過熱時
自動斷電,如果觸發此開關,請拔出電源插頭並使其冷卻。
.運行過程中長按 2 秒關機,蜂鳴器提示聲響一聲,停止運行。

P.28 P.29
操作說明
過濾網更換指示燈
UV-C殺菌指示燈
Wi-Fi 連接指示燈
檔位及濕度顯示
開關鍵
溫度顯示
操作說明
圖標 說明
開關鍵
• 按 開機。
• 開機後重複按 調整風量。
• 長按 1 秒開啟或停止左右搖擺功能。
• 長按 2 秒關機。
• 長按 5 秒進入手機應用程式連接狀態。
過濾網更換指示燈
本產品累計運行720小時後 常亮,表示需要更換過濾網;
更換過濾網後長按遙控器 5秒, 熄滅並重新累計時間。
UV-C殺菌指示燈
透過遙控器啟用UV-C殺菌功能後 常亮;1小時後自動關閉。
Wi-Fi連接指示燈
長按LED顯示屏 5秒, 閃爍並進入手機應用程式連接狀
態,再長按 5秒, 快速閃爍進入相容模式,連接成功後
常亮。再長按LED顯示屏 5秒取消連接。
溫度顯示
顯示溫度,涼風模式下以藍色顯示,暖風模式下以橙色顯示。
檔位及濕度顯示
顯示當前檔位或濕度。
LED顯示屏 LED顯示屏圖標說明

P.30 P.31
操作說明
UV-C
搖擺鍵
開關鍵
溫度調整鍵 風量調整鍵
暖風模式鍵 涼風模式鍵
溫度調整鍵 風量調整鍵
睡眠模式鍵
UV-C殺菌鍵
定時鍵
功能 按鍵 功能說明
開關 • 待機狀態下,按此鍵開始運行。
• 運行狀態下,按此鍵停止運行,返回待機狀態。
UV-C
殺菌
• 按此鍵開啟UV殺菌功能。
• 再按一次,關閉UV殺菌功能(UV殺菌功能開啟1小時後會自動關
閉)。
搖擺 • 按此鍵開啟左右搖擺功能,搖擺角度為80°±5°
• 再按一次,停止搖擺功能。
定時
• 按此鍵可設定1至8小時定時關機功能,時間到機器會自動停止運
行 。
• 如需要重新開機請按 。
睡眠
模式
• 按此鍵進入睡眠模式,LED顯示屏顯示「LL」,風量變小。
• 再按一次,退出睡眠模式。
暖風
模式
• 按此鍵調整為暖風模式。
• 暖風模式下LED顯示屏以橙色顯示。
• 暖風模式下按+/-鍵設定溫度為1-30℃。
• 涼風模式下按此鍵無效。
• 按+鍵,風量增強;按-鍵,風量減弱。
• 暖風模式下可進行4檔調節。
涼風
模式
• 按此鍵調整為涼風模式。
• 涼風模式下LED顯示屏以藍色顯示。
• 按+鍵,風量增強;按-鍵,風量減弱。
• 涼風模式下可進行9檔調節。
操作說明
遙控器 遙控器操作說明
注意 :
1. 使用遙控器控作時,需將遙控器對準顯示屏的遙控信號接收器,使遙控
信號接收達到最好。
2. 使用其他電器的遙控器時,本產品可能會產生反應。
3. 使用本產品的遙控器時,其他電器可能會產生反應。這是由於遙控器的
頻率產生重疊而發生的現象,產品本身並無品質問題,為了避免誤操
作,操作時請將遙控器遠離其他電器。
4. 遙控器的開關鍵不能使本產品電源完全關閉,如果長時間不使用,請拔
掉插頭。

P.32 P.33
恆溫功能說明 (暖風模式)
1. 按下暖風模式鍵,LED顯示屏顯示環境溫度。
2. 按溫度+ -鍵,LED顯示屏溫閃爍,顯示設定溫度,可設定1-30℃。
3. 溫度設定好10秒後,LED顯示屏停止閃爍,顯示環境溫度。
.設定溫度高於環境溫度,製熱功能開啟。
.環境溫度達到設定溫度,製熱功能停止,機器繼續運行40秒後停止運行,進入待
機狀態。
.當環境溫度低於設定溫度,機器啟動運行並開啟製熱功能。
注意 :
• 出廠預設溫度為25℃。
• 暖風模式持續運行9小時後,機器會自動停止運行。重新開機按主機電
源按鍵或用遙控器開啟。
操作說明
警告!
進行保養時請一定要先拔下插頭切
斷電源。
1. 向上拿起濾網頂蓋。
3. 將新的過濾網放回主機內部。 4. 將濾網頂蓋放回主機並磁吸固定。
2. 向上取出舊的過濾網。
更換過濾網
清潔與保養
警告!
.嚴禁水洗HEPA濾網或將濾網浸入水中。
.嚴禁將本產品或HEPA濾網放在潮濕位置使用,以免影響濾網效率。

P.34 P.35
產品表面
.保養的時候,請不要讓產品沾上水或者潑上水,可能會導致機器進水而損壞。
.請勿使用天拿水、汽油、酒精、漂白劑或者金屬物體去擦拭風扇表面,可能會導
致表面變色、變質。
.請用乾的軟布輕輕擦拭風扇表面。
.如果表面比較髒,可以用中性洗滌劑稀釋後用濕軟布擦拭,擦拭乾淨後再用乾軟
布進行擦拭。
進風口及出風口
請用軟刷或吸塵器清潔進風口和出風口處的灰塵,集聚太多灰塵的話可能會影響使
用效果,請在灰塵較少的時候及時進行清潔。
清潔與保養 清潔與保養
HEPA13 HE PA13
遙控器
請用乾的軟布輕輕擦拭遙控器表面。如果長時間不使用,避免電池消耗,請取出遙
控器內的電池。
UV-C
Plasma
UVC
電源插頭
請用乾的軟布清潔電源插頭。
保管方法
.本產品保養後可以裝入塑膠袋並進行收藏。
.請避開震動的場所以及有製冷或製熱功能的電器。
.請避免放置在陽光直射,高溫潮濕的地方。
.請放置在幼兒碰不到的地方。

P.36 P.37
故障檢修 故障檢修
警告!
.維修前必須先關機並拔下電源插頭。
.本產品應由本公司指派的售後人員進行維修,如果消費者委託非本公司指派的人員或者 消費者自
行進行維修,可能存在造成人身損害或財產損失的風險。
故障代碼
故障現象 解決方法
插上電源但不運作 插頭有沒有正確插入插座?
遙控器不運作
電池是不是沒電了?
電池方向是否安裝正確?
遙控器是否有對準風扇主體的遙控信號接收器?
代碼 故障描述 可能原因
E1 欠電壓保護 .供電電壓過低時觸發此故障
.如220V風扇用於110V電壓時觸發此故障
.AC端子接觸不良時,風扇運作後電路板電壓會被拉低,觸發此故障
.風扇高轉速運行時直接拔出電源插頭,由於風扇摩打仍處於發電狀
態,電路板需較長時間掉電,會誤觸發此故障,此為正常現象;風扇重
新上電後即恢復正常工作
.電路板自身不良
E2 過電壓保護 .供電電壓過高時觸發此故障
.如110V風扇用於220V電壓時觸發此故障
.電路板自身不良
E3 摩打堵轉 .風扇摩打安裝不良,風扇扇葉卡轉
.摩打線端子與電路板接觸不良
.摩打本體異常,風扇摩打斷線等
.電路板上摩打端子不良,焊接不良或者缺針
.電路板自身不良:板上驅動器、功率器件(MOS管)或其他元器件被
外力損壞,電路板參數錯誤
E4 硬體過流 .風扇摩打線短路或摩打內部短路
.電路板自身不良:驅動器異常或、功率器件(MOS管)異常
.摩打使用錯誤:在高壓驅動板上使用低壓摩打
E5 軟體過流 .電路板自身不良:板上電流採樣電路異常
E6 電機缺相 .摩打線斷開
.摩打線和端子接觸不良
.電路板自身不良:板上驅動器驅動異常
E7 通訊故障 .010 等型號顯示板和主機板之間通訊不良,排線接觸不良,排線端
子安裝異常
.使用了未更新程式的顯示板和新的主機板搭配錯誤
.電路板上相應端子焊接不良
E8 機身傾斜 .機器放置角度≥30度平面
.傾倒開關壞,電路板自身不良
E9 感溫探頭線
未插
.感溫探頭外掛程式掉
.電路板自身不良
.感溫探頭壞

P.38
保用條款
此保用提供德國寶產品之機件在正常使用下壹年保用
(自購買日起計算)。
Warranty Terms & Conditions
Under normal operations, the product will gurantee a 1-year full
warranty provided by German Pool (effective from the date of
purchase).
1. Customer who fails to present original purchase invoice will
not beeligible for free warranty service.
2. Customer should always follow the operating
instructions. Thiswarrantydoes not apply to:
- labour costs for on-site installation, check-up, repair,
replacement of parts and other transportation costs;
- damages caused by accidents of any kind (including
material transfer and others);
- operating failures resulting from applying incorrect voltage,
improperusage, and unauthorized installations
or repairs.
3. Thiswarranty is invalid if:
- the purchase invoice is modified by an unauthorized party;
- the product is used for anycommercial or industrial purposes;
- the product is repaired or modifiedby unauthorized
personnel, orunauthorizedparts are installed;
- the serial number is modified, damagedor removed from
the product.
4. German Poolwill, at its discretion, repair or replace any
defective part.
5. Thiswarranty will be void if there is any transfer of
ownership from the original purchaser.
1. 未能出示購買發票正本者,將不獲免費維修服務。
2. 用戶應依照說明書的指示操作。本保用並不包括﹕
- 上門安裝、檢驗、維修或更換零件之人工以及
一切運輸費用﹔
- 因天然與人為意外造成的損壞 (包括運輸及其他)﹔
- 電源接合不當、不依說明書而錯誤或疏忽使用本
機所引致之損壞。
3. 於下列情況下,用戶之保用資格將被取消﹕
- 購買發票有任何非認可之刪改;
- 產品被用作商業或工業用途;
- 產品經非認可之技術人員改裝或加裝任何配件;
- 機身編號被擅自塗改、破壞或刪除。
4. 總代理有權選擇維修或更換配件或其損壞部份。
5. 產品一經被轉讓,其保用即被視作無效。
機身號碼 Serial No. :
購買商號 Purchased From :
發票號碼 Invoice No. :
購買日期 Purchase Date :
型號 Model No. :
另請填妥以下表格並與正本發票一併保存,以便維修時核對資料。用戶提供之所有資料必須正確無誤,否則免費保用將會無效。
Pleasefill out the form below. This information and the original purchaseinvoice will be required for anyrepairs. Warranty will be
invalidated if information provided is found to be inaccurate.
此保用只適用於香港及澳門 This warranty is valid only in Hong Kong and Macau
*
貴戶須在購機十天內,以下列其中一種方式向本公司
登記資料,保用手續方正式生效﹕
1)
填妥本公司網頁內之
保用登記表格
www.germanpool.com/
warranty
2)
填妥保用登記卡,
郵寄至本公司。
* This warranty is not valid until customer registration information
is receivedby ourService Centre within10 days ofpurchase
via one of the following means:
1) Visit our website and register
online:
www.germanpool.com/
warranty
2)
Complete all the fields on the
attached Warranty Card and
mail itback to our Customer
Service Centre.
EFB-PCTH
客戶服務及維修中心 Customer Service & Repair Centre
Hong Kong
Unit B, G/F, Sunshine Kowloon Bay
Cargo Centre, 59 Tai Yip Street.
Kowloon, Hong Kong
Tel : +852 2333 6249
Fax : +852 2356 9798
Macau
3/F, Edificio Industrial Pou Fung,
145 Rua de Francisco Xavier Pereira,
Macau
Tel : +853 2875 2699
Fax :+853 2875 2661
香港
九龍大業街59號
三湘九龍灣貨運中心地下B室
電話:+852 2333 6249
傳真:+852 2356 9798
澳門
澳門俾利喇街145號
寶豐工業大廈3樓
電話:+853 2875 2699
傳真:+853 2875 2661
• 所有資料僅供參考,如有錯漏以廠方生產的規格為準。產品規格及設計如有變
更,恕不另行通知。
• 中英文版本如有出入,一概以中文版為準。
• 本產品使用說明書以www.germanpool.com網上版為最新版本。
型號 EFB-PCTH
電壓/頻率 220V - 240V~ / 50Hz - 60Hz
額定總功率 45W (涼風) / 2000W (暖風)
機身尺寸 (H)700 (W)255 (D) 255 mm
淨重 約 5 kg
總重 約 6 kg
技術規格
Table of contents
Other German pool Air Cleaner manuals

German pool
German pool PUF-50 User manual

German pool
German pool PUT-35 User manual

German pool
German pool BEF-353DC-SC User manual

German pool
German pool EFB-PC30 User manual

German pool
German pool EFB-PCT2 User manual

German pool
German pool PUV-2 User manual

German pool
German pool SlimTower EFB-P20H User manual

German pool
German pool PUT-40 User manual

German pool
German pool PUP-100 User manual

German pool
German pool EFB-W526-SC User manual